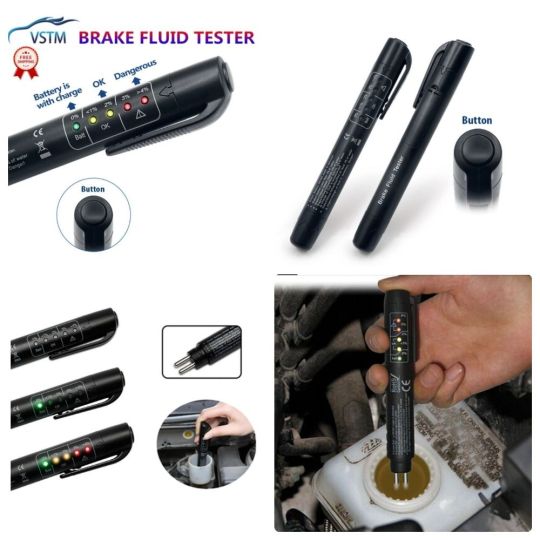
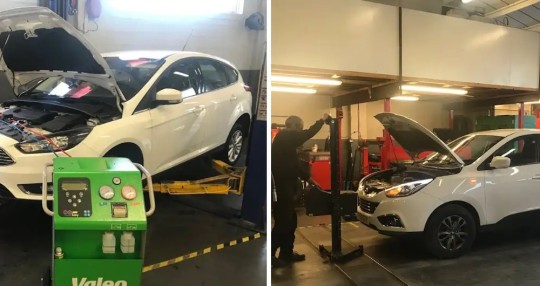
#brake fluid tester
Text
Why Regular Brake Fluid Testing Matters: A Maintenance Must
Regular brake fluid testing is a critical aspect of vehicle maintenance, often overlooked but essential for ensuring optimal brake system performance and safety on the road. Brake fluid plays a crucial role in transmitting the force applied to the brake pedal to the brake pads, thereby enabling effective braking. Over time, brake fluid can absorb moisture and contaminants, leading to a decrease in its effectiveness and potentially compromising brake performance.
By regularly testing the condition of brake fluid, vehicle owners can identify issues such as moisture contamination, degradation, or low fluid levels early on. This proactive approach allows for timely maintenance or fluid replacement, helping to prevent brake system failures, loss of braking power, and potentially hazardous driving situations. Moreover, routine brake fluid tester can also extend the lifespan of brake components and reduce the likelihood of costly repairs or replacements down the line.
In summary, regular brake fluid testing is not just a maintenance recommendation but a necessity for safe and reliable vehicle operation. By prioritising this aspect of maintenance, drivers can uphold the integrity of their brake systems, mitigate risks on the road, and ultimately ensure the safety of themselves and others.
#telematic devices#telematics solutions#vehicle telematics#compliance test#fleet telematics#telematics#brake fluid tester#brake
0 notes
Text
Hammers Made of Ice
The latest programming project is all about unit testing. They're getting us used to the practice of writing a method, then writing a tester for it, and only moving on to the next method once we're confident that the first one's functioning smoothly.
Something that can be difficult in this is if you've got a handle on the logic and you're a reasonably accurate typist you might be able to slap together all five or six methods without any testing and not have any errors...
sort of.
The thing is that handle on "the logic" doesn't get into the edge cases - that is, the user being a dumbass.
This is unfair, kind of. Half the time they're not "being a dumbass," but rather they're interacting with a black box knowing only the inputs and outputs and the errors might come from internal engine interactions. If you-the-engineer know that because of how your brake fluid injection system works the brakes will fail if your user pumps the brakes at exact 2.3 second intervals eight times in a row...you have to fix that, because you know it'll eventually happen and there's no way to teach the user that doing that might be a problem.
And the "it'll eventually happen" bit is the less unfair bit: It doesn't matter if you're talking about doctors or engineers or programmers, get enough people together and some of them will use tools foolishly.
A hammer made of ice is useful exclusively to someone who knows exactly how to swing it. You can't hand that to the general public and expect things to go well.
So is it fair to say you "don't have any errors" if you aren't doing a run through your code behaving like a dumbass? Not really. Your code needs to tell people what's going wrong when things are going wrong, and that involves an extra step of thinking through a few of the basic things that can go wrong - some of the most likely ways someone could misuse your code, such as asking for list-item 25 on a list that runs from 1 to 10. Or asking for item -5. Or asking for item "two," inputting letters instead of the integer 2.
This process can feel useless, when you know how to swing your ice hammer in the way that doesn't break it. But it's worth making code that is actually sturdy.
2 notes
·
View notes
Text
6 Signs That Your Clutch Slave Cylinder Is Faulty or Failing

A malfunctioning clutch slave cylinder may be to blame if your manual car's clutch pedal doesn't feel quite right.
The clutch slave cylinder is a crucial part because it is involved in both engaging and disengaging the clutch.
Searching online for car garages in Reading and scheduling an appointment with a trained mechanic within time are vital steps to take if something goes wrong with the cylinder.
A malfunctioning clutch slave cylinder can make it difficult to change gears and, in severe situations, even harm your transmission. Fortunately, there are several typical warning signs to watch out for, allowing you to fix the issue and get back on track.
What Might Fail?
Leaks are the most frequent problem that affects clutch slave cylinders since hydraulics are necessary for their proper operation. The component may eventually deteriorate from repeated use, enabling the transmission fluid inside to leak out. This indicates that the cylinder's internal pressure is insufficient for it to effectively disengage the clutch.
If you go online and search ‘check my mot history’, you will be able to see all the previous passed and if failed MOT test. Here you can also confirm if a MOT test failed due to a problem related to a faulty clutch system.
The MOT tester can decline to continue the MOT inspection if this occurs during your future MOT testing service since they won't be able to do the necessary tests and inspections.
If left neglected, a defective clutch slave cylinder can harm your car even more. The clutch pedal will seem less sensitive, and gear changes will become more challenging. In addition to making driving more challenging and dangerous, this can harm more transmission system components.
To have a qualified mechanic diagnose, fix, or replace any defective parts on your car, it is advised that you search online for garages in Reading and book your car in as soon as you start noticing anything unusual.
What are the Faulty Slave Cylinder Symptoms?
Neglecting faulty clutch slave cylinders is never a good idea. The following signs and symptoms are to be expected if your car has this problem:
1. The Clutch Pedal Feels Soft - You'll notice that the clutch pedal feels "soft" while you drive, which is one of the most noticeable signs of a failing clutch slave cylinder. Your foot will experience less resistance from the pedal than usual, and this issue is often brought on by a leak in either the slave or master cylinder.
2. Difficulties Changing Gears - Another indicator you could notice when driving a car is difficulty shifting between gears. If you remove your foot from the clutch pedal, the clutch pedal might not reset as quickly as usual, or it might remain depressed. These symptoms frequently point to a leak in either the clutch master or slave cylinder and to a drop in pressure in the hydraulic system that controls whether the clutch is engaged or released. If the pedal does not move at all when your foot is withdrawn, the master cylinder is more likely the problem. Driving a car without a functional clutch carries a high degree of risk.
3. Low Transmission Fluid - It's a good idea to check the transmission fluid levels in your car if something doesn't feel right with the clutch pedal. Check the level again shortly after topping off any low fluids. If you discover that the fluid level has dropped once more, a leaky clutch master or slave cylinder may be to blame.
4. Low Brake Fluid or Fluid Contamination - If you suspect a problem with the clutch, your next step should be to check the braking fluid in your car. Low levels point to a leak that may have originated in the clutch slave or master cylinder. A similar tale is told by braking fluid that has become contaminated. Over time, the rubber seals in these cylinders may deteriorate, allowing debris to move into the brake fluid as it is being used. Fortunately, tainted brake fluid may be quickly identified because it will typically seem hazy and deeper in colour than normal. Grab a brand-new bottle of brake fluid from your local fuel station or garage if you're unclear of what it should look like.
5. Leaks on the Floor or Engine Bay - If your car's clutch slave cylinder is failing, you can also anticipate seeing some leaks that are glaringly obvious. For any liquid pools, look below your car and also within the engine compartment. Leaky cylinders should be changed because they are unable to sustain the necessary pressure for proper operation.
6. Unusual Engine Noise - If you hear a loud noise while holding down the clutch pedal and the car is in gear, it's possible that one of the clutch cylinders is leaking and cannot hold the release fork securely in place or properly disengage the clutch.
If you experience more than one of these symptoms, it's likely that your clutch slave cylinder is to blame. This is a solid indication that something is wrong with your clutch. But keep in mind that a broken clutch master cylinder can also cause a number of these symptoms and indicators. Therefore, it is best to consult a trustworthy mechanic to confirm your worries and identify the problematic cylinder. If the master cylinder breaks down, the situation is typically worse and needs immediate repair.
#mot history#check mot#check mot history#mot history check#check mot status#mot status#check my mot history#mot history checker#mot testing service
1 note
·
View note
Link
0 notes
Text
Navigating MOTs in Godalming: What You Need to Know
MOT testing is a crucial aspect of vehicle ownership in the UK, ensuring that cars meet safety and environmental standards to be deemed roadworthy. For residents of Godalming and surrounding areas, understanding the MOT process and requirements is essential for keeping their vehicles legal and safe on the road. In this comprehensive guide, we'll delve into everything you need to know about MOTs in Godalming, from the testing process to tips for passing and finding reputable testing centers.
First and foremost, let's clarify what an MOT test entails. MOT stands for Ministry of Transport, and the test is designed to assess the safety, roadworthiness, and emissions of vehicles that are three years old or older. The test covers various components of the vehicle, including brakes, lights, steering, suspension, exhaust emissions, and more. The purpose of the MOT is to ensure that vehicles meet minimum safety and environmental standards to protect both drivers and the environment.
In Godalming, as in the rest of the UK, MOT tests must be carried out at approved testing centers by certified MOT testers. These testing centers are regulated by the Driver and Vehicle Standards Agency (DVSA) and must adhere to strict guidelines and standards to maintain their accreditation. When booking an MOT for your vehicle, it's essential to choose a reputable testing center with experienced and qualified testers to ensure a thorough and reliable assessment.
The MOT testing process typically takes around 45 minutes to an hour and involves a comprehensive inspection of the vehicle's various components and systems. During the test, the MOT tester will check the vehicle's brakes, lights, steering, suspension, tires, exhaust emissions, and more to ensure they meet the required standards. If any issues or defects are found during the test, they will be noted on the MOT certificate, and the vehicle owner will be advised on necessary repairs or maintenance.
Now, let's address some common concerns and questions regarding MOT testing in Godalming. One frequent question is when to book an MOT for your vehicle. In the UK, vehicles must undergo an MOT test annually once they reach three years old, and it's the responsibility of the vehicle owner to ensure the test is carried out on time. Failure to have a valid MOT certificate can result in fines, penalties, and even points on your driving license, so it's essential to stay on top of your MOT schedule.
Another concern for vehicle owners is how to prepare for an MOT test to increase the likelihood of passing. While there's no guaranteed way to pass an MOT, there are several steps you can take to prepare your vehicle and improve your chances of success. This includes checking your lights, brakes, tires, and fluid levels, and addressing any known issues or defects before the test. Additionally, regular maintenance and servicing can help keep your vehicle in good condition and reduce the likelihood of unexpected failures during the MOT.
In conclusion, MOT testing is a crucial aspect of vehicle ownership in Godalming and across the UK, ensuring that vehicles meet minimum safety and environmental standards to be deemed roadworthy. By understanding the MOT process, choosing reputable testing centers, and preparing your vehicle accordingly, you can ensure a smooth and stress-free MOT experience and keep your vehicle legal and safe on the road. So don't delay, book your MOT today and ensure your vehicle is roadworthy for the year ahead.
Find out more: https://www.jordansgaragegodalming.co.uk/mot/
0 notes
Text
Mastering the MOT Test: Your Essential Checklist and Annual Training Guide

First and foremost, it's critical to comprehend that the MOT test is a yearly examination mandated by law for cars older than a specific age. The test verifies that automobiles adhere to the bare minimum of environmental and safety regulations. It's critical to offer a thorough manual for passing the MOT test as an MOT expert training facility, along with a necessary MOT test checklist and yearly training suggestions.
Comprehending the MOT Examination.
The Ministry of Transport test, or MOT test, is a yearly requirement for cars over three years old in the UK. The test aims to evaluate a vehicle's roadworthiness, safety, and exhaust emissions. Qualified and experienced examiners administer it at approved testing locations.
The Value of Annual Training.
Keeping up with the most recent testing protocols, laws, and technological developments in the automotive sector requires yearly MOT training. All MOT testers are required by law to have it, and it is crucial for upholding strict testing guidelines and guaranteeing the security of automobiles on the road.
How to Pass the MOT Test: A Crucial Checklist.
It's essential to have a thorough checklist while getting ready for the MOT test to make sure that a car has all the parts and systems it needs. This is a crucial MOT test checklist that addresses the important areas to pay attention to:
1. Signals and Lights
Verify that the headlights, indicators, brake lights, fog lights, and other external lights are all operating properly.
Verify the headlight aim is accurate and make any required adjustments.
Make that the hazard warning lights are operating correctly by testing them.
2. Suspension and Brakes
Examine the wear and tear on the braking discs, drums, and pads.
Make sure there are no leaks in the braking system and check the level of the brake fluid.
Check the suspension parts for wear and damage, such as damaged bushings or ball joints.
3. Wheels and Tires
Verify that the tires' tread depth (1.6 mm across the middle 3/4 of the tread) satisfies the minimum legal standard.
Examine the tires for any punctures, lumps, or uneven wear.
Check the alignment and stability of the wheels as well as their overall condition.
4. Emissions and Exhaust System
Check the car's emissions to make sure it complies with regulations.
Check for leaks, tight mounting, and the presence (if any) of a catalytic converter on the exhaust system.
Examine the exhaust pollution control system's state.
5. Horn and Steering
Examine the steering system's responsiveness and condition, paying particular attention to the steering rack, linkage, and power steering (if applicable).
Make sure the horn is in good operating order and that its sound is consistent and continuous.
6. Vehicle Structure and Body
Examine the body of the car overall, paying particular attention to the strength of the doors, chassis, and panels.
Look for any indications of corrosion, particularly in the wheel arch and structural sections.
Make that the license plates are firmly in place, clearly visible, and readable.
MOT annual training.
MOT testers can improve their knowledge and abilities through MOT annual training, which is a continuous process that eventually raises the standard of MOT testing. This is a thorough overview of MOT annual training, including its significance and main areas of attention:
All MOT testers are required by law to complete MOT annual training and testing rights may be suspended or revoked for noncompliance.
By keeping testers abreast of the most recent laws, innovations, and industry best practices, it helps them advance their careers.
By fostering confidence with car owners and upholding strict testing guidelines, annual training contributes to the safety and dependability of automobiles on the road.
Conclusion
To sum up, to pass the MOT test, you need to have a good grasp of the testing procedure and a thorough checklist to ensure all the important parts are in working order. Furthermore, keeping up with the most recent advancements in the sector and upholding excellent testing standards depend heavily on MOT annual training. MOT testers can improve the safety and dependability of vehicles on the road by prioritising training and following the mandatory checklist.
0 notes
Text
0 notes
Text
Winterizing Your Car - Being Safe and Prepared
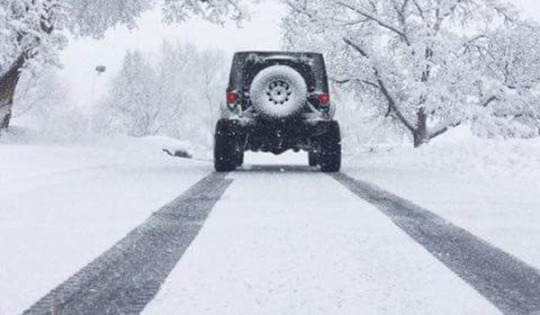
As winter approaches, winterizing your car is essential for the challenging conditions it may face. Winterizing your car not only ensures your safety on the road but also helps prevent costly repairs and breakdowns. Vehicles may struggle to start in frigid temperatures, and tires lose traction. Effective preparation involves snow tires, antifreeze, and emergency supplies.
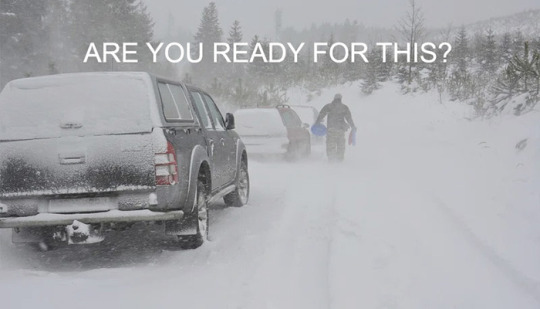
Despite the trials, responsible winter driving and preparation, ensures safety and minimizes the risks associated with harsh weather conditions. For additional reading, you can follow up with a previous post, How To Winterize A Car. However, in this post, I'll go over the quick essential steps to winterize your car effectively.
Inspect the Tires
Proper tire maintenance is crucial for winter driving. Check the tread depth and consider switching to snow or all-season tires for better traction. Ensure tire pressure is at the recommended levels, as it can drop in cold weather. It is highly recommended for car owners to have a tire pressure gauge for all year round safety. For the best deals on tires, I highly recommend Discount Tires. They often have great deals and they are easy to work with on shipping your tires to an installer.
Examine the Brakes
Have your brakes inspected to ensure they're functioning correctly. Slick roads require responsive brakes for safe stopping. It can be prudent to look for build up of black brake dust on your wheels. Also, listen for squealing or grinding when applying the brake to stop. If you notice any of these indicators, the time to get them fixed is before winter hits.

Change the Oil
Use winter-grade oil with a lower viscosity for better cold-weather performance. It helps the engine start more easily and provides proper lubrication when temperatures drop. Due to so many different engine designs, it is best that you read your car manual. Some engines today, use a zero multi-weight motor oil. For example, your car may use 0w-20 oil. In a case like this, you are not going to be able to put a much thinner oil in your engine.
Top Off Fluids
Ensure all fluids, including antifreeze, windshield washer fluid, and brake fluid, are at the right levels. Antifreeze, in particular, is essential to prevent freezing and engine damage. It is always good to have your antifreeze tested with a Hydrometer. To ensure that it can handle the low temperatures in your area, this is really a crucial step when winterizing your car.
Replace Wiper Blades
Install winter wiper blades that are more robust and designed to handle snow and ice. Ensure your windshield washer fluid contains antifreeze to prevent it from freezing. Continue reading to learn How often should you change your windshield wiper blades
Inspect the Heater and Defroster
You'll rely on your heater and defroster to stay warm and maintain clear visibility. Have them checked to make sure they're in working order. This includes the fan heater/defroster fan running properly. If it makes noise when running or only works on some speeds, get it checked out before winter.
Pack an Emergency Kit
Prepare an emergency kit with essentials such as blankets, extra clothing, a flashlight, non-perishable food, water, a first-aid kit, and a shovel. If you don't want to take the time to create your own kit, then shop Emergency Kits on Amazon. These kits can be a lifesaver if you get stranded.
Check the Battery, Starter, and Alternator
Cold weather can put a significant strain on these components. Ensure they are in good working condition to prevent starting issues. Make sure it's in good condition by having it tested. If it's weak, consider replacing it to avoid getting stranded on a chilly winter morning. It is always best to either take your car to a store where car batteries are sold, or you can test it yourself. Battery testers are cheap and they can be handy to have for more than just the winter.
Clean and Test the Lights
Clean all lights on your vehicle, including headlights, taillights, and turn signals. Test them to ensure they're working correctly, as visibility is crucial during winter driving.
Wax and Protect the Paint
Applying a coat of wax can protect your vehicle's finish from the harsh winter elements, including salt, slush, and ice.
Insulate the Interior
Install rubber or all-weather floor mats to protect your car's interior from snow, ice, and salt. This will make cleanup easier and prevent damage to the carpet.
Prepare for Snow and Ice
Keep a snow brush and ice scraper in your car to clear your windows before driving. Consider adding snow chains or traction mats for extra grip in severe conditions. If you live in an area where snow and ice are bad in the winter, you really want to keep snow chains or mats in your car. For the best way to winterize your car, shop HERE for different types of traction mats and chains.
Learn Defensive Driving
Winter driving requires a different skill set. Learn to drive defensively by leaving extra space between vehicles, slowing down, and avoiding sudden movements.
Keep a Full Gas Tank
Running on a full tank of gas can help prevent moisture from building up in the fuel lines and freezing. Also, keeping your tank full can help if you get stuck in the snow. That way you can run the engine a long time to keep the heater working until help arrives.
Conclusion
By following these steps, you can ensure your vehicle is ready for winter, helping you stay safe and avoid unnecessary troubles. Properly winterizing your car, not only protects your car but also ensures your peace of mind while driving in challenging conditions. Don't procrastinate; start preparing your car today, and embrace winter with confidence.
Read the full article
0 notes
Text
Pre Purchase Car Inspection: Ensuring Your Next Vehicle Purchase is a Wise Choice
Introduction
When it comes to purchasing a vehicle, whether it's your teenager's first car or you're an avid vintage collector, ensuring that you're making a wise investment is crucial. In this article, we'll delve into the world of pre-purchase car inspections, vehicle checks, and car inspections near you, and why these services are invaluable in making informed choices.
Meet Cliff: Your Expert Guide
Hi, I'm Cliff! I'm an Australian/NZ trade-qualified automotive mechanic with a remarkable 25 years of experience in the industry. Having managed a thriving automotive repair workshop for 11 years, I possess a deep understanding of all modern cars and 4WDs. Following my time in the repair workshop, I proudly served as an accredited VicRoads RWC licensed vehicle tester for a decade.
The Advantage of a Non-Franchise Inspection
One of the distinct advantages of using my services is that I'm not part of a franchise.vehicle check This translates into two key benefits for you:
1. Cost Savings
By opting for my comprehensive vehicle inspection services, you'll pay significantly less compared to what you might pay at a franchise. This ensures that your investment in a pre-purchase inspection won't break the bank.
2. A Commitment to Excellence
I am wholeheartedly committed to providing excellent service. Being an independent operator, I prioritize your satisfaction above all else. pre purchase vehicle inspection
You can trust that your vehicle inspection will be thorough and meticulous.
The Importance of Pre-Purchase Vehicle Inspections
Now that you've met me and understand my commitment to your satisfaction,car inspection near me let's explore the critical role of pre-purchase vehicle inspections. Whether you're buying a new or used car, these inspections offer several vital advantages:
1. Ensuring Safety
Safety should always be a priority, especially when it comes to vehicles. A pre-purchase inspection can identify potential safety issues and save you from purchasing a vehicle that could put you or your loved ones at risk.
2. Avoiding Hidden Costs
Hidden defects in a vehicle can lead to unexpected repair expenses down the road. A comprehensive inspection helps identify these issues, allowing you to make an informed decision about the purchase.
3. Negotiating Power
Armed with the knowledge from a pre-purchase inspection, you can negotiate a better deal with the seller. If issues are identified, you can either request the seller to fix them or lower the price accordingly.
4. Peace of Mind
Knowing that your future vehicle has undergone a professional inspection offers peace of mind. It instills confidence in your purchase, knowing that you're making a well-informed choice.
What's Included in a Pre-Purchase Inspection?
A typical pre-purchase vehicle inspection covers a comprehensive check of various aspects of the vehicle:
1. Engine and Mechanical Components
We assess the engine's condition, ensuring it runs smoothly and identifying any potential issues.
2. Electrical Systems
Our inspection includes an evaluation of the vehicle's electrical systems, from lights to the battery.
3. Transmission
The transmission's functionality and fluid levels are examined to ensure they're in good working order.
4. Suspension and Steering
We check the suspension and steering systems to detect any wear or damage.
5. Brakes and Tires
The condition of the brakes and tires is crucial for safety, and we inspect these components thoroughly.
6. Exterior and Interior
Our inspection also covers the vehicle's cosmetic condition, including the paint, upholstery, and overall appearance.
Conclusion
When it comes to buying a vehicle, whether it's for daily use or your prized collection, investing in a pre-purchase car inspection is a decision that you won't regret. It ensures safety, saves you from hidden costs, gives you negotiating power, and provides peace of mind. With an experienced automotive mechanic like Cliff by your side, you can confidently embark on your next vehicle purchase.
#succession#welcome home#super mario#the owl house#the mandalorian#taylor swift#ted lasso#across the spiderverse#wally darling#star wars
0 notes
Text
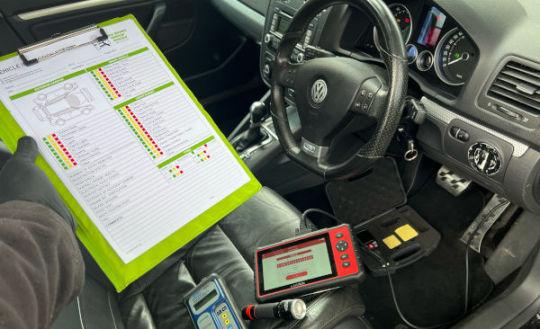
Diagnostic Tools and Techniques: Unveiling the Secrets of Automotive Troubleshooting
In the world of car repair, diagnosing and troubleshooting issues accurately is the foundation of effective repairs. To unveil the secrets hidden within a vehicle's complex systems, automotive technicians rely on a diverse array of diagnostic tools and techniques. In this article, we will shed light on the world of diagnostic tools and techniques that empower mechanics to identify and resolve car problems efficiently.
Diagnostic Tools
OBD-II Scanners: One of the most fundamental diagnostic tools is the On-Board Diagnostics II (OBD-II) scanner. Every modern vehicle is equipped with an OBD-II port, allowing a scanner to connect to the car's computer system. OBD-II scanners read diagnostic trouble codes (DTCs), which are generated when the system detects a problem. These codes provide a starting point for identifying issues with the engine, transmission, emissions, and more.
Multimeters: Multimeters are versatile tools that can measure voltage, current, and resistance. Mechanics use them to diagnose electrical problems in a vehicle's wiring, circuits, and sensors. Multimeters help pinpoint issues such as faulty batteries, alternators, or sensors.
Compression Testers: A compression tester is indispensable when diagnosing engine problems. It measures the compression pressure in each cylinder, revealing issues like worn piston rings, valve problems, or cylinder head gasket failures.
Scan Tools: Scan tools go beyond basic OBD-II scanners by offering advanced diagnostic capabilities. They can access manufacturer-specific data and perform more in-depth system scans. Some even have oscilloscope features for analyzing waveforms in sensors and circuits.
Smoke Machines: Smoke machines are used to locate vacuum leaks and evap system leaks. By introducing a smoke-filled vapor into the system, mechanics can visually identify leaks by observing where the smoke escapes.
Diagnostic Techniques
Visual Inspection: The first step in diagnosing a car problem often involves a visual inspection. Technicians look for obvious issues like loose or damaged wires, fluid leaks, worn belts, and damaged components.
Listening: Mechanics use their ears as diagnostic tools. Listening to engine noises, exhaust sounds, and unusual rattles or squeaks can provide valuable clues about underlying problems.
Road Testing: Taking the vehicle for a test drive can reveal issues that are only noticeable while driving. Mechanics pay attention to how the vehicle handles, accelerates, brakes, and shifts to identify problems with suspension, transmission, or engine performance.
Data Analysis: When using diagnostic tools like OBD-II scanners or scan tools, mechanics analyze data parameters such as sensor readings, fuel trims, and system voltages. Deviations from expected values can indicate specific problems.
Functional Tests: Mechanics may perform functional tests on various components, such as fuel injectors, spark plugs, and sensors, to assess their performance. This helps determine whether a part is functioning correctly.
Pressure and Vacuum Tests: These tests involve checking the pressure or vacuum levels in various systems like the fuel system, brake system, and intake manifold. Deviations from normal levels can point to issues like leaks or component failures.
The Diagnostic Process
Effective diagnosis often follows a systematic process:
Gather Information: Mechanics begin by collecting information from the vehicle owner, including symptoms, recent repairs, and any warning lights on the dashboard.
Visual Inspection: A visual inspection is performed to identify any visible issues or damage.
Scan for DTCs: An OBD-II scanner is used to retrieve diagnostic trouble codes, providing initial clues about the problem.
Additional Testing: Depending on the symptoms and DTCs, technicians may use various diagnostic tools and techniques to pinpoint the issue.
Interpret Data: Technicians analyze data and test results to form a diagnosis.
Recommend Repairs: Based on the diagnosis, technicians recommend necessary repairs or replacements.
Verify Repairs: After completing the repairs, a final check ensures that the problem has been resolved.
In the ever-evolving landscape of automotive technology, diagnostic tools and techniques remain crucial for accurate troubleshooting. They empower mechanics to decipher the hidden language of cars, identifying issues efficiently and providing effective solutions. As vehicles continue to incorporate advanced systems, the role of diagnostics in car repair becomes increasingly vital, ensuring that modern cars receive the precise care they require.
0 notes
Text
The Top Must-Have Car Garage Equipment for better efficiency

Car garage Equipment enhances efficiency, productivity and the ability to offer the best and most effective automotive services. They have got you covered, be it a new car garage or an existing one. You must invest in the top must-have equipment that can improve your operations.
Essential Car Garage Equipment To Boost Efficiency And Productivity-
Vehicle Lifts- These are highly essential for a car garage. With these tools, the mechanics can lift vehicles to a required working height and access the undercarriage. It includes Two-post lifts, four-post lifts, and scissor lifts, etc. These car garage tools can save time and effort in various works.
Diagnostic Equipment- These are required for efficient troubleshooting and accurate repairs. Modern vehicles are widely used so they need modern tools to repair. Diagnostic scanners and code readers help spot issues by reading and interpreting data from various vehicle systems. So you should choose these tools that come with comprehensive diagnostic capabilities and are compatible with different car models.
Air Tools- These tools are indispensable in a car garage as they offer high torque and speed. From removing immovable bolts to tightening fasteners quicker and easier, you can perform these tasks easily. Air tools like Air impact wrenches, air ratchets and air chisels are common, but they save time.
Tire Service Equipment- These tools include tire changers and wheel balancers that can accelerate mounting and balancing tires. They can deal with various tire sizes and types. You can save time by using these tools.
Brake Service Equipment- You should have these dedicated tools like brake lathes, brake bleeders and brake caliper tools. They can help you in repairing brakes precisely and efficiently as well as streamline brake service procedures. They ensure competent brake repairs, dipping downtime and enhancing customer satisfaction.
Fluid Handling Equipment- It incorporates extractors, coolant flush machines, and transmission fluid exchangers. They can surely save you time and reduce mess during fluid changes. They contribute to proper fluid maintenance and overall efficiency.
Specialty Tools- In this category, timing belt tools, engine compression testers, fuel injector cleaners, and electrical diagnostic tools come. It enables you to deal with different jobs with precision and efficiency.
Moreover, it is worth investing in the latest and quality car garage tools. They can enhance the efficiency and productivity of your car garage as well as improve the overall customer experience.
However, certain factors need to be considered when buying required car garage tools. The key factors include durability, compatibility with different car models, technical support and warranty. Moreover, your car garage can deliver the best level of automotive services and stay competitive.
Where Can You Find Quality Car Garage Equipment?
Finding reliable garage equipment suppliers? There are different options you can explore.
Automotive Equipment Retailers
Local Automotive Supply Stores
Online Marketplaces
Trade Shows and Exhibitions
Consider reliable and durable equipment for various benefits. When it comes to quality car garage tools, make sure about the garage equipment supplier’s brand reputation, product reviews, warranty and customer support. This is where Yumat technologies come in. Visit www.yumat.com.ng for more information.
0 notes
Text
If you are a new car driver, you need to know these essential things about the MOT test
If you maintain your car, you will use it for a long time. So, this is your own choice. You may ignore regular car maintenance if you can afford to buy a new vehicle unnecessarily.
But the MOT Havant is not your choice. It is a legal test that you cannot avoid in any condition. If your car is three years old, it has to prove its roadworthiness every year to get a valid MOT certificate.
New drivers feel stressed because of the MOT test because of insufficient information. In this blog, we will tell you about the most essential things related to the MOT test.
Have a look!
What is an MOT test?
An MOT test is a mandatory test that car drivers have to face every year. This test is crucial for road safety since it checks the roadworthiness of the vehicle. The MOT test takes place in a garage that functions as an authorized MOT center. MOT centers are spread across the country. Therefore, you may easily locate the nearest MOT center for the test.
What is the main aim of the MOT test?
The MOT tester will check vital components of your car to check the safety standards. If your car has mechanical faults, the center would not allow you to drive your vehicle. If you have a valid MOT certificate, it clearly means that your car is safe for the road. A lot of road accidents take place on roads just because of mechanical faults in vehicles. So, DVSA wants you to follow the safety rules while you drive your car. This is the main objective of an MOT test.
When one needs an MOT test?
You do not need an MOT test if your vehicle is not three years old. After this time limit, your vehicle should visit the center for MOT every year. The certificate is valid for only one year. You must submit your vehicle for the test before the expiry date. Driving with an invalid certificate is not legal on the roads of the UK.
What is included in an MOT test?
DVSA has made a list of components that an MOT tester needs to check during the test. This list includes components like horn, seat & seatbelts, exhaust, mirrors, lights, doors & windows, driver’s view, number plate, tyres, fuel system, brakes, suspension, and windscreen wipers.
How long an MOT test may take?
An MOT tester may complete the MOT test within 45 minutes to a full hour. You will get the vehicle soon if your vehicle has no fault. If the MOT tester is not happy with the condition of your vehicle, you have to wait more. You cannot drive your vehicle freely without repairing the mechanical faults. Generally, you have to be prepared for a full day if you are near the MOT test.
Common reasons the failure in an MOT test
Although, you cannot be assured of success after the MOT test you can make your best efforts by checking your vehicle thoroughly. There are many areas that you can improve to avoid failure in the test.
You can check the following areas if you want an MOT certificate without any problem:
Check your tyres for issues like wrong air pressure, bulges, cracks, and other signs of damage.
Check lights and change fuse bulbs.
Check the exhaust system for leaks, rust and other damage signs.
Keep your car clutter-free and remove dents or scratches from the exterior.
Check the brakes for their functions along with shocks and struts.
Consider the driver’s view and repair faulty windscreen wipers.
Pay attention to the level of fluids in your car and keep your fuel tank full during the test.
Check your number plate. It should show the number clearly.
Criteria for failing the test
According to the MOT center, your car may have dangerous, major minor faults.
If the tester finds dangerous faults in the vehicle, he would not allow you to drive your car. You have to repair the faults if you want a valid MOT certificate.
Similarly, major faults will also cause failure in the MOT test. You cannot drive your car if you have not repaired the faults.
It is possible to repair the faults in another garage. You can drive to another garage if your car has major faults. In the case of dangerous faults, you have to tow your vehicle since the tester would not allow you to drive your car.
A car with minor faults generally passes the test. However, the driver has to keep an eye on the faults. The driver may get an advisory if the vehicle has negligible faults that may create problems in the future.
1 note
·
View note
Text
6 Signs That Your Clutch Slave Cylinder Is Faulty or Failing
A malfunctioning clutch slave cylinder may be to blame if your manual car's clutch pedal doesn't feel quite right.
The clutch slave cylinder is a crucial part because it is involved in both engaging and disengaging the clutch.
Searching online for car garages in Reading and scheduling an appointment with a trained mechanic within time are vital steps to take if something goes wrong with the cylinder.
A malfunctioning clutch slave cylinder can make it difficult to change gears and, in severe situations, even harm your transmission. Fortunately, there are several typical warning signs to watch out for, allowing you to fix the issue and get back on track.
What Might Fail?
Leaks are the most frequent problem that affects clutch slave cylinders since hydraulics are necessary for their proper operation. The component may eventually deteriorate from repeated use, enabling the transmission fluid inside to leak out. This indicates that the cylinder's internal pressure is insufficient for it to effectively disengage the clutch.
If you go online and search ‘check my mot history’, you will be able to see all the previous passed and if failed MOT test. Here you can also confirm if a MOT test failed due to a problem related to a faulty clutch system.
The MOT tester can decline to continue the MOT inspection if this occurs during your future MOT testing service since they won't be able to do the necessary tests and inspections.
If left neglected, a defective clutch slave cylinder can harm your car even more. The clutch pedal will seem less sensitive, and gear changes will become more challenging. In addition to making driving more challenging and dangerous, this can harm more transmission system components.
To have a qualified mechanic diagnose, fix, or replace any defective parts on your car, it is advised that you search online for garages in Reading and book your car in as soon as you start noticing anything unusual.
What are the Faulty Slave Cylinder Symptoms?
Neglecting faulty clutch slave cylinders is never a good idea. The following signs and symptoms are to be expected if your car has this problem:
1. The Clutch Pedal Feels Soft - You'll notice that the clutch pedal feels "soft" while you drive, which is one of the most noticeable signs of a failing clutch slave cylinder. Your foot will experience less resistance from the pedal than usual, and this issue is often brought on by a leak in either the slave or master cylinder.
2. Difficulties Changing Gears - Another indicator you could notice when driving a car is difficulty shifting between gears. If you remove your foot from the clutch pedal, the clutch pedal might not reset as quickly as usual, or it might remain depressed. These symptoms frequently point to a leak in either the clutch master or slave cylinder and to a drop in pressure in the hydraulic system that controls whether the clutch is engaged or released. If the pedal does not move at all when your foot is withdrawn, the master cylinder is more likely the problem. Driving a car without a functional clutch carries a high degree of risk.
3. Low Transmission Fluid - It's a good idea to check the transmission fluid levels in your car if something doesn't feel right with the clutch pedal. Check the level again shortly after topping off any low fluids. If you discover that the fluid level has dropped once more, a leaky clutch master or slave cylinder may be to blame.
4. Low Brake Fluid or Fluid Contamination - If you suspect a problem with the clutch, your next step should be to check the braking fluid in your car. Low levels point to a leak that may have originated in the clutch slave or master cylinder. A similar tale is told by braking fluid that has become contaminated. Over time, the rubber seals in these cylinders may deteriorate, allowing debris to move into the brake fluid as it is being used. Fortunately, tainted brake fluid may be quickly identified because it will typically seem hazy and deeper in colour than normal. Grab a brand-new bottle of brake fluid from your local fuel station or garage if you're unclear of what it should look like.
5. Leaks on the Floor or Engine Bay - If your car's clutch slave cylinder is failing, you can also anticipate seeing some leaks that are glaringly obvious. For any liquid pools, look below your car and also within the engine compartment. Leaky cylinders should be changed because they are unable to sustain the necessary pressure for proper operation.
6. Unusual Engine Noise - If you hear a loud noise while holding down the clutch pedal and the car is in gear, it's possible that one of the clutch cylinders is leaking and cannot hold the release fork securely in place or properly disengage the clutch.
If you experience more than one of these symptoms, it's likely that your clutch slave cylinder is to blame. This is a solid indication that something is wrong with your clutch. But keep in mind that a broken clutch master cylinder can also cause a number of these symptoms and indicators. Therefore, it is best to consult a trustworthy mechanic to confirm your worries and identify the problematic cylinder. If the master cylinder breaks down, the situation is typically more worse and needs immediate repair.
#mot history#check mot#check mot history#mot history check#check mot status#mot status#check my mot history#mot history checker#mot testing service
1 note
·
View note
Text
Car Repairs You Need to Know
Car repairs are an important part of vehicle ownership. They keep your Car repairs in good working condition and help avoid major repair costs down the road.

Auto mechanics use a wide range of tools and diagnostic equipment to fix vehicles. This proficiency enables them to work quickly and accurately, which can save you money.
Check the Engine
The engine is a vital component in any car. It needs to have a continuous flow of air to run efficiently.
The air filters are also very important. They are responsible for filtering out the dirt and debris from entering the engine.
Once in a while, these filters can get clogged by debris and need to be replaced.
Getting your engine checked regularly is the best way to maintain it and avoid costly repairs in the future.
You can check the engine by removing the oil filler cap and looking under it. Doing this will give you a clear picture of what is wrong with your engine and let you know what to look for if the problem persists.
Check the Tires
Your tires play a huge part in your vehicle’s performance, safety and fuel economy. Properly maintaining them will ensure that your car gets the most out of its lifespan and prevent any costly repairs down the road.
Tires should be inflated to the correct pressure and rotated every 6,000 miles to promote even wear. This can help you avoid uneven tread and other tire issues that may require more frequent tire replacements.
If one or more of the tires on your car service are wearing unevenly, this may be a sign of an alignment issue or a suspension problem. If this is the case, have a professional diagnose and repair it.
Check the Brakes
A vehicle’s brake system relies on hydraulic fluid that moves through a network of hoses and tubes to each wheel. This fluid then forces a clamping device (brake caliper) to squeeze a pair of brake pads against metal discs attached to each wheel.
Then, when you apply the brakes, friction between the pad and rotor slows the car down and stops it. However, your brakes can only do their job for so long before they start to wear down.
When your brakes begin to wear down, you should take them to a mechanic. The technician will be able to inspect the caliper, rotor, and brake lines for any damage or uneven wear.
Check the Radiator
The radiator is a vital part of your car's cooling system. It consists of a liquid coolant, hoses to circulate the coolant, a fan and a thermostat that monitors the coolant temperature.
A damaged radiator is a common cause of overheating. This can lead to costly repairs and a damaged engine.
You should inspect your radiator regularly to make sure that it is functioning properly and not clogged. You should also check for any leaks and refill it with a quality coolant.
A good way to check the radiator is by using a pressure tester and coolant dye kit. You can perform this test by taking off the radiator cap and setting it somewhere safe. Applying pressure with the tester will indicate any leaks in the radiator.
Check the Battery
Your car battery is an essential part of your vehicle's electrical system, and it should be checked regularly. It can be a great way to avoid expensive repairs and keep your vehicle running smoothly.
You can test your battery with a multimeter. It's an inexpensive tool you can buy from most auto parts stores.
To use it, turn the multimeter on to DC voltage (marked with a solid line and a dashed line above a letter V). Touch the red probe to the positive battery terminal and the black probe to the negative battery terminal.
Corrosion around your battery's terminals might be causing your trouble, or it could just be in need of cleaning. If corrosion is a problem, remove it with a batterycleaning solution or some sandpaper.
0 notes
Text
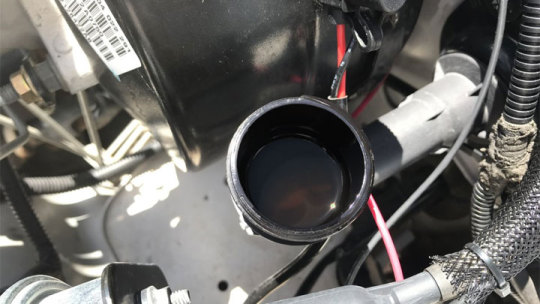
Why is My Audi Brake Light Blinking? Should I Replace the Brake Fluid?

Warning lights on the dashboard are meant to make you alert of any failure in your car. But warning light comes on in two ways- either it would remain illuminate or flashes or blinks. Generally, a blinking warning light is to make you know that there is a serious problem. Brake light is one of the warning lights that illuminate when there is any wrong with brakes. In this article you will know why the brake light blinks and how to get rid of it.
What makes the brake light to blink in Audi?
Note that the brake warning light consists of a circle of yellow or red colour with an exclamation mark or ABS written within the circle, there will be two arcs of a similar circle present at both the left and right sides of the circle.
If your brake light remains blinking in your car then there is a big risk, you have to fix the problems, but before that you have to know all the possible causes that make the light to blink.
Low brake fluid
This is one of the common thing in hydraulic brakes is lack of brake fluid in the brakes. This fluid pushes the brake pad to the drum to make the vehicle slow. If there is no enough fluid in the brake system then the brake would not work properly and there is a high risk of vapour lock in the brake system. The dashboard will show the brake warning light flashing for some time. In most of the cases, there will be no brake fluid at all.
Problem in ABS
Worn out parts in ABS or anti-lock brake system like a damaged ABS ring or sensor mounts send wrong information to the ABS module and make the warning light to illuminate. Some minor corrosion can also cause brake light to turn on.
Worn brake pads
Older, used brake pads are generally much thinner and even worn cannot perform its work to slow down the wheels properly due to low friction on the brake pads. If used again and again in this condition, this can lead to brake plates touching the brake disc.
Damaged bulb in the rear brake lights
If the bulb of the brake lights is damaged, it will not glow when you press the brake pedal. These lights are used to indicate that your car is slowing or stopping which make the drivers behind your car to be alert. This problem can also cause brake warning light to turn on.
How to get rid of the brake warning light?
You have to fix the problem by finding the causes
1. Brake fluid is to be checked first. If there is low or no brake fluid then you have to fill the brake fluid in the brakes.
2. The brake pads are to be checked. If it has become too thin or worn off, then you have to replace them.
3. If you are getting a false warning, because both the brake pads and the brake fluid are in good condition, then there must be some corrosion in the antilock braking system. The whole ABS is to be checked and the corroded components are to be replaced. The system is to be cleaned to avoid more corrosion.
4. Check the sensors properly. A faulty sensor can give wrong information to the computer of the car and make the warning light on. So the sensors should be taken for test. The faulty sensor is to be replaced.
5. If still you see the brake warning light is on, then you can check if the brake pads and the disk are coming to contact properly or not by pressing the brake pedal. If the contact between the brake pads and the disk is good, then try restarting the dashboard after keeping it off for few seconds only.
6. If still the light gets on, then contact a trusted technician or nearest Audi service center.
You should use the brake fluid which is recommended by the manufacturer and technicians. A good quality fluid should be in compressible and viscous and good moisture content.
Conclusion
Different brakes have different bleeding or fluid changing procedures. The fluid is to be filled with care and slowly to adequate amount. After top up the fluid you have to be sure that there is no air bubbles inside it. Before filling, you have to test the fluid by brake fluid testers available in auto parts shops.
0 notes
Last Seen Blogs