#Pixlr download
Text
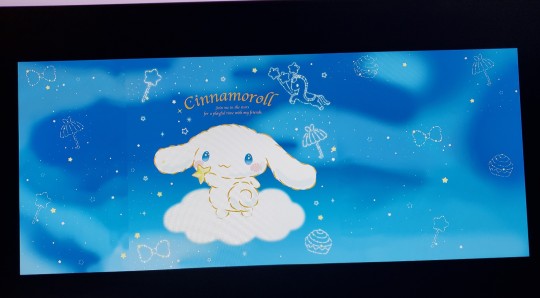
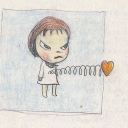
Look at this wallpaper I made for my lil sister ^^
#theres like. no cute wallpapers for huge screens so I downloaded a generic wallpaper and put cinna in the middle#then added color on the sides#and made transparent lil pngs of the shapes and stars and added them on top#cinnamoroll is one of her fav characters so I hope she likes it :')#I also found a cinnamoroll cursor pack so now she has a cinna themed cursor too!#ik its not perfect but I don't have a drawing pen or anything this was just done w my mouse on pixlr lol
7 notes
·
View notes
Text
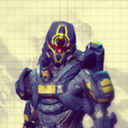
okay so im super self-indulgent about my made up fckin boiling isles metal band so i made them a spotify with all of their "albums" (all songs belong to their og singers/bands obvi but still)
so like
here
also heres some of their "official" album art. Dartak (band's bassist) made it all and thinks its fckn cool looking even tho theyre p dweebish. the other bandmates love it anyway
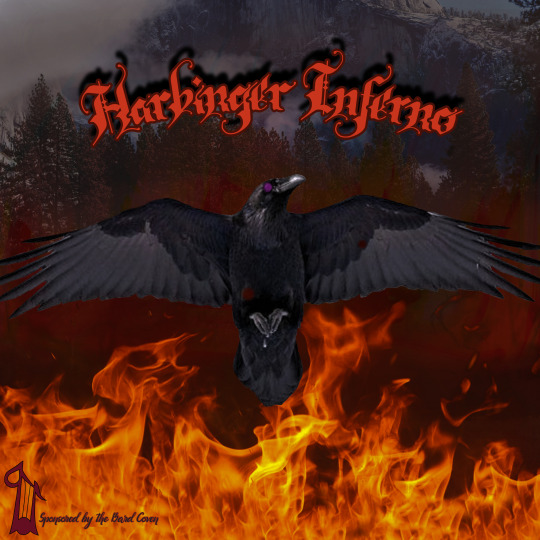
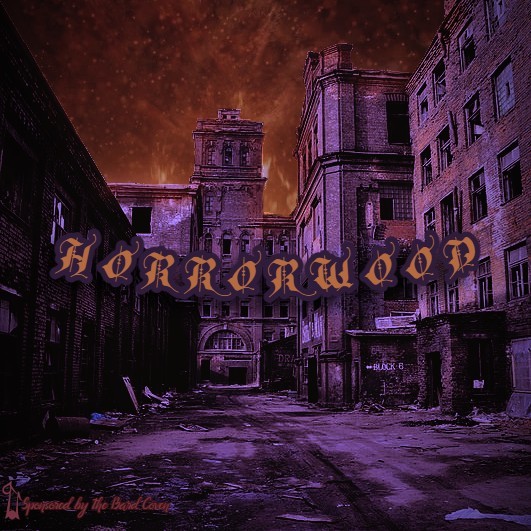
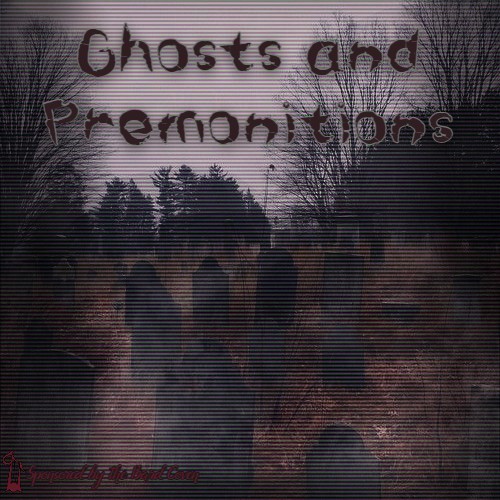
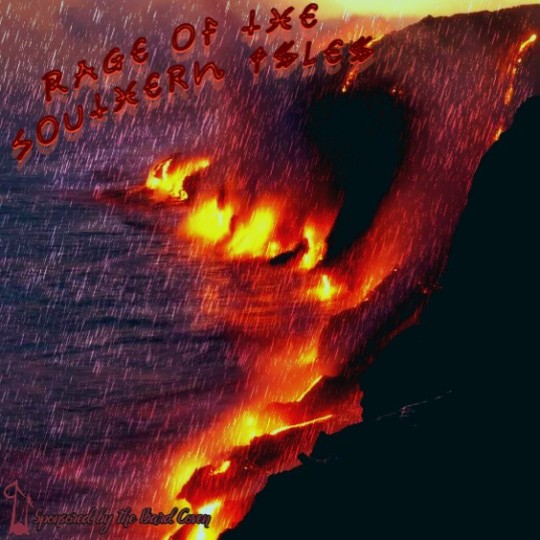
(peep the small "sponsored by the bard coven" on the bottom left of every img lmfao)
also working on a fic for my oc eira so have the link to that too lmfao
im not that far into the fic/their life just yet, so explanations about the other "albums" on the spotify are gonna have to wait lol
or yall can just read the other stuff i put under the "harper's haven" tag lol that works too
#i highkey dont rly like spotify all that much#i prefer pandora music#but for the sake of everyone else i made a spotify anyway cuz ik its more popular#also made it cuz im working on eira's entire backstory on ao3#harpers haven#owl house oc#toh oc#the owl house oc#toh#owl house fanmade work#editing these are so much fun tho#pixlr will only let me save 3 a day without an acc so i gotta wait till tmrw to download the other covers#harper's haven#<--mistagged it at the beginning woops
2 notes
·
View notes
Text
random question for anyone
whats a good free picture editing thingy?
i......... do not want to go through the process of downloading Photoshit on my desktop]
#;ooc#preferably soemthing no download required#all i saw when i searched was pixlr and i havent used tha tin years
1 note
·
View note
Text
Get to Know Me- Sims Style
Thank you for tagging me @bool-prop and @autonomousllama!
What’s your favorite Sims death?
It would have to be the Guinea Pig virus from Sims 1. That was amazing, and the way Will Wright snuck it into the game was pure genius (or evil, depending on your perspective!)
Alpha CC or MaxisMatch?
Mostly Alpha.
Do you cheat your sims weight?
As someone who uses the Sims primarily as a storytelling medium, I have to say yes. Some most of my dinner scenes require a lot of takes to get exactly right, and my Sims have no choice but to stuff themselves for hours at a time and often bulk up as a result. The least I can do for them afterwards is to slim them back down again.
Do you move objects?
I think it's mandatory for storytellers?
Favourite Mod?
The Sims 3 would be unplayable for me without a whole slew of mods, but top of the list would be Master Controller.
First Expansion/Game Pack/Stuff Pack?
The Sims: Livin' Large
Do you pronounce live mode like aLIVE or LIVing
It's the same pronunciation as aLIVE, and I will unALIVE myself on that hill.
Who’s your favourite sim that you’ve made?
I have not technically made many Sims, the vast majority are downloaded from other Simmers a lot more talented than me, or have been born/ created in game. And the few I have made are all pretty meh.
Have you made a simself?
Yes! She is currently hanging out in @gaiahypothesims' game and just like me she is the epitome of style and sophistication, as you can see from the pic that Gaia sent me below.

Which is your favorite EA hair color?
Probably the strawberry blonde.
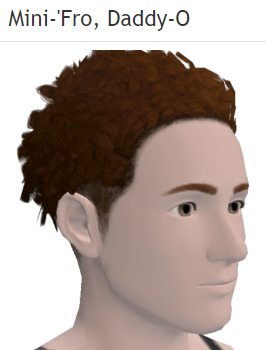
Favorite EA hair?
This one:
Favorite life stage?
Young Adult
Are you a builder or are you in it for the gameplay?
Gameplay/ storytelling.
Are you a CC creator?
No.
Do you have any Simblr friends or a Sim Squad?
I have a couple of Simblr friends that I message regularly and who have even entrusted me with their phone numbers, so I feel very blessed.
Do you have any sims merch?
No.
Do you have a YouTube for sims?
Next.
How has your “Sims style” changed throughout your years of playing?
I can't really answer this because as stated earlier I very rarely create Sims.
What’s your origin id?
I don't have Origin. The best thing I ever did back in the day was to heed the advice of the doom merchants and not upgrade my TS3 game to patch 1.69. Patch 1.69 forced players to use Origin to launch their games. I always used the TS3W shortcut to open my game and I continue to do so to this day. I'm so, so thankful when I hear about all the issues other Simmers are experiencing with Origin and the EA app.
Who’s your favorite CC creator?
I hate to play favourites but I'm going to use this opportunity to give shout-outs to Sandy from @aroundthesims and @spladoum because they have both gone out of their way to create beautiful things for me- check out Sandy's beautiful objects here and Splad's gorgeous poses here!
How long have you had simblr?
Since November 2010.
How do you edit your pictures?
I use Picasa, and Pixlr if I'm feeling particularly creative.
What expansion/ gamepack is your favorite?
Nothing has ever compared to the unadulterated joy I experienced playing Open For Business for Sims 2. Nearly every single one of my households either owned a home business or a retail outlet and the gameplay, challenges and fun were just phenomenal.
I would like to tag @gaiahypothesims @wannabecatwriter @petrolstationflowers @oasislandingresident @imaginary-sims @hurricanesims @hancyan @brannewjoint and @windermeresimblr!
93 notes
·
View notes
Video
youtube
TS4 | Willowcreek apartment | NO CC (Speed Build)
Hello, my name is Ai1004 (아이천사)! I will glad to see ur feedback! (I’m sorry if my English not good, is not my native language~)
All my build u can download by EA gallery in game, my ID > Karuki3
This build for new pack > The Sims 4 For Rent!
• Build Details •
Empty rooms for new start! Starter apt. 6in1
Apartment Lot size: 30x20
Lot Price: § 90.171
Located: WillowCreek
• Where u can find me?•
EA gallery: Karuki3
Tumblr: https://ai1004.tumblr.com/
VK: https://vk.com/ai1004sims
• What software I’m using for editing?•
Streaming Software (Action!)
Video Editing (Movavi)
Photo Editing (Pixlr)
Music: no copyright music from Youtube channels
•Gshades I use•
Tofu by Ellcrze
Also LUUMIA’s - NoBlu NoGlo
Thank U for watch video, subscribe and comment! See u in my next build video!
12 notes
·
View notes
Text
EDITING RESOURCES!
actually, this has been sitting in my drafts for a while and i never quite had the energy to fix or format it but yeah. basically this is a catalogue of editing resources i personally use and/or am acquainted by!
for clarity's sake, i am by no means some great editor. i'm here for the fun and the pretty colors, and while i have been editing personally for a few years, i'm not the most knowledgeable person for this. i created this list first for personal reasons but figured everyone else might find it useful as well. so, yeah, just in case i miss a particular resource or don't add something you like, try to keep that in mind.
this will (attempt to) follow the format of me stating the resource (and if possible, a link) and some personal thoughts and critiques on said resource, especially for those unfamiliar with it.
EDITING SOFTWARE/APPLICATIONS
✧ Adobe Photoshop
is...is this even a question. of course, a natural given part of editing is adobe photoshop, it's universal and well-known, and pretty much is associated with any form of the word "edit." atlhough i can say, it's a bit dizzying for beginners but there are plenty of tutorials everywhere + it's very versatile, you can go from making gifs to drawing art, just nice to use all around.
✧ Photopea
now, photopea, in layman's terms, is just photoshop made online. so you can save yourself the download and the loooooong adobe loading screen with photopea. personally, i use this to color my gifs and for most simpler projects, because i vehemently refuse to wait 2 hours for photoshop to open so i can make a gif lol. it has a simpler interface, easy enough to understand so long as you read the labels. highly recommended for three types of people: those who can't afford ps, those who find ps hard to understand, and those who are both :D /j
✧ Picsart
the golden lamp of the editing community, simply because picsart provides A LOT of user-submitted materials through the form of "stickers" making everything so much more accessible to anyone who needs it. easy to use, easy to grasp, piscart captures editing down to a tee and is great overall! although i will warn you, a number of its resources are locked behind the gold paywall (not the user-submitted ones though) and it has issues with lag and ads in some devices. lastly, some of those stickers you find are fanart, and not all of these artists are okay with people altering or editing their work without permission, and most times, the credit never reaches them anyway. so please be mindful of what you use, artists spend a great deal of time working on their craft, just like us :)
✧ Pixlr E
i have never personally used it but its UI is greatly similar to photopea, simple and eye-pleasing. a great number of editing blogs use this for their work and it's a very capable software for editing.
✧ Ibis Paint X
technically NOT an editing software lmao, but it serves its purpose and it does it well, although it takes some effort. ibis paint x is intended for drawing, but i, as well as a good amount of other editors, can repurpose certain parts of it for editing purposes. it's a great app, from personal experience, and i'll leave some tips regarding it down below!
✧ Polarr
FANDOM-SPECIFIC RESOURCES
i have never seen so many filters in my entire life /hj just your day-to-day edit software, however polarr shines where most apps are weak, it has an extreme amount of mostly user-made filters, which you can find on literally everywhere.. i'm sure you'll enjoy using it~
✧ bsd mayoi wiki
I DO NOT SUPPORT GENSH.INRESO.URCE.
they have made statements regarding hoyoverse's sumeru that are not only dismissive but incredibly harmful for people of color like me, who are having their culture fetishized and skin color villainized by the direction sumeru is taking. dditionally, if you continue to interact with said blog, refrain from interacting with me. i will not be associated with it anymore.
@genshingraphics is an alternative blog for those who are seeking the same effect.
yes, this much is a given but i see a ton of people using the bsd wiki version of the mayoi cards (which are not transparent) when you can access the transparent versions, as well as the chibis, and their different modes in the sprite viewer. A+ for accessibility!
✧ cookie run wiki
okay, i know what you're thinking. there are already separate wiki pages for ovenbreak and kingdom, et cetera, but this one allows you to access both of them in compilation. remember to check a character's gallery, most times it contains official art not featured in game!
✧ ghibli screenshots
quality? amazing. official? yes. free to use? absolutely! little history lesson from your local cat! around the end of 2020, studio ghibli officially released over one thousand high definition screencaps of their films, making all of these images freely accessible to the public. this was a big thing because now you were legally allowed to use all these images so long as it isn't for monetary profit. everything from the big names like spirited away and howl's moving castle to the underrated gems of when marnie was there and tales from earthsea, the official studio ghibli website gives you access to the best quality content of their greatest works, all completely free!
✧ @.bsdwanscreenshots / @.bsdscreenshots
just as it says on the tin, beautiful quality screenshots of the bungou stray dogs anime + wan!
✧ @.teyvatcompendium / @.genshinsnapshots
like the others, in-game images and screenshots in high quality! they're beautiful to look at too~
✧ @.kodokuna-tamashii
they make enhanced screenshots of multiple animes! please remember to like and reblog the screenshots you'll use as appreciation for their hard work! i'm sure this'll be useful to everyone~
GENERAL RESOURCES
✧ list of transparent/png blogs
✧ list of stimblrs (this is outdated to an extent, so please check the dnis of them just in case.)
✧ @.allresources
✧ list of reverse image search software (directed at people listed in tip #7)
✧ aesthetics wiki
✧ pride flags (deviantart)
✧ unsplash ; pixabay ; pexels (stock photos! good for moodboards, aesboards, backgrounds, etc.)
✧ remove.bg
✧ coolors ; list of color palette blogs
✧ waifu2x ; resizeimage.net (in case you need to upgrade or downgrade image sizes!)
✧ how to add gradient/html-colored text on tumblr posts (only desktop but this can be bypassed by using puffin—a mobile web browser—and using the "request desktop site" feature.)
NEKO'S TIPS AND TRICKS:
✧ if you're new to tumblr, i suggest going through this comprehensive guide for new tumblr users. it helps ensure your privacy and prevents unsettling events from happening, because tumblr's userbase and features vary immensely from other sites.
✧ to add a cut / read more on your tumblr post on mobile, simply type ":readmore:" without the quotes and hit enter. you can find the same feature on the post's meatballs menu on the website/desktop. if you're posting something that may be triggering / an extremely long post, please put a read more so it doesn't clog everyone's dash. adding dots on every line does NOT work on tumblr.
✧ if you ever want to put a particular tag on top [e.g. credit or something important you want to say] put the words between quotation marks (" "). it should show up at the very top of the tags.
✧ commas don't work on tumblr tags, however users have found a way to bypass this—like how you can see commas in my tags—with a special type of character that resembles a comma. it's this ( ‚ ).
✧ desktop themes exist! it's comprised mostly of HTML and there are a big amount of amazing theme makers out there. most of you may not pay attention to desktop themes but adding a personal touch to your blog might brighten your day :)
✧ now, onto some edit-specific tips. if you're making reply icons on ibis paint x, i suggest creating the icon first, then going to the tools and choosing canvas. there, pick resize canvas and input the size you want your replycons to be! remember to turn off the keep aspect ratio switch, and when saving, make sure to use "save as transparent png" so the white background won't look off-putting.
✧ tumblr's average icon size is 128*128. however this size can make your edits look blurry or bad in quality which is why most editors choose bigger sizes for optimal clarity. headers are 640*360 for mobile and 3000*1055 for desktop. you will also notice that your edits tend to look blurred on the posts and only increase quality when tapped, this is because tumblr downgrades the display sizes of images. don't worry! this has no effect whatsoever towards the actual edit's quality, as it only changes how it appears on people's feed. clicking the edits showcases its genuine quality!!
✧ so you want to use fanart for your edits. i'll preface you with the fact that i don't use fanart and continuously refuse to do so, for reasons stated in this post here. anyway, in this post, i provided you 5 different reverse image search software, to aide in searching for the artist of a fanart. when using fanart for edits, crediting is required. and if you can't find the artist despite going through all the image search software i provided, you do not use the art. crediting sites such as pinterest, pixiv, etc. are useless. tag the actual artist. if you find they don't allow edits or resposts, delete the edits. if you can't see it on their bio/carrd/whatever, ask them. this isn't asking, this is basic decency towards content creators just like us.
✧ some genuine advice: the first few days of starting up can be...hard. there might be little traction, there might be none at all. requests will be slow as people start to grasp your edit style and understand your character. it can be a little discouraging because you feel like you're flopping, but stick through! make edits you enjoy, ask for promos, and my tidbit: while waiting for requests, try and edit for all your sources! it's a nice way to put your name on all the tags and it also draws more attention to your blog! another thing is making lots and lots of self-indulgent edits! have fun with it, as always~
✧ tag your posts! i am literally begging you to tag your posts bc tagging well is the only way to get better reach on tumblr! the only way to reach people's "for you tabs" as well as properly show up in tumblr's search function, regardless of how broken it is. some tips! if you're making a stimboard, tag every single stim! from food stims to clay stims, be as specific as necessary. tagging them also helps people who are filtering particular content from their dashes as it gives them the ability to block that tag! tag your aesthetics, fandoms, everything! please please tag well, it may be exhausting and repetitive but it lets your post be seen by ppl outside your followers which can lead them to following you for more content!
✧ curate your experience. make that dni! expand that blacklist! use that block button! delete those hateful anons! overuse the tag filtering feature! unfollow people who make you uncomfortable! refuse that request if it's rude and hurtful! as your senpai or senior or whatever, both seemingly tumblr-wise and edit blog-wise, no one else can control what you see, what you make, who you interact with, but yourself. so don't hold back or beat around the bush! making your blog a safe space for everyone is important, but never forget to make it a safe space for yourself, hm? ♡
✧ be kind to yourself. i know it's easy to get swept up in all the drama and discourse, especially for those of you who are new and unaware. just like any other community, editors have some rough edges too, we all have some bad times but please don't let it overshadow the good ones. you'll make mistakes, that much is inevitable, you're only human after all. correct them, fix them, take care never to repeat them, move on. you'll get tired and burnt out, and that's perfectly normal, you're still a person behind that screen after all. rest, find things you enjoy, distract yourself, discover something new. don't despise yourself for every little thing. this goes for other people too. we all have our faults, and we find ways to make up for it. your mistakes aren't who you are completely, no? and everything can be a learning experience. i know you're kind, so be kinder to yourself. i know you're trying your best, so take care of yourself as well. keep going, i'm proud of you!
and that's a wrap, folks! i hope this at least helped some of you and feel free to send me an ask just in case anything isn't working. i do not claim to own any of these resources, please give credit to their respective owners. this was made to help editors, new and old, so please preserve that ideal and use these in good faith. thank you to everyone who kept up with it and i hope everyone finds this somewhat useful!
#there! finally done!!#also i posted this late out of spite toward the rude anons#promo reblog in a bit~#୨୧ * important#this was hell to make and organize to pls appreciate it#if this flops well idc
278 notes
·
View notes
Text
FREE DIGITAL THINGS
• YOUTUBE related, CREATOR related, WORK related:
#free#ref#masterpost#to be added onto#resources#helpful#programs#free programs#free resources#creatorblr#producer
16 notes
·
View notes
Text
Pixlr, the in-browser (no download!) photoshop clone I've been using for years, not too long ago added a limit of 3 free saves a day unless you get premium. I didn't even mind this too much but now they're starting to push some AI shit and I really wanna switch to something else. Any similar alternatives?
4 notes
·
View notes
Note
Sorry if this is a repeat question, but how/with what program do you make your flags?
I made a lot in the past but it was mostly all manual, which got too exhausting to continue with. So I'm pretty curious.
I used to use pixlr a lot, but then they made it that you can only export three images a day and made their layout more confusing, so I quit for the most part. Now I use MediBang Paint, since I use it sometimes when I try to draw anyways. It's easier to use on the computer but they have a mobile app as well. It is also download-only though, so if you can't download software, then it's not gonna work out unfortunately.
4 notes
·
View notes
Note
If u don’t mind me asking, how did u make a custom divider like the one on ur navi??😭
U don’t have to answer if you don’t want to!
hi nonnie! idm at all
i used pixlr.com for this but im sure you can use any website of your choice
first u just gotta pick the image u wanna put, in my case i used the same one from my navi

then choose to add your text from the menu, u won't need a new layer for this

then choose add new text, and scroll down to the "text" box, i don't find it necessary to change the text name at the very top


u can choose any font. from the website i use a font called "molot", but the one in my header is from a website called fancy letters, i didn't need to change the font from pixlr, js copy n paste it from the letters website.
after i choose the font i want i resize it to fill the image

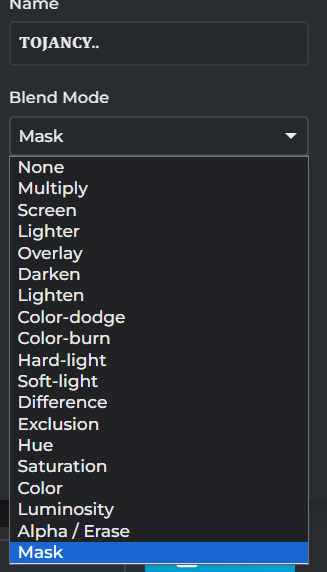
then click on the three dots on the text layer and click on blend mode
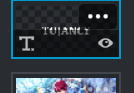

find "mask" there, it's the last one
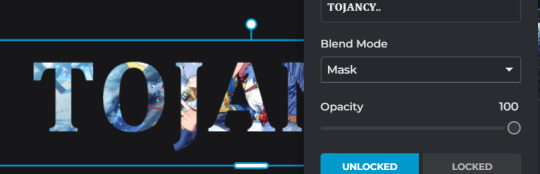
and this is the result
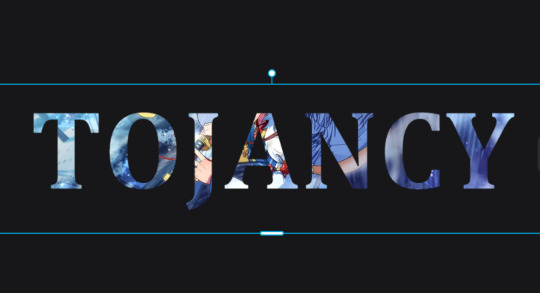
you can always move the text around to fit a certain part of the image like this

and that's all <3 it downloads transparent so you don't have to worry about that. u can always ask if u still had any confusion
3 notes
·
View notes
Text
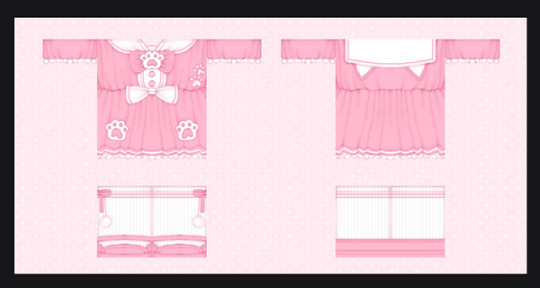
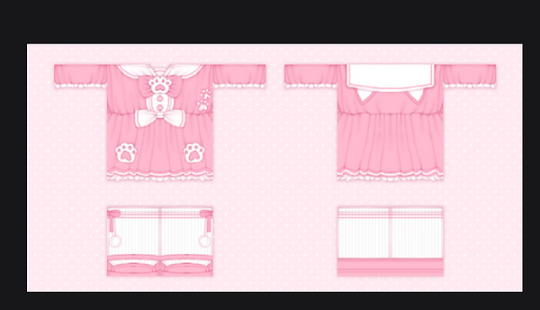
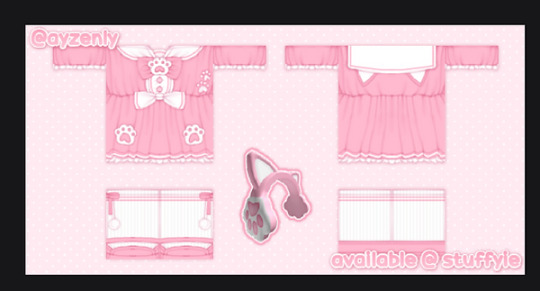
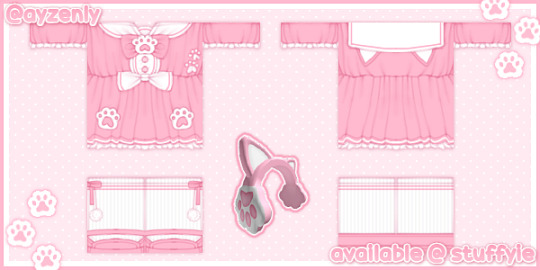
clothing showcase tutorial
halo, today i will be teaching how to make a showcase! the style will be something like below:
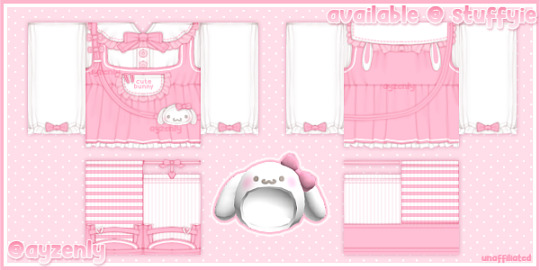

☆
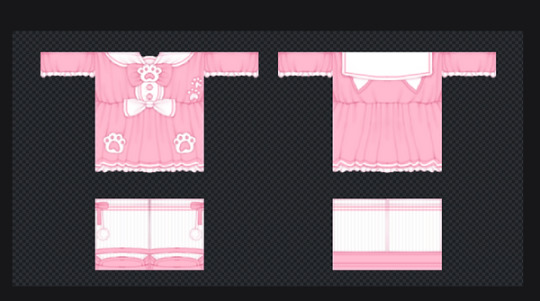
step 1: go to pixlr, and click open image
step 2: open your showcase

step 3: this is optional but you can also include a backside of your design!

step 4: resize your canvas! go to the top left corner, click page, then click page size, and enter the new dimensions! the ones i use are:
1 showcase : 300 x 300
2 showcases : 600 x 300

step 5: rearrange your showcases.
step 6: add a background, i usually go for a polka dot pattern, but you can use whatever u want.
step 7: now i duplicate the showcase layer, and change the whole thing into a shading color (for shadows).

step 8: then drag that layer under the showcase, set the layer to multiply, and blur it!
to blur: filter > details > blur
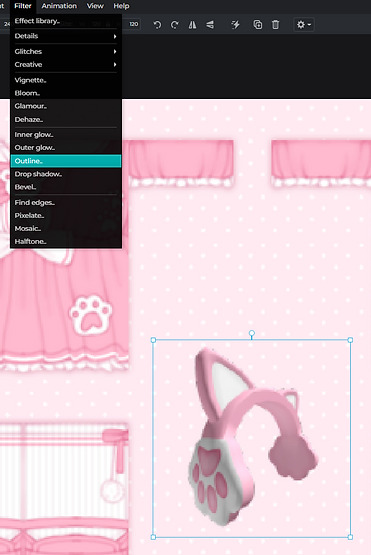
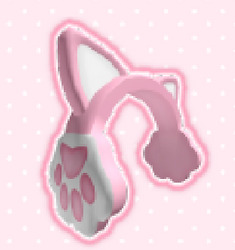
step 9: this is optional and only applies if you want to add an ugc item to your showcase!
a. load the image of the ugc in, then i add an outline to it, sometimes if i’m feeling quirky i’ll do a double outline
b. to outline: filter > outline
c. the same as before, i duplicate the layer and change the color to make the shadow

step 10: it's time to add text! my favorite fonts can be found below, these are the ones I normally use! click the text to be redirected to the download page (‾◡◝)

a. black bubble
b. candy beans
c. cookies
d. fredoka one
e. hey comic
f. milky nice clean
i usually add my roblox/twitter handle in one corner, then where it's available at in the opposite corner.

step 11: again, i add the shadow so it pops more
step 12: add ur watermark (i forgor)
step 13: at this point, you’re basically finished, but i like to add some small fun little pngs to make it look cuter. since this outfit is cat themed, i added some little paws as details.

step 14: i also like to add a double border so it looks more decorative!
to add a border: go to your background layer > filter > inner glow

step 15: if you think everything looks blurry, merge everything into 1 layer.
then go to: filters > details > sharpen
and sharpen your showcase, it makers everything less blurry!
anddd, you're all done, now you can be a certified 'pro showcase maker' like me!!!!
☆
you made it to the end!! lmk if u have any questions, suggestions to making this tutorial better, etc.
credits: ayzen#1111 or @ayzenly on roblox
contact me: ayzen#1111
7 notes
·
View notes
Text
that moment when frosty makes another playlist for an unloved character but xe already maxed out xyr free pixlr downloads for the day
2 notes
·
View notes
Text

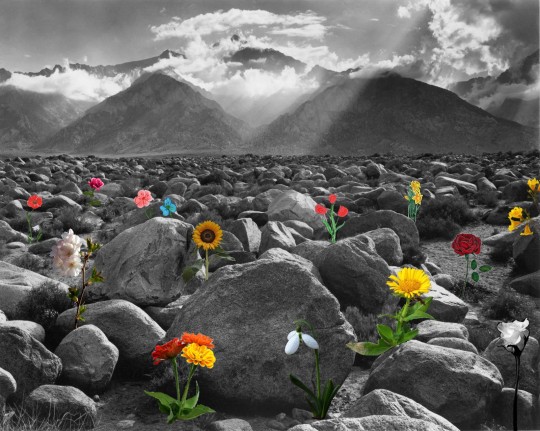
Ansel Adams: Mount Williamson—Clearing Storm, 1944
I search for the photographs of Ansel Adams to use. After finding a proper photo, I think about my concept and its meaning. I use Pixlr to edit the photo. I chose flowers to represent each person. I copy and paste all the links to cite and download the photos which I need. I opened the original work of Ansel Adams and added layers. Then, for each layer, I insert each flower picture. I crop the photos, cut along the edge, and adjust the color. So only the flower image remained. Then, I arranged and evenly scattered the position of the flowers and the size to give the photo depth. After I finish editing, I download it as a JPG file. I mostly used incision, cut-out, adjust, and order tools.
I considered the viewpoint and depth during the editing process. The photo appears to have been taken from the bottom upward, so the stones are highlighted. I chose this photo because this element caught my interest and the concept came to my mind. The photograph conveys a sense of depth. The stones and ground placed in the foreground feel close, while the mountains, sky, and clouds in the background feel far away.
You are unique and special among many people, just as there are countless flowers but they all come in different shapes and colors. The many stones mean trials. Even among those trials, you bloom like a flower.
The story is about uniqueness, resilience, and personal growth. It compares individuals to flowers and the challenges they face to stones. Despite the diversity of flowers and the hardships represented by stones, individuals have the ability to flourish and grow. The special emphasizes the uniqueness and value of each individual. Countless flowers but they all come in different shapes and colors highlighting the diversity among people. The stones represent life's challenges and difficulties. These can be personal struggles, obstacles, or adversities that people face. This sentence conveys the idea that, like a flower that thrives even in difficult conditions, individuals can grow and succeed despite the challenges they encounter.
Work Cited:
www.britannica.com/biography/Ansel-Adams-American-photographer#/media/1/5091/3114
pixabay.com/photos/rose-flower-white-rose-rose-bloom-6799478/
pixabay.com/illustrations/one-creative-artistic-red-garden-4779562/
pixabay.com/photos/flower-life-yellow-flower-crack-887443/
pixabay.com/photos/prunus-plugged-png-graphics-1390240/
pixabay.com/photos/bell-white-flower-white-flower-2537909/
pixabay.com/photos/hand-gift-bouquet-love-1549399/
www.pexels.com/photo/person-holding-yellow-sunflower-1624076/
www.onlygfx.com/10-paint-flower-png-transparent/
www.deviantart.com/weiting1122/art/Flower-PNG-By-Weiting1122-634597550
clipartpng.com/?1649,pink-rose-png-clip-art-image
2 notes
·
View notes
Video
youtube
TS4 | Korean aesthetic Snow house | NO CC (Speed Build) | | 심즈4스피드빌드
Hello, my name is Ai1004 (아이천사)! I will glad to see ur feedback! (I’m sorry if my English not good, is not my native language~)
All my build u can download by EA gallery in game, my ID - Karuki3
• Build Details •
Rent House for vocation in Komorebi (but in Korea aesthetic, I try it..)
Apartment Lot size: 30x20
Lot Price: § 46.232 (§517/day)
Located: Komorebi
• Where u can find me?•
EA gallery: Karuki3
Tumblr: https://ai1004.tumblr.com/
VK: https://vk.com/ai1004sims
• What software I’m using for editing?•
Streaming Software (Action!)
Video Editing (Movavi)
Photo Editing (Pixlr)
Music: no copyright music from Youtube channels
•Gshades I use•
Lightening mod by softerhaze - sunblind
Tofu by Ellcrze
Also LUUMIA’s - NoBlu NoGlo
Thank U for watch video, subscribe and comment! See u in my next build video!
2 notes
·
View notes
Text
How do I make my family trees, part 1
Hello, today I bring you my very first attempt at a tutorial. Time ago I made a couple of family trees that showed how different royal couples were related. While I only posted two of these trees (on two different blogs) and then abandoned the project, I always wanted to go back to it, specially since there are a some that I did but never posted.

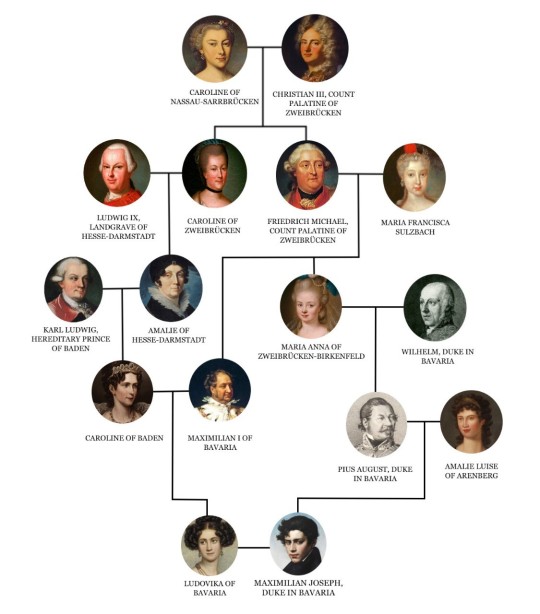
The trees in question.
The other day I was asked how did I make them, so I thought that this was a great chance to go back to this forgotten project. So more trees are coming. But first, a tutorial of how I made them!
First a disclaimer: while I enjoy making edits I'm not actually super skilled on the art and just managed with the bare minimum edit tools of Pixlr. So this is just how I do it, which is probably not the best way to make these trees. Also I'm not even sure if it is the easiest way lol, but I like making them like this because it gives me a lot of control on how the tree will look like, which genealogy websites do not. Because of Tumblr's image limit this tutorial will be done in two parts.
For this tutorial I'll use a simple first cousins marriage as an example, since this kind of trees only have eight people and therefore are easier to draw. So I'll work with Duke Karl Theodor in Bavaria and his first wife, Princess Sophie of Saxony, who were maternal first cousins.
Let's begin!
1. Do your reasearch.
An obvious first step, I know, but this is absolutely necessary. If you're doing a tree that shows intermarriages then you need to make sure that know exactly how many people will be in your tree, and how they are related to each other. It has happened me that I made the tree and then realized that I missed that two people that were on opposite extremes of the tree were second cousins once removed and now I have to start all over. Almost every royal on Wikipedia has an "Ancestry" section with a mini family tree that goes back like four or five generations, I normally base my trees on that info (because the genealogy enthusiast on the Internet will never let any mistake slide, unlike actual published books). Also a tip: the Spanish version of the Wikipedia articles tend to have bigger trees than the English version. Once you are done, we can move to the next step.
2. Draw your tree (on paper).
This step won't be necessary in our example since it's just an eight persons tree, but if you're doing a bigger one (like the H7 and EoY one) then this step is pretty important. Because trees with a lot of intermarriages are an absolute nightmare to put together if you don't want any lines crossing. So you need to figure out how it will look like before you start editing on Pixlr, otherwise you'll likely end up redoing it many times until you get it right.
Currently I'm working on a big tree that covers tons of marriage, and figuring out how to put it together was legit the hardest part of it. Here is a peak to the last of the many trees I drew, in which I finally managed to make sure no lines crossed (can you guess what is it about?)
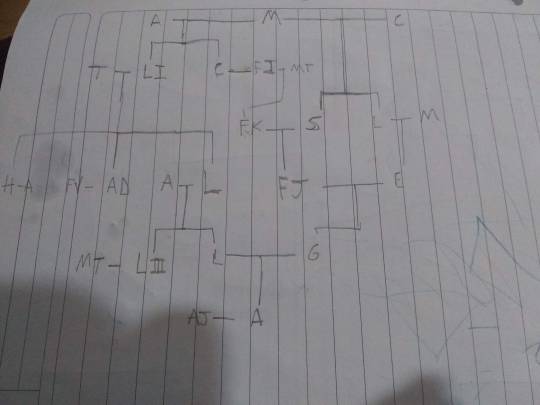
As you can see this is just a rough sketch drawn with a pencil on a page of my French notebook. I don't even bother writing the names, this is just to figure out how I'm going to organize these people on the tree. Of course if you don't find this necessary you can skip this step and plan the tree however you like, this is just how I do it.
3. Get the pictures for your tree
I usually just download the person's default profile picture on their Wikipedia page and call it a day lol; but if I can choose I try to choose pictures that depict the people around the time they got married (that's why I chose Ludovika and Max's portraits from their twenties instead of photographs of them at an older age). If the spouses pictures face each other the better, but I don't bother too much if they don't.
My advice is that you download all the pictures you'll use before we can move to the final step of part 1 of this tutorial.
4. Crop the pictures and turn them into PNGs.
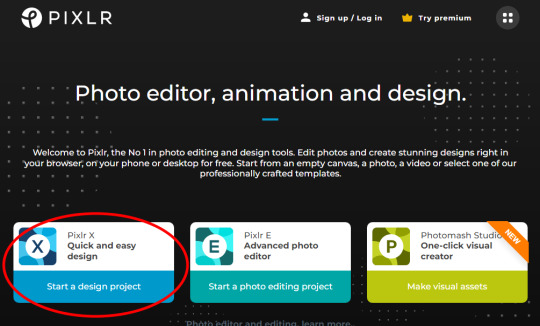
Finally, we can start working on Pixlr! Open pixlr.com, the website will give you three different options of editors. I use the simple version, Pixlr X, since these trees don't require many tools.
Now open one of the picture you chose. I chose this photography of Sophie of Saxony, which is both her default Wikipedia profile picture and my favorite picture of her. The first tool we'll need from the side bar is the "Crop & rotate"
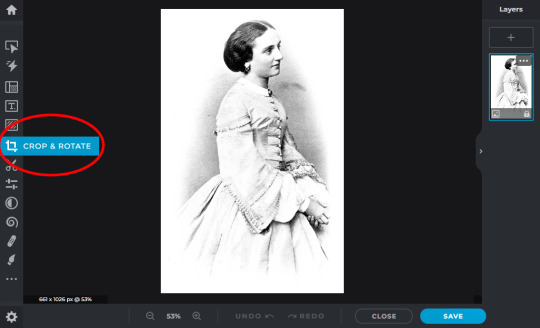
Once in there, crop the photo to show only the person's head:
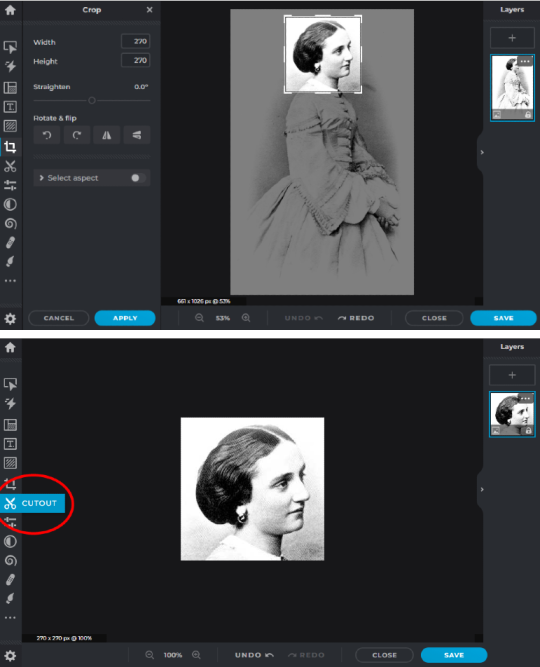
Now with the photo cropped, we can move unto the next tool we'll use: the "Cutout". What this tool basically do is cutting out the background of your picture and leaving only the shape you chose, I use the circle shape.
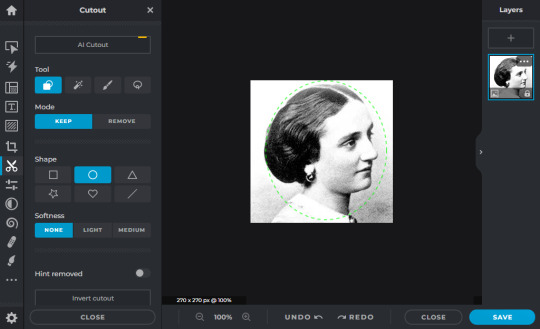
This is the end result! Now the picture has an oval shape with transparent background. I usually go back to the "crop & rotate" tool and crop the photo again, so it doesn't have that extra empty space.
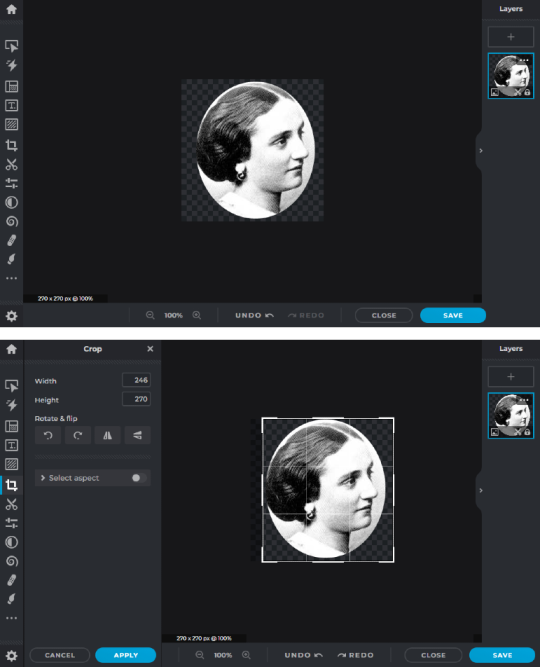
Save it as a transparent png and it's done! Now you do that with all the pictures you'll use for your tree. I chose a circle shape, but you can use whatever of the other options you want.
Tomorrow, the second and final part of this tutorial in which I actually will show you the trickiest part of the tree making: drawing the tree on Pixlr!
#sorry that I do not actually tell you how I make the trees in this part of the tutorial#second part will be better#tutorial
26 notes
·
View notes
Note
what do you use to edit stuff?
I use mostly polarr and was using pixlr for sizing (as it was free until like 2-ish weeks ago and now it's not? So i'm looking for something new) <3 I've also downloaded fonts and stuff from sites online as well
7 notes
·
View notes
Last Seen Blogs
feralalienkiss34
feral dumbass

southerndreamsofstarlight
Dreams of Starlight

bfliptastic
Bfliptastic
zeynker
Zing