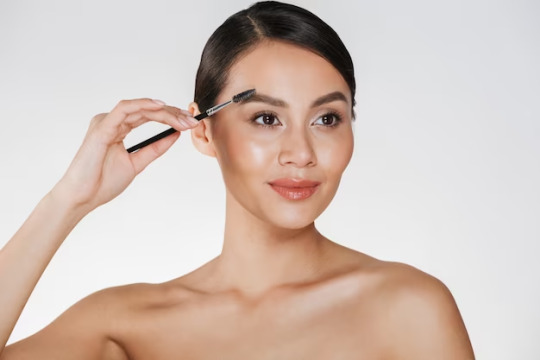
#How To Apply Lipstick For Beginners
Text
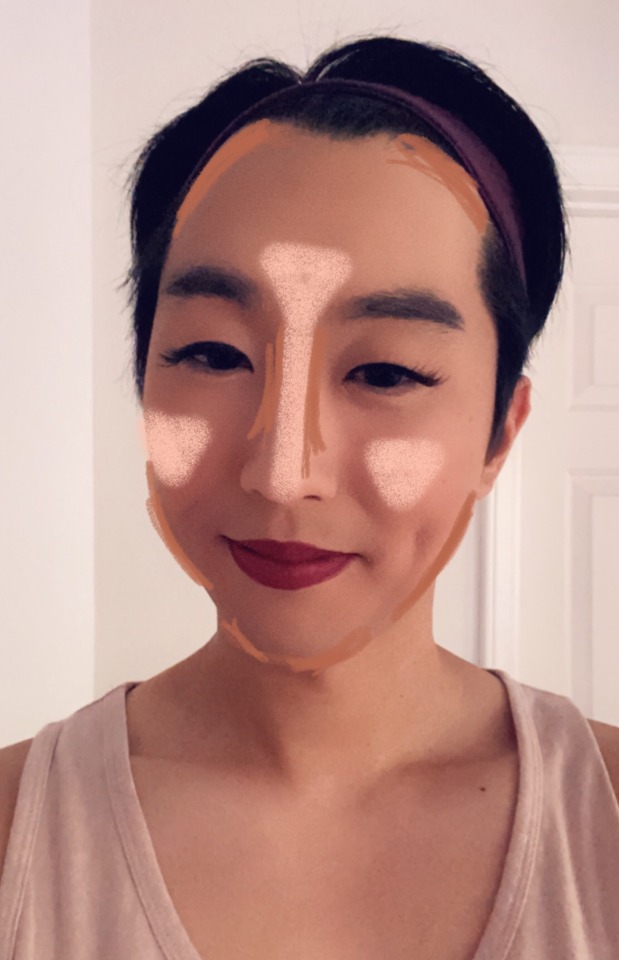
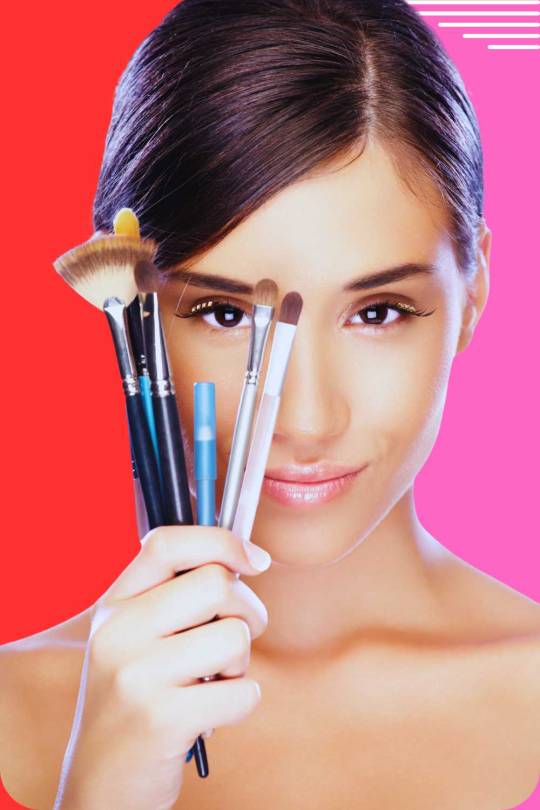
How to give perfect lipstick
The correct method of how to use lipstick has been used in the picture. It is shown that applying color with brush tool is wrong, and applying lipstick with solid color is shown in correct way. How to give perfect lipstick.
youtube
#How to give perfect lipstick#how to apply lipstick perfectly#lipstick#how to apply lipstick#how to apply liquid lipstick#perfect lipstick#lipstick tutorial#liquid lipstick#how to pick the perfect lipstick#beginner’s guide to pick the perfect lipstick#how to apply a perfect lipstick#how to apply red lipstick#how to apply liquid lipstick perfectly#photoshop tutorial#photo editing#photoshop maruf#lipstick colour#lipstick editing#lipstick shades#olive skin tone#youtube#background remove#remove background#japanese skin care#beauty#hairstyle#Youtube
8 notes
·
View notes
Text
★ — bnha characters doing you’re makeup !!
ft. izuku, bakugou, shoto, denki, momo, ashido

izuku
vv exited when you ask him to do your makeup!!!
nervous af at the same time 😭
knows of some products like mascara, blush, lip gloss.
giggling before you even start because aklfjdk you’re so pretty and he’s so scared
he’s so clueless at what to start with. he asked you for hints LMAO
eventually figured it out and was struggling at blending.
accidentally poked you in the eye with the mascara wand.
he’s so sorry forgive him
“i feel so bad, it doesn’t hurt anymore?“
“it’s been 10 minutes izu.”
he’s shaking and crying over doing your eyeliner like help
very good at lipstick, probably blushing the whole time though
the whole look was kinda good, it was just the brows and uneven eyeliner 😣
katsuki
you have to BEG him.
he says yes but for the first 5 mins he’s just wasting your eyeliner and playing with your palettes 🙄
doesn’t know any of the product names. literally only eyeliner because he’s used it before.
“gimmie the sponge and bottle.”
“the beauty blender and foundation?”
“tsk, yeah.😒”
honestly not bad at it like you just sat in silence as he did it
kept grumbling to himself when doing your lashes 😒
not terrible at eyeliner + he looked good when doing it 😓🙏
opens every product you own and and also smells some of them???
starts messing with the highlighter like it doesn’t cost $7.99
mumbling under his breath when doing your lipstick because you look so kissable rn
gives you his phone camera as a mirror and it wasn’t bad.. like it could’ve used some work but it was good for a beginner!!🧎🏽♀️
shoto
knows a little bit about it from watching his sister.
kinda hesitant at first i love him
“are you sure? i might mess it up.”
good at putting the foundation n concealer but was scared to dab the beauty blender too hard
so gentle when doing your mascara so he doesn’t poke you <3
smudges your eyeliner 😭 (i don’t blame him it’s so hard for me too)
he has a cute concentrated face
confused on why lip gloss, lip stick and lip liner are all different but it’s okay
takes a min to just look at you, his hands holding your face and you giggle because of how quiet he was.
he smiles, a bit embarrassed and continues to finish it.
asks if he can do eyeshadow because the colours are so pretty!!
chooses dark blue and is so gentle with it ajldjsajdkj
in the end it was really good, he had everything down except the eyeliner 😨
kaminari
he suggested it!!
he’s so exited likes he’s grinning and everything
very good at the base he likes the beauty blender
ends up not doing eyeliner because he’s horrible at it. he’s tried on himself already.
mascara was okay but he kept scaring himself that he was gonna poke you 🙁
starts playing around with it and putting eyeshadow on you.
you knew it was going south when he was putting the brush in the green and then onto your eyebrow.
“just let me finish it, it looks good!” he lied, holding in his laugh.
kisses you when applying your lipstick, n then kisses you on your cheek so he has to redo your lipstick AND put concealer over the lips mark. 😒😒
like bae stop kissing me in the process of my makeup being done.
loves highlighter, puts in on your nose.
covers your eyes with his hands and leads you to the bathroom to reveal his “masterpiece”.
it wasn’t horrible, the lashes, the eyeshadow and the lips looked very good 🤭 it was just your brows and the amount of highlighter..
congratulate him!!!!😓🙏
momo
her face lit up when you asked her to do it <3
her makeup always looks flawless in class, not that she even needs it.
probably has the best products too because she’s so rich 🤭
so good at eyeliner
she’s so steady and focused with it and you’re just trying not to move or she’ll cry internally
also very carefully does your mascara because she does not wanna poke u
she’s so sweet too
“tell me if i poke you, kay?”
when doing your lipstick she gives you a peck before aksjjsk
needs a moment to admire her work before she gives you the hand mirror
overall look was so beautiful fr you looked like a model 10/10 😓🙏
she was on a roll so she decided to do your nails 🧎🏽♀️
ashido
her makeup is so fun
she pleaded for you to let her at a sleepover and you caved
literally giggling and swinging her feet she’s so exited
practically on top of you when doing it 😭
calling you pretty the entire time
makes a cute concentrated face when doing your eyeliner
she’s so good at eyeshadow and making the colours n stuff blend
chooses pink 🤭
holds your face in her hands for like 10 seconds while examining it
realizes she needs to add more
your face is her canvas and she’s the artist ‼️
squeals when she’s finished and makes you close your eyes till your at the mirror
it looked so good especially the eyeshadow 10/10 😻
now kiss her on the cheek n tell her it’s beautiful
#mha x reader#bnha x reader#bnha x fem!reader#bakugou x reader#denki x reader#mina ashido x reader#momo yaoyorozu x reader#denki kaminari x reader#kaminari x reader#bakugou x y/n#katsuki x reader#shoto x reader#shoto todoroki x reader#todoroki x reader#izuku x reader#midoryia x reader
2K notes
·
View notes
Note
Ok from a transfemme to a trans woman - how do you makeup? I've been wanting to get into it for so long but the first time I tried was an absolute disaster, and I can't find any tutorials that go through the absolute beginner basics
tbh, you have to just keep on doing it even though it’s a complete disaster. i started my transition in 2020 but i was doing makeup and “cross dressing” for nearly 8 years before i considered myself to be trans. and it was years before i was able to do makeup to the point where i felt good about the way that i looked every time i did it.
that being said, there’s no guide that’s gonna be able to tell you everything you need to know but i’ll try to give as many tips and jumping points i can in order for you to try out things and figure out what to look up.
- make up is different for everyone - everyone has a different face shape, eye shape, cheekbones, jawline, complexion, etc. and the way to do makeup that looks good for you specifically is going to vary a shit ton based on those things. when you look up stuff, look up how to do makeup for a certain set of features. figure out what face shape you have, skin types for foundation, etc.
- there’s no one right way to do it - i do a bunch of things that are “technically incorrect” because i’ve tried it the “right” way and it just didn’t work for me. so i figured out something that i liked instead and make that a technique i used regularly. also even though people will say you’re supposed to do certain things, a different technique might yield a different result. as an example, conventional wisdom will say use primer, foundation, then a translucent or setting powder, then a setting spray. recently a very popular technique has been using moisturizer, then setting powder, then setting spray, THEN putting on all your other makeup and supposedly it lasts longer. there’s literally no “correct” way, it’s just whatever works.
- blend the shit out of everything. this is the one technique which pretty much applies for everyone. blend blend blend blend. i like using a beauty sponge. run it under the tap for a second (literally a second, you want it moist not wet) to wet the sponge and then use dabbing motions to blend your makeup.
- asking for help at makeup stores helps A LOT. i’ve had really really good experiences asking for help at makeup stores even though i was super uncomfortable with the idea at first. i found that a lot of people were judgement free and even very gender affirming even when i was presenting masc. and i live in the south!
okay now to more granular stuff - here’s the basics of what i would consider to go into a “full face” makeup routine - primer, foundation, concealer, highlight/contour, setting. eye makeup would add additional things - eyeliner, mascara/lashes, eyeshadow. lips add additional things as well - lipstick, lipliner. ill try to go through the entire process and add my fav products or two. (i should probably make this into a video series tbh)
1) primer - it protects your skin and makes your makeup stay longer and look better. use it.
- my fav: the ordinary - high fluidity primer
2) color correcting concealer - an optional step for transfemmes like me with darker colored facial hair. using a reddish or orangish color correcting concealer or lipstick over the areas where your facial hair shows through the skin will neutralize the shadow that shows through foundation. add a little bit, sparingly, blend with a sponge.
- my fav: la girl color correcting concealer orange
(the best one of these is made by dragun beauty who is a trans woman…but who did blackface…so don’t buy her shit)
3) foundation - figuring out your color is hard. look up a guide, ask in store, try a bunch of different ones. there’s a difference in coverages. full coverage means its made to cover everything. buildable means you need to apply and blend a few times and is good for if you don’t want heavy coverage everywhere. don’t use too much otherwise you’ll look like a plastic doll. unless you want to look like that then go nuts. blend the shit out of it so that it doesn’t cake up.
- my fav: juvias place bc it’s full coverage and actually has my skin tone as an asian person
4) concealer - this is different from color corrector and i usually do this after foundation. this is just a touch up for any blemishes, dark spots under eyes, pimples, shit like that. just use a tiny tiny dab and blend. this is also hard to get your color right so get help if you can.
- my fav: colourpop concealer, or nars concealer if you’re a fancy bitch
5) blush - i don’t really use blush much but blush is one of those things where you should look up a guide for how your face is shaped. positioning blush in different ways will help shape your face in different ways.
6) contouring - okay this is the hard one. i can’t tell you how to contour your face because this is one that varies a shit ton from person to person. the basic gist of it tho is that you are using a contouring stick, bronzer, or palette to add shadows to your face. when you put on foundation it makes everything an even color and makes you look flat, so contouring is basically drawing those shadows back in to contour your face. you can do this in so many ways even for your own face so imo, you experiment and see how you like it. typical places for contour to go will be under my cheekbones, on my nose bridge, sometimes under my jaw to slim the face.
- my fav: i can’t remember i’ll come back to this one
also i drew this diagram a long time ago to help myself get the idea of where i wanted to put it on my own face and i went from there. the brown was contour and the other color was highlight. i don’t do it like this at all anymore but it helped to get the basic idea at first.
7) highlight - the opposite of contour where you’re making certain parts of your face brighter to contrast the darker parts. typically goes on your cheekbones and nose.
- my fav: watts up by benefit
8) translucent powder/setting powder - okay so this one can either go after foundation, before blush, contour, highlighter, or here. basically it’s a powder that goes evenly over your whole face to help your makeup stay where it is. personally i usually do it after foundation instead of here but either works. basically you take a powder brush (the big floofy ones) and then put it all over lightly.
- my fav: nyx hd finishing powder
9) setting spray - it’s a spray that you put on last to help your makeup stay where it is. shake up the bottle real good and just mist it all over.
- my fav: tarte shape tape stay spray
okay i’m tired now and that’s plenty for now. i’ll update with lip and eye stuff later.
337 notes
·
View notes
Text
Facepaint cosplay makeup tips from someone who’s been doing it for 7 years because fuck it why not:
(Keep in mind I work with primarily water based facepaints because they operate best with my skin type)
You will be blowing out (whatever color) facepaint snot out of your nose for 48 hours after wearing the facepaint. Do not be alarmed, happens to all of us, don’t ask me how.
Please do not do more then 2-3 layers the facepaint will begin cracking (far more then usual!) Depending on what brand, that number may vary slightly but not by much. Better a thin and patchy layer then a thick and crackly one. I usually do 2 coats max
If by the time you’ve done two layers there’s still a mistake, just leave it. Leave it alone. You will regret trying to add more paint to fix it, just trust me on that one.(If you really can’t help but fix the error then let the rest of the paint on your face dry before you do it, it’ll still result in a cracky finish but it’ll be less severe.)
Mehron paradise paints are excellent once you learn how to use them, but they’re a bit finicky and not as beginner friendly as people say they are imo. Try snazzaroo if it’s your first time working with facepaint ever! I’ve heard oil based facepaints work excellent on the right skin types, unfortunately mine is not, I have very oily skin, and the paint melted right off me within 30 minutes. It was great when it was first applied though! If you have average-to-dry skin, oil based paint might be an excellent option for you! Check it out, I can’t speak on it.
Facial hair, regardless how thick or thin it is, might make your facepaint do weird things in your jaw area. It reaaaallly varies person to person, for me its something I have to/want to shave.
Setting powder is a MUST after you’ve applied your even base layer before you start contouring. My life changed when I figured that out, and my facepaint started looking “professional” and actually lasting more then 2 hours. I can’t express how much I recommend mehron setting powder.
When you’re contouring or using any powder do not expect it to blend on water-based facepaint like it would on skin. The powder sticks very quickly to the paint and doesn’t want to budge, so it’s better to do thin layers until you’re satisfied, and blend quickly.
Expect it to be uncomfortable, especially your first time wearing it. Your entire face, neck, and maybe more are covered in paint, it’s gonna suck lmao. The good news is, once you’re used to it, you’re USED to it. I wore facepaint for 3 days straight 11 hours a day the other weekend, and forgot it was there almost immediately. However, if it burns or hurts, remove it immediately, that’s not the facepaint for you!
Don’t be afraid to make expressions! If your facepaint isn’t applied too thickly, it should move with you for a good amount of time before expressions begin to crack into it. (And even when it begins to inevitably wear down, your fun is more important then your facepaint.)
Your teeth might look yellow as fuck! Like gold yellow! It’s ok! First and foremost, yellow teeth are natural, secondly, the contrast between tooth color and the different colors of facepaint tend to make your tooth color appear differently then you’re used to.!
Put your contacts in BEFORE you paint your face and thank me later. :)
If you get paint stuck in your eyelashes, dampen your finger tips and gently strain it out of the lash between your thumb and index finger.
To avoid chapped lips, either find a lipstick in a color you can use, or mix a bit of eyeshadow and chapstick.
There’s no easy way to eat in facepaint, but the best advice I got for you is do not be afraid of eating weird. If you have to unhinge your jaw and clamp into a sandwhich to avoid fucking up your paint, just do it. I stopped caring what people thought of my facepaint eating ritual a long time ago. However, if you can opt for it, popcorn, m&ms, grapes, walnuts, and stuff like that are good to just throw in your mouth. (And of course, touch up paint is never bad to have on hand.)
Drink stuff through a straw! I repeat! If you can! Drink stuff through a straw!
And to conclude: Facepaint. Looks. Bad. Inherently. Facepaint will never look like skin up close. It will look like skin to someone over 5 feet away, and on a camera, but it will never look like actual skin. Expect small cracks even if you did your damndest with the base coat, expect your sweat to create a ring around your nose and eyelid. ESPECIALLY if you plan on wearing the paint for more then a couple hours. It’s inevitable, and it’s perfectly ok!! Even those of us who have been facepainting for years still have our sweat stain and forehead cracking days, it’s just in the business. Don’t let the internet fool you with filters!
Facepaint unfortunately takes a good couple attempts to get the hang of. Your first couple attempts might suck! They might! But please don’t let that stop you from filming videos or going to a convention. It’s a part of the learning curve, and before perfection, cosplay is SUPPOSED to be about fun, and any facepaint is good enough to have fun in.❤️
And ahhh don’t forget to take it off before bed!
Happy cosplaying!
#cosplay#Walt talks#Walt cosplays#cosplay tips#I don’t know if anyone on tumblr particularly cares about this but I’m posting it anyway because I might reference back to it if I ever fil#any facepaint tutorial videos
8 notes
·
View notes
Note
my dude how would a person who has never been interested in makeup learn how to apply light makeup like brows/concealer etc to look nice in events/dates 🫠 i only use sunblock and chapstick pls help a girl out
you can always look up tutorials on youtube i recommend violet_fr and haley kim! and also bc natural look is so trendy nowadays you'll easily find products that are beginner friendly my routine when i have to wear make up is just:
light coverage foundation - i've tried mac face and body/milk make up sunshine skin tint/laneige cushion foundation/happy skin cushion foundation and they all look natural on the face you can't go wrong bc they apply so lightly and you can use your hands or the provided puff there are lots of japanese/korean brands that have good bb creams and have a more natural finish too and they're cheaper than american brands
brow mascara - essence brow mascara, benefit gimme brow, you just brush these on ur brows and it gives them a more tinted/defined look and hold and if ur concerned abt brow shape i think it's best to go to a brow salon to get ur brows trimmed instead of reshaping them using 5 products to highlight/define/contour etc etc
lip and cheek tint - i personally use sunnies face blush, but milk makeup lip + cheek tint is great, quo also has dupes for glossier and rare beauty blushes, or even a really good cream lipstick that you can use for both ur cheeks and lips. i also use generation g by glossier for lips and blush, opt for cream to liquid products bc they're beginner friendly and are easier to blend with hands
mascara + lash curler - i use a japanese brand called ff mote mascara, essence princess lash is also very good and for curler i think u can just go to ur local miniso/daiso and you'll find a reliable one or even dollarama or dollar tree! u don't have to spend too much!
hope this helps!
17 notes
·
View notes
Note
Beginner makeup advice:
Find some tinted moisturizer and tinted lip balm. Don’t jump into foundation and lipstick- too hard! Start with things you can apply with your fingertips.
If you use foundation, you have to add some blush to your cheeks. The basic application is to smile and add color to the fullest part of your cheeks.
You might want to conceal imperfections. I have rough acne and cover up acne spots using a very pointy brush and some concealer. I dab just a little on- pinpoint concealing.
Eyelashes are strongly associated with femininity. You need an eyelash curler and mascara. Most people have lashes that are light colored at the tips. Start with a little mascara on the ends and curling your lashes. When you get comfortable, try starting the mascara wand at the roots and brushing upwards.
If you don’t love your eyebrows, edit them a little. I use a sharp pencil to draw individual hair to make mine even. You might prefer a powder to fill things in. I find that makeup on your eyebrows isn’t really important unless you’re doing a full face of makeup.
You don’t need to think about things like eyeshadow, contouring, and highlighter until you get the basics down. You might find that you don’t want to do that much makeup at all. Let me know if you have specific questions!
This is honestly super great, thank you so much! I'll have to stop by the store sometime tomorrow and pick up the moisturizer, lip balm, and some sort of mascara, I've never had a reason to own any of it until now so I don't have any on hand. The only real question I have for now is how to deal with having something so close to your eyes. I've never been good with that, is it something you just end up getting used to or is it something that I can learn little tips to help with the anxiousness I have about things being near my eyes
#I'll have to go with a vegan brand since some makeup has lard and such in it that'll cause my skin to blister#I learned that one the hard way the one time my mom forced it on my face for graduation
4 notes
·
View notes
Text
Write For Us Makeup
Welcome to our comprehensive guide on write for us makeup is Whether you’re a makeup enthusiast or a beginner looking to enhance your beauty skills, you’ve come to the right place. In this article, we’ll delve deep into the world of makeup, covering everything from basic techniques to advanced tricks that will elevate your makeup game to the next level.
Understanding the Basics
Choosing the Right Products
The foundation of a flawless makeup look begins with selecting the right products. It’s essential to consider your skin type, undertone, and desired finish when choosing foundation, concealer, and other complexion products. Opt for formulas that complement your skin’s needs and enhance your natural beauty.
Preparing Your Canvas
Before applying makeup, it’s crucial to prep your skin properly. Start by cleansing your face to remove any dirt, oil, or impurities. Follow up with a hydrating moisturizer to ensure your skin is smooth and supple. Additionally, don’t forget to apply a primer to create a smooth base for your makeup and prolong its wear.
Perfecting the Base
Flawless Foundation Application
Achieving a flawless base is the key to a stunning makeup look. When applying foundation, use light, sweeping motions to blend the product evenly across your face. Focus on areas that need extra coverage, such as blemishes or redness, and build up the coverage gradually for a natural finish.
Concealing Imperfections
Concealer is your secret weapon for hiding imperfections and brightening the under-eye area. Choose a concealer that matches your skin tone and apply it sparingly to areas that need extra coverage. Remember to blend carefully for a seamless finish that looks natural and effortless.
Enhancing Your Features
Sculpting with Contour and Highlight
Contouring and highlighting are essential techniques for defining your facial features and adding dimension to your makeup look. Use a matte bronzer to contour the hollows of your cheeks, temples, and jawline, then apply a luminous highlighter to the high points of your face, such as the cheekbones, brow bones, and the bridge of the nose.
Accentuating the Eyes
The eyes are often considered the focal point of any makeup look. To enhance your eyes, start by priming the lids to ensure your eyeshadow stays in place all day. Then, experiment with different eyeshadow shades and textures to create depth and dimension. Don’t forget to add mascara and eyeliner to define your lashes and make your eyes pop!
Finishing Touches
Setting Your Makeup
To ensure your makeup lasts all day, it’s essential to set it with a setting spray or translucent powder. This will help lock in your makeup and prevent it from fading or melting throughout the day. Simply spritz the setting spray evenly over your face or use a fluffy brush to dust translucent powder over your makeup for a flawless finish.
Adding a Pop of Color
No makeup look is complete without a touch of color! Experiment with different blush and lipstick shades to add a pop of color to your cheeks and lips. Whether you prefer bold reds, soft pinks, or vibrant oranges, there’s a shade out there to suit every skin tone and personal style.
Conclusion
Congratulations, you’re now equipped with the knowledge and skills to master makeup like a pro! By following the tips and techniques outlined in this guide, you’ll be able to create stunning looks that enhance your natural beauty and boost your confidence. So go ahead, unleash your creativity, and embrace the transformative power of makeup!
Read More : taylor swift bun
Contact Us :
How to Submit Your Aricle: If you’re ready to contribute to BeautyGlitch.in, please send your article to [email protected]
0 notes
Text
some makeup advice for new girls, women, and fems, from someone who started out a girl but still had to realise she was one after all:
YOUTUBE MAKEUP ARTISTS ARE (generally) FULL OF IT. There is no set "correct" method for doing makeup! How you apply literally every aspect of it depends on your face shape, individual features, skin tone, and personal style. YouTube MUAs who make tutorials will give fantastic advice if you share their exact face shape and features. Otherwise, take it all with a grain of salt. They're not a useless resource, but their words are NOT gospel.
Wash your face before applying makeup! A gentle cleanser (I typically use Cetaphil Gentle Cleanser and Happy Skin by Lush) and a rinse goes a long way. Removing the sweat and sebum/oil buildup will help massively, both in ease of application and overall final result. No cleanser? No prob, find some gentle facial wipes in the makeup section of the grocery store. It'll make a world of difference!
Also: use Q-tips to neaten up lipstick! You can get angled/pointed beauty q-tips at most makeup stores or stores with makeup sections. People rarely get their lipstick absolutely perfect first try, no matter how experienced they are. You can always adjust, tidy, redo, or start over.
When wearing lipstick, you do not need to line your whole mouth to the edge. Most people actually have uneven lips! It's usually not noticeable until you apply makeup to the whole shape and cry because it looks lopsided and messy. It's okay. You can change the shape of your lips and take creative liberties with it. No foundation or coverup necessary; just play with it, figure out what looks good and even and which shapes flatter your face. You can also overline a little on the top lip; try giving yourself a small cupid's bow! If you've already got one, try enhancing its shape :)
Similarly to Point 3; with liquid eyeliner, the way you may need to give yourself wings will differ depending on your eye shape. For example, I have hooded eyelids, so in order to get an angled wing, I actually have to draw straight up from the middle of my eyelid, then out, rather than following the corner of the eye. Finding out what eye shape you have and then looking at "how to do eyeliner for x eye type" will help much more than a standard tutorial.
This is less of a beginner tip, but primer really makes a difference. It helps with ease of application, blending, and makes the colours really stand out. Foundation can work as primer in a pinch for contour and blush, but I'd recommend saving up and investing in the real thing. Just remember there's different kinds of primer for face and eye makeup!
You don't need to apply foundation to your whole entire face. You don't actually need foundation at all; it can clog up your pores really badly, and using it as concealer runs the risk of worsening acne and rosacea. But if you want to use it, a little bit goes a long way! Sponge applicators work the best, in ny experience. Also, when in doubt, go for the lighter shade; not because lighter skin "looks better", but because too-dark foundation will make you orange.
If your foundation looks shiny or feels sticky or heavy, gently dab away the excess, and try following up with some powdered foundation. This sets and seals the layer and helps it look more natural!
Mascara is your friend, but apply her last or she will be your enemy. Also, if you've got blonde or red eyelashes-- try brown mascara first! You may find it enhances your eyes more than stark black, but it depends on your style. There's tonnes of different brush types and mascara types to experiment with, too.
Applying mascara is much less intimidating than it seems. Firstly, wipe the excess on the edge of the tube, like with lip stain. Be gentle, you don't always have to "blink" down on the brush. If your lashes naturally sit curved up or out, tilt your head up and back slightly, meeting your eyes in the mirror so your eyelashes sit away from the skin. If your eyelashes naturally sit downwards, tilt your head forward Kubrick-style and look up at your reflection. Gently comb the brush once or twice through your top lashes. Experiment with adjusting the angle you brush at or the ways you tilt your head, depending on your eye shape and size. For hard-to-reach eye corners, try using the very end of your brush with minimal product, or find an angled mascara brush designed for hooded/folded eyelids. For lower lashes, if they sit curved out or down, it can help to tilt your head forward slightly. If they sit on a short angle, tilting your head up and back can help you reach them. Using less product (wiping away more excess), lightly glide the brush down your lower lashes once or twice, until you're happy with the result.
Don't worry if mascara gets on your skin or eyebrows, it happens to everyone ♡
Most importantly, find what works for you. Makeup can seem really overwhelming; there's cream eyeshadow, powdered eyeshadow, liquid lip stain, tube lipstick, pen eyeliner, pencil eyeliner, liquid eyeliner, cream primer, liquid primer, pencil primer, liquid foundation, powdered foundation, concealer, rouge, blush, contour, bronzer, highlighter, mascara, mascara brush types, lip liner... You'll be okay. We're all scared of it at first. ♡
0 notes
Text
The International Makeup Mastery Course at UK International London Beauty School, The Best Makeup School In Noida

Do you have a passion for makeup artistry and creating masterpieces? Do you want to transform faces into works of art or just like getting all glammed up? Then the International Makeup Mastery Course at the UK International London Beauty School might just be the perfect gateway into the beauty business.
This reputed makeup school in Noida is well known as the very best makeup school in my surrounding area. They gives full fledge course in creativity and helps you to shape yourself as an artist by conquering makeup skills which will sharpen your techniques. It's a programme designed for both beginners as well for artists who wants to crave their skills.
At the International Makeup Mastery Course, you will learn the latest trends in makeup artistry but, just as importantly, you’ll acquire an understanding of the business behind this industry, and learn how to contour and highlight, as much as you’ll need to grasp different skin tones and types.
The course covers a variety of topics including:
• Learn how to apply makeup, including matching foundation, blending eye shadows, and applying lipstick.
• Learn advanced techniques, such as how to create ombre lips and cut-crease eyeshadow.
• Learn how to create stunning bridal makeup and special occasion makeup.
• Airbrush makeup: Learn how to create flawless and long-lasting makeup using airbrush techniques.
• Portfolio: Develop a ‘portfolio’ of your professional make-up skills for the benefit of possible employers or clients.
The school is committed to providing a responsive, supportive learning environment. At the same time, the classes are kept small, so that every student benefits from personal attention. Students are encouraged to discover and develop their own style and flair, but at all times they are working alongside experienced mentors.
During our course you will be given a globally recognized certificate as well which will help you to find various interesting and highly paying jobs in the beauty field. This course is a tremendous way to gain the edge over your competitors, regardless of whether you want to work as a makeup artist in a salon or freelance, or in the fashion and entertainment industry.
Are you into makeup and would like to improve your knowledge? If that's the case, UK International London Beauty School's International Makeup Mastery Course is the one for you. The course will benefit from diverse and well-rounded curriculum, incredible tutors, and friendly environment. This makes it possible to discover your creativity and build a career as a makeup artist.
0 notes
Text

Common Makeup Mistakes and How to Fix Them
Makeup is a wonderful way to enhance your natural beauty, express your personality, and boost your confidence. However, sometimes makeup can also go wrong and make you look less than your best. Whether you are a beginner or a pro, you may have made some of these common makeup mistakes at some point. Don't worry, though, because there are easy ways to fix them and prevent them from happening again. Here are some of the most common makeup mistakes and how to fix them.
1. Not prepping your skin properly. One of the most important steps in makeup application is to prepare your skin first. This means cleansing, toning, moisturizing, and using a primer if needed. Prepping your skin will ensure a smooth and flawless makeup application, as well as help your makeup last longer and look more natural. If you skip this step, your makeup may look cakey, patchy, or uneven, and it may also clog your pores and cause breakouts. To fix this mistake, always start with a clean and hydrated face, and use a primer that suits your skin type and concerns. A primer will create a smooth canvas for your makeup, fill in pores and fine lines, and help control oil and shine.
2. Using the wrong foundation shade or undertone. Another common makeup mistake is to use a foundation that does not match your skin tone or undertone. This can make your face look too light, too dark, too pink, or too yellow, and create a noticeable contrast with your neck and chest. To fix this mistake, always test your foundation on your jawline, not on your hand or wrist, and check it in natural light. You should also know your undertone, which is the subtle hue that shows through your skin. There are three main undertones: warm (yellow, golden, or peachy), cool (pink, red, or bluish), and neutral (a mix of both). Your foundation should match both your skin tone and your undertone for a seamless and natural look.
3. Applying too much or too little product. Another common makeup mistake is to apply too much or too little product, which can affect the balance and harmony of your makeup. For example, applying too much powder can make your skin look dry and dull, while applying too little blush can make you look pale and washed out. To fix this mistake, always start with a small amount of product and build it up gradually until you achieve the desired effect. You can also use a light hand and a fluffy brush to apply powder, and a stippling or tapping motion to apply blush, bronzer, and highlighter. This will help you avoid overloading your skin with product and create a more natural and blended look.
4. Not blending properly. Blending is one of the most essential skills in makeup, as it helps create a smooth and seamless transition between colors and textures. However, many people make the mistake of not blending enough or blending too much, which can result in harsh lines, muddy colors, or a lack of definition. To fix this mistake, always use the right tools and techniques for blending. For example, use a fluffy blending brush for eyeshadow, a damp sponge for foundation and concealer, and a clean brush for blush and bronzer. You should also blend in small circular motions, and use a light pressure and a back-and-forth motion. You can also use a clean tissue or cotton pad to wipe off any excess product or fallout.
5. Using the wrong colors or products for your features. Another common makeup mistake is to use colors or products that do not suit your features, such as your eye color, eye shape, face shape, or skin type. For example, using a dark or smoky eyeshadow on small or hooded eyes can make them look smaller and more closed, while using a matte lipstick on dry or chapped lips can make them look more cracked and flaky. To fix this mistake, always choose colors and products that enhance your features, not hide them. For example, use a light or shimmery eyeshadow on small or hooded eyes to make them look bigger and more open, and use a moisturizing or glossy lipstick on dry or chapped lips to make them look more plump and smooth. You can also use a color wheel to find complementary colors for your eye color, such as purple for green eyes, or orange for blue eyes.
These are some of the most common makeup mistakes and how to fix them. By following these tips, you can avoid these mistakes and achieve a flawless and beautiful makeup look every time.
#beauty#makeup#skin#hair#nails#lipstick#eyelashes#makeuptutorial#makeupartist#skincare#makeupmistakes#howtofix
0 notes
Text
What is your best makeup advice for a beginner?
Keep it simple: Start with basic steps like cleansing the face, applying moisturizer, and sunscreen. Then gradually learn how to use basic makeup products such as foundation, concealer, and setting powder.
Understand your skin type: Different skin types require different makeup products. Know if you have oily, dry, or combination skin to choose suitable products.
Use appropriate makeup: For beginners, it's recommended to choose user-friendly products, such as liquid or cream foundations and easy-to-blend eyeshadows. If dealing with dark circles, choose suitable concealer while using skincare products containing EOPE ingredients to promote skin circulation and metabolism, effectively improving dark circles.
Invest in basic tools: Get some high-quality makeup brushes or sponges to help with better application and even makeup distribution.
Learn basic techniques: Understand how to properly use makeup brushes, sponges, and techniques like blending eyeshadows, applying eyeliner, and lipstick.
Practice and be patient: Makeup takes practice. Don't get discouraged and patiently try different techniques and products.
Proper makeup removal: Learning the right way to remove makeup and cleanse the face is crucial for maintaining healthy skin.
Seek help and inspiration: Watch makeup tutorials, read makeup books, or follow makeup artists on social media for inspiration and tips.
Experiment and discover: Try different colors and styles to discover your best look.
Confidence: Makeup is a way to express yourself. Enjoy the process and feel confident about your appearance.
In conclusion, makeup is a learning and exploration journey. The key is to stay patient and relish the exploration and self-discovery in this process.
0 notes
Text
How do beginners learn basic makeup?

Learning basic makeup as a beginner can be an exciting and creative journey. Here's a step-by-step guide to help you get started with the basics of makeup:
Gather Essential Makeup Tools
Before you begin, ensure you have the necessary tools and products, including:
Makeup brushes (foundation brush, eyeshadow brushes, blush brush, etc.)
Makeup sponges or blending sponges
Makeup remover and cotton pads
Mirror with good lighting
Makeup products (foundation, concealer, eyeshadow, eyeliner, mascara, lipstick, blush, and more, depending on your desired look)
Understand Your Face Shape
Learn about your face shape, as it can influence makeup application. Common face shapes include round, oval, square, heart, and diamond. Different makeup techniques can enhance your unique features.
Skin Preparation
Start with clean, moisturized skin. Apply a moisturizer suitable for your skin type to create a smooth canvas for makeup application. Allow it to absorb before moving on.
Primer
Consider using a makeup primer to help your makeup last longer and create a smoother base. Primers can also minimize the appearance of pores and fine lines.
Foundation
Choose a foundation that matches your skin tone. Apply a small amount to your face and blend it evenly using a makeup brush or sponge. Pay attention to areas that need more coverage, such as blemishes or redness.
Concealer
Use concealer to cover under-eye circles, blemishes, and redness. Apply it in a triangular shape under your eyes and blend it gently. Pat or blend concealer over blemishes for even coverage.
0 notes
Text
Tutorial On How To Makeup In 2023 : Atoz Guide

In the world of beauty and self-expression, makeup serves as an art form that allows individuals to enhance their features, boost their confidence, and explore their creativity. Whether you're a makeup beginner or looking to refine your skills, this step-by-step tutorial will guide you through the process of achieving a natural and polished makeup look. Let's dive into the wonderful world of makeup artistry.
Step 1: Prepping the Canvas
Before you begin applying makeup, it's essential to start with a clean and moisturized face. Follow these steps:
- Cleansing: Gently cleanse your face using a mild cleanser to remove dirt, oil, and impurities. Pat your face dry with a clean towel.
- Moisturizing: Apply a lightweight, hydrating moisturizer to provide a smooth base for your makeup and keep your skin nourished.
- Priming: To ensure your makeup lasts all day, apply a primer suitable for your skin type. This step helps to minimize pores, even out the skin's texture, and create a seamless canvas for makeup application.
Step 2: Achieving Flawless Complexion
A flawless complexion forms the foundation of any makeup look. Follow these steps for a natural and even skin tone:
- Foundation: Choose a foundation that matches your skin tone and type. Using a makeup sponge, brush, or your fingers, blend the foundation evenly across your face, focusing on areas that need coverage.
- Concealer: Apply a creamy concealer to cover blemishes, under-eye circles, and redness. Blend gently using tapping motions to avoid smudging.
- Setting Powder: Set your foundation and concealer with a translucent setting powder. This step prevents creasing and controls excess shine.
- Blush: Add a touch of blush to the apples of your cheeks, blending upwards and outwards for a natural flush.
Step 3: Enhancing the Eyes

The eyes are the windows to the soul, and makeup can make them even more captivating. Follow these steps for a subtle and elegant eye look:
- Eyeshadow: Apply a neutral eyeshadow shade all over your eyelids. Add a slightly deeper shade to the crease for depth and dimension.
- Eyeliner: For subtle definition, apply a thin line of eyeliner along your upper lash line. Choose from pencil, gel, or liquid eyeliner, and create a wing if desired.
- Eyelash Curling: Gently curl your lashes with an eyelash curler to open up your eyes and create a wide-eyed effect.
- Mascara: Apply mascara to your upper and lower lashes. Wiggle the wand at the base of your lashes and sweep upwards for volume and length.
Step 4: Perfecting the Brows
Well-groomed eyebrows frame the face and add a polished touch to your makeup. Follow these steps for beautifully defined brows:
- Filling In: Use a brow pencil, powder, or pomade to fill in your eyebrows. Create short, feathery strokes that mimic natural hair for a realistic look.
Step 5: Luscious Lips

Complete your makeup look with perfectly painted lips. Here's how to achieve a beautiful lip look:
- Lip Color: Choose a lip color that complements your overall look. Apply a lip balm or primer first to ensure smooth application.
- Lip Liner: Outline your lips with a lip liner that matches your lip color. This step helps prevent feathering and provides a clean edge.
- Lipstick: Fill in your lips with your chosen lip color using a lipstick or lip brush for even application.
Step 6: Setting the Masterpiece

To ensure your makeup stays fresh all day, finish with these final steps:
- Setting Spray: Mist your face with a makeup setting spray to lock in your makeup and enhance its longevity.
With this step-by-step tutorial, you're well on your way to mastering the art of makeup application. Remember, makeup is about self-expression and creativity, so feel free to adapt these steps to your personal preferences and style. As you practice and experiment, you'll discover your unique techniques and favorite products that help you create your signature makeup looks. Embrace the journey of self-discovery and have fun exploring the world of makeup artistry.
https://www.youtube.com/embed/F2px1SvHIIM
Tutorial On How To Makeup In 2023
Also Read more
- Screen Shot On a Samsung
- Air Max System Platform Sneaker
- Apple Gift Cards Balance Check
- How To SS On Chromebook
- Ktn lookup in 2023
- Gifts for 10 Years Old Boys
- Gift For Parents At Christmas
- Foods That Are White In color
- Kitchen Remodel Ideas
- iPhone 15 launch date
- Roblox t shirt
FAQ
Certainly, here's a set of frequently asked questions (FAQ) related to makeup application and tips on achieving a flawless look:
Q1: I'm new to makeup. Where should I start?
A1: Starting with the basics is key. Begin with a clean and moisturized face, then apply a lightweight foundation and concealer to even out your complexion. Gradually experiment with eyeshadow, eyeliner, mascara, and lip color as you become more comfortable.
Q2: How do I choose the right foundation shade?
A2: Testing foundation shades along your jawline is a good approach. The shade that seamlessly blends with your skin without leaving a noticeable line is the right one for you.
Q3: What's the purpose of primer?
A3: Primer creates a smooth base for makeup application, helps makeup last longer, and minimizes the appearance of pores and fine lines.
Q4: How can I make my eyes look bigger?
A4: Apply a light, neutral eyeshadow on your eyelids and a slightly deeper shade in the crease. Use white eyeliner on your waterline to make your eyes appear larger. Curl your lashes and apply mascara for added effect.
Q5: What's the best way to apply eyeliner?
A5: Apply eyeliner close to the lash line for a natural look. You can create a thin line for subtle definition or a thicker line for more drama. Use short, controlled strokes and practice for precision.
Q6: How do I prevent my lipstick from feathering?
A6: Apply lip liner around the edges of your lips to create a barrier. Choose a long-wearing lipstick formula and consider using a lip primer or setting powder.
Q7: My makeup tends to crease. How can I prevent this?
A7: Use an eyeshadow primer before applying eyeshadow to prevent creasing. Apply less product in areas prone to creasing, and set your makeup with a translucent setting powder.
Q8: How can I achieve a natural "no-makeup" makeup look?
A8: Opt for neutral and earthy tones. Use a tinted moisturizer or light coverage foundation, subtle eyeshadow, minimal eyeliner, and a nude lip color. The goal is to enhance your features while still looking natural.
Q9: What's the proper order of makeup application?
A9: The general order is: primer, foundation, concealer, powder, eyeshadow, eyeliner, mascara, brows, blush, and lips. However, feel free to adapt this order to your preferences.
Q10: How do I choose the right makeup brushes?
A10: Invest in a few high-quality brushes for different purposes: foundation, concealer, eyeshadow, blending, and blush/bronzer. Synthetic brushes are good for liquid products, while natural bristles work well with powders.
Q11: How do I fix makeup mistakes?
A11: Keep makeup remover wipes or a cotton swab dipped in makeup remover on hand for quick fixes. For foundation or concealer mishaps, gently blend with a damp makeup sponge.
Q12: How do I make my makeup last all day?
A12: Use a makeup setting spray at the end of your routine to lock in your makeup. Additionally, setting powders can help control oil and extend wear.
Remember, makeup is about expressing your unique style and enhancing your features. As you practice and experiment, you'll develop your techniques and preferences. Don't be afraid to step out of your comfort zone and have fun with your makeup looks!
Read the full article
0 notes
Text
12 Makeup Tips and Tricks: To Enhance your beauty| Best Makeup Artist in Delhi
Makeup tips and tricks are always beneficial for having a smooth makeover experience. Whether you are a beginner at makeup or a professional expert. For example, a basic hack can help you get the perfect cat eye or wing design using eye shadow. You might be surprised that you can use the same eye shadow palette to highlight your cheekbones, or even to fill in your brows or highlight your face. So take a look at your cosmetics products and think about creating a masterpiece.

1. Set/Seal your lipstick with a tissue and powder
To make the lipstick last for hours, simply apply it on and dab with a tissue over your mouth, then apply a layer of powder on top to keep the colour from fading or smearing. The powder can even alter your lip colour and the shield will protect it from brightening or dulling your lips.
2. Groom your eyebrows using a spoolie or mascara brush
Brush your brows with these spoolie brushes aka these mascara wands. Prepping your brows with a spool can take up to 10 seconds, but it’s an easy way to make sure your brows are in place before you use other beauty products. Spoolie brushes are very cheap and reusable.
3. Prep your lips with exfoliation before applying lipstick
Try prepping your lips with a gentle lip scrub. The physical exfoliation will help remove the dry skin on top of your lips, leaving you with a smoother, softer base. for your products. Make sure to use it no more than once a week applying too much can lead to the risk of irritation.
4. Warm up your pencil liner for its smooth application
Creamy makeup products blend better when warmed. So, if your eyeliner is smudged or pulled on your eyelids or used multiple layers for a decent look, mix it slightly before you start to line it. To do this, heat the tip of the liner under a light flame for a second or until it becomes sticky, let it cool a bit, and then observe the consistent change before your eyes.
5. Create a cat-eye outline
If you’re having trouble creating the winged eyeliner, try outlining the shape first and then filling it in. Extend a line through the lower lash line to create the lower part of the cat’s eye first. Next, decide how thick you want your liner to be and draw a top line from the end of the brow line to the upper lash line. Once you’ve traced both sides and everything looks symmetrical, fill in the gaps.
6. Utilize a spoon as a stencil for winged eyeliner
If you can’t draw a freehand cat’s eye, get a spoon and use it as a stencil. Apply the tip of the spoon to the outer corner of the eye, and use the liquid eyeliner to draw a straight line as the first step to apply the cat eye. Then flip the spoon over so it is your eyelids and use the rounded outer edge to create the perfect curved wings effect.
7. Smoky eye makeup look with the help of a hashtag
A smoky eye can go from glamorous to sloppy very quickly if you don’t know what you’re doing. To keep it simple, use a liquid eyeliner to draw the slanted hashtag symbol on the outer third of the eyelid, then blend in with a sponge or blending brush. Not only will this ensure that both eyes are symmetrical, but it will also help prevent you from overdoing your eyeliner.
8. Warm your eyelash curler tool using a hair dryer
Create your own heated eyelash curler by blowing hot air over your eyelash curler. The application of heat will help your lashes curl up faster and stay in shape longer duration. Simply heat the curler with a hair dryer until it heats up, wait until it cools a bit but is still warm (test on the inside of your arm before application), then clamp down your lashes to provide them curls.
9. Make sure you use a bobby pin to apply eyelash glue
If you aren’t able to apply false lashes, then try out this makeup tip. Use a clean bobby pin, carefully apply a few dots of glue with the help of the bobby pin’s tip to the lashes, and spread them evenly. Wait a few seconds or until the glue adheres, then apply the lashes.
10. Prioritize applying foundation before concealer
The easiest way to improve your makeup routine is to try applying foundation before your concealer. Start with a base that will help minimize any redness or discoloration, almost like creating a smooth base for the rest of your products. You can then use your concealer to treat any remaining breakouts or redness, and you’ll use less product in the process. Foundation before concealer is a great solution to prevent cakey makeup and creases wrinkles.
11. Mixing petroleum jelly with the lipstick
If you have an eye shadow that you absolutely love and also want to use as a lip colour, then mix the liquid pigments with some Vaseline (Aquaphor or Vaseline is great) in a spoon and just apply it on the lips. You can create your personalized lip colour according to your choice. This is the best makeup trick ever. The easiest and fastest method to identify your lip shade is to use a lip liner in the same shade as your lipstick and create an X to match your natural lip line. Next, apply lipstick on the bottom three parts of the X that you will create, and continue to apply lipstick as usual to complete your look.
12. Conceal dark circles with a triangular-shaped
If you really want to brighten your under-eye area, stop applying dotted concealer and try applying concealer in a triangle pattern. Draw the bottom of the triangle just below your lashes and the top towards your cheekbones. This helps to completely hide the redness and shadows to give the illusion of a lighter bottom.
For staying connected for more updates follow us on Instagram and Facebook. you can also navigate to our personal website Kirti Makeovers
0 notes
Text
Top 12 Makeup Tips & Tricks: To Enhance Your Beauty| Kirti Makeovers | Best Makeup Artist In Delhi
Makeup tips and tricks are always beneficial for having a smooth makeover experience. Whether you are a beginner at makeup or a professional expert, for example, a basic hack can help you get the perfect cat eye or wing design using eye shadow. You might be surprised that you can use the same eye shadow palette to highlight your cheekbones or even to fill in your brows or highlight your face. So take a look at your cosmetics products and think about creating a masterpiece.
Primer, foundation, and blush or colour correctors you can use any makeup product with a little trick to look flawless and stylish. With simple instructions and tricks, this article will be your ultimate gateway to stunning beauty. Try these fantastic Makeup tips to get your best look. Read on to learn more!

1. Set/Seal Your Lipstick With A Tissue And Powder.
To make the lipstick last for hours, apply it on and dab it with a tissue over your mouth, then use a layer of powder to keep the colour from fading or smearing. The powder can even alter your lip colour; the shield will protect it from brightening or dulling your lips.
2. Groom Your Eyebrows Using A Spoolie Or Mascara Brush.
Brush your brows with these spoolie brushes, aka these mascara wands. Prepping your brows with a spool can take up to 10 seconds, but it’s an easy way to ensure your brows are in place before you use other beauty products. Spoolie brushes are very cheap and reusable.
3. Prep Your Lips With Exfoliation Before Applying Lipstick.
Try prepping your lips with a gentle lip scrub. The physical exfoliation will help remove the dry skin on top of your lips, leaving you with a smoother, softer base. For your products. Make sure to use it at most once a week. Applying too much can lead to the risk of irritation.
4. Warm Up Your Pencil Liner For Its Smooth Application.
Creamy makeup products blend better when warmed. So, if your eyeliner is smudged or pulled on your eyelids or used multiple layers for a decent look, mix it slightly before you start to line it. To do this, heat the tip of the liner under a light flame for a second or until it becomes sticky, let it cool a bit, and then observe the consistent change before your eyes.
5. Create A Cat-Eye Outline.
If you’re having trouble creating the winged eyeliner, try outlining the shape first and then filling it in. Extend a line through the lower lash line to make the lower part of the cat’s eye first. Next, decide how thick you want your liner to be and draw a top rope from the end of the brow line to the upper lash line. Once you’ve traced both sides and everything looks symmetrical, fill in the gaps.
6. Utilize A Spoon As A Stencil For Winged Eyeliner.
If you can’t draw a freehand cat’s eye, get a spoon and use it as a stencil. Apply the tip of the spoon to the outer corner of the eye, and use the liquid eyeliner to draw a straight line as the first step to apply the cat eye. Then flip the spoon over so it is your eyelids, and use the rounded outer edge to create the perfect curved wings effect.
7. Smoky Eye Makeup Look With The Help Of A Hashtag
A smoky eye can go from glamorous to sloppy very quickly if you don’t know what you’re doing. To keep it simple, use a liquid eyeliner to draw the diagonal hashtag symbol on the outer third of the eyelid, then blend in with a sponge or blending brush. Not only will this ensure that both eyes are symmetrical, but it will also help prevent you from overdoing your eyeliner.
8. Warm Your Eyelash Curler Tool Using A Hair Dryer.
Create your heated eyelash curler by blowing hot air over your eyelash curler. Applying heat will help your lashes curl up faster and stay in shape longer. Heat the curler with a hair dryer until it heats up, wait until it cools a bit but is still warm (test on the inside of your arm before application), then clamp down your lashes to provide them curls.
9. Make Sure You Use A Bobby Pin To Apply Eyelash Glue.
If you can’t apply false lashes, try out this makeup tip. Use a clean bobby pin, carefully apply a few dots of glue with the help of the bobby pin’s information to the lashes, and spread them evenly. Wait a few seconds or until the adhesive adheres, then apply the lashes.
10. Prioritize Applying Foundation Before Concealer.
The easiest way to improve your makeup routine is to try applying foundation before your concealer. Start with a base that will help minimize any redness or discolouration, almost like creating a smooth base for the rest of your products. You can then use your concealer to treat any remaining breakouts or redness, and you’ll use less product in the process. Foundation before concealer is a great solution to prevent cakey makeup and creases wrinkles.
11. Mixing Petroleum Jelly With The Lipstick
If you love eye shadow and want to use it as a lip colour, mix the liquid pigments with some Vaseline (Aquaphor or Vaseline is excellent) in a spoon and apply it on the lips. You can create your personalized lip colour according to your choice. This is the best makeup trick ever. The easiest and fastest method to identify your lip shade is to use a lip liner in the same shade as your lipstick and create an X to match your natural lip line. Next, apply lipstick on the bottom three parts of the X that you will make, and continue to apply lipstick as usual to complete your look.

12. Conceal Dark Circles With Triangular Shapes.
If you want to brighten your under-eye area, stop applying dotted concealer and try applying concealer in a triangle pattern. Draw the bottom of the triangle just below your lashes and the top towards your cheekbones. This helps to completely hide the redness and shadows to give the illusion of a lighter bottom. To stay connected for more updates, follow us on Instagram and Facebook. You can also navigate to our website, Kirti Makeovers.
#Best Makeover In Delhi#Bridal Makeup Artist In Delhi#Makeup Artist In Delhi For Bridal#Top Bridal Makeup Artist In Delhi#Best Bridal Makeup Artist In Delhi NCR#Top Ten Bridal Makeup Artist In Delhi#Engagement Makeup#Party Makeup
0 notes
Text
How to Learn the Basics of Makeup: A Comprehensive Guide
Are you looking to delve into the world of makeup but don't know where to start? Learning the basics of makeup can be an exciting journey that allows you to experiment with different looks, enhance your features, and boost your confidence. Whether you're a complete beginner or someone with minimal experience, this comprehensive guide will provide you with the essential knowledge and techniques to get started on your makeup journey. the Basics of Makeup
From understanding different products and tools to mastering basic application techniques, we'll cover everything you need to know. Let's begin exploring the fascinating world of makeup!
Table of Contents
Understanding Your Skin
Essential Makeup Products
Building Your Makeup Kit
Prepping Your Skin
Basic Makeup Application Techniques
Enhancing Your Eyes
Creating Flawless Skin
Lipstick and Blush Application
Fixing Common Makeup Mistakes
Maintaining and Removing Makeup
Understanding Your Skin
Before diving into the world of makeup, it's essential to understand your skin type and undertone. Identifying your skin type (oily, dry, combination, or normal) will help you choose the appropriate products that work best for your skin.
Additionally, determining your undertone (warm, cool, or neutral) will guide you in selecting makeup shades that complement your complexion.
Essential Makeup Products
Building a basic makeup collection starts with understanding the essential products you'll need. These include foundation, concealer, powder, blush, eyeshadow, eyeliner, mascara, and lipstick. Each of these products serves a specific purpose and can be tailored to create a variety of looks for different occasions.
Building Your Makeup Kit
Once you have a good understanding of the essential makeup products, it's time to build your makeup kit. Begin by investing in quality products that suit your budget and preferences. Consider factors like skin type, desired coverage, and personal style when selecting a foundation, eyeshadow palettes, and lipsticks. Additionally, ensure your kit includes the necessary brushes, sponges, and tools for effortless application.
Prepping Your Skin
Before applying makeup, it's crucial to prepare your skin properly. Cleanse your face with a gentle cleanser, followed by toning and moisturizing to create a smooth canvas. Applying a primer can help extend the longevity of your makeup and minimize the appearance of pores and fine lines. Sunscreen is also essential to protect your skin from harmful UV rays.
Basic Makeup Application Techniques
Learning the fundamental makeup application techniques is key to achieving a flawless look. These techniques include foundation application, concealing blemishes, setting the makeup with powder, contouring, and highlighting, and blending eyeshadows seamlessly. By practicing these techniques, you'll gain confidence in creating a polished and professional finish.
Enhancing Your Eyes
Your eyes are the windows to your soul, and makeup can help enhance your beauty. Explore the world of eyeshadows, eyeliners, and mascaras to create various eye looks. Experiment with different colors, textures, and techniques to find what suits you best. From a natural daytime look to a sultry smokey eye, the possibilities are endless.
Creating Flawless Skin
Achieving flawless-looking skin is a common makeup goal for many. Learn how to choose the right foundation shade, apply it evenly, and blend it seamlessly into your skin. Discover the art of concealing imperfections and blemishes while maintaining a natural-looking finish. Setting your makeup with a suitable powder helps control shine and extends its wear.
Lipstick and Blush Application
Enhancing your lips and cheeks with the right colors can instantly brighten your face. Experiment with different shades of lipstick and lip gloss to find your perfect match. Learn how to apply blush to add a healthy flush of color and contour your face for added definition. Mastering these techniques will elevate your overall makeup look.
Fixing Common Makeup Mistakes
Even the most experienced makeup enthusiasts make mistakes. It's important to know how to correct these mishaps. Whether it's smudged eyeliner, uneven foundation, or clumpy mascara, we'll provide you with tips and tricks to fix these common makeup blunders and achieve a seamless finish.
Maintaining and Removing Makeup
Properly maintaining and removing makeup is crucial for healthy skin. We'll guide you on how to remove makeup effectively using gentle cleansers and makeup removers suitable for your skin type. Additionally, we'll share tips on cleaning and caring for your makeup brushes to ensure their longevity.
Frequently Asked Questions
Q: Can I learn makeup techniques from online tutorials?
A: Absolutely! Online tutorials are a great resource for learning makeup techniques. Many talented beauty influencers and makeup artists share their knowledge through detailed video tutorials, making it easier for beginners to grasp the basics of makeup application.
Q: How long does it take to learn the basics of makeup?
A: The time it takes to learn the basics of makeup varies from person to person. With consistent practice, you can gain proficiency in basic techniques within a few weeks or months. Remember, patience and practice are key to improving your skills.
Q: Do I need expensive products to learn makeup?
A: While high-quality products can enhance your makeup application, they are not necessary for learning the basics. Start with affordable options and gradually invest in quality products as you become more confident and experienced.
Q: How can I find the right makeup shades for my skin tone?
A: Understanding your undertone is essential in selecting makeup shades that flatter your complexion. Warm undertones are complemented by earthy tones, while cool undertones pair well with shades like blues and pinks. Experimenting with different shades and seeking guidance from makeup professionals can help you find your perfect match.
Q: Should I follow makeup trends or stick to classic looks?
A: The choice between following trends or sticking to classic looks depends on your personal style and preferences. It's always fun to experiment with new trends, but classic looks are timeless and versatile. Feel free to blend both approaches to create a makeup style that reflects your individuality.
Q: Is it necessary to wear makeup every day?
A: Wearing makeup is a personal choice. Some individuals enjoy wearing it daily as part of their routine, while others prefer a more natural look. There are no hard and fast rules. Embrace what makes you feel comfortable and confident.
Conclusion
Learning the basics of makeup is an exciting journey that allows you to explore your creativity, enhance your features, and boost your confidence. By understanding your skin type, acquiring essential products, and practicing various techniques, you'll soon master the art of makeup application. Remember, makeup is a form of self-expression, so feel free to experiment, have fun, and create looks that make you feel beautiful.
With time, practice, and the knowledge gained from this comprehensive guide, you'll become skilled in the art of makeup and develop your unique style. Embrace your newfound knowledge and enjoy the transformative power of makeup!
0 notes
Last Seen Blogs

bloomsbury
thick thighs, thin patience.

mizgin-21
Mizgin🌈

bakbakbakbakbak
Don't think! EAT!!!!

deadend4d
✿.。.:* ☆:**:. 𝕕ⒺⒶⒹ 𝓔ⓝ𝒹 4๔ .:**:.☆*.