Text
Offering free tarot reading right now if anyone is interested
2 notes
·
View notes
Text
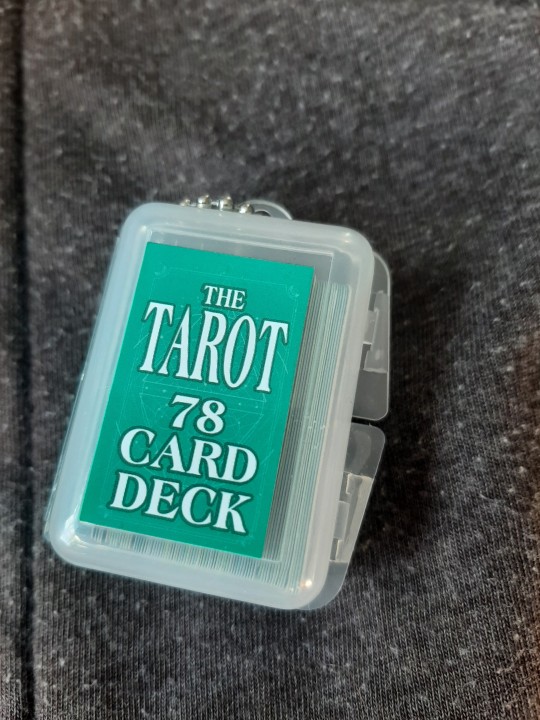
Keychain sized tarot deck at 5 below

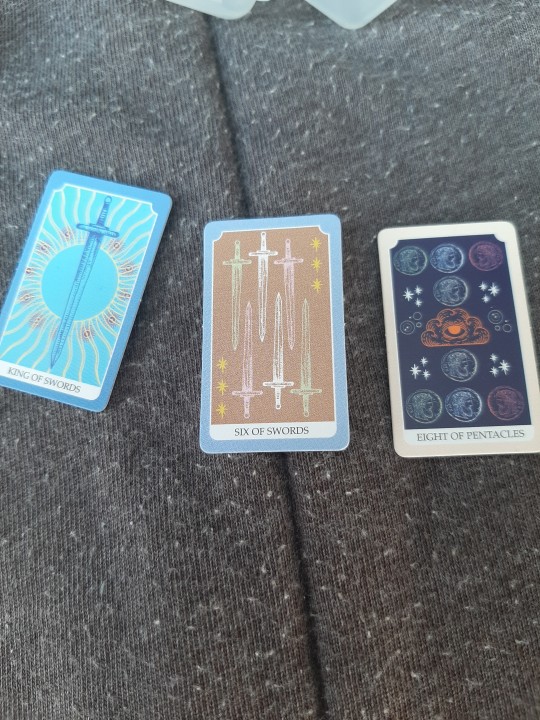
A really nice deck that I plan on using with spellwork :)
#witchblr#paganblr#pagan#tarot#tarotblr#witchcraft#tarot reading#tarot tips#tarot cards#tarotcommunity#5 below#five below
48 notes
·
View notes
Text
Digital Altars📱🔮
Altars are considered a key element of witchcraft for deity worship, elemental, planetary or ancestral connections, or spell work. However, they can be costly, you may not have the space for it, or you may be in the broom closet. But you don't need a physical altar, you don't even need physical tools. Digital altars are a great way to worship deities in the case you’re unable to set up a physical altar. There are heaps of alternatives if you’d like to get creative with it.
Some people doubt the integrity of digital altars, however I believe they gain metaphysical energy as they’re created, which can be used for witchcraft. Think about emoji spells for example!
Digital altars are different to digital shrines, which are similar in concept, but different in purpose. Shrines are more of a permanent honouring of a being, and they don't necessarily have to be used actively. Meanwhile altars are for active worshiping, when you’re actually giving an offering or trying to contact that deity. However, digital altars can also function as a shrine, depending on use!
Below are 19 different options for digital altars (but I'd suggest using multiple!)
Image/Collage Altars
Picrew Altar Sketch (by Camade)
This game was designed specifically for creating altars suitable for sacred spaces to perform deity worship, to connect with ancestors, and to be a witch’s working table. After saving it you can edit the picture frames to add pictures of your deity, your family or any other being. It has a lot of variability so it’s great for creating multiple altars very quickly in a consistent aesthetic.
Here’s a link to one I made the other day, using colours and imagery to suit my purpose. This is probably the easiest of the options, while also being the most versatile. However, there are limitations as you can't really make it specific to your chosen deity unless you edit the image later.
Canva / Morpholio / Photoshop
These allow for creating single image collages to set as your phone or laptop background with crystals, cardinal directions, deity images, candles, wands or any other altar tools, along with quotes, intentions and prayers. This can be as subtle or structured as you want, making it helpful for closeted witches.
You can use the collages you create for wallpapers on your laptop or phone, or you could get them printed out and stick them on your wall!
In-Game Altars
Minecraft
On Minecraft you can built entire structures as an altar or shrine, but you’re limited with decorations unless you install a mod. Mods can give you a lot of room to be creative and have a strong aesthetic. Alternatively, you can build just one room and line it with books, add an enchanting table, potions, diamond/emerald blocks, brewing stands, cauldrons and more, using the standard texture pack.
@gailcraft was kind enough to speak to me about her experiences using altars on Minecraft. She usually uses her Minecraft altars to function as a travel altar or when her physical altar hasn’t been cleansed, mainly as a visual representation of her physical altars rather than an actual workspace. When using her Minecraft altar, she generally keeps it strictly digital, writing out prayers on signs and giving in-game offerings of food and potions which correspond with the deity.

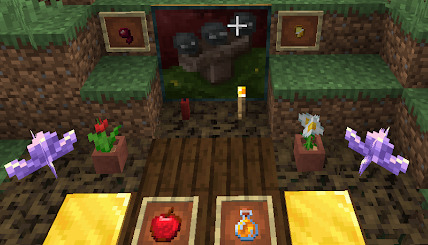
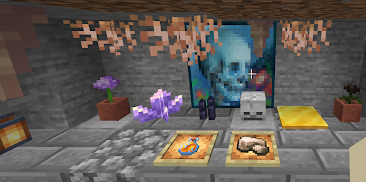
As you can see in the images she’s provided, she’s created a cottage-like structure to house her main digital altar to serve as a safe space, decorated with candles, crystals and plants inside. She has separate deity altars for Hades and Persephone, decorated with skull paintings, gold, spiders eye, crystals, flowers, a skeleton skull, lanterns and the aforementioned offerings in picture frames.
These are great altar alternatives as they don’t require much maintenance or energy, and are suitable for witches who are unable to have a physical altar or who travel a lot.
Another really cool idea for digital altars by @neonswitchhouse is to make digital spell jars by placing items in chests that may best represent your purpose, and you can specify this by writing intents on signs above the chests.
An added bonus is that you can design a skin for your avatar to look like yourself, and you can get pets like wolfs or cats.
Animal Crossing
New Horizons has so much potential for digital altars as it’s super customisable. You can dedicate an entire room in your house to witchcraft, decorating it with a glowing magic-circle flooring, candle wallpaper, candles, stonework kitchen sets, gothic mirrors, decorative bottles, cauldrons, brick ovens, pillars, stone and candle chandeliers. They also have divination sets with crystal balls, incense, bones (in the form of dinosaurs) and a whole load of other decorative options. The main issue is that collecting all of these is time-consuming unless you purchase them online. You can make offerings by placing items that correspond with your deity in your room.
There are heaps of examples of this. @spookynerdghoul has one here and @blomi-isle has one here. Alternatively @ostarasghost has a dedicated corner which you can see here.
You could also make an outdoor altar space, or multiple all around your island. You can create patterns to put on the floor as runes or sigils that correspond with your intent, if you’re looking to do spellwork or deity worship in-game. You could make offerings through art by creating patterns and placing them on stands.
There’s even a zodiac-themed item set that you can create by wishing on shooting stars. You can customise and dress up your avatar to wear cute witchy clothes too, or download outfits from their online section that other players have designed.
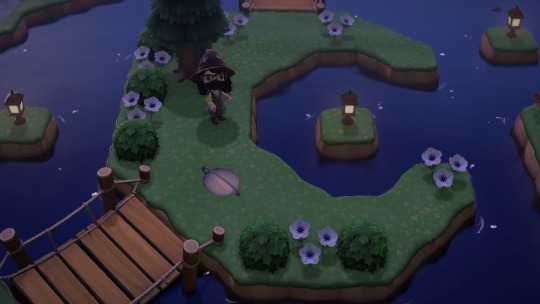
On my island, I have one section with a stonehenge which lines up with the full moon, as well as a separate rocky-section with some candles and a skull-hat, and a crescent moon island with a pattern of Saturn that I created, but I encourage you to go more full-out than I did!


Stardew Valley
@baduhennasravensraven classifies these as shrines, but I’d like to show it as an example as a potential altar. They’ve set up multiple sheds to serve as shrines/temples for different deities! You can see images in their post here.
Like for Minecraft, you do needs mods to get the full experience, but again you can make digital spell jars by growing the plants that best represent your purpose and placing them in with items that may best represent your purpose.
Sims / Avakin
I’ve grouped these together because they’re similar, but in both you can design and decorate houses in a 3D virtual world.
Again, expansion and stuff packs are needed to use Sims to the fullest, but you can find some great ones by @simdertalia here and here, or one by @lycheesmods here. Some more of the relevant ones are the Magic School mod (fair warning: it’s Harry Potter inspired) and the Paranomal pack, where you can have ghosts as roomates and perform a séance.
Here's an example altar made on Avakin by @onixdace. I'm not that familiar with this program, but it looks similar in concept to other house-design/decoration games.
Hollowmoor
@hollowmoor-game is a steam game still in the works with a planned release in 2023. I’m not sure yet of specific ideas in using it as a digital altar, but I’m sure it’ll be great, and I’ll update this post when it does come out.
According to their page, “As a budding young Witch or Wizard you’ll need to manage your farm and explore the mystical world to gather your ingredients. Brew potions! Forge enchantments! Complete orders for the townsfolks and learn their stories! Bring magic back to Hollowmoor!”
It seems promising! I believe it’s similar in concept to Stardew Valley and Animal Crossing, so I’m sure you could form a digital altar in the same way in Hollowmoor once it’s released.
Abstract Art Altars
Dream AI
[Edited 10 Dec 22] I’ve recently become aware AI art generators steal from creators online and I no longer endorse this method. Instead I recommend using art apps like CSP, playing a devotional playlist and drawing or painting what comes to mind to create an abstract piece of your own for a specific purpose. This way, in very low opacity, you can write out your intention and add images to be displayed subliminally on your altar.
Dream AI is an artificial intelligence art-creating app. You can use this to make an abstract artistic altar by typing in words like your deities name and their associations or a short prayer or intention, use the outcome as an altar by making it your phone background. You can also set a base image to inspire the art with your deity of choice, making a sort of subliminal image of that deity within the creation. This is helpful for closet witches, you can just claim you like the art the AI produced if anyone asks.
Alternatively, you can use the art as a digital offering by posting it on your tumblr altar captioned with a prayer, like @crazyskirtlady has here. Check out her page for more examples of techno witchcraft!
Mixed Media Altars
Notion
Notion is a great organisational app where you can add a mix of photos, gifs, text, embedded videos, music and playlists onto a page, making for a multi-media style altar. You can also store resource notes and links for any research you do.
@caduceussky and @arabellascraft were both kind enough to walk me through how they use their Notion altars!
@caduceussky has multiple different altars for different uses, like for deities and spirits, productivity, work-life balance, and prosperity spells that she uses in conjunction with physical altars, depending on convenience and her personal preference.
For deity/spirit work, she typically sets up her Notion altar first as a placeholder while she’s working on setting up a physical altar, then she treats it like a travel altar. She also use Notion for spell altars that have to do with work and study, since she uses her laptop for those, with separate pages set up for certain spells, sort of like digital spell jars.
For deity/spirit altars, she plays a devotional playlist while setting up the altar and adds a photo of a candle and photos of the deity/spirit or their associations like a collage. Digital offerings can go here, too, such as devotional writing or art. It can also be used as a journal to write her experiences and lessens she’s learnt from the deity/spirit.
For spell altars, she writes her intention at the top of the page, and any additional manifestations underneath. Similar to her deity/spirit altars, she includes photos of associations of the spell’s intentions, and sigils specific to the spell.
@arabellascraft uses her Notion altar for spontaneous rituals and spellwork as her physical altars are generally temporary. She meditates to her Notion altar or leaves a note, for example for gratitude.
She practices Irish folk traditions, one of which being having a moment of reflection and prayer when you first see the new moon of the month. Having her Notion altar in her pocket makes practicing this simple as it’s portable, however, one weakness is that there’s a lack of a physical connection. On the up side, the ability to embed playlists into Notion keeps her in the spiritual mindset rather than having to go back and forth in Spotify.
There’s about to be a Notion AI too, with the function of brainstorming assistance. This means you can type in something such as “What can I do to increase my mindfulness,” and a list of related answers and ideas will be produced, or “Write a poem about the God Apollo,” and the AI will generate one for you. You can join the waitlist here.
Phone App Altars
#Self-Care
This game includes a digital altar with a function to integrate your personal experiences by setting objects to a meaning, memory or realisation, like a journal. It also has organising functions to put objects away from you altar when you’re done with them and bring them back out when you’d like to display them again.
You can gain objects for your altar by performing in-game tasks like putting away laundry, fill-in-the-blank word activities with your choice of affirmations or life tips, simple puzzles, and gain tarot cards by picking a daily tarot card. You can also light a candle and type in an intention!
It does take a while to collect enough objects to display for a particular purpose, but if your digital altar is going to be your main altar, this one is a good long-term option.
The app is customisable to a certain extent with colours and designs, but some of the fancier stuff you have to pay for (like nicer backgrounds and patterns).
Here’s an image of my current altar on this app after about a week of use, along with an image of the main page.


Discord
On Discord, you can join a public server with custom categories to use as digital altars, such as this one by @homeiswherethehearthis. Alternatively, you can create a private server with chat rooms for various areas of worship and then post pictures/gifs and write prayers there.
With Discord altars, you can write messages to your deities, send them pictures, links to articles or books about them, as well as send them offerings of your creations. It’s a great way to have a massive private or shared space dedicated to your deity.
Further, you can add Discord bots that can do divination for you, as suggested by @lyresstrings in this post, such as a pendulumn bot, a daily tarot bot, or a horoscope bot. There’s even one that states the current moon phase!
Notes App
In the standard Notes app you can create folders for specific deities, and inside each folder, add notes daily, with images, links, song names and lists of correspondences to that deity. Further, you can write letters to your deity within the notes app, as well as intentions, wishes, and things you’re greatful for.
A great feature of this app is that you can actually lock your notes with a password just incase you’re worried about someone going through your digital altar.
This one is a good option to use in conjunction with a Collage altar if you make it your phone background.
Pinterest Shuffles
Pinterest Shuffles is a sister app of Pinterest, but instead of boards, it’s like scrapbooking. It’s an amazing tool for creative expression with a similar vibe to what Polyvore used to be.
The altars you can make with this are similar in concept to collage altars but the uses are specific to phones, meaning you can only make phone wallpaper images. With Shuffles, you can incorporate images directly from your Pinterest boards, which is great if you already have a deity board and want to condense it into a single image to set your wallpaper.
You can add text with intentions and prayers, or you can just use symbols of your deity of choice. I’d suggest making multiple of these, all with different intentions, so you can change your wallpaper based on what you’re asking of the deity for that day and worship on-the-go just by looking at your lock screen.
I made one as an example which you can view here. This is currently my home screen wallpaper! I added symbols of Saturn such as a clock, skeleton, herbs, capricorn, the world tarot card, the shrine of Saturn in italy, a crow, the number 3, karma, saturn-related texts, and my favourite images of Saturn.
Social Media Altars
Tumblr Blogs
This is probably the most common digital altar, mainly because of the massive witchcraft presence on Tumblr, and the ability to make multiple secondary blogs for each deity.
You can reblog general posts that remind you of your deity, images, gifs, spells, associations, prayers, emoji spells and more. However, are often considered to be more shrine-like activities. You can turn it into an altar by creating posts with digital offerings such as art and collages captioned with text spells, emoji spells, or prayers/worships (as inspired by @crazyskirtlady), or write poems for your deity.
Blogs are totally customisable, and you can change the designs with pictures, music, fonts and more. One important thing to note with secondary blogs is that you cannot initiate social functions like DMs, comments, even following and liking, and you can never change your secondary blog into a primary blog (trust me, I’ve tried. I made the mistake of making this account a secondary blog, now I can’t interact with any of you unless you reach out first).
The tagging system is a little weak though, and it can be difficult to search through all your posts and reblogs, so I suggest if there’s anything you want to keep track of, you have a separate space for it, such as on Notion.
Pinterest Boards
With Pinterest, you can create multiple boards for different deities or spirits, adding images that remind you of those beings from what others have posted. Finding inspiration is super simple! You can add images of representations of your deity, like food, clothes, crystals, art, sculptures, elements, animals, objects and more.
Instagram
In the same sense as creating a Pinterest board, you can dedicate an entire Instagram account to your deity. You don’t have to follow anyone, and can keep it on private, or you can share it publicly. You can post your offerings, photos of things you come across in every-day life like images of the sun, the ocean, trees, plants, bugs and more.
Be careful with this option, however, as you can’t just download photos from Pinterest and post them without credit. This option is more appropriate for art you’ve created yourself and documenting your experiences with captions, poems, emojis, short letters, gratitudes, and intentions.
Musical/Playlist Altars
Spotify
One post by @asatroende got me thinking about how apps like Spotify can be used as digital altars by creating playlists with songs you associate with a deity as a form of prayer. Some examples other than normal music includes subliminals, podcasts, instrumentals, and white noise sounds. If you add a short ambient candle sound in the middle of the playlist, this can aid in visualising a candle, making your prayer or offering, then it
You can add a picture of your deity as the album cover and add an intention or emoji spell in the description to customise it further. Spotify also allows you to make folders, and insert multiple playlists within those folders, which is great it you have multiple deities you’d like to make altars for.
An added bonus is that if you have a Notion altar, you can embed this playlist into it!
For my Spotify altar for Saturn, I added Sleeping At Last’s ‘Saturn’ from Atlas I, a 1:24 minute candle sound, then the planetary/space sounds recorded and posted by NASA called ‘Nasa - Saturn’. This way, I can get in the mindset, make my devotional prayer to the candle visualisation, then mediate to the sounds of Saturn for 30 minutes. I used an emoji spell as the description, and used an image of Saturn eclipsing as the cover.
Apple Music
I’m not a user of Apple Music, but I’m sure it can be used in a similar way to Spotify. If you have the free version, you can only add songs that you own to a playlists. To get around this you can use a youtube-to-mp3 converter to get ambient sounds, subliminals and more. However, this isn’t necessary, and you can just include music you own that reminds you of your chosen deity.
Virtual Reality Altars
Oculus
One last idea is if you have the technology and setup for it, you can create an altar in a VR game or space. Unfortunately, I wasn’t able to find any practical examples of this one.
—————————————
Special thanks
I’d like to give a big thank you to @gailcraft, @caduceussky and @arabellascraft for giving me permission to talk about their personal digital altars, and for providing me with information regarding them. A further thank you to @gailcraft for providing me with images to share with you all. Go check them out!
Here’s the explanation for baby withces:
Some people doubt the integrity of digital altars, however I believe they gain metaphysical energy as they’re created, which can be used for witchcraft. Think about emoji spells, for example!
Digital altars are different to digital shrines, which are similar in concept, but different in purpose. Shrines are more of a permanent honouring of a being, and they don't necessarily have to be used actively. Meanwhile altars are for active worshiping, when you’re actually giving an offering or trying to contact that deity. However, digital altars can also function as a shrine, depending on use!
Altars can be used for multiple purposes, for deities, patron planets, ancestors or general spirit work. Some people have one altar for everything, or separate their altars to keep these purposes separate, minimising the ‘cleansing’ you may have to do between each ritual.
Traditionally altars include tools to represent, the four elements, the cardinal directions, genders (although this is sort of being phased out), and offerings. The sub-categories of these are where you can get creative in the representations. More on that in a future post!
690 notes
·
View notes
Text
I'm in the mood to practice a bit with the Deck of Many Things, so hmu for a reading with this deck!
4 notes
·
View notes
Text
Different magical element meanings
Magical elements are a common concept in various cultures and fantasy settings. They typically represent fundamental forces or energies that can be harnessed for mystical purposes.
Here are some of the commonly recognized magical elements:
1. Earth: Often associated with stability, grounding, and the physical world. It encompasses concepts like stone, soil, plants, and minerals.
2. Air: Representing intellect, communication, and freedom. Air magic pertains to the element of wind, breeze, and the unseen forces around us.
3. Fire: Symbolising transformation, passion, and energy. Fire magic is connected to flames, heat, and the spark of life.
4. Water: Signifying emotions, intuition, and adaptability. Water magic relates to rivers, oceans, rain, and the flow of energies.
5. Spirit (or Aether): Sometimes considered a fifth element, representing the divine or spiritual essence that connects all things. It's the bridge between the material and the ethereal.
6. Light: Often associated with purity, illumination, and enlightenment. Light magic embodies concepts of clarity, truth, and goodness.
7. Darkness (or Shadow): Representing mystery, the subconscious, and the unknown. Dark magic encompasses hidden knowledge, mystery, and the depths of the human psyche.
8. Metal: Less common but occasionally included, metal magic focuses on concepts like strength, structure, and transformation.
9. Ice: In some traditions, ice is treated as a distinct element. It embodies cold, stillness, and the power of preservation.
10. Electricity (or Lightning): This represents energy and power, often associated with speed and sudden change.
Remember, the interpretation and inclusion of these elements can vary widely depending on the culture, belief system, or fictional universe in question. Some systems may include additional elements or have unique perspectives on the traditional ones.
469 notes
·
View notes
Text
Anyone want me to make a pick a card?
1 note
·
View note
Text
how to sew a drawstring bag for your tarot deck — version 1 (unlined)
Sometimes I get really annoyed with the packaging that my tarot decks come in, and I want to replace that little cardboard box with something of my own creation. That’s where these drawstring bags come in! This version (without a lining) is the first of two potential bags you could make (or you could make both versions; I’m not judging you).
If you’re new to sewing and/or on a pretty tight budget, I would recommend this version, since there’s less fabric involved and fewer seams. However, you will be able to see the internal seam(s) on the inside of the bag. If that bothers you, check out the lined version of this tutorial (coming soon). A sewing machine is useful for this project, but there will be a hand sewn portion toward the end (even if you’re using a machine) and you can sew the whole bag by hand if you so desire.
For my closet witches — if someone asks you why you’re making a bag, you can always say that the bag is for keepsakes or other small odds and ends. You can also use this bag for storing crystals, runes, or dice! However, a tarot deck requires the most measuring, so that will be our example.
Project Difficulty Level: Easy/Beginner Friendly
All measurements are Imperial (inches).
Materials
For this project, you will need:
fabric (for the body of the bag, not optional). For one bag, you won’t need more than a “fat quarter” (18x21 inches). If you go to a physical craft store for fabric (quilting cotton is often cheap, comes in lots of fun prints, and is ideal for this project), the person at the cutting station will recognize this measurement. If you don’t want to buy fabric, look around your home—do you have an old shirt, bedsheet, tablecloth, or pillowcase that’s no longer in use? That will work too! If you’re new to sewing I’d advise avoiding slippery-smooth or very stretchy fabrics like spandex or silk charmeuse, because these are more difficult to sew.
polyester ribbon, twill tape, yarn, leather or braided cordage, or a pair of shoelaces (for the drawstrings, not optional). The length depends on the size of your tarot deck. Measure the short side of your tarot deck, then double that measurement, then add 6 inches—that’s the length of 1 drawstring. You’ll need two drawstrings (they’re the same size).
1 cutting tool (not optional). This can be scissors (ideally fabric shears) or a rotary cutter, though for the latter it’s advisable to also have a cutting mat.
thread (for machine sewing and hand sewing, not optional)
1 needle for hand sewing (not optional)
1 thimble (for protecting your fingers while hand sewing, optional)
sewing/quilting pins (for holding together the fabric pieces, not optional). You can also use safety pins, but they’re a bit more fiddly.
1 sewing machine (optional; I will provide instructions for how to sew the bag entirely by hand. However, if you have access to a sewing machine, this project will go a lot quicker).
1 marking tool (for reminding yourself where to cut, optional). You can use chalk, a pencil, or a special fabric-marking pen. You can also just use pins to mark a line.
1 measuring tool (for a straight edge for marking + measuring, optional). A plain old ruler works just fine for this, though there are all sorts of fancy quilting rulers as well. If we’re being completely honest, for this kind of project you can absolutely measure just about everything by eye, but some people like the reassurance of knowing exact distances.
1 iron + surface upon which to safely use the iron (for pressing seams, optional). This will make working with your seams so much easier, but you can do without one if you need to.
Fray Check liquid glue (for finishing raw edges, optional). There are a multitude of ways to finish raw edges, but you will need to finish them; if you don’t, sooner or later the fabric of your bag will fall apart. (I’m listing Fray Check as optional only because it’s not the only finishing method; read on for more). You cannot wash your bag if you use Fray Check on the raw edges.
1 pair of pinking shears (for finishing raw edges, optional). Another, less permanent, way to finish off a raw edge and stop it from fraying is to trim it with pinking shears that make zig-zag, triangle-shaped cuts.
1 serger/overlock machine (for finishing raw edges, OPTIONAL). A serger, if you don't know, is a special type of sewing machine that finishes raw edges. I don't have access to a serger, so I'm not qualified to talk about them except to mention that they exist and are useful if you have access to them. They won't be discussed any further by me.
NOTE: if you don’t have access to Fray Check or pinking shears + you’re sewing this bag entirely by hand, you can use French seams and enclose the raw edges within a larger seam allowance. French seams require a bit more fabric and some measuring (and they add a lot of bulk to the corners of the bag) but if you need/want to use them, keep an eye out for the appropriately labeled sections.
Step 1: measure & cut your fabric (standard seam + French seam version)
Take your tarot deck and secure the cards together (a rubber band would be good) and place the cards onto your fabric. If you have a 90° corner to work with, that would be perfect. Leave enough room around the edges of your tarot deck to account for a 5/8-inch seam allowance + sufficient room for the volume of all the cards and/or whatever else you would like to store in the bag. You will need extra height beyond the top of the deck (about 2 inches) to account for the fabric of the bag that will get folded over to encase the drawstrings. Mark the edges of the amount of fabric you’ll need—if you don’t want to do math, eyeball it to the best of your ability; the tarot deck doesn’t need to fit super snugly, so when in doubt go a bit bigger than you think you’ll need.
The French seam version and the standard seam version require very similar amounts of fabric. (Spoiler alert: in the photo below I ended up needing a LOT less fabric for the French seam version than I thought I would; the bag is comically big).
The rectangular panel you’ve outlined will be one side of your bag. Cut it out of the larger piece of fabric, and use it as a template for cutting out your second piece of fabric. You only need two pieces.
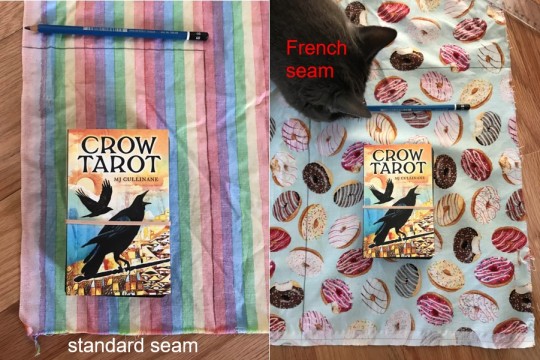
I used some leftover quilting cotton from my fabric stash (both prints were acquired at Joann’s, if you’re looking for donut or rainbow-printed cotton). I also used a 6B pencil for fabric marking in both cases. (Pic on the right features Feline Assistance, since I am an incompetent sewist without The Furry Tyrant supervising me).
We’re going to focus on the standard seam version of the bag for the next step, and will return to the French seam version later on.
Step 2a: building the drawstring casing + finishing the edges (standard seam version)
First, fold the edge of the top of the bag over just a little bit. You don’t need to formally measure this. Then, fold it over again, larger, to make a tube that the raw, unfinished edge is enclosed inside. This edge, because it’s enclosed in the drawstring casing, doesn’t need to be finished, but the rest of the edges do. This tube needs to be big enough for both of your drawstrings to be threaded through. Pin this drawstring casing in place on both panels of your bag. (See pictures below for a visual aid).
Now, there are several ways of finishing a raw edge—aside from using French seams—that have been mentioned previously: using pinking shears to trim the raw edges (workable, but not recommended), and using Fray Check to glue the raw edges and thereby stop them from fraying (and also render the finished product un-washable). Use these methods if you so desire.
If you have access to a sewing machine, there is also a third option: the zig-zag stitch.
For the zig-zag stitch: on the sewing machine, change your stitch width to a much wider setting than usual. I’m using my mother’s Polish behemoth from the 1980s, so I can’t give you a one-size-fits-all guide for changing the settings on a sewing machine. If you don’t know how, your sewing machine should come with a manual explaining how to use it, or you could find the brand + model number and look up tutorials online. Once the stitch width has been changed, you need to know how much of your bag to sew in this stitch.

Going as close to the edges of your fabric as possible, sew the zig-zag stitch around the single-layer edges of the sides and bottom of the bag (the topmost side in the photo). DO NOT sew any part of the drawstring casing; that will come later. At the beginning and end of your stitching, go back and stitch 1/2-inch of what you’ve already sewn with the machine. It will look a little ugly, but this forms a knot that ensures that the stitching won’t come undone (and when the bag is finished, you won’t be able to see this from the exterior).
Do this for both panels of your drawstring bag.
Step 2b: building the drawstring casing (French seam version)
It’s exactly the same as the standard seam version. The raw edges of French seams will be entirely finished after they are seams rather than just edges, so you only build the drawstring casing here.
Step 3a: seaming the panels together (standard seam version)
Put the 2 panels together with the “right” sides of the panels facing each other. (If you’re using printed fabric, the side of the fabric where the print is brighter + more visible is the “right” side). If you’re using solid-color fabric, the right vs. wrong side of the fabric probably won’t be visible enough to matter. Pin the panels to each other so they remain together.
If you’re using a sewing machine, change the stitch width back to its normal, narrow width. Using a 5/8-inch seam allowance (there will likely be a guide on your sewing machine’s throat plate, near the needle—if not, you can draw a guideline for a consistent seam allowance with a marking tool), stitch along the bottom and sides of the bag to seam the two panels together, leaving an opening at the top. At the beginning and at the end of your seam, backstitch at least 1/2-inch over your work to ensure that the stitching doesn’t come undone. DO NOT sew over the drawstring casing or under it; your finished seam should make a sharp-cornered U-shape. Remove the pins if you haven’t already.
If you’re sewing by hand, thread your needle with a single strand and tie a knot at the tail end. Using the back stitch (video tutorial here), sew along a 5/8-inch seam allowance in as straight a line as possible (it would help to draw yourself a guide beforehand) to make that U-shaped seam. Tie a knot once you’ve reached the end of the seam, and remove the pins if you haven’t already.
If you have access to an iron, iron the seam open as best you can so that the two wings of the seam lie flat against the body of the bag. DO NOT IRON if you’re using velvet; ironing will crush the “pile” of the velvet and ruin it—permanently.
Step 3b: seaming the panels together (French seam version)
This is very similar to the standard seam version, BUT instead of the seam having a U-shape, you’ll instead be making 2 vertical lines; you’re only sewing the side seams, and the bottom of the bag will be left open for now.
Step 3.5b: finish the raw edges + sew the bottom seam (French seam version)
Remove ALL the pins if you haven’t already, even the ones for your drawstring casing. Unfold your drawstring casing. Take one of the raw edges of the side seams and fold it under itself, so that the edge is out of sight. Do this for the unsewn, topmost portion of the bag that forms the drawstring casing, too. If you have access to an iron, press this edge so that it holds this shape and the raw edge stays hidden. If you don’t have an iron, use pins. Do this to both sides of both seams.
Next, sew the wings of the side seams into their folded position so that they cannot unfold and the raw edges are permanently hidden away. This stitching will be visible regardless of whether the bag is right side out or not, so be neat here if aesthetics matter to you. Because these seams aren’t going to take a lot of strain, you can use a running stitch (video tutorial here) rather than a back stitch if you’re sewing by hand. It’s quicker.

After that, take the bag and turn it right side out. If you want to get into good sewing habits and do this “properly,” then you’ll mark a 1/4-inch seam allowance along the bottom edge. 1/4-inch seam allowances aren’t common except in quilting, but if you were making a garment you’d want this seam to be 1/4-inch and then the next seam to be 3/8-inch, and therefore your final (French) seam will be exactly 5/8-inch just like a standard seam—thus, the propriety of sewing is preserved.
But, for a project like this where we don’t spend a lot of time looking at rulers, that level of precision isn’t necessary. My advice, if you’re new to sewing and you’re using a machine, is to have all your seam allowances be the same size for this project. (You compensate for this uniformity by needing slightly more fabric, however).
Therefore, sew the bottom seam of the drawstring bag with either a 1/4-inch or 5/8-inch seam allowance—whichever your heart desires. Make sure your side seams are at the sides (the above photo series was twisted around just to demonstrate the stitching) if aesthetics matter to you. If the side seams aren’t at the sides when you sew the bottom seam, the finished bag will be oddly-shaped and close crookedly. Use a back stitch if sewing the bottom seam by hand. Next, trim down the excess seam allowance to approximately 1/8 of an inch (it doesn’t have to be exact). Yes, you will cut through parts of your side seams when you do this; I promise they won’t unravel once the bag is complete.
Once this is done, turn the bag wrong side out again and (if you have access to an iron) press the bottom seam as flat as you can. Then sew another seam further up the bag from the previous seam you just made, ideally at that 3/8-inch seam allowance.
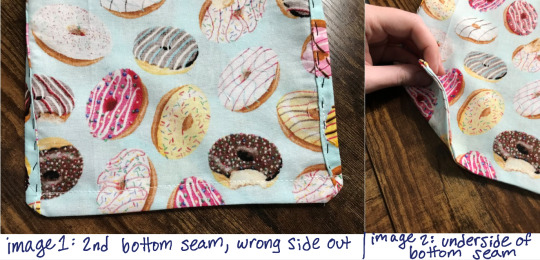
The bulk of the side seams at the ends will be difficult to sew through. If you’re hand sewing, a thimble would be useful here. If you’re sewing by machine, go slowly; you don’t want to break your needle. If you did this correctly, turning the bag inside-out where indicated, then the raw edge of your first bottom seam should be completely encased within the tube created by the second bottom seam and thereby protected from fraying. If it isn’t… pick apart your stitches and restart from wherever things went awry. You can do this!
Step 4b: sew down the drawstring casing (French seam version)
We’re moving from the bottom of the bag to the top. Do you remember those folded-over tubes from Step 2 that encased the raw edges of the top of the bag and formed the drawstring casing? You’ll need to refold and re-pin the top of the bag now. If you’re using a sewing machine you can sew down that fold, staying as close to the edge of the fold as possible to maximize the size of the tube.
DO NOT sew the ends of the tube shut; you’ll want them open so that the drawstrings can slide through. DO NOT sew the two halves of the bag together; there needs to be an opening so you can put your tarot deck inside. If you’re sewing by hand, use the whip stitch (video tutorial here) to tack down the folded fabric and hold it in place.
Turn the bag right side out.
Step 4a: sew down the drawstring casing (standard seam version)
Step 4a is largely the same as Step 4b, BUT before you fold down and pin the top of the bag, you need to fold back the vertical raw edges that haven’t been finished, tuck the raw edge under the bulk of the fabric, and then sew them into place. This always involves a tricky arrangement of pins when I do it, so I tend to do this part by hand with a whip stitch.
Once this is done, fold and tack down the drawstring casing the same as you would in Step 4b. Turn the bag right side out.
Step 5: insert the drawstrings (standard seam + French seam versions)
I generally use polyester ribbons as drawstrings, since I have altogether too much ribbon at my disposal. However, you can also use twill tape, braided fiber or leather cordage, yarn, or (in a pinch) a pair of shoelaces.
The method of threading your drawstring through the casing is the same in all cases: take a safety pin and attach it to one end of your drawstring, then begin feeding the safety pin through the casing. Go all the way around so that the two ends of the drawstring poke through on the same side. Remove the safety pin. Do the same thing for the next drawstring, but start and end on the opposite side of the bag.
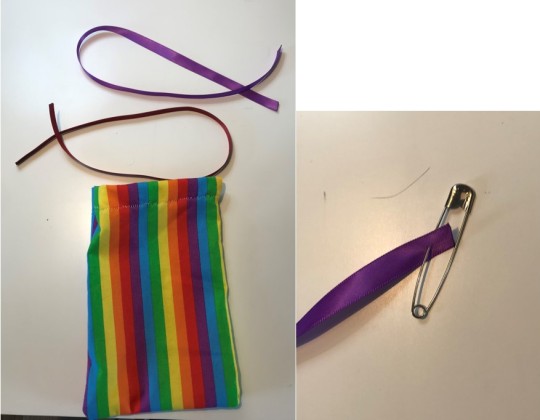
Leather will not fray. Shoelaces, so long as the aglets are still attached, also will not fray. Polyester ribbon, however, frays very easily. If you’re using polyester ribbon, the easiest way to prevent it from turning into a bunch of loosely-connected string is to take the ends and briefly hold them near but not inside a candle flame—not close enough that the polyester catches fire or smokes, but just enough that the polyester (plastic) melts and forms a hard edge at the very end of the ribbon. If you don’t want to involve fire with this project, you can also use Fray Check OR tie a hard knot.
If you want to add beads and/or charms to the drawstrings of your tarot bag, now would be a good time to do so. You can tie the ends of the drawstrings together to hold the charms/beads in place.
And we’re done! Congratulations on finishing your drawstring tarot bag!

(Optional) Step 6: add decoration
Your bag is complete! However, if you want to add some personal/decorative touches, absolutely feel more than free. Some ideas for decoration are:
felt appliqué
embroidery
beading
iron-on patches (I would recommend sewing them, for extra security)
Thank you so much for reaching the end of this tutorial. I’m really proud of you for even just being interested in this DIY project; it’s always good to learn how to make your own things when and where you can! If you’re struggling with any aspect of the tutorial, please feel free to send me questions, and I’ll help out to the best of my ability. A version of this bag with a lining to hide the internal seams is coming soon!
74 notes
·
View notes
Text
5 notes
·
View notes
Text
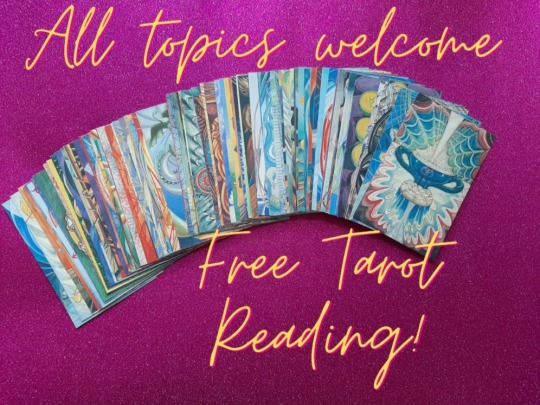
Free tarot readings available
I'm a bit bored so if anyone wants a reading just ask! All topics are welcome!
3 notes
·
View notes
Text
🎴Making my very own deck🎴
Pt. 1
I've made my own divination deck before but it was based on a system I found in a book. This time I want to try and make my very own deck with things that I want included.
I'm still not entirely sure what I'm putting but I'll figure it out as I go.
The plan:
Take some playing cards and glue them onto posterboard.
Cut them out
Use an ink pad to make colorful edges
Draw on the images and words
Color (not sure if I'll do it but I might. Might decide to use colored pencils or acrylic if I feel like it)
And that will be the plan! If anyone has suggestions for cards or questions about making them feel free to ask me!

#paganblr#witchblr#pagan#tarot tips#tarotblr#tarot#diy#oracle#art#art magic#witchcraft#making my very own deck
7 notes
·
View notes
Text
Funnily enough it's a set of celestial tarot cards from five below. It was the first deck I got and it was pretty hard to learn because of the lack of symbolism on a lot of cards. I like it a lot though! It's always been accurate for me and just has a familiar vibe.
Fav tarot deck and why, go!
125 notes
·
View notes
Text
Just a little idea I had
Because it's hard to get some herbs and some crystals what if I just made pictures of them? I could get some cardstock and draw the crystal or herb and use that in its place. Has anyone ever done this before?
30 notes
·
View notes
Text
I had a dream that five below was selling a really cool tarot deck with actual symbolism instead of Clipart they found on google
5 notes
·
View notes
Text
I downloaded joyofsatan pdfs files to make a post about the antisemitism but it is so much worse yall one of these files is literally called "white power" "The Jewish run sex slave" "The real holocaust" and so much more
I read them, yes, but just the titles alone show what kind of organization they are
Anyone denying the blatantly obvious fact that they are nazi adjacent white supremacists are more than likely also nazi adjacent white supremacists
All the proof you need is in their public library
474 notes
·
View notes
Text
🕯 Jewish Entities 🕯
Many folks know that Judaism is a closed practice, but don't always know how to spot appropriation. Here is a list of Jewish entities that aren't shared with Christianity, meaning they are closed to non-Jews.* This list isn't fully-comprehensive, but I've marked some of the more popular ones. (For Jewitches, this could also be treated as a list for Jewish spirit workers who want to reclaim some of these entities as part of our own path!)
*Note: Some of these entities ARE shared with Islam (another initiatory tradition,) so they would still be open for our Muslim friends to work with but still restricted to the general public. Those entities are marked with an asterisk*.
Angels
Erelim
Hashmallim
Ishim/Eshim*
Lailah
Metatron*
Se'irim
Demons
Agrat bat Mahlat
Alukah
Lilith
Mazzikin
Naamah
Samael
Tanin'iver
Creatures & Monsters
Broxa
Chalkydri
Dybbuks
Estries
Golems
Re'em (Unicorns are okay, just don't call them Re'em!)
Ziz
958 notes
·
View notes
Text
Ring witchcraft 💍
Right hand - Action
Left hand - Intuition
Gold - Success, power, wealth
Silver - Wisdom, truth, beauty
Thumb - Power & logic
Index finger - Decisions, leadership, influence
Middle finger - Intellect, focus, self worth
Ring finger - Commitment, love, ambition
Pinky finger - Divination, intuition
440 notes
·
View notes
Text
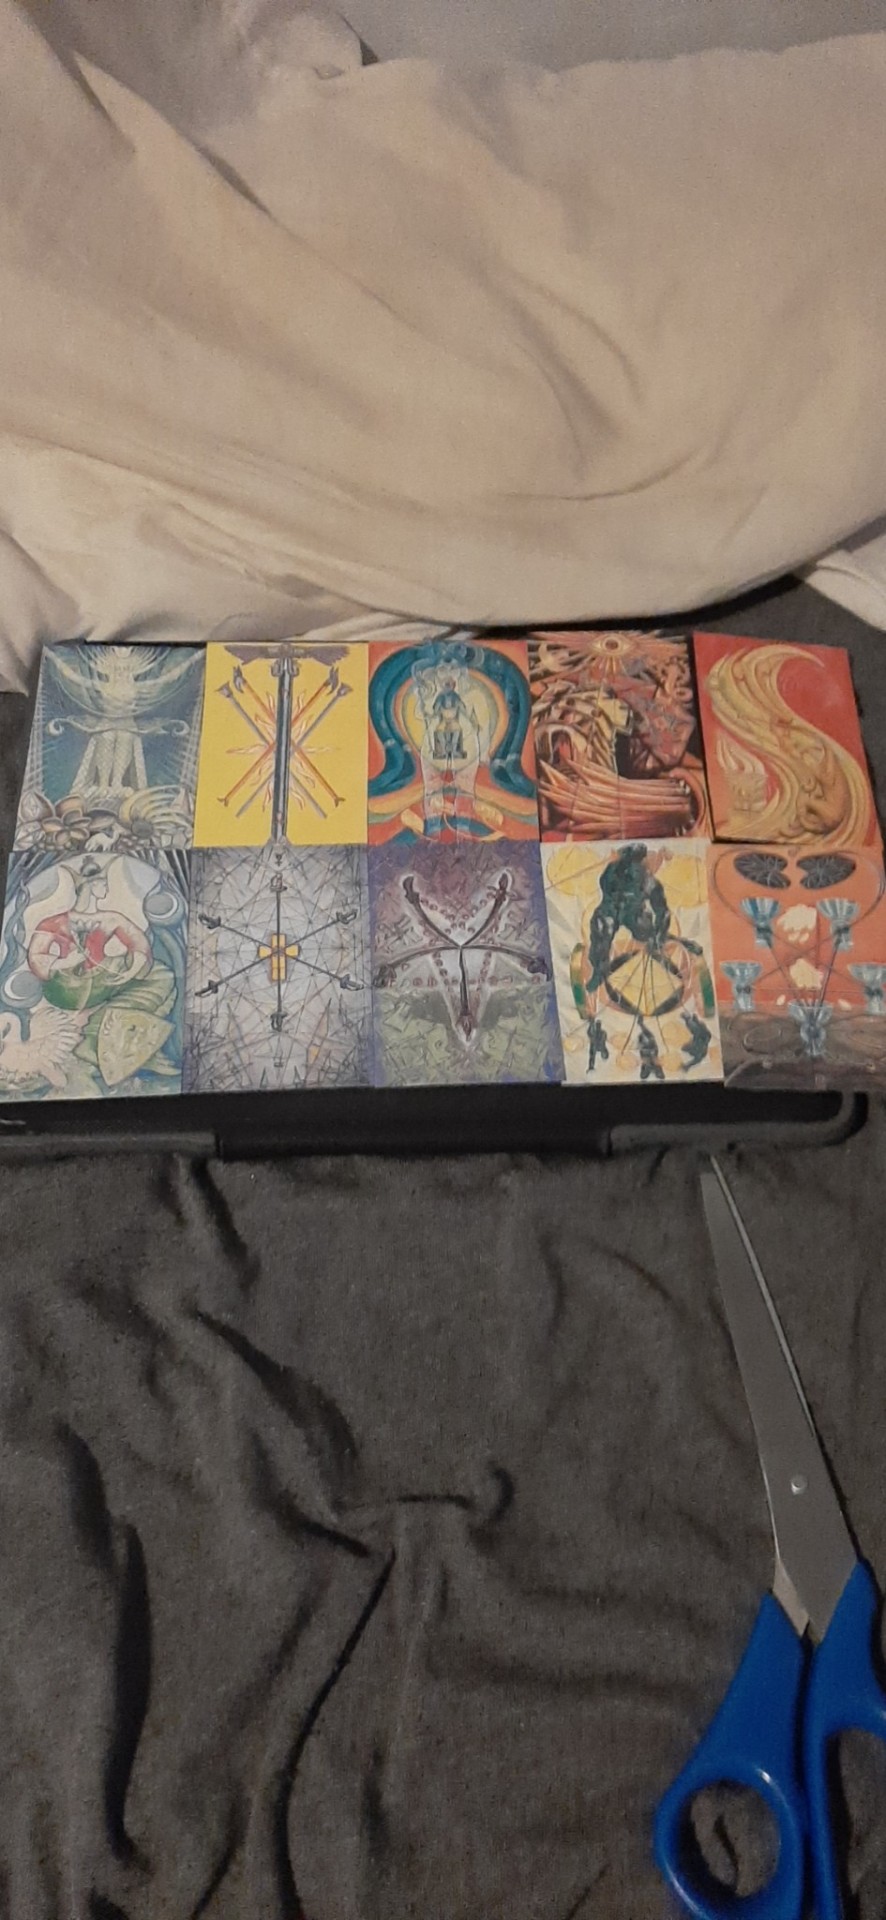
I trimmed the borders off of my Thoth Deck!!!
I'm really happy with how it looks!
3 notes
·
View notes