#worm compost
Text
Garden Report 23.01.07
So ... Happy New Year!
Was out in the garden new years day feeling rather sad but the day was lovely and I wanted force myself Out. I worry about the ancient fruitless plum tree. There is a section of heartwood exposed and conks are thriving. We always talk about taking it out but might have to be the year to avoid liability. This year has just begun but it has been really difficult and I don’t want it. If nothing else, it has to be topped heavily. The little sapling next to it is budding up to bloom so it needs to happen soon if the weather allows.
This is going to be the year that there we some heavy pruning, so much so that I am thinking we might have to rent a chipper. I like chips and need chips (both wooden for the garden and potato-kind for my belly ;) but that’s another avenue for discussion!).
I think I have tried everything possible under the sun and am reverting back to some older gardening styles. Mind you, this is all just in my head for now. I am wanting to take out the grow boxes but then again I want to raise them up higher. But, for navigation purposes, and not being boxed in (no pun intended) they are going. Most of the wooden box edges have rotted and all building materials are too expensive. I think I am going to go with a perpetual hotbed with French intensive style of growing . I really feel this is going to be the best option for my location after everything I have tried. It will raise the ‘soil’ temperature, keep moisture in the soil on an even keel, keep compost in direct line to consumption of plants and hopefully, less work for higher yields ... and we all like those higher yields/less work ratios! I hate hugell mounds due to the vermin population tunneling and setting up housekeeping so I am hoping that a high hotbed will not have the same problems. Fingers crossed! Time will tell if I can get this project launched.
Garlic that we planted late is popping up just as wonderfully strong ... as if we weren’t late; it don’t care! its super garlic! old variety aka heirloom & robust. I really need to plant more garlic and onions because for some reason they are MIA at the grocers. Need more grow space -- Looking at perhaps taking out a pergola that is next to the area of the summer house. I hope that opens up more space for container growing if I can beat down the monster kiwi who came back From The Dead With Vengeance! The bamboo and kiwi are now courting cousins of the third kind and a bane to my sense of permaculture garden dwellers. I can yell Not In My Garden but obviously, yes, in my garden, in spades [cue theme song mash up Who Ya Gonna Call from Ghost Busters and Bad Boys from Cops].
Hens, I love my hens. For Christmas I got a ceramic art tile that says “I get by with a little help from my hens”. We jest that they are my therapy chickens but you know, its not far from the truth. Maybe I can get just a few more (chicks) and slowly integrate ... I’ve done that before but its like some of the ‘blended family’, they tolerate each other and pretend to play well with each other while being watched BUT technically have two micro flocks.
The Worm friends, I confess, I have neglected. I just have not been mobile enough to be fussing over them. They are probably happier that I am not disturbing them. They are hardy stock and don’t complain (unlike my vocal chickens!). When/if I do my hot mounds/hot beds I will introduce part of the population to those situations. I had divided my vermiculture holdings into two boxes so I will probably take the older box for the beds since that box will probably be composted the most (?) idk. Have to wait and assess.
I have my plastic ammo can of seeds that I keep my newest seeds in. I have my older seeds in a shoe box and need to Do-A-Dump garden which is kind of fun. I mix all my old seeds and broadcast sow into a single bed. If it grows, huzzah! If it don’t, it won’t and just nestles itself into the compost cycle of things. I have to do this every couple of years because saving, sharing and purchasing happens more than what I can use for my small patch at one time so it all sort of just gathers up and accumulates to a point of action is necessary ... I could make seed bombs but my experience it, they don’t do well. Cute idea, big on the feel good aspect but really not best situation for the germinating seeds. So we do the Do-A-Dump so they have a better chance of surviving.
So this is the update of the garden doings -- most of it just plans while we wait through the Winter months. Hope everyone is planning and dreaming of gardening, both big and small.
#catholic gardener#gardening#garden#2023#winter#permaculture#vermiculture#hens#seeds#new plans#old ideas#seed bombs#hotbeds#hot beds#compost#worm compost#pruning#trees
4 notes
·
View notes
Text
Fall Gardening 2023
View On WordPress
1 note
·
View note
Text
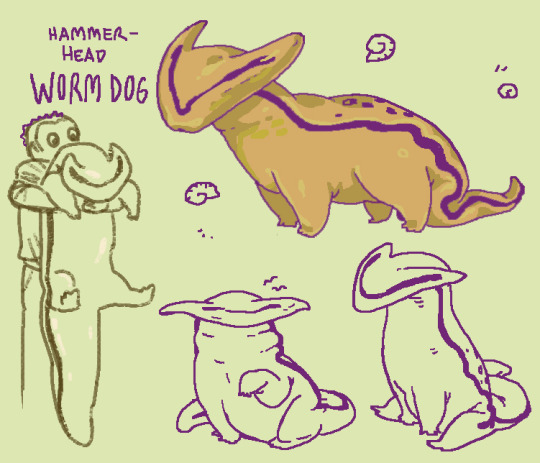
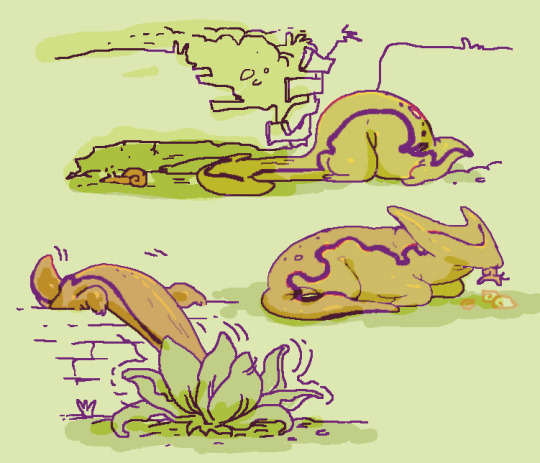
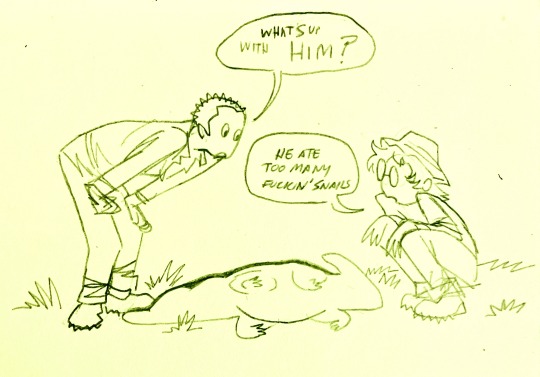
the garden i tend at work is getting overrun with snails so i thought about a world where we acquired a domesticated a "working dog" breed of hammerhead worm (they eat snails and slugs and worms) that is also. a puppy. Bred to clear vegetation of common slimy garden pests. click under readmore if u wanna see the worm theyre based off of i think theyre really cute
Itch.io / Redbubble / INPRNT / Twitter / Patreon


#in this world hammerhead worms are not a noxious invasive species im just having fun#art#my art#hammerhead worm#wormdog#vyscera#his ass is NOT allowed near the worm compost bin#worm
12K notes
·
View notes
Text

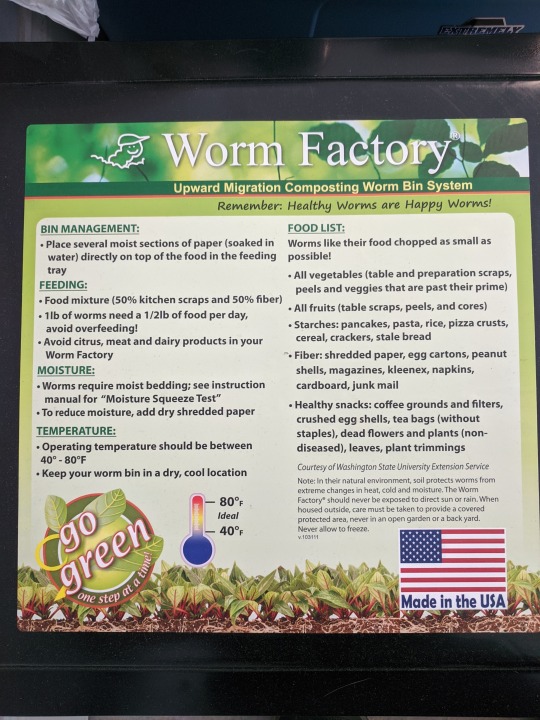


FINALLY got my worms migrated into their new home! I picked up a Worm Factory 360 and got it ready for them. The instructions for setting up the bedding were really clear and the kit came with everything I needed. I feel very silly for not having purchased one of these in the first place, honestly.
The bin has a pretty small footprint and will live next to our bulk paper recycling bin. The lid has a great basics to remember list.
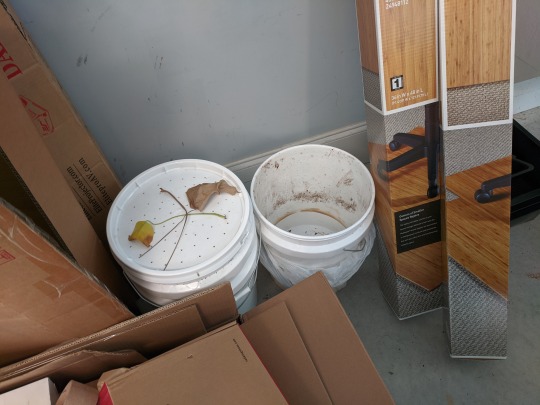
I moved everything in my old bins (the white buckets) into the first tray that sits on the stand. I layered the bottom of the bin with some paper before I dumped the stuff in.
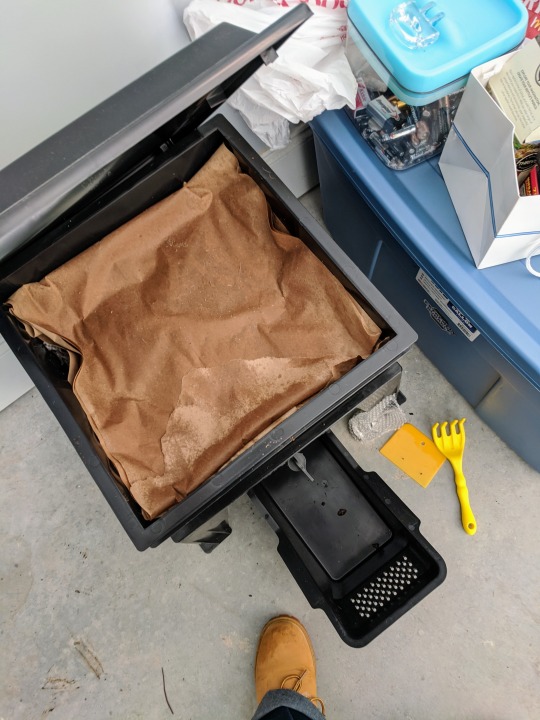
Then I mixed up the shredded newsprint, pumice, coco coir, and mineral powder as instructed in a bowl. I used some of the old worm tea to dampen it further.
After that, I put the new bedding in another tray on top of the first one. I dampened some packing paper to make a new worm blanket.
Left it alone for a couple of days before I added anything. These worms will likely mostly be fed on coffee grounds, banana peels, and onion skins. Those are just the things we eat most often.
I'll add a new tray in a couple of months. Will write about it when I do, I suppose.
1 note
·
View note
Text
I got to steal the like 20lb bag of coffee grounds from work today the worms are going to love me >:)
0 notes
Text
Lately I've been pleased whenever I find a way to make use of something that would otherwise get thrown away; for instance, I learned that you can use scrunched-up aluminium foil to scrub pans and pots, instead of that ball of wire you can buy!
The walnuts that you can't completely clean out of shells, are a great bird snack, who can get their beaks in there. Fruit that is starting to go bad/already has gone bad, is a great food for butterflies. Any food that's starting to get rotten can be a great addition to a compost pile and a snack for any worm. Citrus peels can be used to infuse vinegar to make nice-smelling cleaning solution. Or they can be made into sugared candy! Lemon slices that make a great winter decoration, can be used as a halloween decoration later when they turn black. Any small carboard box you have can be used for organizing, and if you have a big one, you can put a wooden board on it and create a little shelf to put plants on! An old cracked aquarium can be used as a little greenhouse, or an extra shelf on top of a surface. Old newspapers and old clothing can be cut into strips or tubes, and weaved into baskets. Old paper egg cartons can be soaked, blended and then turned into paper. Any plastic container can get a hole at the bottom and grow a plant in it.
Please tell me more things that you know how to reuse that would otherwise just be thrown away! I want more of this knowledge.
153 notes
·
View notes
Text
A wizard that uses a stiffen and harden spell on his earthworm familiar to use it as his magic staff. He turns it to have its mouth face the ground and he automatically gains an immense burrowing speed, plus a fantastic source of nutrient rich fertilizer.
#wizard#wizardposting#wizard shit#wizardblogging#wizardblr#d&d#dnd#familiar#worms#earthworm#make up a guy#character idea#composting
180 notes
·
View notes
Text
Make a worm composting bin!
Worm composting (also called vermicomposting) uses worms to break down your compost faster and with less smell. Plus you can make the bin whatever size you want, which makes it a great option for smaller spaces.
Here are some instructions to DIY your own worm compost bin.
Here are some instructions for a smaller DIY bin with 5-gallon buckets.
Here’s another set of instructions for a 5-gallon bucket worm bin.
Go forth and put some worms in your compost!
148 notes
·
View notes
Text
youtube
We're a 10-acre urban farm in Phoenix, Arizona on a mission to turn "garbage" into food.
We use the power of Red Wiggler Worms, Black Soldier Flies, and hot compost piles to turn Valley waste into natural gardening products, vegetable starts, and produce.
What I appreciate about this video is that the whole process is delivered by someone who has obviously hosted this tour many times. His delivery is so clear and informative.
Despite the repetition, his enthusiasm for worm shines though the whole time!
31 notes
·
View notes
Text
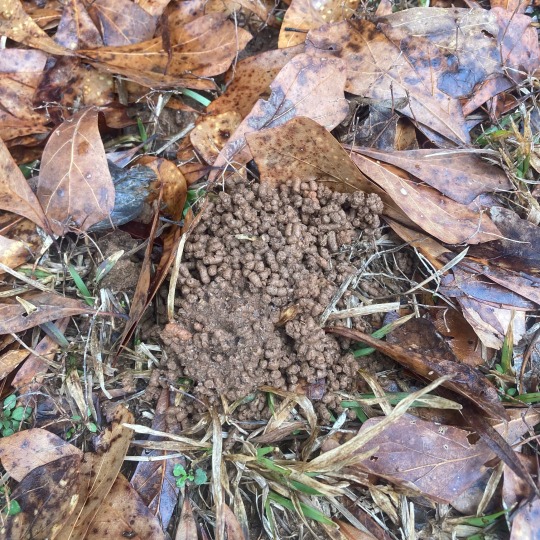
Aeration… air, worm holes, elimination of waste that is a benefit to the entire system. These piles of worm poo give me inspiration. They excite me to continue to create healthy soil. They encourage me to share with others the dimensional joy of observation. Nature is abundant and we are responsible to keep it that way.
Save the soil.
Save the butterflies.
#visionary growing solutions#compost#simple food small farmz#biodynamic#soil#soil biology#atlanta urban ag#biodiversity#permaculture#worms#worm poo#worm castings#simple food small farmz air bnb agriculture experience#simple things#atlanta airbnd experience#air bnb experience atlanta#simple food#maurice small
27 notes
·
View notes
Text
Video description: 1 minute of me talking about the love of my life, leaf mould
If you like videos like this, check out the Rumade YouTube channel!
369 notes
·
View notes
Text
writing a letter to worms
gonna send it in the compost
35 notes
·
View notes
Text
A fresh baked potato is so good, but a leftover baked potato the next day is so so so so so bad.
#food#so hard and lumpy and unmashable and blergghh#what happens? where does all the nice texture go?#I hate wasting food but I don't think I can bring myself to eat this last potato#I think it'll have to be compost and then the worms can eat it#potatoes
69 notes
·
View notes
Text
In honor of earthworms on this “international earthworm day”, we give you 455 red wiggler worms.
Sound On!!!
#vermicomposting#earthworm day#compost#soil#permaculture#biodynamic#food systems#atlanta urban ag#urban ag#food access#soil food web#biodiversity#soil creation#worms#organic#polyculture#soil health#food justice#food security#food sovereignty#maurice small
153 notes
·
View notes
Text
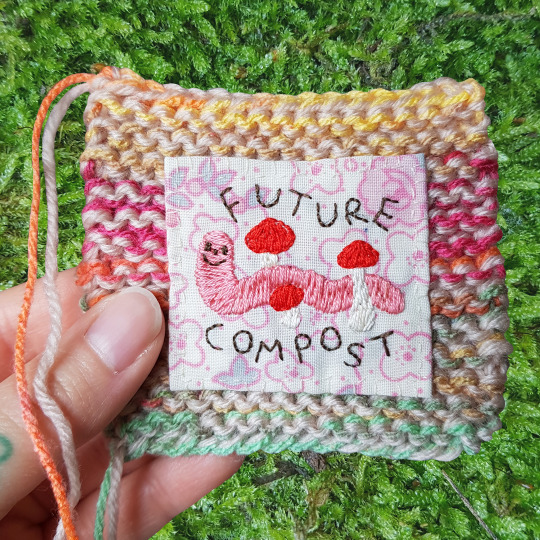
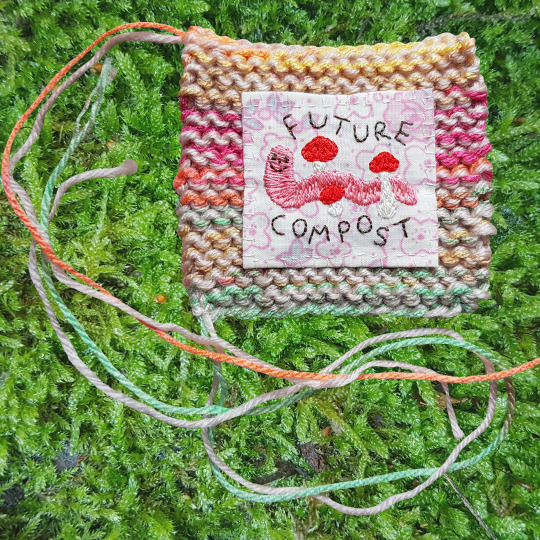

i made another of the future compost patches and it sold already (thank you!) so i'll make another soon. the fabric on knit is so satisfying to me and i also love the worm's silly little face 😊💚
8 notes
·
View notes
Text
Worm Bin Tutorial
Disclaimer: the information I’m giving is based on my own personal experience and research. Some of the things that work for me may not work in a different setup. If you’re interested in learning more, I’d highly recommend the book “Worms Eat My Garbage” by Mary Appelhof.
Why have a worm bin?
It’s a great way to dispose of organic matter while minimizing methane emissions! Landfills aren’t set up for aerobic decomposition, so food scraps in landfills often give off a ton of methane emissions when decomposing, which is a pretty potent greenhouse gas! Also, worm castings are an excellent fertilizer/mulch/soil amendment.
A worm bin is super low-maintenance once you figure out what you are doing. It doesn’t smell bad and can be kept indoors—I keep mine by my desk in the winter! And I think it’s pretty fun. Also, your trash won’t smell as bad when it isn’t full of rotting food!
Making the Worm Bin
Really what you need here are two containers. One of them you put a bunch of holes in, and that sits inside the other container. The holes are important because they allow for drainage of water (which is then caught by the external container) and diffusion of oxygen. I used some kitty litter buckets for this, and they work great! The lid is really useful.

Pro-tip: you don’t need a drill to make the holes. If you have a knife or razor blade, you can press it into the plastic and rotate it, which makes nice, round holes.
The bin with holes in it sits inside the other bin, but there should be space for water drainage/collection and air permeation.
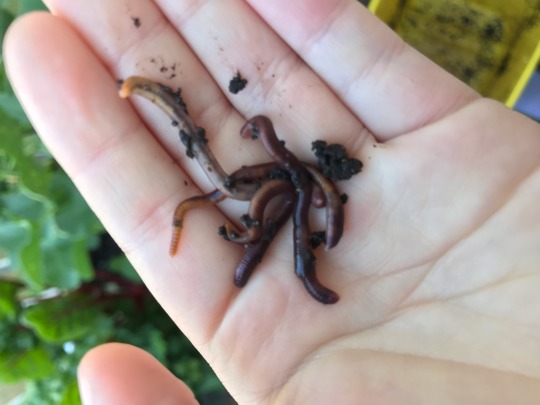
Worms
The worms you want in general are “red wrigglers” or Eisenia fetida. These are sometimes sold as bait worms, but in my experience the “red worms” are actually European Nightcrawlers (labeled “ENC”). Those can also work, but they prefer different conditions from red wigglers (I believe they live deeper in the soil) so they might not be as successful. You also need a lot of worms to start out with, like a pound of worms. I had the best success going to a local vermiculture business and getting a pound of mixed worms (red wigglers, European night crawlers, and Indian blues). I think the mix is useful since having a couple different species makes the bin more resilient.
Note: buying local is really beneficial here. When worms are sold online and shipped, the sellers “dehydrate” them a bit to help lower weight and prevent overheating. The worms will be perfectly healthy after you give them moist bedding again, but you’re going to miss out on bacteria and other beneficial critters that could come with the worms if they are fresh.
Setting up the Bin
An important thing I have learned from experience: you can’t just put food and worms in a bin and expect things to work. You also need bedding. Bedding is filler material, like newspaper or coconut coir. I mostly use newspaper I buy from a local vermiculture business. I tried ripping my own paper and once it got wet it turned into a solid layer, whereas the pre-ripped newspaper I buy has a fluffy consistency.
I’ve also tried using peat moss as bedding, but that didn’t work so well—I got a huge spike in the more population (maybe from acidic conditions?). Peat moss also isn’t great for the environment in general.
The bedding is important because worms shouldn’t eat too much food or too much of their own poop (castings) as both are bad for them. Bedding should be topped off when possible. When you add food to the bin, use a shovel to bury it in the bedding. This helps things rot properly, prevents mold and bad smells, and keeps away critters like fruit flies.
Other Critters
Your worm bin can and should have other critters in it! Some in my bin include mites and springtails, who both help the worms break down organic matter. However, there should be a balance between other critters and the worms. If something appears to be taking over, you might have a problem. I’ve also had fruit flies in my bin—this didn’t end up being a huge problem as long as I only opened the lid of the bin outdoors.
Worm Bin Maintenance
Once you get going, the worm bin doesn’t require much maintenance. I keep a freezer bag in my freezer and fill it up with food scraps, and once it seems the worms are mostly finished with the last feeding, I’ll thaw the bag and feed them again. (Freezing is helpful because it’s a convenient way to preserve the scraps, but it also helps to kickstart breaking down, since freezing damages things.) Be careful not to over-feed the worms, as this can lead to a sour bin and/or string-of-pearls (which is a pretty disturbing worm ailment).
Also be careful of what you feed the worms. You can look up lists of dos and donts online, but in general, stick to plant matter, and don’t feed them aromatic herbs or citrus. Also make sure to feed the worms plenty of crushed eggshells, as this provides grit and halos to regulate the pH of the worm bin.
The worms should be kept in a location with temperatures that are comfortable to humans. They don’t do well if conditions are too cold or too warm.
Make sure to dump out any water that accumulates and add bedding when it’s needed. I use this to water plants, and I haven’t had any negative effects, but some people will say you shouldn’t do that.
Once the bin starts to get full, you can remove worm castings. There are fancy ways to do this, but I just dig through the bin and scoop out any areas that are nearly all worm castings and then remove any worms/eggs that are in the castings by hand. The castings can be mixed in with potting soil or used on top like a mulch. (Although be careful: Ive heard worms are an invasive species in some areas so check before you potentially introduce them to the ground.)
Conclusions
So that’s it! If you want more information, I encourage you to do your own research. Although try to seek out multiple sources—not all the information out on the internet (or even in books) has been properly vetted. I can also try my best to answer questions based on my own experience, but I’m still relatively new at this.
47 notes
·
View notes
Last Seen Blogs

kitwing
Untitled

lavellenchanted
change your stars

karenfordonte
Caring For Donte

alunasky-blog
Alunasky

sweetgirl90-mily
I moved!