#the pieces would be about 1in each?
Text
does anyone besides me want digimon linking charms 😔
#the pieces would be about 1in each?#yes this is 01/02/tamers + lunamon and coronamon + survive lines#i also sketched out some jogress mons + devimon/ladydevimon/mastemon#aaaaaauuuuuuugghghghhh#if the answer is no id probably just cut it down by half the lines and just do ones that include my top faves
21 notes
·
View notes
Text
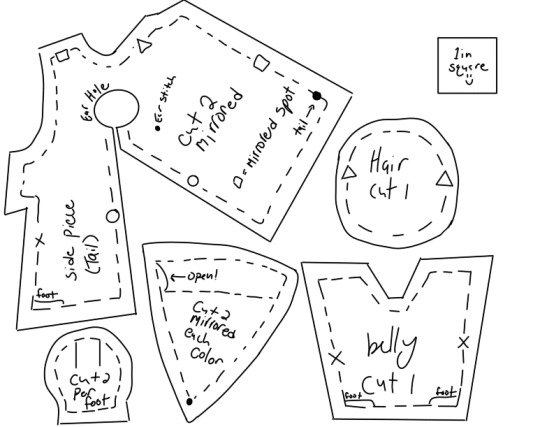
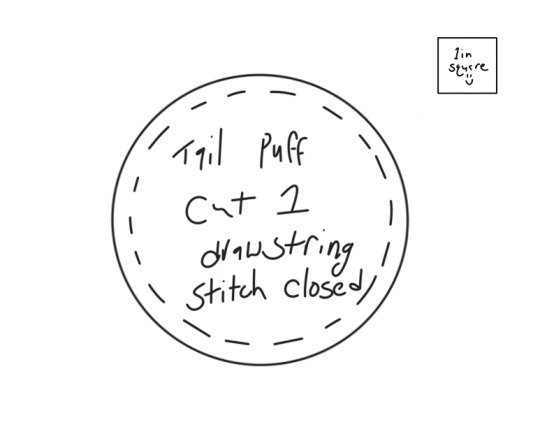
1998 Furby Pattern (Tail Version)
1998 Furby Pattern (Mane Version)
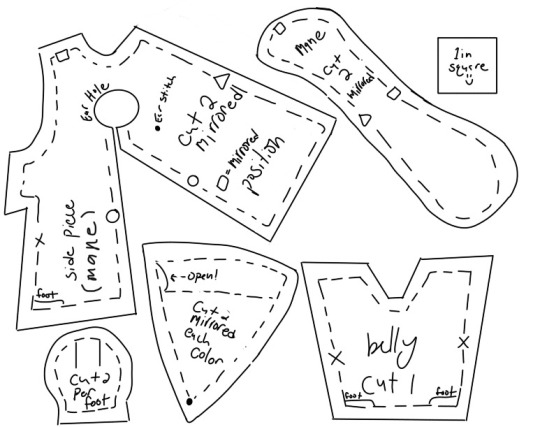
Do Not Crop Or Resize!
This pattern will print out proportional to a regular piece of printer paper (8.5in x 11in)! This pattern includes seam allowance! I have marked in where the ear gets sewn on, where the feet go, and to leave a portion of the ear open. Otherwise, just match up the markings! There is a note on the side piece to match squares with their mirrored position. For the ears "2 of each color" means the inner color and the outer color.
I guessed on the hair puff, so it may not be entirely accurate. However it seems to be about that size and based on the funky sewing on the inside, its a circle. PLEASE CORRECT ME IF IM WRONG AND I WILL ADJUST!
I dont yet have a pattern piece for the tail bc that requires disassembling one, which i will do when I begin my next custom.
I hope to make patterns for 1998 babies, 2005 adults, and connects before the end of the summer.
Edit: I have added the mane pattern! please note that the mane and tail version of the side piece are DIFFERENT!! You cannot use the tail side piece for a maned furby, or the skin will be too big.
Edit 2: Please don't forget to add the fabric at the bottom for the zip tie/elastic!! The band is about 1/2 inch wide, so I would suggest making the strip you cut 1 1/2 to 2 inches wide. I dont have a measuring tape on me rn, so I can't measure how long it is :/
Edit 3: Tail added! You might need to resize the tail one a bit bc for some reason the 1in reference square doesn't look the same size? Hope this helps! :)
#safe furby#furby#furby fandom#all furby#furblr#furbies#furby community#furby love#furbycore#custom furby#furby 1998#1998 furby#furby pattern#patterning#sewing patterns#tech stuff
705 notes
·
View notes
Text
Wednesday 19 April 1837
7 5
1 ¼
Slept in K.C. as since the 11th – fine morning but rather hazy and F40 ½° at 8 ¼ - breakfast at 8 ½ got the remainder of my books (leaving only the unbound magazines) from out of the library into the drawing room – sometime with Bligh in the hall – out about 11 – went down to the meer (having just had Charles Howarth to come tomorrow – told him not to bid the thousand for the coal – I would take his advice and hold back altogether) – nearly as full of water again as on Monday morning – then with Robert Mann + 4 stubbing old roots and thorns at bottom of coal pit field – to puddle the low pool and be about there in the afternoon – sauntered about during the mens’ dinner – had John Booth and one horse getting away the scraplings from the west tower to the pool-walk one (Michael) filling for him the rest wheeling stone from there John shot them down and getting 2 large pieces of rag-stone set along the top pool so as to make up the walk – one piece lying near the mouth of the arch for long – another piece brought from the garden (near the dry arches) in the cart and John got the cart all along the walk up the edge of the pool – took the horse out (could not turn) and men backed the cart out again – Had Holt (James) and Holt the engineer about 3 pm – H- (James) and his brother Joseph had levelled the Incline at 8am (Joseph Mann engaged to meet A- at Cliff Hill at 9 ½ she did not get there (having left here) about 11 or after and then gone to the school) till after – 1 or after – Incline 750 yards will dip 4 1/2in. per yard – the water will be 30 yards to pump (from the rag) – Holt, engineer, gave me a little pencil sketch – thinks the Engine will stand much better there than below – the geering and everything will be much simpler told him to have a new estimate ready for Mr. Harper tomorrow – price of everything as much in detail as possible – the boiler separate – price of such an one as that furnished to Miss Walker and the price of one or 2 stronger and better giving the capacity and weight of each – there will be as much stuff to move for the platform here at the top of the bank as in Godley Lane? I must look at the ground and calculate tomorrow if I can – it seems as if the plot to be levelled 84ft.x28ft. or 28yardsx28yards = 784x4 (it will probably average about 4 yards deep of cutting) = 31136 yards cube + a corner that may perhaps contain about 150 yards cube more – suppose there will be 3000 yards cube to move + 750 yards of Incline 2 yards square .:. 750 x 4 =3000 – left the 2 Holts to drink their beer after having stood talking perhaps ¼ hour or 20 minutes – H- engineer doing an engine for Barnetts’ corn mill in the old lane on the Ovenden brook – steam to assist the water power – wheel 5ft. 6in. or 6ft. breast and 30ft. diameter calculated at 20 horse power to turn 7 pair of stones and their appurtenances – H- E. thought my wheel could only keep 3 pair stone going during the 2 or 3 dry months in summer but would drive 6 pair in winter – H- (James) owned the red brook was better than the Ovenden – I hope .:. that I shall be able to provide for 5 pair of stone in spite of H- James thinking I cannot – after leaving the H-s with Robert and c° could not make the low pool (the 2nd pool from the top) water tight – left it to empty itself – Jack Green and John Irish staid stoning the pool-walk and Robert + 2 went down to the meer about 5 and I went at 6 for ½ hour – Booth there kept his men to finish setting the stone pen-trough, and Robert and his men staid to puddle the brook turned off about 11 ½ this morning because 2 men came to say Mytholm was standing for want of water –
SH:7/ML/E/20/0049
the brook turned in again 5 for a couple of hours – Had Joseph Mann about 5 – A- will want 5 men for a fortnight to open the water closet drain at Cliff Hill – 150 yards of new drain to make 2ft. 1 (or 3) in. wide and 20in. high – must be taken out 4ft. wide and 3ft. deep at least – covers should be 4in. thick and 3ft. 1in. (or 3) wide and bottoms should be from 1 to 2in. thick – came in at 6 40 – dressed – dinner at 6 50 – tea A- poorly and lay on the sofa – had just written so far at 10 ½ when she came to me very poorly – indigestion swelling of the extremities and stomach, lips and face – called Cookson who got her undressed as quick as possible and I carried her to bed – gave her a glass of hot very weak Madeira and water and got her feet warm water at 11 20 – very fine day F42° now at 11 25 just left A- to write the last line or 2 and lock up my things – went back to her took her lastly ½ glass more weak Madeira and water (hot) and left her at about near 12 then looked into the newspaper and sat reading till 12 35 – just opened A-‘s door and listened for a minute or 2 – she seemed nicely asleep
4 notes
·
View notes
Text
Leashes:
Leashes are probably one of the most important tools you have for your dog when leaving the home, besides a good collar! A good leash is dependent on what you want to use it for, and what kind of dog walker you are. Leashes are very important, in most places you are not allowed to have your dog off leash at all in public, or only if they are well controlled by voice commands. I recommend keeping your dog on a leash no matter what; just because you trust them to play nicely doesn’t mean other dogs will.
Some things to start with: firstly, unless it's a picture I took of a product I own and love, I will not be posting to this blog about actual products because I currently am not affiliated with anyone or have affiliate links, nor do I plan to try and get rights to images I don’t own. If this changes in the future, I will be sure to update my info and let you guys know. Secondly, just so we don't get confused, leash or lead mean generally the same thing, they both refer to a long piece of material that you attach to a dog in order to keep it from straying.
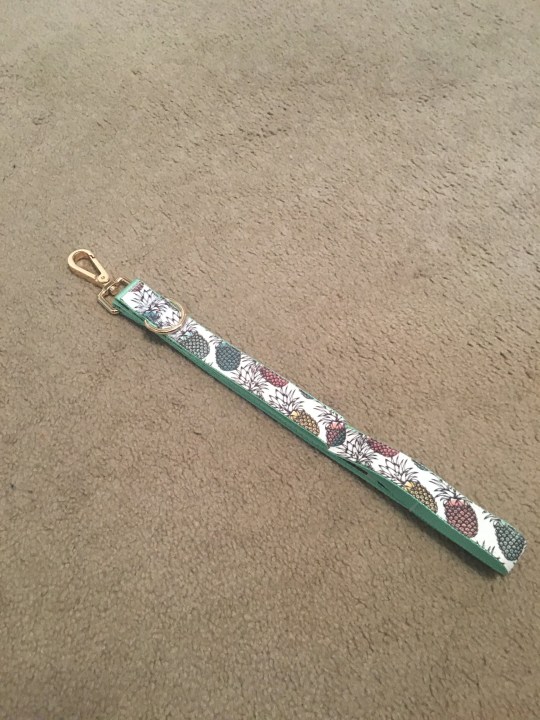
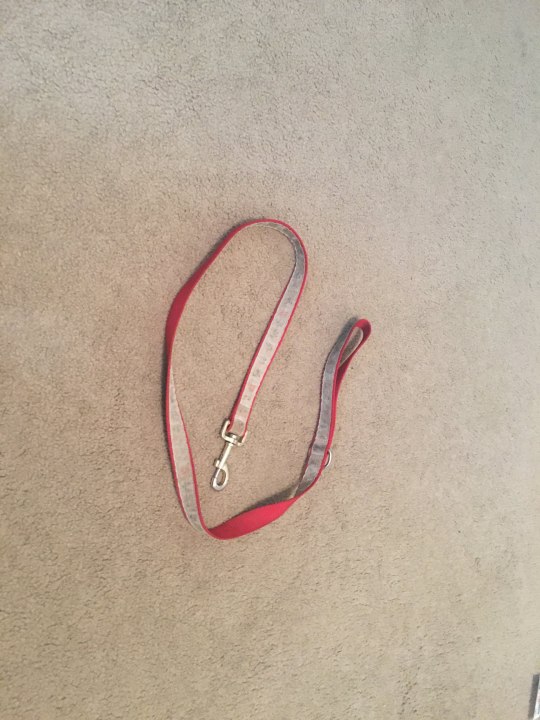
So first off is your standard flat leash, a six foot nylon(or other strong material) leash that is typically 1/2-2in in width. It's usually your cheapest option at the dog store, though you can splurge on really expensive pretty ones. These get you from point a to point b. They also come in four foot leads, which are useful for keeping your companion closer to you without having to wrap up the excess. These types of leashes are great when you’re just starting out or need something without frills. I definitely recommend having one or two of these hanging around your house; personally I like to use them when we’re going out for a fun trip or walk rather than work. A good basic leash will be strong enough to hold your dog and not break when they pull. For example, while a 1in lead may be too heavy for a toy breed like chihuahua, it may not stand up to the strength of a great dane. Typically, for most medium to large dogs a 1in width is enough. (For reference, the pineapple leash is a pretty one I haven’d used yet. The red and white on is a leash I bought for Harley when she was a baby. Its obviously well loved.)
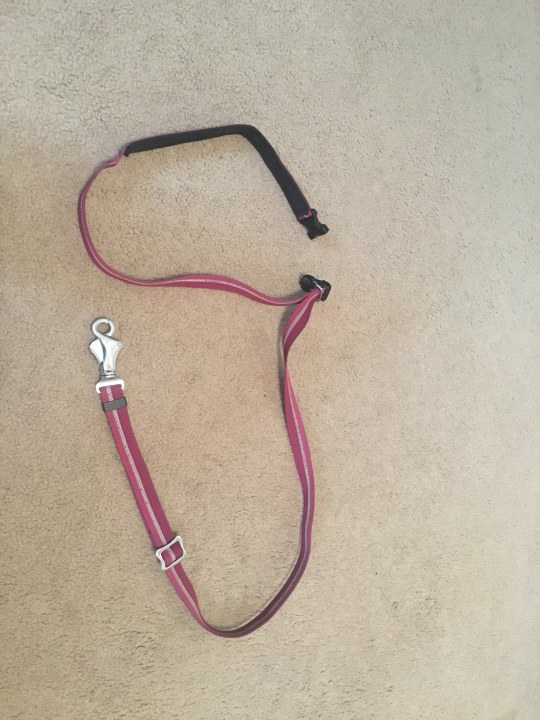
My personal favorite type of leash is the waist or hands free style leash. These leashes usually have an adjustable portion that you can either wrap around your waist or body, leaving your hands free to do other things. I use these when I am out and about with Athena because it makes doing my errands easier. The drawback to these kinds of leashes is that they take some time to get used to. Rather than being able to go in many directions, these leashes often have a very short radius for your dog to walk around with. This means that you have to get used to working as a team while walking together because otherwise you may end up tangled up on the floor. A dog needs to understand directional cues from you in order to successfully work with one of these leads. This doesn’t mean you have to train them in things like “right” or “left’; they just need to be able to follow your directions and read your body to see where you plan to go. With some practice you will be able to use these in no time.
Leather leashes are long favored by the training community. They’re extremely durable when well taken care of; one of the pet parents I took a class with had one from her childhood that she used to train her first dog with. When you buy one new, it will take some time to break in, meaning that it may be very stiff or have some edges that can leave marks on your hands if you have a dog who likes to pull. Leather is also a strong material, it will stand up to strong pullers unlike other types of leashes. I personally have never had the money to invest in a leather leash, though I have heard the exaltations of its proponents.
Flexi leads/retractable leashes are my least favorite type of leash. Now, I am going to admit I am a little biased towards these, because oftentimes when I’ve encountered these in the wild they are attached to owners who don't control their dogs or read canine body language well. Retractable leashes have a hard plastic handle, which contains a cord that extends or retracts automatically based on tension from the dog. They often can be locked at a certain length. Pros of retractable leashes include that the plastic handle is often easier for people who have issues with gripping things and they allow the dog a greater range of freedom in the distance they can go. The leash cord itself is typically lightweight, making them easier to use with smaller breeds. One of the biggest considerations when choosing this type of leash is making sure that it is rated for your dog's full grown weight, otherwise you run the risk of it snapping and losing your dog. Personally, I don’t like taking that kind of risk with my dogs.. Another concern with this type of leash is that it doesn’t allow the handler nuanced control of their dog. This is a concern because whether or not that dog is well behaved, other dogs may not be and being able to rush into another dogs space can turn very bad very fast depending on how the other dog reacts.

Traffic leads are short leashes under four feet, usually around two or three. These leashes are short and sweet, and mean that you have your dog up and close to you all the time, which can be especially useful in urban environments. Traffic leads are often used by service dog handlers, because their short length means they can drop the lead on top of the dog when they need their hands and easily pick it back up again. Traffic leads, like waist leashes, require good teamwork between the dog and handler because you are right on top of each other. I have used a traffic lead in the past, however I found it wasn’t as useful as I hoped it would be as it was too restricting of Athena’s movements.

Slip leads are a type of leash that uses a slipknot type loop that goes around the dogs neck. These are especially useful to those who have low mobility, and for picking up dogs running at large. Slip leads do not require a collar to use. A major drawback of the slip lead is because it works with a slipknot, it is very similar to a choke collar, meaning that it can tighten around your dogs neck a great deal and choke them or cause them to cough. However a dog who walks politely on a leash faces very little harm from a slip lead. I personally find that the benefits of slip leads outweigh their risks, because theres no way to get a collar on a dog running along a highway. I also like the convenience of a slip lead for quick trips to the drive thru because it means that I don’t have to clip and unclip the lead from my dog. You may also find these at your local vet clinic, as they are a way to easily leash a dog who may have come in without one.
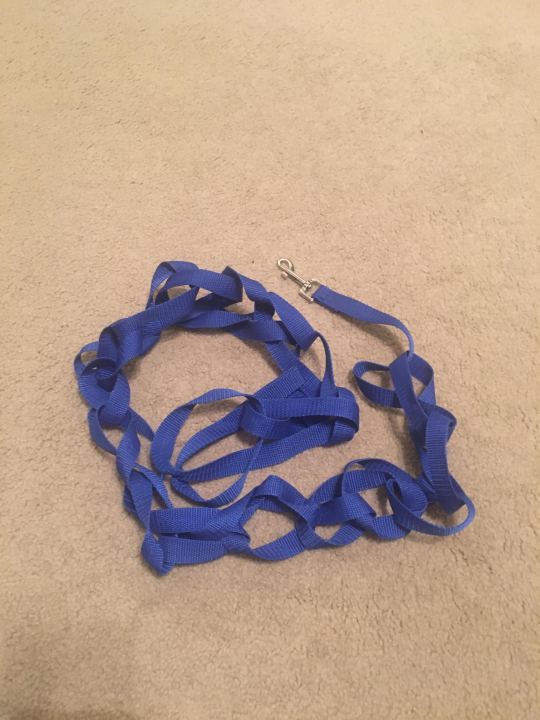
Finally, the last type of leash I will talk about is the long line. A long line is a very long leash, usually over 10ft. These are used to help train a dog recall in a large open space like a park. I’ve used mine very little because I bought it just before last winter, and then the pandemic happened so its mostly spent its time hanging out in the leash pile, hence the poorly done daisy chain. Long lines are typically beneficial to people who are training working dogs in areas such as hunting or schutzhund.
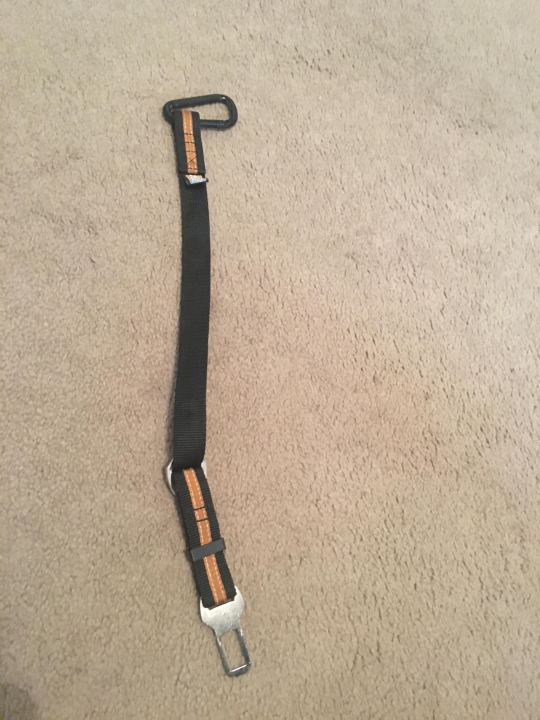
Bonus round: Though not technically a leash, did you know you can get a seat belt for your dog? Doggy seat belts are similar to a short lead in length, and have a seat belt tongue(the metal part that goes into the buckle) and attachment point so that your dog is restrained. These need to be used in conjunction with a harness because using it with a collar can lead to injuries. Seat belts for dogs work wonders to keep a dog out of your hair and in the car, even when the windows are down. However, a caveat: according to Center for Pet Safety, who did tests on harnesses in car crashes, there are only certain ones that provide your dog with protection. Read more here.
To keep in mind: there are a lot of other considerations that go into choosing a leash. One of the big ones, do you need/want a padded handle? Many leashes made today have neoprene padded handles that reduce the amount of pull damage your hand takes, and are well worth it for the comfort. Reflective materials are also an important consideration, especially if you plan on doing a lot of walking during the dark hours in the early morning or winter evenings. They even make leashes now that light up at the press of a button. You may consider having several leashes for different occasions, I know I have close to a dozen now even though I only have two dogs. Anyways, that's it for this post! Let me know what you think in the replies/reblogs.
2 notes
·
View notes
Text
Pleated Skater Skirt (with suspenders)
Materials--
-3.5-4 yards medium weight fabric
-4 slide buckle adjusters
-1 zipper
-1 button set
-black thread
-regular and zipper foot
-iron
-dressmaker’s pins
-tape measure
-fabric pen or chalk
OPTIONAL: two small squares of fusible interfacing, to stabilize the buttonholes

[ID: notes for the skirt, including an overview or materials, and a key for the measurements for each piece.]
One, Prep. Always start by preshrinking fabric in the wash. This is also a good time to see how much shrinkage you’ll have to deal with regarding this fabric, so you know for the future whether you’ll be able to regularly wash and dry it or not. If you’re not sure how the fabric is going to dry and you’re worried about a lot of shrinkage, just cut off a small, palm-sized square, and dry only that. It’ll give you a good idea of how much the fabric will shrink before you shrink, you know, the whole thing.
While this is washing, it’s usually a good time to clear yourself a space to work. You’ll need a decent amount of floor space for this project initially while making the pleats, so keep that in mind when setting up a workspace. I usually try to work near outlets, because ironing is very important while sewing. Trust me; I didn’t think it was and would often bypass it, and that wound up leaving so many otherwise lovely projects a little off.
>Note: while waiting for the fabric to wash, I turned two of my slide adjusters into makeshift “D rings” because I didn’t have any lying around, and these are basically the same thing. (Also I still have like 40 slide adjusters laying about.) To do this, just take a butter knife and carefully pop off the middle bit of the adjuster. It took me five minutes, though I did keep getting distracted by an episode of Drawfee and my cat. This step is also technically unnecessary -- you can just hide the slide bit when you sew it to the lower strap -- but I don’t like the very faint jingling noise, so I removed it. It also looks just a bit cleaner upon close inspection, but if anyone is looking that closely at the hardware on your skirt, you may have other problems.
Two, Skirt. Take and decide measurements. My skirt is almost a mini-skirt when accounting for my body, so including the waistband, it’s 16 1/2 inches. Subtracting a 1 1/2in waistband, and then adding 3/4 inch of seam allowance (for the bottom hem and to attach the waistband), the length of the “♥A” measurement is 15 3/4in. “♥B” will be my waist measurement, 29in, x3, and then +2. In all, the length of my Skirt Piece will be 15 3/4in x 89in. It may seem like a lot of fabric now, but the pleats will be flat once ironed and sewn in place.
When you’re first starting sewing, numbers can be very vague and not mean much tangibly. A length that would be a miniskirt on me would not necessarily be a miniskirt on you. In these situations, it’s best to look at clothes you already own, and measure a final length from those. When cutting, remember that if you’re not sure, be safe and just cut a little more. You can always take away from the bottom hem later down the road, if needed.
Three, Waistband. The “♣A” measurement is however wide you want your final waistband to be, x2, + seam allowance. I typically include, in all, 1/2in of seam allowance for waistbands, because I sew two 1/4in seams into them. My “♣A” will be 3 1/2in, in all. My “♣B” will be my entire waist measurement, +2 inches. For me, this will be roughly 31in.
Four, Straps. Your straps, for 1in slide adjusters, will be 2 3/4in on 1/4in seam allowance. You will have to turn these inside out, and you want the final width of these straps to be just wider than the adjusters themselves to keep them in place. You’ll need the main strap, which will go through the slides to adjust the length to your comfort, and two much shorter straps, that will go through the D Rings. You can either cut two very long straps, and then trim the ends for your Δ-Strap pieces, or you can cut two “♦” pieces and two “Δ” pieces. The length of your “♦” pieces will be 50in (each!) when all is done, though. I like to have straps at a length where the metal of the slides are visible around my chest/shoulders, because I think it’s pretty, though this can be adjusted to be shorter if you’d prefer they only be visible from the back. All of these pieces will have an A measurement of 2 3/4 inches, while the “ΔB” will be 3in, to result in 1 1/2in loops. (You can make these shorter if you’d prefer, though I’d go no smaller than 1in loops, for both aesthetic and ease of assembly reasons.)
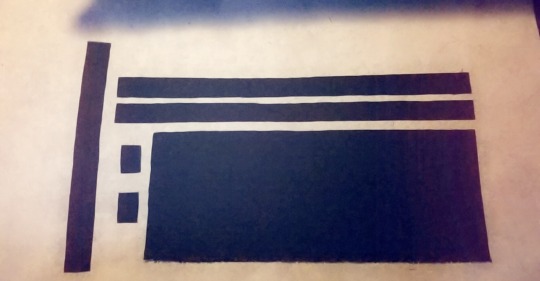
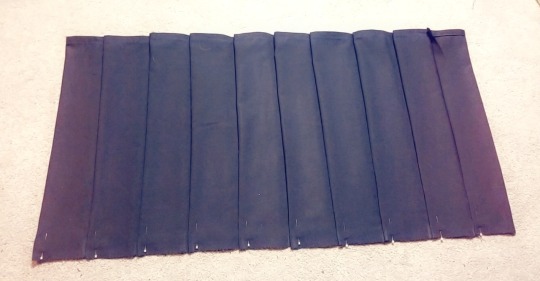
[ID: a picture of the six skirt pieces laid out together.]
Five, Hemming. Once your fabric has all been cut and sorted, lay your Skirt Piece out somewhere, completely flat. Before proceeding with anything else, take a minute to hem the BOTTOM of your skirt. You will regret it if you wait until you’ve pleated it. I like to do rolled hems for outside hems; take the fabric, fold it up 1/4in, and iron it in place. Then, fold it another 1/4 inch in and pin it in place. Secure with a straight stitch. This is time-consuming now, but makes sewing the seam much easier at the end.
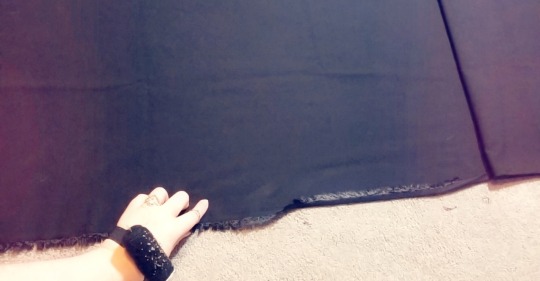
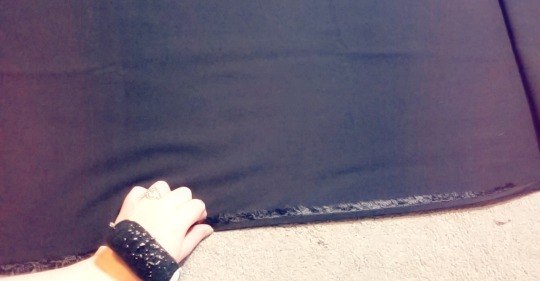
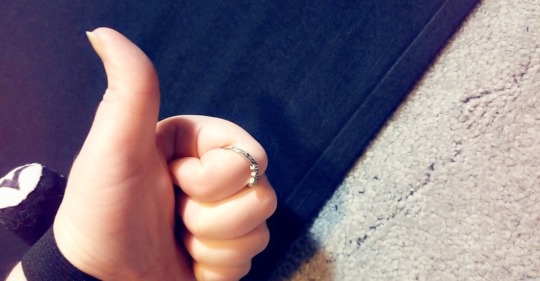
[ID: three pictures showering the process of a rolled hem. In the last picture, I’m giving a lil thumbs up.]
Six, Pleats. Starting at one end of your skirt -- I started at the right sight of my fabric, right side facing up, and I think this was a mistake, so start at your LEFT -- use your tape measure to measure one inch in, and mark it with some kind of pen, chalk, or marker. This flap will later home half of your zipper. (Note! I’ve used permanent marker on fabric before, and so long as it’s set into the fabric, it won’t bleed, and it won’t be visible on the final product.)
After that, mark every 3 inches, until you run out of fabric. Then, starting at the beginning, you will take your first mark and fold it over the second, to meet the third. The second mark will be the hinge of the fold. Think of it as the spine of a book, with the first and third marks being your pages. Repeat this until your entire skirt as been pleated. At this point, it should be the same length as your waistband. If you’re unsure of your pleats, you can do them all, and double-check your measurements, or you can iron and pin as you go. Whatever is best for you, but DO make sure to iron the pleats down flat, and THEN pin them in place. (You only need one pin per pleat, running parallel to the outer edge of the pleat.) I promise, this makes the sewing part MUCH easier!
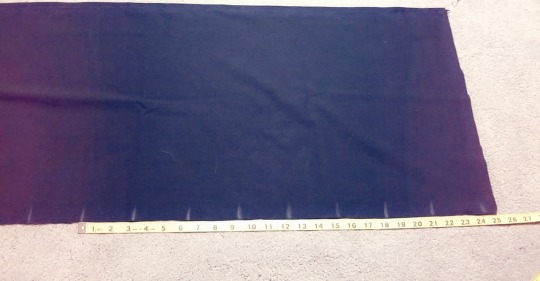
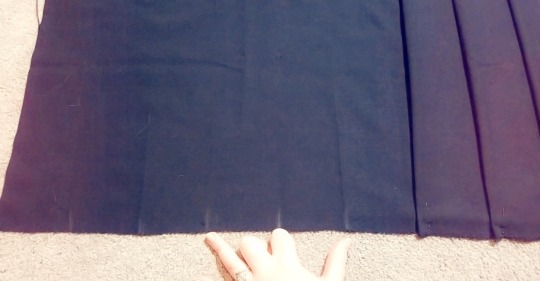

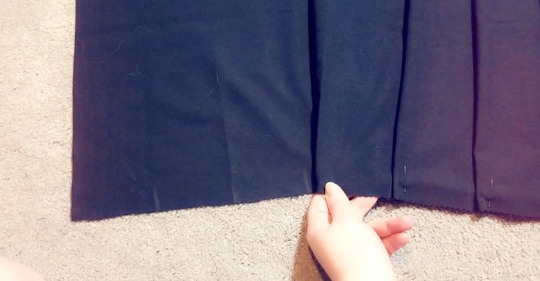
[ID: four pictures showing the process of making pleats. The first shows the measurements next to a tape measure, the second shows me indicating the three parts of the pleat, the third and forth showing the process of folding the pleat over.]
Seven, Pleats continued. With the pleats facing TOWARD you, sew the top hem at 1/4in seam allowance. You’ll want to make sure the “hinges” of the pleats are going through your machine before the open ends. Then, sew each of the pleats down. You only need to go about 1-3 inches down per pleat, depending on how “structured” you’d like them, but it makes the final result look much neater either way. I tend to go down a bit further, as I have a lot of hip, and don’t want to add unnecessary bulk there.
>NOTE: You can also sew the pleats in place, THEN iron them, though I find it easier to iron and pin and THEN sew the hem. Sometimes I wind up doing an extra bit of ironing afterwards, but it’s usually unnecessary.
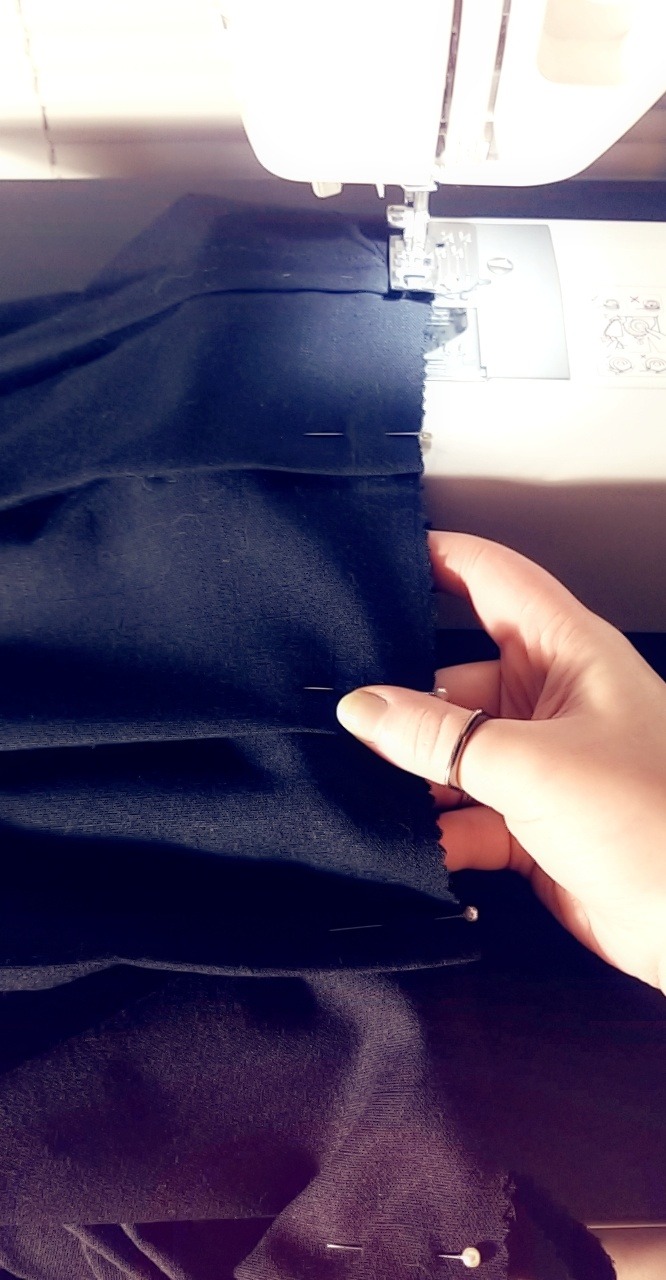
[ID: the skirt with all the pleats pinned in place, then the pleats being sewn down.]
Eight, Waistband continued. If your fabric has a wrong side, fold the waistband piece in half right sides together, and sew down the entire length at 1/4in seam allowance. Turn the tube inside out. (If you have a turner, this step is much easier, though you can do it just fine without one.) Iron the tube flat, and then attach your waistband to your skirt at 1/4in seam allowance. You can just go over the first line of stitching you made to seal the top hem of your skirt.
Nine, Zipper (AKA, fuck this). When I talked to my grandmother about how to attach zippers, she told me to hand-baste them first. For so long, I, as the foolhardy lionheart ingenue ignoring the advice of her wise mentors and elders would have, didn’t listen, and I so deeply regret this. What you’re going to do, young Knight of Yore™, is listen to me, because someone really should heed this sweet old woman’s advice. So here’s what we’ll do:
First, you will bring the outside seams of your skirt together, right sides touching. Pin them in place as far up as you’d like. Note that wherever you stop, this IS where the bottom of your zipper will be. I recommend leaving about 7 inches for zipper length, but that’s because I have quite a bit of thigh and butt to contend with. If you’re less worried about those things, you can get away with anywhere from 4-6 just fine, though I always prefer seven anyways. I’ve found it as a comfort spot for me when dressing.
Next, you’ll make a seam as normal up to where you’ve marked on 1/4-1/2in seam allowance, whichever you accounted for when cutting. Make sure to fully backstitch at the top and bottom of this hem. Next, laying your fabric flat, you’ll press this seam open. You’ll also press the remaining seam allowance on the fabric up to either side, so it’s perfectly flat. If you’re looking at the skirt from the outside, these two seams should be neatly folded, concealing the raw edges inside the garment. Once this is done, arrange your zipper over the fabric, and take care to pin it in place. At this point, you can handle the rest of the attachment one of two ways.
One, you’ll now hand-baste the zipper into place. I always thought this wasn’t a necessary extra step, but pins are hazards when sewing, and hand-basting is invisible and much safer. If you think you’ve done too many stitches when basting the zipper into place, you probably haven’t; if you think you’ve done enough, you certainly haven’t. Your zipper doesn’t need to be securely attached at this point, but it shouldn’t be shifting. Make sure the corners are in the proper place, and neither the zipper OR fabric have bunched at all. Now, you’ll be able to attach the zipper using your machine. Just follow the guidelines of the zipperfoot, arranging the seam on either the right or left side as needed, and attach. When you get to the bottom of the zipper, do be sure to turn your fabric and finish your stitches by going across the bottom of your zipper. If you’re using a zipper with plastic teeth, this WILL NOT ruin or damage your machine/needle, but you MUST take care. Use the hand crank to carefully go over the teeth; do not sew over it normally. This is a necessary step, as it will make your new zipper stop.
Two, you simply hand-sew the zipper in. I like to use backstitches when hand-sewing anything that needs to be sturdy. The process is much the same, but you need to pay slightly more attention that your stitches are not only secure, but straight, too. You’ll still have to make a new zipper stop, but this is functionally the same as above: just wrap the thread around the bottom of the teeth a few time to keep them securely together.
Both of these processes have pros and cons, but both will result in a very neat and securely attached zipper. Sewing is like cooking: do whatever you want, and as long as you like it and no one dies, no one is allowed to complain.
Nine-point-five, Button. You can technically do this Whenever at this point, but I recommend doing it now; you’re probably going to want to try the skirt on soon (for both necessary construction reasons, but also to just be proud of your progress). To figure out where the button will need to be, put your skirt on, and mark on the center of your waistband where you’d like the closure to be. Then, take whatever press button set you got, and following the instructions on it, attach your button to the fabric that will cover your zipper. If you don’t want a visible button detail, you can also just use press studs and sew them inside at the top edges.
If you think your garment is going to get a lot of wear and you’re worried for the durability of your fabric, cut out two tiny pieces of fusible interfacing, and attach them (as the package directs!) to the INSIDE of your garment over where your buttons will be. This will give it just a tiny bit of extra strength around the button, and won’t be visible from the outside of the assembled garment.
[Unfortunately, I did not take pictures of any of this.]
Ten, Straps. You’re going to assemble the straps much the way you assembled the waistband; fold each piece in half lengthwise, either pin or iron it in place, sew with a straight stitch at 1/4in seam allowance. Once they’re finished, turn them, and iron them flat. Here, you could either leave the straps as is, or make them look very clean by sewing two top-stitches down the length of either side, about 1/4in from the edges. It keeps your straps very flat, and gives them an extra little ~finished~ look.

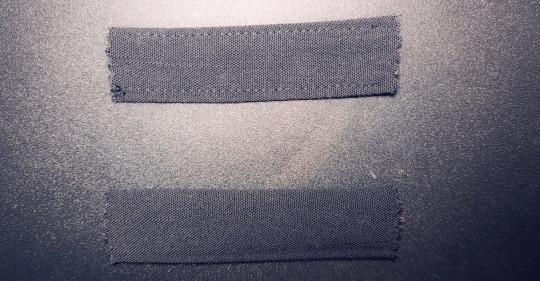
[ID: one of the long straps laid out, and then a closeup of the two small straps. On the bottom is the turned strap that’s only been ironed; on top is the strap once the extra stitching has been added.]
At this point, you’ll want to try the skirt on if you haven’t already, and ask a friend (or your mom) to help you mark out where you want your straps to sit on both the front and back of the skirt.
Now, you’re ready to attach the hardware. First, loop one end of one of one ♦ through the adjuster’s center piece. Make sure to give yourself enough slack to tuck the raw end up, and then sew this as close to the adjuster piece as you can comfortably get.


[ID: pictures showing the strap being threaded through the adjuster.]
Then, take the remaining length of fabric and thread it through one of the D Rings, BEFORE looping it through the rest of the adjuster.

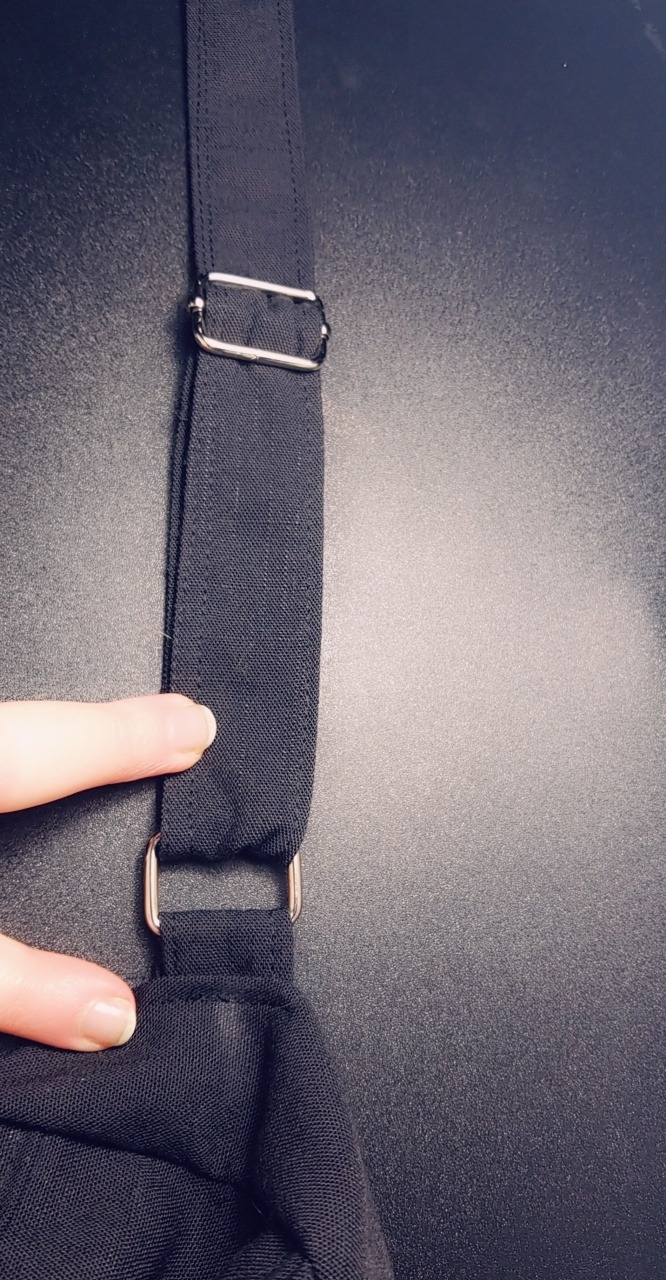
Take the Δ straps, and loop each one through the other end of the D Rings.

Fold the raw ends up so they’re hidden, and use a straight stitch to attach them where marked on the back of the skirt, as close to parallel to the top of the waistband as possible. You can also attach them a bit lower, stitching a box over the straps for extra security, but I don’t think it’s necessary, seeing as they’re not functional suspenders. Repeat with the remaining end of your suspenders on the front of the skirt. [You can see pictures of this above; I decided to attach the triangle straps first, but it really doesn’t matter what order you do it in!]
Eleven. Technically, you’re done! You have a fully assembled and CUTE AF skirt!
But since we live for Aesthetics here, let’s embroider something on. The great thing is, you can put anything you want, anywhere! Tiny daisies along the bottom hem, a large rose at the hip, ivy going up the hem-- whatever you want! Just be sure that once the design is on, you lay the skirt out again and iron it flat. And then you’re done! Go into the world and look adorable as hell!
2 notes
·
View notes
Text
THE UNSTOPPABLE RISE OF MR JOE ALWYN
https://www.mrporter.com/journal/the-look/the-unstoppable-rise-of-mr-joe-alwyn/
Fame is a funny thing, able to operate on different frequencies at once. Mr Joe Alwyn is a case in point. On the one hand, the 27-year-old British actor is still in the rising firmament – he’s not causing riots on the Tube quite yet. On the other, he is living through something exceptional, the subject of a million clicks. Who is this actor whose very first film was not only directed by Mr Ang Lee, but featured him in the leading role? Who has already modelled a campaign for Prada? And who has for the best of two years been the other half of Ms Taylor Swift? Not bad for someone who, by his own admission, “only left school about three years ago”. The star is born, but we blinked and missed the conception.
This winter you can see Mr Alwyn in the cinema three times, which goes some way to reminding us what a very good actor he is. In the gay conversion drama Boy Erased, in the feminist retelling of Mary Queen Of Scots and in the wacky period intrigues of The Favourite, he capitalises on that first incredible leap forward, when Mr Lee cast him, straight out of drama school, in 2015’s Billy Lynn’s Halftime Walk. Back then, he had sent in a tape, was shipped out to New York for a weekend and ended up staying two weeks (the film’s producer had to go out to buy him new underwear). By the end of it, he was a Hollywood lead.
“I really do owe everything to the first film that I got, and the breaks that came with that. I’m very aware that I’m very lucky that I’ve had these opportunities, and quickly,” says Mr Alwyn, who is polite, personable and determinedly down-to-earth, in a well-bred north London way. But here’s the thing: although he claims to be surprised, he actually doesn’t sound it. The key to his rise is probably his startling self-possession. The idea, for instance, that he might be on a rollercoaster ride is always kept to a determined minimum. “You just do the things you’ve always done,” he says with a shrug. Sitting in the restaurant of a smart London hotel, getting ready to do a junket, he looks utterly suited to the job at hand, although there is a sense of illusion to it. “I don’t own any of these clothes,” he laughs cheerfully, of his chic sandy-coloured jacket or his sweater with “interesting” holes. Then again, that in itself is indicative – he’s clearly most at ease in a role.
The films, then. In one he is a courtier, in another he’s a troubled soul, and in the third he’s a courtier with a troubled soul. It’s the latter which is the most straightforward for him. In Mary Queen Of Scots, Mr Alwyn plays Robert Dudley, 1st Earl of Leicester, the favourite of Queen Mary’s great rival, Queen Elizabeth I. Under Ms Josie Rourke’s direction, Mr Alwyn has the conventional role, a paragon of romantic love and loyalty. It could have been different: there’s a persistent rumour that the Earl pushed his wife down the stairs. In Ms Rourke’s telling, though, he’s the royal court’s sole decent bloke. “There’s definitely a darkness that could be there as well,” admits Mr Alwyn, and though he is only deeply complimentary about the project, you soon sense that he wouldn’t be averse to a little action on a staircase.
Boy Erased is an adaptation of the memoir of Mr Garrard Conley, relaying his experiences of gay conversion therapy in the Deep South this century, a deeply troubling system that continues even today. “It’s just crazy,” says Mr Alwyn. “The fact that those places still exist in some 36 states, and that [US Vice President] Mike Pence is on record speaking in favour of them, is just absolutely mad.” Mr Alwyn’s character, Henry, seems a pretty clear product of repression and homophobia; it leads him to do something terrible. “He’s kind of shiny on the outside, the all-American good guy, and then obviously kind of deeply cracked underneath. I like those contrasts.”
All of which leads us to The Favourite. In Mr Yorgos Lanthimos’ hands, the private life of Queen Anne, who died in 1714, becomes a darkly funny love triangle filled with sadism, lesbianism and a menagerie of pet rabbits. Ms Olivia Colman, as Queen Anne, and Ms Rachel Weisz and Ms Emma Stone have the peach parts, but Mr Alwyn has nearly as much fun as Baron Masham, a courtier in love with Ms Stone. Or, as Mr Alwyn puts it, an “airhead”.
Rehearsals didn’t involve analyses of Stuart history or their characters’ motivation, but rolling around the floor, screaming, singing, switching parts and tying their bodies together instead. “It was fun,” says Mr Alwyn matter-of-factly. And the results are no less surprising. What looks set to be a conventional ballroom scene turns into a weird avant-garde bump’n’grind; Mr Alwyn even seems to break-dance.
“The thing I like about it is that Yorgos has completely thrown out the textbook on what a period drama is,” says Mr Alwyn. “Who knows what it was like back then? It probably wasn’t as refined as we think it is, or as it’s often performed. It can be quite tidy… the edges can be sanded off a bit.”
What about his edges, though? Scratch as you can, Mr Alwyn presents a resolutely smooth exterior. This seems part temperament, part design. The son of a documentary filmmaker father and a psychotherapist mother, he might seem well-equipped for a job all about studying and empathising with other people. He knows this, but only because everyone has started telling him so. “I’m not good at answering these questions because I’ve never really thought about them,” he offers apologetically. He struggles to think what each parent gave him (he has a brother, too), eventually settling on his height (he’s a lithe 6ft 1in) and slight sarcasm from his dad; he says he doesn’t have anything “really mad and crazy in terms of hobbies”. Well, do you like football? “Football? Yeah. Am I allowed to say those kinds of things?”
Suffice to say that Mr Alwyn is aggressively, determinedly normal. He doesn’t consider himself famous, the attention hasn’t been overwhelming (“maybe bits and pieces at a time – it’s been a readjustment”) and he doesn’t even think he’s had to fight for his privacy, even what with dating you-know-who.
“I don’t think more than anyone else. I don’t think anyone you meet on the streets would just spill their guts out to you, therefore why should I? And then that is defined as being ‘strangely private’. Fine. But I don’t think it is. I think it’s normal.”
The next normal thing in his life is a drama about the slave-turned-abolitionist heroine Ms Harriet Tubman, an African-American saint to many. Is it true he’s playing a slave owner? “I am. I’m not playing Harriet, not this time,” he says wryly. To be clear, Mr Alwyn’s small CV already includes a Nazi, a slave owner, a rapist and an airhead. He laughs when they’re all lined up. “I mean, I don’t feel like they’re just bad, bad people,” he volunteers. “And I do think it’s interesting to look at the bigger picture of why people are the way they are.” With just a couple of honourable exceptions, of course.
The Favourite is out now; Mary Queen Of Scots is out 18 January; Boy Erased is out 8 February
99 notes
·
View notes
Note
Mind sharing your orange chicken recipe?
Sure!
I use only chicken thighs.
For breading:
Equal parts flour and corn starch. This go around, I did two cups each. Two eggs. Added enough water until the consistency of the batter was like pancake batter.
I cut the chicken up in about 1in pieces, battered it. Fried it in peanut oil. I fried it once, but I think next time I’ll do it in kind of a karrage method. Fry it three times over. It didn’t brown as fast as I would have liked for some reason.
For the sauce I did
3 cups water
1 cup soy sauce
1/3 cup hoisin sauce
A tablespoon of minced ginger.
2 cups brown sugar, 1 cup white
Had to use garlic powder cause I forgot to buy the fresh stuff. About a tablespoon.
Copious amounts of red pepper flakes. I think I did about two tablespoons.
The juice of one navel orange. As I boiled and reduced the sauce over medium high heat I kept the orange rinds, quartered, in the sauce the entire time.
Only thing I would do different is use a second orange and actual fresh garlic. I’m also thinking about adding rice wine and honey next time
4 notes
·
View notes
Text
Week1
GW:57.0kg
day1
CW: 57.7 kg
Waist: 26in
Thigh: 24in
Wrist: 6in
(guess i was bloated b4(60.3kg))
Breakfast: 40g water oatmeal
Lunch: lettuce, cucumber, bell pepper, chicken 50g
Dinner: 1 slice of bread with 2 eggs, + lettuce and cucumber
Snack: 4 almonds
In addition: water, coffee , tea
After day 1 i was so hungry I couldn’t sleep, therefore i had the almonds. Not sure if I should make adjustments or try to shrink my stomach
day2
CW: 58.6kg
Not sure why my weight has gone up this much.. I was working all day yesterday and didn’t have time to exercise. I’m assuming it’s water weight or I’m constipated so I try not to worry about it! The most important thing is to keep going... In truth I should plan eating less this day, as I’m joining a birthday party tomorrow, but I would like to be able to sleep.
Breakfast: <40g oatmeal
Lunch: 1.5 slices of bread, scrambled eggs (2??), with crispy lettuce, 2 slices of bacon and 20g(?) philadelphia cream cheese
Dinner: 300mL soup, 1 apple(170g) + 5g peanut butter
Snack: 3 small bites of cake.. 200kcal?
In addition: water, coffee
End of day note: frick!! I couldn’t help myself from cake at work today, but I hope I managed to keep 1200kcal... I think I should punish myself tomorrow somehow, but I’m not sure how. It’s important I don’t give up now. I ate this much dinner so I’ll be able to sleep without waking up from hunger and binge or smth... Been thinking I should find a model around my height I can look up to, and work towards.
day3
CW: 57.7kg
I know I will probably have to eat something before I sleep so I’m able to... Instead of lunch I will go to the gym.
Breakfast: 40g oatmeal
Lunch: Smoothie ice cream + sugar free soda = 78kcal
Dinner: probz 600kcal of what’s served at the birthday party (scrambled eggs, 1 piece of bread, small piece of salmon and turkey, ice berg lettuce)+ 3 pieces of cake!!!
In addition: water, coffee, 0kcal energy booster
End of day note: So... Birthday party was pretty late so I didn’t have to worry about having to snack before sleep. It wouldn’t have mattered anyway because I had way too much dinner and dessert! At first I was planning on a very light dinner + 1 piece of something sweet, cakee, so noone would suspect anything, and maybe not finish it. I think I went so hungry shopping today, I barely had energy to move and so my body was really craving sugar and carbs by the end of the night. I wasn’t able to workout. HOWEVER. I will not quit. I can still do this. This is my 3-day-curse where I binge and quit. I will not quit. I will keep going and in the end I will see results. Tomorrow, I’ll have my regular breakfast, skip lunch for gym and light dinner and snack... I will just get back on track like regular. It will be okay. (Although it sucks cuz today I could actually see my pants had been getting looser!!!)
day4
CW: 57.8 kg
Aaaa I didn’t gain too much from my binge yet!! I’m going to the gym today and I hope all those calories will go in to preserving my muscles... Still so hungry now I’ve woken up tho?? I’m determined to follow my plan!! I will not quit, school starts in 2 weeks, and I’m leaving for uni in a year. I can keep this going! I will make my end of week goal.
Breakfast: 40g oatmeal
Lunch: =Half a pack cup noodles + 70g veggies mix
Dinner: 1 slice of bread with 1 egg, ice berg lettuce, cucumber + pepsi max
In addition: water, coffee, tea,
End of day note: I didnt really think i ate that much but looking back it’s kind of hard to tell. I was really hungry before lunch, but before dinner I was both hungry & full? maybe full on water? I was feeling sort of sick and didn’t want to eat but I needed my mom to see me eat a meal today, she’s acting suspicious. I assume I’ll gain my weight from yesterday tomorrow, especially since I can’t find my gym card and can’t go to the gym and only walked a lil less than 7k steps today. But as long as I stay on track I still have hope to hit my week goal by the end of the week!
day5
CW: 58.0 kg
As expected I did gain a lil bit of weight, even though I followed my plan yesterday. I’m hoping it’s water weight, and will still follow my plan today for results!
Breakfast: Oatmeal 40g w water
Lunch: 1 slice of bread, scrambled eggs (2?) , 2slices of bacon, 10g cream cheese
Dinner: 1 large slice of pizza w 1tbsp dressing
Snacks: 1 small piece of cake(but spit out and not swallowed) , 500mL sugar free soda= 10kcal, cheese from pizza buns 20g? + 5 pieces of chips
In addition: water, coffee, tea
End of day note: Aaaaa.binge.sadz. totally exceeded 1200kcals.gots to keep going, but what makes things worse is that i’m at my dads now and don’t have a scale... I won’t be able to weigh myself until wednesday :’( Don’t know how i’ll keep my motivation up then... I will try my best! If i just keep going I’ll be able to wear huge sweaters in december...
day6
CW: ???
I’m at my dad’s!!!
Breakfast: Oatmeal 40g w water
Lunch: lettuce, cucumber, bell pepper, chicken 50g
Dinner: 3 small pieces of homemade pizza, small homemade pizza bun
Snack: lil chocolate=150kcal, lil cupcake topping=200kcal, pizza dough + 30?g cheese, 15 chips
In addition: water, coffee, pepsi max
End of day note: :(. cravings. have to learn to fightem. At least I’m at my mom’s now and will be able to weigh myself tomorrow for motivation.
day7
CW:57.9kg
1 week ago I weighed 60.3 kg, so I’ve sort of lost 2.4kg since that. But actually I lost 2.6kg overnight, and even though it was probz water weight or smth, this sort of feels disappointing. At least I’ve sort of maintained that weight, but I find it hard to believe I’ll lose 0.9kg over tomorrow, so I probz won’t reach my goal for the week. Nevertheless, I’ll have to keep trying today, and try to eat less. Today I’ll be superr-aware not to snack in between my meals like I did yesterday, and eat only in the presence of my mom. If my mom wants me to eat but I’m not feeling hungry, I’ll say I’m sick or smth and have smth small instead, we bought 95kcal musli bars yesterday.
Breakfast: 2 small slices home made grain bread + 1 slice gouda + 1 slice brown cheese + 10g butter + 1/4 cup lettuce + 4 slices of cucumber
Lunch: Family dinner, only 1 plate! = 1 hamburger (1 patty, 1bread, 1/2cup lettuce + 4 slices of cucumber) + dessert= 50g mango
Dinner: Chia pudding: 1dL almond milk + 2tbsp chia seeds
Snack: 95kcal muslibar, ‘3-400 kcals of small bites of cake+bread+chips
In addition: water, coffee, pepsi max , tea
End of day note: Well. I was not able to avoid snacking. I think the problem is having nothing to do after eating a meal boosts my cravings. Also I went for a mountain hike after breakfast w my mom today. I didn¨t have any energy and almost cried myself to the top as I didn’t even get motivation on the way. It was awful. I’m disappointed with the week but I guess I’ll see my progress tomorrow. I just have to keep going. I feel really lonely. I don’t have the energy to do anything, but I kind of want to. Idk. I have work tomorrow I guess. I’m going to allow myself a small scoop of ice cream if I crave chocolate when I’m hungry. Hoping I’ll avoid binging. Hope I didn’t gain weight. Hope I¨ll be able to sleep even though I’m hungry.
RESULTS
CW: 57.0kg! (-0.7kg)
Waist: 25.6 in (-0.4)
Thigh: 23 in (-1in) each
Wrist: 6 in
So I just woke up and omg. I really wasn’t sure if I made it! This is just what I needed to keep going. Hopefully I’ll make smarter choices and binge less next week, and get even more results. I’m really happy about my thighs since they are huge and I lost 1 whole inch. I thought they seemed smaller in the mirror but I wasn’t sure- overall I’m really happy I made my first week goal and will continue :)
4 notes
·
View notes
Text
The Besom (Broom)

Written and compiled by George Knowles
The besom, or broom, is one of the main ritual tools of the witch and is sacred to both the Goddess and God. The God - through its symbolic phallic shape, the Goddess - through its three-piece make up, the shaft, the bristles and the binding cord, three being the triform aspect of the Goddess. While besom and broom are two names used interchangeably, there is a small difference in their definition. The brush of a besom is usually made of twigs and is therefore more rounded in shape, whereas the brush of a broom is primarily made of straw, which is flatter in shape.
Traditionally a besom was made from three different woods, Ash for the shaft, Birch twigs for the bristles and Willow strands for the binding cord. Ash is protective and has command over the four elements, Birch is purifying and draws spirits to one’s service, while Willow is sacred to the Goddess and binds them all together. In modern witchcraft today, while the traditional besom still takes pride of place, other woods are used for special purposes: Oak for added power and protection, Pine for luck and health, Redwood for longevity, Maple for love and money, Walnut for health and wisdom, and Cinnamon for spirituality.
Magically, a besom is used for a variety of purposes, but more generally they are used to purify and protect. In ritual they are used to cleanse sacred space before magick is performed by visually sweeping away negative energies and astral build up. Before casting the circle, the Priest or Priestess will walk clockwise (deosil) around the circle space, and holding the besom a few inches off the ground sweep outward from the centre while chanting the Besom Chant:
Besom Chant
“Besom, besom, sacred broom
Sweep out darkness, sweep out gloom
Rid this sacred hallowed ground
Of demons, imps and hell bent hounds;
Then set ye down on Her green earth
By running stream or Mistress' hearth,
Till called once more on Sabbath night
To cleanse once more this sacred site.”
(Author unknown)

Sweeping the area with a besom can be done in addition to or in place of incense, to purify ritual space, and is often used for such when rituals are conducted in smoke-free areas. When not being used in ritual, place your magical besom by the door to protect the home from evil spirits and negative energies. When standing a besom, always place the bristles up, with the shaft on the floor. This not only makes the bristles last longer, it will also bring you good luck. Another old custom was to place a besom outside the door, this as an indication to other witches that the occupants are out, or working, and didn’t wish to be disturbed.
To make your own traditional besom you will need the following:
A length of Ash approximately 4ft long and about 1in
thick for the shaft.
Birch twigs (about 1-2 ft. in length) to act as the bristles.
Several strands of Willow for binding the bristles to the
end of the shaft.
A pair of Scissors.
Water and salt.
Soak the Birch twigs and Willow strands overnight in warm lightly salted water (to make them pliable) and allow them to dry slightly before using. They need to be damp and pliable before binding them to the Ash shaft. Arrange the twigs alongside the shaft about 3-6 inches from the bottom, larger twigs form the center of the brush with shorter ones around the outside, then bind them with the Willow strands. Be sure to tie them very securely. Use as many layers of twigs as you like depending on how full you want the brush to be. Leave overnight to dry.
Whether you make your own besom in the traditional way “as above,” or purchase a ready made one, you may then wish to decorate is it with a magickal name or other meaningful symbols or sigils. Once decorated, the besom should then be consecrated ready for use in your magickal workings. To do this anoint the besom with oil while reciting the following chant:
Consecration Chant
“Besom of birch and willow tied,
Be my companion and my guide.
On ashen shaft by moonlight pale
My spirit rides the windy gale
To magickal realms beyond both space and time.
To magickal lands my soul will sail.
In the company of the crone I'll ride
This besom of birch with willow tied
So do I consecrate this magickal tree.
As I will it, so mote it be.”
(Author unknown)
Once consecrated for use in the magick circle, it should not be use for any other purpose. When making a besom for normal household usage, it can still be magically charged for that use. On one side of the shaft (from the bristles traveling upwards) carve the following words while visualising your intent: “I sweep out evil and poverty.” On the opposite side of the shaft (from the top traveling down to the bristles, carve “I sweep in money and luck.” When sweeping, visualise the same intent, but sweep towards the fireplace if you have one. If not sweep in any direction except towards the front door, so as not sweep out and lose your good luck.
Myths and Folklore
Most people identify the besom with the old wedding ceremonies performed by Gypsies and early American slaves, when couples “Jumped the Broom” to cross the threshold of their new homes ensuring fertility, domestic harmony and longevity. This custom continues today in modern hand-fasting rituals, when as part of the ceremony, the bridal couple will jump across a decorated besom as conformation of their commitment to each other. Should the marriage not work, or end in divorce, jumping the broom backwards will break that commitment.
The age-old image of witches flying around on broomsticks casting baneful spells is believed to have come from old fertility rites associated with nature and agricultural. As part of the seasonal Spring rites to aid the growth of newly planted crops, women from local villages would gather around fields with their besoms. Placed between their legs as they circled the field, much like riding on a hobby horse, the idea was the higher they leapt, the higher the crop would grow.
In renaissance times, according to the demonologists, the Devil himself presented brooms and flying ointment to newly initiated witches so they could fly to the Sabbats. Often they carried with them familiars in the shape of demons or animals. They were also said to fly across fields blasting their neighbour’s crops, or ride out to sea in order to rise up storms. However, such concocted myths were generally forced from the poor tortured victims of the persecutions, and should not be taken seriously.
Other Magickal Uses
Placing a broom across a doorway allows your departed friends and family to speak to you if they so choose. As long as the broom remains, they can communicate freely. To bring rain, stand outside and swing a broom in the air over your head. If lightening blows your way put a broom on your porch to act as a lightening rod. Electricity and lightening are thought to be attracted to brooms. Another way to safeguard a house against lightning strikes is to cross a spade and a broom outside the main entrance.
A besom placed under the bed or beneath the pillows at night, will protect the sleeper from nightmares and ensure a peacefully sleep. Similarly, it is not wise to leave a bed empty for too long. If you are going away for any length of time, place a besom in your bed, laying the bristles on the pillow. This will guard the bed against evil spirits until you return.
Two crossed besoms hung on a wall or the back of a door will protect the house from unwanted influences. With the exception of those used exclusively for magickal purposes, moving an old besom into a new house will result in bad luck.
End
Written and compiled on the 16th February 2009 © George Knowles
https://www.controverscial.com/The%20Besom.htm
2 notes
·
View notes
Photo

Do You Need to Groom Chinchillas?
Grooming your chinchilla would be fun, but if you're like most owners, you can't get the thing to sit still long enough to brush it. But is grooming a chinchilla necessary? And if so, how do you do it?
How do you take care of chinchilla fur? Chinchillas groom themselves, and dust baths keep their fur clean. As such, you shouldn't need to brush a pet chinchilla. Breeders and chinchilla show entrants brush their animal with specially made brushes, although some use flea combs or greyhound combs for rough grooming. They pick their chinchillas up by the bases of their tails to do so.
There are several chinchilla grooming tips below—everything you need to know to keep your pet's coat fresh and clean, plus details on a controversial point in chinchilla rearing. Read on if you want to find out what it is!
Do You Need to Groom Chinchillas?

Chinchilla fur is too thick to brush with a normal brush. Image courtesy of © Salix / Wikimedia Commons / CC BY-SA 3.0 & GFDL
You ideally shouldn't need to groom your chinchillas. Between your chins grooming each other and themselves, and their regular dust baths, their fur should stay clean and knot-free on its own.
But what's true in theory isn't always true in practise. Semi-regular basic grooming can prevent knots and matted fur, and assist with shedding. The only issue is that some chinchillas won't sit still long enough for you to groom them.
Most brushes and combs don't work on chinchillas. But what many owners do is get their hands damp (not wet) and run them over their pets. This picks up dirt and loose hairs.
Should You Brush a Chinchilla (Or Comb It?)
You don't need to brush or comb a chinchilla's fur. Your chinchilla will take care of most of the work for you.
What's more, most brushes and combs don't work on a chinchilla's fur. It's too dense. People have one or two hairs in each follicle, while chinchillas have up to eighty.
To understand why this is an issue, imagine combing your hair. Your comb has teeth which are a fraction of an inch apart, which can get between the hairs and separate them. Now imagine trying to comb your hair with a comb that had teeth an inch apart—it would be useless. It wouldn't get rid of any knots in your hair, or style it in a particular direction. This is what using a regular comb is like in chinchilla fur.
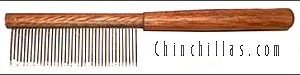
A chinchilla brush. This one is for rough grooming. Courtesy of Chinchillas.com.
You can get special brushes and combs designed just for chinchillas. These have teeth which are very close together and can tease out loose hair without pulling out live hairs. Some owners think that flea combs are a good option while others don't, but they're definitely better than regular combs.
Is Grooming a Chinchilla Necessary?
Most owners will say that grooming a chinchilla at all isn't necessary. They also keep their fur clean by:
Grooming themselves
Grooming each other
Freshining their coats with dust baths
Avoiding getting wet
Picking one corner of the cage to wee in, so it doesn't get their fur dirty
This is far more than other animals do. Also, chinchillas are indoor pets, which means they'll never get muddy or dirty outside. You can also keep your chinchilla's cage clean which will stop bacterial and fungal infections. This means that you will only very rarely have to groom a chinchilla.
The main exception to this rule is when a chinchilla is neglected. If you neglect your chinchilla, it has to sit in dirty bedding in a dirty cage. Its fur will get damp from water or urine and it will get matted. Unfortunately, this is the condition that many chinchillas are in when they are given to rescue centers. These chinchillas have to be groomed because the condition of their fur can make them ill.
How to Groom a Chinchilla
Most owners suggest not using brushes. That's because most brushes aren't capable of grooming chinchilla hair—it's too dense. The tines of the brush (the sticks that stick up) aren't close enough together on typical brushes to be much use on a chinchilla.
Instead, owners suggest using your hands. Here's what you do:
Wash your hands under running water. You don't need to use soap unless they're dirtier than your chinchilla's fur!
Wipe your hands until they're almost dry. They shouldn't be soaking wet, but still damp.
Pick up your chinchilla as you normally would.
Stroke your chinchilla along its back.
The residual moisture on your hands will pick up stray hairs like a brush will.
It's a myth that chinchillas can't get even a drop of water on their fur, so your chinchilla will be fine. If you do accidentally get it too wet, pat it dry with a towel, and if it still won't dry then blow dry it on a cool setting.
This is an effective way of getting rid of loose hairs. But it won't get rid of knots or clumps. For that, you'll need a brush.
How to Dust Bath a Chinchilla

Another way of keeping your chinchilla's coat fresh is to give it frequent dust baths. Chinchillas love dust baths, and most would bathe every day if you let them. Owners recommend twice weekly dust baths, and this is more than enough to keep your pet's coat clean.
To dust bathe a chinchilla, take a small bowl e.g. for doing the dishes. Place a small amount of chinchilla dust in the bowl—most owners put around 1in. Then leave the bowl somewhere that it won't cause too much of a mess, e.g. in the bathtub. Leave your chinchilla with it for a minute or two and it will start rolling around in the dust.
If you like, you can couple this with the grooming method described above. To do so, use the method above before the dust bath as the moisture will cause the dust to clump up.
How to Brush a Chinchilla (Expert Level!)
Most owners don't bother brushing their chinchillas, and their pets don't suffer for it. But one context in which brushing is essential is for show chinchillas.
Show chinchillas are specially bred chinchillas entered into shows by breeders and experienced owners. These chinchillas are larger and have nicer fur than average pet chinchillas—breeders call this a distinction between pet quality and show quality chinchillas. Considering that many chinchillas aren't even considered pet quality, that means show quality chinchillas must be very well taken care of!
How show entrants brush their chinchillas is a point of contention for some owners. Breeders and experts are more comfortable holding their chinchillas than most owners, many of whom won't even handle their chinchillas at all. What breeders and experts do is hold the chinchilla by its tail to brush it. Some show entrants report that their videos on YouTube are bombarded by hostile owners who think they're hurting their pets!
Holding a chinchilla by the base of its tail is perfectly safe, so long as the owner knows what they're doing. It doesn't hurt the chinchilla if it's done right. The owner will then brush the chinchilla's fur while holding it.
However, we don't recommend doing this unless you're very experienced with chinchillas. There is something else you could try, which is to take a tile and place it in your lap, and hold your chinchilla there. The chinchilla will have less purchase to squirm around than it would directly on your lap, so it should settle down. If this doesn't work, you will find it difficult to get your chinchilla still enough to brush it—but this shouldn't be a major problem as it will take care of its own fur.
How Do You Get Knots Out of Chinchilla Fur?
With other kinds of hair or fur, you can gradually unpick a knot. If you have long enough hair, you'll have experienced exactly this problem after you blow dry it. If you're careful, you can tease out small knots in your pet's fur with a fine-toothed chinchilla comb. Do this in the way described above.
Matted hair is another issue entirely. Matted hair can't be teased out, even with a fine-toothed comb. That's because a chinchilla's fur is too dense. Owners have tried and it simply doesn't work.
What you can do is tug the matted hair out. Slide the comb underneath it and tug firmly. This will cause fur slip—but that's what you're aiming for. This is the only way to get the matted hair out without cutting it.
This will cause your pet momentary discomfort. It will likely be annoyed at you for a while. But this is necessary to prevent bacterial and fungal buildup in your pet's fur.
Can You Cut a Chinchilla's Hair?
You can cut a chinchilla's hair, but it's unnecessary in almost all cases. When your pet has small knots in its fur, a chinchilla brush will do nicely, plus dust bathing and basic grooming.
As mentioned above, some chinchillas are neglected and taken up by rescue organizations. Some of these chinchillas have fungal infections in their fur, plus lots of knots and matted parts. For these chinchillas, cutting the fur out is better than grooming out every single matted piece of hair with a comb. This will cause the chinchilla less pain and stress.
What you shouldn't do is cut your chinchilla's fur to try and style it. Your chinchilla needs its fur to properly maintain its body temperature. You could also hurt your pet.
Below, you can find our chinchilla quiz, new posts for further reading, and a signup for our Chinchilla Newsletter!
[ays_quiz id='9']
There's always more to learn about chinchillas.
#chinchillas #chinchillacare
0 notes
Text
A Taste Worth Savoring [Short Screenplay]
I’m back at it again with the NYC Midnight competitions. I always find the Short Screenplay competition fun, and it’s sparked some ideas that I’d eventually grown into larger works or entered into other contests, some garnering a few small-time awards.
This time, my prompts didn’t really inspire anything new in me, so I fell back to a short story of mine and made some adjustments to make it work. It came out better than I thought!
Rules of this round:
Genre: Drama
Location: A Wine Bar
Object: An ATM Machine
Limits: 5 pages, 2 days
A man on an important life-or-death mission faces the realities of mortality, as he digests the realization of his dark place in its process.
EXT. WINE BAR - NIGHT
Edward (30s) operates an ATM MACHINE. A BRIEFCASE sits on the ground. Owen (30s) stands nearby, back against the wall. Edward grabs cash from the machine, then the briefcase.
OWEN
Can't track cash.
Edward nods nervously, pockets the cash. He's sweating, not looking so well.
OWEN
What's up? You can do this, right?
EDWARD
What? Yeah yeah. Just got a bug or something. I'll be fine.
Owen nods, unconvinced.
OWEN
Alright. C'mon.
CUT TO:
INT. WINE BAR, AT TABLE - A BIT LATER - NIGHT
The place is busy. Owen and Edward sit at a small table, each with a near-empty glass of wine. The briefcase is beside Edward's feet; he's looking worse.
EDWARD
You ever think of dying? Not falling down dead, I mean the process. Emphasis on the "ing," y'know? From the day we're born, we're doing just that. Only one result. Some day, dead.
OWEN
Yeah. No. But by the looks of you, you might be getting close.
Owen checks his watch.
OWEN (CONT'D)
Shit, I need to hit the head. You get us a couple more, yeah? You good? Won't be long now.
Edward nods. Owen heads for the restrooms.
INT. WINE BAR, AT BAR - NIGHT
Edward waves some cash at the passing-by BARTENDER.
EDWARD
Hey. A couple Trésor, here?
He's ignored. The bartender passes again. Edward waves.
EDWARD
Hey!
He's again ignored, as though he doesn't exist.
OLDER WOMAN
Trésor. Nice choice. 2009, I hope.
Surprised, Edward whrils to his left, where an OLDER WOMAN (60s, English) sits at the bar sipping wine, admiring him. Edward nods a nervous "okay," and begins to turn away.
OLDER WOMAN (CONT'D)
Shame you can't drink it when you're dead.
Again, Edward whirls, fuming.
EDWARD
And what the hell is that supposed to mean?
She rolls her eyes, nods in the direction of Edward's table. There sits Edward, head on the table, as if resting. Dumbfounded, the Edward at the bar flips his gaze several times between the table and the woman.
EDWARD (CONT'D)
That...?
The woman nods, amused. With Edward, realization sinks in.
EDWARD (CONT'D)
And you? You can't be...
The woman shrugs.
OLDER WOMAN
You expect a scythe and a black cloak, do you? Grrr.
EDWARD
So I'm dead. That's it?
The woman takes a long sip of wine, then a slow shake of her head.
OLDER WOMAN
I'm not quite done with you yet.
EDWARD
Done with me? What the hell is that supposed to mean?
OLDER WOMAN
Edward, have you ever had something so good that you simply wished it would never end? A delicious piece of candy as a child? A drug-induced high? A girl, perhaps?
EDWARD
So you're, what? You're using me?
OLDER WOMAN
Using? More like ... savoring.
EDWARD
Savor? You make it sound like I'm a piece of meat. Like I'm food.
OLDER WOMAN
Well that's precisely what you are to me, Edward. I don't eat, per se. You're not food so much to me as you are sustenance. As all the dead are. As all the dying, as you know, become. Just minutes ago you thought of dying and of how every living thing undergoes the process from the moment of creation. Right you are. Right you are.
The woman's eyes dart about, as though to ensure prying ears won't spy upon what juicy secrets she's about to spill.
OLDER WOMAN (CONT'D)
At birth comes my first bite, you see. Just a tiny one. Just enough for a taste. An amuse-bouche. I suppose you could say it's quite like the first stage of digestion, actually. I must say, at times it's a bit too good to take from the start, and then it's all over with right quick; just can't help myself, I'm afraid. And then there are the usual ones, the ones that will do just fine as they are. In due time they're finished off as well. But there are some I just want to hold onto a little longer. Their flavor. It's too good. Worth savoring, you see.
(Beat)
And that's you. Your dying is delicious, Edward.
Edward gulps.
EDWARD
If you're not ready for me, why the hell am I here? Why are you taking me now?
The woman pouts with disappointment.
OLDER WOMAN
Isn't it obvious? I'm not here for you, Edward.
Edward follows the woman's gaze as she scans over all of the bar patrons, stopping on the briefcase on the floor by dead Edward's feet.
OLDER WOMAN (CONT'D)
One way or another, Edward, my dinner is about to be served. If you want to go, you'd best be doing so now. Otherwise ... I've got quite the feast ahead of me, don't I?
As the woman puts the glass of wine to her lips ...
CUT TO:
INT. WINE BAR, AT TABLE - IMMEDIATELY FOLLOWING - NIGHT
Edward snaps awake with a snort as Owen approaches the table.
OWEN
Hey. I thought I said to get us a couple more.
Edward's speechless, confused. A BELL RING as the outer door opens, and two WELL-DRESSED MEN enter, all business. Owen recognizes them, turns to Edward.
OWEN (CONT'D)
Targets are here. This is it. You know what to do. I'll meet you outside.
Owen leaves the table and exits as the two well-dressed men are seated. Edward stiffens, throws a look toward the bar. The older woman raises her glass to him.
OLDER WOMAN
Most consider people like you disgusting and vile. Not me, Edward. Certainly not me.
Locking eyes with the woman, he reaches beneath his seat, opens the briefcase, and flips a switch inside before closing it again.
EXT. WINE BAR - NIGHT
Edward exits, head bowed, ashen. He meets up with Owen, and they start down the street.
OWEN
I know. Puts a sour taste in my mouth too. But it's for the good of the country. You just gotta stomach the fact that collateral damage is just part of the job.
(Beat)
We need to disappear. Let's go get something to eat.
FADE TO BLACK
END
0 notes
Text
Sunday 26 January 1840
8 40/..
2 10/..
fine morning R-8° out of doors and R11 ¾° at my bedhead and on the console now at 9 55/.. and breakfast – at church at 10 55/.. and waited ¼ hour Mr. Camidge preached I suppose about ½ hour from Acts xiii. 38 to 41. – from church to Mrs. Fischers’ – found Mr. F- and 2 daughters at luncheon, Madame se faisait la toilette – there at 1 5/.. and sat about ½ hour – mentioned having changed my line of route, and now meaning to go direct to Odessa – home at 1 20/.. had Mrs. Howard and then A- dressed and I had just changed my stockings when princess Tcherkaski called – très aimable personne – delicate health, and having suffered much affliction her daughter (aet. 19) died of fièvre chaude – returned here for the winter instead of in summer after having been acclimatée in Germany or France, Suisse, etc. and probably the severity of the Russian climate was too much for the poor girl – belle et bonne tout ce que pouvait désirer sa mère – princess T- has also 2 brothers but condemned à la mort civile – banished to Siberia without hope of return – implanted in the same affair at the accession of the present emperor as countess A.P-‘s brother princess R- tall and elegant and extremely interesting – fine dark eyes – pale – handsome – her father prince ........... her mother an English Parkhurst – hopes to see us to dinner – Wednesday mentioned – but I know not that the thing was actually fixed – had had Mrs. Howard for perhaps ½ hour – had inquired about Odessa of her landlord – we might arrive there in going soon from here and diligently before the debâche of the rivers – but should be detained there on this account probably till April – must go on wheels from Nicolaief – could not get father than there sur [pattins] – must take wheels with us – nothing to be had at N- beyond a common Kibitka – for board and lodging of Gross she asked 150/. per month and 25/. per month for the carriage stand – I said she must to to do both for 150/. to go in one day and back from Vosskrecensk [Voskresensk], a relay of horses must be sent the night before = 6 horses at 10/. = 60/. – dressed – at the old countess Panins’ to dinner at 4 or perhaps a minute or 2 after not more – dinner upstairs in the [long] Galerie in about ¼ hour – ourselves and countess A.P. and Sophie and Miss Scorgall, and old countess P-‘s lady and 2 gentlemen – I should think dinner was over at 5 ½ - then looked at the prints and atlas belonging to Dubois’s work (3vols. 8vo. that I have) on the Caucasus – but took my leave on hearing 6 struck knowing that the old countess then took her nap – she retired but on asking me to stay and look at the prints with countess A.P. we staid with her till 6 ¾ talking over our journey – the to take or not to take Gross, etc. etc. Resolved that he would be useless, and that, all things considered, it would be best to leave him behind -
SH:7/ML/E/23/0189
what a blessing – countess A.P. repeated her advice to go direct to Tiflis, more especially as we should be road-bound at Odessa till April when the steamers begin to ply between there and the Crimea – the old countess very civil –asked us to go and visit us in the country at her large beautiful palace of a place – a large good handorgan played at the beginning of dinner and before the end – we began by a sort of mock turtle soap with a great quantity of the mock-turtle meat in each ones’ plate – then came flans (sort of crumpet) with thin long pieces of fish stuck in (fried in) then and [seen] on the top, looking like shreds of almond (1in. or more long) – and with these caviar was handed round and then butter melted as at the Ocouloffs’ – then (slices with pretty little rizolles of potato) roast veal – then another plat of veal like small pear-shaped cutlets round or something out of a round pudding – like mould, that nobody cut into – then asparagus, large and long and all perfectly white – then poulet – concombres sales’, then Italian cream, then pears and pllaes and biscuits, then apricot marmalade – (all meats cut up and handed everywhere) – then coffee at the tea-table near the sofa at the top of the gallery – a servant stood behind each ones’ chair – but only 2? I think not more, at any rate, then 3, in livery – after coffee came the incense or perfume-burner, as usual, to take away the smell of one viands – I thought of going direct chez les Ourousoffs’ – but A- had been less amused than I – did not like to run the risk of staying so long (I no tliking to be limited to the minute) and .:. we came home (home at 6 55/..) and I stood talking till 7 10/.. and then set off by myself – found the old people by themselves – princess R- had been making visits in the morning (countess A.P. tome she been chez elle), and was gone to make 2 more this evening just gone before I arrived but would soon be back – was very much tired having been to church this morning, 1st time – she came back about 8 – agreeable evening – came away at 9 5/.. – home at 9 20/.. having told her we would go on Thursday evening probably to take leave – I said I should probably be at home for a little while in the autumn or before the end of the year and the letter to Dr. H.S.B- being difficult to write had I not better wait to explain vivâ voce? yes! this is much the best way on all accounts – tea at home and sat talking a little then while A- had Grotza I wrote journal and afterwards stood both of us eating up the remainder of the preserved orange we brought from home and then till now 12 ½ wrote the whole of this page – a little small haily driving snow several times today – R12 ½° on my table and 12 ¼° on the console now at 12 ½ tonight – then sat looking at map of Russia etc. till 1 40/..
3 notes
·
View notes
Text
Sakizo’s Alice
Worn at Anime Expo 2017 Day 3.

To say that this costume was a last minute decision would be an understatement. And in all logical reason, in order to keep your sanity, you do not attempt a Sakizo costume on a three week timeline.
But what is sleep?
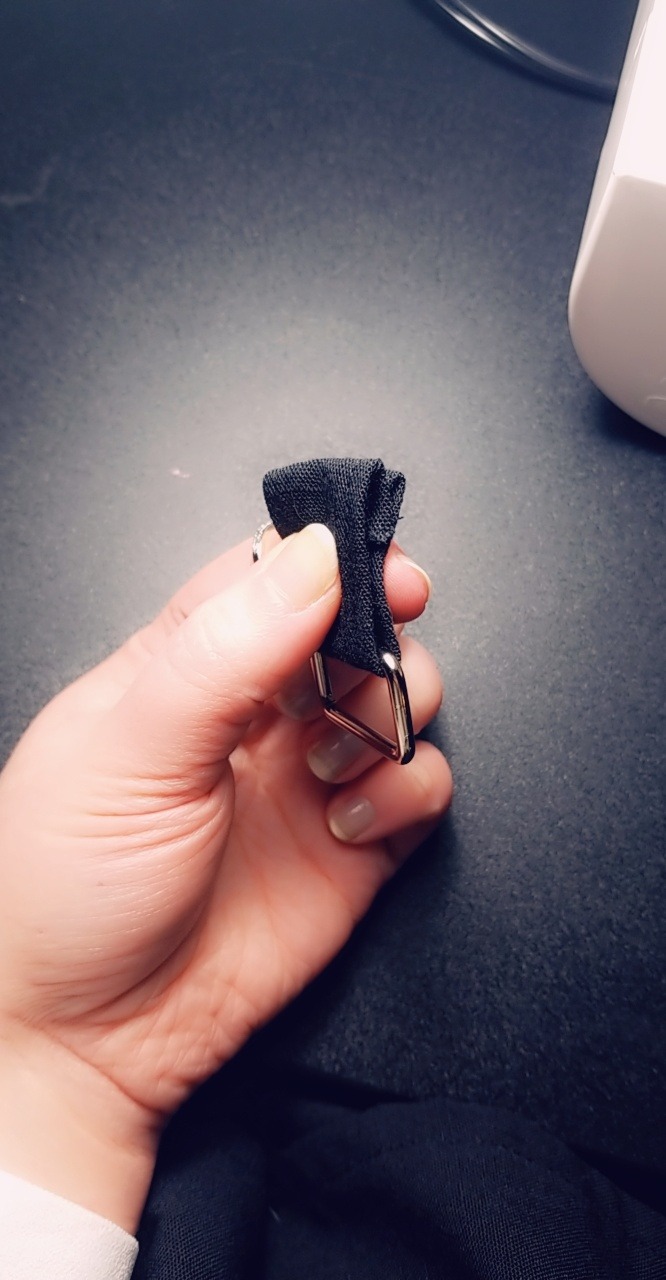
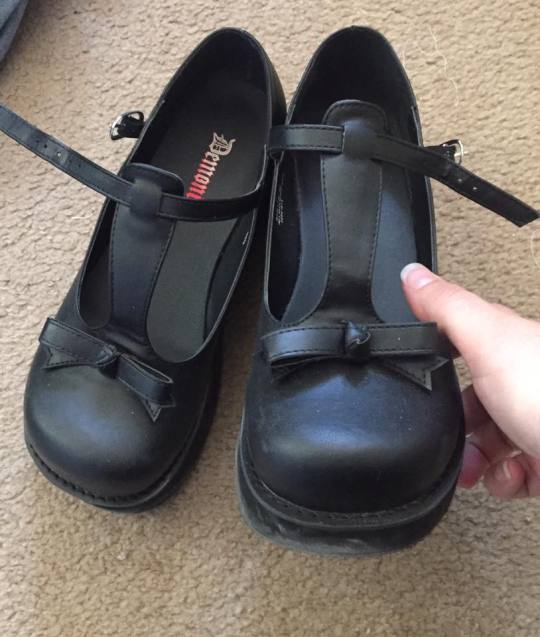
The shoes are Demonia T-strap Mary Janes that I purchased off of Ebay.
The wig I used for Alice is a lolita wig I’ve had for years that I purchased from Gothic Lolita Wigs however, rather unfortunately, the color and style are no longer available.
Tights were purchased from We Love Colors in the color Ivory.
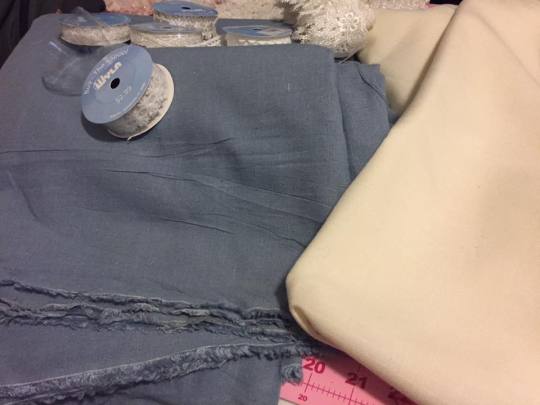
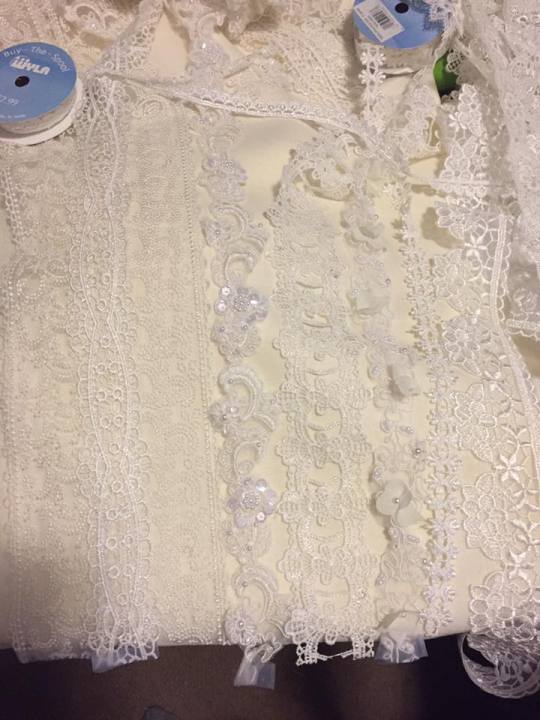
The base fabrics for Alice were purchased June 5th but actual progress on the costume didn’t start for another full week. All of the lace used on her was purchased at Joann’s when I had about 7 different 50% off coupons. Use the coupons kids, ‘cause Joann’s has upcharged their stuff 3-5 times their actual price.
You’re probably wondering why I didn’t buy all the lace in the fabric district in LA. Well, at the time I was there I didn’t know what kind of lace I wanted and the stuff I was looking at didn’t really stand out to me for Alice. However, solely relying on Joann’s severely limited my options and color matching was extremely difficult.
First thing I did was start on the under dress using McCall’s M6989.
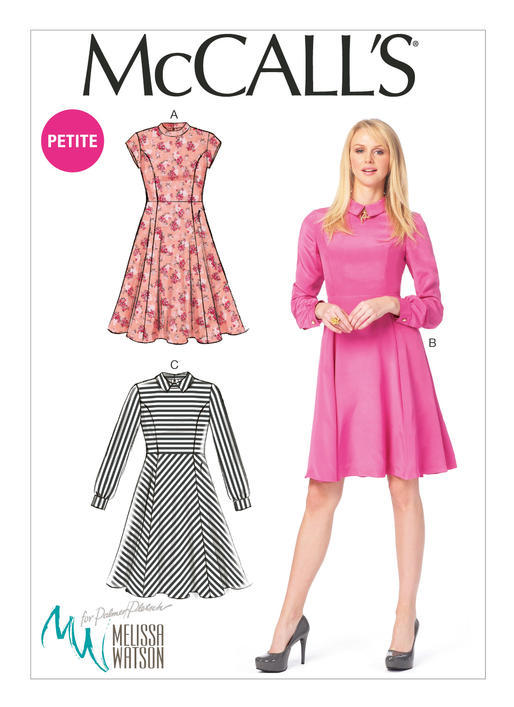
I ended up only using this pattern for the bodice and collar. I wanted the skirt to be one piece and a bit fuller to accommodate two lolita petticoats. Everything was cut out of a French blue linen. I used an hand drafted skirt pattern for the skirt and then added a 12yd ruffle to the bottom.

It was a lot of gathering. But that would be a recurring theme for this costume.
Before I added sleeves to the dress I went ahead and patterned the apron, the base pattern being the same bodice pattern from the dress.

Instead of just stitching the ruffle that falls just above the bust like on top of the apron, I decided that I wanted it to actually be a seam. Once I had my pattern, everything got cut out of a linen/polyester blend in cream.
Once that was finished I laid out all of the lace and pinned it on to be machine stitched down with long basting stitches. There wasn’t going to be any stress on the lace itself so basting stitches made this process somewhat quicker.

The large medallion appliques that run down the center were purchased from the Esty store The Swan Pond in Ivory. A total of 8 were purchased and evenly spaced down the front and back of the apron.
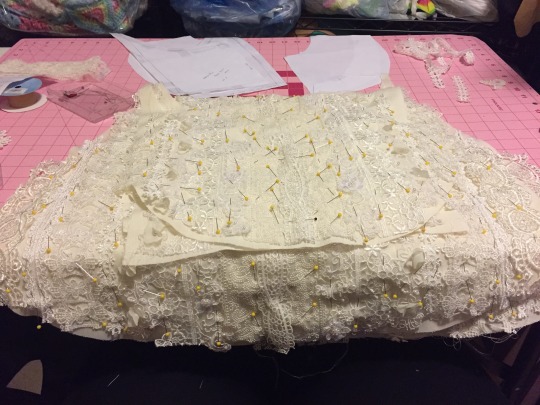
It was a whole lot of lace. In total I think I used 12 different types of lace on this costume.
Once the lace was secured down it was time to ruffle. Each skirt piece had a 5yd ruffle gathered down to 60in and each side of the bodice had 1/2yd pieces gather down to 16-17in depending on whether it was the front or back. The piece that wrapped around the bust and upper back of the bib was also 5yds gather down to 60in.


On top of the ruffles, to blend the seam, another piece of lace was stitched down.
Once the ruffles were finished it was time to begin assembly and this was scary. With the addition of the sheer yardage of the ruffles, seam thicknesses were scary.

The seams where that bib attaches to the lower part of the bodice was 3/4ths of an inch thick.
At this point in the process I took a break from the overload of ruffles to finish off the dress. The sleeves were made with Simplicity’s 2325 Alice pattern.

For all of the black ribbons on Alice I used Joann’s black micro velvet. It is the softest velvet they sell and it is heavenly. However, it costs a pretty penny so please utilize coupons on it as it runs normally at $30/yd.
The velvet band that goes around the seam between the skirt and the ruffle was a little over 4yds, and once stitched down was then edged with a black scallop lace.
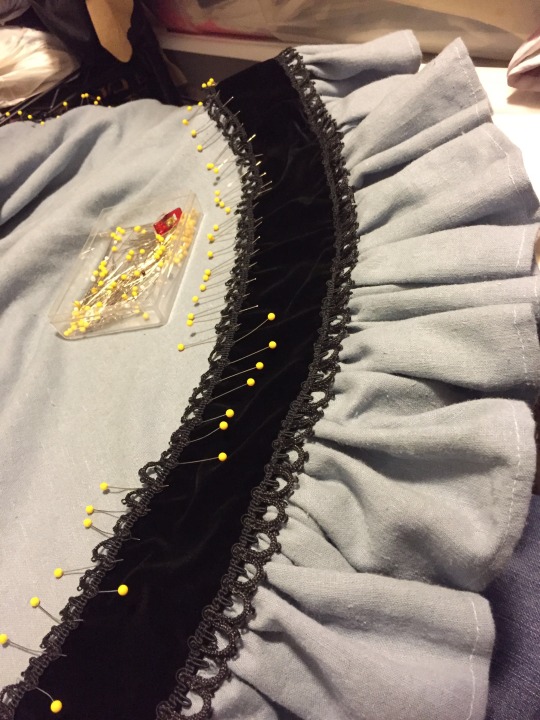
Over top that was two more laces, a small daisy chain (I bought 16yds of this to do the diamonds) and a scallop flower edge lace.
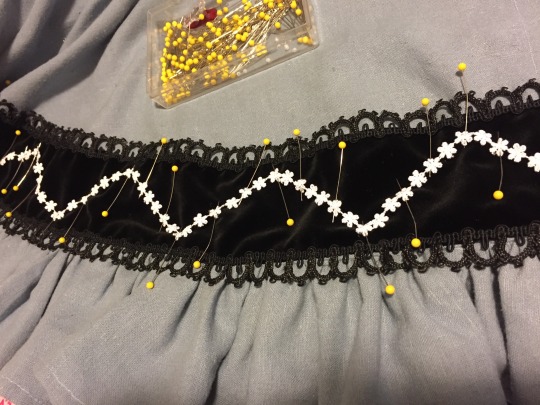
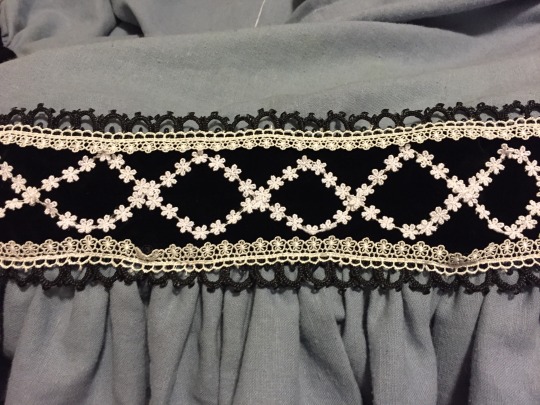
At this point, stressing over the color of the lace matching was a little unrealistic so I just went with what was available to me, and I actually ended up liking the subtle differences in color. You can tell on the apron as well that all of the laces aren’t quite the same color.
Underneath there is an ivory underskirt using the same pattern as the actual skirt that was then stitched to the waist of the dress.
Once the sleeves were complete and the zipper and hook/eye were stitched into the back, the dress was officially complete. It was time to finish the apron.
And I had one day left before I had to leave for LA.
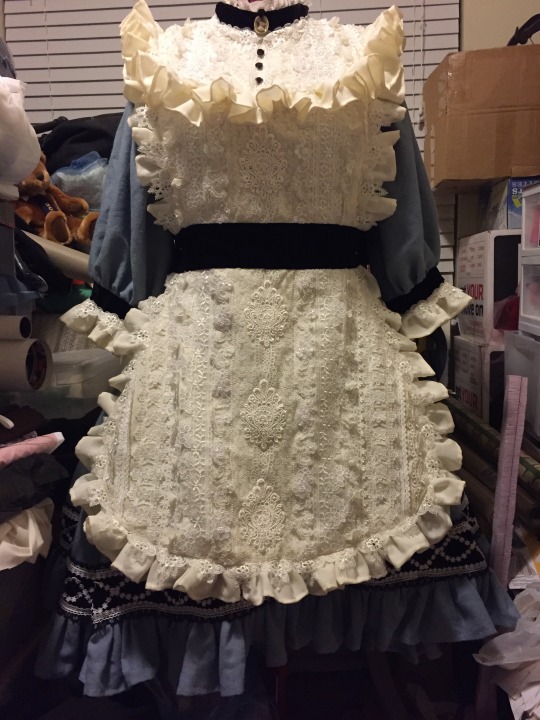
The apron was lined before any of the waist bands were added on. The waist bands of the apron were also lined in velvet and the apron closes with 4 heavy duty sew on snaps.

Lace was then stitched over top the seams to blend the harsh lines between lace and velvet.
The last things to be made were 3 different bows. Two for the waist band and one to go on a headband. The bows themselves are 3 pieces each, the puffy part of the bow and two tails. These were lined with an off black linen that I had lying around from a previous project.

In the centers of each bow three bridal applique flowers were stitched by hand. the same goes for the headband. I still plan on going back and adding more pearls and possibly some swarovski rhinestones for even more texture, but it’s not an immediate need. I like her as she is.
I took a 1in wide headband and covered it in velvet before stitched the bow in the center at the top.
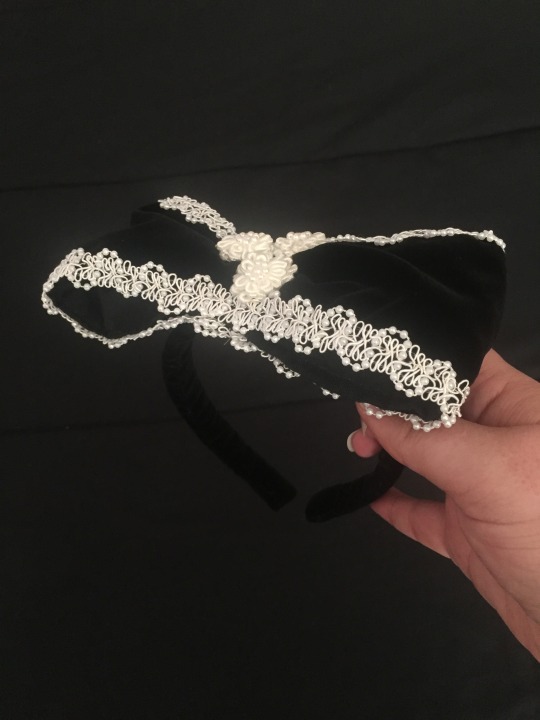
And with that, Alice was finished at 12:14am the day I had to leave for LA.
Unfortunately, I never managed to get a full outfit picture in this costume. so expect a photoshoot sometime in the future. But have a photo I took of me in the dress without petticoats and apron since we had to drive to the convention center and still needed to eat food.

Overall, Alice is probably one of my most comfortable cosplays to date. Despite my initial worries that the she was going to be really heavy with all the lace and ruffles, once she was on, the weight was very well distributed.
She’ll more than likely be worn to many future conventions since she’s so easy to wear.
#write ups#alice#sakizo alice#sakizo#sakizou#sakizou cosplay#sakizo cosplay#cosplay#really long post
3 notes
·
View notes
Photo

New Post has been published on https://toldnews.com/world/celebrity-parents-and-the-bizarre-cheating-scandal/
Celebrity parents and the bizarre 'cheating' scandal
Image copyright
Reuters
Image caption
Actors Felicity Huffman and William H Macy at the Golden Globe Awards in January
A network of affluent parents were this week accused of using audacious practices to secure their children places at elite US universities. What exactly is alleged?
“What we do is we help the wealthiest families in America get their kids into school.”
It was quite the mission statement.
The words were spoken by the alleged kingpin of United States’ biggest ever university admissions scam, William “Rick” Singer, according to prosecutors.
He was making a pitch to a potential client, a wealthy New York lawyer, explaining the ways to get his child into a prestigious university.
There were the normal channels – which rich people did not want to be “messing around with”, he said. And then there was the back door and the side door.
The back door necessitated contributing to “institutional advancement” – ie family connections or a multi-million-dollar donation, such as funding a new building, which is all legal.
But the side door – the one that Singer had his foot jammed in and has drawn the attention of the authorities – was more accessible.
He could guarantee success, he said. All you had to do was make a “financial commitment”.
Image copyright
Getty Images
Image caption
Police named their investigation after the 1999 film Varsity Blues, starring James Van Der Beek
The revelations
On Tuesday, reams of FBI documents were unsealed from “Operation Varsity Blues”, an investigation named after a 1990s film about the pressures of sports scholarships.
The case looked at a period between 2011 and 2018, when, according to the authorities, $25m in bribes were paid by people looking to sneak around the usual university admittance process.
Fifty people – including 33 parents and various sports coaches – were indicted.
“I have never seen anything like this,” Lenore Pearlstein, publisher of Insight Into Diversity magazine, which is dedicated to making higher education and business more inclusive in the US. “The depth of it, the number of people involved, the amounts of money. It’s mindboggling.”
It feels like a “slap in the face” for those genuinely trying to make change, she told the BBC.
Among the most jaw-dropping revelations was the alleged involvement of Hollywood actresses Felicity Huffman and Lori Loughlin.
Actresses sued in college cheating scam
TV network drops Loughlin over ‘bribes’
“Ruh roh!” as Huffman might say.
The authorities alleged the star of TV series Desperate Housewives using this Scooby Do expression in email exchanges with Singer.
According to the FBI, she was responding to news – in October 2017 – that her daughter’s school wanted to use their own exam invigilator, rather than a compromised one who would be able to boost her scores.
She allegedly emailed her concerns to Mr Singer. “We will speak about it,” he reportedly replied.
Image copyright
Reuters
Image caption
William “Rick” Singer has pleaded guilty to charges
The architect
Rick Singer, a Californian life coach in his late 50s, presented himself as an expert in the university admissions process.
He wrote books about it, including the self-published Getting In: Gaining Admission to Your College of Choice, which opened with an inspirational quote from Nelson Mandela.
However, he kept his more illicit techniques within a closer circle.
The FBI has traced his scam back to 2011. It is not known if this was a particular turning point in his three-decade career.
In 2014, he founded a non-profit organisation called Key Worldwide, which claimed to help “disadvantaged students around the world”. The website said it would “open doors” for young people escaping troubles such as gang violence.
However, according to the authorities, the organisation functioned as a slush fund. It became a façade through which payments could be funnelled as “charity donations”. Singer pocketed some of the cash and paid the rest in bribes to those who could help him get the results he guaranteed.
Over time he had developed two possible paths to success. One would involve manipulating exam results. The other would involve securing special treatment – most typically via faked sporting prowess.
According to the FBI, the two Hollywood actresses went down separate routes.
Image copyright
Getty Images
Image caption
Felicity Huffman (left) pictured alongside her Desperate Housewives co-stars in 2006
Huffman, Macy and the ‘exam plot’
The authorities claim that Felicity Huffman knew she needed to send her oldest daughter to a specific exam centre in West Hollywood to follow the plan. Hence the “ruh-roh” when it nearly went wrong.
Singer had connections there.
It is alleged that he would typically suggest his clients faked learning disabilities for their children and then, once they got a medical certificate, they would be granted extra time and could make a more believable case for switching to external exam centre.
Huffman had allegedly already secured 100% extra time for her daughter’s SAT (college entrance) exam. It is unclear how.
Apparently, this was not enough.
The next step involved bringing in someone else to take the test for her.
Singer often used the services of a man called Mark Riddell. He was in his mid-30s, an ex-tennis professional, and the director of college entrance exam preparation at a boarding school in Florida.
According to the FBI, he would fly in, take the test for students in a hotel room, or sneak them the correct answers in the exam room, or inflate their scores when they finished. Sometimes he would be given a sample of the teen’s handwriting so he could copy it.
Riddell did not know the questions in advance, according to Massachusetts Attorney General Andrew Lelling. He was “just a really smart guy”.
Image copyright
IMG Academy
Image caption
Mark Riddell has pled guilty and apologised
It is not yet known how Huffman first came into contact with Singer.
In 2017, he visited the Los Angeles home she shares with her long-term partner, William H Macy, the star of Shameless and Fargo, the court documents say.
The couple – who met in the early 80s and married in 1997 – are not usually caught in negative headlines. Macy’s hobbies reportedly include woodturning and playing the ukulele, while Huffman has been running a wholesome parenting site, What The Flicka, based on her childhood nickname.
They have been known to post loving messages to each other on social media.
Early on Tuesday morning, FBI agents turned up at their door.
Only Huffman was indicted. The crime she stands accused of relates to mail fraud, which is when communication methods are used to conduct a scheme that intentionally deprives another of property or honest services. Macy has not been charged.
Neither has commented publicly.
Media playback is unsupported on your device
Media captionStudents react to cheating scam: “This is how we got into an elite college”
The couple made a $15,000 payment to the Key Worldwide Foundation for their older daughter’s exam scheme, according to court documents.
In an art-mirrors-life twist, it was the exact same amount that Huffman’s character in Desperate Housewives had paid to a headmaster in an episode about corrupt schools admissions.
In real life, her older daughter’s exam score jumped 400 points – a huge leap – after Singer’s involvement, it is claimed.
If those claims are proven, Huffman and Macy appear to have secured a bargain. Many people paid hundreds of thousands for his help. He usually paid $10,000 to the surrogate test-taker alone.
Image copyright
Getty Images
Image caption
The sailing coach at Stanford University has been fired for alleged involvement
The sports scam
Academic manipulation was only one side of this story, and the alleged sports scam was even more outrageous.
Singer was taking students with no prowess, and turning them into sporting stars on their applications, it is claimed.
In some cases he would arrange for their heads to be Photoshopped on to more sporty bodies. In others, their basic stats would be manipulated – one basketball player had his height changed from 5ft 5in to 6ft 1in, presumably betting on a once-you’re-in-you’re-in outcome.
Police found their first strong piece of evidence of this scheme during a wiretapped encounter in a hotel room in Boston, Massachusetts, according to the Boston Globe.
The newspaper says that investigators had been working on an entirely different story – alleged fraud in the stock market – when they received an unexpected tip.
A financial executive told them a sports coach from Yale University, Rudolph “Rudy” Meredith, asked for a bribe to help the businessman’s daughter gain admittance to the Ivy League school.
The executive agreed to wear a recording device and meet Meredith, who then offered to designate the young woman as a member of his soccer team.
Meredith – as well as Singer and Riddell – have been working with the police, hoping to reduce their sentences.
Sports bring in such huge amounts of money and prestige to US universities that they will often lower academic requirements to bring in new talent.
“Student athletes often have excellent leadership qualities and excel both in the classroom and on the field, recognising that makes sense for colleges looking for the best students,” says Eric Yaverbaum, author of Life’s Little College Admissions Insights.
“The hard work it requires to be a student athlete is what makes the fact that some of these parents took advantage of this route so disturbing. It’s appalling that some parents and coaches betrayed those students by buying and selling those coveted positions.”
Image copyright
Getty Images
Image caption
Lori Loughlin with her daughters in West Hollywood last year
The daughters of Full House actress Lori Loughlin and fashion designer Mossimo Giannulli were not outstanding sportswomen.
However, the couple allegedly spent $500,000 to get them into University of Southern California by presenting them as accomplished rowers. They have not commented since the charge were filed.
LLori Loughlin’s daughters in spotlight
Actress free on bail over college scam
After getting her place, their youngest daughter, Olivia Jade, made matters worse by bragging online, saying she would rather be concentrating on her Instagram career. She is an influencer and has 1.3 million followers.
“I don’t know how much of school I’m gonna attend but I’m gonna go in and talk to my deans and everyone, and hope that I can try and balance it all,” she said on her YouTube channel. “But I do want the experience of like game days, partying… I don’t really care about school, as you guys all know.”
She has since apologised for her comments, but the backlash has been huge.
It is not clear how much any of the children knew about the alleged plots. According to the court documents, some were involved, at least to a certain degree, while others were in the dark.
“[The entire scandal] is a perfect example of the entitlement that comes with wealth and privilege,” adds author Eric Yaverbaum.
“We knew the system was unfair (after all, wealthy parents can pay for multiple test retakes and expensive tutoring, and the wealthiest can pledge large donations to a school just as their children are applying), but we didn’t know wealthy parents were taking it even further. In either case, it only reiterates the need for the admissions process to be re-evaluated.”
In recent days, the US media has uncovered that Loughlin’s Full House character, Aunt Becky, was also involved in a school cheating story – perhaps indicating just how common the idea is, at least in theory.
In real life, however, the story unfolding in the news has outdone the scriptwriters.
Though the focus may have been on the two actresses so far, the rest of the cast of real-life characters is almost as intriguing.
Other parents indicted include a self-help author, a casino operator and a Napa Valley vineyard owner.
One of the many questions outstanding is – who will play whom in the inevitable TV adaption?
0 notes
Text
Magnetic bottle opener
DESCRIPTION:
I started making these over 2 years ago. I made the first batch for my brother in-laws, my dad and, father in-laws. They all loved them and wanted some to give to their friends. So, I have kept making them. I typically make them for about $15 in materials and sell them for $20. If I was going to sell them at a craft fair or online I would sell for more money. This the 3rd iteration of them. I have changed how i finish them and I swapped out the pine for red oak. The pine was just too soft and damaged too easily. You could easily batch these out and sell them online or at a craft fair. I have a Sketchup file with basic dimesions in the plans section of my website.
MATERIALS:
4in x 1in x 6ft Red oak board - local home center
4 in x 1in x ? Walnut board - local wood working store
Titebond II wood glue - http://amzn.to/2suPseM
A can of Shellac - http://amzn.to/2s0kzST
3 - N52 Neodymium Magnet 1.26" x 1/8" Discs - http://amzn.to/2u2gjja
1 - cast iron opener - http://amzn.to/2tHeY1O
2 - 5/8 brass screws - http://amzn.to/2s8wxpu
5-Inch 8-Hole 120-Grit Hook-and-Loop Random Orbit Sandpaper - http://amzn.to/2t8pdzl
TOOLS:
bar clamps - http://amzn.to/2rwMvxa
Rockler glue brush - http://amzn.to/2qGUa8N
table saw - the one i use is discontinued and I don't recommend it.
miter saw - http://amzn.to/2skdiuB
orbital sander - http://amzn.to/2rLtIzd
Self-Centering Bit Assortment - http://amzn.to/2rLpNPa
Forstner Drill Bit Assortment - http://amzn.to/2tDhBBQ
Painters Pyramid - http://amzn.to/2t8qm9K
Step 1:
Cut the red oak board into 9 equal pieces. Then number each piece all the way across it, so that you can know how to put them back together after you cut them apart.
Step 2:
Now cut off 3/4 of inch from each side. This way you grain will match across the front after you insert the walnut sections.
Step 3:
Rip the walnut to 1/4 inches wide. Then, cut the 1/4in walnut into strips the same length as the 9 red oak pieces. Keep in mind you will need 18 walnut strips for all 9 bottle openers.
Step 4:
Drill the hole for the magnet that will catch the bottle caps. It needs to be as close the "front"(bottom of the piece in the picture) of the wood as possible to get maximum pull force. You need to drop the drill bit all the way to the table and then back it out just a hair. Then set a depth stop your drill press so that you don't drill all the way through the wood.
Tip: make sure that you have consistent down force all the across the work piece or your hole maybe crooked or the bit might pull the piece up off the table and ruin it. This 1in forstner bit causes a lot of twist force..
Step 5:
Using hold downs, put the magnet on the edge of the wood and mark how thick it is on the side. Then move your bit to that line and put a depth stop to make sure you cut a consistent depth each time. Make sure to add just a hair more to the depth make sure that magnet will not stick out past the wood after you sand the wood. But remember, that you need the magnet as close to the surface as possible to get maximum pull so that it won't move while opening bottles.
Tip: Even though the magnets are smooth, they will mar some surfaces that wood will not, especially a stainless steel fridge.
Step 6:
Put some craft paper down on your bench to avoid getting glue all over the bench.
Step 7:
Spread apart the sections turning all of them 90 degress to the right except the left one.
Step 8:
Apply a bead of glue to all parts except the one on the far left.
Step 9:
Spread the glue evenly with silicone glue brush or your finger. It is not super important to get total glue coverage on these since the joint will not be under any stress or very little stress.
Step 10:
Then rotate all of them back 90 degrees to the left and press them all together with clamps. Try to get even pressure and make sure that the back and the bottom are as even as possible. There will be less sanding needed this way. You should see a little glue squeeze out. If not, you might consider un-clamping and adding more glue.
Step 11:
After sanding all side smooth 120 grit sandpaper, make sure that the magnets are not sticking out passed the wood. This is will avoid marring any surfaces that you stick the bottle opener too.
Step 12:
Mark and use a punch to make a hole for the bottle opener maounting screws.
Step 13:
Set the max depth of the your drill bit with a piece of tape. This way you don't drill the hole all the way through the wood. Because this is red oak you will need a pilot hole so that you don't split the wood or break the head off of the screw, especially since we are using brass screws here.
Tip: Making a flag with tape instead of just wrapping it around the drill bit will better help you to see when you have gone deep enough.
Step 14:
After drilling the pilot holes, do a test fit and actually screw on the metal bottle opener.
Step 15:
Now apply 2 coats front and back of spray shellac. I like this finish becuase of its naturall look, its water resistance, and that it dries in about 10 mins between coats.
Step 16:
Use super glue to glue in magnets. For the center magnet press the magnet with good force to squeeze excess glue up the sides and onto the back, then wipe off. Be cautious since some glues will dry to skin instantly. For the other 2 magnets, put just enough glue to cover all of the wood surface then press the magnets down firmly for about a minute. Try not to put o much glue because excess glue on the back of the magnets might affect the pulling power against whatever you are sticking it to.
Tip: Make sure to look at the glue you are using and check the cure time. It might set in 1-10 minutes but might have a 24hr cure time. If you try to use the bottle opener too quickly and the glue hasn't cured the magnets will pull off the wood and stick to your metal surface.
Conclusion:
Here are two versions of my bottle openers side by side. The new on is on the left and the old on is on the right.
0 notes
Last Seen Blogs

ministerofjoy
grrr....

koreposion
A Garden

xn--8mrs87i0cc9z3a-blog
鶴原製薬株式会社の未来への向き合い方


sophiamerlin
SophiaMerlin