#pullip assa
Photo

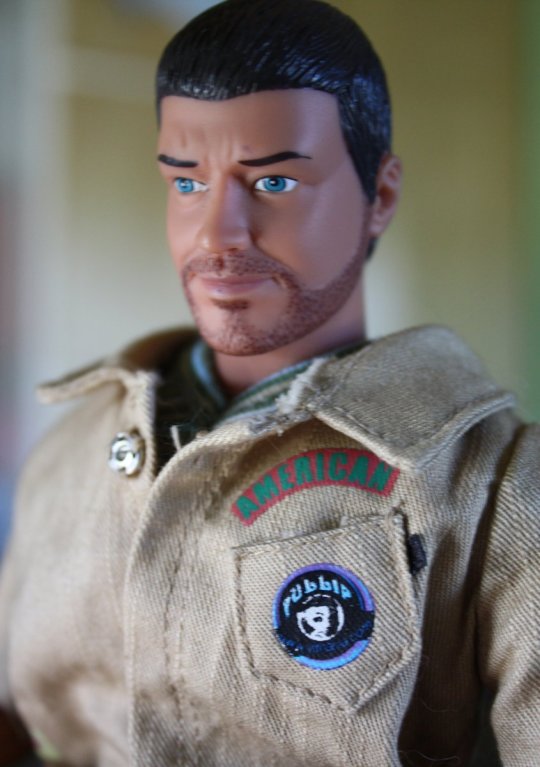


Gerard, wearing Pullip Assa’s jumpsuit
saved from my flickr archive - Sept 7, 2009
2009ish, I went a bit crazy for doll-sized jumpsuits. Pullip Assa and a certain Petworks Momoko were the biggest reasons. No hope of getting the Momoko, but I managed to get some of Pullip Asa's stock outfit. I got the long-sleeved shirt, the jumpsuit, and her bag.
I'm still fascinated by these (screen printed?) "patches", with English phrases. (Pullip is made by Groove Inc, formerly Jun Planning, and is based in Korea, afaik.) Alas, this series of pics got cut from my flickr page, amid the purge.
Photo descriptions below the cut.
1- Gerard is a playline action figure that I acquired through a Canadian friend. (I regret trading my repaint and her awesome wig, but I still really love this guy.) At the time, I thought he resembled actor Gerard Butler. Aside from his great (almost too many!) joints, I really love his beard.
I think the line is called World Peacekeepers. (Maybe “Power Team”?) Andrea @dollsahoy knows that they're a very good line for customs. And yes, he's standing on his own, without shoes.
This jumpsuit is purposely baggy. It's even baggy enough to fit my "broad"-sized Ken. The striped shirt underneath is from an early-2000s Ken fashion pack, iirc.
Please note the backwards "music" design on the right-hand lapel. Or it could be a stylized "wazic" upside-down.
2- Portrait view. On the left-hand chest, a curved banner with the text "American" (all caps). On the pocket, a smaller version of the circular logo that's on the back of the jumpsuit. At this size, you can read PubblP Pullip in fancy lettering. The web address isn't easy to read.
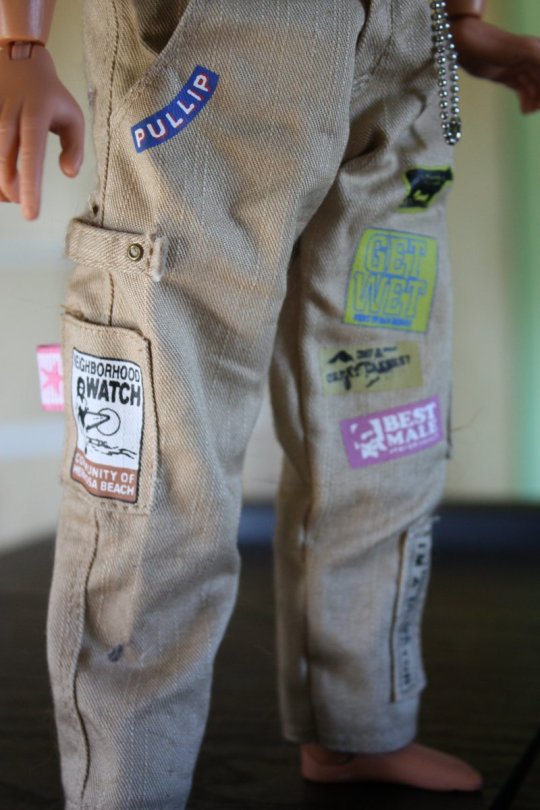
3- A broad view of the legs. The close-ups in the next images show the designs better.
4- Right hip area. Above the waist line, near the side-seam, "Beach Deli 125[?] Pacific Coast Hwy Holister CA". Tiny letters are tough to read, so that might not be the correct number.
Below the waistline, there's a curved banner that follows the opening of the hip-pocket: "pullip" (all caps).
5- Along the outside seam, between the hip and cargo pockets, there's a strap-band thing? Idk, I think it's supposed to help hold Assa's tools in her pocket.
Just above the knee is a large cargo pocket. There's a pink-and-white star ribbon "tag" sewn in a loop on one side. The pocket's "patch" looks like a sign. "Neighborhood Watch" with a lady holding a surfboard. "Community of Hermosa Beach" at the bottom. All the text is in caps again. I just hate reading all-caps.
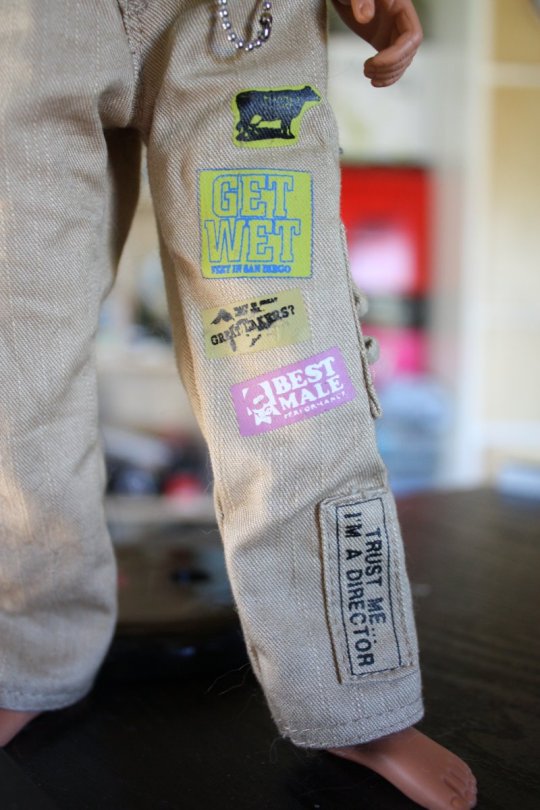
6- Left leg, viewed from the front. Below the hip pocket is a black cow (with udder; odd detail) on a yellow background. Next is a yellow square: "get wet" in large letters; "feet in san diego" in smaller text below that.
I can't read this next one. Tiny text, then "great takers?" in larger text. Can't figure out what that splotchy design is supposed to be.
"Best Male Performance", with a goateed guy in sunglasses.
Thin cargo pocket at the bottom of the pant leg, likely to hold Assa's screwdriver. "Trust me... I'm a director", again in all-caps.
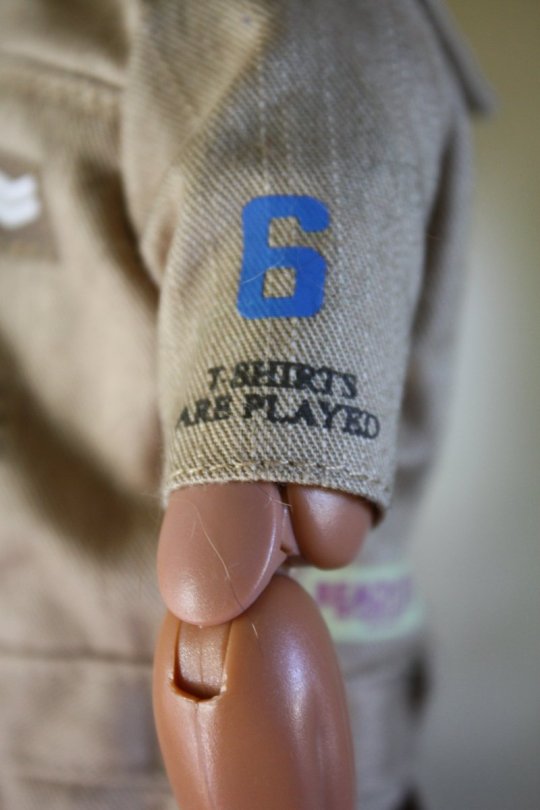
7- Right sleeve. A blue number 6, no background. In black text, "t-shirts are played" in all caps, also with no background.
8- Backside, broad view. Guess I didn't photograph the "patch" on the left sleeve, oops. Back-torso design shown in next image. On the left butt-area, another number 6 and "want some action?"
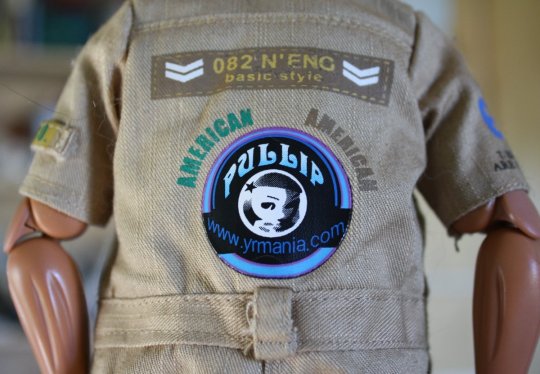
9- Back torso. Shoulder banner with a "stitched" border and military chevrons. "082 N'ENG basic style"
Two curved bits above the circular logo, both say "American" but in different colors.
Circular logo says "PubblP" "Pullip" in fancy script. Middle circle is a stylized photo of Asa herself. Underneath is a web address, likely defunct by now: www.yrmania.com
#doll nerd#action figures#world peacekeepers#pullip#pullip assa#doll clothing#doll jumpsuit#clearing drafts#flickr purge#queued post is queued#long post
18 notes
·
View notes
Text
Scroll very fast if you don't like dolls
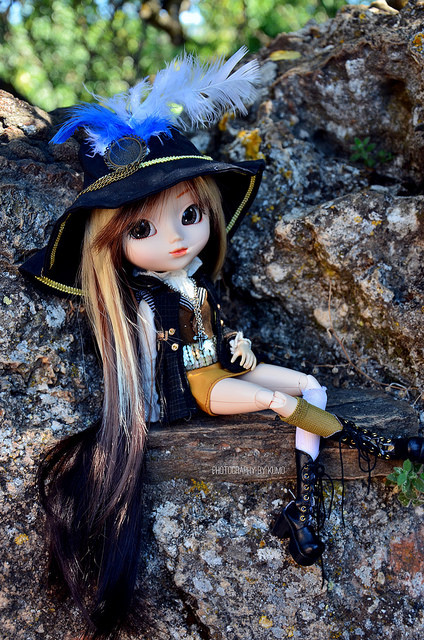
So Pullip dolls have been my hobby for the past 16 years and I ended up temporarily finishing a custom Ive had in mind for a while...


I say "temporarily" because I'm going to switch this body out for one with a little more stage presence, as well as make some actual outfits from the show, but yeah, um, two of my obsessions combined today. Twin Peaks and Pullips. Audrey is probably my favorite character in this show. Teenage me wished they had half the swag she does.
*jazz playing in the distance*
(And if you don't like dolls I'm sorry, I tagged this post as 'dolls' and 'dolls tw')
#twin peaks#audrey horne#pullip#custom pullip#pullip ooak#pullip faceup#pullip custom#sherilyn fenn#yes i painted the shoes#dolls#dolls tw#and for the pullip people wondering#this is a pullip assa 3 part head on a type 2 body#not an mio!#i wanted her to have a type 1 body but it requires me basically making a new neck peg which will take some time#i was gonna try one of the new 24cm obitsus for the flexibility#i might settle for that since type 1 arms are so floppy
5 notes
·
View notes
Video
Les jacinthes by Andie Lewis
Via Flickr:
"Les jacinthes" Pullip FC par Polka Dolls Fabrics Andie L. ------------------------ Web site : www.andielewis.fr Instagram : www.instagram.com/andielewiscapharnaum/ Facebook : www.facebook.com/photographie.AndieLewis
#pullip#full#custo#custom#assa#dread#girl#wig#monique#eyes#lullaby#glass#obitsu#doll#dolls#japon#japan#photo#photography#polka#fabrics#ooak#rement#flowers#art#rennes#france#andie#lewis#blue
1 note
·
View note
Text
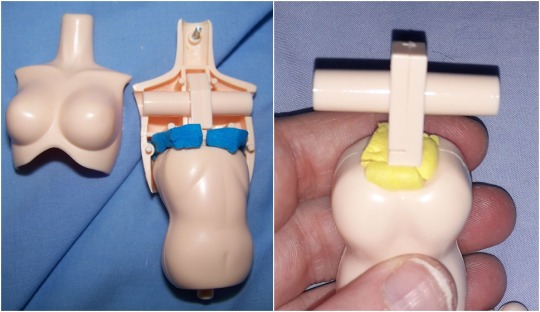
Obitsu fixing
First pullip doll I chose to take apart was the closest to me, Renée, the Poison Girl custom (n°5 and unsigned, from way back when she first opened commissions), formerly a Assa that was covered in superglue inside and out. Bad choice because that lead to hours of work LOL. You see, when Assa (now Renée) first arrived, my priority was getting her open as everything including the head cap was melted shut then once I realized I couldn’t save her face up as it’d been eaten by superglue, cleaning the face plate for customization. I reconstructed the broken neck hole and screw notches with two part epoxy and reinforced the cracking plastic where both plates had fused but that’s the extent of it really.
In the years since then I’ve learned so much about plastics and had access to far better tools for repair. Back then I only had access to sandpaper in large sizes via the hardware store and you’d have to buy a pack with max 3 grits, today I can choose between a magic eraser and 8 different grits of sandpaper pasted on a sponge for finger nail care. I have pry tools that mean I won’t break nails or scratch the obitsu, and friendly plastic that holds up far better than crumbling emergency sink-repair epoxy.
It’s amazing just how much you learn over time because when I went to check on Renée’s Obitsu today I was kind of horrified that she was in such bad condition because OMG I can fix that, I can tidy this, that mod won’t hold up but here’s a better one... you know? So Renée has been a beautiful faceplate on a janky hacked together backplate until now. Now she’s a beautiful face plate on a slightly less janky but still clumsily repaired humpty dumpty of a doll.
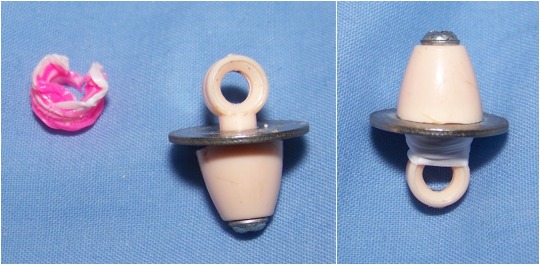
aaaanyways, back on topic, the craft foam used in the Obitsu’s has held up and didn’t stain, it just need a little adding to for some dolls. The elastics holding the necks either crumbled or turned into solid plastic blocks so I replaced them with teflon tape. I also tidied all the hastily scraped and sanded Obitsu nipnops for nice smooth boobage.
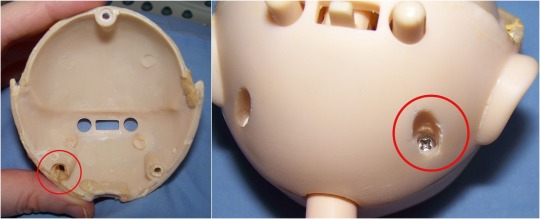
Renée got lots of sanding, scraping and all 3 screw bits were cracking and got repaired with thermo-plastic. I’m not posting pictures of her gross yellowed glue streaked backplate because they’re kind of ew.
Yellow from wig and glue removed from forehead:
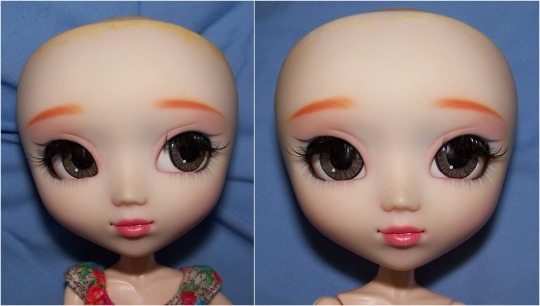
thermo plastic repair of a broken bit (yes I havn’t finished polishing the backplate so it still looks scratchy)
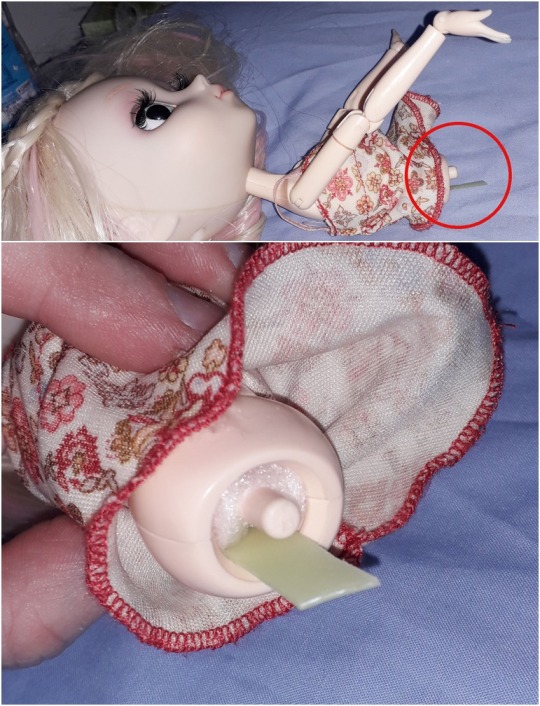
Rida needed the neck anchor reinforcing with teflon tape and also the tiny piece of metal that holds the round part of the anchor so that her head no longer flops.
My Melody had a body that flopped backwards so I added extra foam to the prexisting blue stuff (yellow harder foam at the top and white thinner foam inside) and a plastic spine of sorts at the bottom end.
This is when my camera stopped and wanted recharging so I switched to the phone:
Papin just needed teflon tape, her liv body with a carved neck and homemade washers are holding up great. I used plastic washers for a little more flexibility than metal here. Knees a little weak but not bad considering how heavy Papin is with her big head and rainbow wig.

This is the kind of mod I hope to do with a Barbie made to move curvy body eventually.
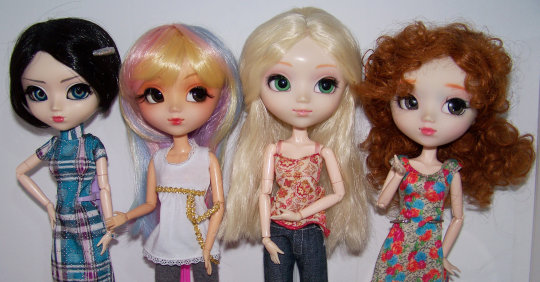
(old photo of the current four, soon to be five)
60 notes
·
View notes
Photo
Smokey in Penang Island Outfit by vanie~ on Flickr.
~durinfeels
#smokey assa obitsu penang island outfit set pullip#pullip doll#pullip assa#pullipdolls#jun planning#groove#assa
52 notes
·
View notes
Photo
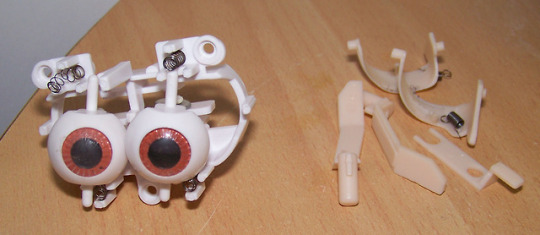
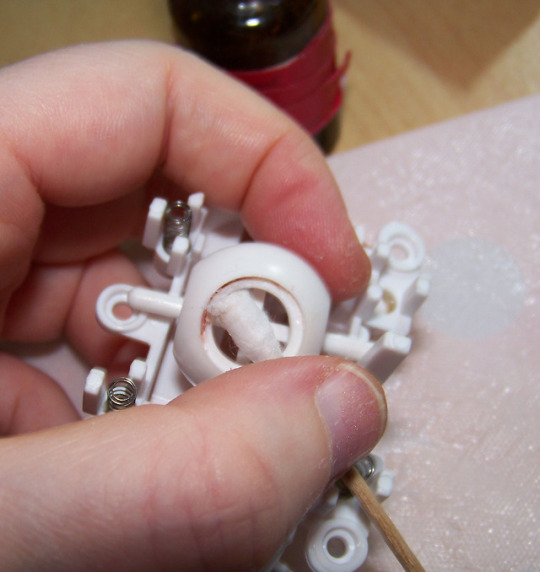
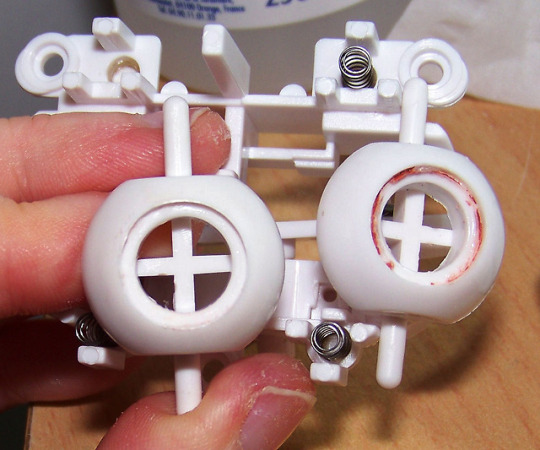
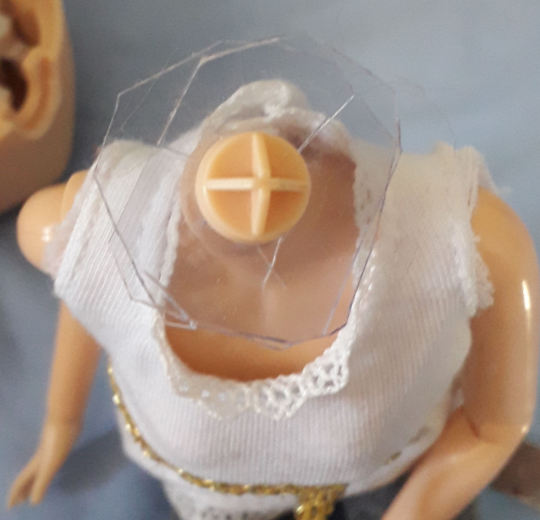
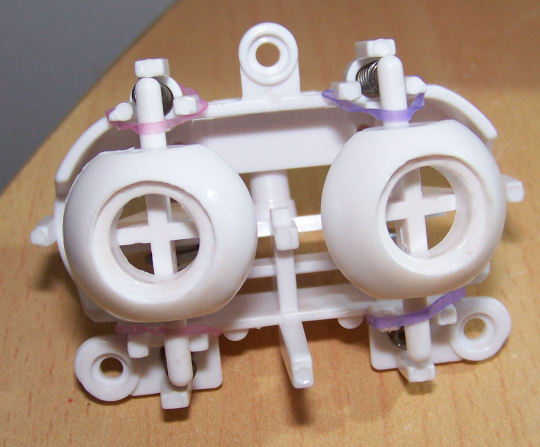
Eye mech repair part 1: Eye Wells and spring
I received this Make It Own Pullip eye mechanism in a trade from the lovely @andersonsdollpurpose and am repairing it and modding it to fit a type 2 pullip (three part head).
Upon arrival, from the tell tale frosting, it was clear that I wasn’t going to be able to cut out the eyechips without damaging the eyewell and decided to keep the eyewells in shape and sacrifice the eyechips instead (this will be part 2 or 3, they are surprisingly mostly intact!). So I popped out the eyechips from behind with a plastic paint brush end.
I have experience working with super glue mess on hard plastic from years of doll + gadget fixing and from my Pullip Assa who was bought covered in superglue and pretty much welded together.
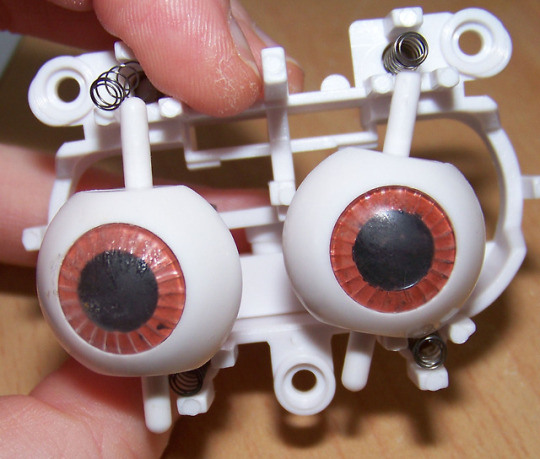
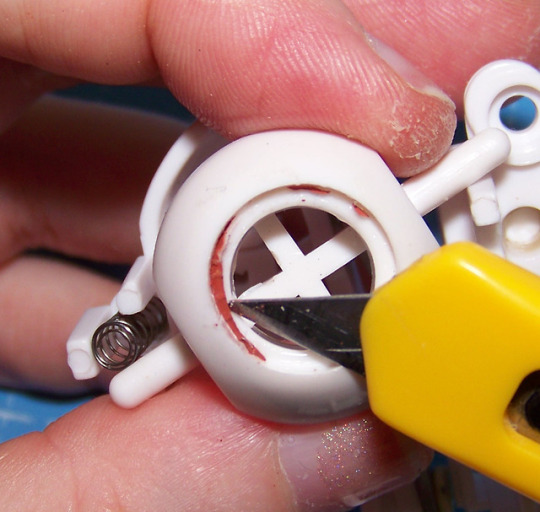
Clearing the eyewells of superglue took 3 hours and is a delicate process of applying acetone by dabbing it for a few seconds then attempting to dislodge or scrape off superglue residue in sections of about 5-7mm at a time. I’ve since found out that using ice can help break the bonds between the superglue and the original plastic. You want to apply acetone to the super glue without it touching the plastic because that would cause melting and other deformation. Sanding and dremelling without a magnifier is just a recipe for damaging the original plastic.
The photos are posed 1 handed and for illustration only, you need both hands and to get a good feel for what is and isn’t the original plastic by how your tools “feel” in your hands against it and running your fingers against the area itself, fingertips are very sensitive down to the micromilimetre. Especially working with clear or white plastic, visual cues aren’t much help though I do recommend taking high res photos and zooming in to see if there are any areas you missed.
Work against a towel or foam so that you can apply force when needed without worrying about breaking stuff.
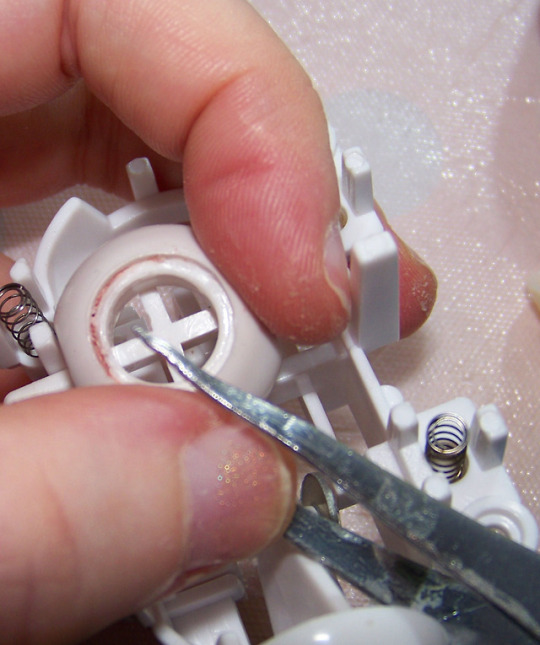
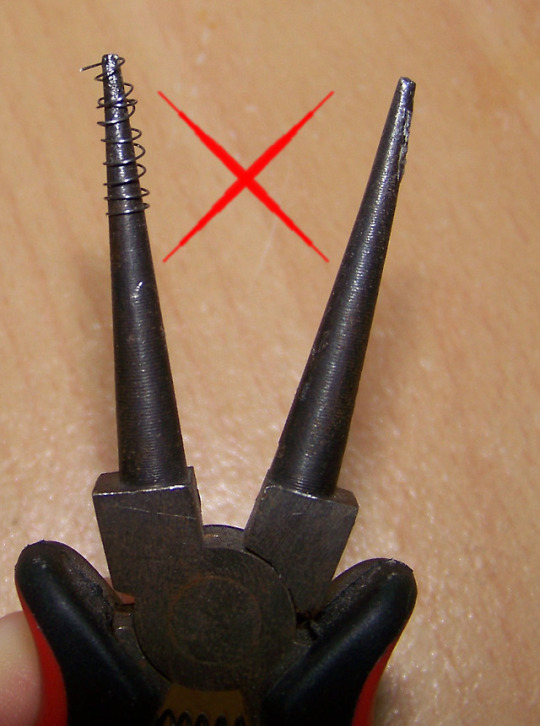
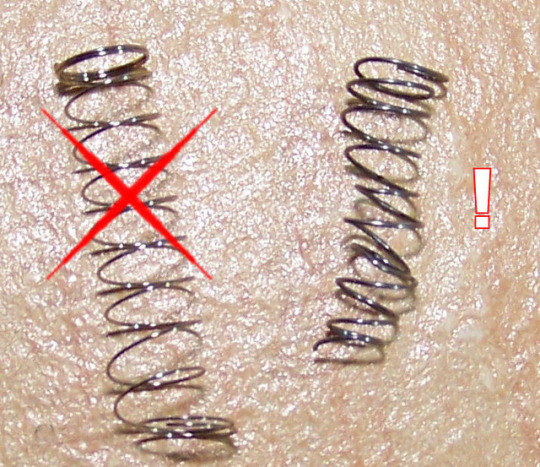
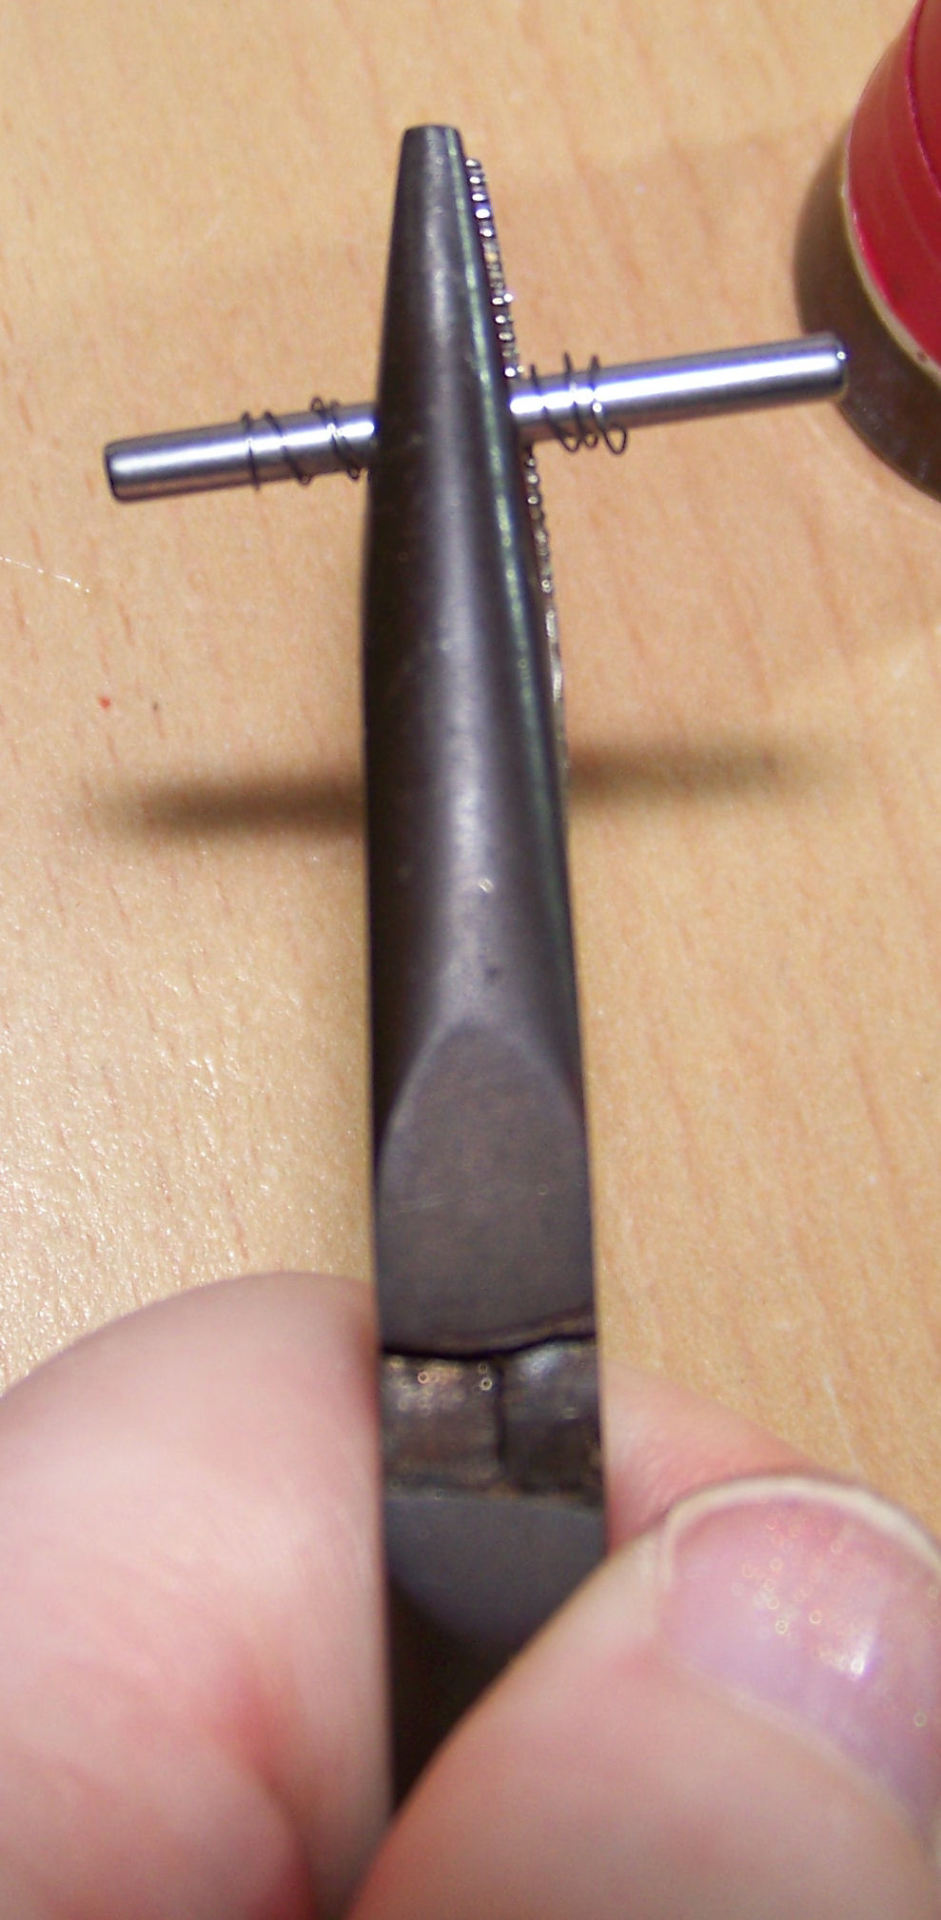
For the damaged spring, my first idea was to try and replace it but pen springs are slightly too wide for MIO eyemechs. Then I tried to reshape it on needle nose pliers and that didn’t work but in my box of doll parts I found a metal cylindrical dowel and used that with normal pliers to reshape the spring by twisting and pressing. I then cut part off with wire cutters as it was still too long.
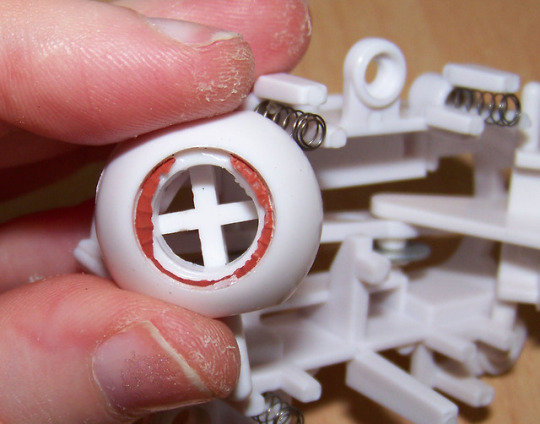
end result, held in place with elastics to keep everything in place while working on the fit inside the head. Glue residue on the eye whites was scraped off with the back of a craft knife then polished with the buffering sandpaper on a nail block.
The next step was about going through my goblin hoard of tiny screws (collected from broken gadgets) to find three long ones to fit the mech and one 2mm thin screw with a lip to fit the eye movement lever.
12 notes
·
View notes
Last Seen Blogs

shiromichi-week
Shiromichi Week

bitchboiclitty
Slut Boi

itsstevenonfire
the super (and not so super) adventures of mcqueen
dollelujah
kiyomi haunterly appreciation life
randomsillypolls
silly polls