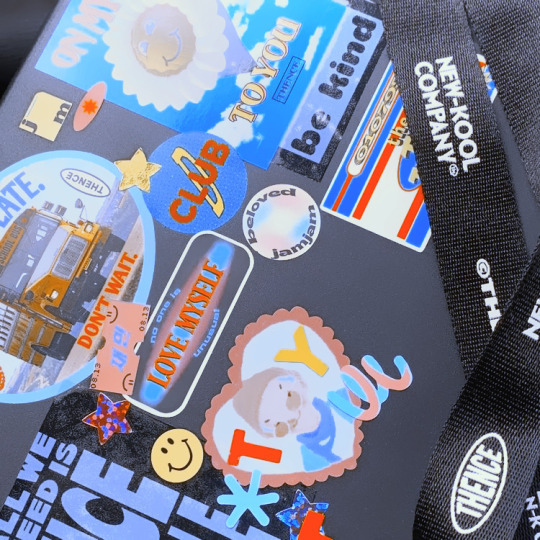
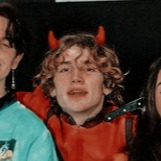
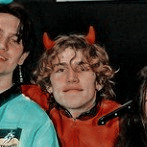
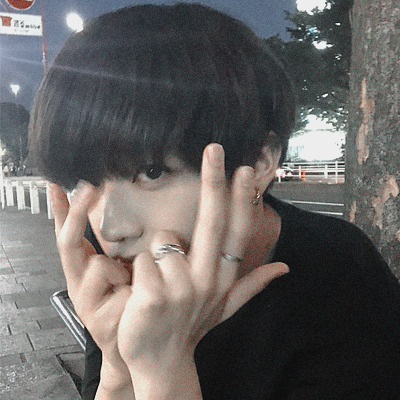
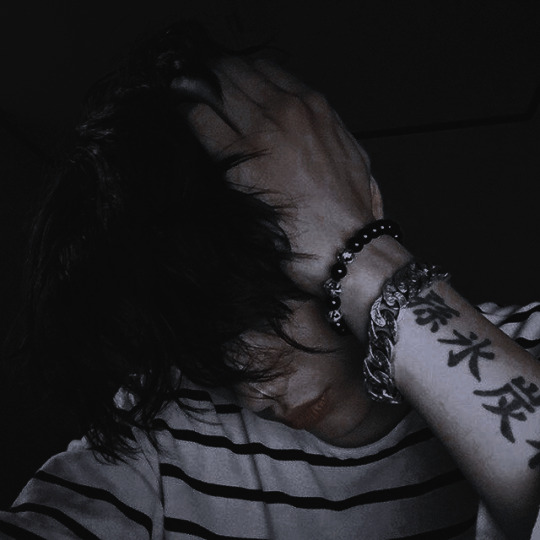
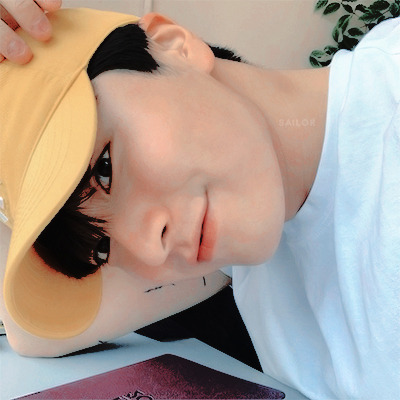
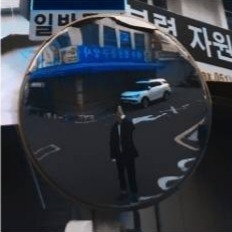
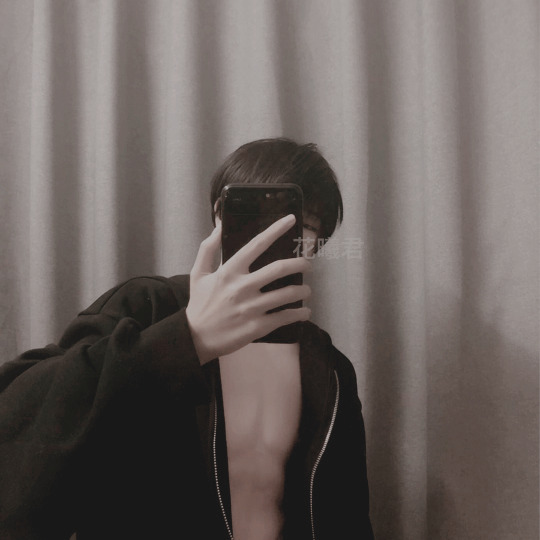
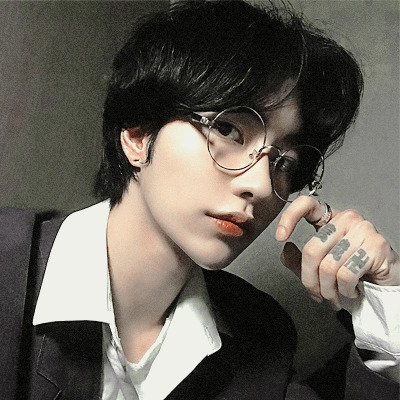
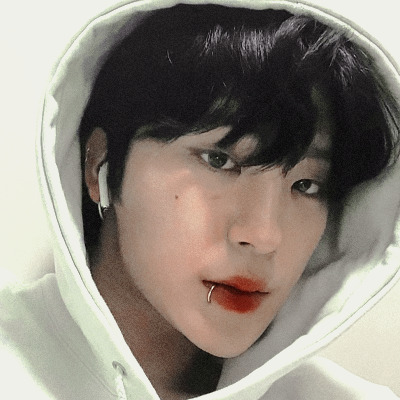
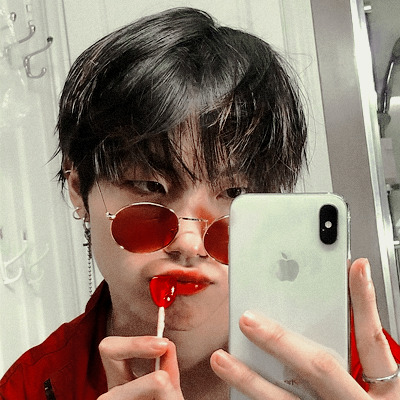
#ig boys with psd
Text

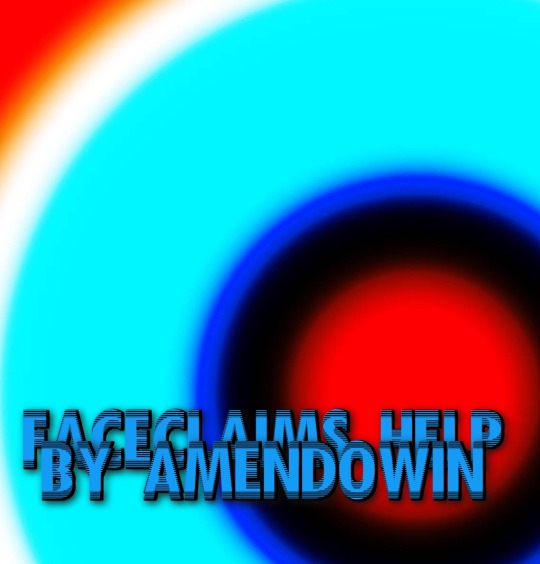
📩ᩚᩨ\㌮ꕤ⃗ᩚ🔊᪶✖️🏐🏑✿ᩴ𑑙faceclaims, ☆n ig💬᪶ᩚ𓂋ꕑ💱


私さ٬٬📬 juliatpe
私さ٬٬📬 kayden.weathers
私さ٬٬📬 pizza4alice
私さ٬٬📬 ph1girl
私さ٬٬📬 mazieann.e
私さ٬٬📬 sunnyysarah
私さ٬٬📬 _earth2autumn_
私さ٬٬📬 coolkidcarly
私さ٬٬📬 ashthefairyy
私さ٬٬📬 kenlatte
私さ٬٬📬 niasghost
私さ٬٬📬 anaarrants
私さ٬٬📬 ayokellyy
私さ٬٬📬 macaylaa.a
私さ٬٬📬 eoshunt
私さ٬٬📬 eucarinasoares
私さ٬٬📬 mla.ea
私さ٬٬📬 corinabradley
私さ٬٬📬 gabs.z.x
私さ٬٬📬 imjuliss_
私さ٬٬📬 isabellalalonde
私さ٬٬📬 deathstarrrrrr
私さ٬٬📬 laraaceliaa
私さ٬٬📬 briafo
私さ٬٬📬 nicaphan
私さ٬٬📬 dinadenoire
私さ٬٬📬 canfrgu
私さ٬٬📬 faithcollins
私さ٬٬📬 havannawinter
私さ٬٬📬 kailahashimoto
私さ٬٬📬 louisseriot
私さ٬٬📬 jacksonpassaglia
私さ٬٬📬 maxxseel
私さ٬٬📬 kaden_hammond
私さ٬٬📬 andiisbae
私さ٬٬📬 dayker
私さ٬٬📬 dominiktarnowski
私さ٬٬📬 des.qua
私さ٬٬📬 john_supnik
私さ٬٬📬 cedricioo
私さ٬٬📬 tetervinas
私さ٬٬📬 okjohnnyboy
私さ٬٬📬 theyanmark
私さ٬٬📬 llover.boyy
私さ٬٬📬 moritz_hau
私さ٬٬📬 carlosssdan
私さ٬٬📬 aidanalexander
私さ٬٬📬 manurios
私さ٬٬📬 uonlad
私さ٬٬📬 didluck

#aesthetic#icons#moodboard#amendowin#gif#gif with psd#faceclaim suggestion#faceclaims on ig#site models girls#site models boys#random site models
52 notes
·
View notes
Text
Hi there! I have never gotten around to make a gif tutorial because there are plenty of good ones out there and I suck at explaining things. Back when I basically use my side blog (@marvelsaos) as my main, I didn’t get that many questions regarding gif making, I presume because many people who followed me there weren’t gif makers. But this year, I finally come back to my real main blog and started posting more gifs over here. This blog is where I mostly follow gif makers and is mostly followed by gif makers. I have gotten a lot more ask on how to achieve certain things in my gifs, most notably my recent Winnie The Pooh set. And this is why I decided to make this post. This is by no means a tutorial, just a post sharing my giffing journey and the things I do in gif making that might be of your interest.
‼️Tons of rambling below. Text, image & gif heavy. Proceed with caution‼️

Table of Contents
Introduction
The Basics
Everything about making a simple gif from start to finish
How to optimize your giffing process
The more advanced stuff?
“Recolouring” & rotoscoping in After Effects
Tutorials mentioned in this post
Acknowledgement
Feel free to jump to any section you find useful. Most of the ramblings are in the introduction.
1. Introduction
i. How I started
You thought that was the intro?! I’m the kind of person who someone would know for a decade without hearing me say a word, and when I finally spoke (usually about stuff that I’m passionate about) I just go on and on and on and it shocks people to no end. I’ve been on tumblr 10 years now as some of you might know I’m doing my 10 year celebration, but I didn’t start giffing until about 7 years ago. And I just realised I have never properly introduced myself. Hi! My name’s Winnie and my username across all social media is Ms_Stanatic. Before I started giffing, my main fangirling platform was IG, and boy I’ve got sooooo many accounts I don’t even remember all of them, the bigger ones were mofy, ouat & aos related, and these days I’m giffing all of my old favs for old time sakes. If you happened to know me back then, drop by and say hi. It probably felt like I drop off the face of the earth when I quit IG. The show that got me started on giffing was, as some of you might know, Agents of SHIELD. @marvelsaos was my “main” blog for the first 6+ years of my giffing journey. Now thinking back it was because I finally got my first laptop when I got into uni and didn’t have to make edits on my android phones anymore. But at the time, all I wanted to do was to capture Melinda May’s eye rolls and actions and static images just weren’t doing it for me anymore. And that’s how I embarked on the journey of gif making.
ii. Tools/ Softwares I used
I had a Macbook air back then, and finding a cracked photoshop for mac was kinda hard, so I had to settle with GIMP. Without the GAP plugin may I add because I do not know how to install it till this day, so it was just pure nightmare. Making gif in the beginning was the most tedious thing I ever did, I’ll explain a bit more later on. The giffing community felt very different back then. I don’t know if it’s because I wasn’t aware or because I wasn’t in it. I felt like there wasn’t as many giffing tutorials on this site, and all I kept seeing was people sharing their psds. It might have been useful if I had photoshop but I didn’t. So the idea was that you can just open up the psd files and drag the adjustment layers onto the image stacks that compose of your gif, and the adjustment layers would affect all the layers beneath it. Not with GIMP though. In GIMP, the adjustment layer(s) only affect the single layer right underneath it. You heard me right. At that time the gif size limit on tumblr was 2mb, a gif I made is usually 20-30 frames/ layers. So I had to duplicate the adjustment layers 20-30 times, them move them right above each image layer. And if I don’t like how it looks, I had to do it all over again. This is slowly turning into a rant but seriously thinking about it gives me headaches. Also, did I mention I didn’t even read up on tutorials and stuff, I basically just googled everything I needed, how to screencap, import it into GIMP, crop & resize, how to use curve, then lastly how to export. No sharpening, no nothing. I didn’t even learn about recolouring like less than 2 years ago (my AoS peeps know which post I’m talking about 😉). This went on for about a year or two, then uni got busy and my life basically went downhill. Somehow, AoS pulled me out of that deep dark hole and get me back on my feet again also because I finally graduated but I’d like to think it’s my love for tv that saved me. I got a bit more time on my hand, I decided to go back to giffing and this time I was determined to get GAP installed on GIMP and have it working. But alas I have failed once again. It was around that time I found out photoshop’s older versions like cs5 was free to download, so I got that instead and finally begin giffing with photoshop.
Moral of the story: Try your best to get photoshop for giffing. It’ll save you so much headache.
And my story didn’t end there. While I was using cs5, I think many people have switch to photoshop cc which has the timeline function for things like smart sharpen (which was a major topic back then) and keyframes (which is what I heard people talking all about these days). Even without timeline, photoshop is definitely a step up from GIMP personally and I managed with a workaround on the smart sharpen function thanks to Julie (@doramilaje). Side note, all the gif makers (beginners & experienced alike) I’ve talked to are all such amazing people. They put so much energy into this craft and are more than happy to talk to you about it when asked. So don’t be afraid, just ask nicely. And maybe go off anon, you might make a friend or two.
2019-20 were probably my most prolific giffing years, I giffed non stop every single day as if it was my full time job. For me, it was something small and easy to complete and it kept my days going. And eventually my Macbook Air that I’ve been using for 5 years was starting to give up on me. And when I upgraded the OS system to Catalina, it no longer supports cs5 and I was devastated. I eventually got my hands on photoshop cc 2020, and in some ways I re-learnt how to make gifs again (like for the third time?).
I knew it was about time to get a new laptop. And now that I know I’m gonna use it for some heavy duty, and I didn’t want to get another macbook because I’m just not that crazy about it and at that time I wanted to use avisynth (more on that later) which was only available on windows (I didn’t know how to install vapoursynth on my macbook ok?). Eventually I got a gaming laptop with a 10th gen i-7 processor and a Wacom Intuos Pro using my sibling’s student discount. I got the Wacom tablet trying to get into digital drawing, but eventually it came in super handy with just day to day editing and especially recolouring.
Moral of the story: Start with whatever you’ve got, then upgrade your equipment when you’re serious about it.
iii. What I’m doing now?
This year has been kinda different for me. In the past, it has always felt like I’m on my own sitting in front of my laptop churning out gifs 24/7. This year, I’ve joined a couple other blogs and gif maker/ ps user networks, learnt a whole lot of new things and diversified my giffing content (I have been giffing AoS 99.9% of the time non stop previously I kid you not). And I’ll be back in school for my part time masters a month or two later, so who knows how often I can gif. I don’t ever wanna stop giffing but I know one day I will, and before that day comes I just wanna share some of my memories with you guys on this hell site. So, basically all that led to this post.
2. The Basics
I’m gonna assume you have a bit of knowledge about gif making. If you’re a complete newbie, I’ve tried my best to link some tutorials to help you understand or get started. And don’t get intimidated by the length of this post. Even though a lot goes into gif making, once you get everything sorted and find your routine, it’ll become second nature. The following is simply my workflow of gif making. It is by no means the right/ better way of gif making. Everyone does things a bit or drastically differently, I’m just here to share my process in hopes that someone might learnt something new or find something interesting. If I got something wrong, feel free to inbox/ message me and address it politely, since I didn’t exactly started out giffing with clear directions, I do get some of the fundaments wrong. And I am no expert in photoshop or any editing software, it’s more of a learning as I go sort of thing. So just take everything with a grain of salt. With all the disclaimers out of the way, here come the things you’re probably here for.
i. Video source
There’s one simple rule, go with the most HQ one, I’m talking 1080p or 4k and make sure it’s the biggest in file size because not all 1080p are created equally. Here’s a post by Taylor (@kylos) explaining all of that and where to download as well. For the most part I just use 1080p because I personally can’t tell the difference but I’m sacrificing a lot of time for a 4k video to load/ process. It’s only instances like these I would use a 4k source.

(gif taken from my set here)
Downloads are gonna take up space but you probably want to keep them if you might gif the show/ movie in the future again since you already spend all that time downloading, so you might need to invest in some hard drives for this. I used to use my uni’s unlimited gdrive plan which was available even after I graduated, but after Google cancelled it I was in huge trouble. I save pretty much all my hd downloads and all my psds & gifs. I’ve recently got a WD Elements 12TB just so I can transfer all 6+TB data on my gdrive to there with space left for the next couple of years.
ii. Screencapping vs Video clipping
So there are a couple of ways to go about this that I’m aware of.
screencapping with mpv (tutorial by Taylor) or other softwares
video clipping with handbrake (here’s an in depth tutorial on gif making including clipping with handbrake by Nums @cillianmurphy), vlc, km player, etc.
video clipping + cropping + resizing with Vapoursynth (download here | tutorial by Em @realstraykids)
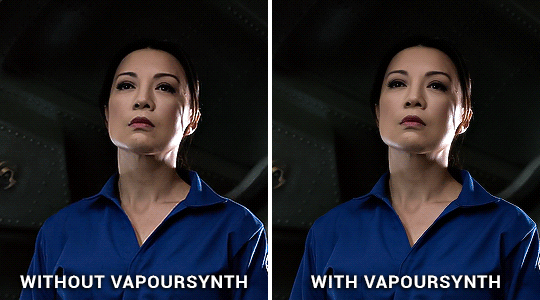
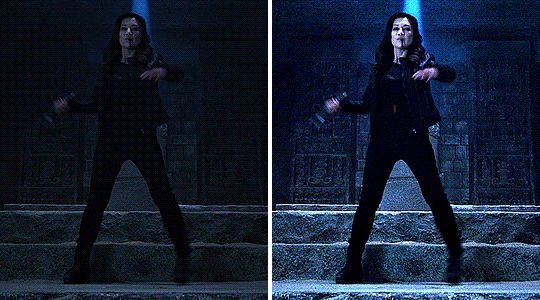
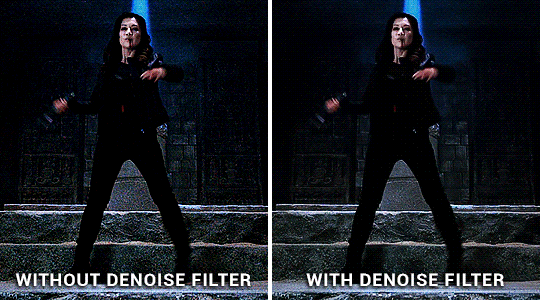
I have tried all of the above. I started with screencapping till around late 2020, when I found out about avisynth (now replaced by vapoursynth) and finally got my hands on a pc where I can download it. I was using screencaps for a really long time because older versions of ps don’t have timeline, I would end up having to convert the video back to frames anyways so why don’t I just import screencaps as is. I think it’s the same logic for me now, because I start all of my editing in timeline, so it’s just quicker to import video clips for me (especially when comparing screencapping with mpv vs video clipping with handbrake). From late 2020 till now, I mostly use avisynth/ vapoursynth. There should be less detail lost when resizing using vapoursynth compared to ps. Personally, I think ps does a pretty good job and I wouldn’t say vapoursynth is a must, it just happens to be a video clipping and resizing two in one tool for me. Vapoursynth has additional denoise & sharpening tools, but I just couldn’t quite get the setting right to incorporate them into my giffing routine, so I stick with ps for those purposes.
Here’s a comparison for you if you’re thinking about using it. On the left is how I used to gif without vapoursynth. I did the same thing for both gifs except for sharpening, because the clips from vapoursynth just look slightly sharpened to me so I compensated with more sharpening on the left. Honestly, now looking at it side by side I actually like the one without vapoursynth more 😂 I’ll let you decide for yourself. Also, when I’m doing a huge compilation set where there are a lot of gifs and they are basically tiny and I don’t really have the dimensions in mind yet, I’ll just go with video clipping. It’s faster and I can resize it later.
iii. Resizing
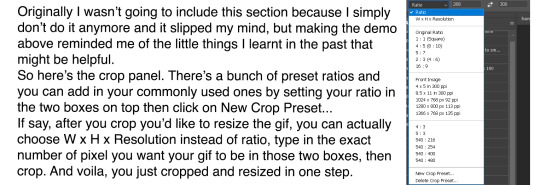
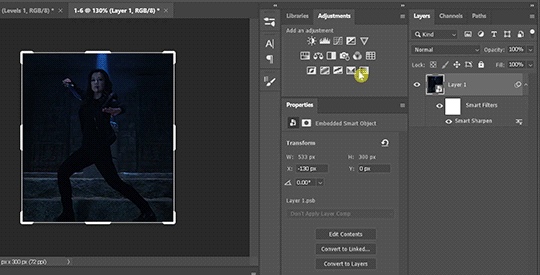
There might be reasons why you don’t want to use the W x H x Resolution crop for your gif, because in the image size panel you can actually choose how you want your resampling setting. Normally I just go with Preserve Details 2.0, and set reduce Noise to 100%.

iv. Sharpening
Once I load my clips into ps, the first thing I do is add smart sharpen to them. For the longest time I only sharpen once. Here’s a sharpening tutorial by Ava (@anya-chalotra). I think those settings are mostly what people use and if you’re new to this you should probably stick with that. But I’ll let you on a secret (not a secret anymore now that’s in the open), I don’t do the whole over sharpen then blur it out thing, I just sharpen to the amount I like. This is coming from someone who spent the first 2? years giffing without sharpening, and when I do realize people sharpen I didn’t even look/ properly follow a tutorial on how to do it. I just knew smart sharpen is a thing. So, I’m sure there’s good reasons why you should sharpen to 500% then add gaussian blur and you probably should do that too. Prior to using vapoursynth, my settings were like radius 0.3, amount 100%-200%. With vapoursynth, I find it slightly sharpens my clips so I go with radius 0.3, amount 50% like 90% of the time.
Then there’s the second sharpen thing if you noticed in my banner gif which I learnt from Sid’s (@sidonidoneeey) tutorial recently. I think it adds more contrast & definition to the objects in the gif.

Here’s a comparison for you to decide for yourself. I tried the max sharpening then add gaussian blur method in the second gif, and I’m still not quite convinced.
v. Colouring
This I would say is pretty much the essence of a gif maker’s style. Again, everybody does it differently, different gif makers swear by different adjustment layers.
Here are some tutorials for getting rid those difficult colour cast:
Kate’s (@dewandawise) channel mixer tutorial
Airam’s (@magnusedom) colouring tutorial
The best/ most experienced gif makers I know all swear by channel mixer so you should definitely check out Kate’s tutorial.
Personally, my routine adjustment layers are like the ones in the banner gif. Levels → (+/- Curves) → Colour Balance and/or Selective Colour and/or Hue/Saturation → (+/-Vibrance). Then repeat any of those if necessary.
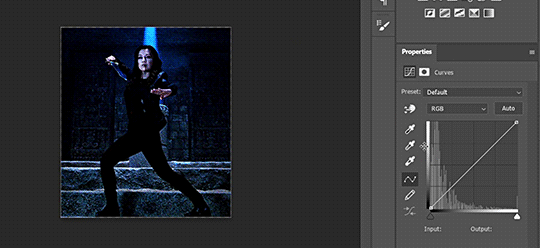
Levels:
Personally, I always start my colouring with levels. When I first started giffing, all I heard about is curves and I spent a lot of time fussing around with it not knowing what it actually does. Until I found out about levels. It is way easier to understand than curves and very suitable for beginners in my opinion.
You basically drag the right most arrow to meet the right side of the histogram. What you’re doing is telling ps what value in the gif you want to be the brightest (aka white), and everything beyond that value is going to be white as a result. You do the same thing on the left, and in this case defining the darkest/ black in your gif. I find this to be the simplest way to brighten and add contrast to gifs. The results as you can see is night and day.
Curves:
Curves can basically do what levels do but more. See those two arrows under the histogram in curves (right), they basically do the same thing as what I just showed you in levels (left). And then obviously you can manipulate the curve to get your gif how you want, but honestly I still don’t fully understand what curves is so I’m not gonna try and explain that to you. What I can do is show you some other neat tricks you can do with curves.

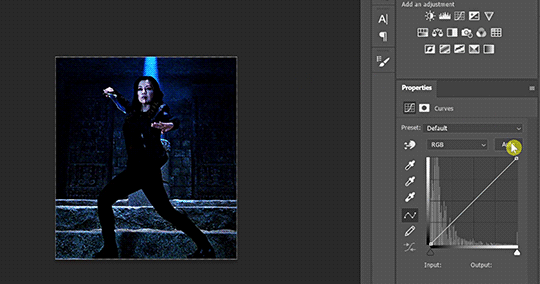
You can click on the hand with the pointing finger icon, click and drag up to brighten or down to darken on any area in the gif you’d like to edit.
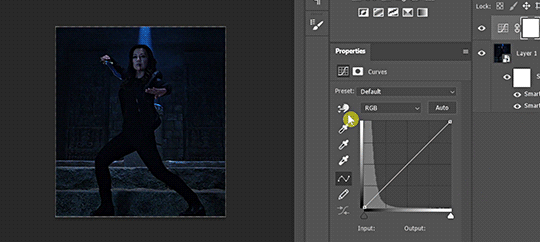
Another thing I like to do is click on the white (last) or grey (second) eyedropper, then click on an area where you think should be white or grey to get rid of any unwanted colour cast. This video tutorial goes more in depth and is more of a proper way of doing it, but I just don’t bother with doing all of that normally.
So here you can see I click on the grey eyedropper, than I clicked somewhere in the background I think should be grey, ideally further away from that blue light beam behind her because everything near that is just gonna be more bluish. And you can see immediately the ground has less of a cyan tint and there’s more red in her skin. Sometimes, you have to try a couple of different places to get the best results. Sometimes, it just won’t work at all.

You can also Alt+click on the auto button, and a panel shows up. Click on them and see if any of those works for you. But normally I don’t use this because I have already enhanced the brightness and contrast with levels.
Once I get my overall values how I like it, I go into colour correcting. Usually nothing drastic, just trying to get rid of any colour tint and get the gif to look more neutral in colour. My go to are colour balance, selective colour and hue/saturation.
Colour balance:
This is usually my go to to adjust the overall tone of the gif, and the panel gives a good visual of rgb vs cmy.
Selective colour:
This is when I only want to adjust the tone of a particular colour without affecting the rest of the gif. I usually go to red the most to adjust characters’ skin tones. Also, people often ask if they should use relative or absolute mode. I would say for simple adjustment I would go with relative because it’s more subtle, but for major colour change and I want it to really show I’ll go with absolute.
Hue/Saturation:
This I usually go in and click on the hand button then click on wherever in your gif you want to change the colour. Slide the hue or saturation slider around till you’re satisfied.
If you want to, say, change your background to a single colour, check the box colourized. And slide the hue slider to your desire colour. Then paint black over the object in the layer mask to preserve it’s original colours.

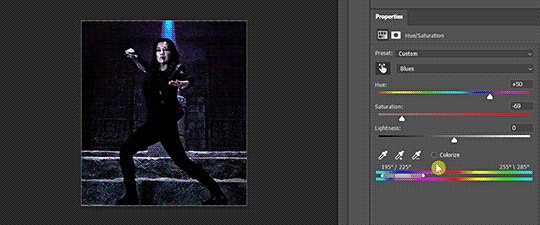

Also, that slider you see right there. The center light grey region is where the colours would be affected by the changes you made. And the two darker grey regions flanking it are sort of a buffer so the colour transition isn’t as stark if it makes sense. You can basically slide those sliders closer to each other so the adjustment affects a smaller targeted range of colours. You can always crank the saturation to the max to see what part of the gif you’re changing the colours of.
Photo Filter:
This is a cool one that I learnt about recently. You can basically apply a warming/ cooling filter to quickly change the tone of the gif. Sometimes it helps with getting rid of that last bit of an unwanted colour filter.
vi. Blend modes
Do you know that you can change the blend modes of your adjustment layers to get a different result? I don’t think a lot of people do this, I don’t either most of the time. But there are a couple ones that you might find helpful.
Screen: This will brighten up the gif a lot, could be helpful with really dark scenes.
Colour: When I want my adjustment layer to only affect the colours but not the brightness of the gif.
Luminosity: When I don’t want my adjustment layer to affect the colours.
Here’s a video explaining all the blend modes in photoshop.
vii. Denoise & Clean
It was from the same post that I learnt about avisynth that I found out about Topaz Labs, particularly their denoise plugin & clean plugin. I won’t go in depth into that because I’ve tried it a couple of times and couldn’t get the settings that work for me and it is very time consuming. But if it is something you want to try, here’s a post of the user sharing her topaz settings. What I actually want to talk about is Camera Raw in ps.
I normally add my denoise filter after I coloured the gif, because all the brightening and saturating the gif with colours add more noise to the original clip itself. But if a scene is particularly grainy to begin with, I’ll add a denoise filter right after sharpening, add my adjustment layers, then another denoise filter if necessary. Also, if you want to keep more details in the certain areas like the hair of the characters, just take a soft round brush and paint black in the smart filter layer mask.
Go to Filter → Camera Raw Filter. The denoise function is under the tab Detail. I usually only move the noise reduction and colour noise reduction slider, and keep the detail at 50.
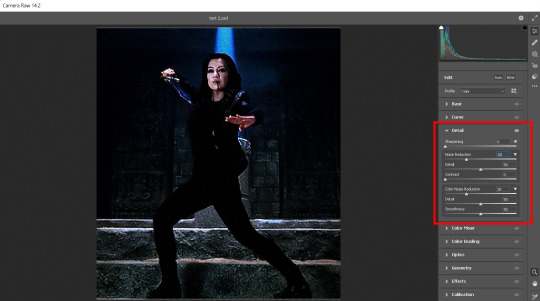
There’s so much more you can do with camera raw. Here’s a tutorial by @michietuts on how to colour your gifs with camera raw. I actually completely forgot about it until I went digging for tutorials for this post. I think the reason why I never got into using camera raw to colour gifs is simply because there’s too many sliders and it’ll take a long time to figure out what works, so I just stick with what worked for me.
viii. Convert to frames & export
After I add all my adjustment layers and denoise filters, I normally convert it back to frames for further editing because I find it takes so long for the video to play in timeline mode. It’s just easier for me to gauge what I want to do with the gif in frame mode, such as whether more adjustment is needed, or how I want to crop my gif. I know a lot of people would just edit everything in timeline mode, and convert back to frames as a last step to change the delay to 0.05s before exporting. You can do it however you want. It’s just spending so much time with cs5, I’ve grown accustomed to editing in frames mode.
Here is my export settings:

For most people, it’s the choice between selective vs adaptive and diffusion vs pattern. Personally I prefer how adaptive pattern looks and I rarely change it across different gifs because I have my export action automated. There’s more explanation and comparison in Ava’s tutorial here.
ix. Subtitles
The majority of gifs I make are what I call “scene edits”. Not that I’m lazy or anything and don’t want to be bothered with making fancier gifs, it’s just what I like to do. Especially when giffing a show I haven’t giffed before I always start with making plenty of scenes, to the point where I can recall just about any scenes from that show when I want to make a fancier gif set. So I’m just gonna share me text settings for the subtitle, show you how I center the text box to the bottom and how to duplicate it to the rest of your files.
Press T for the text tool, and type in whatever subtitle you need. Here are my subtitle settings:

Alt+A to select the whole canvas then press V for the move tool. Then select align horizontal centers and align bottom edges.

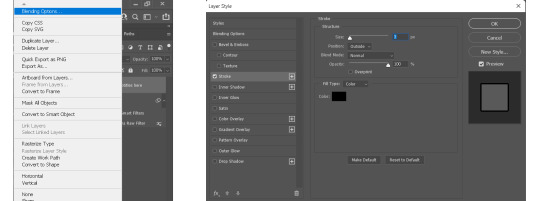
Now that you have your text centered at the bottom, you might want to style it. I usually go for a stroke outside the text, some people op for drop shadow or both. Right click your text layer and select Blending Options... Check the Stroke box, change the size to 3px, position to outside and colour to black.
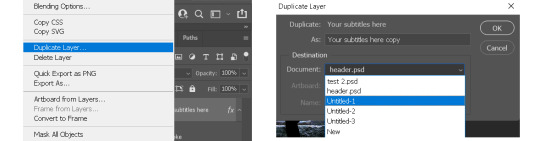
To duplicate text box to the same exact position in another gif, right click your text layer and choose Duplicate Layer... Then choose whichever document you want to duplicate to and press ok.
And of course I have my text duplication automated, so the text would show up in all my gifs in a matter of seconds.
x. Recap

3. How to optimize your giffing process
i. Actions
This one single function in ps is gonna save you sooooo much time & energy my friends. If you’re a chronic giffer like me, you probably spend all your time starring into your computer and just clicking away like a manic, especially those times when new episodes drop and everyone is trying to get their gifs out there as quick as possible. Let me tell you, life before I found out about actions was miserable. Back then, my laptop was even slower, so maybe after I did one thing I had to wait for it to load, then repeat the same process to the rest of the gifs in the set, which is normally 10 in total. I had to grab my laptop with me during meals because I basically couldn’t walk away from it. Actions was a lifesaver, especially for things you’d routinely do when making gifs like sharpening, resizing, denoising, convert to frames, export, etc. You basically use actions to record yourself doing it once, and you can just hit play every time you want ps to do it again. And to take it a step further, you can automate ps to play that action on all the opened files. You then record that automation into an action, then voila you can sharpen/resize/export all your gifs in one click. Now, I can click automate convert to frames, go out and eat dinner and come back to it.

Now here are my actions. I know the naming doesn’t make much sense to you, but basically I have actions to automate sharpening, denoising, converting to frames, setting frame delays, exporting and saving. And yes, I do regularly hit that automate save button so I don’t lose everything when my ps crashes. Then there’s actions for formatting subtitles, duplicating layers, pasting frames after or over frames. I think this covers about everything I use on a daily basis.
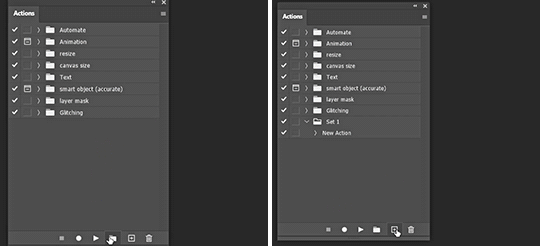
Here’s how you record an action and automate said action. (Left gif) First you click on the folder icon to create new set, name it and click ok. Click the + icon to add new action, name it and press record. Then you do whatever you want to record, and when you’re done click to stop button to stop recording. (Right gif) To create an automation of the new action, click the + icon to add new action, name it and press record. (Third gif) Then go to File → Automate → Batch. Choose the set the action you want to automate is in, then choose the action. Click ok then stop recording. Now you have an action to automate the previous action you made.

(gif below) The box on the left of your action is the dialog on/off button. Basically if you check it those dialog boxes will pop up every time after you played the action, which is good if you want to customize every time but not so much when your goal is to click one button and let it run across all gif without interruption. I check most of them off except for the denoise filter which I do want to customize for each gif.
To get the action panel to look like the one I showed in the first picture, click on the little button on the top right corner of the actions panel and choose button mode. And you’ll get to play an action by simply clicking on it.

ii. History
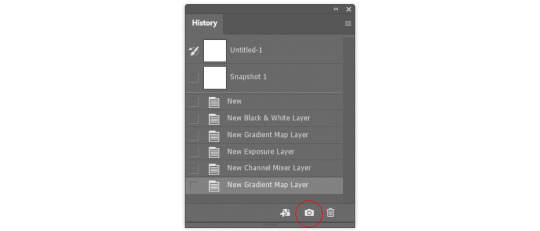
There are a couple of things I do in this panel. Have you ever make an adjustment, undo, make a new adjustment, and now no matter how many times you hit revert you just can’t get back that first adjustment you made? There’s a simple fix in the history settings. Click on the little button on the top right corner of the history panel and choose History Options, then check the box “Allow Non-Linear History” and click ok.

I often like to use the history to go back to previous adjustment, because I can see clearly what has been done (sometimes I click on the wrong button without knowing) and I can go further back without keep hitting Crl+Z. You can also click on the camera icon in the bottom right to take a snapshot of the current process/ step of the gif, so in case you don’t like some changes you make, you can always go back to that snapshot. Or you can take snapshots of different adjustments you made to the gifs, then you can quickly compare how they look by toggling between snapshots.
iii. Keyboard Shortcuts
Know/ customize the shortcuts for things you often do, such as Crt+Z for undo, T for add text, V for move, Crl+A for select all, etc. It’ll save time & effort in the long run.
To customize, simply go to Edit → Keyboard Shortcuts.
iv. My Workspace
I’m the least organized person I know but I still want to talk about my ps workspace. It’s been structure to fit my giffing needs. Basically all the panels I need are there, and I maximize my space for the document window and timeline.

If you go to Window → Workspace → New Workspace, you can save your current workspace as a preset. So maybe if you moved things around or accidentally closed some panel that you don’t remember the name for, just click on that preset workspace, or if it says you’re already in that workspace click reset “whatever the name of your workspace” and your workspace will be reset. There’s mainly 2 workspace I toggle between, one for giffing and another for digital painting.

4. The more advanced stuff?
i. “Recolouring”
I’m not gonna spend a lot of time on this part because the next part is actually what I really want to talk about. But Hue/Saturation is going to be your friend if you want some major colour change. Then add a gradient map over it for good measure. I’ll link some tutorials for you if you don’t know what I mean.
Becca’s (@yenvengerberg) mega colouring tutorial
Kate’s tutorial on @usergif (←there’s all sorts of gif tutorials in their resources directory, go check it out)
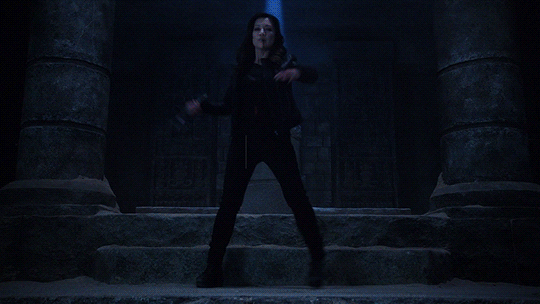
People would always tell you to find gifs where the character barely moves or the background is of a contrasting colour to make the process easier. Now, with timeline you’ve got keyframes to help with slightly more movement. But what if you want to make something like this gif below? 😨
I made this during my earlier days of recolouring (which was not that long ago), and the only thing I could think of was colour it frame by frame. This gif has 73 frames. There are 8 gifs in this set which I had to all colour frame by frame. It was a long and tedious process I tell you, but the results, in my humble opinion, is stunning!!! But what if I tell you it can be done without colouring it frame by frame and it only takes a fraction of the time I spent?
(gif taken from my set here)
ii. After Effects & Rotoscoping
The reason I started using after effects was for this gif set. I got a gif request and my inspiration was the intro from the youtube channel sortedfood. Here’s how one of the gif looks like.
See the character cut out on the right? Basically the same thing in my recent Winnie the Pooh set. In my first trial, I was trying to do it frame by frame on ps like I always did, but there was no way I could get it looking smooth, it gets very jagged when the background was a completely different scene. And with some googling, that’s how I found out about rotoscoping on after effects.
This is the youtube tutorial I learnt it from and the one I send it to people when they ask me how I do character cut outs like that. I’ll try to quickly show you how I do it below, but please refer to that video if you want more details.
Usually I export my gifs as videos in timeline mode in ps, then import the video into ae. After I’m done, I’ll export the ae file as video, import it back into ps, convert back to frames and do the rest.
Here are my steps to rotoscoping:
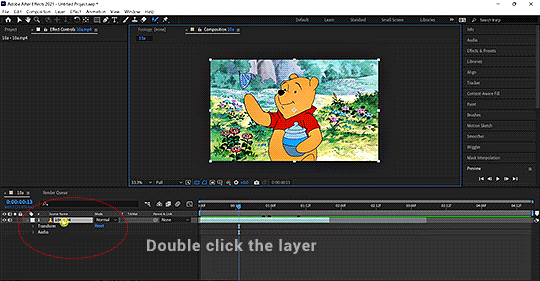
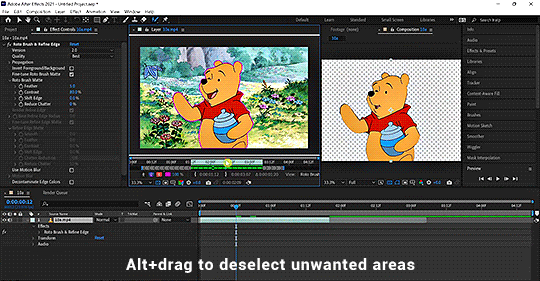
Double click the layer you’d like to work on. The layer window should pop up and that is what you want to work with.
Click on the Rotobrush tool and paint across the object you want to include. Always paint across, not outline.
I have my roto brush set to version to 2.0, and I would change the quality from standard to best.
Continue painting until everything is included. Alt+drag to deselect unwanted parts. Hit spacebar when done and let it run.
You can change the properties of the roto brush selection in effect controls.
If you want a more detailed written explanation than this. Go to adobe’s help page on roto brush here.
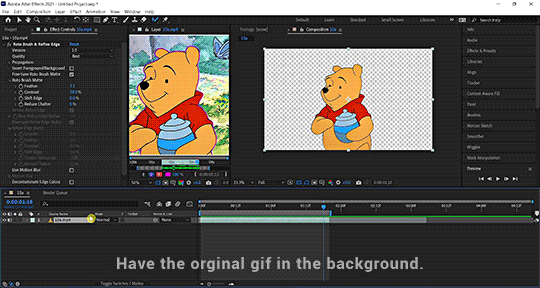
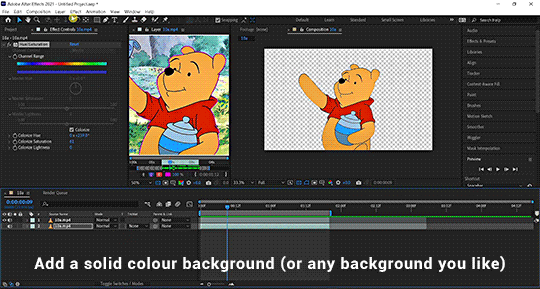
Once you have the cut out of the object you desire, there are many things you can do with it.
Duplicate the original layer, change the colour of the bottom layer as aforementioned. And now you have a gif with a different coloured background.
Or you can have a different background (either a solid colour or a different video/gif)
You can have text behind the object, etc.
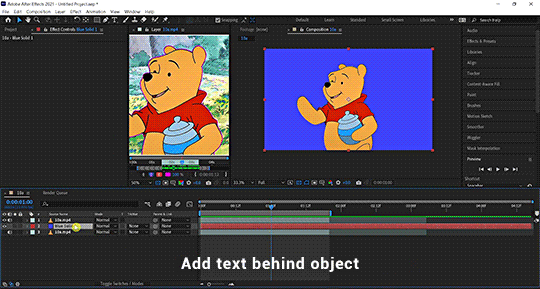

You get the idea. (This is a simple demo, please excuse the quality and choppiness of the gif)
Now you’ll never recolour gifs the same way again. Here’s a Kate & Yelena gif for you guys (even though it’s not the best, could’ve blurred out the edges a bit more but it’s still pretty damn awesome and I wouldn’t have coloured it like that if it wasn’t for ae)
(gif taken from my set here)
Here’s another gif I made with AE from this set. The possibility is endless and I’m barely scratching the surface. I can do a separate AE tutorial if you guys are interested. Let me know in the comments or tags.

5. Tutorials mentioned in this post
i. Text tutorials
@kylos’s film downloading and screencapping tips for making gifs
@kylos’s gif tutorial
@cillianmurphy’s giffing 101- your ultimate guide on how to make gifs
@realstraykids‘s gifmaking with vapoursynth tutorial
@anya-chalotra‘s sharpening & exporting tutorial
@sidonidoneeey‘s sharpening tutorial
@dewandawise‘s the beginner’s guide to channel mixer
@magnusedom’s colouring tutorial
@yenvengerberg’s mega colouring tutorial
@usergif’s how to change the background of any gif tutorial
adobe’s Roto Brush and Refine Matte
ii. Video tutorials
PiXimperfect’s Color Correction with Easy "4-Point" Technique!
PiXimperfect’s The Science of All 27 Blend Modes in Photoshop!
@michietuts‘s How to Color Grade Gifs Using Camera Raw
C.M. de la VEGA ‘s Get the Best Results with Rotobrush 2
6. Acknowledgement
Thank you so much to the authors of all the amazing tutorials, everything was so eloquently written, well explained and easy to follow.
And a huge shoutout to the people at @pscentral & @womenofmcu. Our conversations on gif making have prompted me to write this post.
I’ve learnt so much from the people at psc and thank you Ace & Val for creating this place that I didn’t even know I needed. It is one place I feel truly belong. So If anyone is interested in gif making, come join us at pscentral.
And thank you to the ladies at womenofmcu for being so nice and welcoming, always love chatting with you lot.
Last but not least, I’m patting myself on the back. For someone who’s terrible with words this is one hell of a long text post.
As always, happy giffing!
#completeresources#allresources#ps resources#userdanni#maystag#usergiu#tuserheidi#usershreyu#uservivaldi#userfnuggi#supervalcsi#aphrandt#userdean#userannalise#userrainbow#uservier#userelio#rogerhealey#tusercat#my tutorials#gif tutorial#even though I said this is not a tutorial I still need to tag it in a way I can find it
294 notes
·
View notes
Text


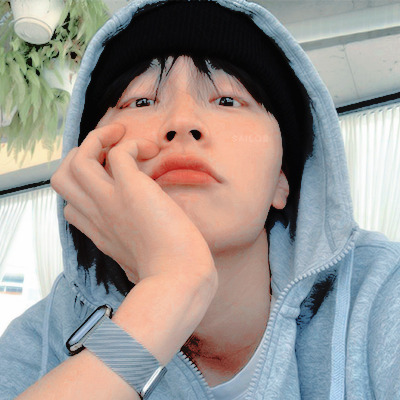
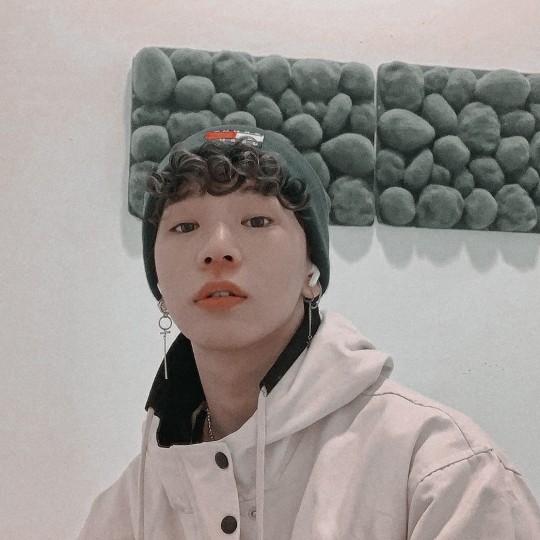
ꜥ ˖ ! ꐑ🥯ꐑ ˓ 大嫌む🄻🄸🄺🄴 🄾🅁 🅁🄴🄱🄻🄾🄶 ✸ ⌕ 𖥻 icons ( 𝘃𝗶𝗻𝗻𝗶𝗲 𝗵𝗮𝗰𝗸𝗲𝗿 ) 𖣠 🥣 credits me Ꮺ ָ࣪꒧
#i4miau#icons with psd#icons vinnie hacker#vinnie hacker with psd#vinnie hacker icons#vinnie hacker icons with psd#tiktok boys with psd#icons tiktok boys#tiktok boys icons#tiktok boys#icons site model boys with psd#site model boys icons with psd#site model boys with psd#icons site models boys with psd#site models boys with psd#ig boys with psd#ig boys icons with psd#ig boys icons#icons tumblr#icons#twitter icons#boys tumblr#icons boys#site models icons#boys random with psd#icons random boys with psd#random boys#positionstwff
249 notes
·
View notes
Text


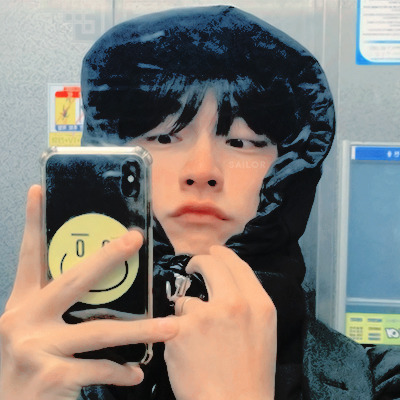
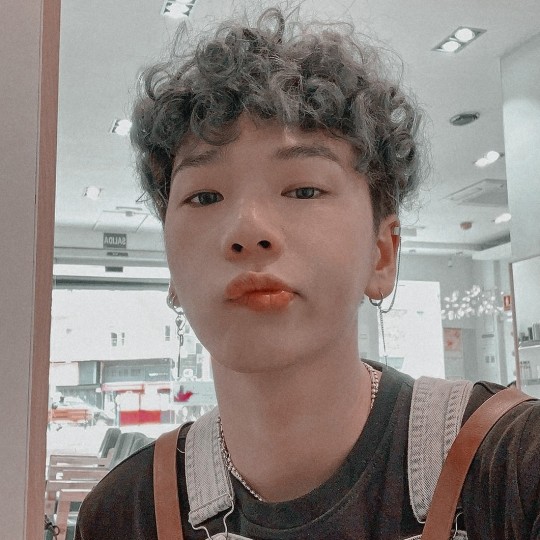
꒰🍎ꜜ✧₊˚ 🅽ew post ˗ ˏˋ ⎙ if you save/use, like or reblog ᝰ̟۟ 📍𝇈 vinnie hacker icons 𖤐٫݂̥۟࣪credits me.
#icons#vinnie hacker#psd#tiktok#twitter icons#vinnie#vinnie hacker icons#hype house#icons with psd#icons with soft psd#vinnie hacker with psd#vinnie icons#icons vinnie hacker#randon icons#tik tok icons#ig boys#tiktok boys with psd#beautiful boys#boys icons#tik tok boys#icons com psd#psd coloring#among us#nailea devora#nailea with psd#nailea icons#random icons#icons tik tok#icons tumblr#soft icons
101 notes
·
View notes
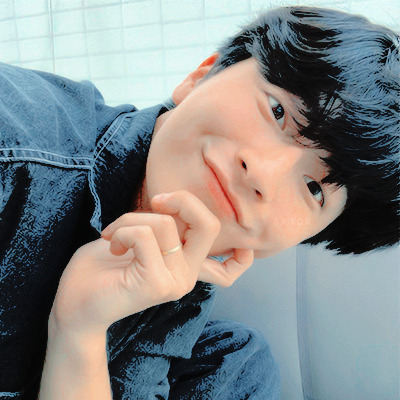
Photo

#ulzzang#boys#ulzzang boys#ulzzang icons#ulzzangs#ulzzang boys icons#boys icons#grain icons#soft icons#lq icons#lq#random icons#twitter icons#icons with psd#ig#ig model#male model#asian boys#kboys#korean boys#random boys#boy#blue#blue aesthetic#aesthetic icons#ulzzang boy#odiei porem ao mesmo tempo estou sem forças para fazer algo decente
209 notes
·
View notes
Text

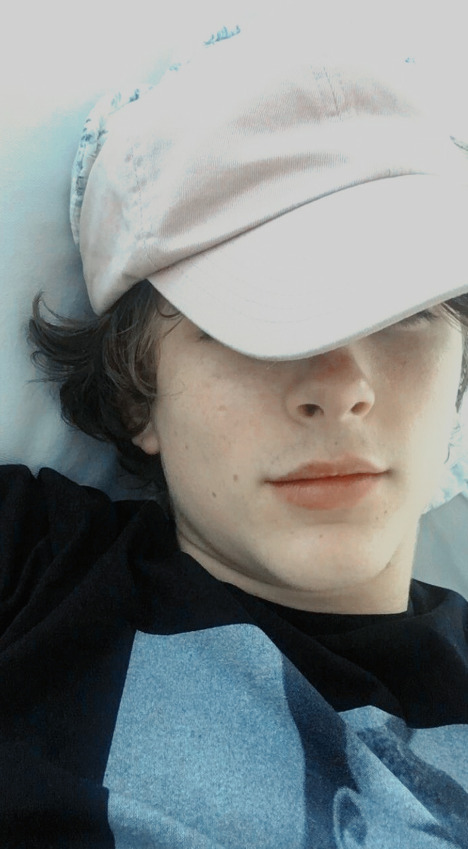
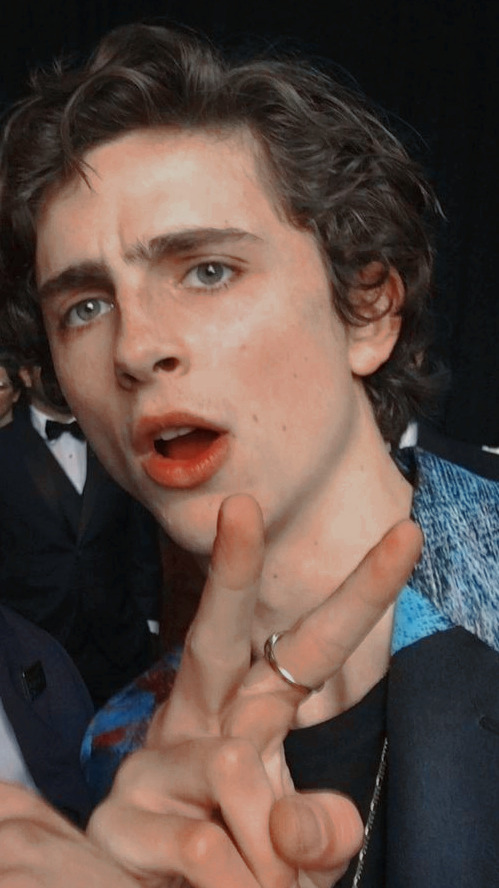
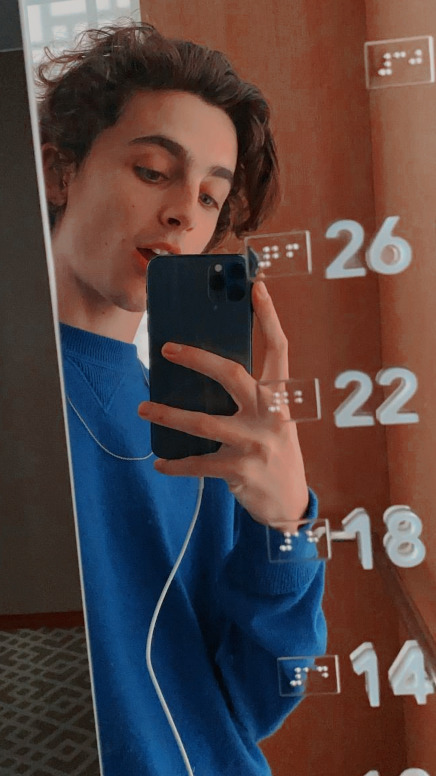
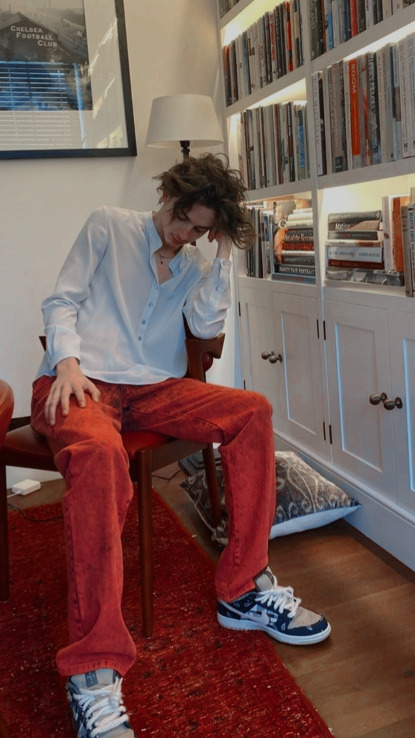
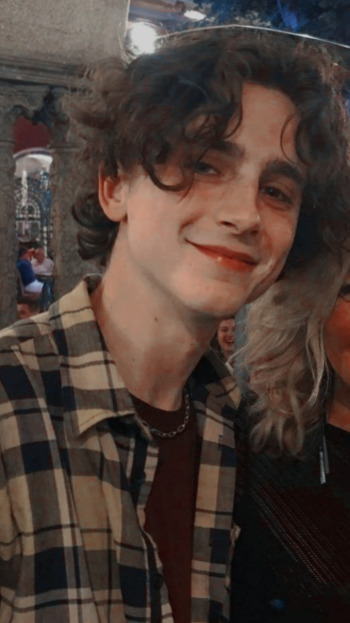
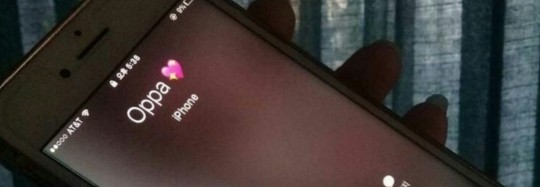
timothée chalamet – lockscreen
like/reblog if u save or like it please..
#lockscreen#timothee’s instagram#timothee chalamet#timothee chalamet lockscreen#timothée#timothee#lockscreen with psd#psd#male actor#actor#ig boy
195 notes
·
View notes
Text


★ 𝘂𝗹𝘇𝘇𝗮𝗻𝗴𝘀 ' 𝖨𝖢𝖮𝖭𝖲 ― 𝐴𝑆𝑇𝑅𝑂𝑀𝐸𝐿𝐼𝐴𝐷𝑆.
★ like or reblog if u save. don't respost.
#ulzzangs#ulzzangs icons#ulzzang#ulzzang icons#ulzzangs boys icons#kboys#kboys icons#ig icons#boys icons#asian boys#asian boys icons#dark icons#dark psd#psd
175 notes
·
View notes
Photo


· 𝗜𝗖𝗢薇𝗡𝗦 : 85_29p fr. ıg ulzzang ¡ [ पत्ती ] lıkᥱ / rᥱblog ıf чou usᥱ*! › ♪
Ⓒ @pxrslıdᥱr or @onfagsaı on twt
#korean#korean boy#korean ulzzang#korean ulzzang icons#nameless boy icons#psd icons#rp icons#85_29p icons#ig ulzzang icons#asian boy icons#asian ulzzang icons#twitter icons#ulzzang boy icons#k-ulzzang icons
10 notes
·
View notes
Text


╭੦͢ꕤꯨ꒰ ULZZANG icons♡ᩧ۪۪᪾ꜝꜝ▭▭╮
⸦᪶⸧᪶⃕𑀈᪶➫ᩘlike or reblog if you save]]⅔᪼᪻͜⅏͢!¡
do you want a specific layout? dm whenever you want! uwu ~
#li_zgz#li_zgz icons#tik tok#tik tok icons#instagram#instagram icons#twitter icons#boy icons#boy site icons#ulzzang#ulzzang icons#ulzzang ig#ulzzang instagram#icons#cute icons#kpop icons#icons with psd#icons with soft psd#icons with polarr#psd#li_zgz6#site models#site mode icons#male icons#aesthetic#aesthetic icons
46 notes
·
View notes
Text
i deadass deleted my progress on a drawing im finishing :”)))
16 notes
·
View notes
Text
can my brother stop hogging my laptop to play roblox i just want to complete my seungmin gfx xgdjdhjs 😭😭😭
#i bought him a mac book but apparently that doesn't satisfy him lmaoo#and i literally have to delete every trace of skz before he goes on bc he'll wonder why i have random asian boys on my laptop dgsjsh#its a sad life#even had to delete my seungmin psd :")#its in the recycle bin tho so no worries ig#cherry.talks#not skz
1 note
·
View note
Text

𑈹𑇍🍽🪞𑂼 𑄣𑄋𑄊 🅿️𑄝᥍t, βᤂbε 𑄚🌀🪲༶ᝐ𑈹⸙🐾熚 𑃳𑅁kε ✤ꢒ 𓂋 ꢯ𑄋b𑃴𑄛g ▒ᩚ✲𓂍🌳📫熐
#aesthetic#icons#moodboard#soft icons#icons aesthetic#icons with psd#i2kacchan#gif#gif with psd#travis green#_travis.green on ig#travis green on ig#travis icons#travis green icons#travis moodboard#boys with psd#headers with psd#with psd#moodboard with psd#drewrrys#styleszitas#amendowin#boys icons#site model boys#random boys#edgy grunge#edgy layouts#dazai icons#dazai moodboard#dazai osamu
75 notes
·
View notes
Text


(1) behind the phone icons,,
ig : huaxi777
like and reblog if using ♡
#with psd#with filter#edited#cosplayer#ig link#chinese#asian guy#soft icons#asian icons#boy icons#chinese icons#cosplayer icons#icons with psd#icons with filter#ig user#ulzzang#ulzzang boy
3 notes
·
View notes
Text

꒰🥀ꜜ✧₊˚ 🅽ew post ˗ ˏˋ ⎙ if you save/use, like or reblog ᝰ̟۟ 🖍𝇈 vinnie hacker icons 𖤐٫݂̥۟࣪credits me.

#vinnie hacker icons#vinnie hacker#vinnie#hacker#icons with psd#icons with soft psd#twitter icons#icons#psd#tik tok boys#tiktok#hype house#vinnie icons#vinnie hacker with psd#randon icons#beautiful boys#boys icons#tik tok icons#tiktok boys with psd#ig boys#icons tumblr#instagram icons#icons vinnie hacker#icons tik tok
50 notes
·
View notes
Photo


#ulzzang#ulzzang icons#boys#boys icons#ulzzang boys#ulzzang boys icons#ulzzangs#eboy#eboy icons#twitter icons#soft icons#ig model#random icons#icons with psd#aesthetic#guys#guys icons#boy#korean boys#korean boys icons#asian boys#asian boy#asian boys icons#icons#icon#white aesthetic
224 notes
·
View notes
Text

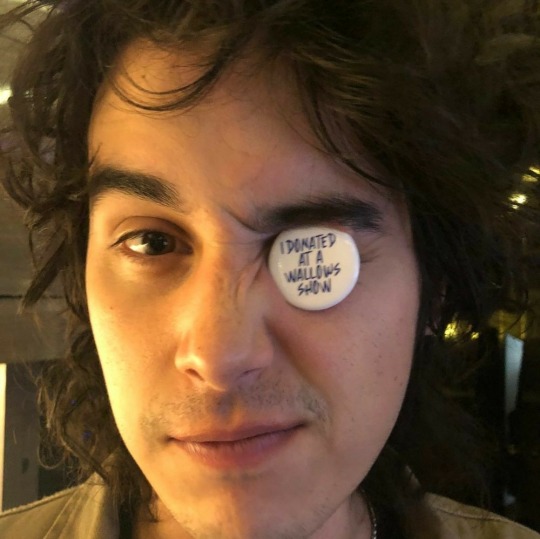
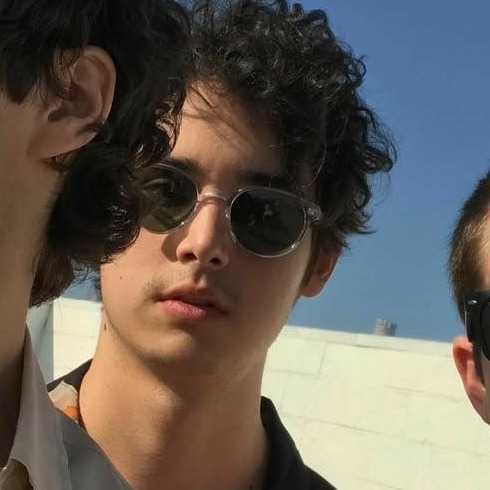
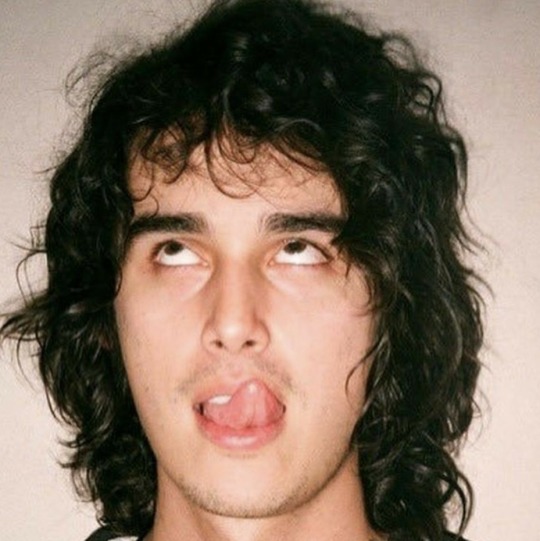
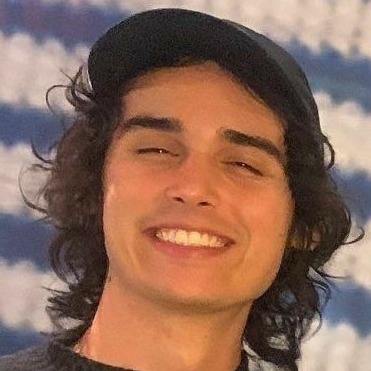
cole preston – icons
like/reblog if u save or like it please..
#wallows#icons#cole#band#cole preston#ig boy#wallows icons#icons without psd#indie icons#wallows icon#twitter icons#dylan minnette#braeden lemasters
97 notes
·
View notes
Last Seen Blogs
gypsyformcolombia
Gypsy From Colombia
ups1gbt3f7op3dr
MCYT Sneak Art Corner

cffentea
Anonimamente Triste
miyawebb
cris ♥︎

fuckedupmuffinsblog
kyu!! 🌸ㅤ⊹ º