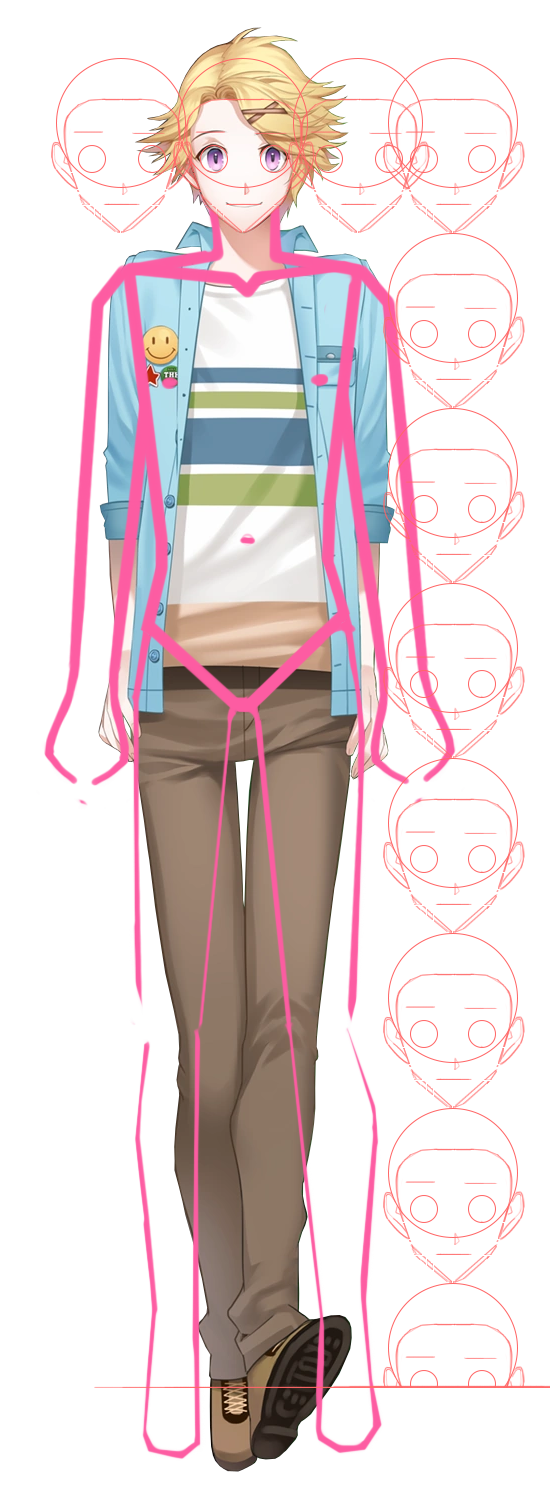
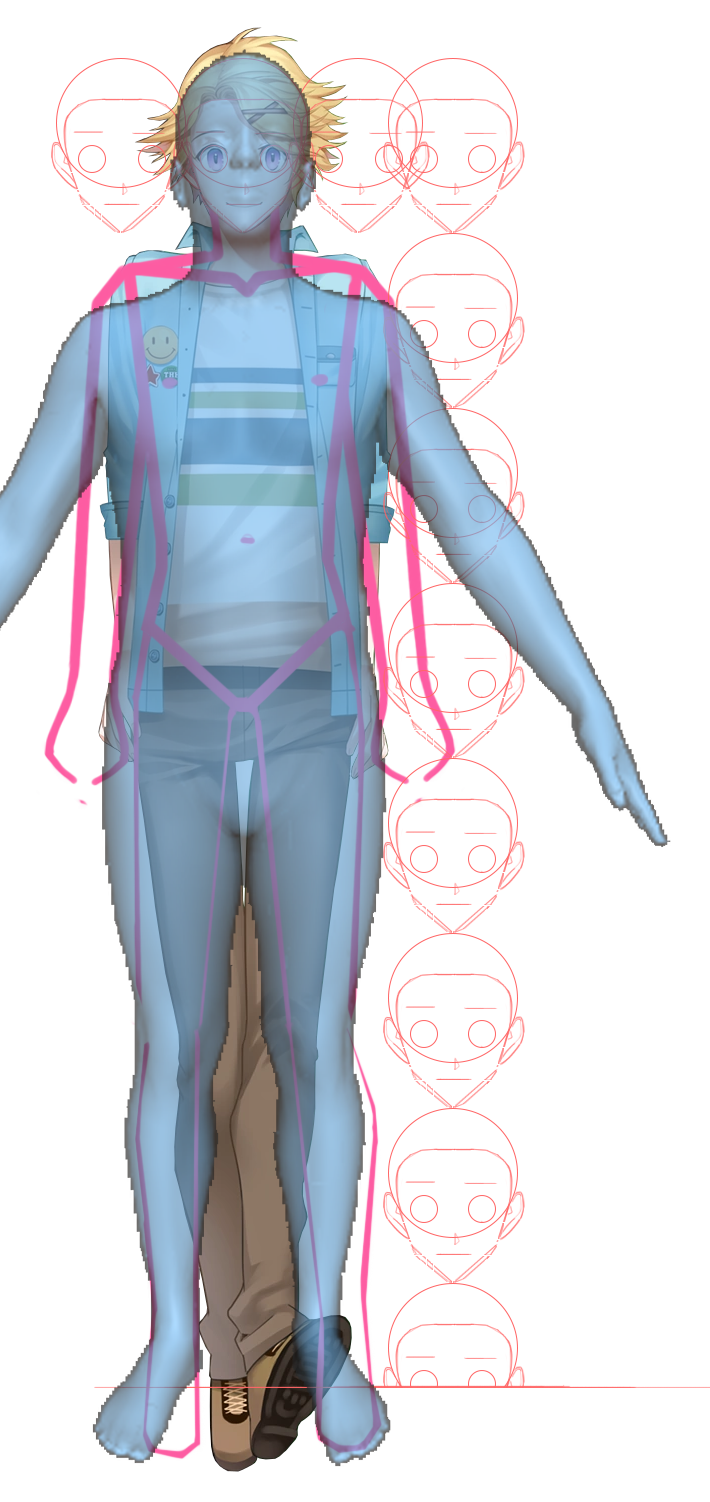
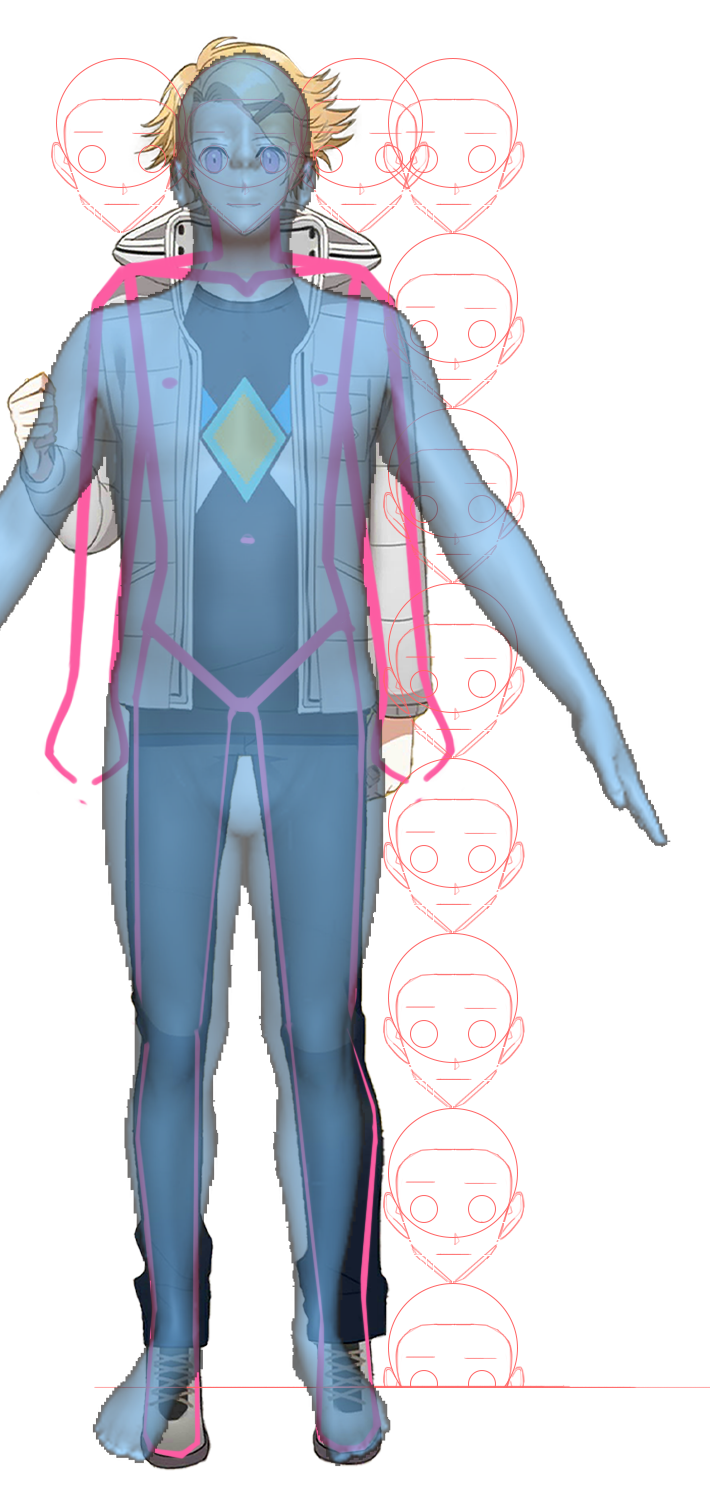
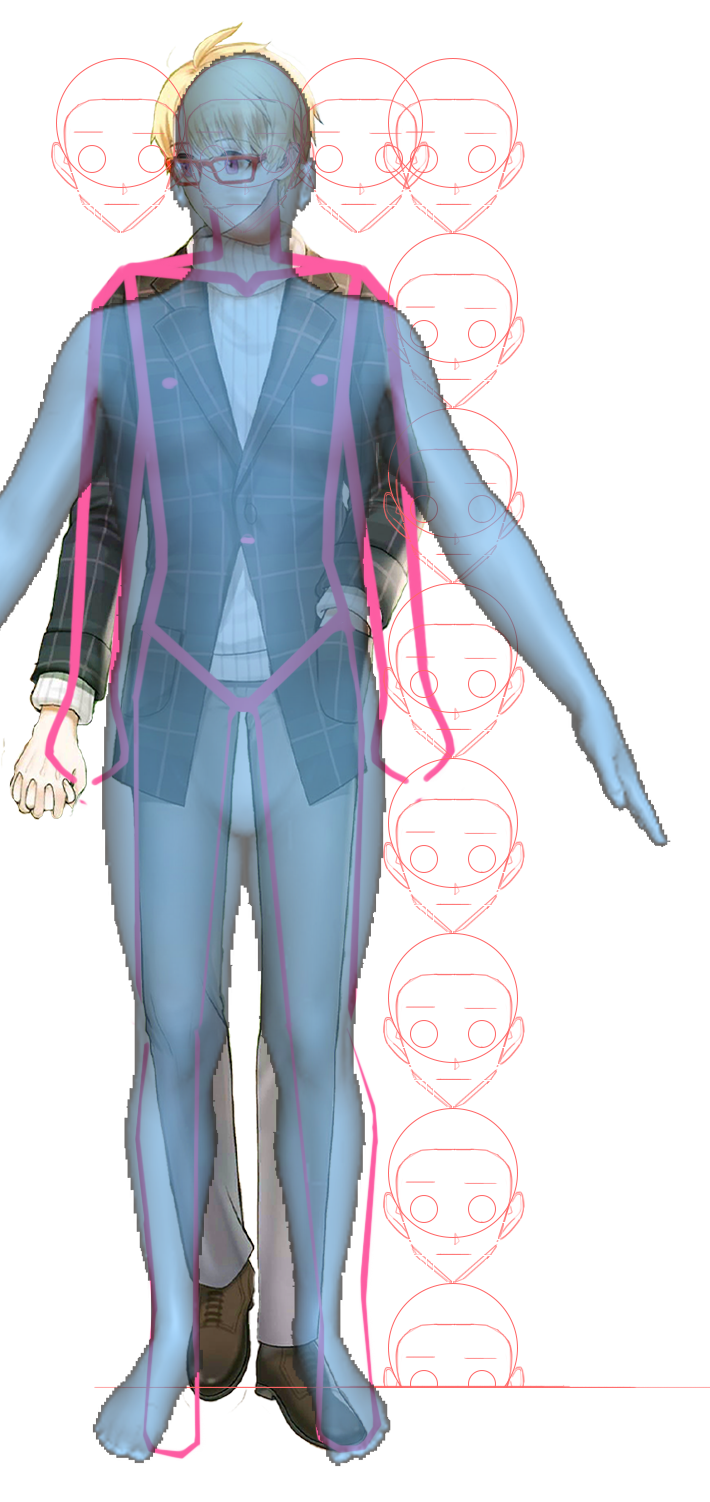
#i did actually google heights for this and try to make it roughly accurate. like i put a stupid amount of effort into this
Text

whos your favorite of the crusaders from part 3... i think i love baofu the most tbh
#persona 2#baofu#jjba#jotaro kujo#noriaki kakyoin#joseph joestar#muhammad avdol#jean pierre polnareff#persona 2 eternal punishment#kaoru saga#p2ep#p2#this is making me laugh stupid hard ITS NOT EVEN A GOOD BIT. THIS IS A STUPID BIT. but its really funny to me right now#im too lazy to type out context for this just search like the words ''baofu'' and ''joestar'' and youll probably find it#i mean. if tumblr search decides to work. but thats not up to me#(all jokes aside if u like cant actually find it just send me an ask and ill find it for u)#...should i tag this. i might tag this. i think im gonna tag this i want to really confuse and/or annoy someone#maybe even both if im lucky#and in case you were wondering (which im sure you were not):#i did actually google heights for this and try to make it roughly accurate. like i put a stupid amount of effort into this#not that much. but like for what this is? wayyyy too much time went into it#its okay though i had fun. peace and love on planet earth#muffin mumbles#edit: just remembered i think tumblr only shows the first few of ur tags im going to move the character tags to the front#so if these tags seem like theyre in a weird order. Thats probs why
19 notes
·
View notes
Text
☆ I'm stupid but finally I have proof!!! ☆
orz or not/// urrrkkkk I thought I did, but somehow I can't feel convinced.
I dunno who all remembers my post asking if anyone knew Yoosung's canonical height in the Valentine's after story and that I'd found a couple images circulating the internet stating that he had grown to 5'11'' or something, which I've still never seen proven.
See, I've come back to this tangent because my loser meticulous ass decided to start making a character style sheet of him for essentially no real reason only excused by "research" for my art, when I already know my mind just sometimes demands to study data points and overanalyze everything.
Anyway, originally my brain clicked and I realized Yoosung's arms are present in both his sprite images. I measured his wingspan because I remembered wingspan roughly equates to the height of that same person, and the arm lengths were the same.

Of course the thought that they just.. used Yoosung's old sprite when they made his older version sprite.. Made me want to keep looking. I thought to myself, man I need to find a point of reference. Is everyone's skulls roughly the same height? No, right? The 7 1/2 to 8 heads rule... did not work for Zen's full body reference... orz He ended up being like... 9 1/2 of his own heads. Then I thought, "What age does one's skull stop growing in height size?" Google didn't have much for satisfactory answers, merely alluding to the idea that the skull stops growing to it's full size capacity at around 16-18, but will keep changing otherwise throughout life. But that 16-18 just kinda sounds like it grows in proportion to the rest of you, full body height included. Then, I thoght "Eye balls?? Don't they pretty much stay the same size all your life?" I think this would be the closest indicator if he grew, and they do match up one to one when sized up.


Somehow, still didn't feel secure in my findings. I had another click moment while google searching Mystic Messenger heights images. I remembered the visual novel mode has the heights comparable to the other characters. Then I giggled jovially as I set up the visual novel reference of Yoosung standing next to Seven, then him in the Valentine's After Story. ohohohoho I got it this time, I thought to myself.

I'd also say this is some pretty solid proof that he didn't grow any taller, but I still had to keep in mind that they very obviously used the same base. I thought about how his face seemed narrower, but then I realized they copied and flipped the side of his face that showed his ear to accommodate his hair change, though.. the neck from the other side was copied and flipped too actually...
On that thought, I became somehow curious about his dimensions again, "for research", trying to find his waist line under all the baggy clothing he tends to wear. I think back to how he said he used to be fat, and considering... For one, he weighs almost 20 lbs more than Saeran (Y 149 -> S 130) who is actually an inch taller than him (Y 5'7''-> S 5'8'', an inch shorter than his own twin.), but also Saeran is pretty frail. Saeyoung is 2 inches taller than Yoosung, but only a kg heavier, which is potentially muscle (Potentially *le shrug*). To my knowledge Yoosung doesn't do much for exercise or weight training, if not a sufficient amount at all. Of course we all carry our weight differently, so that's absolutely a thing.
If you take BMI into account, which is a bit more accurate if you don't do weight training, honestly, I'm not entirely sure where he is carrying the weight. lol
I did actually look into examples of real people with the same sizes as Yoosung, and yeah, not a single one of them was without some softness, especially around the mid section, which could explain the baggy clothes... Yoosung's calculated BMI was 23.2, which according to asian BMI charts is pretty much at the cusp of normal and overweight (It does matter, supposedly Asians carry weight differently than western ethnicities and are susceptible to weight related illness at lesser weight/ body fat indexes than western people as well. Says medicine. On average. Apparently their bone mass tends to be less dense as well.) Of course, based on this data, I'd say Yoosung is pretty safe, but of course the sedentary lifestyle and consumption of not so healthy foods could be a cause for concern. I kind of came to a soft conclusion that Yoosung did used to be in what would be considered "over weight" territory before, but considering how beauty standards can be over there, I venture to wonder if it was like... 10 to 20 lbs heavier. If I were to guess, the weight pretty evenly distributed throughout his body, probably mostly in the mid section, as it tends to more so in men, then a bit more in the thighs, and a bit more in the upper arms. Of course to the pinchable cheeks. :9 I dunno man, his full body sprite looks so skinny to me lol.
If I were to consider the waistline I originally came up with, which was mainly based on his Valentine's after story, it does seem like he potentially lost more weight since getting into a relationship. That makes sense to me, as it was insinuated that together with his partner, he became more active and most probably ate more healthy foods. (I cry, it seemed like he doesn't really play games anymore by the Valentines after ending. T__T I'll just choose to believe he'll still game from time to time if his partner is also a gamer.) Come to think of it, looking at that gif comparing his VN sprites, his face really is narrower...
Personally, I embrace soft Yoosung. I'd bet he'd still be just as cute as he always is, and squish♥. :"3 But mostly of all, I'd want him to be as healthy as he can be and happy for a very long time (forever!) ♥
#Mystic Messenger#Mysme#Yoosung Kim#Mysme Yoosung#MM Analysis#Please don't hang me for talking about weight. T __T I just want to imagine what he looks like. under the baggy shirt. >>#ok you can hang me. ill accept death#MM*Analysis
27 notes
·
View notes
Text
OK SHUT UP SHUSH SHUT THE FUCK UP IT’S 1AM BUT SHUSH LISTEN! HEY, LISTEN!
I AM GIVING YOU THE TOOLS TO FIND THE EXACT DISTANCE OF ANYTHING ANYWHERE IN HYRULE, CUSTOM MAKE YOUR FIC JOURNEYS TO THE METER, FIND THE AREA OF ANY TOWN OR LANDMARK, OR JUST FIND OUT HOW BIG (or small) HYRULE KINDGOM TRULY IS ONCE AND FOR ALL SO GO AHEAD AND SAVE THIS POST TO YOUR DRAFTS CAUSE YOU MIGHT WANNA SEE IT FOR FUTURE REFERENCE
Ok so this all starts with THIS

FEAST YOUR EYES LADIES, LADS, AND GENTLEFOLK ON THE ONLY PIECE OF INFORMATION IN ALL OF HYRULE CONCERNING DISTANCE AND TIME.
[Image ID: A screenshot from The Legend of Zelda: Breath of the Wild, depicting a picture of Ash Swamp hanging in Impa’s house. The dialogue box from Impa reads, “Does it look familiar? From this village, you should be able to get there in a half day’s time.” End ID]
Impa states that it would take you half a day, about 12 hours, to travel from Kakariko Village to the depicted 13th memory, which is at Ash Swamp by Fort Hateno.
Now here is where I took this information. I took it to
objmap.zeldamods.org
A fantastic online Botw map resource with tons of features like finding specific objects, and highlighting areas, and placing pins, and the basics of showing the locations of everything like shrines and korok seeds and all that.
BUT the thing that we care about today is this ability, here:

DRAW!
With those widgets on the right, I can specifically mark lines and shapes and the website will give me the distance of it in meters!
“But Kip, if the map already gives you the distance of anything you want then isn’t this entire post pointless?” Ashshshshshhshh no, shut the fuck up, shush shut, no, stop, silence, I am high on caffeine and I haven’t slept for two days. No.
As great as the map is, the exact ratio isn’t the best. Like, it tells me that the length of Hyrule is only 10km, or 6.2 miles.

I wager that realistically, Hyrule would be a bit bigger than that. And THAT, is where I come in. Or, more specifically, Impa.
Impa states that it takes 12 hours to travel from Kakariko to Fort Hateno. (I am saying Fort Hateno and not Ash Swamp because I am going of the nearest prominent landmark location near the 13th memory, and I highly doubt that Impa knew the exactly square foot patch of dirt that Link needed to stand on to activate his memory)
According to Google, it takes around 10 to 12 minutes to walk a kilometer. (I am assuming Impa was referring to walking and not riding, because I feel like she would have said, “You should be able to get there in half a day’s ride” or something of the sort. So, walking it is)
So:
12 hours divided by 12 minutes
(Which is 720 minutes / 12 minutes)
gives us
60
The distance between Fort Hateno and Kakariko village is 60 kilometers.
Badabing badaboom, great job! We did it. BUT NOW this is where our handy dandy online object map comes in.

[Image ID: A screenshot of the Breath of the Wild map showing the area of Kakariko Village and the plains in front of Fort Hateno. A blue line highlghts the path from the village to a marker on Fort Hateno. The line reads “1.89km.” End ID]
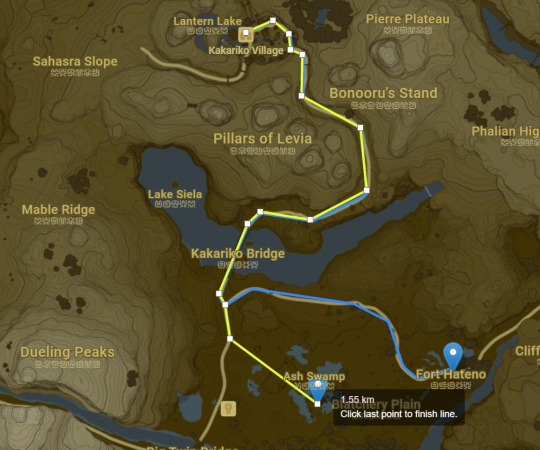
[Image ID: A screenshot of the Breath of the Wild map showing the area of Kakariko Village and the plains in front of Fort Hateno. The blue line from the previous image is still there, however, there is now a more prominent yellow line. The yellow line runs from Kakariko village, but ends at a marker point at the location of the 13th memory at Ash Swamp. The yellow line reads “1.55km.” End ID]
So while this map doesn’t give me distances that are exactly to my liking, it DOES give me a measuring means that will stay consistent. SO! As you can see, the map says Kakariko to Fort Hateno is 1.89km. (And just to be safe, I also did the distance exactly to the point of the 13th memory as shown in Impa’s picture, which came out to 1.55km. But! It’s doesn’t matter anyhow, because) We’re going to round this to 2km for the sake of my sanity because surprise surprise! I actually suck at, and hate, math.
So the map says Kakariko to Fort Hateno is 2 kilometers, but we know that in real life, the distance is actually 60 kilometers. So, if you want to use this object map effectively, you have to make a means of converting the “false” measurements, (which I will be refering to as “zelda” (kilo)meters, or zm/zkm) from the actual ones.
So THIS is what I fucking did oh my god help me it took me way too long even though it was really simple in hindsight I was just stupid and spent two hours trying to get the ratio equations right when really all I had to do was divide, it was a whole thing, anyhow, read away.
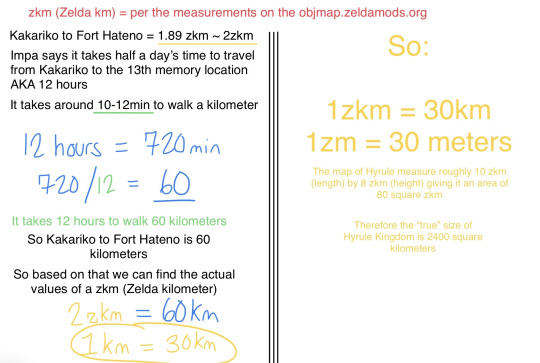
[Image ID: A screenshot of MATH oh my god it’s fucking math...BUT it’s kinda color coded so that’s nice. The top left of the page depicts text. In red text reads “zkm (Zelda km) = per the measurement on the objmap.zeldamods.org” and below that, in black text, reads, “Kakariko to Fort Hateno = 1.89 zkm ~ 2zkm,” which is underlines in yellow. Another line of black text reads, “Impa says it takes half a day’s time to travel from Kakariko to the 13th memory location AKA 12 hours.” Another line of black text reads, “It takes about 10-12min to walk a kilometer,” which is underlines in green.
Handwritten in blue ink is the equation,
“12 hours = 720 min
720/12 = 60″
The 12 is highlighted in green, and the 60 is underlined. In green text, below it, reads, “It takes 12 hours to walk 60 kilometers.” In black text under this, it reads “So Kakariko to Fort Hateno is 60 kilometers.” Another line of black text under this reads, “So based on that, we can find the actual values of a zkm (Zelda kilometer).”
Handwritten in yellow ink is the equation,
“2zkm = 60km
1km = 30km” [typo, I meant 1zkm = 30km]
The 60km is in blue, and the equation 1zkm = 30km is circled.
To the right of everything, in bigger, yellow text, reads “So: 1zkm = 30km 1zm = 30 meters
The map of Hyrule measures roughly 10zkm (length) by 8zkm (height) [typo, I meant width] giving it an area of 80 square zkm.
Therefore, the “true” size of Hyrule Kingdom os 2400 square kilometers.” End ID]
SO ARMED WITH THIS NEW KNOWLEDGE, you can now use this map to measure whatever you want, and by converting 1zm to 30 meters, you can get accurate result as to what that distance is.
Chart the roads, measure the rivers, the map even gives area tools for polygons, squares, and circles! This entire post was born out of a desire to see how long the characters in my fic should rest for when travel between different stables.
Now before anyone asks, yes! 2400 square kilometers is fairly small. That’s around 930 square miles. I believe even Wales is more than three times bigger than that. BUT! Considering Hyrule is a medieval kingdom that’s actually pretty sizable considering the average size of a Kingdom was 100 to 900 square kilometers.
And juuuust to double check, I ran the size though a Medievil Demographics generator, and 2400 (under the conditions of Fertile Land with 64% of the land being arable since I figured roughly 46% for lakes, the ocean, plus unusable land was more than enough to cover the Hebra, Death Mountain, and the Gerudo Desert. Which honestly is even MORE generous considering there are races that occupy these areas, but I digress) This still gives Hyrule Kingdom a good population of 108,000 people! Before the Calamity when all of its villages were up and occupied, of course. So the area is definitely more than enough, and can still give Link a more realistic amount of time to travel between areas (when you add eating and rest of course. Don’t make my guy walk for 10 hours straight from the Great Plateau to Hebra D: plz)
TL;DR: Hyrule is 2400 square kilometers; use the map, plus the conversion 1 zelda meter to 30 meters to measure anything you want; I am tired
Quick Edit: Please note that this conversion is for the purposes of people out there who need more realistic means of measuring distances for larger scale travel and such, like for writing fic journeys, or dnd campaigns. This conversion isn’t the best for smaller scale measure like buildings and such (EX: I’ve checked with buildings in Castle Town and the Coliseum, and they come out much too big, just a symptom of game design ratios not being perfect since it’s hard to balance consistent measurements and the immersion and plan a creator has for their game world!) So if you are measuring those smaller entities using the linked map, just stick with the given zelda meters! (EX: The Coliseum radius in zelda meters matches up nicely with the real world Roman Colosseum, beating it out by a few dozen meters!)
Also if you are a true believer in the interpretation of Impa’s dialogue as “half the amount of daylight hours,” see the reblogs!
#botw theory#cause it's technically a theory i guess#botw reference#botw#breath of the wild#legend of zelda botw#loz botw#if my math is wrong just shoot me on the spot ok#loz#legend of zelda#hyrule
1K notes
·
View notes
Text
Tarot as Representations
So one of the recommended uses I talk briefly about in my zine, tarot in the time of the apocalypse, is to use tarot cards as icons in a parred down travel altar set up. What I didn't get into too much is how to select these cards to use as representations. I wrote the zine originally with a more experienced practitioner in mind and thought that most folks would select a card based on intuition.
Which will totally work. But recently as I was using cards to set up a petition, I realized there was a lot more I could have said there. Some of it
Astrological Representations
So a lot of people know that Tarot has astrological associations. I knew about a lot of these but I've been learning about so many more recently. You can use these associations to create representations of your work with the planets for petitions, prayers, or other workings. If you have decks you don't need, you can us the card as a base to attach paper talesmins to and give them some rigidity while adding to the correspondences (good for if you need to tuck it in a car visor or a book). Really there are so many options for using tarot as representation for astrological concepts.
The classical planets and the 12 zodiac signs are the most agreed upon from what I can tell and they are as follows.
Classical Planets
Moon - the High Priestess
Sun - the Sun
Mercury - the Magician
Venus - the Empress
Mars - the Tower
Jupiter - the Wheel of Fortune
Saturn - the World
The Moon card is traditionally associated with the sign of Pisces but I've swapped these out a few times and not noticed a major difference. I have also substituted Judgement for Saturn when not working with them in an earthly or cthonic capacity and that's worked alright for me. I try to stick to the traditional associations when reading a spread but when picking a representation it seems like it's slightly less important.
Outer Planets
Uranus - the Fool
Neptune - the Hanged One
Pluto - Judgement
These are less agreed upon but what I've found most common. I use them when reading but I will swap them out when picking a representation. I think they work okay for the most part. But truthfully I don't work with the outer planets a whole lot and don't often need a representation of that.
Zodiac Signs
Aries - the Emperor
Taurus - the Hierophant
Gemini - the Lovers
Cancer - the Chariot
Leo - Strength
Virgo - the Hermit
Libra - Justice
Scorpio - Death
Sagittarius - Temperance
Capricorn - the Devil
Aquarius - the Star
Pisces - the Moon
Just as a note, the signs also correspond with parts of the body and can be used to represent requests or petitions in that way too. I have some times used the Emperor (the sign of the head) and the Moon (the feet) to represent that my request is for my whole body. It's too much to fit into this article but it's easy to find on Google and something to add into the language of what you can represent.
Representing Fixed Stars
It's become more popular to work with fixed stars of the Zodiac (Deneb Algredi, Algol, Regulus, etc) and one way I've been using to set up an altar to the ones I work with is to select the tarot card that corresponds to the decan that the fixed star is found in and par it with the Star card.
The decans and card associations are too many to list here but the principle is fairly straight forward. There are 4 elements of the zodiac (Fire, Earth, Air, Water) and they correspond with the four suits of the Tarot (Wands, Pentacles, Swords, Cups; respectively). The Aces embody the elements themselves. Without the Aces, each suit has 9 cards, that are then divided by the three modalities of the Zodiac (Cardinal, Fixed, and Mutable). Each of these modalities has three cards representing the three decans of each sign. Each decan covers 10 degrees of a sign and have associations themselves.
Cardinal signs are at the beginning of each season, so they are equated with the beginning of each suit (2,3,4). Fixed signs are in the middle of each season, so they are equated with the middle of each suit (5,6,7). Mutable signs are at the end of each season, so they are equated with the end of each suit (8,9,10). Using this you can figure out what decan belongs with which sign.
Say you want to represent Algol, who is at 26 degrees Taurus. Taurus is a Fixed (5,6,7) Earth (Pentacles) sign. 26 degrees is between 20-30 and so is in the last decan of Taurus. Meaning the card you'd select would be the 7 of Pentacles.
Sun, Moon, Rising
So on occasion, when I realize I probably won't be using a deck but I want to keep it around, I'll pull a few of the cards and use them as artwork. One way I've done that is by displaying my Sun, Chart Ruler, and Rising Sign using Tarot Cards. I don't have any presently to show as an example but I will get stiff paper, attach cards in a grid, and put it in a cheap frame. Now that I know the decans, I would also include the decans in addition to or replacing the sign cards. I use the World here for Rising Sign because it has felt right to me and at one point incorrectly learned Saturn as being associated with Judgement so I still use that when laying out cards for this kind of artwork.
For instance:
The Sun - The Chariot - 2 of Cups
The World - The Devil - 3 of Pentacles
Judgement - The Star - 3 of Swords
Hell of a combination, I know. The reason I've done Chart Ruler instead of Moon is purely because I have a total solar eclipse in my natal chart so they'd use the same sign and decan cards and this way I don't have to have a second deck.
I'm actually working on turning this layout into a spread/worksheet. More on that in another post though.
Deity Representations
I have used tarot cards as deity representation a lot in my practice, especially with travel altars as I mentioned. But it really could be extended to others as well. This is where there's more intuition and less structure to go off of so what I say here is by no means law. Artwork of the cards themselves will dictate quite a lot.
For the Greek and Roman deities associated with the planets, the choice is pretty easy; the Magician can be a representation of Mercury, the Empress for Aphrodite, etc. For Kemetic deities that were syncretized with Greek and Roman deities, you can also use those correspondences too. I have used the Magician card to stand in for both Hermes and Yinepu for instance.
For other deities, my recommendation is to stick with the court cards as your basis. These already are often read as actual people in a given situation and the artwork in a lot of decks will only include a single person - which is just helpful for me personally when using it as a representation in an altar set up.
However, where you want to call a deity in a specific role, combining a court card and a major arcana can be really powerful. When I use the cards in my work the Morrigan, I always use the Queen of Swords as my base. But if I want to call her in her role as prophetess, I might combine the Queen of Swords and the High Priestess. If I want to call her in her role as battle raven, I might combine the Queen of Swords and the Tower.
If you work with the Elements as entities or as guardian spirits, you can utilize the Aces for their representation as they are the embodiment of the purest qualities of each element. This also works in combination with a Court Card for deities you are calling in connection with their association with an element. Say if I wanted to represent Geb, I might use the King of Pentacles and the Ace of Pentacles.
Ancestor Representation
I have not done a lot of this personally though in the times I have tried it, it has worked pretty well. Court Cards not only refer to people but often have associated ages as well and in a pinch I've used the Court Card associated with the gender and age that someone passed away. I have not used this yet for someone who has passed away that was nonbinary but I would probably default to using the Knight or the Page as they're less gendered, even though they correspond with younger age groups. It's imperfect and I'll write more on this later as it evolves.
The age groups associated with the court cards (as I learned them) are:
Page: young, usually under 35
Knight: someone mid career, age 35 - 50
Queen and King: someone at their height or who has reached old age, 50+
I tend to pick the suit for what they were most known for; were they really emotionally oriented (Cups), did they work really hard (Pentacles), were they especially known for their intellect (Swords), or were they fiery and artistic (Wands)?
If you want to use the cards to honor your dead generally, you can always use a representation of a psychopomp who opens the way for you if that's a part of you practice. You can also just use the Death card, perhaps in combination with the Six of Cups. I am much more likely to do this than represent a specific ancestor but I have needed to on occasion and this is roughly what I used.
Spellwork Representations
This honestly could - and hopefully will - be it's own article or zine at some point but I did want to mention a little bit on using the cards for spellwork on the fly. The main ways I've used them so far is either to petition the spirits of the Major Arcana for assistance or use the pips to specify what I want to happen.
The former is pretty straight forward. I personally have found the Major Arcana to be spirits in of themselves, which makes sense to me coming from a Chaos magic background, and I have petitioned them with offerings like I would any other spirit. The Magician has seemed to be most open to this so far but others are helpful in their own ways.
The latter works the best if you've worked with the cards long enough to understand their concrete meanings. Often beginners will have these very general understandings, that are still accurate by all means, but hard to take action on. If you're at a point in your tarot practice where you can see for instance the 4 of Wands know it's connotations with marriage and contracts or the 9 of Swords associations with bringing on nightmares, then this method should work for you.
Sometimes I'll combine this with a deity representation and lay a pip before it as my petition and then give offerings and burn a candle or incense. Just using them as representations for what I want to happen alone hasn't worked well but using them in combination with something else has. Have someone walk over the 5 of Pentacles or 3 of Swords enough times and there will be consequences. Just as walking under the 6 of Wands or the 10 of Cups will bring blessings.
Conclusion
So I hope this was helpful to someone out there. It's been super helpful for me to just grab my deck and go in so many situations. I can grab it and then scrounge for offerings when I get some place and not feel like I'm without something core to what I need.
And I know there are so many variations on this. This is by no means the be all end all of how you can use them and I do hope to expand on some of them in later writing, but I do think this is a decent springboard to experiment with.
How do you use your tarot deck for representations?
529 notes
·
View notes
Text
Sonic ‘06 - Greenflower Zone Mod Technical Write Up
On April 27th of 2020 I released the Version 1.1 update for my Greenflower Zone mod for Sonic ‘06, a few days before release, I got the idea to do a technical write up on the process that I went through making this mod, as it is a strange one that has morphed over the span of almost a year, evolving and growing with the ‘06 Modding Scene itself.
Original Proof of Concept
youtube
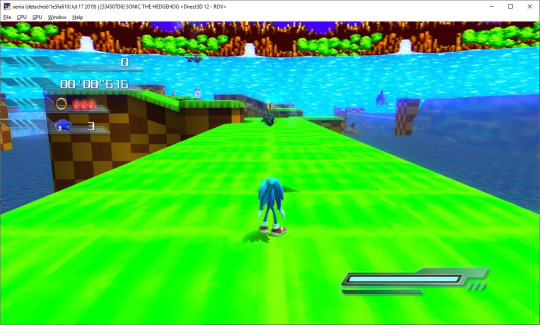
Back in May of 2019, I started toying around with some old Sonic ‘06 tools, thanks to my interest in modding the game rising following improvements in Xenia which made the game more playable within it. As I’d previously done Greenflower Zone Act 1 for Shadow The Hedgehog in February of the same year, I decided to use it as an experiment for importing stage terrain into ‘06; as I already knew the rough process for converting a model to an XNO thanks to me trying to put one of my Sonic Forces Avatars over Sonic.
However, we didn’t have a way to do collision at this point, so my initial plan was to use the common_stopplayercollision object to kind of fake the collision so I would at least be able to walk around it. Unfortunately, the character doesn’t treat that object as ground, so they just float above it. Yet I still decided to place some objects around by manually typing in coordinates based off the object placements I’d previously done for the Shadow port.
Initial Collision Experiments
Shortly afterwards, Melpontro offered to convert a collision mesh for me, while we didn’t have surface tags on it, it was a good enough job to let me experiment more with the stage, which I did by continuing to copy and paste object coordinates from the Shadow port, again, all in plain text XML files. As a result, objects weren’t rotated correctly due to Quaternion Rotation being literal satan and I would have to check an object in game to even see if it was close to being correct.
SonicGLVL
At some point, I hit upon the idea of using SonicGLVL (the Sonic Generations Level Editor) to visualise the object placements. This mostly came about due to me remembering that object rotations in Generations SET Files are also Quaternions, so I could copy and paste their values to get the rotations correct. While I was still hand typing everything, this made it easier to determine object placements, especially considering Shadow The Hedgehog could spawn multiple Rings from one Ring object, a feature ‘06 lacks, as a result, I had to guess the right coordinates for the other Rings with no way to visually check it without booting up the game.

Surface Properties and Sticky Walls
A few days after I’d done more SET work, I sent Melpontro a version of the collision with various meshes tagged by type, allowing him to create collision with various Surface Properties, resulting in proper footstep sounds for surfaces. However, this also led to an issue caused by ‘06′s unusual tagging system for collision meshes.
Walls in ‘06 need to be tagged as such, resulting in quite a bit of trial and error until we got it mostly working. With Act 1 done to a good enough state for a proper work in progress, it was time to move on to Act 2.
WinForms and HedgeLib
Around the time of working on Act 2, I decided to start cobbling together various small C# programs using HedgeLib to try and help me with the process, while I was roughly familiar with bits and pieces of the ‘06 SET Format thanks to my previous work on the Sonic ‘06 Randomiser there was still a lot of things I didn’t know.
One of the first things I wrote was something that would load a SET File and allow me to see all the parameter values of the objects within the SET. This allowed me to document what I thought the parameters for certain objects do (while also discovering a frustrating quirk in HedgeLib). As time passed, work continued on Act 2, while I also started creating an original layout for Shadow, designed under the mindset of playing the stage backwards. Before I got sidetracked working on something else.
The Mod Manager’s early beginnings

Over time, I gradually became frustrated with having multiple copies of ‘06 and accidentally cross contaminating them with various mods thanks to me copying them to the wrong install. While Hyper had a GitHub page for a Sonic ‘06 Mod Manager, it didn’t actually work, leading to me to write a small C# Command Line application to copy and remove the Greenflower files for me. This eventually led to me creating a small GUI for it with the ability to load multiple mods together, which would soon be expanded upon.
Around the same time, I also experimented with Melpontro’s old Emerald Coast stage mod, managing to get it running on Xenia, while also figuring out how ‘06 handles volume objects such as camera volumes. I also brought back a joke Sonic Forces mod at this point, Chair The Sonic, which would evolve into Furniture Adventure 3 before I killed the joke thanks to it going far enough to become unfunny.
Greenflower did take a backseat at this point, only really being used to test Vertex Colours for underwater colouring, as well as experimentation with the game’s dynamic lighting system. Though it would soon be used as a testing ground for something.
The GLVL Converter
On the 2nd of June, I posted this image to my Twitter, based on the wording of my tweet, it sounded like I already had a system in place to convert Generations objects to ‘06. However, I would have still had to do all the parameters manually in an XML. This process seeked to change that, with me manually creating GLVL Templates for objects as I needed them and writing code to auto convert them (shamelessly ripping off the GensToForcesSETConverter in the process). At a future point, I wrote a tool that would autogenerate the templates for me, although the object parameters were just labelled as Parameter1, Parameter2 and so on.
Throughout the process of experimenting with and understanding objects, Greenflower was used as my test bed, as I was too lazy to make a proper test stage for myself at the time and didn’t really have easy access to the unused test level recreations.
The Mod Manager and Tropical Jungle Extra
While working on the SET Conversion experiments, I continued to work on my Mod Manager alongside it before creating a new experiment to mess around with the DLC system and the converter. I started creating a layout for the third section of Tropical Jungle for Sonic, as he does not normally visit that segment of the stage.
Greenflower took a massive backseat at this point, as most of the focus went into Tropical Jungle Extra, before me and Hyper teamed up to create a better Mod Manager out of both of our work. After releasing Tropical Jungle Extra, I worked on a similar concept for Silver and the first section of Dusty Desert, although this never saw the light of day, nor did my short lived attempt at creating a DLC episode for Knuckles.
Lost in Translation and Camera Experiments
At some point in July, I started tinkering with Greenflower again, rebuilding the SET files from the ground up with our new templates and the GLVL Converter, while also experimenting with using dynamic cameras for some parts, at some point I also inserted the music thanks to our XMA workarounds. However, thanks to me having no ability to experiment with the collision, I drifted away from it again and started working on a new project, messing around with Google Translate’s API. This project became Sonic The Hedgehog: Lost in Translation.
I was still working on the Randomiser at this point, so my attention was very divided, with Greenflower slipping down the priority list. At this point, I was also aware of SRB2 2.2′s intent to redesign the zone from the ground up, which pushed it even further down while I waited for it.
The Collision Converter
Towards the end of the month, I remembered Sajid’s previous attempt to write a Collision Converter for me using LibS06, after requesting that code, Skyth provided me with the line to make it work, which I tested on a shoddy import of the Sonic Adventure 2 version of Green Hill Zone Act 1.
With a Collision Converter in hand, I started experimenting with other stages, creating a version of Westopolis for ‘06, as well as some other experiments that didn’t go very far. Before eventually jumping back into and finishing Lost in Translation.
At this point, Greenflower was still on the backburner, with me only really using it to see how the Sonic Adventure HUD mod would look with it and also putting it into the ‘06 demo for the hell of it.
More focus was placed into the Mod Manager around this time, with us rewriting it (leading to the creation of the Aldi Mod Manager jokes).
Mortar Canyon
For some silly reason, I started messing around with Mortar Canyon from Sonic Forces, there isn’t really much to say about it, other than the fact that I needed to use the Switch terrain, as the PC terrain behaved unusually.

SRB2 Version 2.2
Following the release of Sonic Robo Blast 2 Version 2.2, I tested opening and exporting the Greenflower Act 1 terrain for it from Zone Builder to see if it still worked, and it did. As a result, I started messing with it again, although my priority at the time was on my Tropical Jungle mod for Sonic Forces. Issues with the Zone Builder export also lowered my motivation to work on it, although I continued to experiment in the background, trying to find fixes.
About a week later, I toyed around with the Zone Builder source code, finally managing to correct the issue, which was caused by Zone Builder’s OBJ exporter “optimising” the exported terrain by throwing out certain vertices.
With the source for Zone Builder, I also experimented with having 100% accurate object placement, writing a small hack to export the Thing Placement into a text file which I could then use to write into a SET file with HedgeLib. However, object heights are handled incorrectly in Zone Builder, requiring me to fix certain objects manually.
As I finished up work on Tropical Jungle for Forces, I started working more on Greenflower in the background, while also experimenting with some dumb jokes. However, I soon hit another motivational block, The water and grass edges...
Nonami the Material God
Thanks to poor documentation of the XNO format, we had no clue how to make transparent objects look good or how to make translucent objects at all. As a result, I kinda trailed off for a while. However, on the 2nd of March, Nonami showed an image on the Lost Legacy Discord server of translucent water in their Emerald Coast mod and also told us the byte to hex edit to enable it. A quick test later, and I had translucent water
I soon moved the level over to the Kingdom Valley slot, as I wanted to use the breakable wall object that stage has, which meant I needed that slot for the sound, before following up with creating Vertex Colours for the underwater terrain.
Hyper later took over some work on the Skybox and Grass Edges, experimenting with hex edits and texture upscaling to help smooth out the transparent edges while I worked on creating the SET files for the other characters He also worked on fixing up the fence collision for me, as the way it exported from Zone Builder caused Sonic to be able to fairly easily clip through them.
Eventually, I decided (with very little thought behind it) to make various elements of the stage grindable, before following it up with (incredibly tedious to make) Light Dash splines. Eventually, me and Hyper screwed around with it in Multiplayer late into the night, giving us the inspiration to start trying to create a Prop Hunt gamemode for ‘06 too.
With most of the motivational stumbles out of the way, I decided to tackle the flowers and trees by recycling models from Sonic Lost World and Sonic Generations, a process which proved extremely tedious, as the XNO Converter we use only allows for one model at a time. A fact which didn’t help when I needed to export every single flower and tree one by one.
The Act 1 Release
On the 18th of March 2020, I decided to FINALLY release a version of Greenflower, with it soon being updated to correct a few small issues I’d overlooked. After a small break, I started working on Act 2. Thanks to my workflow developed for Act 1, Act 2 went fairly smoothly at first, as I already knew what I needed to do to make the grass edges and water look good. I could also copy the Skybox from Act 1 with no problems, which was nice.
The Act 2 Retargeting Whack-a-Mole
When it comes to level layouts for ‘06, easily the biggest annoyance comes from objects such as Springs. In ‘06, Springs can target other objects by their IDs, which is a really nice feature. However, if the object IDs get changed around, then the target will no longer match up, as a result, I had multiple points where I had to comb over the act to make sure every Spring still targeted the correct object. This was an issue that was much more pronounced in Act 2, due to there being many more Springs in it.
To make matters worse, the object IDs shown in SonicGLVL seem random, so to get the ID of the object I wanted to target, I’d have to convert the SET and look for the object there to get the correct ID. Towards the end of development, I hacked something together that would make the GLVL IDs match the converted ones, making it much easier to handle, if still tedious. My insistence on deleting unneeded objects in the various other character SETs is the primary reason for this headache.
Another problem I noticed a lot in Act 2 were seams in the terrain where Zone Builder didn’t export the terrain correctly, while these were (mostly) easy to fix, it was tedious every time. As it involved the following process.
-Remove the Skin Modifer
-Edit the affected meshes so they’d join up correctly
-Reapply the Skin Modifier
-Export the edited meshes
-Import them one at a time
-Edit the collision
-Export the collision
-Convert the collision
Not hard, just tedious, as with a lot of the work that needed to be done on this project.
Specular Mapping
At some point, I toyed with the idea of adding a small specular map on the windows and roofs of the various houses scattered around the zone. After multiple attempts which blew up in my face, Nonami pointed me to a shader that would do what I wanted, creating this nice, actually fairly subtle effect which was also added to Act 1 for consistencies sake.
However, attempting to add this trick to the water did not go well at all...

Developer Time Trial
At some point when working on Version 1.0 of Greenflower, I changed the text for the Hard Mode selection on the stage select to Not This One. Thanks to me not bothering to make a Hard Mode SET thanks to me finding them to be a waste of time.
In Version 1.01, I did sneak a small SET in that would be loaded if you selected the option, but it otherwise served no purpose.
While messing with the Town Mission timer for Prop Hunt, I realised I could use it to create a Developer Time Trial mode, by simply recording my best time and setting it as the Timer’s value. Originally I intended to record runs for all nine characters, but a limitation of the DLC system prevented me from neatly adding them for the amigo characters, so it was cut down to just Sonic, Shadow and Silver.
youtube
These also use slightly modified SETs, mostly to remove the Bronze Medals, Starposts and Voice Triggers.
Bronze Medals
When initially importing the SETs, I decided it would be a cute idea to replace the Emblem and Emerald Tokens in SRB2 with the very underused Bronze Medals. As it turns out, ‘06 actually has a counter for these medals that goes unused in the final game, activating the counter was a simple as adding OpenMedal(_ARG_0_, 15) to the main event in the stage’s Lua file. While the medals serve no purpose in Greenflower, I felt like enabling the counter just to show an unused piece of ‘06 off while also encouraging exploration in the form of Medal Hunting.
Closing Words
While it may not seem like too much on the surface, I personally am actually quite happy with how Greenflower has turned out. Its long development time and various restarts have given it the chance to fully take advantage of our advancements in the Sonic ‘06 modding scene. While there is still a lot left for us to learn, I’m content with this project’s release state and am ready to move on to something new in the future.
Greenflower for ‘06 has being nearly a year in the making, and I’m glad to have been able to see it through. A special thanks goes to the people who helped me in this mod’s creation, it wouldn’t look as good as it does without Nonami’s XNO research and it may not even have gotten finished if Hyper hadn’t helped me test it and thrown some ideas my way.
Here’s hoping we can do some more quality ‘06 mods in the future and realise some of the potential this game never got to show (and maybe do some silly stuff along the way too!).
4 notes
·
View notes
Photo

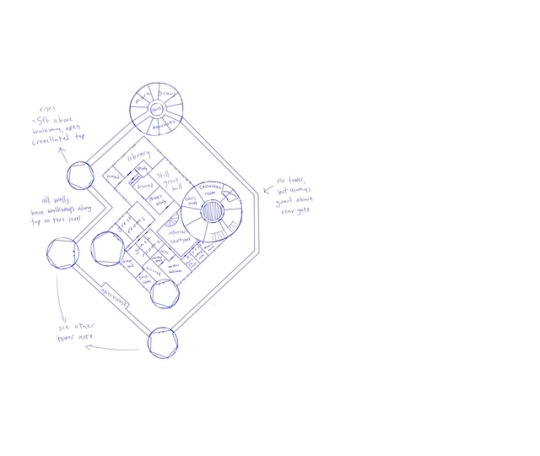

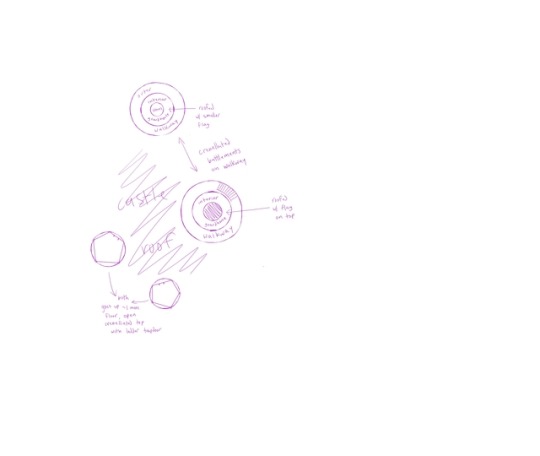

I PRESENT...CASTLE WHITESTONE! Open these in a new tab for the full effect - the files are real big and you can zoom in and read everything. There are also captions clarifying which floor is which.
Based/somewhat traced from the picture of the castle in the Tal’Dorei campaign guide, I have created a vague idea of what the inside of the castle might look like (post-Briarwoods), because I am like this. If you like this and wanna ask me about any other details, shoot me an ask! I’d love to talk about this more. This is also free for anyone to borrow as a reference for a story or whatever, should the need arise.
More details below the cut, because a lot of thought went into this!
So, this is mostly going to be me explaining various details that were too long to write in as notes on the actual map. There’s a lot, including details taken from various actual medieval castles that I wouldn’t expect people to know, so let the explainin’ commence!
first things first: the first floor! The gardens/lawn contained within the lesser wall (as in, the wall not surrounding the castle itself) were traced from the picture that was in the campaign guide, so idk really what’s going on out there. I did, however, identify a specific portion as the family graveyard, because there probably is one and it seemed like a suspiciously enclosed section.
The gardens exist as partly ornamental and partly functional; I’ve also added a greenhouse on the northeast wall, because it seems reasonable that one might have been built at some point (possibly with Keyleth’s help). The guard tower directly above is where the guards that watch the castle/Cassandra stay, bc there’s a lot of them. As all the towers along both the main and lesser walls are manned at all times, I figure there’s a lot of guards working at the castle. Coupled with domestic staff, Percy and Cassandra probably employ a decent chunk of Whitestone’s population.
As for the guards: the rooms aren’t super big on either floor, but the guards probably do share; each room houses one day shift and one night shift guard, so neither of them are there at the same time, allowing this to work out better. The guards in the tower generally are the wall-watchers; any that guard Cassandra or the other inhabitants would live in the Keep (the bigass tower within the castle itself, helpfully labeled). I say Cassandra specifically, because figures like Percy of Vex who are important enough to be guarded probably don’t need guards to defend them.
All the towers are equipped for defense, so any non-residential rooms and the west/south towers probably mostly have some ammo (arrows, crossbow bolts) lying around, as well as other necessities for defense. Noted in the key: ALL the staircases go counterclockwise, because assuming right-handedness in most guards, that makes it easier for a defending force to swing a sword, and harder for the invaders who are presumably trying to go up.
If you’re wondering why the interior of the towers are shaped Like That: I looked up medieval castle layouts and saw a map with towers shaped like that. it makes sense to have SUPER thick walls and tiny window openings when you’re trying to shoot at other people from a place where you don’t want them to be able to get in. You can probably Google it yourself and see where I took my inspiration from.
Speaking of the walls: the lesser wall around the garden is only one story tall, as are the towers (but all towers are a little higher than the level of the walkway along the top of the walls, by about six or seven feet). The walls have crenellated battlements (u know, when the edge looks all blocky like Minecraft), and the towers have the same. Both the Keep and the guard tower are big enough that there are roofed rooms on the top of each, circled by a larger walkway. I’ve made a note that each has a flag flying, though the Keep’s roof flies the primary flag with the de Rolo crest.
The Keep has a lot of unlabeled rooms, mostly because a LOT of those rooms are just standing ready should they need to be occupied. The Keep is the last bastion of defense should the castle be invaded, and so there needs to be space for EVERYONE in the castle to retreat and live there for however long a siege may last. There’s just the one door, and as few windows as possible. The disarming room on the first floor is where everyone would remove their weapons when entering. This is also why Cassandra’s room, as well as the old master bedroom and Julius de Rolo’s room are in there: it’s the best-guarded place in the entire castle.
(Percy’s master bedroom is not in there because he can’t bring himself to take his parent’s room; also, the Briarwoods took it over, and he doesn’t want to sleep in their bed either).
Percy and Vex’s master bedroom also can only be accessed through a solar, which is like a little room to chill in. It’s essentially where they might entertain guests in a casual setting without inviting them into their bedroom.
There are a lot of disused rooms (the other de Rolo bedrooms on the second and third floors are purposefully undisturbed), mostly because nobody’s had a reason to use them yet. I tried to label most things, but on the first and third floors especially there’s just some pointless rich people rooms that nobody’s bothered to clean up for use.
Also, there are servant’s quarters within the actual castle itself! The Victorian ideal was to have servants completely separate from the actual house, but this castle is super compact and they’ve got to live somewhere. It’s more convenient this way, making them closer to the people they’re meant to be helping. Additionally, the kitchen area just off the great hall connects to a bunch of fun areas like a pantry and larder: essentials for any castle. They actually do need to be separate, because they serve different functions. Just below in the basement there’s also an icebox, which was a Ye Olde refrigerator. It would be packed with ice and snow in the winter so thickly that it wouldn’t melt until the next winter, at which point it would be refreshed. The cellar area is mostly for storage, but it also leads to Percy’s workshop, safe behind a VERY thick door. It’s under the kitchen because who’s going to notice a weird bit of extra heat wafting up in a room with like three different huge cooking hearths?
The interior courtyard is my attempt to make the castle a little more realistic. Actual castles were mostly just wide walled-in courtyards with a keep and some buildings running through them; Whitestone is, as I said, super compact and unusual for a castle. The cliffs surrounding it make a moat superfluous, but I had to add in a gatehouse at the main gate as well. As far as realism goes, there’s no skylight or anything in the courtyard or great hall, and not a ton of windows (ESPECIALLY not on the first floor, and not at all on any of the towers’ first floors). Anywhere in castle Whitestone is going to be relatively dimly lit, usually with torches or candles. The space in between windows is covered with whatever paintings or tapestries weren’t destroyed by the Briarwoods/were recovered from wherever they were shoved into storage.
Three floors is probably an unrealistic height for a great hall, but if matt mercer can say the west tower is EIGHTY FEET TALLER THAN THE ROOF (making it, roughly, ten stories tall, a height i have reduced by half for my own purposes and also to make it less COMPLETELY RIDICULOUS) then I can make a super rad soaring ceiling for the great hall.
The great hall is one of two rooms that is actually SUPER well lit, the other being Pelor’s chapel (because sun god, duh). Both of them have very tall, probably stained-glass windows just to be Fancy as Fuck™. If you can’t be extra with the architecture of your own castle, then what’s the point? I did put a balcony in the great hall on the third floor just to make it more interesting, tho.
You may be wondering why some of the rooms are only accessible if you go through other rooms. Sometimes That’s Just The Way Things Are. It was very common in older buildings, especially going back hundreds or even thousands of years in human history. A building briefly suspected to be the Labyrinth of Crete (where the Minotaur was supposedly held) is actually just a castle with like, one or two hallways total.
Also, fun fact: the long row of guest rooms near the west tower on the second floor is where the gang was staying when Hotis ambushed Vax! I have no recollection of the precise layout of the battlemap for that, and some of the layout was wonky (EIGHTY FEET DOWN TO THE ROOF, MATT? EIGHTY FEET?), but I’ve done my best to make it reasonable. Similarly, I drew the dungeon as accurately as I could remember it without tracking down the exact episode where they’re given a map.
#critical role#castle whitestone#whitestone#my art#no offense but has matt mercer ever seen a castle in his life#idk even what i would've done differently but it would've been different#im real tempted to @ the critical role team on this post#maybe tweet @ them#i entertained vague ideas while making this of literally printing it out and sending it to somebody#dunno if somebody would have been taliesin or matt
44 notes
·
View notes
Last Seen Blogs