#doll dyeing
Text
Dye, doll, dye
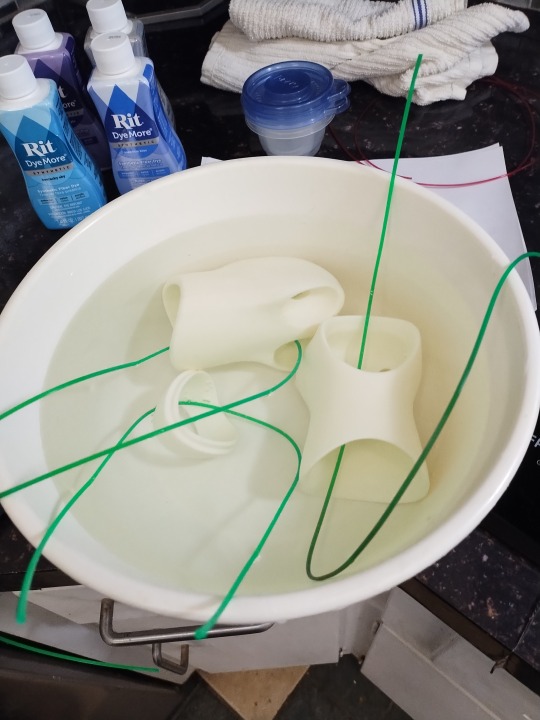
I did a dyeing thing - a white Resinsoul centaur (Dawn) and different vinyl shell parts of an Obitsu 50 cm body (whitey and super whitey).
What I used:
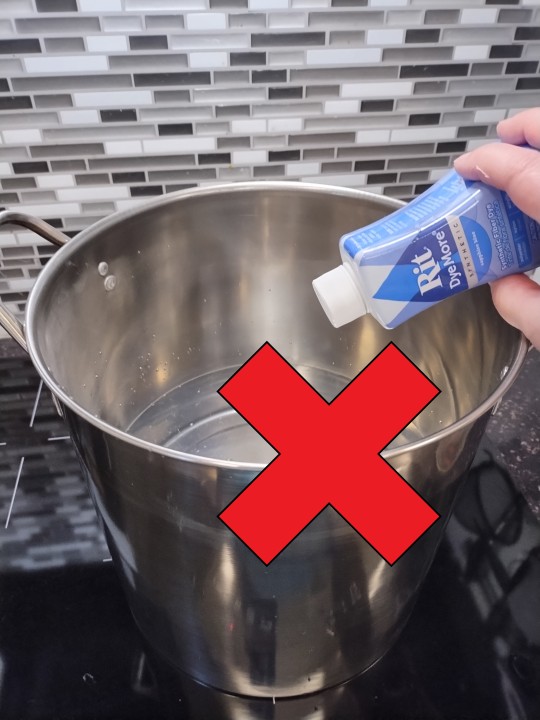
A big shiny pot. Life pro tip - if you have an induction cooktop, check your crappy pot that you ordered from Amazon right away. Amazon sellers are liars.

Lots of towels (water everywhere). Dye (RIT DyeMore is what I used, because it's specifically for synthetics), isopropyl (rubbing) alcohol and a melamine sponge (Magic Eraser) for oopsies, and weed whacker trimmer string for the parts. Plus coffee.

Strung doll parts. NOTE: before I dye resin or vinyl, I soak it in cold water for 10-15 minutes. Resin is porous. Water will help open the pores for a slightly more even dye distribution.

So one thing I see over and over that drives me CRAZY is people dumping the whole bottle of dye directly into the water.
RIT has recipes. Here's the recipe for Fallen Star using "small" items:
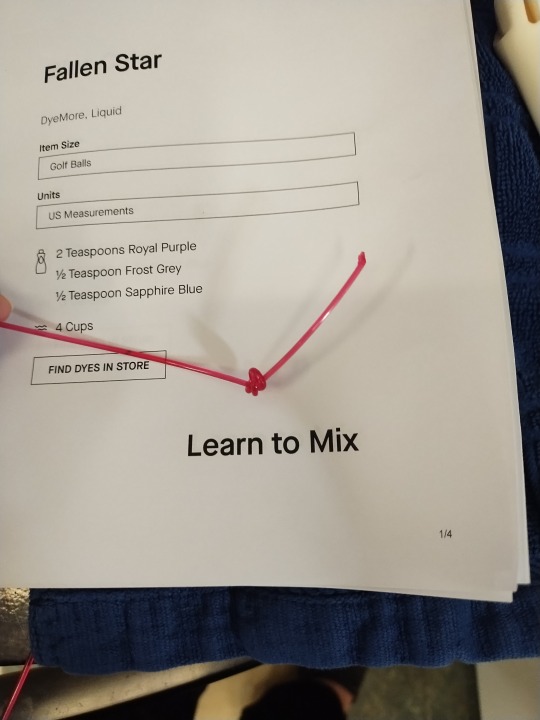
It doesn't matter which small item you pick - the recipe is the same. For a more intense color, increase the amount of dye (Fallen Star is 2 teaspoons of Royal Purple, 1/2 teaspoon Frost Grey, 1/2 teaspoon Sapphire Blue per 4 cups of water). If you dump in the whole bottle, 1) you're wasting dye, and 2) you're not going to get the color that the dye is supposed to produce.

Dye measured - and then I measure one more batch in a separate cup. As stuff goes in the water, dye is absorbed and removed from the water - so you gotta add a little back. Like, an eyedropper at a time, a little.

I set the water to be just under a boil - no bubbling, but still painful when you accidentally stick a finger in there. It's soapy because RIT recommends adding a tiny bit of dish soap and a little salt to the dye bath to help disperse the color evenly.
Dunk:

The resin parts got 3 minutes each. The vinyl parts got 6 minutes.

Horse butt magnet came unglued, and there's something on the butt that prevented it from absorbing dye. I don't know what it is. I'll have to color correct with pastels. Also: the horse body was cast in two parts that were glued together, and the seams sanded. This became immediately apparent post-dye.
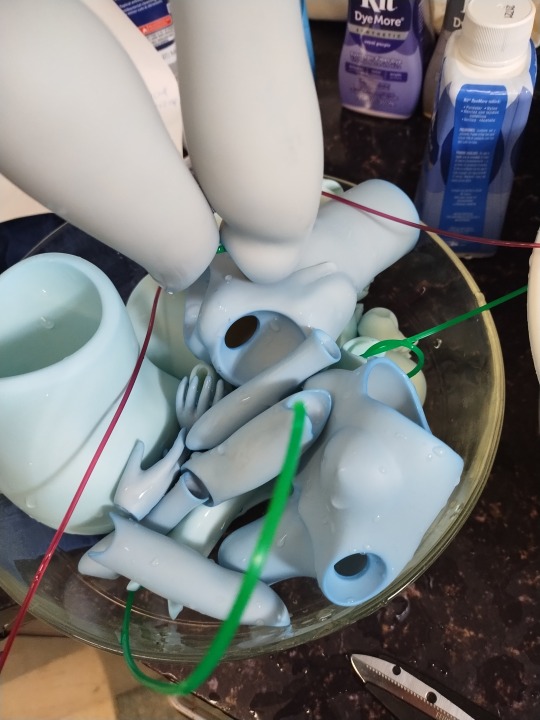
The floating blobs top left are vinyl thigh parts after 3 minutes in the dye bath. The darker blue human parts of vinyl parts after a six minute bath.
A few more things: whatever that butt glue was, it liquified in the pot and stuck to stuff. I am not happy about this.
Because parts are thinner in some places and thicker in others, when I pulled a part out of the bath, I would run it under cool water. Then I grabbed my melamine sponge and scrubbed areas where the dye was darker or absorbed funny. Isopropyl alcohol can also help remove some of the dye.
The dye continued to process, even after I rinsed all the parts. When I woke up the next morning, everything was an even more intense blue - especially the vinyl.
My self-imposed max time for resin in a hot water dye bath is 3 minutes. 2-part epoxy resin reacts quickly and hardens to equilibrium - NOT completion. When resin parts are put into almost-boiling hot water, the reaction is reactivated. The resin parts will shrink. I read on a resin manufacturer's website that after 20 minutes, the resin will become extremely brittle and fragile. From past experience, I know that 3 minutes in hot water is enough to make a resin part shrink.
Since the resin parts were dyed for 3 minutes each, this means I will NOT be attempting a gradation with dye. I'll use pastels instead.
But vinyl, however - vinyl can take some heat. Heh heh heh.
Next up: purple!
57 notes
·
View notes
Text


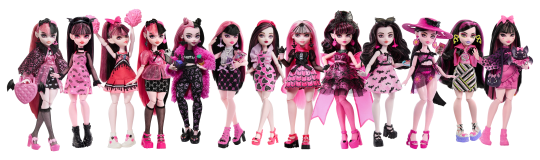
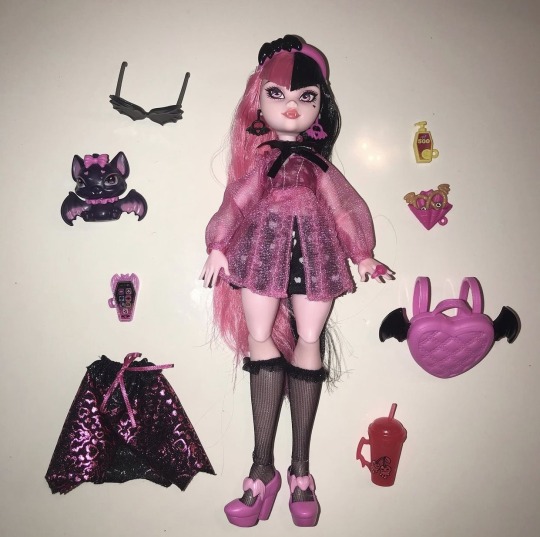
All 13 released and upcoming g3 Draculaura dolls as of August 2023
Draculaura dolls with split dye hair:

Just 4.
Most recently Skulltimate Secrets s1. And one of them is just a budget version of the first one.
When will Draculaura's split dye return from the war 😔
#monster high#draculaura#monster high g3#dolls#doll thoughts#monster high thoughts#my posts#been wanting to put together a comparison like this for a while#was inspired by cryptoriascollectiblog's post about the split dye#because it's been bothering me since we first saw leaks of Bite in the Park after just getting 3 dolls in a row with g1-like striped hair#anyway i spent Too Much Time violently hyperfixating on this because i was ignoring Bad Stuff irl so uh#woe draculauras be upon ye
581 notes
·
View notes
Text
look at him go
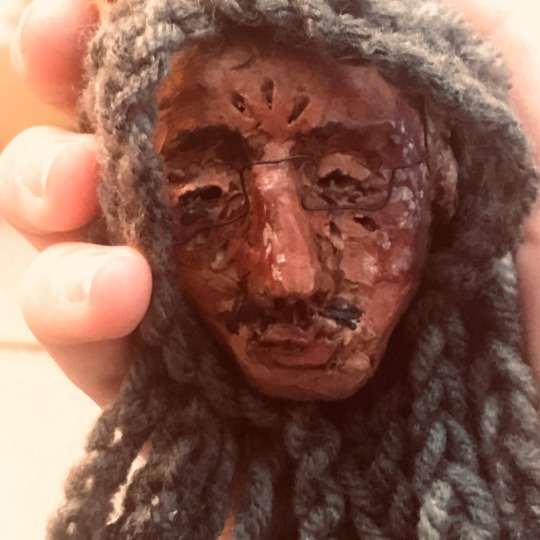
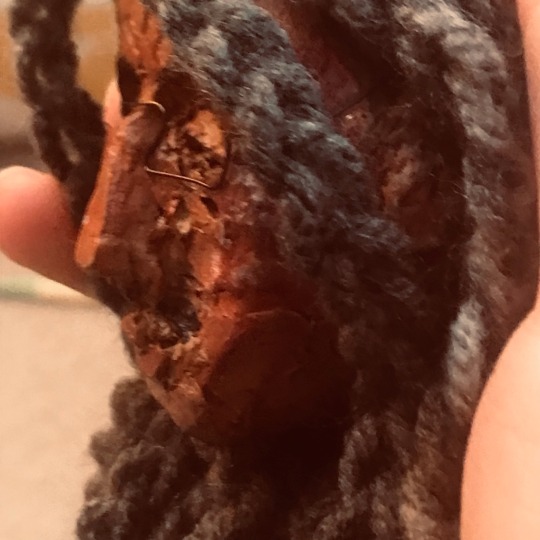

#was gonna be a full doll but i lost his hands :-((#the hairs a little wonky bc i only have white yarn so i had to hand dye it#hopefully i will find his hands soon#i was actually proud of them too like come on :((#jonathan sims#tma#nikola orsinov#the magnus pod#the magnus archives#my art
67 notes
·
View notes
Text
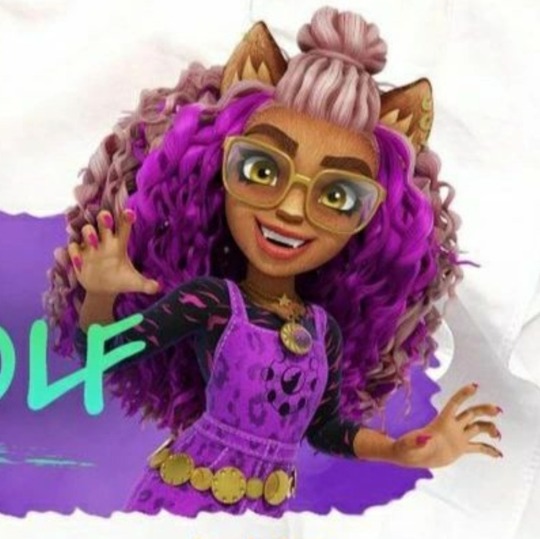
If you reblog, put in the notes what color you would call it.
#monster high#monster high g3#clawdeen wolf#clawdeen wolf g3#polls#id in alt#been wondering for a while what people think#its on my mind cuz i just got her g3 doll with plans to reroot it#her hairstyle isn't great either which certainly doesn't help#i gave her a new style until i can afford to get the hair for the reroot and it made me dislike it a little less#tbh idk what color to call it#its kinda mauve...? but its also not that pink#it looks pink because of the magenta in her hair#it looks like she bleached her hair then dyed it pink and this is how it looks after the pink washed out#i would really like to know the designers thought process with her hair color because it doesn't even make sense in canon#her mom's hair was legit purple and clawdeen's looks like a washed out dye job but its somehow natural...?#i kinda don't want to include the indifferent option#but its a perfectly valid opinion to have on the matter
41 notes
·
View notes
Text

Hair: faded
Cheeks: pink
Eyebrows: immaculate
Life: absolute clown chaos
28 notes
·
View notes
Text
#need to dye my hair asap#!#not mine#girlblogging#girl blogger#this is what makes us girls#girlhood#lana del rey#girl interrupted#girl interupted syndrome#lizzy grant#blythe doll
25 notes
·
View notes
Text

Dyed my Souldoll Junia from NS recently and I’m so pleased with how she came out! I was trying to go for kind of a cooler-toned brown color like the limited resin color she was originally released in, and I think I succeeded. Can’t wait to give this girl a faceup and wig and get her dressed! :)
22 notes
·
View notes
Text

Custom Michelle!
#can y’all tell I’m having fun dyeing my dolls hair?#my original plan was giving her red hair and like red all over#but it didn’t turn out that great and I feel like it didn’t go with her#so I was like let me try brown#and boom#Michelle is now a goth-ish girly#her nails are drying it’s why she doesn’t have hands rn#rainbow high#rainbow high dolls#mga dolls#rainbow high series 5#doll restyle#michelle st. charles
86 notes
·
View notes
Text
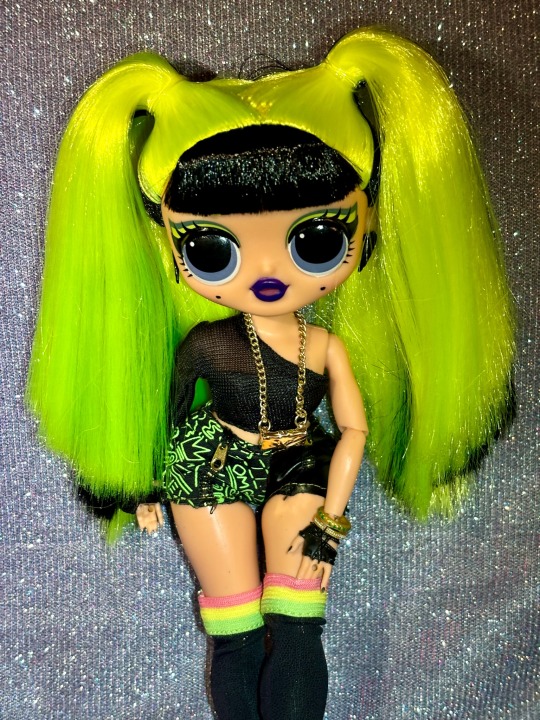
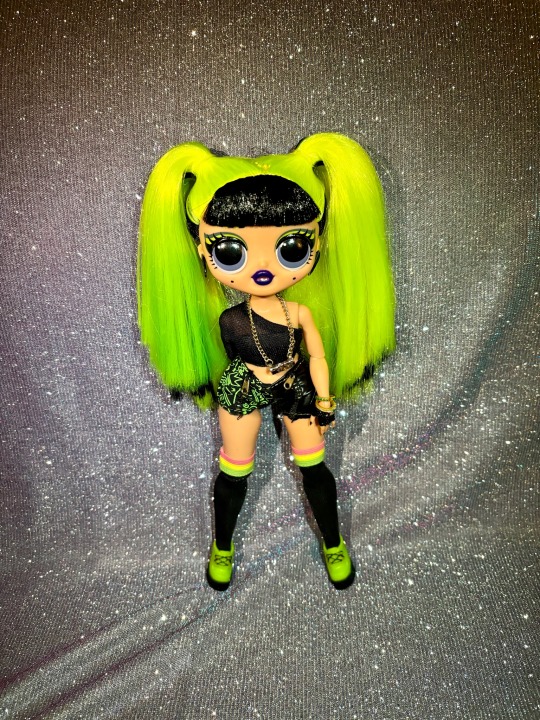
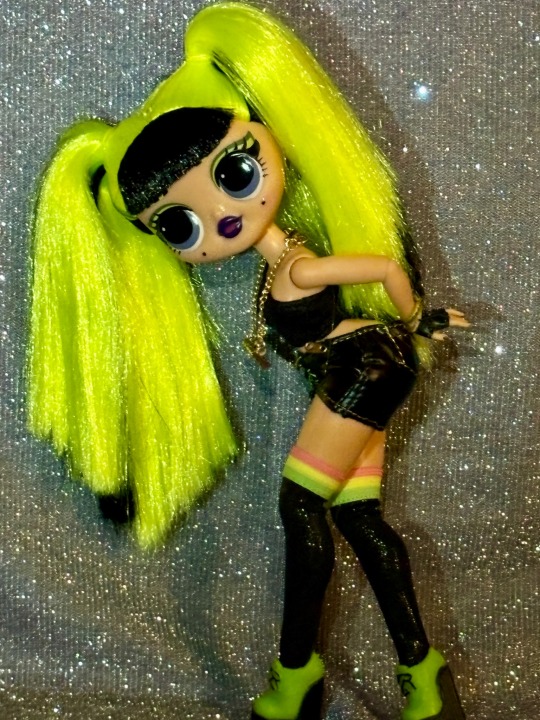
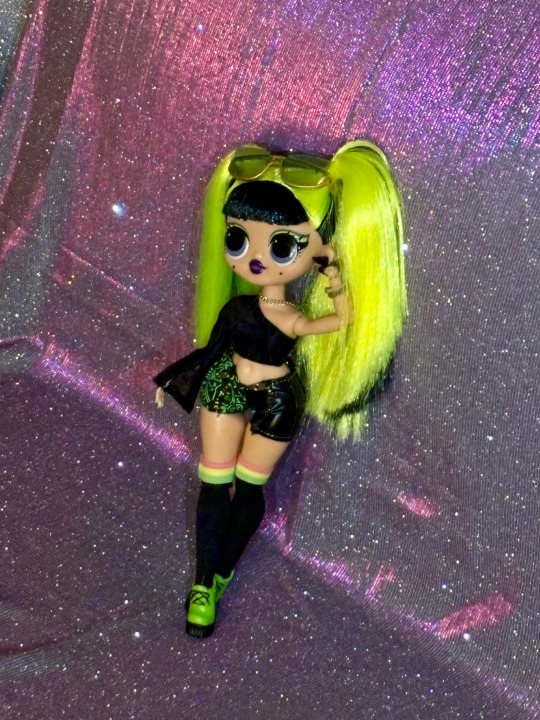
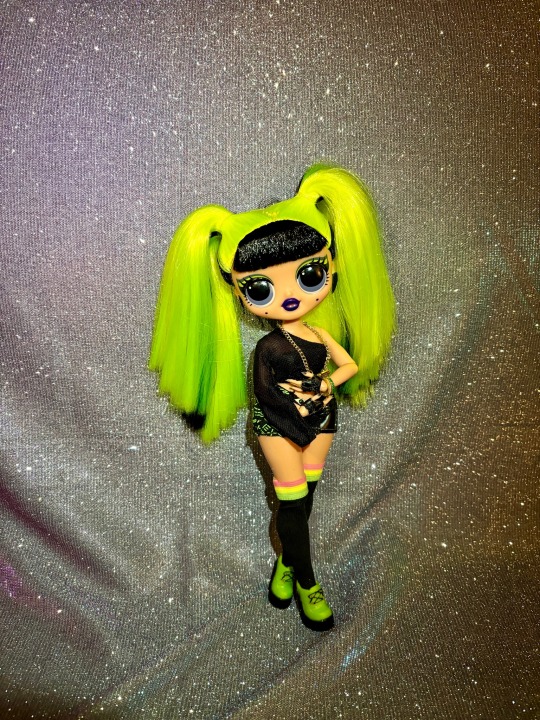
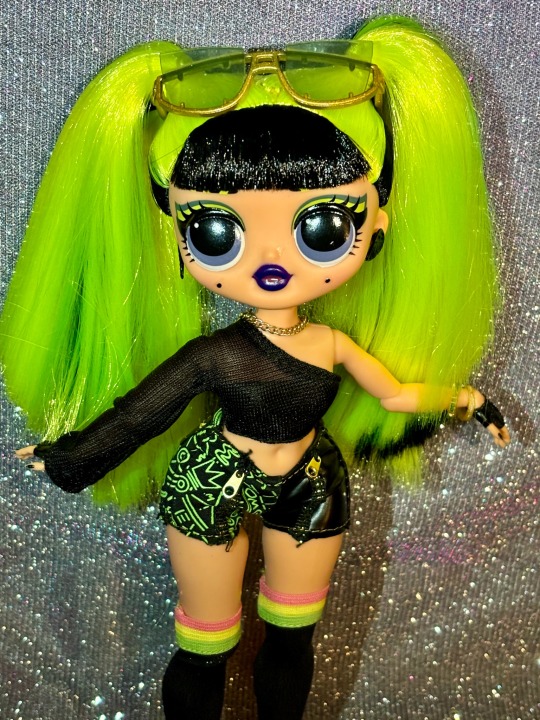
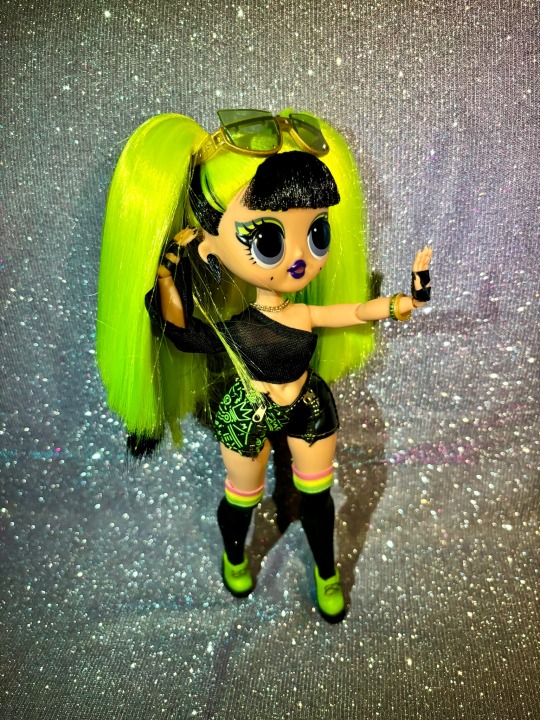
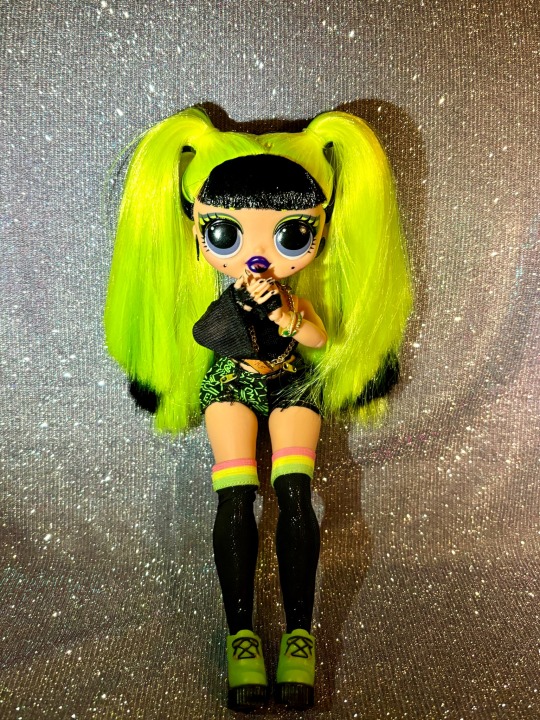
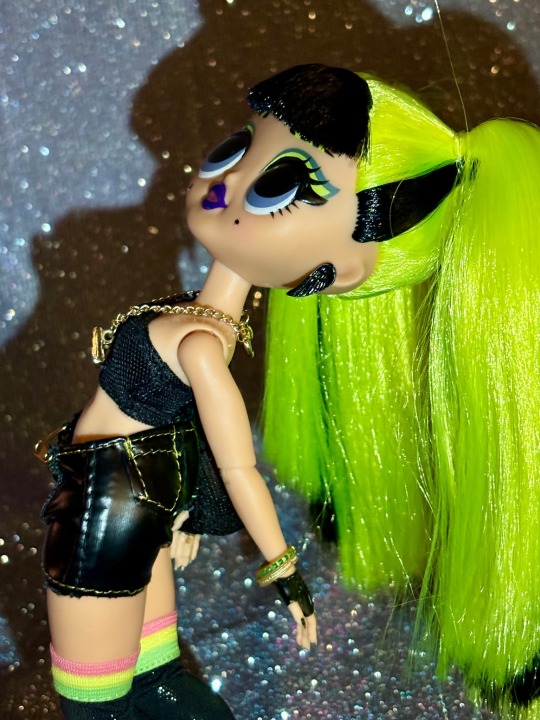
💚bhad gurl restyle🖤
✨look 5/10✨
dimple piercings look so cute on lol dolls 🥰 i like this doll way more than i thought i was going to
also i forgot to put her glasses back on when they fell off 😩 maybe i'll try this outfit again on sways and then i'll keep the glasses on
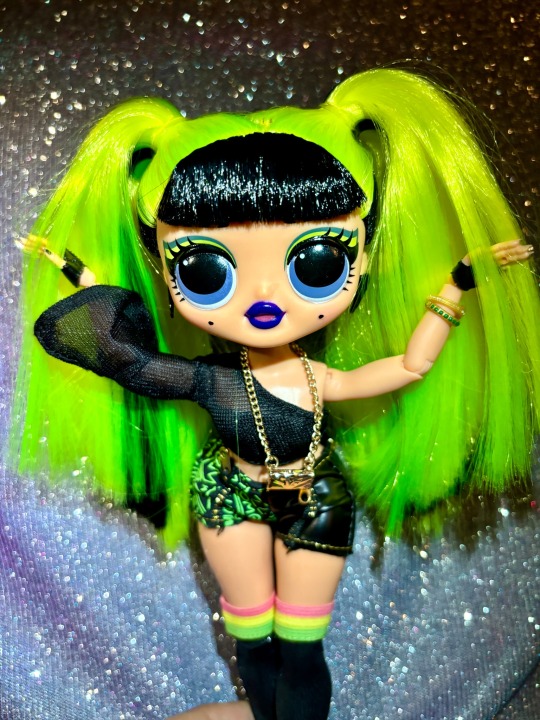
#nonbinarydollie#bhad gurl#lol bhad gurl#lol surprise bhad gurl#super sonix#lol omg dolls#lol surprise dolls#lol dolls#omg dolls#omg bhad gurl#adult doll collector#doll collection#doll community#doll photography#doll photoshoot#ball jointed doll#fashion dolls#dolls#doll collector#doll clothes#doll hair#my dolls#lol surprise collector#lol surprise#outrageous millennial girls#green doll#dollblr#dollcore#split dye#green and black
12 notes
·
View notes
Text
Kinda also wanna write airhead Steve (which is canon anyway) and Eddie thinking it's cute and getting turned on by it...
#steddie#airhead steve#even better if steve dyes his hair blonde and eddie calls him his barbie doll 💗
603 notes
·
View notes
Text

💕 drew this draculaura back in October and forgot to post her! Oops!!! 💕
#art#drawing#digital drawing#digital art#fashion dolls#procreate#dolls#doll art#mh#monster high g3#monster high art#draculaura#mh fanart#pink#pink hair#split dye#Dracula#monster high#monster high dolls#drawn
48 notes
·
View notes
Text
Also just for fun
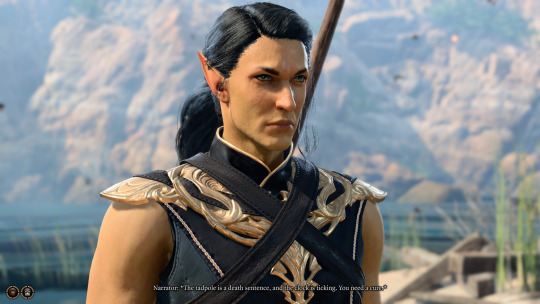
#bg3#taliesin skyrim#trying to mod things to give me more dyes put poor tally in a purgatory where nothing would trigger and no one would speak with him#so like. eh. sorcerer's robes fit the vibe#sure#okay done with dolls. back to work
17 notes
·
View notes
Text
What no one tells you about making plushies is that the hardest part is finding the motherfucking fabric
#i'm trying to make a pokey doll and by god i will#but finding the blue fur is not only IMPOSSIBLE but whatever similar fabrics i can find are so damn expensive too#i have like one place left to go ask#either a miracle happens and i find it there or i'll have to compromise and get white short fur and dye#or order the long one online and hope for the best#also white bc blue is not that popular a colour ig#i'm distressed#lords in black#pokey#hatchetverse#hatchetfield#diy merch
21 notes
·
View notes
Text
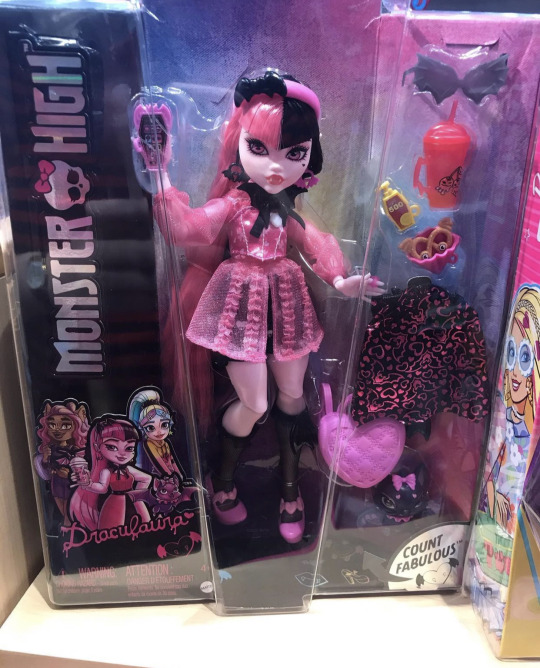
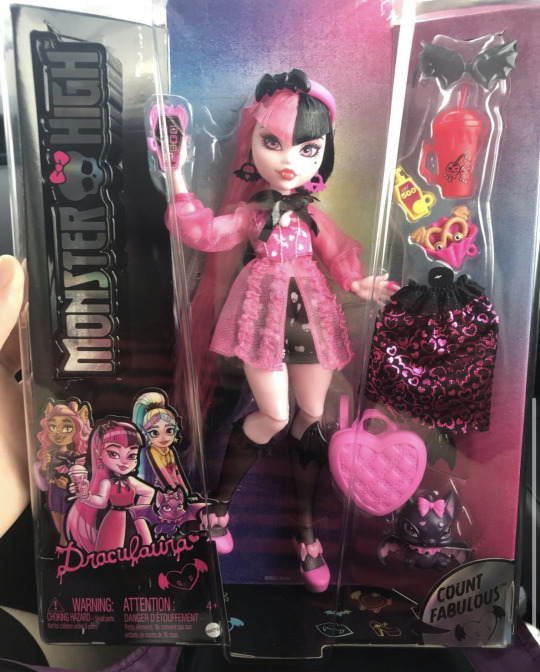

HELLO?!?!! DRACULAURA WAS FOUND BOXED IN A STORE IN CANADA?!?!!!
[image cred: catty13noir on insta]
#monster high#mh#draculaura#monster high reboot#monster high draculaura#monster high dolls#dolls#monster high movie#doll leak#personally i think she’s adorable and im obsessed w her!!!! but still not sold on the split dye#other than that she SLAYED#im living for her new body sculpt!!!!
313 notes
·
View notes
Text


#my dolls#rainbow high#laurel#serena#they were a sabrina st. cloud and a harper dune respectively but laurel got a wig and serena got a dye job#doll diary#dollblr
41 notes
·
View notes
Text

smile lines
.
.
.
30 notes
·
View notes
Last Seen Blogs

lil-pet-regressor
Pet Regression

nephsech
NEP ZONE

barbituratestore-blog
Barbiturate Store

fromthedesktop-blog1
La aventura de aprender... un espacio de reflexión
alf12311
Sklave