#diy accessories
Text
When I met (unexpectedly, amazingly) with @coveredinredpaint, I saw that his army bag has many pockets. Mine only has one, so I gave it more pockets.
Here's the hidden pockets that made my fingers kinda hurt because the fabric is thick af:
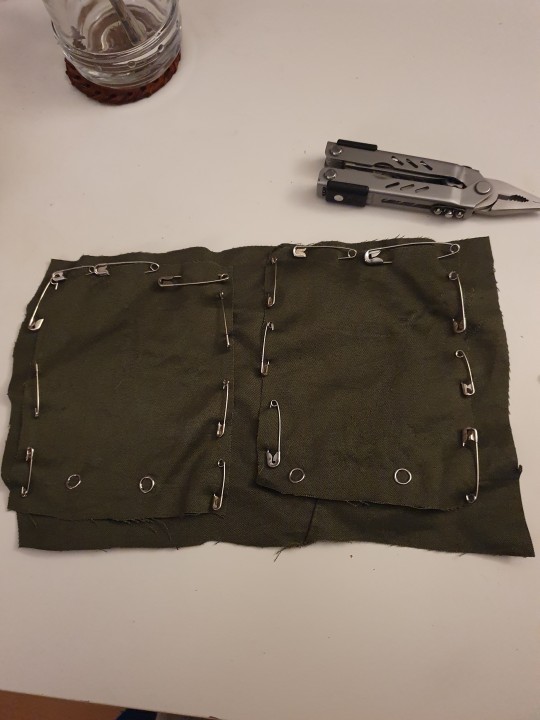

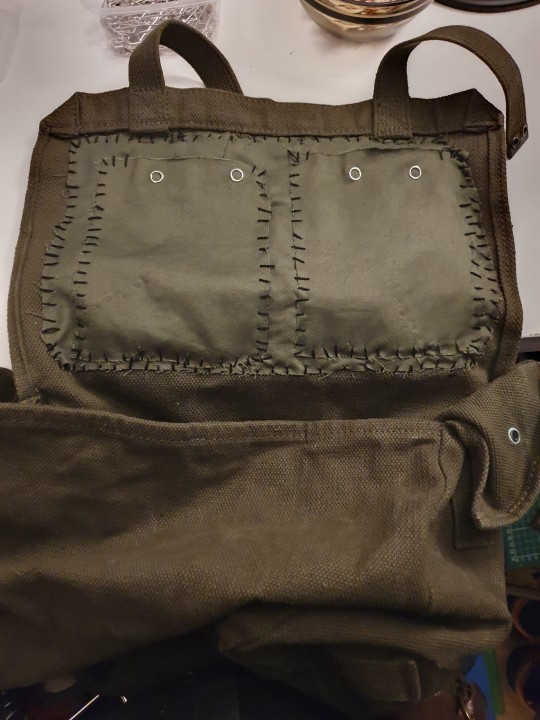
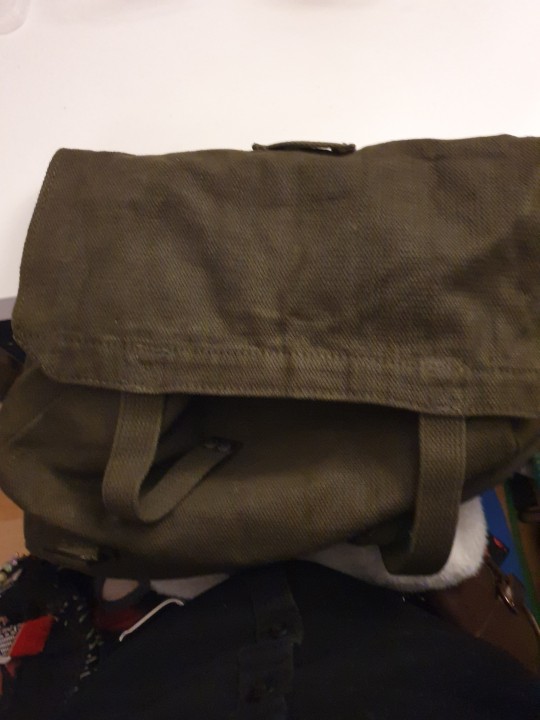
As you can see, they're also completely invisible from the outside! A good place for essentials like emergency pads, candy, stickers, gum, etc
#things i made#diy#sewing#diy clothes#diy accessories#army bag#clothing modification#hand sewing#punk diy
178 notes
·
View notes
Text
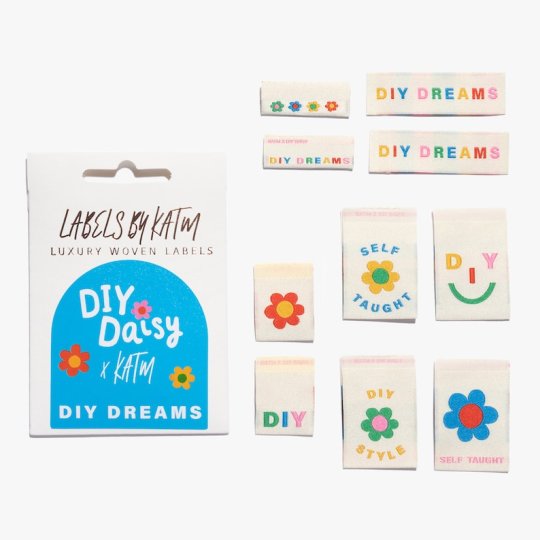
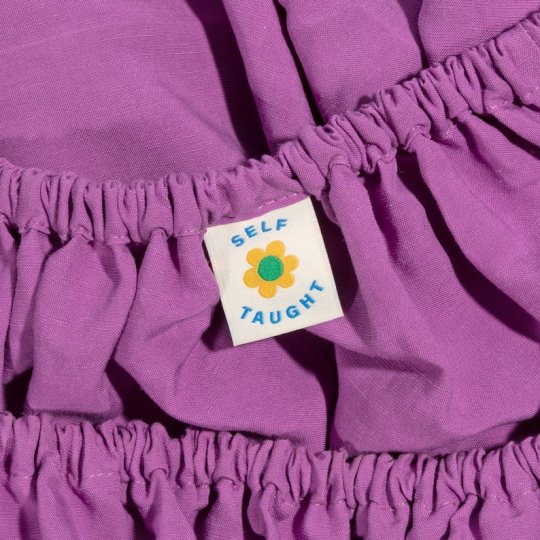
Kylie and the Machine - DIY Dreams by DIY Daisy x KATM | Sew-in Labels by PrettyLittleHedgehog
#sew in labels#sew in tags#sewing#sewing supplies#sewing accessories#diy supplies#diy accessories#craft supplies#PrettyLittleHedgehog
43 notes
·
View notes
Text
[ DANNY'S TUTORIALS: BOTTLECAP PIN ]
Hi there!! I'm gonna teach you how to make a bottlecap pin since I've gotten a lot of questions about where I got mine from baby punks and others who just find them cool! I've found that a lot of people buy their pins online from companies that overprice and over-process their designs, and often times steal them from smaller businesses. Punk has been gentrified over the years, so this tutorial acts as a way to reconnect to the roots of DIY fashion made by people with limited resources and time. This is a great way to show your interests, pride in your community, and pretty much anything else you want even if you don't have a penchant for traditional art. Don't worry about it looking good, just try to have fun! At the end of the day, the shittier the job, the more punk it is.
[ Step Count : 6 ]

Here's what you're gonna need! (optional materials have a star next to them instead of a regular point):
-> hot glue gun (in replacement of pliers)
-> safety pin
-> bottlecap (unbent, preferably a twist off)
-> can tab
✮ pencil/pen
✮ sandpaper
✮ paint & paintbrush/posca pens
✮ regular Elmer's glue
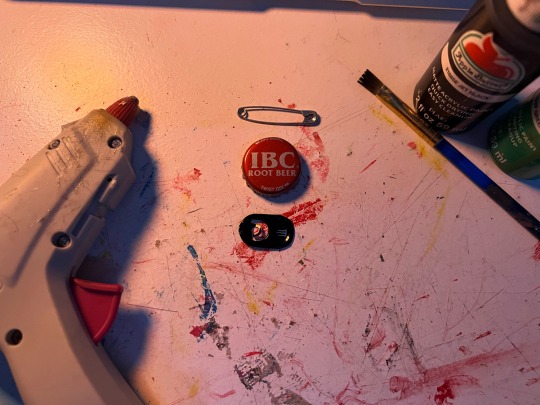
STEP 1:
Gather your all of your materials and place them on your workspace. I'm going to paint mine, so I got the sandpaper, paintbrush, and paints as extra materials.
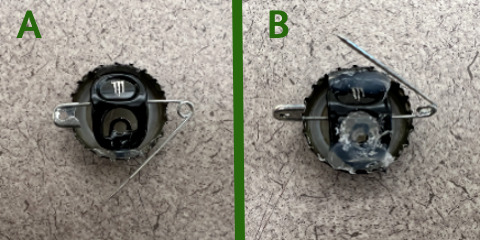
STEP 2:
If you're not going to paint yours, go ahead and skip to step 3. Otherwise, get your sandpaper and your bottlecap, then sand down the surface (A). Paint your base, draw a design with the pencil/pen, and fill it in with your paints/posca pens (B)! After I'm done painting I'll usually seal it in regular Elmer's glue to make sure it doesn't get messed up anytime soon (C). I chose a little green skull since the person I'm gifting this too likes and spooky stuff and green is their favorite color :]

[ Also sorry for the change of scenery, I had to finish at the library cause I was studying. Visiting, donating, and helping your local library is Punk As Fuck. ]
STEP 3:
What you're going to do now is set your bottlecap aside, and take out your can tab. I have joint problems and I can't use pliers, so I bend it over the edge of a table by holding it half over the edge and pushing down to bend the metal. But try not to bend it too much so your safety pin stays in place!
STEP 4:
Okay, here comes the tricky part. Like I said, I have joint issues, so I can't use pliers because they hurt my hands. Instead I'm going to set aside my now bent can tab and bring back my bottle cap, then flip it over. Place 2 hefty drops of hot glue on the bottom and top of the pin, then get your safety pin and open it so you can place it on the back horizontally.
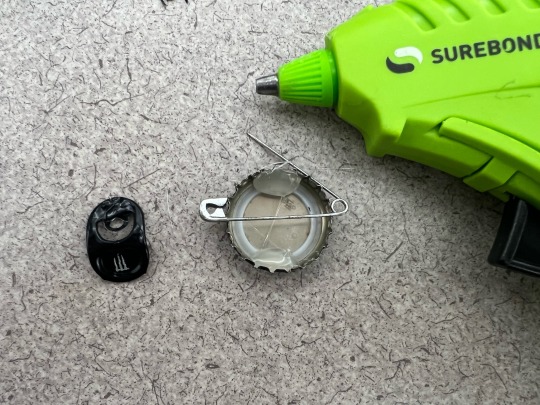
STEP 5:
Now, place your bent can tab on the back of the pin and over the open safety pin, pressing it into the hot glue drops and letting it dry for a little bit (A). If you like, you can also put two more drops of hot glue on the tops of the bent can tab for extra security (B). I also put some hot glue in the middle of the tab's opening for extra security on the safety pin. Please pardon the absolute dogshit photo quality it wasn't cooperating for some reason LMAO
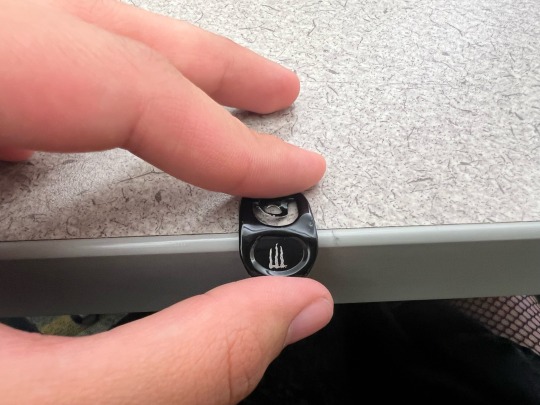
STEP 6 [FINAL]:
Wait for it to dry, then you're all done!! Your very own bottlecap pin. You can attach this to bags, jackets, shirts, pants, and pretty much any material that a safety pin can glide through.

Here's the finished product, as presented by my friend D at the library (everybody say thank you D for modeling)!!
[ -> Next (coming soon:]) ]
#punk#diy punk#bottle cap pin#diy tutorial#punk rock#bottlecap#bottle caps#punk tutorial#diy#diy jewelry#diy accessories#danny's tutorials
473 notes
·
View notes
Text
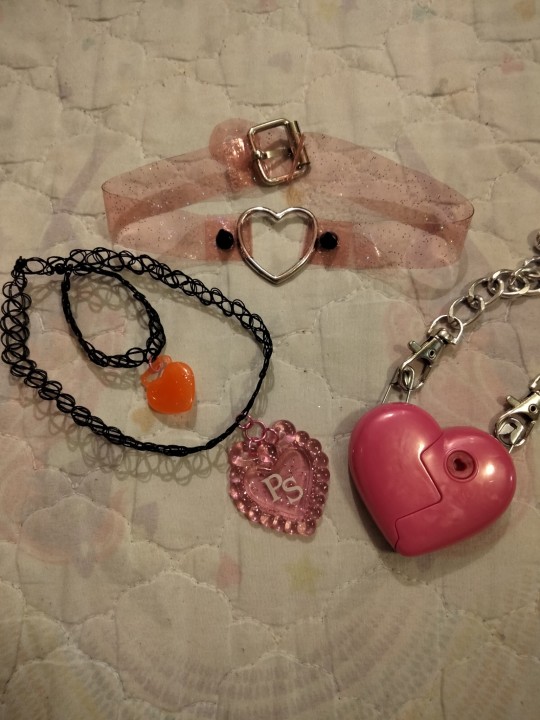
The diy inspiration has been crazy this week ^_^
Top - choker made out of a vinyl binder pocket and a bracelet that was too big, I used a candle and a screwdriver to melt the plastic together where needed. I like doing this :D
Tattoo choker - tag from a puppy surprise but I may or may not have broken the ribbon loop off to get it so I had to get creative with attaching it
Locket chain and tattoo bracelet - the locket part of a real littles journal, bracelet was made out of a shortened tattoo choker and the key to the locket
23 notes
·
View notes
Text


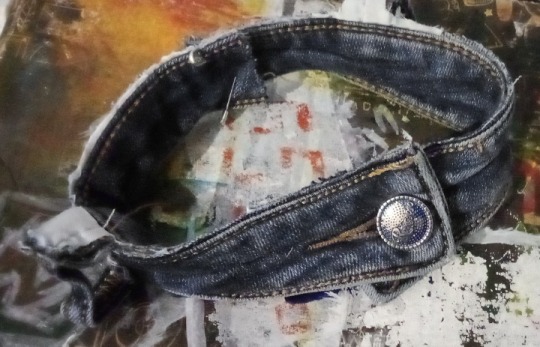
Inspired by Mai Magi (is she no longer on tumblr? couldn't find her) and my friend from insta (mosscoveredtroll) I made my own braided belt reccently! I started simple by doing a standard braid with 3 main strands (4 strands per "strand" though) and used this pretty bronze gold belt buckle I've got from a bargain bin ages ago. Finally it's time to shine has come!!
Making the belt was so much fun, I immediately made another one for my dear friend Meg's birthday present and already plan already on making another one for a craft swap with my dear friend @wuselwesen.
[id]Pic 1 & 8 are full body shots which incoorperate the finished braided black belt into an outfit. A fat, white, young seeming woman with long brown hair worn over one shoulder and glasses is wearing a berry-coloured dress. The dress is loose-fitting, and as such nicely accentuated with the braided black belt. She's wearing a berry-coloured bandana in her hair, with white lace edging. A black scarf, black leggins and black shoes tie in the black belt. A berry and orange patterned kimono-inspired jacket finishes the whole look!
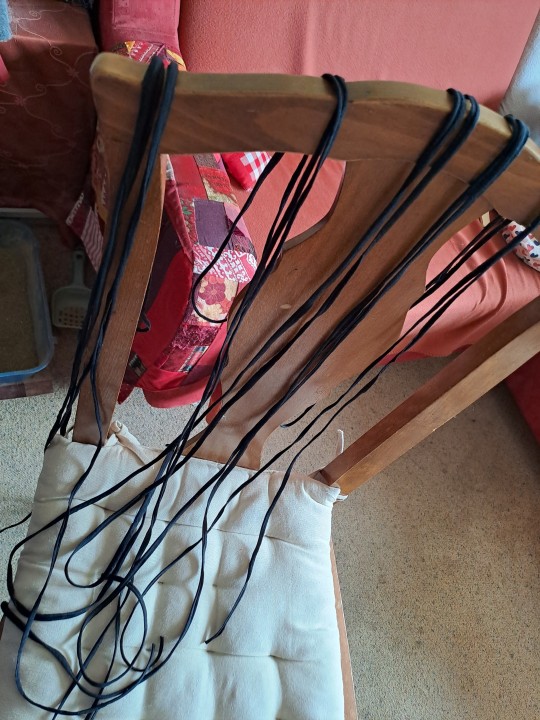
Pic 2-7 show progress pictures of how the braided belt was made.
Pic 2: show the single strands of the belt being prepared and hung over a chair in the meantime
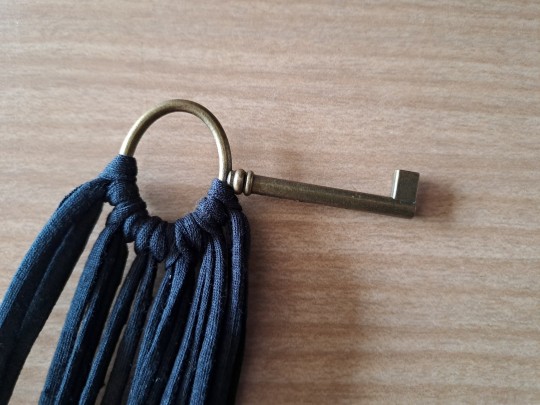
Pic 3: The beginning of the braids: the strands of shirt-yarn are being knotted to a bronze-coloured key (wait? a key?)
Pic 4: We see a finished black belt with a key buckle, which you use to tie the belt up.
Pic 5: But what's that?? More belt buckles?? (including the one seen in the full body shots.) Wait a moment... might these pictures reveal something?
Pic 6: Alas, the first belt turned out too small and the belt being worn in the outfit is actually the second belt! Surprise! They are very similar, one belt just has a key belt buckle and the other a D-shaped belt buckle. And of course the second one is longer (though you can't really tell, as it's wrapped around a bottle in the picture)
Pic 7: Apparently a braided bracelet has been made from scrap material! Also conveniently modeled on a water bottle.
[/id]
#diy or die#diy accessories#diy belt#handmade accessories#braided belt#belt made from tshirt yarn#this was so much fun#i love braiding#it's very soothing#tags for belt:#strega fashion#goth fashion#mori kei fashion#dark mori kei fashion#tags for outfit:#layered fashion#handmade fashion#berry coloured outfit#the black scarf i'm wearing is thrifted#mixing it all together#eye contact#image described#fashion described#image description
31 notes
·
View notes
Text
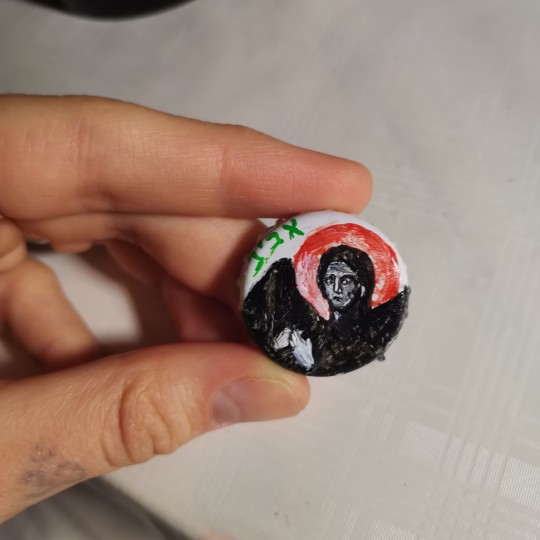
Я сделал значок!
///почти: надо еще булавку приклеить и лаком покрыть, но 90% работы уже сделано///
#русский tumblr#русский блог#блог#русский тамблер#вброс#фото#фотография#Турумбочка#рисунок#Ангел#Христианство#Значки#diy pins#diy#diy accessories#angel#orthodox christianity
17 notes
·
View notes
Text
youtube
New episode up my channel! This week we’re making some adorable handy dandy notebook hair clips!✨
#nickelodeon#blues clues#2000s nostalgia#nostaligiacore#kidcore#kitsch art#1990s nostalgia#diy accessories#Youtube
28 notes
·
View notes
Text
New choker!!

3 notes
·
View notes
Text
I ordered the Rody plush!!
I made jax the fairy wings so I should probably make Rody something..
A flower crown maybe?
5 notes
·
View notes
Text
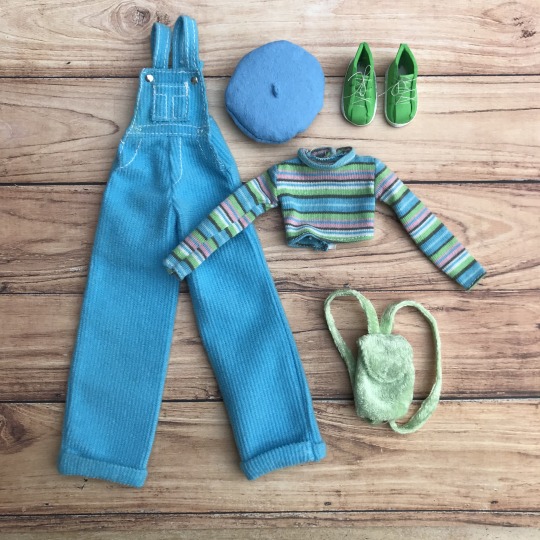
Béret et chaussures DIY.
#doll diy#diy#diy accessories#barbie fashion#barbie mattel#barbie world#barbie dolls#barbie#dolls#fashion dolls
28 notes
·
View notes
Note
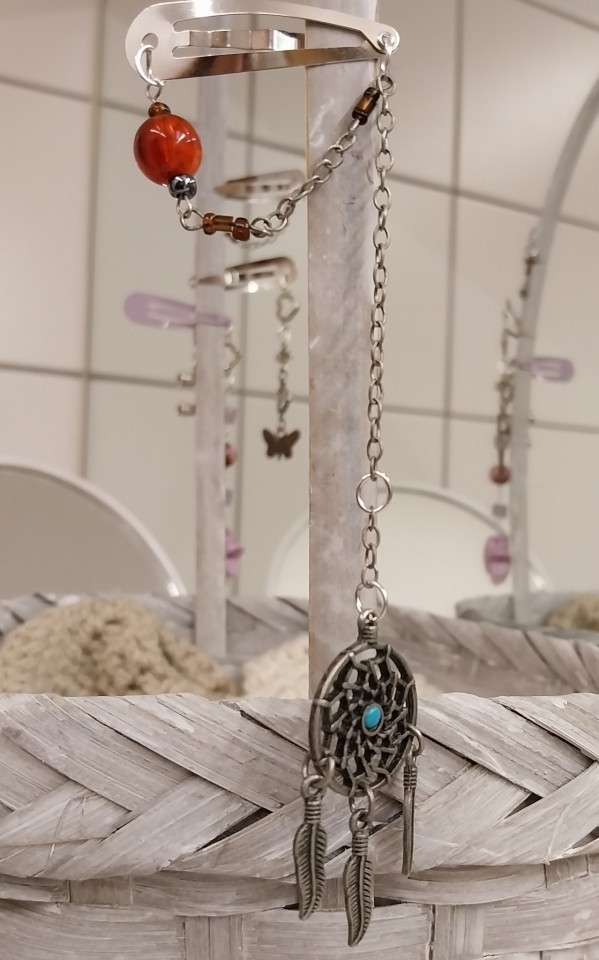
I have been sent
What's your favourite thing you've done DIY-wise recently? I saw the cloak a bit further down the blog and the moons on the back look super cool
It's so hard to pick a favourite tbh... the cloak is one of the largest things I've made recently and I'm very very happy with how it came out!
Here's some recent works that I don't think I posted on tumblr yet?

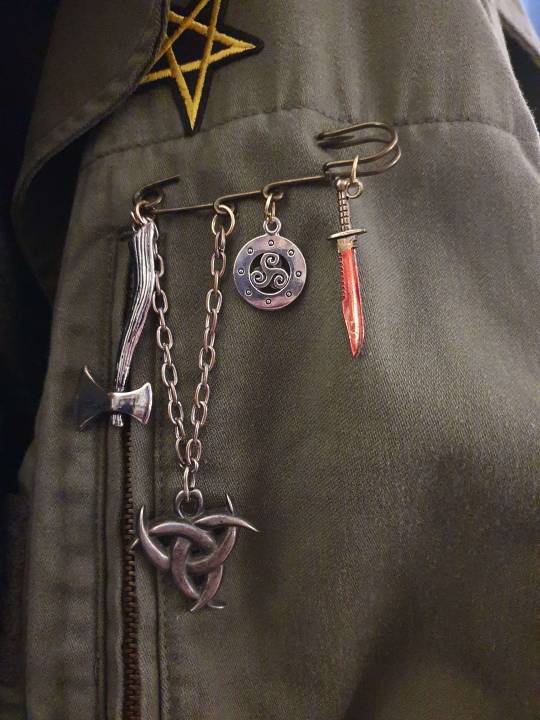
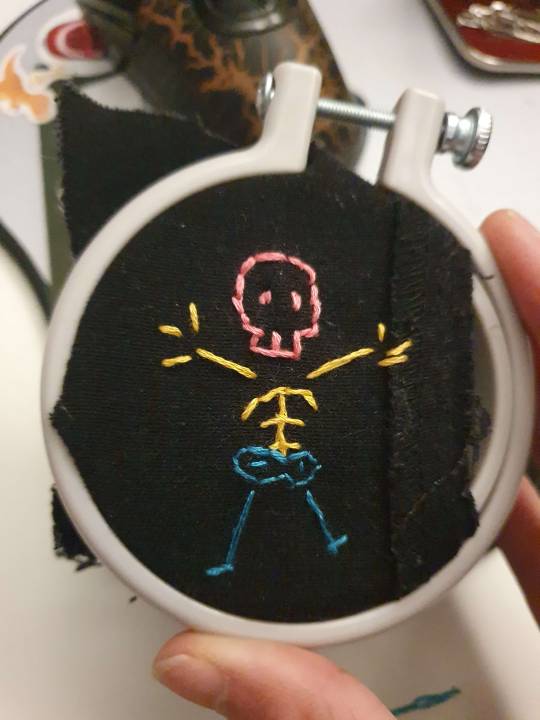
Pouch I sewed earlier this year and embroidered for @coveredinredpaint, a dangly trinket for on a jacket and a little pan flag skeleton
148 notes
·
View notes
Text
How to Make Your Own Accessories from Leather or Fabric Scraps
In this post you learn how to make four DIY accessories from leather and fabric scraps.
Do you have some leather or fabric scraps lying around that you don’t want to throw away? You can turn them into beautiful and unique accessories with some creativity and basic sewing skills. In this post, I will show you how to make six different accessories from leather or fabric scraps: a leather bow, a…
View On WordPress
#DIY accessories#DIY project#gifts#leather bow#leather corset belt#leather lady tie#leather or fabric scraps#leather scraps#reuse leather#ribbon embroidery earrings#sewing
3 notes
·
View notes
Text


Been doing a lot of these thingies lately!, fun :3
#emo#scene#emo scene#scemo#emo blog#emo stuff#scenecore#emocore#scene stuff#accesories#diy accessories#my photoz
5 notes
·
View notes
Text


Re-vamped my combat boots with more of a crowcore vibe to suite my new style.
Happy to finally have a project to use the bronze gear charms in, I've had them in my trinket hording box for so long. Some of the beads are meant to look like mushrooms, not sure if it's working but I like them anyway.
#arts and crafts#combat boots#crowcore#mosscore#cottagecore#beads and trinkets#diy accessories#my crafts#clothing#accsesories#shoes#my closet
19 notes
·
View notes
Text
reused some jacket cuffs and an old bandana for these
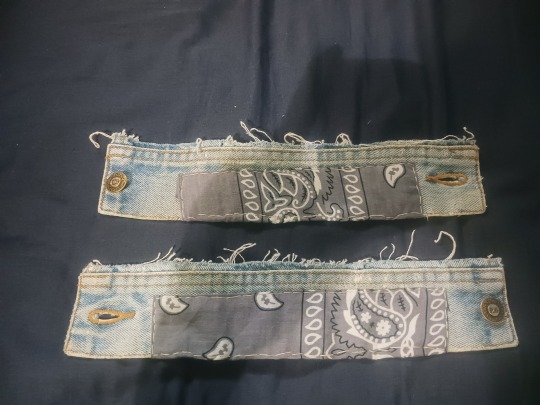
I might make more at a later date
#storm fucks around and finds out#storm sews#storm crafts#diy punk#punk diy#diy accessories#denim cuffs#also thinking about studding these but idk
3 notes
·
View notes
Text
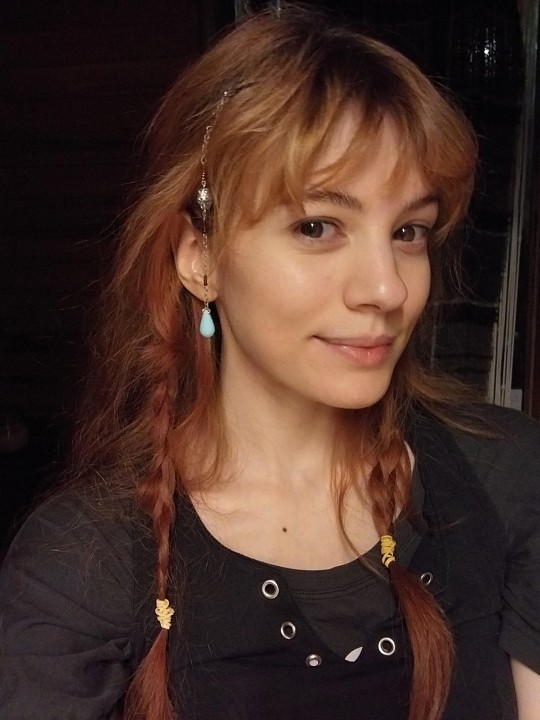
More hairclips hehe
Also, what i learned from making these is that I kinda really like the vibe of blue and "orangey" brown together 💙 🤎
3 notes
·
View notes
Last Seen Blogs

nenebewet
Untitled

crispycollectorreview-c1ca0-blog
love all women
wulfyworld
wulfyworld
fanfiction-collection
woso sideblog

sirtravisjacksonoftexas
Untitled