#cricut design space
Text
youtube
When it comes to crafting with Cricut, Windows or Mac laptops are the preferred choices. However, users may face the issue of Cricut not connecting to a laptop. To troubleshoot, they should check Internet connections, update firmware, and ensure that the firewall isn't blocking the machine. This video tutorial provides step-by-step methods for instant resolutions to the Cricut laptop Windows 10 connection error.
#art#illustration#mannymaker#crafts#cricut machine#cricutprojects#cricut design#cricut maker setup#cricut design space#Youtube
2 notes
·
View notes
Text

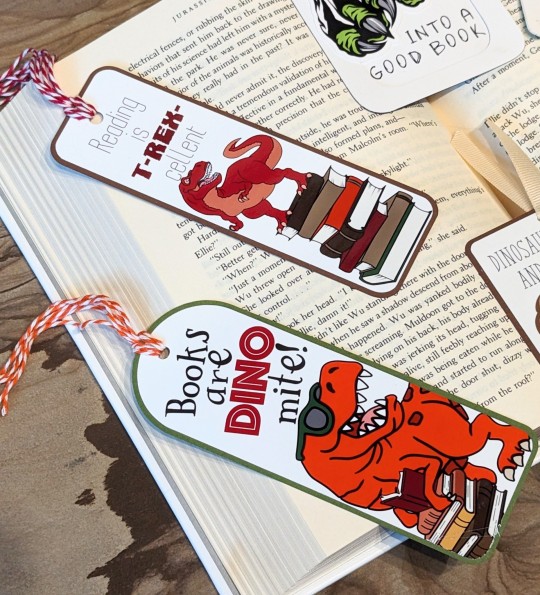

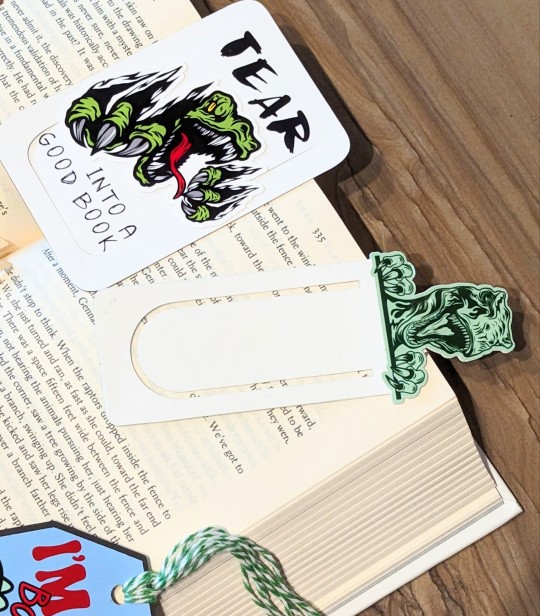
I made some bookmarks for my kiddo the other day. He loves dinosaurs, so I had fun coming up with various ideas and puns.


#craft#crafts#crafty#books#bookmark#dinosaur#dinosaur bookmarks#dinosaur puns#t rex#velociraptor#brontosaurus#bookosaurus#bookblr#handmade crafts#handmade#cricut#cricut crafts#print then cut#cricut design space#design space#reading#read a book
3 notes
·
View notes
Text
Do you take your crafts seriously? Cricut is a perfect machine that allows you to craft with your heart. So, use the machine and employ all your crafting skills to end up with a wide range of personalized and professional handmade items. Also, download and install the Design Space software to add more creativity to your project. Go to cricut.com/setup and get the software right away. Once you make a unique and attractive project, give it a professional touch and take your crafting skills to a commercial level. Cricut Design Space Login You can utilize online platforms to sell them and make some extra bucks while staying in the comfort of your home.
#Cricut Design Space#cricut design space login#cricut design space download#cricut design space for mac#cricut design space app#cricut design space setup#cricut software#cricut.com setup windows#cricut.com/setup windows#cricut.com/setup#cricut.com sign in#cricut.com/create#cricut.com design space#design cricut.com download
2 notes
·
View notes
Text
Cricut Design Space Login - Cricut Setup
With an intention to make the Cricut app run on PCs & mobiles, all the DIYers need to know the basic system requirements. Each OS comes with its separate requirements, which should be fulfilled to support the app. Once the app satisfies the requirements, it will start running on the devices without any technical glitches. However, to get the app on the devices, they need to open cricut.com/setup.
Visit - design.cricut.com
www.cricut.com/setup
Cricut Design Space
cricut.com/setup windows
#cricut.com/setup#design.cricut.com#cricut crafts#cricut explore air 2#cricut design space login#cricut new machine setup#www.cricut.com/setup#Cricut Design Space#cricut.com/setup windows#Cricut.com setup mac#Cricut setup#Cricut.com setup download#Cricut.com sign in#cricut.com/setup pc#Setup Cricut.com#Cricut Design Space Login
2 notes
·
View notes
Text
How to Upload Fonts to Cricut? [Easy Ways]

The use of the right font is essential in creating crafts projects. Each font you select gives your project a different feeling and emotional effect. Fonts are an important element in the process for a crafter using Cricut. The good news is they can learn how to upload fonts to Cricut and use them for their project.
Here is a useful tutorial that you can read and learn how. It will teach you quick ways of uploading fonts to the Cricut Design Space software and using them on Windows and Mac. After that, you can use them to give a personalized touch to your project. But to upload a font, you first need to download it. Before starting the uploading process, let's first know where you can find fonts to download.
Where to Find Eye-catching Fonts to Download?
There are several places where crafters can discover both free and paid fonts to download for their projects. They can select from beautiful and high-quality font collections and include them in the Design Space to begin with their project. Most often, their free font downloads option includes a personal use license. It makes them use those fonts for free in their projects. Thus, if you want to sell items with certain fonts, include only the one for commercial use.
Easy Steps to Access Fonts in Cricut Design Space
You can access Fonts in the Cricut Design Space with some basic steps. Here are some of the steps you need to execute for the purpose.
First, download the font you want.
After that, unzip your font file folder.
Double-click on the individual font file.
Follow the prompts to install the font file on your computer.
Now, open Cricut Design Space.
Start to create a New Project.
In the next step, add a new text box to your canvas.
Click on the font drop-down menu to change the font.
How to Upload Fonts to Cricut Design Space on Windows/Mac?
You can access the font on several devices. You only need to download and install the font onto each device you want to use. Here are some easy steps that can help you add fonts to this Cricut's software on Windows and Mac computers.
For Windows
Follow these instructions if you use Windows to access the Cricut Design Space. Once you learn how to upload fonts to Cricut on Windows, you can include those fonts in your project.
First of all, download the font file you want to have in your project.
Next, navigate to your Downloads folder.
Find the downloaded font file and right-click on it.
Choose the Extract option to extract those files.
In the following step, right-click on the font file and choose Install.
Once you perform these steps, the fonts will get installed on your windows. You can find them in the Design Space to access.
For Mac
Do you want to add fonts on your Mac device? Here are a few of the directions that you need to follow.
First, download the font you prefer.
Double-click on the downloaded zip folder.
Once unzipped, select the fonts and use ctrl+click to launch the menu.
Now, select Open with > Font Book option.
Now, you will see a pop-up to install fonts.
Tap on the Install tab to begin the installation process.
It will make your fonts appear in the FontBook. From there, you can use it in the Design Space.
Conclusion
The text gives an emotional touch to the project. Thus, every craft lover should know how to upload fonts to Cricut. The process is also quick and straightforward. Moreover, Design Space makes it effortless and time-saving too. First, download the font from a specific site and then add it on a device - windows or Mac to use it in your project. Keep experimenting with crafts and fonts for attractive projects.
Frequently Asked Questions
How Can I Add Fonts to Design Space on My iPhone?
For this purpose, you first need to install Fonts, a free font manager app. Below are some instructions to make your fonts available in the Design Space app.
Begin to download and install the Fonts app.
Unzip the file after downloading.
Now, open the iFont and choose Font Finder.
After selecting Open Files, move to the font file and select the file you want to install.
Next, select the Installer tab and click on Install to continue.
Now, close the app and open Settings.
Tap on the tab Profile Downloads.
In the end, press install.
Why are My Downloaded Fonts Not Showing Up in Cricut?
Have you downloaded your favorite font, but it's not showing? It can be because of several reasons, which include the following:
After downloading, you still need to install the fonts.
There was no successful installation.
Your font file format was not .ttf or .otf.
You still need to restart the app after installation.
How Can I Unzip the Downloaded Fonts File?
Make sure to execute these easy steps to unzip your downloaded font file. Here they are.
Right-click on the .zip folder with font files.
Next, click on Extract.
Select the TrueType or OpenType font files.
Subsequently, right-click on them and then install them.
At last, click Yes to allow the program to change your device.
Source: How to Upload Fonts to Cricut
Visit: design.cricut.com/setup
Cricut.com/setup
Cricut EasyPress 3 Setup
Cricut heat press guide
Cricut Design Space Login
#Cricut.com/setup#Cricut EasyPress 3 Setup#design.cricut.com/setup#cricut design space#install cricut design space app#cricut design space for mac#Cricut heat press guide#how to upload fonts to cricut
2 notes
·
View notes
Text
Cricut login design space
Unleash your creativity with Cricut machines for custom projects. Whether you're crafting for fun or small business, Cricut's versatile machines and Design Space offer endless possibilities. Visit cricut.com/setup to download and install the Cricut software and access a wide range of free and subscription-based designs. From customizing materials to crafting various projects, Cricut makes creativity easy and enjoyable.
#Cricut.com/setup#design.cricut.com#www.cricut.com/setup#Cricut Design Space#cricut.com/setup windows#Cricut.com setup mac#Cricut setup#Cricut.com setup download#Cricut.com sign in
2 notes
·
View notes
Text
What are Smart Materials for Cricut? [Top 5 DIY Craft Tools]
Since the latest versions of Maker & Explore have been launched, all the crafters are looking for one question, “what are smart materials for Cricut?” However, the answer to this question can be easily understood. These clever cutting materials are designed and are directly fed inside the Maker & Explore machine without requiring a mat. Various versions of these cutting machine materials exist, such as Smart Vinyl, Iron-On & Smart Paper Sticker Cardstock.

Apart from that, they have allowed the creators to dream outside by cutting a single image or repeated image up to 12 ft (3.6m) in one go. It means no slicing and dicing the extra-long banners, wall decals, etc. The Cricut roll holder also keeps these materials organized for precise cuts. Learn the best smart materials for creating customized projects from this blog.
1. Matte Metallic Smart Vinyl- Permanent (3 ft)
Equally important, you can add immediate sophistication to big or small projects through this metallic effect. In the presence of this permanent smart vinyl, it isn’t a big task to create some sort of fashion decal for a mug. As per the designers, this permanent smart vinyl is ideal for all outdoor projects.
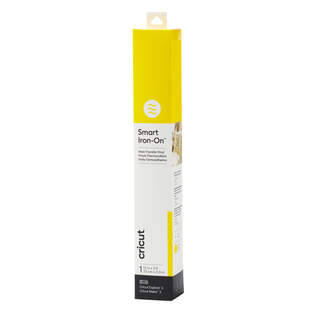
2. Smart Iron-On (3 ft)
Under the catalog of what are smart materials for Cricut, with the smart iron-on, you can carry your creativity along with you anywhere. This substance works perfectly on a wide array of materials and lasts up to 50+ washes. Moreover, the crafters prefer this material by giving little personality to T-shirts, jeans and other garments.
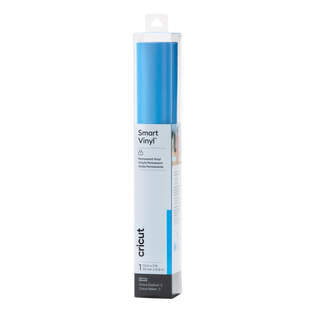
3. Smart Vinyl-Permanent (3 ft)
Furthermore, with smart vinyl, you can quickly make your personalized craft with the load & go button. Moreover, creating birthday banners or other labels has become quite easy, leaving a big impact. On the contrary, this vinyl comes with a matte finish look and a weather-resistant outdoor facility.
4. Transfer Tape (21 ft)
Among the smart materials for Cricut, the transfer tape has its individual importance. Through this, the user can shift the customized vinyl to various surfaces easily and precisely. Other than that, it is specially designed for some important materials for creating crafts, such as custom decals, labels, decor etc. Moreover, this isn’t recommended for glitter or shimmer vinyl.
5. Smart Iron-On Holographic (9 ft)
Besides what are smart materials for Cricut, these holographic materials permit crafters to add glimmer and shine to the existing project. This material operates without the cutting mat during the cutting process. In addition, you can add more shine to projects compared to earlier times.
Frequently Asked Questions
Question: How to Prepare Smart Materials for Cutting?
Answer: Read the steps to know about the preparation process:
Align the loaded materials to the machine with the left material guide and slide under the mat guides and up against the rollers.
After that, press the Load button, trim the excess material and save it for future uses.
Try to trim the material straight across rather than at an angle if you plan to load it without the mat.
Question: How Do Cutting Machine Smart Materials Work?
Answer: The existing software will prompt you when it is time to load the respective materials and how much quantity. Followed by this, your machine will measure, ensuring the materials loaded are enough for the project. After that, the machine sensors will cross-check the materials fed inside it and will ask for the allowance. You’ve to wait till the trimming process comes to an end.
Question: What are Smart Vinyl and Its Types?
Answer: The brand-new smart vinyl comes in a huge range of colors, effects and material lengths from 3 ft to 75 ft. However, it has been categorized into two types: Permanent & Removable variables. If you want vinyl that lasts for many years indoors & outdoors, then choose permanent vinyl, as it has a longer time duration. However, if you love to display your creativity, then opt for removable vinyl, which can be easily removed and doesn’t damage the wall.
#What are smart materials for Cricut#Cricut.com/setup#design.cricut.com#cricut explore air 2#cricut design space login#cricut design space#cricut setup
2 notes
·
View notes
Text
How to Use the Cricut Monogram Maker in Design Space
Monograms are single or more letters; the initials merge with the decorative design. You can use Monograms to identify possessions, such as stationery, clothing, and others. Monograms have existed since ancient times and are still famous for adding personalization to the Cricut projects. This comprehensive guide will teach you about the types of monograms, free monogram fonts, and best monogram frames.

Users can add monograms to projects such as ornaments, t-shirts, mugs, towels, robes, tumblers, wall decor jewelry, and more. Also, the monogrammed projects create fantastic gifts. Cricut has simplified crafting with monograms by introducing the Monogram Maker in the Cricut Design Space program. Users can develop monograms with letters, or there are various frame choices to go around their monogram. It is a straightforward method to create a custom monogram.
Also Read: Ultimate Guide to Cricut Tools and Accessories
What is Cricut Monogram Maker, and Who can Use it?
The Monogram Maker in the Cricut Design Space is a brand-new feature that users can access by tapping on the Monogram tool on the left side of the Cricut Canvas. You will see numerous options used to design beautiful monograms. You will know all the essential features in this tutorial.
The Monogram Maker feature is only accessible to Cricut Access subscribers. Cricut Access is a monthly subscription service for fonts and services. You get over 4,000 fonts and 200,000 images as a part of your subscription. You will also obtain perks, such as discounts on product orders and the Monogram Maker.
Instructions to Use Cricut Monogram Maker
Launch a new project in the Cricut Design Space software. The Monogram tool will appear when you tap on the Monogram icon in the Design Panel. Let’s check out each feature of the tool.
Operation Type
Operation type enables users to filter monograms that they can cut through the blade in the Cricut machine and monograms that are cut and drawn ( or foil).
Initials
Here users can write their four initials, for example, CAG. Remember that users need their last name in their last space. This is because many monogram designs have huge letters for the last name, and the Cricut Design Space will utilize the last letter you write as your last name.
Changing Fonts
Now, you must select the desired font. Below the header Classic, you will find several fonts for your monogram, such as handwritten, elegant, modern, and vintage categories. Under every category you will see numerous fonts under different categories. In most monogram types, the last name is at the center and more significant than the other letters.
Simple Borders
Based on your desired font, you can include a simple border. So, for instance, choose the second font below the Modern category, then select a round border. This will automatically change your font color to match your border. Next, you can add this to Canvas. Also, you can convert the colors of the monogram through the color tool on the top.
Also Read: How to Use Flatten Tool in Cricut Design Space
In a few monogram styles, if users change one color in the monogram on the Cricut Canvas, every color changes. You can utilize the Contour Tool and duplicate to separate the layers, but for new users, it can be confusing or fussy.
Thematic Monograms
If you tap on the Thematic tab (next to Classic), you will see a vast range of monogram frames, such as decorative, botanical, interests, occasions, and sports. When you tap on the desired frame, you will view the numerous monograms you can utilize with a frame under the image. You can tap on the original monogram styles and scroll the page using the arrow.
There are numerous options to select the desired one, but sadly Cricut still needs to include the three-letter monogram for your circle monogram frames.
Materials for Monograms
After creating your desired monogram, tap on the Add to Canvas tab, and you can also modify the image. After that, cut the image in your chosen material.
Final Verdict
Cricut has recently made crafting with numerous monograms a lot simpler with the launch of Monogram Maker in Design Space. You can create monograms with letters or many frame options to blend around the monogram. It is a super easy method to create a custom monogram. Users can use monograms on projects, including robes, wedding items, ornaments, tumblers, jewelry, and more. Also, the monogrammed projects make beautiful gifts for your friends or family.
Source:https://hariguide.com/cricut-monogram-maker/
2 notes
·
View notes
Text
How to Connect Cricut Maker to Computer and Phone?
Do you want to connect Cricut Maker to a desktop or mobile device? If so, I’ve got your back! While disconnecting my Cricut machine today, suddenly, I started thinking about my journey from the beginning to date. It has been full of challenges, and I am sure you might face them as well.
Without challenge, nothing worthwhile happens! Is this? Thanks to Cricut, I love challenges, and they have helped me become a crafting expert. It has made my crafting journey so much easier. This Cricut cutting machine is easy to use and connect. But it is okay if you feel intimate in the beginning. There is no shame in asking for help, as it may help you update your knowledge of the crafting.
So, what will you learn in this blog today? In this post, I plan to teach you how to connect your Cricut Maker machine to any device, including Windows, Mac, Android, and iOS. Let’s get started now!
How to Connect Cricut Maker to Computer via Bluetooth?
Before connecting your Cricut machine to a desktop, make sure your computer is compatible with running the Cricut software. Although we are not going to download any software, you will be downloading it later. So it’d be better to prepare in advance.
For system compatibility, you need to have Windows 10 or later version. Meanwhile, Mac users should have a MacOS 11 or later. Despite this, there are hardware requirements you need to check. Visit Cricut’s official site to learn more about it.
For Windows
Ensure you are placing your Cricut under the range of 15 feet of the PC.
Then, you need to open Settings.
After that, choose the Devices option.


5. Afterward, select the Bluetooth option. Then, you should wait for a while until it shows your Cricut model.
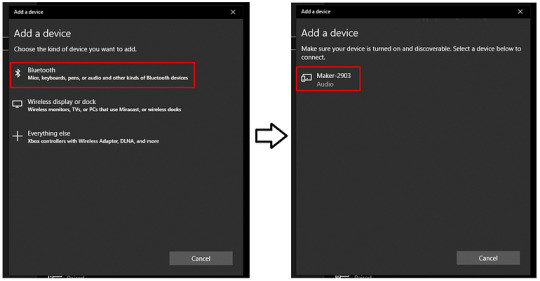
7. Finally, your pairing will be done.
For Mac
To connect Cricut Maker, find a flat surface and place your Cricut on it.
The distance between your Cricut and Mac should be 10 to 15 feet.
Afterward, you should navigate to the Apple menu.
Then, you need to hit the System Preferences.

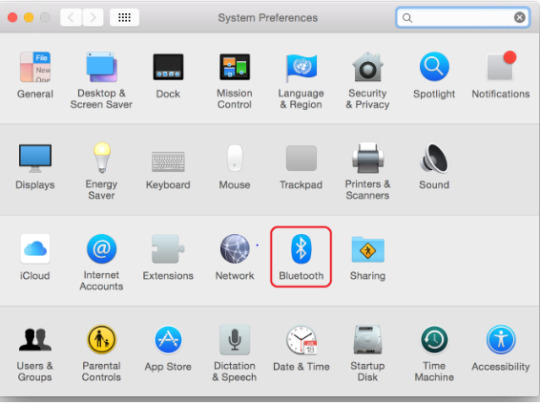
6. On the following screen, turn on Bluetooth.
7. Next, select your Cricut model from the available list.
8. Now, your pairing is done, meaning you have connected your Cricut to your MacBook.
How to Connect Cricut Maker to Phone Using Bluetooth?
Smartphones are the easiest way to handle this device, and we can remotely control our Cricut machines by using them. This is just amazing, thanks to Cricut making it compatible with Android devices. But do you know what the system requirements are for your mobile phone? To know more, you can visit Cricut’s official site. However, you can proceed ahead if you are using Android 10 or later/iOS 15 or later.
For Android
Switch on your Cricut Maker machine.
Keep your phone near your Cricut. Not more than 15 feet away from your Cricut.
After that, navigate to your phone Settings to turn on the Bluetooth.
Next, proceed to the Bluetooth option.

5. Then, you have to turn on the Bluetooth. If it is already on, go ahead.
6. Once Bluetooth is on, you are ready to connect it to your machine.
7. Wait for a while and check if your Android detects the Cricut model that you want to connect.
8. Once your Android phone detects the Cricut machine, you have to click on the Cricut model’s name.
9. As you click on Cricut’s model name, you will be moved to pair up the devices.
10. If it asks you for a 4-digit PIN, simply enter 0000.
For iOS
Position your Cricut product at a suitable place.
Ensure your phone is kept near Cricut. But the maximum range is 15 feet, and you should try to keep it below the range of 15.
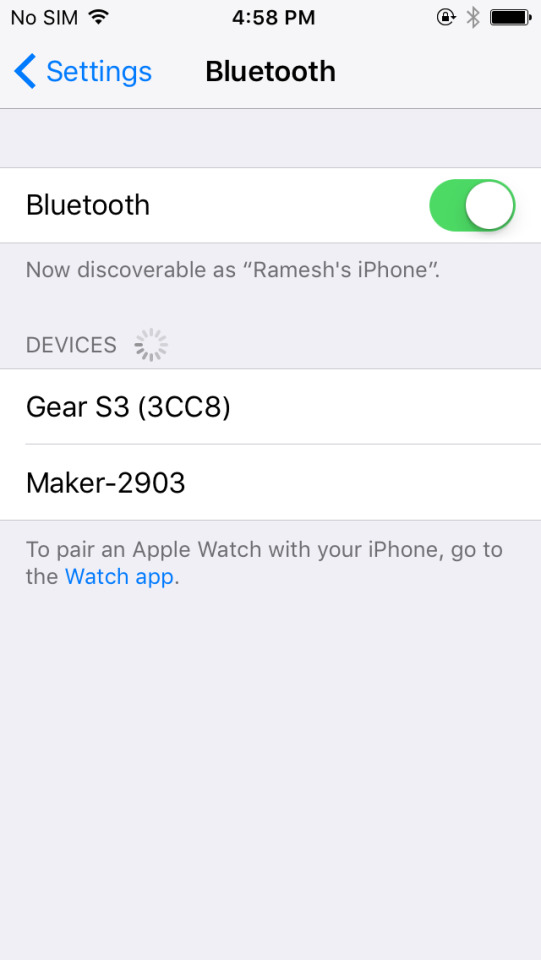
Now, you have to go to your Settings on your iPhone.

4. Afterward, turn on the Bluetooth to pair up with your Cricut.
5. Next, wait and see if your iOS device detects any nearby Cricut machines for connection.
6. When it is finally detectable on your iPhone or iPad, you need to click on the Cricut model and start pairing.
7. If you are required to enter a four-digit PIN, type 0000.
8. Lastly, click on the pair button, and that’s it!
Finally, I have explained how to connect Cricut Maker to Windows, macOS, Android, and iOS devices. Before connecting to Cricut, you should be able to use your compatible device. For this, you can visit Cricut’s website to check whether your computer or mobile device meets the system needs for establishing a connection.
FAQs
Question 1: Why is my Cricut Maker not connecting to Bluetooth?
Answer: Many reasons can make it difficult to connect your Cricut cutting machine to Bluetooth. However, the issues can be resolved easily in a few minutes. All you need to do is try the following fixes I have written below:
Check if your Cricut is turned on.
Also, verify that the Cricut is placed within 10 to 15 feet.
If connected to a USB cable, you will need to check the computer’s USB port or cable.
Question 2: Can I connect Cricut Maker to Bluetooth only?
Answer: No, there are other options, too. For example, you can connect your Cricut Maker to a USB cable if you prefer USB over Bluetooth. USB cables are the most preferred way and easily connect to Mac and Windows computers if they have a USB port. Just plug the USB’s head into its port, and you are ready to go. In short, you can connect your Cricut to Bluetooth or a USB cable.
Question 3: Can I connect my Cricut without the internet?
Answer: Obviously, yes! You can connect your Cricut to your computer or mobile devices without needing the internet. The internet is only required when you want to download the Cricut Design Space software to setup your Cricut. For connection, you just have to rely on Bluetooth and a USB cable.
Source: Connect Cricut Maker
Visit here For More Information: Cricut.com/setup
You tube
Pinterest
0 notes
Text
How to Connect Cricut Explore Air 2 to iPhone: Full Guide
Hey, Cricut enthusiasts! Do you know how to connect Cricut Explore Air 2 to iPhone? No? That’s all right! I am here to teach you everything from system requirements to simple and quick steps to connect your Cricut Explore model to your iPhone.
Last year, I got my first iPhone 15, and being the DIY enthusiast that I am, I wanted to use my Cricut using my new iPhone😁. Seriously, I have been crazy about iPhones ever since I got them. But what did I do to use my Cricut with my iPhone? Do we need to connect it to Cricut? If so, then how can we do that? Don’t worry. I have answered all these questions in this blog. So, what are you waiting for? Dive deeper into this blog and connect your iPhone and Cricut together in no time! Let’s get started!
System Requirements for iPhone to Connect to Your Cricut Machine
Now, let’s learn to connect Cricut Explore Air 2 to iPhone. But wait! Have we done everything required? Well, no! I need to tell you the system requirements for the Cricut Design app.
This Cricut software runs on compatible devices only. For this, you should know the basic needs we need in our devices. Since we are going to connect our Cricut to an iPhone, we will only check the requirements for this device.
Operating System: iOS 15 or later
Internet: Minimum 2 -3 Mbps for download & upload
Offline Feature: Cricut can work offline on iOS devices
Compatible Devices: iOS 17, iOS 16, or iOS 15
Now that you have understood the basic requirements, you need to look into your iPhone. Now, let’s dive into the steps to connect your Cricut Explore Air 2 to your iPhone 15.
Connect Cricut Explore Air 2 to iPhone via Bluetooth
Since I got my new iPhone 15 machine, I have wanted to connect it to my Cricut machine so that I can use it easily. For this, I had to connect my Cricut to my iPhone. Below, I have described the steps completely in stepwise:
In the beginning, navigate to your iPhone 15 smartphone.
After that, you have to open the Settings app.
Now, it’s time to turn on the Bluetooth. To do this, you can go to the toggle button and enable it from there.
Afterward, you will need to wait for a while.
Then, let your iPhone 15 find your Cricut cutting machine.
Once your mobile phone has detected your Cricut machine, click on it to pair.
Now, you have learned to connect Cricut Explore Air 2 to iPhone. Since you have connected it with an iPhone, I will walk you through the steps to teach you the uses of this machine. Let’s jump into it.
How to Use Cricut Explore Air 2: 3 Easy Steps
As I have taught you to establish a connection between your Cricut and iPhone, let’s learn to use this machine.
After connecting to Cricut, I will move to the next step, i.e., downloading and installing a Cricut application on my iPhone. Below, I have described the simple steps for the same:
Step 1: Download the Cricut Software
First, you need to use the App Store on your iPhone device.
After that, go to the search bar and type Cricut Design Space.
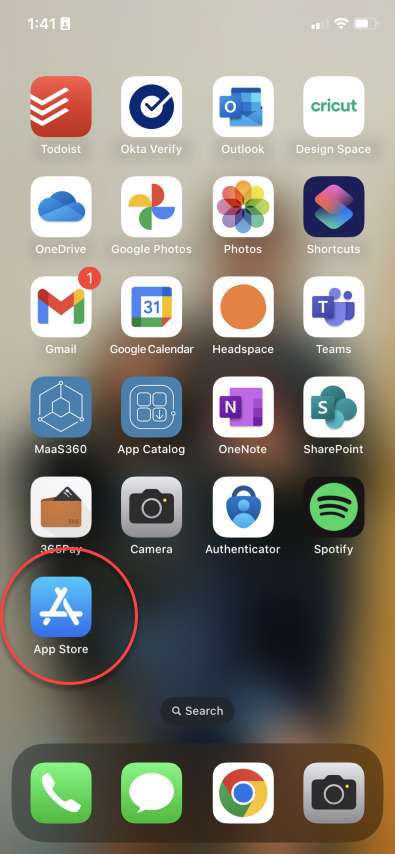
Then, you will need to find and select the Cricut software from the shown results.
Next, tap the Get tab to install the Cricut app on your iPhone.
Once you have downloaded the app, you can launch the software to setup the machine.
Step 2: Setup a Cricut Cutting Machine
Setup is necessary for the new cutting machine. Let’s see how to setup a Cricut before using it:
Once you have paired up and downloaded the Cricut, you need to launch the Design Space app on your iPhone.
You need to sign in to the Cricut account by following the instructions on the display.
Following this, select the Cricut model from the given list.
You need to complete the setup by following the on-screen commands.
After completing the setup, you have to perform a test cut, which we will learn about in the next step.
Step 3: Perform a Test Cut on Cricut
By performing a test cut, you will learn how to use a Cricut machine. Let’s dive into it:
First, put the materials on your cutting mat.
Second, you will need to load the mat into the machine.
Select the material that you are using in the Cricut software.
Then, you need to click on the Make It button.
Now, select the tab Test Cut.
You will notice that your machine has cut a small square in the corner.
In the last step, unload the mat from the machine.
Congrats! You have learned how to use a Cricut Explore machine. I also taught you how to connect Cricut Explore Air 2 to iPhone in simple steps.
FAQs
Question 1: Why is my Cricut Explore Air 2 not connecting to Bluetooth?
Answer: Below are the reasons why a Cricut Explore machine is not connecting to your Bluetooth:
The Cricut is not turned on or placed too far away from the computer/mobile.
The Windows Firewall or antivirus software interrupts the device.
The software on the Explore Air 2 is outdated.
The computer doesn’t meet the minimum system needs for Bluetooth connectivity.
Question 2: Why do I need to connect my Cricut to my iPhone?
Answer: You will need to connect your Cricut to your iPhone because you will want to set it up. Crafters who have bought a new Cricut machine need to setup the machine. You will need to connect the machine first for setup. Only then can you begin the setup procedure.
Question 3: What do I need to connect my Cricut Explore Air 2?
Answer: In order to connect your Cricut Explore Air 2, you will need to have a Bluetooth connection or USB cord. You will also need the Cricut software: Cricut Design Space. It is necessary to download this to a device. Whether you are using a desktop or phone, you can easily download this software on those devices.
Source: Connect Cricut Explore Air 2 to iPhone
Visit here For More Information: Cricut.com/setup
You tube
Pinterest
0 notes
Text
Want to learn how to apply vinyl to leather using your Cricut machine? It's easier than you think! Our video tutorial reveals the basic steps to creating a flawless HTV project that meets your vision. Prepare your materials and follow our guide to unlock a world of crafting possibilities using Cricut.
#art#illustration#cricut machine setup#cricut machine#cricut maker setup#cricut design#cricut design space#cricutprojects#cricut#crafts
2 notes
·
View notes
Text
Cricut Easy Press 2 Setup: Quick and Easy Instructions
In my previous blog, one of my readers left a comment asking me to teach about the Cricut EasyPress 2 setup. It will be a little tricky for me because it’s been a while since I have used this machine. With this Cricut product, you can create amazing iron-on projects such as tote bags, pillows, aprons, and so much more. In addition, this Cricut machine comes with the speed of a heat press and the convenience of a household iron.
Before using this Cricut product to make DIY projects, you must set it up on a computer. Plus, you will register this Cricut Easy Press model through Cricut Design Space. If you don’t want to miss the golden chance to grab the content about the machine setup and registration procedure, then read this blog.
Cricut Easy Press 2 Setup on Your Computer
If you want to learn the Cricut machine setup process on PCs, this blog section benefits you. It will share all the details that will make it easy to set up the devices. To execute the process in a proper format, take a look at the steps given below:
In the opening step of the process, download and install Cricut Design Space on your computer.
Next, you must sign in or create your Cricut ID to use the app.

Then, go back to the Cricut app main page and select the Menu bar on the left-hand side.
After that, click the New Product Setup button under the Canvas dropbox.
Following this, tap the Cricut Heat Press and then Cricut EasyPress 2.
In this step of the Cricut EasyPress 2 setup, plug the power cable into the wall socket.

Also, ensure the socket is working and not too far from the Heat Press.
At this point, plug the cord’s small end into the EasyPress 2 USB port and the large end into the computer USB port.

Now, finish the rest of the process by following the instructions displayed on your system screen.
After successfully setting up both devices, you need to register your Cricut Heat Press by following the instructions below.
How Do I Register My Cricut EasyPress 2 Machine?
In addition to the Cricut EasyPress 2 setup guide, let’s study in depth the method for setting up this product through the Cricut Design app.
First, switch on your desktop or mobile devices and open Cricut Design Space.
Second, download the Cricut app and follow the instructions present on your screen.

Third, choose New Product Setup by opening the app on your device.
Now, go through the on-screen guidelines to complete the remaining setup process.
Finally, your Cricut EasyPress 2 will instantly register when the setup is concluded.
You can create different heat-transfer projects after successfully registering this Cricut Heat Press model.
How to Adjust Cricut EasyPress 2 Temperature?
In case there comes the point where you want to change the product heating temperature, then take the help of the info given below:
Commence the process by powering on this Cricut EasyPress version.
Now, click the temperature button for a few seconds to turn it on.
Afterward, adjust the Cricut product temperature using the (+) or (-) button.

Then, change the temperature from *C to *F by holding the temperature button for a few seconds.
At this time, set your machine’s time by clicking the clock icon and setting the time using the (+ or -) sign.

Now, the orange light will display that your Cricut EasyPress 2 is heating up.
Also, the green light will display that the press has reached the set temperature.
If you see a red light, it clearly indicates that an error was made while adjusting the temperature.
Finally, your Cricut EasyPress 2 is all set to be used for crafting numerous personalized projects.
Overall, this Cricut product is one of a kind among its series. Undoubtedly, if you are a beginner, you might face difficulty in the beginning, but once the Cricut EasyPress 2 setup is done, everything will instantly get sorted out.
Frequently Asked Questions
Question: How to Update Cricut EasyPress 2 Firmware?
Answer: To update your Cricut EasyPress 2 firmware, check out the following steps:
Open the Cricut New Product Setup page.
On the page, select Cricut Heat Press and then Cricut EasyPress 2.
Now, sign in to your Cricut account and follow the on-screen instructions.
Afterward, hit the Update option, and the press will update the firmware.
Finally, tick the Done option and start crafting various projects.
Question: How to Access Cricut EasyPress 2 Heat Guide?
Answer: To get access to your Cricut EasyPress 2 Heat Guide, read this method:
The procedure will start by opening the official site of Cricut Design Space.
Now, start looking for the Heat Guide and then open it.
Afterward, choose the Heat Transfer material & Base material from the section.
Also, choose the Cricut cutting mat and then click the Apply button.
At last, select the temperature & timing depending on the material.
Question: Does Cricut EasyPress 2 Support the Cricut Heat App?
Answer: No, Cricut Easy Press 2 doesn’t support the Cricut Heat app for any reason. This model doesn’t have built-in Bluetooth connectivity, which is why it doesn’t scan the Heat app. On the other hand, you can easily connect the app with Cricut Easy Press 3, which has Bluetooth and various other features.
read more: cricut.com/setup mac
install cricut design space app
Cricut Design Space
Cricut New Machine Setup
Source: cricut easy press 2 setup
0 notes
Text
How to Connect Cricut to MacBook: A Complete Guide
Do you want to connect your Cricut machine to your MacBook? If yes, then this blog will help you understand the connection between Cricut and Macbook. It’s not only about you; almost everyone who is starting with a Cricut machine finds the setup procedure difficult. Therefore, be with me and learn how to connect Cricut to MacBook here.
Before that, you need to understand that Cricut Design Space is an intuitive Cricut software that you need to set up on your device to connect your Cricut product. To get this software, you need to download and install it on your device. Then, you will be ready to set up your Cricut machine for a MacBook.
What Do You Need to Get Started?
To get started with the Cricut connection to MacBook, you need to keep a few things in mind. Look at the steps below to learn the necessary requirements.
Now, you are ready to start the Cricut setup on your MacBook. Let’s check the steps.
How to Connect Cricut to MacBook?
As you know, Cricut machines are compatible with Windows and Mac computers; you can set it up easily on any of your devices. Here, you’ll learn how to connect it to a Mac device. Look at the steps below.
Step 1: Connect Cricut to a MacBook via Bluetooth
Your first step should be to connect your Cricut to a MacBook using a suitable method. I’m choosing the Bluetooth connection method, which is the best wireless connection.
Finally, your pairing process will be finished. You have learned one step towards how to connect Cricut to MacBook.
Step 2: Download Cricut Design Space
In the second step of connecting Cricut to a MacBook, you need to download and install the Cricut Design app on your device. Look at the steps given below to install the Cricut software.
Finally, you have learned how to install Cricut Design Space and how to connect Cricut to MacBook. Now, you can start project-making with your amazing Cricut machine.
FAQs
How Do I Setup Cricut Machine on My Phone?
To set up a Cricut product on a phone, follow these steps.
How to Connect Cricut Maker to Mac?
Follow these steps to learn how to connect Cricut to MacBook:
Why Am I Unable to Run Cricut Design Space on My Mac?
This problem is common, and everyone might have experienced it. This issue may arise when your app is not updated or there are some issues with the device you’re installing. Hence, if you get such issues, immediately try updating your app. Otherwise, you can also uninstall it and then install it back.
Visit: install cricut design space app
www.cricut.com setup login
Source: https://explorenewmachine.com/how-to-connect-cricut-to-macbook-a-complete-guide/
#cricut.com/setup mac#cricut.com/create#cricut.com/setup#cricut.com sign in#cricut.com design space#cricut setup#cricut explore air 2#cricut#install cricut design space#cricut design space#install cricut design space app#cricut design space login#cricut design space app#www.cricut.com setup login#www.cricut.com/setup#www.cricut.com/setup login#install cricut explore air 2#cricut new machine setup#cricut software app#cricut create connect to computer#setting up your cricut maker#cricut setup for pc#cricut setup explore air 2 setup
0 notes
Text
How to Connect Cricut to App: A Stepwise Setup Guide
So, here you will learn how to connect Cricut to app. Right? But before I dive further into this blog, I would like to clarify one thing. This blog talks about how to connect your Cricut machine to an app (Cricut Design Space), but I don’t think it is the same as connecting Cricut to your computer or mobile phone.
Connecting a Cricut to an app and connecting Cricut to a compatible device are two different things. Don’t get confused! The question is, if both are different, then what are we going to learn from this blog? In this blog, I will teach you how to connect a Cricut machine to an app. However, it is also called a Cricut setup. We will be learning about machine setup on Windows computers. Let’s dive into it without any further ado!
Step 1: Unboxing a Cricut Product
Okay, so to get to the exciting part of the Cricut machine setup, we will first need to unbox the machine. However, if you have already unboxed it, enjoy🥳and move to the second step in order to learn how to connect Cricut to app.
Here, let me share my experience of unboxing my Cricut.
I opened the box’s lid and saw a matted folder over the top surface of the Cricut machine. Here I am, actually, opening my Cricut Explore Air 2 machine. It came with a blue LightGrip mat. Those who got the Cricut Maker machine then will receive a green StandardGrip mat.
The list is long; let me show you what else I got with my Cricut Explore:
Step 2: Open Your Cricut Cutting Machine
To open the Cricut machine, I pressed the Open button (on the left side). As I pressed the button, the rest of the doors opened on their own. Here, Cricut Maker users need to lift the top lid. After that, the front door will open on its own (automatically).
Note: Do not open the doors that open automatically. Just wait and let them open slowly on their own.
When your Cricut is opened, you need to remove the foam and other tape on the side.
Step 3: Plug Into a Cricut Machine
Plugging the power cable into the Cricut cutting machine is the first step in learning how to connect Cricut to app. Now, it’s time to turn it on. Yes! So, let’s grab the power cords that come with our Cricut machine.
You can just plug the main plug into the wall outlet and insert the other into the back of your Cricut machine. But, here, you have to plug in the machine; you don’t need to turn it on the machine here. We’ll do it later.
As the machine is turned on, you need to move to the next step, where we will start setting up our machine.
Step 4: Pair Cricut to a Computer via Bluetooth
I have connected my Cricut using a USB cable, too. Currently, I am using a Bluetooth wireless connection. So, let me show you how to connect Cricut to PC via Bluetooth:
Now, let’s download a Cricut app so that you can understand how to connect Cricut to app, i.e., how to setup Cricut.
Step 5: Download Cricut Design Space
The machine setup requires software called the Cricut Design app. To download the software, you need to go through the steps given below:
Next, follow the prompts until your installation is done. Once done, move to the last steps to learn how to connect Cricut to app.
Step 6: Finish the Cricut Setup
Launch the Cricut Design Space software, and you will see the option to select your Cricut cutting machine on the app. Select the type of machine you want to setup. Next, sign in to your Cricut account. If you don’t have an account, sign up to create one.
Once you have created an account, you need to sign in and then start connecting your Cricut to your app. Although you will get screen prompts to setup the machine, I will explain it briefly.
First, turn on the machine by pressing the power button, and then you need to connect your machine. After that, your setup is done!
HURRAY!!!!!!!!! 😍 YOU DID IT!
FAQs
Question 1: Can I connect my Cricut to an app on my mobile phone?
Answer: Yes, absolutely! Connecting Cricut to the app or setting it up is the same. For this, you will need a Cricut app that you can download from an online app store where you can download the app. For example, if you want to install the Cricut software on iOS, then you can get the application from the App Store, and for Android, you need to go to the Google Play Store. In short, you can easily connect your Cricut machine to an app.
Question 2: Is Cricut machine setup difficult or time-consuming?
Answer: Setting up the Cricut machine is easy and not that time-consuming if you have the right software. The simple-to-use interface of Cricut Design Space will walk you through the easy directions to setup the Cricut cutting machine, which will take you a few minutes. So, install the right software on a compatible device, and then you will be ready to go.
Question 3: Is Bluetooth compulsory for Cricut machine setup?
Answer: No, it is not necessary if your Cricut has a USB cable. Except for the Cricut Joy machine, all the Cricut models have USB ports so that they can be connected via USB cords, too. However, for Cricut Joy users, Bluetooth is compulsory when setting up the machine. In short, Bluetooth is compulsory only for machines for which Bluetooth is not available.
Source: https://desincricut.wordpress.com/2024/04/16/how-to-connect-cricut-to-app-a-stepwise-setup-guide/
#cricut.com/setup#cricut.com setup download#cricut.com setup#cricut.com setup mac#cricut.com setup windows#cricut.com/create#cricut.com sign in#cricut.com/register#cricut.com design space#www.cricut.com setup mac#install cricut printer#install cricut design space app#install cricut explore air 2#cricut explore air 2#cricut create connect to computer#connecting cricut maker to computer#cricut com setup#cricut setup#setting up my cricut maker#setting up your cricut maker#cricut new product setup#cricut design space app#cricut design space#cricut new machine setup#cricut software app#cricut explore 3#cricut account on setup#cricut setup on account#cricut
0 notes
Text
Cricut Design Space Mac: A Comprehensive Guide
If you are using a Cricut machine, it is obvious that you know about the Cricut Design Space app. And you are here just to learn how to start with Cricut Design Space Mac? Well, I can help you use this Cricut software on your Mac computer. I have a small Cricut business, and I am an expert in using the Cricut machine along with its software. Before starting my DIY shop, I used to make many projects and sold some of them on online websites. I understand the need for this software in crafting and thus decided to create a useful post for all crafters.
Through this post, my aim is to help Cricut users use its app on their Mac computers. Thus, I will cover the minimum system requirements for Mac, plus the downloading and installation steps for the software. So, you will find this post helpful when using the Cricut software on a Mac computer.
Cricut Design Space Minimum System Requirements for Mac
Do you have no idea you need to know the system requirements to use the app on your system? Mac users can look into the criteria below and find whether the app is able to work on their systems or not. If they fail to meet, the app will not work on their devices.
If your Mac device fulfills the above requirements, you can move further with learning how to use Cricut Design Space on Mac. I will cover the downloading and installation process of the Cricut app in the next section.
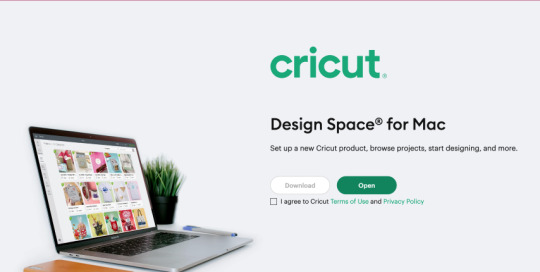
Cricut Design Space Mac Download
After you know that your system is compatible with the Cricut software, you can move on to your next step by downloading it to your system. I am listing below a step-by-step process that helps you download the app quickly and hassle-free.
Did you download Cricut Design Space Mac successfully on your Mac computer? You can now move next to install the downloaded Cricut file on your system. To do this, read the next section of this blog, which includes steps to install the app.
How to Install Cricut Design Space on Mac?
If you want to use the Cricut Design app on your Mac system, read the given below steps and follow them carefully. This helps install the software efficiently on your system.
Now, after you install the Cricut Design Space Mac application, your job is not yet over. You will now have to create a User ID or start logging into your Cricut account.
How to Log Into a Cricut Design Space Account?
Cricut and Mac users can log into the Cricut app and start creating their favorite projects in a time-saving way. But the question is how they can do it. Check the steps mentioned below.
With these steps, you can simply use the Cricut software on your Mac system and begin crafting in an efficient and time-saving way. Start with the Cricut Design Space install on Mac free and login to start crafting.
Conclusion
Cricut Design Space is easy to use on a Mac system. DIY makers or professional crafters who want to create projects quickly can use this software and create projects efficiently. The process of Cricut Design Space Mac includes the steps to download and install the software on a system. Thus, ensure to download and then install it and then create a Cricut account. Old users just need to log into the app.
Frequently Asked Questions
What Cricut Machines Can I Use With Mac to Download Cricut App?
A Mac computer and Cricut user needs to check the minimum system requirement and then plan to use the Cricut app. The list of some machines that work with the Cricut Design app are:
How Can I Setup Cricut Machine With Cricut Design Space?
Cricut Design Space setup is easy, and thus, you can do it without much effort. To start with, here are a few steps.
How Can I Fix Slow Working of the Cricut Software on Mac?
Sometimes, the reason for this is the slow internet speed. So, ensure to save your work first and then force Reload to fix the error you are having with this app. Follow these steps and fix the issue.
Visit: Cricut.com/setup
www.cricut.com/setup login
design.cricut.com/setup
Source: https://cricricutdesigncut.wordpress.com/2024/04/16/cricut-design-space-mac-a-comprehensive-guide/
#design space setup#digital design#www.cricut.com/setup\cricut explore air 2 setup#www.cricut.com/setup login#www.cricut.com/seup#www.cricut.com/setup#design cricut.com download#cricut.com/setup#cricut.com/create#cricut.com sign in#cricut.com/register#cricut.com design space#cricut.com/setup\#cricut explore 3#cricut new machine setup#cricut design space#install cricut explore air 2#cricut maker bundle#cricut.com/setup explore air 2 setup#cricut.com/setup mac#cricut design space login#cricut design space app#design space cricut#design.cricut.com/setup#design.cricut.com#cricut design space setup#cricut design space download#cricut design space for mac
0 notes
Text

Begin your crafting career enthusiastically with Cricut. Crafters will have endless ideas to work on, from a robust machine like the Cricut Maker to a portable Cricut Joy. A companion app runs the Cricut machine smoothly on computers and smartphones. The Cricut Design Space software is required to setup the Cricut machine. Download it by simply navigating to Cricut New Machine Setup.
#Cricut Design Space#cricut design space app#design space signin#Cricut New Machine Setup#cricut.com/setup#install cricut explore air 2#cricut explore 3#cricut.com/setup mac
0 notes
Last Seen Blogs

heftbyjapanesebreakfast
im a pretty impossible lady to be with

murkymedusa
MurkyMedusa


wheny0urhigh
Open Your Mind

thesituation
where’s everyone going? loot lake?