#PhotoshopTools
Photo
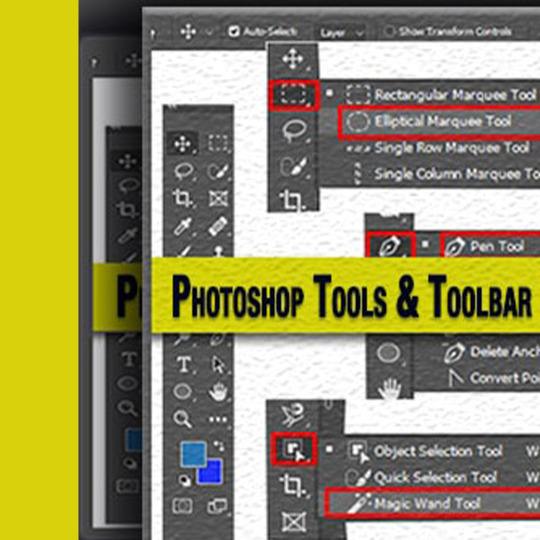
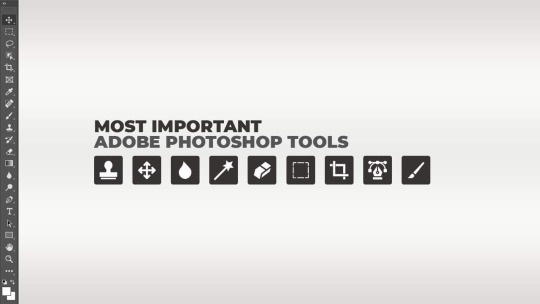
Photoshop Tools & Toolbar: Are you looking for a beginner’s guide about Photoshop CC Tools & Toolbar?
Learn the latest tools & toolbar of Photoshop from this easy tutorial.
0 notes
Text
How to Use Healing Brush in Photoshop: Mastering the Art of Photo Editing
Introduction
In the realm of photo editing, precision and finesse are key. One tool that exemplifies this is the Healing Brush in Photoshop. This versatile tool allows you to seamlessly remove imperfections and blemishes from your images, leaving them flawless and professional. In this comprehensive guide, we'll walk you through the intricacies of using the Healing Brush, providing you with valuable insights and expert tips along the way.
How to Use Healing Brush in Photoshop
Mastering the Basics
The Healing Brush tool is a powerful feature in Photoshop that enables you to correct imperfections in your images. It works by sampling pixels from a source area and blending them seamlessly with the target area, resulting in a seamless and natural-looking correction.
To get started, follow these steps:
Select the Healing Brush: Open your image in Photoshop and select the Healing Brush tool from the toolbar on the left.
Adjust Brush Settings: Customize the brush size and hardness to suit the specific area you're working on. This ensures precise corrections.
Alt-Click to Sample: Hold down the 'Alt' key and click on a clean area near the imperfection you want to correct. This sets the source point.
Brush Over the Imperfection: Carefully brush over the imperfection. Photoshop will blend the sampled pixels, seamlessly correcting the area.
Fine-Tune if Necessary: Adjust the brush settings or sample from different areas if further refinement is needed.

Expert Tips for Optimal Results
Use a Soft Brush: When working with the Healing Brush, a soft-edged brush often yields the best results, especially for blending.
Adjust Opacity: Lowering the opacity of the brush can help in achieving more subtle corrections.
Regularly Resample: To maintain accuracy, frequently re-sample by Alt-clicking to ensure the source area matches the target.
Advanced Techniques for Healing Brush Mastery
Expanding Your Skill Set
Now that you have a solid grasp of the basics, let's delve into some advanced techniques to take your Healing Brush skills to the next level.
1. Utilizing the Healing Brush on Different Layers
One of the most powerful features of Photoshop is the ability to work on separate layers. When using the Healing Brush, create a new layer for each correction. This allows you to make adjustments without altering the original image. It's a non-destructive way to edit, giving you more freedom and flexibility.
2. Fine-tuning with the Clone Stamp Tool
While the Healing Brush is excellent for blending and seamless corrections, the Clone Stamp Tool offers more precise control. It allows you to manually select the source point, making it ideal for intricate details and complex corrections.
To use the Clone Stamp Tool:
Select the tool from the toolbar.
Alt-click to set the source point.
Brush over the area you want to correct.
This combination of the Healing Brush and Clone Stamp Tool provides a dynamic duo for flawless edits.
3. Working with Different Blending Modes
Experimenting with blending modes can yield fascinating results. After applying the Healing Brush, try adjusting the blending mode of the corrected layer. This can add depth, texture, or creative effects to your image.
4. Utilizing the Patch Tool for Larger Corrections
While the Healing Brush is superb for minor imperfections, the Patch Tool shines when it comes to larger areas. It allows you to select and replace a whole section, making it perfect for areas with complex textures. It makes Color editing more easy.
To use the Patch Tool:
Select the tool from the toolbar.
Draw a selection around the area you want to correct.
Drag the selection to a clean area.
5. Creating Custom Healing Brush Presets
Save time and enhance efficiency by creating custom Healing Brush presets. Set specific brush sizes, blending modes, and opacity levels that suit your editing style. This streamlines your workflow and ensures consistent results.
6. Using the Healing Brush for Portrait Retouching
The Healing Brush is a go-to tool for portrait retouching. It can seamlessly remove blemishes, wrinkles, and other imperfections, resulting in polished and natural-looking portraits.
Remember, practice is key to mastering these advanced techniques. Experiment with different scenarios and discover what works best for your unique editing style.
FAQs
How can I change the brush size in Photoshop?
In Photoshop, you can easily adjust the brush size by using the square bracket keys on your keyboard. Press '[' to decrease the size and ']' to increase it.
Can I undo a correction made with the Healing Brush?
Yes, you can undo a correction by pressing 'Ctrl+Z' (Windows) or 'Command+Z' (Mac) on your keyboard.
Is the Healing Brush suitable for all types of imperfections?
The Healing Brush is highly effective for minor imperfections like blemishes, dust spots, and small objects. For larger or more complex corrections, other tools like the Clone Stamp may be more suitable.
How do I change the source point while using the Healing Brush?
To change the source point, simply hold down the 'Alt' key and click on a new area to set the source.
Can I use the Healing Brush on a separate layer?
Yes, it's recommended to work on a separate layer when using the Healing Brush. This allows for non-destructive editing.
What's the difference between the Healing Brush and the Spot Healing Brush?
While both tools serve similar purposes, the Healing Brush allows you to choose the source point manually, providing more control over the correction.
Conclusion
Mastering the art of using the Healing Brush in Photoshop can significantly elevate your photo editing skills. With its precision and versatility, you can achieve seamless corrections that enhance the overall quality of your images. By following the expert tips and steps outlined in this guide, you'll be well-equipped to tackle any imperfection with confidence.
You can also red this article https://clippingcreationsindia.com/blog/spot-healing-brush-tool/
0 notes
Video
youtube
How to Retouch Skin Using Frequency Separation in Photoshop using Gizmo Panel
Gizmo Panel provides an effective technique for retouching skin called Frequency Separation. This technique involves separating an image into two layers, the high frequency layer and the low frequency layer. The high frequency layer contains all the details of the skin, such as pores, wrinkles, and blemishes. The low frequency layer contains the overall tone and color of the skin. By retouching these two layers separately, you can achieve a natural looking result without damaging the delicate structure of the skin. If you enjoyed this video, please give us a LIKE and SUBSCRIBE for more videos.
#frequencyseparation #frequencyseparationforfaces #adjustmentlayers #adjustmentlayer #photoshoplayers #photographyediting #editphotoshop #photoshopplugin #photoshoptools #editlikepro #photoshoott #photoshoottphotography #professionalphotoediting #photographytips #learnphotography #learnediting #howto #howtoedit #howtoeditpictures #photoshophowto #howtoeditinphotoshop #improveyourphotography #gizmopanel
18 notes
·
View notes
Link
#graphicdesign#toolbar#photoEditing#Imageediting#PhotoshopWork#PhotoshopTools#PhotoshopLiquifyTool#photoshop
2 notes
·
View notes
Video
Adobe Photoshop Tools and It’s Uses for Beginner.
1 note
·
View note
Text
How to Use Photoshop Tools

Do you want to know about How to Use Photoshop Tools? Here we are providing all the information about How to Use Photoshop Tools? Just Visit the link and Get the full info...
https://graphic-design-course-in-delhi.my-free.website/blog/post/1387955/how-to-use-photoshop-tools
#toolsinphotoshop#photoshoptools#selectiontoolinphotoshop#brushtoolinphotoshop#croptoolinphotoshop#spothealingbrushtoolinphotoshop#healingbrushtoolinphotoshop#clonestamptoolinphotoshop#gradienttoolinphotoshop#pentoolinphotoshop#graphicdesigninstitute
0 notes
Text
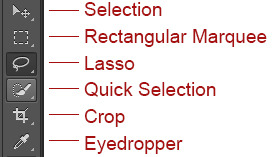
Photoshop’s Selection Tools
For this image, I'd like to keep the original colors in the main subject (the child pushing the wheelbarrow filled with pumpkins) and colorize the rest of the background with a single color. To do that, I'll first need to select the main subject. I could try drawing a freehand selection around everything with the Lasso Tool, but Lasso Tool selections tend to look rough and unprofessional. The Pen Tool would work great with this image thanks to all the sharp edges and smooth curves, but drawing a path around the main subject would take some time. The Magnetic Lasso Tool would also work well due to the strong contrast between the main subject and the background. But let's see how well the Quick Selection Tool can select the area we need.To begin my selection, I'll move the Quick Selection Tool's cursor into the top left corner of the child's sweater and I'll click once with my mouse. An initial selection outline appears around the area I clicked on:An initial selection outline appears in the top left of the sweater.So far so good, but obviously there's much more I still need to select, which means I'll need to add to my existing selection. Normally, to add to a selection, we need to hold down the Shift key on the keyboard to switch the tool to its "Add to selection" mode, but the Quick Selection Tool is different. It's already in "Add to selection" mode by default, indicated by the small plus sign (+) displayed in the center of the tool's cursor.If you look in the Options Bar along the top of the screen, you'll see a series of three icons which let us switch between the tool's three selection modes (from left to right - New selection, Add to selection and Subtract from selection). The "Add to selection" option (middle one) is already chosen for us, since the whole point of the Quick Selection Tool is to continue adding to the selection until you've selected everything you need:For a faster way to select the Lasso Tool, simply press the letter L on your keyboard. There are two other types of lasso tools as well - the Polygonal Lasso Tool and the Magnetic Lasso Tool, both of which are hiding behind the standard Lasso Tool in the Tools panel. We'll look at both of these tools in separate tutorials, but to access either of them, simply click and hold your mouse button down on the standard Lasso Tool until a small fly-out menu appears, then select either tool from the menu:If you find that you didn't begin your selection in exactly the right spot, there's no need to start over. Just hold down your spacebar, then drag your mouse to move the selection where you need it. When you're done, release your spacebar and continue dragging out the selection.To complete the selection, all I need to do is release my mouse button. The wooden block is now selected (or at least, the pixels that make up what we see as the block are selected), and a selection outline appears around the block in the document window. Any edits I make at this point will affect that specific block and no others:Photoshop is a software that comes with a wide variety of tools to help you create brand new masterpieces with intricate details, in this post, I will be talking about the main selection tools used in Photoshop.Selection tools are what you use to select parts of an image in order to edit them, while each of these tools are for selection, they’re all different, meaning that they each have their own unique ways to go about selecting parts of an image.
Rectangular Marquee
The Rectangular Marquee: this particular selection tool helps you to select rectangular portions of an image, this tool can be found sitting at the very top of the Tools panel in Photoshop. It's the tool with the icon that looks like the outline of a square.
The Rectangular Marquee Tool is an easy tool to use in selection making, you click with your mouse at the point where you want to begin the selection, which will usually be in the top left corner of the object or area you need to select, then continue holding your mouse button down as you drag towards the bottom right corner of the object or area. When you release your mouse button, the selection is complete.
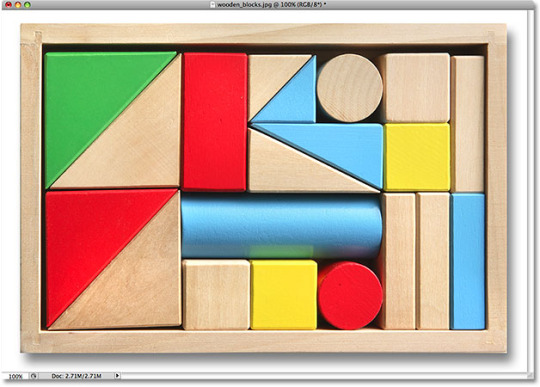
Example: below is a series of colourful blocks. If you want to change a certain thing, example, the red block in the top row, it’s an easy thing to do, Photoshop may not be able to identify the wooden block, since all it sees are pixels, but the user can see it and can identify it as a rectangle, which means that the task of selecting it is perfectly suited for the Rectangular Marquee Tool. Selecting this tool, pressing “M” on your keyboard will instantly select the Rectangular Marquee Tool. Then, to begin the selection, click the top left corner of the block. While still holding down the mouse button, you can drag towards the bottom right corner of the block:
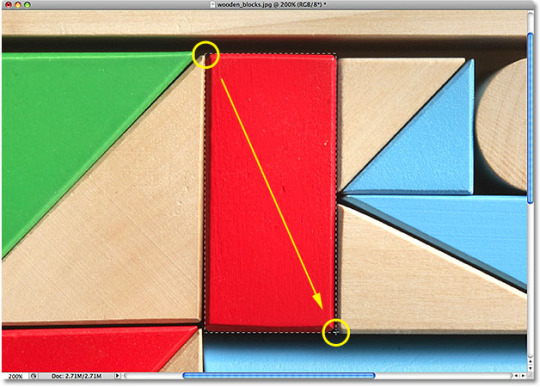
If you feel you didn’t select the parts of the image you wanted to select, you don’t need to start over, holding down the space bar and then dragging your mouse to move the selection where you need it will work. When you're done, release your space bar and continue dragging out the selection. in order to complete this selection, all you need do is release the mouse button.
The wooden block will then be selected and an outline will appear that shows the selection is made, from that point on, only the selected area will be changed should you do any editing.
Lasso
The Lasso tool allows you to draw your own free form outline of what you wish to select, it works best for areas not quite considered as shapes. The Lasso tool has a few variations to it, but I’m focusing on the standard Lasso, you can find this tool by clicking its icon in the tools panel, it’s recognised by how it sounds: it resembles the sort of lasso a cowboy would swing at a rodeo.
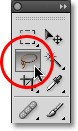
The Lasso’s shortcut is “L” on your keyboard, there are two more lasso tools too:
the Polygonal Lasso Tool and the Magnetic Lasso Tool
Both of these tools are found behind the standard lasso tool, the options pop up in an additional panel and you can select them from there.
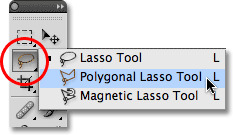
All three lasso tools share the letter L as their keyboard shortcut for selecting them, so depending on how you have things set up in Photoshop, you can cycle through the three tools by pressing the letter L repeatedly or by pressing Shift+L.
The Lasso is one of the easiest tools to use and understand, to use it, all you need to do is drag a freehand selection around the object or area you want to select. With the Lasso Tool selected, your mouse cursor will appear as a small lasso icon, and you click at the areas in an image you want to begin the selection, and then continue holding your mouse button down and drag to draw a free form selection outline:
In order to complete the selection, return to the spot where you began and release your mouse button.
The Lasso Tool isn’t the most accurate of selection tools, but its usefulness is greatly improved with Photoshop's ability to add to and subtract from selections.
Example:

To begin the selection, grab the Lasso Tool from the Tools panel, click somewhere along the top of the sleeve of the person on the left to begin the selection, although it really makes no difference where along the object you begin your selection with the Lasso Tool. Once you have your starting point, continue holding the mouse button down as you drag to draw an outline around the area of the photo.

Keep going until you return to your starting point and then release and marching ants will appear around the selection.

Quick Selection
This tool is used similar to the lasso tool except it works best on an area with a clearly defined edge, when using it, you click and drag and the outline automatically selects the edges. To select the Quick Selection Tool, click on its icon in the tools panel or you can press W on your keyboard to select it with the shortcut:

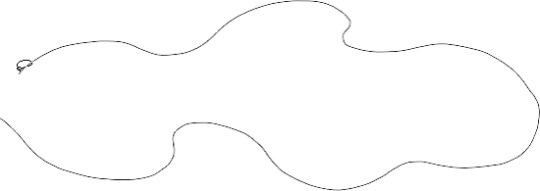
Example: in the image below, we want to keep the original colours in the main subject and colorize the rest of the background with a single color. To do that, select the main subject. To begin the selection, move the Quick Selection Tool's cursor into the top left corner of the child's sweater and click once with the mouse. An initial selection outline appears around the area that’s been clicked on:

To select the rest of the area you want, you need to add to the existing selection. The Quick Selection Tool is already in "Add to selection" mode by default, you can see this by seeing the plus sign (+) displayed in the center of the tool's cursor. From the options bar, you can see three icons that help to alternate between the tool’s modes: new selection, add to selection and subtract from selection. The "Add to selection" option is already chosen, since the whole point of the Quick Selection Tool is to continue adding to the selection until you've selected everything you need.
With this tool, you can continue to keep adding to your selection or you can remove the selections until you select the entire area you wish to work with.

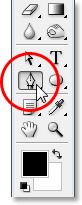
Pen tool
The Pen tool is located in the tools panel like any other tool, but it’s grouped in with the Shape Tools, the Type Tool, the Path Selection and Direct Selection.
Despite the name implying it to be a pen, the tool is no such thing, at least, not the sort of pen you'd normally think of when you hear the word "pen". If you were to use the tool like an ordinary pen, you’d end up with a twisted, tangled mess and things looping all over each other.
Example:

The icon on the right is the Fill pixels icon, this is grayed out and not available when working with the Pen Tool. It's only available when working with the various Shape Tools, so there's really only two icons we need to look at.
The icon on the left is the Shape layers icon, and it's the one that's selected by default. If we were to work with the Pen Tool with that icon selected, we'd be drawing shapes, just as if we were using any of the various Shape Tools, except that instead of drawing a predefined shape like a rectangle or an ellipse, we could draw any shape we wanted. Select the Paths icon:

With the Pen Tool selected and the Paths icon selected in the Options Bar, click once anywhere inside your document, don't click and drag, just click. When you do, you'll add a small square point.

The first point added is the starting point of our path. The "point" is called an anchor or anchor point, and it's named that because it anchors the path into place. This first point will anchor the beginning of the path to this spot inside the document. As we add more points, each of them will anchor the path into place at that location. To add another point, click somewhere else inside the document, anywhere will do.

Adding a second anchor point gives you a straight line joining the two points together, that is the path, to add more points, a click a few more times at different spots, just click, don’t drag.
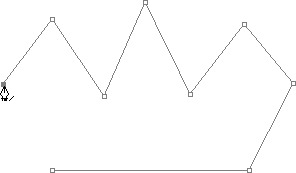
In the image above, more anchor points have been added by clicking at different spots with the Pen Tool.
Closing A Path
To close a path, all we need to do is click once again on our initial starting point. When you hover your mouse cursor over the starting point, you'll see a small circle appear in the bottom right corner of the pen icon:

A small circle appears in the bottom right corner of the pen icon when hovering the cursor over the initial starting point of the path, that circle tells us that we're about to come "full circle" with our path, finishing it off where it began. To close it, simply click directly on the starting point.

The path is now closed, finishing at the starting point, creating a closed path.
Crop
The crop tool allows you to select a portion of the image and get rid of everything not included in the selection, it’s useful for getting rid of backdrops you don't want.
Eyedropper
The eyedropper tool is used to sample a colour in the image you’re working on and matches it to the one in Photoshop, it’s useful if you want to retouch part of an image but can't tell which color to use.
The icons in the tools panel each have their own “house” with other tools, other variations of the standard tool you select, all you need to do is hover your cursor over the tool’s icon and a separate panel will drop down.
Rectangular Marquee Tool:
Eliptical Marquee Tool
Single Row Marquee Tool
Single Column Marquee Tool
Lasso Tool:
Polygonal Lasso Tool Magnetic
Lasso Tool
Quick Selection Tool:
Magic Wand Tool
Crop Tool: Slice Tool
Slice Select Tool
Eyedropper Tool:
Colour Sampler Tool
Ruler Tool
Note Tool
Count Tool
0 notes
Photo
BLURRY - ICON TEXTURES
DOWNLOAD . .
HERE
3 notes
·
View notes
Photo

Every portrait that is painted with feeling is a portrait of the artist, not of the sitter. Oscar Wilde Made by @art_biself in @photoshop Model @rajan_mehmi01 #paintings #photoshopeffect #photoshopeffectslight #photoshopeffects #photoshopart #dipperedit #dipperpaints #dipperpaint #paintingart #paintingartist #paintinggallery #paintingartgallery #bird #instagram #instagramers #hummingbird #artlife #digitalartwork #digitaldrawing #photoshoptools #photoshopfun #camerarawfilter #photooftheday #portrait_vision #portraitphotography #editing #editor #photoeditor #imagemanipulation #imaginationiseverything (at Patiala-The Royal City) https://www.instagram.com/p/CE_6-ifprBf/?igshid=rxazw1rg41lf
#paintings#photoshopeffect#photoshopeffectslight#photoshopeffects#photoshopart#dipperedit#dipperpaints#dipperpaint#paintingart#paintingartist#paintinggallery#paintingartgallery#bird#instagram#instagramers#hummingbird#artlife#digitalartwork#digitaldrawing#photoshoptools#photoshopfun#camerarawfilter#photooftheday#portrait_vision#portraitphotography#editing#editor#photoeditor#imagemanipulation#imaginationiseverything
0 notes
Photo
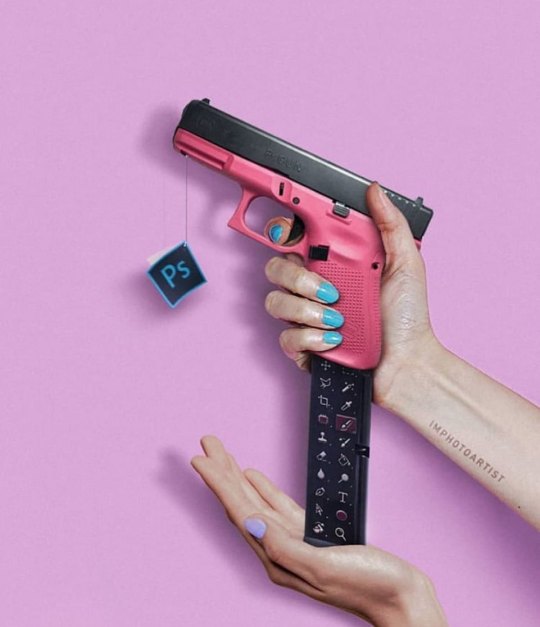
When client keep saying changes 👩🎨 . 👩🎨 @imphotoartist . #graphicgang #designerthings #designerworld #designerproblems #photoshop #photoshopart #photoshopedit #photoshopgun #photoshoptools #photoshop_cc #tools #gun #reload #graphicdesigner #uidesigner #artoftheday #designhumor #designerhumour #memes #memes😂 https://www.instagram.com/p/CErL6dKjSKT/?igshid=3baivzmb94f1
#graphicgang#designerthings#designerworld#designerproblems#photoshop#photoshopart#photoshopedit#photoshopgun#photoshoptools#photoshop_cc#tools#gun#reload#graphicdesigner#uidesigner#artoftheday#designhumor#designerhumour#memes#memes😂
0 notes
Photo
4 Arrows My #digitalexperiments continue using a variety of #photoshopbrushes and other #photoshoptools #arttherapy #myartwork #digitalartist #instagramartist #digitaldrawings #digitalpainting #monochromeart #experimentalart #artdigital #abstractartwork #artistoninsta #artlife🎨 #myart🎨 #originalart #digitalartgallery #digitalpainter #digitalabstractart https://www.instagram.com/p/CDjW_9uD7yg/?igshid=1i6igeuni5o20
#digitalexperiments#photoshopbrushes#photoshoptools#arttherapy#myartwork#digitalartist#instagramartist#digitaldrawings#digitalpainting#monochromeart#experimentalart#artdigital#abstractartwork#artistoninsta#artlife🎨#myart🎨#originalart#digitalartgallery#digitalpainter#digitalabstractart
0 notes
Video
youtube
How are Adobe Photoshop Plugins, Gizmo Panel Lite and Gizmo Panel, different?
Today, we will show you how the Adobe Photoshop plugins, Gizmo Panel Lite and Gizmo Panel Full version, are different from each other. Both are great to get you started, but there are differences in two versions and we display to you some of those differences and more.
If you enjoyed this video, please give us a LIKE and SUBSCRIBE for more videos.
Our Adobe Photoshop Plugin: https://gizmopanel.com/
Both versions of Adobe Photoshop Plugin: https://gizmopanel.com/shop/
Gizmo Panel Lite: https://gizmopanel.com/lite/
Gizmo Panel Full: https://gizmopanel.com/product/gizmo-panel/
#gizmopanel #gizmopanellite #photoshop #photoshoptutorial #photography #photographylovers #photographytips #professionalphotoediting #professionalphotography #professionalphotographer #photographytools #photographytechniques #frequencyseparation #dodgeandburn #makeuptutorial #makeup #hairediting #eyesediting #skinediting #skintone #skintexture #landscapephotography #colorcorrection #imagecorrection #noisecorrection #sharpen #sharpening #specialeffects #hotpics #recover #recoverphotos #luminosity #brushtool #testlayers #luminositymasks #luminositymask #photoshoppresets #photoshoptools #photoshoott #photoshoottphotography #photographytips #learnphotography #learnediting #howto #howtoedit #howtoeditpictures #photoshophowto #howtoeditinphotoshop #improveyourphotography #usinggizmopanel #gizmopanelversion #adobe #adobephotoshop #plugins #plugin #photoshopplugin #photoshopplugins #different #difference #howdifferent #adobephotoshop #adobecreativecloud #adobecreativesuite #adobetutorials #digitalart #digitalmakeup #applyingmakeup #beauty #beautyeditorial #landscape #landscapephotography #landscapepresets #landscapeeffects #photoshopeffects #skinpigmentation #orton #backgroundblur #skyediting #popsubject #editingwithgizmopanel #editinglayers #photoshoplayers #vignette #adjustmentlayers #oneclickphotoediting #whatisdifferent #comparisonvideo #choosegizmopanel #chooseone
0 notes
Video
youtube
how to create water mark and apply on image in Photoshop
0 notes
Text
Tools in Photoshop
#toolsinphotoshop#photoshoptools#selectiontoolinphotoshop#brushtoolinphotoshop#croptoolinphotoshop#spothealingbrushtoolinphotoshop#healingbrushtoolinphotoshop#clonestamptoolinphotoshop#gradienttoolinphotoshop#pentoolinphotoshop#graphicdesigninstitute
0 notes
Link
Photoshop is definitely the complete photo editing tool we have access to. But it's not the only one. The problem is that there are hundreds of photo editing tools on the market. With so many options, it's hard to know which one can help complete all your editing tasks.
0 notes
Last Seen Blogs

intoxicationwetrust-blog
Dogshit Taco


lizwins
Life With Derek

coxventure
CoXventure

iek24
ihelensims