#I changed the colors on here‚ I'll be posting process pictures in the reblogs in a second
Text
BSD 4th&5th Season Staff Book clean Soukoku illustration
↳ For @bunniezai ♡
#This illustration is so cute!!#osamu dazai#chūya nakahara#skk#soukoku#bsd#bungou stray dogs#bsd s5#bsd official art#my edit#my cleaning#mine#Can never figure out how to nicely format the caption. Ugh#I changed the colors on here‚ I'll be posting process pictures in the reblogs in a second
421 notes
·
View notes
Text
Cover Tutorial
Because several people requested it and while I'm a bit reluctant to share my secrets, I'd rather have this knowledge out there because I know how hard it is to make stunning covers. All of this stuff I learned by trial and error and my process differs with each cover, but here you go!
I use Photopea, not photoshop but the process should be the same.
That being said, I'd rather you didn't reblog this post. Feel free to reply and like it, just don't reblog it pls.
The cover I'll be showing you how to make is my most recent one for my Ron Weasley fic Manic (x)
tagging: @akabluekat @booty-boggins @materialkii @kazinejghafa @leviackermannns @a-song-of-quill-and-feather @jewelswrites-ish @randomestfandoms-ocs
1. Go to file and hit "New" to start a new canvas. My preferred dimensions are 512x800 because that's the Wattpad size, but you can change it to whatever you like!

2. Load your background and FC image you want to use. I shop around for good background stock packs and the one I used for Manic is from a fantasy pack I found on deviant art. The image of Danna Paola I just found on google. I prefer to use transparent PNGs cause I don't have to erase around them, but regular photos work too!
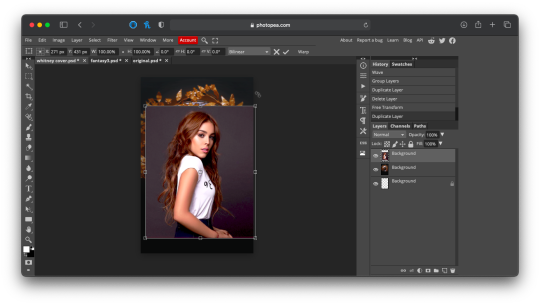
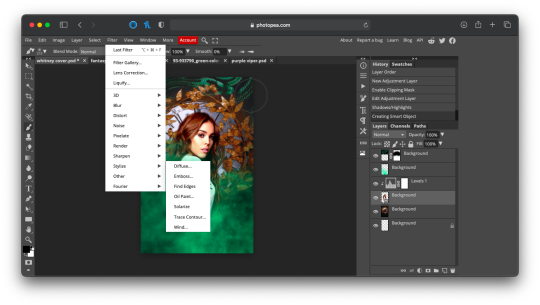
3. The next thing you want to do is hit "Free Transform" and adjust the background and PNG to the position you want. You should see an outline like in the above picture. Now that I have the images where I want them, I'm gonna erase the excess background around Danna so that the clock shows behind her. Load the brush tool and set it anywhere from 40% - 70%. That way the edges aren't too harsh. I add a raster mask and use the black paint tool to erase it. It should look like this when you are done.

4. Now come the fun part, TEXTURES!! Seriously these changed my life. For this one I added some green smoke that I found on google and an image of a green snake that I also found on google.
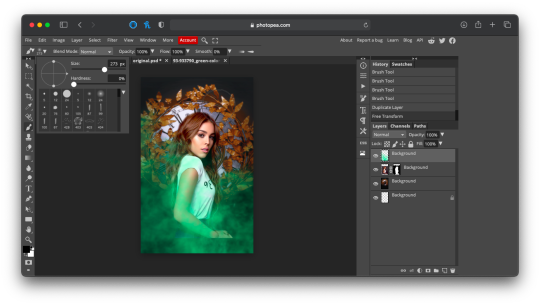
Because I didn't like how the border of Danna's pic was showing through the smoke, I erased the bottom of her picture so it looked more blended in. Then, after adding the snake pic, I went over to the little bar above the layers that says "Normal" and switched it to "Lighten" so it blends in more. Then I took the brush and continued to erase parts of the pic until it looked like how I wanted it!
5. Now if I want to get that shiny sort of waxy look for my OCs, I have four very simple steps. The first is to click on "Image" and go to "Shadow and Highlights" It should look something like this:
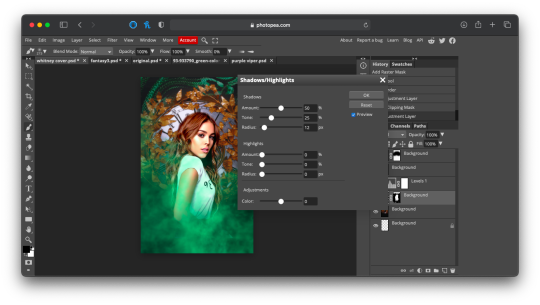
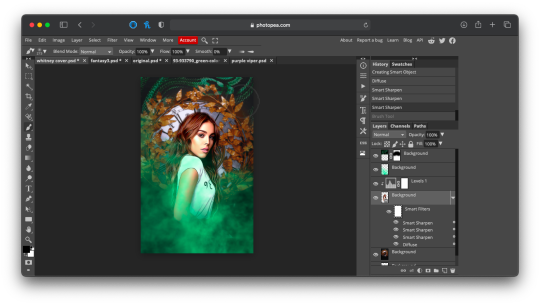
From there I just adjust the top part to my liking. I tend to lower Amount and increase Radius but it differs from picture to picture. When I'm satisfied, I go to "Layer" and hit "Convert to Smart Object" so you should have a tiny little square that indicates it's been converted. Then I just play with the filters Photopea gives me.
I personally like to use Diffuse, but there are tons of different options you can use. After that, I click Smart Sharpen three times and that's how you get that waxy sort of look. With the Diffuse filter especially the face and hands of your FC can get all wavy and stretchy, so I just take the brush tool and brush it over the wavy and stretchy areas.
Your cover should look like this now!
6. To achieve the sort of highlight and green look, I take a Hue/Saturation layer, hit colorize, and adjust it to my liking like this
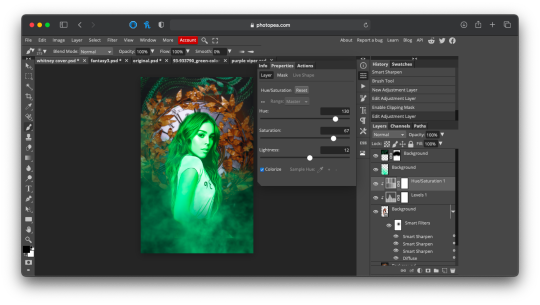
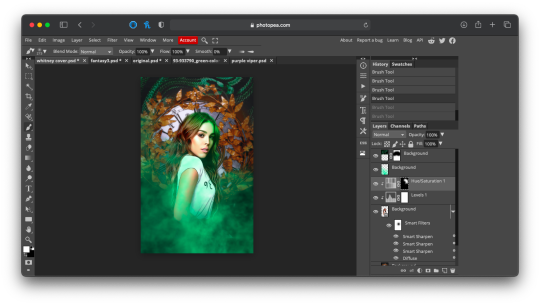
I wanted it to match the green smoke, so I made the layer green. I then hit CTRL + I to invert the raster mask and take the brush layer and just highlight the areas to make it look like it's hitting her naturally. USE WHITE FOR THIS STEP. Also make sure your brush is at 0% otherwise it won't look as good. It should look like this when you're done!
7. Now add your PSDs and text and you're done! If you want something a little extra fun, go to filters and hit "Distort" while on the text layer and play with the different options until you find something you like!
And now you have a cover!!

TADA!!!! Let me know if you guys want more tutorials!
54 notes
·
View notes
Last Seen Blogs

zhenyafok
ZhenyaFok

unhappy-kizunaai
✗😜КЇΖЦЛΛ😍ΛЇ😆✗

clown-around-and-find-out
you don't need a license to drive a sandwich!

squirrelpatties
Dookie fart

ninjagonewtimes
Ninjago New Times Comic