#Enlarge Image using AI
Text
How To Use Starry AI And It's Top 8 Features
Best way to Enhance your images and experience the full potential of starry AI.
Look no farther than Starry AI, a technology that has the potential to revolutionize the creative process. Imagine having only a few clicks to transform plain text into distinctive and lovely images. It’s precisely what Starry AI accomplishes.
With over a thousand distinct art styles to choose from, Starry AI turns into your personal experimentation space where you can try out various prompts…
View On WordPress
#Enhance Image using AI#Enlarge Image using AI#How To Use Starry AI#Starry AI best features#Starry AI Image generator#Starry AI Image upscale
0 notes
Note
Hello, I just found your blog and first of all I like your story but I have a question. I literally looked through your entire blog and fanfic but I realized something, you said that Okita was turned into Mewtwo when she was 6 but according to Unova she was the one who conceived Okita so that the transformation would be completed BUT here I have my problem... HOW? HELL WAS THAT POSSIBLE!? BECAUSE A 6 YEAR OLD HUMAN CHILD IS AT LEAST APPROXIMATELY 106.68 CENTIMETERS OR FOR AMERICANS, 42 INCHES! I mean, yes, Unova is 2 meters or 6 feet BUT IT DOES NOT JUSTIFY HOW THEY COULD REDUCE A HUMAN, INSERT HIM INTO UNOVA'S UTTERUS AND HIS BODY DIDN'T REJECT THE FETUS! Because if you know physics then you should be familiar with the Square-cube law which basically states that if we enlarge a mouse to the size of an elephant it will explode and if we reduce an elephant to the size of a mouse it will die cold, you don't have to be a scientist to know. If we reduce a six-year-old child to the size of a fetus, he will die and if you don't believe me about the size, look at this image:

On the left is six-year-old Okita and on the right is Unvoa
Hi, thanks for the strong interest! I'm glad you like it, and I appreciate the effort you've put into this ask!
I have three ways I want to answer this, as this ask is very intense:
A "haha pokemon go brrrrrrrrr" fashion [1], a serious fashion (to clear up any confusion) [2], and a 'lol whut' fashion [3]:
[1]

[2] To clear up any confusion (and it is mostly my own fault, as I haven't cleared this up on any pinned post link) [Spoiler warning for some]…
Okita the human girl, and Okita the babytwo were two separate entities (this is the main plot twist in the fanfic which is yet to come. Apologies, I've keep that detail very vague, not to spoil things).
They we're both fused together by Team Helix Rocket (T.H.R), in the hope that she would bend to Giovanni's will easier with a human element. Unlike the other experiments that were fused with Unova's DNA and a psychic vessel.
The unborn babytwo from Unova, and frozen embryo stored by Ai and Amare, were both stolen by T.H.R for the experiment that became modern day Okita).
During the fanfic's timeline, Okita likes to keep up the naritive in her mind that her earliest memory was from when she was 6, and that she was taken. This's why she says what she says in the first chapter; that's also the narrative that her parents told her.
But truly, her earliest functional memories are from within the tank, being 'created'…
Treating her like a human for a moment, our earliest memories are often fabricated by what our parents tell us.
Both Unova, and Okita's creator will tell Okita what really happened at separate points during the fanfic (the main plot twist). Okita firmly denies both of their stories, and becomes very cold with both of them.
Final points: Unova was pregnant with Okita, as a fetus babytwo, probably no bigger than a human baby at a late second trimester.
Ai and Amare (Okita's human parents), had conceived naturally, but decided to freeze the embryo of Okita (Human) probably a month or so in to Ai's pregnancy.
In the up-coming Chilli arc, the story dives into Okita's mind as she finally accepts what really happened to her.
[3]

Hope this covers it all! Apologies for the late reply and undisclosed-confusing lore
Thanks for the ask!
21 notes
·
View notes
Text
Your Stable Diffusion Qs answered, part 1

Several of you have asked questions in the comments and msgs, wanting to generate your own Stable Diffusion AI inventions like these. I don't consider myself any kind of expert on this, I've just been messing around, pressing buttons and seeing what happens. But then, that seems to be what everyone who uses Stable Diffusion has been doing, so I guess I'm probably as qualified as anyone to share how I've done this.
So to start, I've answered the basics on what set up I'm using below. When I get a moment, I'll do another post answering questions about prompts, and then one on models.
Hardware and software
I'm running this on a 5 year old Dell XPS 8930 with a 6GB graphics card. It's just a good consumer PC, not a cutting edge supercomputer. But if all you have is a cheap laptop with no GPU, you should probably look to somebody else for guidance, this method probably won't work for you. I think there are other ways you can do it, but I have no experience with them so can't advise on those.
I installed Automatic1111's Web UI following these instructions. Since I did that, somebody has created an installer that is intended to make all that easier, but since I already did it easily enough the first way, I can't vouch for that option.
Config
The best thing to do is play around with things and see what happens. I've messed around with all the different sliders and options, but found that most of the time changing them from the default doesn't do much to improve the results. The only ones I change from the default are sampling steps, which I typically put in the ~100-120 range, and face restoration, which I usually have on during image generation but not during enlargement.
Workflow
The main secret to getting images that I deem worth posting here has little to do with getting the config right, or even writing a perfect prompt, and everything to do with generating a lot of images and binning piles of garbage, then iterating the few creations that have some promise. To get to an image worth posting I typically:
Prompt it to generate a large number of 512x512 images on a theme.
Delete most of what it creates and pick the best looking one - judged on overall composition and the design of the gear, rather than details at this stage.
Send it to the img2img tab to iterate it, typically telling it to generate half a dozen or more variations with denoising strength usually set in the 0.6-0.9 range, depending on how close it already is to what you wanted. Sometimes refining the prompt keywords at this stage too if something stands out as needing a nudge in the right direction.
Pick the best one and send it to the extras tab to enlarge it. There are lots of enlargers available. I've used 4xValar a lot. I often couple it with lollypop, which creates quite a bold, smooth and vibrant look which works well with shiny gear. But I haven't tried many, so there may be other great enlarger options out there.
Now send the enlarged image to the inpaint tab to improve any areas which have problems, like low res artifacts, bad faces or fabrics that aren't what you wanted.
For step 1, the "Script">"Prompts from file or textbox" function is useful: you can write a variety of different prompts, and create minor variations on prompts to see how different keywords affect the results. Fill the textbox with a list of prompts, set the "Batch count" to anything from 20 to 100, then leave the computer churning them out in the background for you to deal with when you have the time to do the other steps.
For step 5 I select an area of the enlarged image, tick "inpaint at full resolution", and if the selected area is larger than 512x512, try to match the width and height settings to approximately the size of the selection. I typically set denoising strength in the 0.3-0.6 range - setting it higher will have a stronger effect, but can also result in that area looking less like it belongs as part of the image, as the lighting and colour balance can end up being a mismatch. Then I write a prompt that is specific to the selected area and have it generate half a dozen options.
The image at the top of this post, for example, started as one of many dozens of guys in shiny Adidas 3 stripe waterproof sportswear, generated as one big batch, the majority of which went straight in the bin.
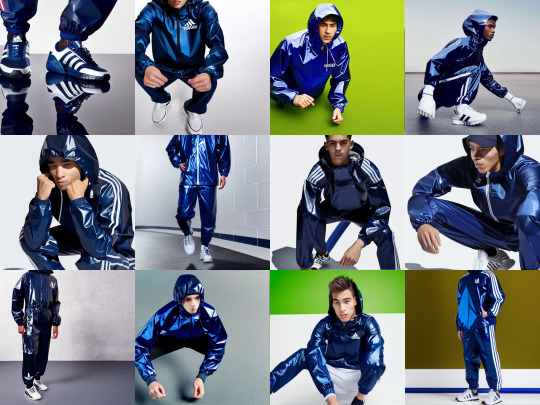
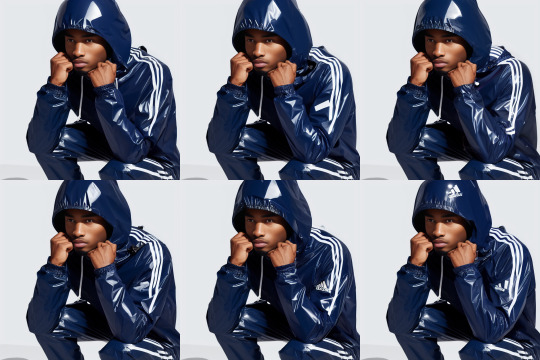
After img2img iterating it with small refinements to the prompt and picking the best out of a couple dozen variations, I inpainted an area including the left arm, shoulder and hood of the jacket, with a low denoising strength and a gear-specific prompt, just to give it a smoother and higher definition appearance than the enlarged low resolution image had (and still has, on the right arm and legs - they catch my eye less, so I didn't bother trying to perfect those). I then did the same for an area around the face and hands, so it would have better texture and detail, clear up a few oddities in the general shape and the hand structure, and give the guy less crudely sculpted facial hair.
It sounds like a lot of work when now I lay it all out in detail like this, but most of the work is done by the computer in the background: line up a batch of stuff for it to generate/iterate, be patient and leave it to do its thing. Then when you come back to it later, you've just got to pick out the best and do a bit of inpainting once you've got some good images to refine.
At least, that's the workflow I was using for most of these posts - until the most recent 2, filled with the painting/illustration-style creations. Those were even simpler. But I'll get to that in the post on models.
77 notes
·
View notes
Photo
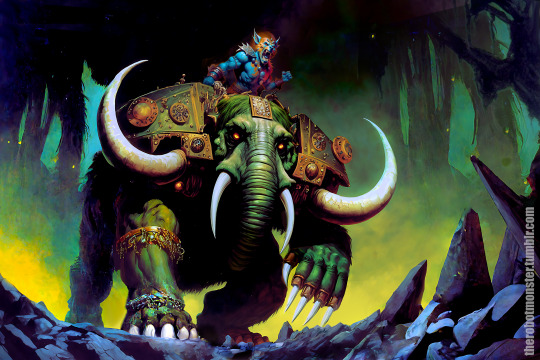
Making a Monster: Smackoderm (or maybe Ogrephant?)
Technically, this is a WIP despite the main image being complete, because I’m planning on toy package graphic design elements, but this might be an interesting look into my “completed piece” AI process, for those interested.
I wanted to see if I could use Midjourney V4 to produce something resembling late 70s, early 80s toy package paintings, the kind you’d see on lines like MOTU and late-run Micronauts.
Long post after the fold.
To this end, I started prompting with:
bio-mammoth, cyborg mammoth/mastodon/elephant with glowing green bio-goo cannons on its back, huge metal claws, and glowing green eyes. barbarian warrior with green skin rides the beast into battle. battle painting, Masters of the Universe package painting, 1985, by frank frazetta and earl norem, pulp fantasy painting
I didn’t really get my Bio-Mammoth. Complex ideas are difficult for text-to-image at this stage, and I intentionally introduced a lot of conceptual chaos with my image prompts, which included such things as the MOTU slime pit, a beast of the apocalypse, and yes, a Frank Frazetta of a mammoth.
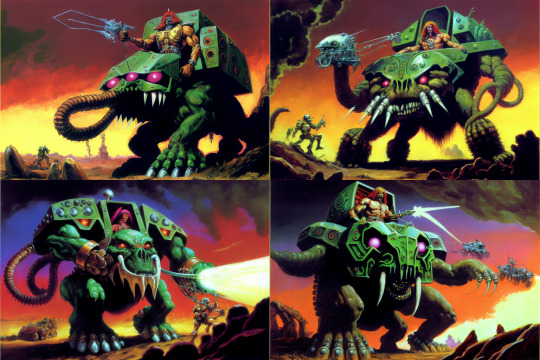
A couple of attempts got me at least a few that were pachyderm-like (the other weirdos aren’t necessarily wasted, as I can adjust prompt and evolve them into their own creations)
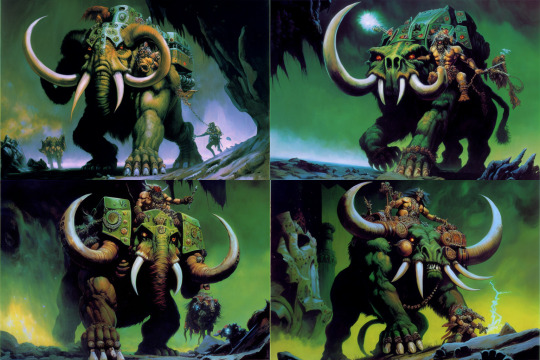
I wound up developing about five strains of the concept, tweaking the prompt as I went, until one started to produce results that fired my imagination.
Not just in that it was a cool beast, but in that it had the right look for an early 80s 5.5″ fantasy toy release. A battle-steed creature, with the not-included figure riding on the back (probably in an awkward bucket-seat that leaves little room for organs), four easy-to-lose tusks. Just scary enough to be cool, just goofy enough to be fun.
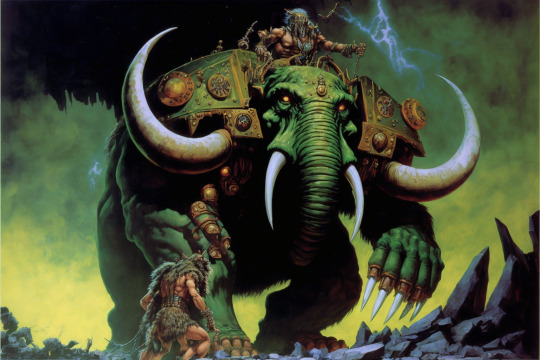
In all, I enlarged about eight of couple of dozen variants of the image I worked up, and began compositing and repainting. I knew I was going to need more real estate for packaging so there be space for logos, text blurbs, feature call-outs, etc. So once I got the basic chunks’o’phant squared away, I reposition, and start expanding out and replacing background features.
Then I run into the problem that the humans generated in-picture are all pretty much mush, which isn’t shocking given they’re small portions of the overall composition.
So after upscaling my main composition, I start working on the hyena warrior.
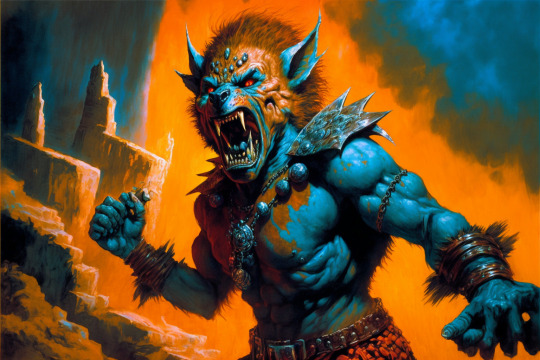
an orange anthropomorphic hyena warrior, gnoll, with a bioluminescent blue spots, shouting, 2/3 portrait composition,, Masters of the Universe package painting, 1985, by frank frazetta and earl norem, pulp fantasy painting
I didn’t spend as much time iterating the hyena, since he was going to be small and I’d have to retouch his hands extensively regardless. Eagle eyed viewers may note that most of what I’ve got here isn’t quite what I requested. AI art is bad as specificity, one of the many things humans do better.
For funsies, here’s a hyena I didn’t use.

I was playing this one free-and-loose, and rolling with elements that looked cool, rather than those that matched my initial vision. If I’d been more intent on a specific result, I’d have prompted more generically and leaned more on manual reworking. This time, however, I was steering with, rather than against, the current, so as to learn how the AI responds to different kinds of requests.
Once the hyena-rider was in place, I did work compositing him in, and did some more background touch-up. After that is color-adjusting and balancing (I like to shift the darker values of the piece toward the blue to add depth), another round of cleanups and tweaks, and then pushing it out for all to see despite not really being sure its “done.”
#midjourney#midjourney v4#masters of the universe#galaxy warriors#toyetic#fauxstalgia#unreality#MOTU#ai artwork#midjourney edit#generative art#noslalgia#fantasy art#concept art
43 notes
·
View notes
Text
The Loss of Rev Mayor Bubba Copeland, Part 1
(Content note: we're going to address topics like suicide, child sex abuse, graphic descriptions of sex & abuse in fiction, fundamentalist & conservative hatred towards LGBTQIA people, & the Southern Baptist Convention's cover-up of child sexual assault within its leadership. This is a cry for justice, & it's not going to be pretty. If any of this is unhealthy for you to read about, please use the back button to save your sanity.)

Rev. F.L. "Bubba" Copeland died by suicide on Friday, after a low-speed chase with local Sheriff's deputies. Rev. Copeland had been targeted with five articles in three days by the site, "1819 News Dot Com," when his alter-ego was discovered. No one but his wife was aware of his private online life before the 1819 site exposed it.
Privately, Rev. Copeland posted on sites like Instagram, Reddit, & Fictionmania, as Brittani Blair Summerlin. She'd post on topics like size-inclusivity, fashion & budoir photos, hormonal transition, transgender rights issues, & yes, sex.
She also wrote fiction.
Let me be the first to say, it seems like Brittani did some really stupid things.
She apparently used the pics of *real* minors to make memes about a fantasy of transition & casual sex. I may be wrong, but it looks like they were about specific stories she'd written, & acted as a thumbnail or cover art for them.


I won't defend using real minors for that. It's wrong.
I will say, "Since the trash tabloid outed him, he took his accounts down, & there's no way to verify that Reb. Copeland actually made these memes."
I will say, "I wish she could have been in a healthy fanfic community, where someone could have pulled her aside & said, 'Don't do that. It's wrong. Here's some AI sites where you can generate whatever face fits your stories. Or, here's a fanfic artist, why don't you commission them to make you some original cover art for $25?'"
(Note, that's where my profile pic came from. If you'd like one, I'm happy to pass along the artist's contact info.)
I've only been a part of online fanfic communities for a couple of years, & I've seen writers do stupid things. I've seen the uproar of actors when they discover things like, "Real Person Fanfic (RPF)" exists. I've seen the discussions over when & how using real people in fanfiction is a problem--& this was about celebrities! It must be an entire other level of discomfort for private adult citizens to have their images & names put in fiction, & it's ABSOLUTELY WRONG to do it to children, who legally & morally cannot consent to public use of their photos.
It's wrong, but it's NOT A CRIME.
It's a crime to sexually abuse or exploit children, & take pictures, video, or audio of it. It's a crime to own or distribue that media. It's NOT a crime to take pictures that were already posted on the internet, & alter them for your own personal use.
Is it really weird? Absolutely.
Is it a crime? NO. It's not.
It's really important to understand the distinguishing factors here: Rev. Copeland did something wrong, but according to the pictures posted by 1819, it's easy to see that it was a mistake. It was not a crime, it was not sexually exploitative, & it was not illegal.
It's not a crime to write the kinds of stories Brittani wrote, even if they're disturbing. Yes, that includes if they use real people as characters. (It should be noted that the protagonist in the most disturbing of the stories was NOT real, & was neither Brittani nor Bubba.)
Even worse, if Bubba Copeland had been James Patterson, he would have been PAID for his work.
Just take a look at this excerpt from Patterson's bestseller, "Kiss The Girls."

Yep, James Patterson wrote a graphic sex scene where a serial killer uses a snake to enlarge the anus of a victim. Patterson has sold over 425 MILLION books, & I assure you, this isn't the only graphic description of rape & murder in them. The victims in this story were often college age women, only a couple of years above being minors themselves. I don't know if Patterson himself wrote graphic descriptions of violence against minors, but I'm ABSOLUTELY CERTAIN that plenty of famous thriller writers have.
Why does Patterson get to be a millionaire, but Rev. Copeland is viciously mocked, & driven to suicide?
What's worse, is that Southern Baptist leaders are typically quite willing to hide the sexual abuse of children, as we discovered yet again less than two weeks ago.
On October 25th, the twitter account @SBClitigation posted a link to an amicus brief, filed by the SBC lawyers this past spring, trying to limit legal liability for, "non-perpetrator third parties who were allegedly made aware of the abuse and violated common-law duties in responding to it."
In other words, the SBC leaders KNEW about sexual abuse happening to their members, by their members, or even by others in the leadership, & either did nothing, or actively discouraged the victims from pursuing justice. Yes, every link is an example.
You should read @SBClitigation's entire thread, to see how far SBC leadership is willing to go to cover their butts.
Why did those particular SBC leaders get protection, when Rev. Copeland did not?

Brittani harmed no one, abused no one, & told no one, except her wife. Yet, Bubba Copeland died by his own hand, while people like Paul Pressler & CJ Mahaney still have thriving careers.
****
I apologize, I worked longer than I thought I would today, & I'm exhausted. I will have to do a more detailed part 2 of this commentary later on. Let me end with this:
If you write, read, or love fanfiction, you should speak out against the vicious & inhumane treatment that Rev. Copeland received. Using real people's faces is a mistake that should have been caught & fixed by a fanfic site moderator. It should not result in someone's death.
If you care about the victims of sexual abuse, you should speak out against the vicious & inhumane treatment that Rev. Copeland received. People who write the types of fiction he wrote often have a history of being victimized.
If you care about gender nonconforming people of any type, you should speak out against the vicious & inhumane treatment that Rev. Copeland received. The people who harassed Brittani literally to her death *do not care* about the victims of child sexual assault. They've proven this again & again by their actions towards victims & perpetrators.
Brittani was a scapegoat, used to deflect accountability from their own inaction, & focus people on a collective boogeyman: a transgender woman on the internet.
#Bubba Copeland#Brittani Blair Summerlin#SBC#Church too#Southern Baptist#Survivors#SA survivors#fanfiction#fanfic writing
5 notes
·
View notes
Text
So I just came across this article. Basically AI art has been posing a series of ethical issues that go beyond just replacing artists. It seems like AI has recreated the racism and sexism of humanity. Asian women get nudes and sexualized photos of themselves without request while white women get wholesome photos. Black and latino men are more likely to come up when putting inputting the word criminal. AI art has no idea how to draw an asian face that isn't east asian. Skin lightening and boob enlargement is a constant problem and not only that, celebrities like Megan Fox are getting loads of sexual harrasment as the AI generates thousands of images of her body without her consent.
And please don't try to tell me just because she's a celebrity she doesn't get consent because I will put the asshole hat on you.
Please consider joining artists in the fight to create more ethical restraints on AI art. The debate isn't whether or not AI art is art. The debate is whether it's ethical art.
If you're an artist you can look at the site Have I Been Trained? to see if your art has been used in image generation.
4 notes
·
View notes
Text
AI Photo Enhancers: Transforming Your Images with Artificial Intelligence
In the age of digital photography, capturing moments has become easier than ever. However, not all photos turn out perfect. Whether it’s low resolution, poor lighting, or other imperfections, we often wish we could enhance our images. That’s where AI photo enhancers come into play. These powerful tools leverage artificial intelligence to improve and transform your photos. Let’s explore some of the best AI photo enhancers available in 2024:
Remini: If you’re looking for an all-in-one solution, Remini is a top choice. It offers many AI-powered features, including upscaling low-res images, restoring old and blurry photos, denoising grainy images, and color correction. Remini can even beautify portraits and generate different versions of yourself. While the free version has ads, the paid plan provides a more robust experience.
Clipdrop by Stability.ai: Clipdrop is a fantastic web service that enhances photos using AI. It’s free to use and offers features like object and text removal, image upscaling, relighting, and background replacement. The “Uncrop” tool lets you expand images, and the new “Reimagine XL” feature creates multiple versions of an image.
Lensa: Lensa focuses on portrait enhancement. It automatically detects faces and applies adjustments like skin smoothing, eye brightening, and teeth whitening. It’s a mobile app and offers free and premium features.
PhotoApp: PhotoApp combines AI with manual editing tools. It provides features like automatic color correction, noise reduction, and sharpening, and you can fine-tune the adjustments to your liking.
Fotor: Fotor offers a user-friendly interface and various AI enhancements. It includes features like one-tap retouching, filters, and effects. While the free version is robust, the premium version unlocks additional tools.
Let’s Enhance: As the name suggests, Let’s Enhance specializes in upscaling images. It uses AI algorithms to increase resolution without losing quality. You can enhance old photos or enlarge small images with impressive results.
Adobe Photoshop: While not exclusively an AI tool, Photoshop integrates AI features. Its “Enhance Details” function improves image sharpness and detail. Photoshop remains a powerful choice for professional photo editing1.
Topaz Photo AI: Topaz offers various AI-powered plugins, including Sharpen AI, DeNoise AI, and Gigapixel AI. These tools excel in sharpening, denoising, and upscaling images1.
And now, let’s dive into the specifics of the FotoTweak app:

FotoTweak: AI Face Swap and Photo Enhancer
AI Art Generator: Craft unique and captivating art in seconds with FotoTweak’s AI generator. Type in your text or upload a photo to start generating AI art.
Photo AI enhancer
AI Filters: Add a whimsical touch to your photos with neon, pop art, and anime styles.
AI Headshot Generator: Reinvent your selfies with professional, fancy, or casual styles.
Turn Photos into Art: Transform images into various artistic styles like anime and pixel art.
AI Tattoo Generator: Design unique tattoos effortlessly.
Anime and Cartoon Yourself: Become an anime or cartoon character with specialized styles.
AI Face Swap Magic & AI Avatar Maker: Revolutionize your photos with advanced AI Face Swap technology.
Restore Old or Damaged Photos: Revitalize cherished memories by fixing wrinkles, scratches, and imperfections.
AI Photo Enhancer: Unblur photos, sharpen, and enhance photo quality.
Colorize Black and White Photos: Bring old black-and-white photos to life with color.
Remove Objects: Easily modify images with AI-powered editing tools.
In summary, AI photo enhancers empower us to transform ordinary photos into extraordinary ones. Whether a casual photographer or a professional, these tools can elevate your images and make memories unforgettable. Try them out and see the magic unfold!
0 notes
Text
Topaz Photo AI Download (Latest 2024) Free Download
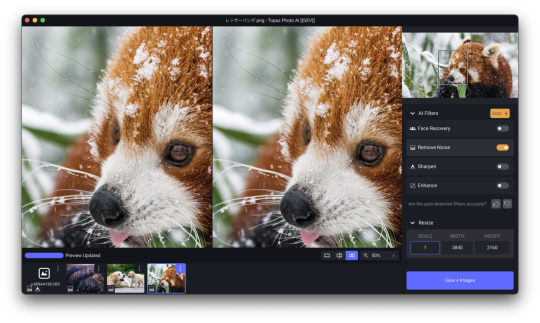
Topaz Photo AI Download
Download from official site
### Download Topaz Photo AI Full Version for Windows – Achieve Professional Results
#### Topaz Photo AI Overview
In the competitive world of photography, capturing eye-catching images is crucial to stand out. Even experienced photographers face challenges during post-processing, and that's where Topaz Photo AI comes in. This article explores Topaz Photo AI and how it can streamline your photography workflow, producing stunning, professional-quality images. Let's get started!
#### Understanding Topaz Photo AI
Topaz Photo AI is a sophisticated photo enhancement software powered by artificial intelligence and machine learning algorithms, transforming ordinary photos into extraordinary art. Developed by Topaz Labs, a leader in image processing, this tool blends cutting-edge technology with a user-friendly interface, making it accessible to photographers of all levels.
#### Key Features and Benefits
**1. Intelligent Noise Reduction**
Topaz Photo AI excels in noise reduction. Its AI algorithms eliminate color and luminance noise, resulting in cleaner, sharper images. Whether dealing with high ISO shots or low-light conditions, this feature helps you achieve remarkable results without compromising image quality.
**2. Advanced Image Upscaling**
When photographers need to upscale images without losing detail or introducing artifacts, Topaz Photo AI is the solution. Using deep learning models, the software enhances image resolution, allowing you to enlarge photos while maintaining sharpness and fine details for flexible printing and display options.
**3. AI-based Enhancements**
Topaz Photo AI offers a variety of AI-driven enhancements to boost your photos' visual appeal. From enhancing colors and contrast to adjusting exposure and fine-tuning details, the software intelligently analyzes and selectively applies enhancements, ensuring a natural and realistic look.
**4. User-Friendly Interface**
Despite its powerful AI technology, Topaz Photo AI remains easy to use. Its sleek and intuitive interface allows photographers to navigate various tools and options effortlessly. Whether you're a professional or a beginner, you can quickly master Topaz Photo AI, making it an essential part of your post-processing toolkit.
#### Integration and Compatibility
Topaz Photo AI integrates seamlessly with popular post-processing software like Adobe Photoshop and Lightroom. This ensures an efficient workflow, allowing you to use Topaz Photo AI's capabilities alongside your existing editing tools. A simple plugin installation provides access to its features within your preferred editing environment, streamlining your post-processing tasks.
#### Conclusion
Topaz Photo AI transforms the way photographers enhance their images. With its intelligent noise reduction, advanced upscaling, AI-based enhancements, and user-friendly interface, this powerful tool enables photographers to achieve stunning results and unlock the full potential of their photos. Whether you're a professional aiming for the next level or an enthusiast seeking visually captivating images, Topaz Photo AI is a must-have.
Embrace AI and elevate your photography with Topaz Photo AI. Experience the future of image enhancement and turn ordinary photos into extraordinary masterpieces!
#### Technical Details and System Requirements
- Windows 10/11 64-bit
- At least 4 GB of RAM
- At least a 2 GHz processor
- At least 4 GB of available hard drive space
Read the full article
0 notes
Text
How RTX AI PCs Use NVIDIA DGX Cloud to Boost AI Power

NVIDIA DGX Cloud
Windows apps and games now have new powers thanks to generative AI. It powers spontaneous, animated NPCs, lets artists produce original artwork, and lets players increase frame rates by up to four times. However, this is only the start.
The need for compute to support generative AI is growing along with its capabilities and use cases.
To effectively and efficiently fulfil the needs of AI workloads, hybrid AI blends scalable, cloud-based GPUs with the onboard AI acceleration of NVIDIA RTX.
AI Hybrid: A Love Story
The increasing use of AI has app developers searching for ways to launch their products: High performance and low latency are provided by AI running locally on RTX GPUs, which is always accessible even when the internet is unavailable. On the other hand, cloud-based AI can support numerous customers at once by scaling across numerous GPUs and operating larger models. A single application will frequently make use of both.
A sort of matchmaker, hybrid AI balances NVIDIA DGX Cloud scalability with local PC and workstation compute. It offers the freedom to tailor AI workloads according to particular use cases, expenses, and output. It aids developers in making sure AI jobs execute where it makes the most sense for the particular applications they are working on.
NVIDIA GPUs and NVIDIA’s AI stack, which includes TensorRT and TensorRT-LLM, accelerate AI whether it is operating locally or in the NVIDIA DGX Cloud. This implies spending less time staring at death-staring pinwheels and more time delivering cutting-edge, AI-powered functionality to users.
Developers, gamers, and artists can use hybrid AI processes using a variety of NVIDIA tools and technologies.
Imagine in the Cloud, Realise on RTX
It has been shown that generative AI may assist artists in ideation, prototyping, and brainstorming new works. A cloud-based generative photography service designed for and in collaboration with artists, Generative AI by iStock powered by NVIDIA Edify is one such solution. It offers compensation to artist contributors and solely uses licenced content for training.
Beyond only creating images, iStock’s generative AI gives artists a wide range of tools to experiment with styles and variants, edit specific areas of an image, and enlarge the canvas. Artists may easily bring ideas to life even after multiple ideation sessions with all these tools at their disposal.
Artists can return their finished creative concept to their local systems. Whether it’s creating an incredible piece of artwork in Photoshop with local AI tools, animating the image with a parallax effect in DaVinci Resolve, or building a 3D scene with the reference image in Blender with ray tracing acceleration, and AI denoising in Optix, RTX-powered PCs and workstations offer artists AI acceleration in more than 125 of the top creative apps to realise the full vision.
Hybrid ACE Involves Life Into NPCs
Moreover, hybrid AI is opening up a whole new world of interactive PC gaming with NVIDIA ACE, which enables digital creators and game developers to incorporate cutting-edge generative AI models into digital avatars on RTX AI PCs.
With NVIDIA ACE, developers and designers may construct non-playable characters (NPCs) that can comprehend and react to text and speech from human players thanks to artificial intelligence neural networks. It uses artificial intelligence (AI) models, such as speech-to-text algorithms for handling spoken natural language, to produce responses from NPCs in real time.
A Tool for Hybrid Developers That Works Anywhere
Moreover, hybrid aids in the creation and optimisation of new AI models. On RTX GPUs, NVIDIA AI Workbench facilitates the rapid creation, testing, and customisation of pretrained generative AI models and LLMs by developers. Data scientists and developers can simply duplicate, collaborate on, and move projects with its simplified user interface and faster access to popular repositories like Hugging Face, GitHub, and NVIDIA NGC.
When more performance is required, projects can be quickly scaled up to a data centre, public cloud, or NVIDIA DGX Cloud. After that, they can be returned to local RTX systems on a PC or workstation for inference and minor customisation. Data scientists and developers can use pre-built Workbench projects to speed up data science workloads with smooth CPU-to-GPU transitions, fine-tune LLMs, use retrieval-augmented generation (RAG) to chat with documents, and more.
Developers can run and modify a configurable RAG application by using the Hybrid RAG Workbench project. Users have the option to conduct inference on a local RTX system, a NVIDIA DGX Cloud endpoint hosted on NVIDIA’s API catalogue, or NVIDIA NIM microservices by embedding their documents locally. The project allows developers to quantize models to operate on the GPU of their choosing and can be customised to use different models, endpoints, and containers.
On NVIDIA GeForce RTX PCs, RTX workstations, and in the NVIDIA DGX Cloud, NVIDIA GPUs power amazing AI solutions locally. With the development of hybrid AI workflows, developers, gamers, and creators may benefit from the best of both worlds.
This article is a part of the AI Decoded series, which shows off new gear, software, tools, and accelerations for GeForce RTX PC and RTX workstation users while demystifying AI by making the technology more approachable.
Read more on govindhtech.com
#nvidiadgxcloud#nividia#NvidiaRTX#rtxworkstation#LLM#AI#aimodel#rtxgpus#NvidiaAI#generativeai#artificialintelligence#GPU#news#TechNews#technology#technologynews#technologytrends#govindhtech
0 notes
Text
Ultimate Guide on How to Blow Up Pictures For Free in 1 Click!
Some of you may get annoyed when you always get blurry images when enlarging them in some image editors. Now, this guide is going to introduce you ways to blow up images without quality loss! Actually, when AI-powered tools are occupying the market at an amazing speed, it no longer is a trouble to get high-quality image outputs even if you need to enlarge your images to a much larger resolution.
Now, let's just dive in and get some practical guides that can significantly help you blow up images and greatly enhance the visual impact of your work.
What Does It Mean to Blow Up A Picture?
To blow up a picture refers to the process of enlarging an image to a larger size than its original one. This is a frequent demand that many of you probably meet in daily life. For example, some of you need to blow up banner images to make your marketing materials suitable to be uploaded on different platforms to boost sales; while others may want to resize the images to make them look more attractive and get more views while uploading to social media platforms. However, blowing up a picture can mean a quality loss in the past days and you may get blurry outputs. That's also why so many users are trying to do it with image upscaling at the same time in order to maintain good image quality.
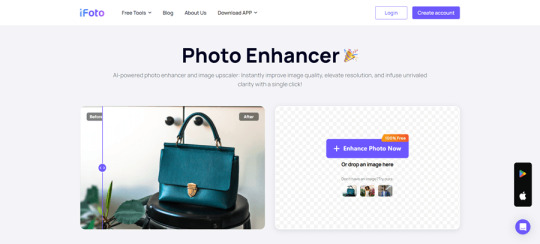
Best Practice to Blow Up Images - iFoto Photo Enhancer
If you wish to maintain lossless quality while blowing up an image, iFoto Photo Enhancer can definitely be the best option to consider. With the AI techniques integrated in the tool, iFoto Photo Enhancer is able to accurately detect the object details and process image upscaling to achieve a higher resolution (best at 4K) in one shot. No matter for old pictures or those blurry ones you just resize to larger sizes, iFoto Photo Enhancer can guarantee the best enhancing quality to display natural outputs.
Highlights of iFoto Photo Enhancer
- Precise object detection - ensuring the tool can outline object details clearly in order to serve with the best upscaling effect;
- Perfect image refining ability - iFoto Photo Enhancer can smartly deal with image refining according to the surrounding parameters and elements of the images, in order to guarantee natural outputs.
- Fast resolving speed - to improve image resolving efficiency, iFoto Photo Enhancer is embedded with multi-core acceleration techniques to blow up images in batches for you. It only takes seconds to complete a batch of image upscaling at once at a pretty quick speed!
- 100% secure platform - iFoto Photo Enhancer is developed with encryption techniques to enhance data security. All your uploaded images will not be kept on the server, and there won't be any messy ads bringing in malicious viruses, malware at all.
- Cross-platform supported - the image upscaler is equipped with an online service and also iOS, Android versions, availing users of different device systems to blow up images efficiently.
Step-by-step Guide to Blow Up A Picture Online via iFoto Photo Enhancer
Also designed with an intuitive interface, iFoto Photo Enhancer only takes you several taps to blow up images at lossless quality online. Now, walk through the steps below and learn how to use it effortlessly:
Step 1. In a web browser, go to iFoto Photo Enhancer
Step 2. Click on the Enhance Photo Now button to select or directly drag and drop the picture you want to blow up to the online tool.
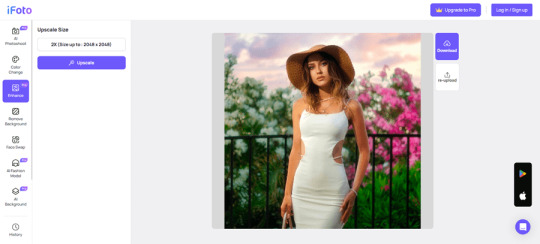
Step 3. Once uploaded, select size and confirm blow it up by clicking on the Upscale button.
NOTE: You can further adjust the image effects with iFoto's other provided image editing functions as well.
Step 4. Finally, simply click on Download to get the upscaled image saved on your computer again.
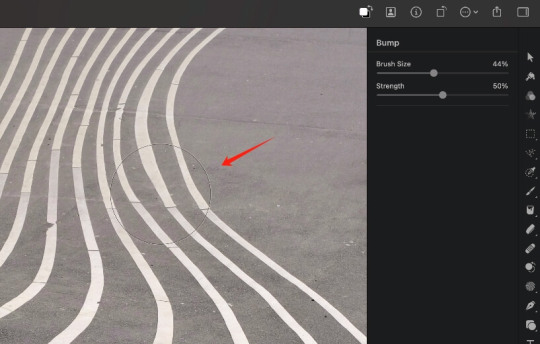
Extra Tip: How to Blow Up A Specific Part of A Picture?
If you only want to blow up a specific part of a picture but not an entire one, another helpful program can definitely meet your demand - which is Pixelmator Pro.
This professional image editor is developed with a "Bump" tool, which mainly performs to move the central areas away toward the edges of the brush, so that make the object larger easily. Now, you can follow the steps below to blow up only parts of an image with the help of Pixelmator Pro:
Step 1. Open Pixelmator Pro and import the image to the program.
Step 2. You need to go to Tools > Reshape to find the Bump tool.
Step 3. Customize the Brush Size and also Strength according to your demands.
Step 4. Now, move the brush to the object you want to blow up. Hold it and then drag the area, and you can successfully enlarge it without hassle.
Final Words
If you are still getting annoyed by the blurry outcomes while trying to blow up images for any purpose, iFoto Photo Enhancer can definitely be the best helper to overcome this obstacle and bring you perfect high-quality image outputs without sacrificing quality at all. Its advanced AI algorithms have ensured efficient and have been tested for thousands of practices to guarantee the best output condition. In addition, it is a 100% secure platform you can trust and use without worrying about data disclosure. iFoto Photo Enhancer is also free to get started! Now, navigate to the tool and blow up your images in a cost-free and quick way!
Read the full article
0 notes
Text
Magic Eraser Review
Aiming to provide a seamless background removal experience, this transformative tool streamlines workflows for photographers, graphic designers, and ecommerce businesses. It combines advanced AI algorithms with a user-friendly interface to deliver exceptional results in seconds.
Previously exclusive to Pixel owners and Google One subscribers, Magic Eraser and Photo Unblur are now available for all Photos users. Get picture-perfect memories by erasing unwanted objects and watermarks from your photos.
User-friendly interface
Magic Eraser is an AI-powered software that allows users to remove unwanted elements from multiple pictures at once. The software is easy to use and offers a variety of features that make it ideal for both amateur and professional photographers. The app is available for download in the app store and can also be accessed through the web. It is also a popular choice among businesses that need to create visually appealing content for marketing and advertising.
The photo editor is free to use and offers high-quality results. Its advanced algorithms help ensure that the edited images maintain image quality, removing any pixelation or loss of detail. It is also compatible with most image formats and is perfect for enhancing both professional and personal photos.
Auto-detects and removes unwanted objects
Whether it’s a photobomber or power lines in the background, removing unwanted objects is essential for creating polished images. This AI-powered tool can automatically remove unwanted elements, including people, watermarks, signatures, text, emojis, sketches, and more. It also helps reduce image noise, resulting in clearer and more focused photos.
The ai magic eraser software’s first step is to analyze and improve the image’s quality, which prepares it for precise object detection. It then locates the primary subject and isolates it from its surroundings. Once the object is isolated, it’s removed from the picture, and the surrounding pixels are blended for a natural-looking result.
The ai magic eraser can help photographers, graphic designers, and e-commerce businesses create visually appealing content. It also streamlines the editing process, allowing users to focus on their creative vision and boost productivity.
High-resolution downloads
Whether you’re an e-commerce professional, a photography enthusiast, or just looking to spruce up your profile photos, Magic Eraser is the ultimate background removal solution. With advanced AI technology, this tool eliminates distracting backgrounds with precision and ease, enabling you to create beautifully polished images that highlight your subject.
Magic eraser online free can also be used to remove watermarks, text, and other unwanted objects from an image. Simply upload your photo and paint over the object you wish to remove, and the software will automatically erase it for you.
The online tool supports JPEG and PNG formats, allowing you to edit multiple pictures at once. You can even enlarge images without losing quality, making it perfect for creating visually appealing content. Magic eraser also allows you to remove background from photo with text, which is useful for creating compelling product photos and engaging social media posts.
Easy to use
Easily remove unwanted objects, people, text, watermarks, and blemishes from your photos with Magic Eraser. Our photo editing app uses cutting-edge AI technology to erase distracting elements from images and leave them looking crisp and natural. It also offers a drag-and-drop interface and allows for bulk editing. It’s free for basic use and does not require signup.
Using advanced AI algorithms, the Magic Eraser ai tool revolutionizes the background removal process for digital images. Whether you’re a photographer, graphic designer, or ecommerce business, the Magic Eraser is a must-have for any image editing workflow. Its powerful features and easy-to-use interface make it a versatile option for users of all skill levels. Its high-accuracy and speed deliver transformative results. It also offers a streamlined workflow that saves time and effort.
Free trial period
Magic Eraser is the ultimate image cleanup tool, allowing users to effortlessly erase unwanted objects from pictures. This includes text, pesky watermarks, and distracting blemishes that take away from the image’s quality.
The app offers a free trial period and a reasonable monthly price for users who wish to use it more regularly. A subscription plan also gives access to features such as high-resolution downloads and bulk editing.
Magic Eraser AI is revolutionizing the photo editing world by streamlining workflows for photographers, graphic designers, and e-commerce businesses. With cutting-edge AI algorithms, the software eliminates tedious background removal tasks and delivers superior results. This allows users to focus on the creative process, maximizing productivity and the overall quality of their work. This is a must-have photo editor for any professional.
0 notes
Text
WEEK 8: AUGMENTED REALITY FILTERS
As this week’s topic is "augmented reality filters," this post will focus on discussing the reasons why people use AR filters. Although people use filters because of filters' benefits, they also need to keep in mind that filters also have their disadvantages, and these disadvantages are also discussed in the post. However, it is necessary to understand the definition of AR beauty filters before analyzing the pros and cons of them. Regarding Isakowitsch (2023), AR beauty filters can be understood as automated tools for editing photos using AI and computer vision in order to detect the features of a face and modify them. Hence, in general, people use AR beauty filters to edit photos. Nevertheless, editing photos is not the only reason why people use AR beauty filters. People choose to use AR beauty filters because of these benefits:
BENEFITS
The first benefit of filters, according to Baker (2020, p. 208), is that filters can be used as alternatives for makeup. People can apply “appearance” and “makeup” filters to reinstate their makeup look as well as polish their appearance after a long day (Baker, 2020, p. 208) (Figure 1). The second advantage of filters is that they offer users more power and control over their own image and appearance when they can change their appearance themselves without relying on cosmetic surgery (Coy-Dibley, 2016, p. 6). For instance, filters can change people’s face shape, adjust their skin, raise their cheekbones, and so forth (Isakowitsch, 2023).

Figure 1: Filter reinstates people's polish appearance
DRAWBACKS
Despite offering many advantages, filters also have disadvantages, and these disadvantages negatively impact society. One of the greatest disadvantages of filters to society is that they create a “stereotypical form of beauty” (Baker, 2020, p. 209). Filters create a “stereotypical form of beauty” because most of the filters are created with a function, which is to “thin out the face, slim and shorten the nose, enlarge the eyes, plump the lips, and smooth the skin” (Baker, 2020, p. 209). Furthermore, this “stereotypical form of beauty” is created due to the limitations of the apps themselves, when the apps create filters that only illustrate some of certain types of aesthetics, which the aesthetics follow current trends (Coy-Dibley, 2016, p. 5). As a result, “stereotypical form of beauty” can lead to fears, dysmorphic disorders, and body dissatisfaction among people in society. The first reason is that social comparison is individuals’ desire because they want to know more about themselves (Crusius et al., 2022). More specifically, individuals have a desire to evaluate themselves objectively through comparing themselves with others; additionally, individuals compare themselves with media images as well (Grogan, 2008, p. 118, as cited in Coy-Dibley, 2016, p. 5). Thus, when there are many “negative” dissimilarities, either between individuals and others or between individuals and media/ideal images, they will be dissatisfied with their current body image (Coy-Dibley, 2016, p. 3). Moreover, the second reason is that conforming to the ideal beauty standard of social media causes pressure on individuals, and individuals also have more anxiety and uncomfortable feelings about their current body image (Verrastro et al., 2020, p. 31), which lead to dysmorphic disorder and lower the quality of life of people in society.
In conclusion, AR filters offer both advantages and disadvantages for users and the society. On the one hand, filters provide convenient and creative tools for makeup application, self-expression, and altering one's appearance. On the other hand, the constant exposure to unrealistic beauty standards promoted by these filters can potentially leading to social comparison and body dysmorphia.
REFERENCES
Barker, J. (2020). Making-up on mobile: The pretty filters and ugly implications of Snapchat. Fashion, Style & Popular Culture, 7(2), 207–221. https://doi.org/10.1386/fspc_00015_1
Coy-Dibley, I. (2016). “Digitized Dysmorphia” of the female body: the re/disfigurement of the image. Palgrave Communications, 2(1), 1–9. https://doi.org/10.1057/palcomms.2016.40
Crusius, J., Corcoran, K., & Mussweiler, T. (2022). Social Comparison: Theory, Research, and Applications. In D. Chadee (Ed.), Theories in Social Psychology. WIley. https://doi.org/10.1002/9781394266616.ch7
Isakowitsch, C. (2023). How Augmented Reality Beauty Filters Can Affect Self-perception. Irish Conference on Artificial Intelligence and Cognitive Science, 239–250. https://doi.org/10.1007/978-3-031-26438-2_19
Verrastro, V., Fontanesi, L., Liga, F., Cuzzocrea, F., & Gugliandolo, M. C. (2020). Fear the Instagram: beauty stereotypes, body image and Instagram use in a sample of male and female adolescents. Qwerty, 15(1), 31–49. https://doi.org/10.30557/qw000021
#filters#cosmetic surgery#social comparison#swinburne#mda20009#week 8#ar filters#beauty filters#makeup#beauty enhancements#ideal beauty#stereotypical form of beauty
0 notes
Text
Web design trends 2024
It's easy to picture a world where websites aren't just static pages but actual living things that answer to our every command and wish. Imagine using a virtual reality interface or talking to chatbots that are driven by AI and are built into every website you visit.
When picturing the web design trends that will shape our online lives in 2024, the only thing that stops us is our imagination. As we look into the exciting future of web design in the coming years, prepare for a visual journey you've never seen before.

1. UX-Focused design
Today, many websites pay attention to UX, or user experience, which is good. This top web design trend will grow as designers try to give users more engaging experiences. User-centered design includes many parts of websites.
The trip is focused on the visitors, even though the end goal includes getting more leads, traffic, and sales. The website's interactions and touchpoints were carefully thought out with the user in mind.
The navigation bar, the hero picture or headline, the animations or videos, and the text are all set up to grab people's attention as soon as they land on the site. Every piece of information should be easy to understand and quickly show what a business can do for potential customers and what value it brings.
Companies can quickly figure out what their customers want and need, and they can also make unique events for each customer. Many websites now use AI-driven platforms to make navigation easier and give instant answers or suggestions. UX may become an even bigger part of web design trends.
It's easy to picture a world where websites aren't just static pages but actual living things that answer to our every command and wish. Imagine using a virtual reality interface or talking to chatbots that are driven by AI and are built into every website you visit.
When picturing the web design trends that will shape our online lives in 2024, the only thing that stops us is our imagination. As we look into the exciting future of web design in the coming years, prepare for a visual journey you've never seen before.
2. Kinetic or Dynamic Typography
Kinetic typography, also called "moving typography," is a new style in web design that uses moving text to grab people's attention right away. A lot of designers and brands are embracing this style.
You can use the kinetic font as the main focus of your website or leave it on the home page and use it as is. You can keep people interested in your website without adding a lot of extra forms or images by using moving text for headlines and subheadings. It also doesn't slow down the page and looks good on phones.
This web design movement will likely have a big effect in the future. Adding kinetic typography to websites for digital marketing services, portfolios, companies, and SaaS platforms can make them stand out more.
3. Large or Oversized Text
Consider utilizing a large or expanded font in every section to create a simple website that provides crucial information rapidly. Strong, thick headers can effectively showcase services, best-selling products, contact details, and the main headline above the fold.
Using plain text in sans-serif font styles could make your website look more visually appealing. By keeping layouts straightforward and eschewing the necessity for massive pictures on websites, using huge and enlarged text helps you express more with less while improving website responsiveness.
This type of web design is perfect for SaaS websites, agencies, and service-oriented businesses. Utilizing large or expansive text draws attention to the USP (unique selling point) and emphasizes how a product is addressed.
4. Handmade Illustrations
We expect to see more of this new web design style in the future. Website illustrations became famous because of Mailchimp but were seen infrequently in recent years. But things have changed a lot since then. I have seen a number of websites with hand-drawn pictures that grab people's attention and make them want to read the whole thing.
You can use these images to tell stories, show how a business solves real customer problems, or effectively promote different services. Handmade solutions don't need to be complicated; simple ones can still convey the message.
Adding pictures to any website can make the user experience more memorable. Handmade drawings are expected to become very popular in 2024 because they can be used in many ways. They can go with many different themes, layouts, and features, and they're also a big part of ensuring that businesses always use good web design practices.
5. Motion Effects on The Home Page
Motion effects on home pages are a new trend in web design that is already making a lot of noise in the field. This style has become very popular among designers because it can be used to create immersive experiences for visitors. It will be one of the top ten trends in 2024, and we can expect it to become more common.
Different kinds of motion effects can be added to the home page for more engagement. Scroll-driven graphics show users how to get to different parts of the page and draw attention to what the company or service has to offer. Hover animation, loading animation, accent animation, and moving parts are other ways to add motion effects.
Visitors can easily be interested in showing off past work in a portfolio or telling inspiring visual stories.
It's very important to ensure that adding these moving features to a website doesn't slow it down or make it look not good on mobile devices. Too strong effects should be avoided because they could be too much to look at or confuse users.
Websites that offer design services and SaaS goods can get ideas from this trend. Adding animations to homepages makes platforms more appealing and encourages visitors to connect with these sites more while browsing.
6. Interactive Storytelling
In order to use storytelling well in web design in 2024, artists will have to get good at what they do. This trend is already prevalent, and you can use it to give your brand a unique voice and personality in a digital world that is very competitive.
How can storytelling stay a new trend in web design when it has been popular in the design world for a long time? Coming up with new ideas is the key. You can significantly affect the audience and get them to stay interested in the material for a long time by adding interactivity to stories.
Getting good at participatory storytelling might take a lot of work. It's all about adding things that make it easy for guests to move from one point to another without stopping the flow of information.
Websites can give users a great experience by adding games, movies, and 3D graphics that draw them in. Also, this method works for more than just big productions; it works well with two or three visuals and easy animations or dynamic text. This web design trend benefits e-commerce sites that want to keep people interested.
7. Vibrant Gradients
Gradients were used again in Instagram's logo, which started a new style in the industry. Designers and brands learned from how people responded to the app's icon that gradients could make websites, images, and logos look better. It's important to talk about this when talking about web design trends.
Adding black and white gradient accents can make a big difference, whether starting from scratch or changing a current website. You could also use bright colors for CTAs to get people's attention. For a stronger color palette, you might use gradients in background images or whole areas and white space to break up the layout.
Gradients can also improve SaaS and e-commerce sites by drawing attention to important messages that make people want to take action while pushing them to keep scrolling.
8. Glassmorphism for The Hero Section
The hero picture, which takes up the whole space above the screen, is usually the first thing people notice when they visit the website. Another new trend that can help this stand out and appeal to your audience is "glassmorphism."
Glassmorphism is a style of design that uses transparency to make something look like glass, giving it a unique look. It's becoming increasingly famous, and 2024 is expected to be the year it takes over. By using glassmorphism in the hero area, you can get people to pay attention to your message or product.
If someone sees an image or shape in this way that they like, they might want to learn more about the business or brand by scrolling down. Even though it seems complicated, professionals can save time and effort by using glassmorphism in their designs. It also fits in with minimalistic ideas and works well on websites for many different businesses.
9. Parallax Scrolling
Parallax scrolling is an old technique that keeps making waves yearly by bringing in new and interesting ways that keep users interested and give designers ideas for effectively communicating brand messages.
It became famous last year for multiplanar sliding to appear. People who scrolled down saw material that moved along both the x- and z-axes. Some websites even had content that moved backward along the z-axis or had cool zoom effects.
This change shows how vital parallax scrolling is becoming for artists to express their creativity. It also has many other benefits, such as blending in smoothly with different animations, being a key part of current storytelling trends, and giving even the most boring website designs a new look.
Without question, parallax scrolling will still be popular this year. In line with current trends, you can expect more visually beautiful scroll-driven experiences with cutting-edge technology, motion effects, and interactive elements. On the other hand, people who like simplicity can find ways to show beauty by using nontraditional axis movements and avoiding too many visual elements.
When adding parallax scrolling to websites, it's important to remember that too many of these effects can make some users feel uncomfortable. This makes it even more important to balance creativity and functionality and ensure the best user experience is maintained without hurting marketing tactics for readability.
When focused on mobile devices, another thing to think about is that long scrolling sessions may test users' patience, and keeping them interested may mean making some sacrifices. For instance, you could use image-scroll animations or dynamic effects to show key messages carefully.
Conclusion
Web design trends for 2024 that strongly emphasize immersive experiences, user personalization, and sustainability are likely to change the digital world. As long as creators keep trying new things and pushing the limits, websites in 2024 will be more fun and beautiful to look at than ever. You should follow these trends if you want to stay ahead of the curve and give users more meaningful digital encounters.

Janet Watson
MyResellerHome
MyResellerhome.com
We offer experienced web hosting services that are customized to your specific requirements.
Facebook Twitter YouTube Instagram
0 notes
Text
W1D1 fundies: 1 (software/pūmanawa)
We started to learn more about the differences in-between vector and raster. Vector is drawn lines that form a illustration (usually on PS), these type of illustrations don't lose quality if you zoom in. Raster are pixelated illustrations (usually on Ai) and if you zoom in loses its clean lines and is obviously pixelated, so it is not the best way of making a logo or illustration for a large image. Raster is better suited for images with lots of colours that aren't going to be enlarged (better suited for photos).

We then set up our tumblr accounts, which we will be using to post what we learn every class.
folder stytem:
Hannah Hemi:
project name:
PRJ= project files
IMG= image files (image files: photos, sketches, reference pics etc.)
DOC= documents (any format: cleint brief. vcleint feeback, docment data files, asset lists etc.)
OUT= output folder (pdfs for projects drafts and final pdf go in this folder)
command N for folders = new finder window
save first file in project file with 00 before hand (in renaming), then next one can be 01 and it will make ur files be in chronological order.
illustrator commands
z = zoom (or command+) (drag right or left on z to zoom in or out)
space = pan
/ = clear fill/stroke (stroke is the border, fill is the inside)
x = toggle (swap) fill/stroke
p = pen (get out of pen without closin shape is COMMAND click)
v = selection tool (full arrow = full shape - select all)
A = direct selection tool (hollow arrow = one part - a peice of the shape) (or hold command click)
move, rotate and scale are known as transform
using skills learnt in session:

the illustrator version.
for the first shape i just used pen tool and tried to make sure all the lines stayed all in a line and that the triangle were symmetrical to each other. since the shape wasn't a closed shape i used A tool to click out of using pen tool.
for he diamond i tire to use the guides illustrator has when using the pen tool to make it symmetrical.
for the third shape i drew the shape without the gap first and then used a tool to add anchors in the path allowed me to remove part of the line.
for the fourth shape i used pen tool (P) and then shift to make sure my lines stayed straight and then i tried to make the spacing accurate to the drawings we were given.
for the fifth shape i drew a symmetrical triangle and again used A to make anchors so i could remove part of the path and then i drew the inside spiral part of the triangle, trying to stay symmetrical to the outer triangle shape.
the last shape i created one line with the pen tool and then copied the line so all the lines wee the same length and then i used object - transform - rotate and rotated the lines so they were all on the right angle.
It was fun to try make the shapes and pretty easy to do with all the tools we learnt today
1 note
·
View note
Text
0 notes
Last Seen Blogs
mtsts
浪漫

thereal951237
The Devil of FA
webshootersandwingdings
With Great “Paw”er...

silcell
love that white boy

napkins22
2020