quinlinkin
QBERTOSAURUS REX
HEYO, call me Q! ( 30 / indigenous canadian / he/she/they ) 🩷💜💙🩷🤍💜🖤💙icon by marsoid!
970 posts
Last active 2 hours ago
Don't wanna be here? Send us removal request.
Last Seen Blogs
strictly-na-mx5
Strictly NA MX-5 Roadsters
twinanimatronics
Twin Animatronics Fanfic

moemoeliscious1
Kawaii - MiniGirls

florinalirlandaise
FéeréliaPortails des mondes
abyssalechoes
screaming into the void
Text
youtube
21 notes
·
View notes
Text


NANCY WHEELER IN EVERY EPISODE: SEASON ONE, EPISODE ONE: THE VANISHING OF WILL BYERS 「1/7」
#stranger things#nancy#( SHEEEEEE I LOVE HER#nancy deserves so much more love and appreciation gdi#she's SUCH a good character )
5 notes
·
View notes
Text


proof in which nancy and mike have karen's whole face
#stranger things#nancy#mike#karen#( gotta hand it to netflix in that they always do some SUPERB casting like??#tell me they don't look like a legit family bc they dooooo#they both take after their mama so much and i love that for them!! )
11 notes
·
View notes
Text

you and me.
#firstprince#rwrb#red white and royal blue#rwrb movie#rwrb fanart#henry fox#prince henry#prince henry of wales#henry george edward james hanover stuart fox#henry george edward james fox mountchristen windsor#alex claremont diaz#acd#agcd#Q's art
379 notes
·
View notes
Text
youtube
17 notes
·
View notes


Text
hi everyone! I've gotten several requests to make a tutorial on how to make gifs for someone just starting out and I finally got around to slapping a tutorial together.
This tutorial will cover:
software recommendations
choosing what to gif
creating a gif step by step with probably a lot of unnecessary detail
some tips and tricks:)
(This particular tutorial will not cover how to find tv and movies to download and gif, or any specific instructions on coloring. only the basic gif making process.)
so for the purposes of this tutorial, we will be using Adobe Photoshop, which is the most common program for making gifs, and the one I recommend. the version you have doesn't make a major difference in terms of capabilities but the interface may be slightly different looking if you have an older version or a different type of device. you cannot make or edit gifs in any mobile version of the photoshop application.
Optionally, we will also be using Adobe Premiere Rush/Pro or another video editing software of your choice. wherever you are downloading Photoshop, whether from Adobe or a third party, you should easily be able to acquire Premiere as well.
I am aiming to be as detailed as possible in this tutorial, so it may sound more time consuming than it really is. once you get the hang of things, it goes fast. the most time consuming part by far is the editing and coloring.
in my opinion, one thing that majorly saves time while giffing is knowing your keyboard shortcuts and using your mouse/trackpad as little as possible. I will be going over these in this tutorial as well.
before we begin, some general tips:
gifs of single shots that do not cut between angles or subjects generally will look the best, barring exceptions
for a single gif set, choosing scenes and shots with similar lighting will be easiest to get to look uniform when compiled together, since editing wildly different looking scenes to have similar coloring and lighting is hard and takes some practice!
avoid shots that will require you to majorly crop or zoom to properly frame the subject, as this will greatly diminish quality
speaking of quality, gifs will look best using 1080p video, but you can get away with 720p as well. I would not recommend giffing with anything lower resolution than that
Tumblr's upload capacity for image and gif files is 10mb. be sure when exporting your finished gif that it is under that size. if it is a bit over, you can try trimming a few frames off your gif in the video timeline.
if you get frustrated, don't give up! giffing is hard and complicated especially if you are new to photoshop. I tried to make this tutorial as detailed as possible so it's easy to understand (although im sure I still forgot some stuff)
ok onto the tutorial!!!
STEP ONE: choose what range of frames you want to gif, and how.
once you have decided what you want to gif, there are two main way to convert your episode into a range of frames to make into a gif. the first is by screencapping. this involves downloading a program like mplayer or vlc which can be used to convert video files into "stacks" of screencaps, which can then be separated into whatever range of frames you want and imported into photoshop. this is seemingly by far the most common method I have seen amongst gifmakers*, but personally I don't care for it and I think it's more confusing and time consuming overall, so I will be explaining the second method: importing video frames to layers.
now, normally what this would mean is opening the full episode in photoshop and using the pathetic little playheads on either end of the scrub bar to trim the file into a clip. this is where your video editing software comes into play.
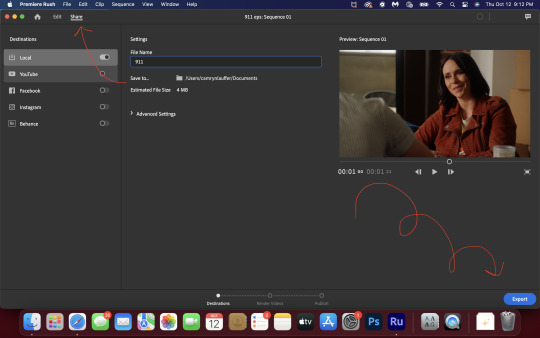
open whatever episode or movie you want to gif in your program. if it is a large file like a long movie in 1080p, this may take a few seconds. like I said, I am using Premiere Rush. I will be using a random episode of 9-1-1 for my example gif.
in your media browser, hover over whichever episode you want (you can also just add the whole episode to your project and scrub through, but that can take longer unless you know what time stamp you're after). click the fullscreen button by the bottom righthand corner.
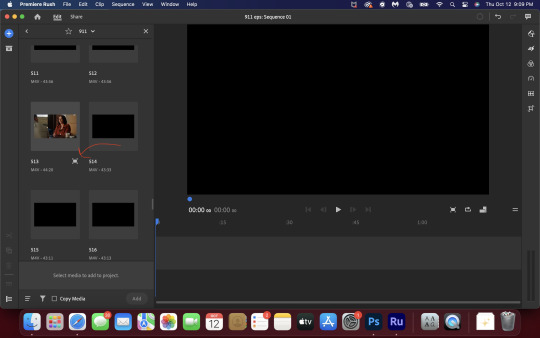
now you can scrub through and trim the episode before you even import it to premiere. this makes trimming your clip even easier.
use the trim bar (yellow outlines) to trim as close as you can around the scene you want to gif.
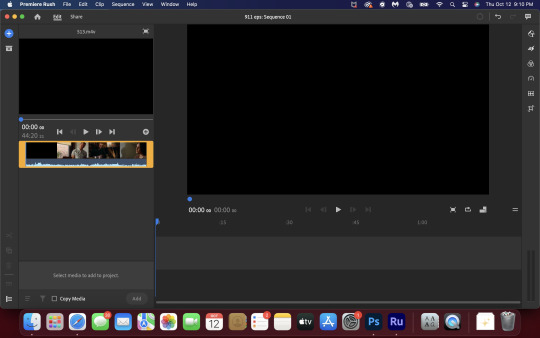
then click this plus, and then "add" below. this will add the clip to your project.
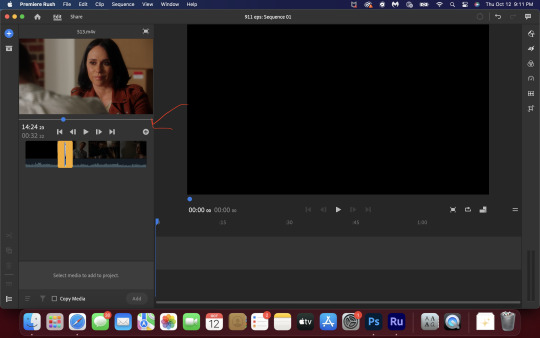
now, move the blue playhead up to the frame you want your gif to start on. then, use the scissors button off to the left to slice the clip. select the portion before the playhead, and delete it.
now move the playhead to where you want the gif to stop. a good length for most gifs is around 1.5-2 seconds in my opinion. some may be shorter depending on how long the shot is, or longer if you plan on making them smaller (remember, the uploading capacity on Tumblr is 10mb per file.) trim again, now delete the portion after the playhead. you can also use the left and right arrows beside the play button to move frame by frame, and you can adjust the side of the horizontal scroll bar below your clip to “zoom” in on it and make scrubbing easier.
once you have your clip, go up to where it says "share". your clip will be rendered, and then you can click export to save it.
repeat step one as many times as you want for each gif. I know this may sound complicated, but like I said above once you get in the rhythm this step takes only a few seconds.
STEP TWO: create your gif!
close premiere. open photoshop. head to the control bar at the top. select file > import > import video frames to layers.
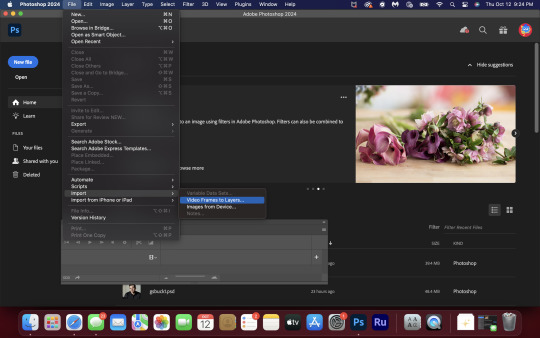
navigate to whatever folder you exported your clip to. select it, and hit enter. a second popup will appear asking you to select your range of frames. since you have already trimmed your clip to your liking, simply hit enter a second time.
now your screen looks like this, and we are going to crop and resize our gif! (troubleshooting: if you do not see the timeline bar at the bottom, select window from the control bar, scroll down, and make sure timeline is selected as part of your workspace. Adjustments and layers should be there automatically but if not add them too).

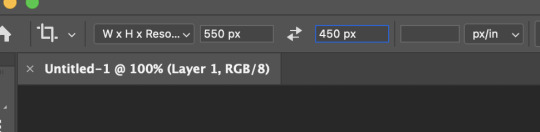
Tumblr posts are 540px wide, so in order to make my gifs as small as possible while maintaining quality, I typically crop my gifs to be around 550-600px wide, with varying heights depending on what shape I want the gif to be. experiment with this a little and decide what works for you. just don't make the width lower than 540px. once you have the portion of the frame you want inside the cropping grid, hit enter again. sometimes you have to hit it twice.
here are the measurements I am using for this gif
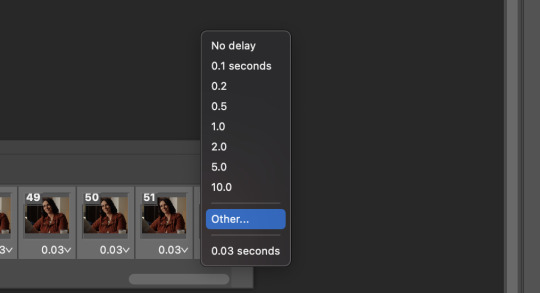
now in your timeline, select frame 1. hold down the shift key and scroll to the end to select the very last frame, thereby highlighting them all. from here we will edit our frame delay rate. photoshop will automatically set it to .03s, which will make your finished gif awkwardly fast. I typically use .05s, or .06s if I want a gif to be subtly slower (this comes in handy if the shot you are trying to gif is very short). anything longer than .06s will look weird though. choose "other" from this menu and type in your delay rate. make sure not to miss the zero after the decimal.
once you've set your frame rate, go to the other end of your timeline and click here to convert your frames into a video timeline.

then press option + command + A (on Mac) or windows + alt + A (on PC) to select all layers. then right click (control + click with a trackpad) on any one of the highlighted layers in your layers tab off to the right. scroll down in the popup menu and select Convert to Smart Object.
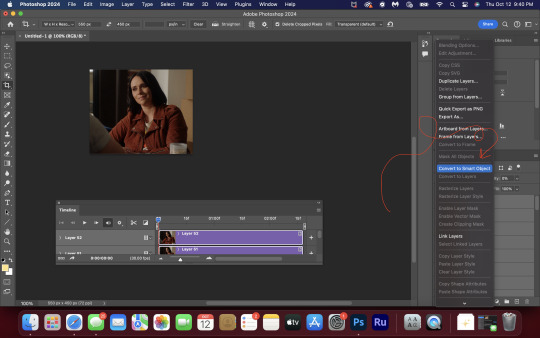
THAT'S IT!! CONGRATULATIONS!!!!! WE HAVE GIF!!!
from here comes the fun part!! you will begin adding action filters like sharpening as well as adjustment layers to color and edit your gif. experiment with different adjustments and styles until you find something you like. too many adjustment layers will up the size of the finished gif though, so I tend to keep mine to 3-4 layers max unless its a really hard to color scene. if anyone is interested in a separate coloring tutorial, please let me know!
once you are finished editing your gif, click file > export > save for web (legacy) OR hit shift + option + command + S. play your gif in the export window to make sure it looks okay, and then hit save!
I hope you guys find this helpful and informative. if you use this tutorial! please hit up my in box if you have any questions or if anything doesn't make sense. happy giffing!!!
*one reason people seem to prefer screencapping to this method, is saving all the individual clips as video files does take up a lot of space on your scratch drive, which in turn can cause your computer to work slowly or crash programs. this can be rectified by making sure to delete the clips from your computer once you are done making the gifs. another space hoarder to look out for is the proxy files of your episodes that will be automatically saved to your hard drive whenever you add an episode to your project in Premiere. Periodically, go through your storage and delete all the .proxy video files. this will not delete the original episode files, only the proxy files created by Premiere.
tagging some mutuals to sb hehe: @shitouttabuck @lover-of-mine @honestlydarkprincess @eddiediaaz @compactdiscmp3 @eddiebabygirldiaz @bigfootsmom @callaplums @athenagranted @firemedicdiaz @sibylsleaves @loserdiaz @buck2eddie @diazass @eddiediaztho @giddyupbuck @monsterrae1 @icecreampotluck @sunflowerdiaiz @swiftfootedachilles @singlethread @aziraaphales @911onabc
117 notes
·
View notes
Text
I got a laptop with Windows 11 for an IT course so I can get certified, and doing the first time device set-up for it made me want to commit unspeakable violence
Windows 11 should not exist, no one should use it for any reason, it puts ads in the file explorer and has made it so file searches are also web searches and this cannot be turned off except through registry editing. Whoever is responsible for those decisions should be killed, full stop.
Switch to linux, it's free and it's good.
109K notes
·
View notes
Text
(source)
Unsplash - photography, illustration, & art
Pixabay - same as unsplash
Pexels - stock photos and videos
Getty Images - photography & illustration
Veceezy - vectors and clipart
Gumroad - photoshop brushes (and more)
StockSnap.io - stock photos
Canva - needs login but has lots of templates
Library of Congress - historical posters and photos
NASA - you guessed it
Creative Commons - all kinds of stuff, homie
Even Adobe has some free images
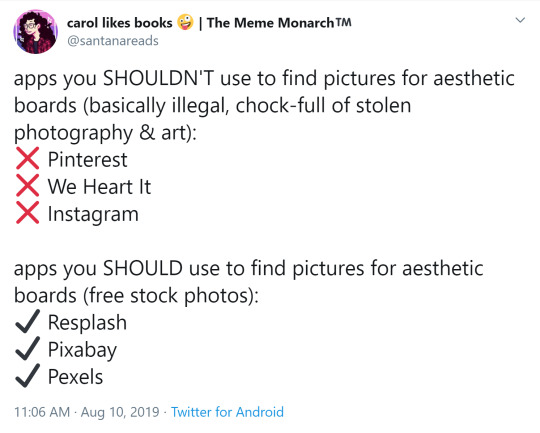
There are so many ways to make moodboards, bookcovers, and icons without plagiarizing! As artists, authors, and other creatives, we need to be especially careful not to use someone else’s work and pass it off as our own.
Please add on if you know any more resources for free images <3
376K notes
·
View notes
Text
rwrb bonus henry pov chapter!

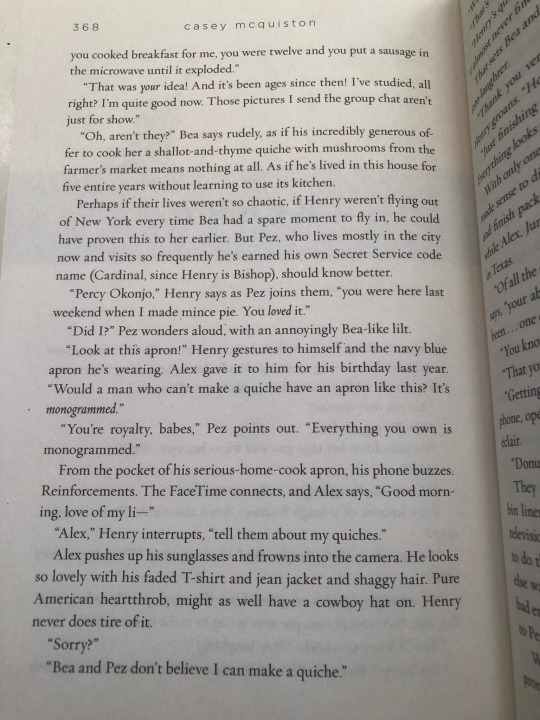
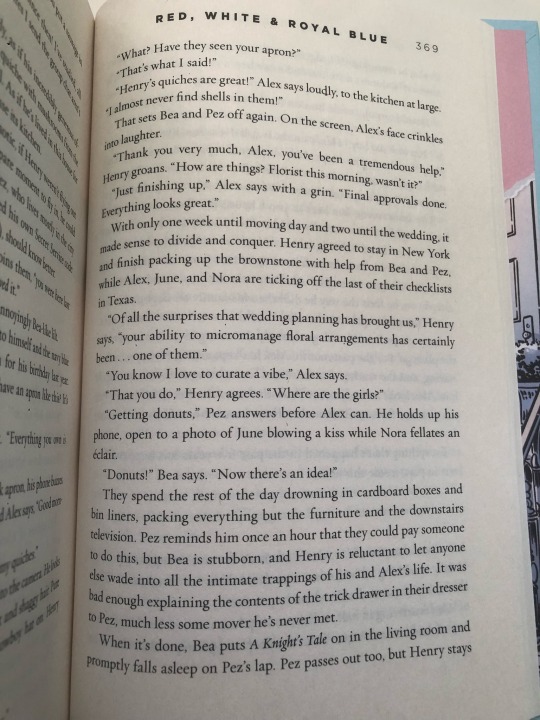
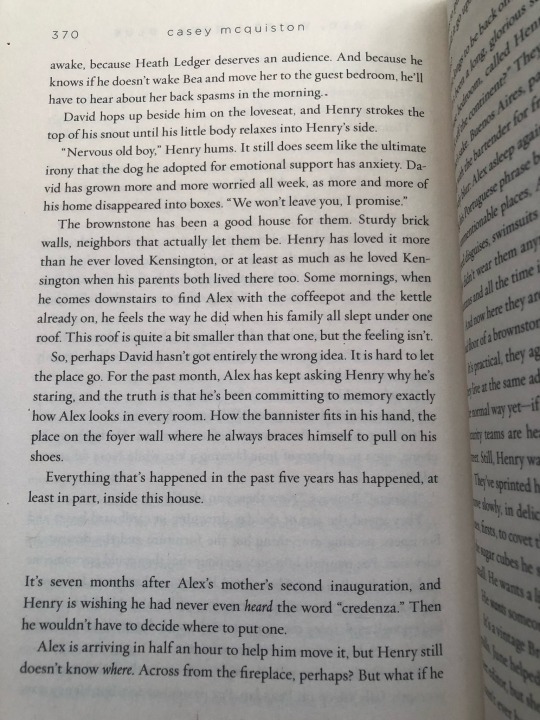
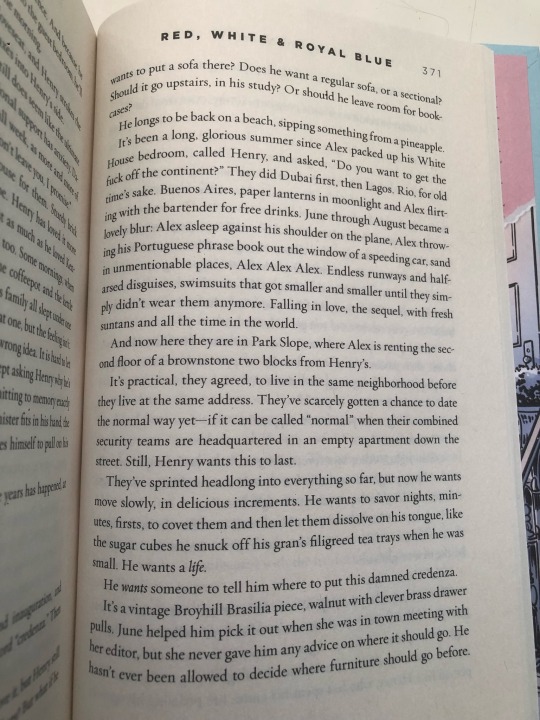
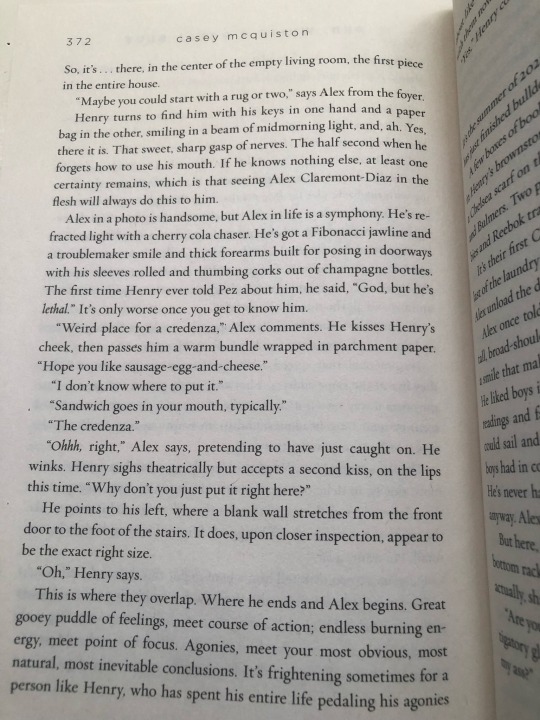
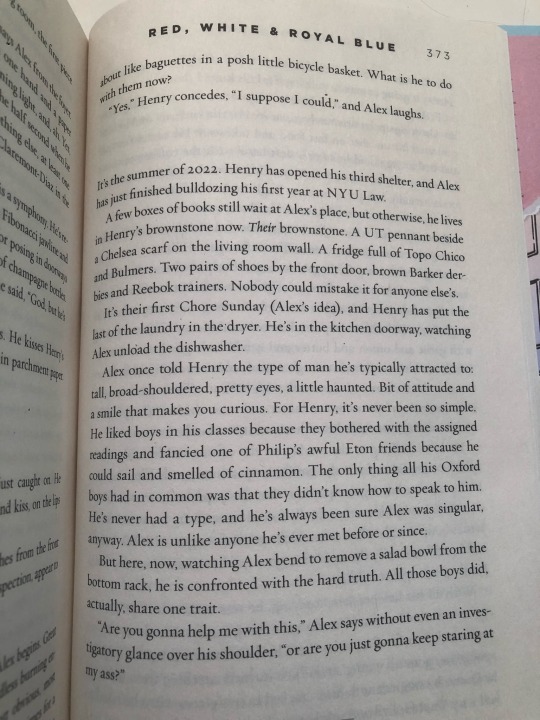


go feral babes <3
part 2
part 3
5K notes
·
View notes
Text


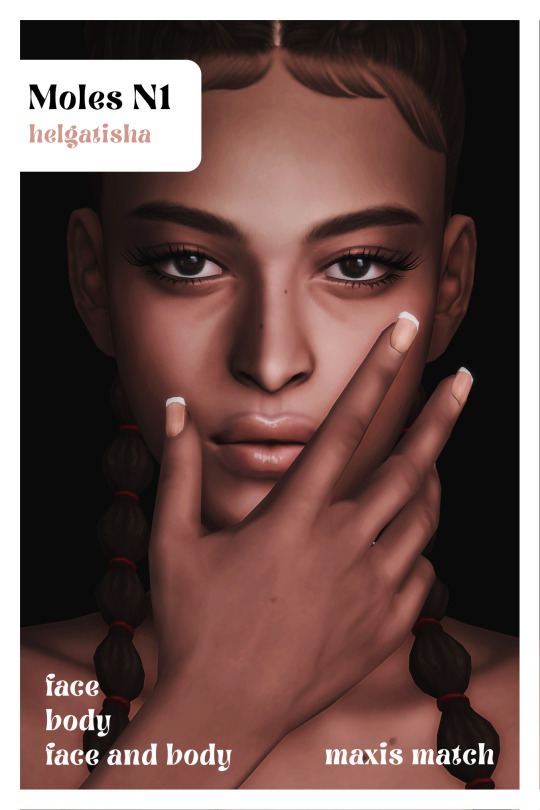


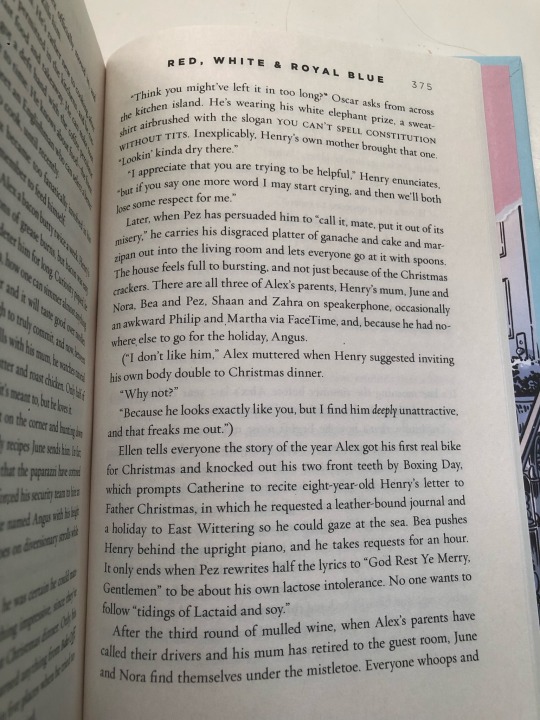
Moles N1
Download: boosty | patreon | simfileshare
base game
all genders
elder, adult, young adult, teen
maxis match
info face:
only face
mole face
10 variants, 10 single mole
info body:
only body
mole upper back
5 variants
info face and body:
full version
mole upper chest
5 variants
please read and respect my tou
DONATE ❤
7K notes
·
View notes
Text
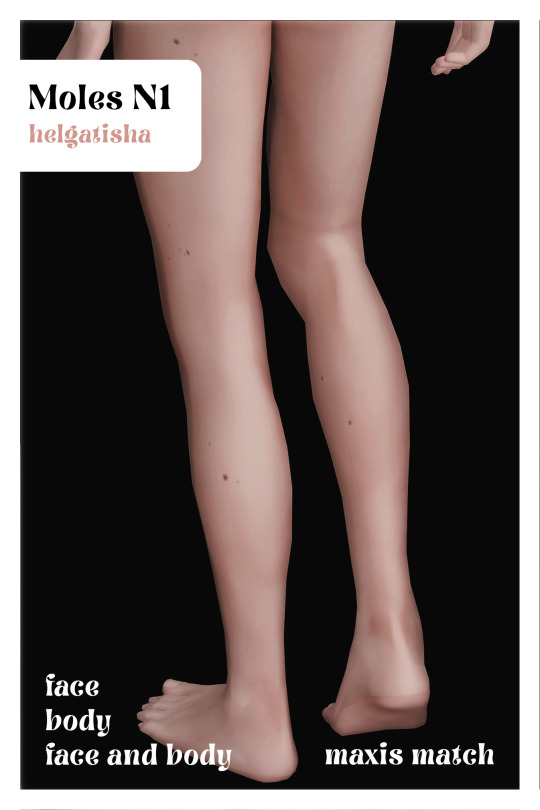
— RED, WHITE AND ROYAL BLUE.
Part One, 394 Screencaps.
Part Two, 394 Screencaps.
Part Three, 395 Screencaps.
All in GALLERY. Like or reblog if it was useful, every interaction shows us that we should keep making screencaps for y'all ♡
259 notes
·
View notes
Text

was chatting with my bff @rubysrevenge about how much of a shame it was that alex didn’t wear his glasses in the movie adaptation and idk have this very mediocre edit lmao
38 notes
·
View notes
Note
i wanted to ask was, how do u make ur gifsets (like in what programs, etc)? and, what do u rec to upcoming gif makers like myself to figure out how to make gifs? plzzz n ty btw but i understand if u dont wanna answer my questions bcuz ik google is there. its just u seem nice lollll !!
hi!! absolutely no worries, i don't mind answering questions <33 below i've linked some programs/tutorials that i personally think are useful and have helped me a lot, especially when i was first starting out.
programs
the first program i reccommend is 4k video downloader. this is what i use to download the videos i want to gif. while there are other methods you can use, like using your laptop to screen record specific clips, or screen capping (which is when you use a sequence of images to make gifs rather than clips of videos - i'm not super knowledgeable on this), but this is the method i prefer the most.
this next program is optional, but if you want high quality gifs, i highly recommend installing vapoursynth. vapoursynth allows you to clip specific timestamps from videos, resize them to fit tumblr's dimensions, and sharpen them. it can be complicated to use at first, but i promise it's easy once you're used to it!! again, this program is optional because you can technically do all of this in the programs listed below, but i use it because it helps with the quality of my own gifs. here's vapoursynth for windows, and vapoursynth for macos (and both of these links are complete with guides that walk you through the installation process).
adobe photoshop is the most common program gifmakers use to make gifs. you can do basically everything in it - clipping, resizing, sharpening, coloring, etc. but if you can't afford to pay for it (like me), you can pirate it :D this document has a list of links you can use to pirate photoshop. make sure to download the right one (windows vs macos) and follow all the directions listed so that it goes smoothly.
if you feel overwhelmed by photoshop and don't want to download a program that takes up so much space on your laptop, you can also try photopea!! i actually did use photopea at first when i started out making gifs. it's basically a web browser version of photoshop, and while it doesn't have all the features, it's still good enough for making gifs.
tutorials
there are so many different methods for making gifs, and if i went over them all, it would take forever lmao. so i'm just going to link some of my favorite tutorials, and you can look through them and decide what method is best for you. the ** indicates the tutorials that are the most similar to the methods i personally use.
gif tutorial by @jeonwonwoo (full gif tutorial; uses photoshop)
**basic gif tutorial by @shuaberriez (full gif tutorial; uses vapoursynth and photoshop)
**basic giffing guide by @wonwooridul (full gif tutorial; vapoursynth and photoshop, though the former is optional)
**giffing guide by @iive (full gif tutorial; uses vapoursynth and photoshop)
gif tutorial by @dqmeron (full gif tutorial; uses photoshop)
gif tutorial using photopea by @lacebird (full gif tutorial; uses photopea)
coloring/sharpening tutorial by @parkloves (coloring/sharpening only; uses photoshop)
how to color kpop stages by @jeonghan-yoons (coloring only; uses vapoursynth and photoshop, though the former is optional)
**sharpening settings from @football (sharpening only; uses photoshop)
sharpening settings from @jeonwonwoo (sharpening only; uses photoshop)
how to fix grainy gifs by @kangyeosaang (exporting gifs; uses photoshop)
masterlist of coloring resources from @asiandramasource
i hope this is helpful!! feel free to reach out if you have any questions regarding any of this information <33
33 notes
·
View notes
Text
funds for indigenous communities affected by the canada wildefires *updated*
grassy narrows first nations (ontario) needs funds for an escape route
odawa first nations (quebec-ontario) is raising funds for evacuees
algonquins of barriere (mitchikanibikok inik in alberta) lake mutual aid request
you can drop donations for the odawa first nations at 815 st laurent blvd in ottawa
you can drop off food donations for mitchikanibikok inik at the ramada plaza in gatineau; you can also email info/@/health.rapidlake.com with mutual aid donations. please note that the maniwaki native friendship center is now closed to donations
if you’re directly affected, the pueblo action alliance has developed a guide for DIY filtration for the smoke
updates (as of 6 june 2023):
donate funds for evacuees from little red river cree nation (via kahkakow)
k'atl'odeeche first nations needs funds to rebuild homes and businesses lost (via aelabee)
i’ll update this as i find more fundraising initiatives and please free to share your own. reblogs with anything than sharing resources/mutual aid requests/fundraising opportunities get blocked.
29K notes
·
View notes
Text


and i vow, carlos reyes, to take care and nurture your heart for the rest of my life as if it was my very own
#( idk if the tags are properly working for this post but!!#this is my new tarlos sideblog if anyone is interested in following!!#i’ll be posting my tarlos content over there from now on :) )
380 notes
·
View notes
Note
Heyyyyyy just wanted to say hi from a fellow indigenous (bodied system)! Your twdg stuff is still awesome!
HI! thank you so very much, you are too kind!! it's always great to hear from other indigenous peoples around the world, i'm glad to hear you enjoy my content :)
1 note
·
View note