
pajamaqueencooks
Pajama Queen Cooks
Fatigued Feminist finding Spoons for fine foods & occasional crafts
3 posts
Don't wanna be here? Send us removal request.
Last Seen Blogs

shots-crack-ft
shots crack (serial key) full version 8CVQ,

maccc24
Bez tytułu

jane-in-kakariko
Adventures in Kakariko

vampwrrrmistresslist
Look Upon My Works, Ye Mighty, and Shrug

raph-the-muscle
Raphael's Tumblr
Text
Some feminist food for thought to chew on while you cook! What innovative fantasy world feminism are you spotting out there?
I always find it kind of weird that matriarchal cultures in fiction are always “women fight and hunt, men stay home and care for the babies” because world-building-wise, it makes no sense
think about it. like, assuming that gender even works the same in this fantasy culture as it does in ours, with gender conflated with sex (because let’s be real, all of these stories assume that), men wouldn’t be the ones to make the babies, so why would they be the ones to care for the babies? why is fighting and hunting necessary for leadership?
writing a matriarchy this way is just lazy, because you’re just taking the patriarchy and just swapping the people in it, rather than actually swapping the culture. especially when there are so many other cool things you could explore. like, what if it’s not a swap of roles but of what society deems important?
maybe a matriarchy would have hunting and fighting be part of the man’s job, but undervalued. like taking the trash out or cleaning toilets: necessary, but gross, and not noble or interesting. maybe farming is now the most important thing, and is given a lot of spiritual and cultural weight.
how would law work? what crimes would exist, and what things would be considered too trivial to make illegal? who gets what property? why?
how would religion work? how would you mark time or the passage into adulthood? what would marriage look like? if bloodlines are through the mother, bastardy wouldn’t even be a concept - how does that work?
what qualities would be most important in a person? how would you define strength or leadership? what knowledge would be the most coveted and protected? what acts or roles are considered useless or degrading?
like, you can’t just take our current society and say you’re turning it on its head when you’re just regurgitating it wholesale. you have to really think about why things are the way they are and change that.
#food for thought#feminist#feminism#feminist fiction#creative writing#fantasy writing#gender roles#matriarchy#power structures#gendered heirarchy#gendered ideology
109K notes
·
View notes
Text
Aromatic Pastes

How often have you passed over a recipe because it called for a slice of ginger or a single sprig of thyme, and you just knew you wouldn’t be able to use up the rest of that tiny, expensive package of greens? Don’t feel bad—we’ve all done it. But I’m here to tell you those days are over. Meet your new best friend—the aromatic paste. No more wasted greens, no more sad, wilty basil in the drawer, and perhaps best of all, no more time and patience wasted mincing garlic into itsy-bitsy pieces.
When you're counting Spoons, being able to completely skip the mincing steps considerably speeds up a lot of recipes, while upping your flavor options, and the cost-efficiency of your ingredients at the same time. By the time I get home from work most days, the idea of peeling garlic, as small a task as it is, can seem exhausting, let alone dealing with other fresh herbs. With a collection of these pastes, whipping up top-notch food is within reach, even on an exhausted weeknight. Personally, I always stock a large mason jar of garlic paste, along with smaller jars of ginger and chive pastes, and then whatever might possess my passing whimsy. Mint in summer? Sure! Basil? Why not?
In general cooking terms, aromatics can encompass any mixture of fresh and dry spices, herbs, or other flavorings that, as the name indicates, add potent aroma and flavor to cooking. In this case, though, we’re only concerned with the fresh and, thus, perishable types. Think garlic, ginger, basil, chives (pictured above), rosemary, lemongrass, cilantro—the works. And, better still, if there’s a particular combination that you use constantly (say, ginger and garlic, if you cook a lot of Asian-style dishes), you can mix them together into a flavor-packed mixture, saving yourself one more step when it comes time to cook.
This is one of the simplest and most magical tricks in my arsenal, and it’s so basic that it’s barely a recipe. All you need is a medium-to-large batch of your chosen aromatic(s), an air-tight container (Mason jars are my go-to), a food processor/chopper/blender, and a smidge of oil and water. Citrus or citric acid are optional additions, if you like the taste, or are worried about your paste keeping. Generally speaking, the combination of refrigeration and oil is enough to keep a paste fresh for up to two weeks, but, if you’re worried, a dash of the citric acid in lemon juice will make your paste damn near invulnerable. If even the superpowers of citric acid don't reassure you, there are always herb cubes (and all kinds of other food-saving-savvy cubes)!!
Aromatic Pastes
Ingredients
1/2 cup or more aromatic(s) water neutral oil (such as canola, light olive, or sunflower) Lemon juice or citric acid (optional for preservation/citrus flavor)
Notes
If you plan to use garlic, save yourself some misery, and buy the pre-peeled cloves. Most upscale grocers and Asian markets will sell them this way at a very modest markup—at my local Asian market, I pay under $4.00 for a jar that probably holds over a cup of garlic cloves. If you deal with a lot of fatigue, the extra few bucks are more than worth the energy spent meticulously peeling multiple heads of garlic.
If you have a small food chopper or mini-food processor, or can borrow/buy one (they usually run only $25-$35), they are far-and-away the best tool for the job. You can use a full sized food processor or blender, but you may want to make a larger batch—the less full the processor bowl is, the more the machine will struggle to circulate and properly chop the ingredients. If you only have a larger machine, don't stress—make a double or triple batch: the extra can be frozen into herb cubes whose lifespan is nearly infinite.
Directions
If your aromatics don't come pre-peeled/washed, wash thoroughly. Pick out any bad pieces, trim roots or dried ends, and/or peel.
If you're working with an herb like rosemary with a tough, woody stem, remove herb leaves from the stem.. If you're using ginger, cut into slices or large chunks.
Set up food processor/chopper, and add aromatics. Be sure you have enough aromatics to fill the bowl to at least 2 inches, or the blades won't be able to work properly.
Run the processor on the highest setting, and wait. Depending on what aromatics you're using, it may take only a second or so, or a minute or two for things to get broken down. If you want to use it, add 1-2 tsp. of lemon juice (or equivalent citric acid) during this step.
If it's been a minute, and the paste isn't as fine as you'd like it to be (a matter of preference), add water, one teaspoon at a time, until you achieve the desired consistency.
Use your smallest spatula to scrape your paste into your container—be sure you have at least an inch to spare!
Add 2-4 tbsp. oil. You can stir the oil in if you'd rather, but if you do, be sure to add enough oil so that there is some covering the top layer.
Voila! You have a supply of fresh aromatics ready to put to use at a moment's notice!
Most aromatics and herbs last at least 1-2 weeks, but you should be sure to check for mold or mildew each time you open the jar, just in case.
#food#food blog#foodie#gourmet#pajamaqueencooks#Spoonie#spoon theory#cooking#recipe#vegan#vegetarian#allergy free#keto recipes#paleo#condiment#herbs#garlic#eat fresh#weeknightmeals#pantry staples#food for fatigue#cooking hacks
1 note
·
View note
Text
Pantry Building for Low-Spoon Food (Part 1)
Welcome to the very first post of Pajama Queen Cooks, a feminist food blog! I’m so excited to start sharing some of what I’ve learned, living and cooking with chronic illnesses, fatigue, and food intolerances, as well as recipes for plain old good food (biggest lesson: elimination diet food doesn’t have to be bland and gross! Really!!!). Seriously—even if you have no illnesses or food intolerances, these recipes are still for you! My healthy, restriction-free friends ask me to cook for them all the time, and my elimination diet never stops them asking for seconds, or for my recipes. If you’re in that group, stay tuned; crowd favorites are coming soon to a feed near you. For those of you I don’t know yet, you can see more on me here.
Those are the introductions, so, shall we?
When I got this blog set up, I thought I’d pick some marvelous recipe for my first post. Something genius. Something glamorous, but simple. Sexy, but not too complicated. Pretty on the plate, without being intimidating. Seasonal, but not generic … I think you can see where this is going. Every recipe I thought of was somehow lacking, just shy of the perfection that a first post seems to call for. First impressions are important, right?
So, I decided to start with my pantry. Sure, it’s less exciting, but doing some simple setup (in some cases, just an item or two added to the grocery list) can save you hours of work and many precious Spoons. When I first moved out, this was the hardest and most important lesson I learned. If hyper-organized Type-A meal planning sounds exhausting and/or excessive to you…. me too. Instead, my Low-Spoon-Expenditure pantry aims to set you up with all the supplies you need so that when you don’t have the time or energy to plan ahead, you’re all set to make something sustaining and tasty, fast.
Note: If you’re already a substitutions pro, most of the information in this post is likely old news to you. Please stick around! Recipes are coming soon!
When I started outlining this post, I quickly realized that I was looking at a series of posts, so, in today’s post, I’m going to cover allergy-free* cooking fats, candida-friendly sweeteners, and some odds-and-ends pantry staples. Read: non-perishable or long-lived staples that you can buy, and have kicking around for whenever you need them. Alright—let’s break it down!
Oils & Fats
Cooking oils and fats lend moisture, flavor and richness to your food, on top of preventing regrettable pan-scrubbing situations. Unfortunately, if you are on an elimination or otherwise limited diet, a lot of cult classics are off limits: classical cooking’s darling, butter, and the clean-eating obsession, coconut oil, are both off limits for me because I’m intolerant of both dairy and nuts. However, I’ve gotten pretty savvy at work-arounds for these! When cooking savory foods, I go simple: extra virgin olive oil, light olive oil, canola/sunflower oil, and sesame oil. For most general applications, my olive oils are the go to (EVOO for an olive-y flavor punch, and extra-light for a more delicate touch). Because olive oil is such a staple for me, I always buy the best quality I can afford—trust me when I say you’ll taste the difference if you splurge a little on some nice oil.
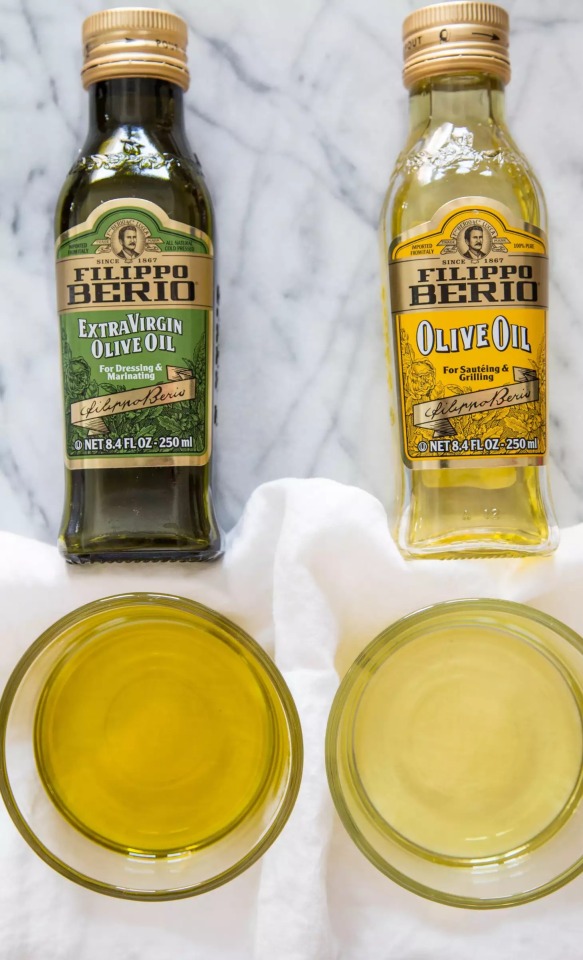
Extra Virgin, and Light/Cooking Olive Oils from Filippo Berio
Canola and sunflower oils are ideal candidates for my occasional deep frying needs—at preference, you could substitute peanut or corn oils; I grew up using canola, and it’s super cheap, so that’s what I gravitate towards if I’m going to be using a whole bunch of oil at once. Sesame oil, while a little pricier than some of the other oils, is concentrated in it’s rich nutty flavor—a little goes a long way, and it’s irreplaceable for Asian-inspired recipes!
Fats for baking, where texture is crucial, are a little trickier. Coconut oil is the common replacement for butter because of it’s ability to remain solid or semi-solid at room temperature. I’ve replaced it with relative success using combinations of vegetable oil, vegan butter (always check labels for other potential allergens!), and vegetable shortening.
The Sweet Stuff
Because my sensitivity to all kinds of yeast lead to candida overgrowth, the first stage of my Elimination Diet was really strict. I couldn’t have any processed sweeteners, natural sugars (maple, agave, dates, etc.), dried fruits, fruit juice, or artificial sweeteners (Splenda, Sweet’n’Lo, etc.). At that stage, baking wasn’t really an option, and if I wanted to sweeten savory foods, by best bet was to cook in fresh fruits. Note that stevia is allowed, but, because nearly all stevia products are, by volume, mostly made of other sweeteners, this wasn’t really much help.
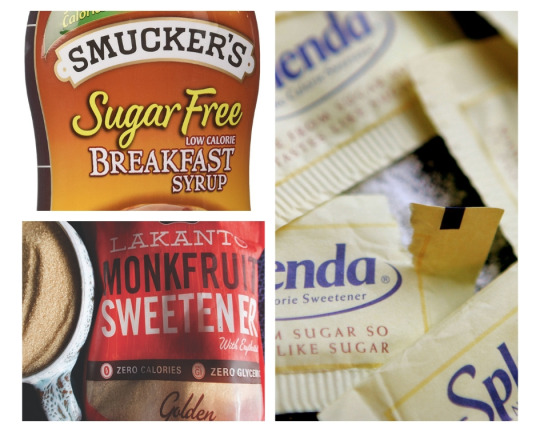
Fortunately, now that my candida is under better control, I can make use of a select few natural and artificial sweeteners. My go-to options are Lakanto brand Golden Monkfruit. This granulated sweetener is based on erythritol, so it won’t affect blood sugar, and the golden monk fruit extract does a phenomenal job cutting the “cold” artificial taste of erythritol so that in most applications, it is hardly noticeable. For liquid sweetener, I’ve been experimenting with Smucker’s Sugar Free Syrup. And, lastly, when a truly clean sweet taste is needed, I use Splenda. It isn’t natural, and research shows that in excessive amounts it can have some weird effects on metabolism, but for my needs, it works well if used moderately.
Other Pantry Staples
This category is going to seem like a really odd-ball mix. That’s mostly because it is. Some or all of these might not fit your tastes or dietary needs, but it’s worth thinking through, what kinds of dry or long-life refrigerated staples turn into quick satisfying meals? Which are single-use, and which are more versatile?
For me, that versatility is key for putting together meals with less planning and higher quality results. So, here are a few things I like to keep on hand that don’t readily fit into any other category:
Starches
Brown rice, Gluten-free pastas (brown rice and chickpea) & instant potato flakes are all handy, versatile staples. I like the Banza brand chickpea pastas, and Bob’s Red Mill makes my favorite potato flakes, but frankly, these items are so basic that the brand you buy isn’t going to matter much.
Dry & Canned
Dry and canned beans, sunflower seeds (or, if you don’t have an issue with tree nuts, any mix of nuts and seeds that you enjoy), diced and crushed tomatoes (especially the fire-roasted kind! If you can find these, you won’t be disappointed with the flavor they add!), tomato paste and, if you’re not on the candida diet, a variety of vinegars.
Dry beans are more economical, but not much beats canned beans for fast whole foods. I usually keep chickpeas, pintos and some mix of white beans around—some combination of the above can meet the needs of nearly any Latin-style, American or Mediterranean bean recipe.
So, that’s my first installment on getting set up for Spoonie (& general) success! I hope some of this information was new or useful, and if not, I’d love to hear from you about what your kitchen quandaries and challenges are!
#Pajama Queen Cooks#Chronic Illness#Elimination Diet#food intolerance#food sensitivities#Spoonie#Pantry Staples#Cooking#Food blog#Cooking for Spoonies#Chronic Fatigue
1 note
·
View note