
heartmachinez
HEART MACHINE
Projects Dev Blog
59 posts
Don't wanna be here? Send us removal request.
Last Seen Blogs

the-one-true-nobody
The One True Nobody!

intuitive-divinations
Intuitive Divinations

gonepodemo
Untitled

raceforfirst16
Untitled

Text
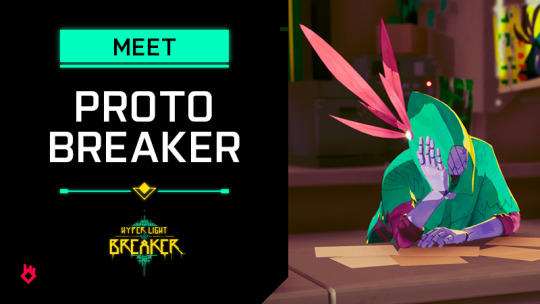
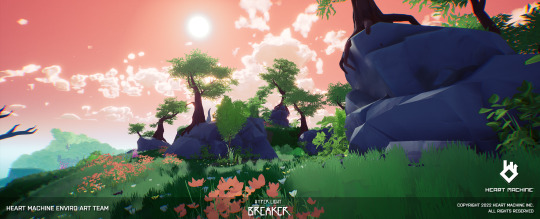
Hyper Light Breaker: Meet PB
PIVOTING TOWARD CHARACTER-BASED STORYTELLING
A while ago, we shared that we were developing Hyper Light Breaker with a limited form of character creation in mind - our player “characters” would be specific species, all following the same character archetype. The goal was to reduce animation scope down significantly by sticking with the single archetype.
As time went on, however, we discovered that a specific story was taking shape. And it needed to be told through a discrete cast of characters with their own backstories, motivations, and personalities.
We are now pivoting away from broader character customization, in favor of enriching player experience and empathy through highlighting each of these unique characters and their journeys through the world. We are still retaining customization in the form of offering near limitless loadout options, hub options, and other ways for players to have agency over this world.
With that said, please meet…
PROTOBREAKER


PB was featured prominently in our Announcement Trailer, but the character’s identity and role in the Hyper Light universe has been shrouded in mystery since. We’re now ready to share a little more about her.
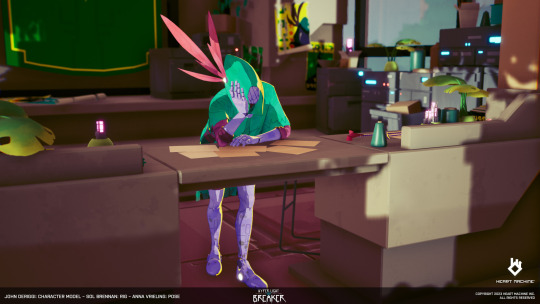
You meet PB in the Hotel Lobby of the Hub, the launch point for all of your ventures into the Overgrowth. A former highly skilled Breaker herself, she now works a desk job where she assigns and oversees Breaker missions.
PB has a long history in this world. But she is generally reserved, and minces few words. It is up to you to uncover her past, and play a crucial role in writing this new chapter in her story.
PB IN THE WORLD OF HYPER LIGHT
PB has a unique role in Breaker’s narrative. The abandoned wilds of the Overgrowth are shrouded in mystery, and PB has been here since they were first sealed away from the rest of the world.
Within the Breakers, PB is your commander, so she passes along your marching orders from Breaker HQ. But like you, she’s curious about the Overgrowth’s mysteries. In particular, she wants to learn the goals and motivations of the Crowns—why do they fight the Breakers? What are they protecting, and why?
PB knows many secrets about this place, but she’s not quite sure which of them are relevant to the mystery. When you discover some brand new information about the Crowns or the Overgrowth, you’ll bring those stories back to PB. She’ll share her own memories with you, and help you put the mystery together.
PB has a few secrets herself, too. She’s been living in the Overgrowth for a long time, and she seems to have a strange personal connection to the Crowns. If you help her discover more about the Overgrowth, she may share some of her history with you!

LET US HEAR FROM YOU!

How do you feel about our character-based storytelling process?
What do you think happened to PB?
Blaze
0 notes
#hyper light breaker#hyper light drifter#gamedev#storytelling#narrative#game story#game design#game development#heart machine#game narrative#narrative design
261 notes
·
View notes
Text
CELEBRATING 10 YEARS OF HEART MACHINE
A Decade of Creativity and Community

A decade ago, we began a journey that would lead to the birth of Heart Machine - a game studio committed to crafting immersive, vibrant experiences that resonate with players on a profound level. As we celebrate our 10-year anniversary, we reflect on our history, achievements, community, and the exciting future that lies ahead.
THINKING BACK
Glitch City, Kickstarter, and Hyper Light Drifter
In 2013, we took a leap of faith and launched a Kickstarter campaign for our debut project, Hyper Light Drifter. Little did we know that this campaign would not only secure the funds needed to bring our project to life, but also ignite a beautiful connection with supporters, players, and community members who believed in us from the outset.
Fueled by a need for camaraderie and knowledge, we spent those early days of Drifter’s development as a part of Glitch City, a then-small collective of independent game developers, artists, and creators all working together out of Alx’s basement. Those early days and (often) sleepless nights vision were critical in defining our design philosophies, studio culture, and grassroots community connections - setting the stage for what was to come.
Our Heartfelt Gratitude to Our Early Contributors
To date, thanks to the incredible support of our community, the Kickstarter for Hyper Light Drifter remains one of the most successful game projects on the platform. It smashed through the initial funding goal of $27,000 and ultimately raised over $600,000.
To our early backers who believed in us and our vision, and those fellow devs who helped us through endless rounds of playtesting and feedback, we extend our deepest gratitude. Your unwavering support enabled us to bring our dreams to life and emboldened us to continually push the boundaries of game design.
Special shout out to core Drifter team members: Alx Preston, Beau Blyth, Teddy Dief, Casey Hunt, Rich Vreeland, Akash Thakkar, Sean Ward, Lisa Brown, and Cosimo Galluzzi.
The critical reception following the release of Hyper Light Drifter was incredible - beyond our wildest expectations. We never could have anticipated the accolades and recognition it received, or the impact it made on players far and wide. It was humbling, and affirmed our dedication to continue to make great games to share with the world.
Moving Into a New Dimension
We started development on Solar Ash about a year before the multi-platform release of Hyper Light Drifter. Early on, we joined forces with Annapurna Interactive, whose expertise and resources facilitated our exploration of 3D game development. Over the next five years, Annapurna's support played a pivotal role in bringing this ambitious project to fruition. The vastness of the game's ethereal landscapes and fluid movement mechanics opened new avenues for worldbuilding and storytelling.
To date, Solar Ash continues to engage new players and inspire returning ones to create beautiful works inspired by the game. It is following in the footsteps of its predecessor and is now available on a a wide array of game platforms for a worldwide audience.
All of the positive reception that followed Solar Ash’s release proved that our community was ready to continue along this new aesthetic path with us. Just as Drifter smashed through its initial Kickstarter goals, we are poised to once again smash the boundaries of possibility with our upcoming projects.
HEART MACHINE TODAY
Reimagining a Familiar World
As we celebrate our 10-year milestone, we're thrilled to now be well underway with our newest title set in the familiar Hyper Light Universe. This new project, Hyper Light Breaker, builds upon the foundations we've laid, evolving our creative vision in unexpected ways.
A Shared Journey
Our journey would not be complete without acknowledging the invaluable contributions of our community. From community leaders who pave the way forward with creativity and kindness, to creators who challenge us with incredible skill and passion, to modders who continuously breathe new life into our games, to wiki writers who meticulously document every detail, to speedrunners who push the boundaries of possibility – you are the heartbeats that keep our worlds alive.
Over the years, we've had the privilege of connecting with our wonderful community at conventions and events across the digital and physical world. These gatherings allowed us to share our passion, hear your stories, and learn from your insights. Your presence and enthusiasm continue to inspire us.
We’re so grateful to: Polare, Lukas, Durtle, Clark, Yrrzy, CornMayor, Aza, Andreas, Conscy, Perfectly Mediocre, Thunderbrave, Bryonato, Utsu, NicowithaC, Covert Muffin, Sylvi, among many many others who make our work worth doing.
Our Company Vision
At Heart Machine, we've built more than games. We've cultivated a company culture that values kindness, inclusivity, and pushing the envelope. Our mission has always been not only to entertain but also leave a lasting impact. This dedication has enabled us to support and grow a thriving studio of some of the most talented, thoughtful, and fun people in the entire industry.
Our ethos revolves around fostering a work environment that prioritizes professional advancement, mental and physical health, and employee happiness. This commitment takes shape in various dimensions of our culture. We proudly offer Heart Machine University (HMU), a collaborative peer-teaching initiative where we cover everything from how to LARP or make sculptures out of driftwood to environment, concept, and tech art techniques. We also organize activities like group gaming and anime sessions, provide access to networking and learning resources, and support social and charitable initiatives to reinforce our team’s sense of purpose. As a studio, we strive to hang our culture on a framework where each individual can flourish and achieve their own growth and learning goals.
It’s no accident that the trajectory of these past 10 years has led us to forming the team we have now. We have always and will continue to adhere to our culture of high quality standards, emphasis on creative innovation, and heart-first leadership practices.
LOOKING AHEAD
As we stand at the threshold of the next chapter, we're excited to announce that Hyper Light Breaker will be arriving in Early Access in 2024. This project represents our ongoing commitment to pushing boundaries, taking risks, and creating experiences that captivate and challenge players in our specifically unique ways.
Beyond Hyper Light Breaker, we have other projects currently under wraps that will continue to define us as a studio. We can't wait to share these journeys with you as we forge into this next decade.
Thank you thank you thank you for joining us on this incredible ride. Heart Machine wouldn't be the same without each and every one of you. Here's to the many more adventures that lie ahead!
With love and gratitude,
The Heart Machine Team
#hyper light drifter#solar ash#solarash#annapurna#gearbox#kickstarter#hyper light breaker#game development#gamedev#indiegamedev#indiegames
212 notes
·
View notes
Text
Hyper Light Breaker - Early Access in 2024
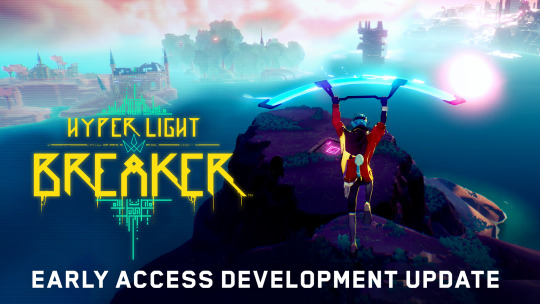
New Hyper Light Breaker dev update! To bring the game to its full potential, we need a bit more time. We're delaying Steam Early Access to 2024.
The development of Hyper Light Breaker has been an extraordinary journey, as we’ve set out to make this new Hyper Light adventure the best possible version of a truly wild idea. We've made remarkable progress and the game has come a long way since we started development. Taking this additional time to focus on development will allow us to bring the game to its full potential and we are incredibly grateful for the support from our community that’s been with us every step of the way. We thank you for your patience and understanding as we work to deliver a new adventure that lives up to what fans expect from a Heart Machine title.
We will will continue to give fans a look inside Hyper Light Breaker’s development, in the lead up to Early Access launch in 2024.
To keep up with all the latest updates, please visit: https://www.hyperlightbreaker.com/ or get updates via X, Facebook, and the Official Heart Machine Discord.
122 notes
·
View notes
Text
Embracing Accessibility and Diversity: The Vital Role of Remote Presentations in Game Conventions
In recent years, the gaming industry has witnessed an unprecedented surge in popularity and innovation. This phenomenon is often celebrated at large international conventions like Gamescom / devcom, where developers, enthusiasts, and creators from around the world gather to showcase their latest creations, share insights, and explore new horizons.
However, as the gaming community continues to expand, so does the need to ensure that these conventions remain accessible and inclusive for everyone. Enter the concept of live remote presentations – a powerful tool that preserves diversity, fosters representation, and empowers those who might otherwise be excluded.
During the pandemic, many conventions like GDC, Gamescom, Gen Con, etc. decided to go remote rather than cancel their events outright. Now that COVID-19 is under control, these same conventions have decided to return to an IRL format for the obvious benefits of fostering greater networking opportunity, spontaneous collaborations, personal branding, cultural exchange...among other advantages.
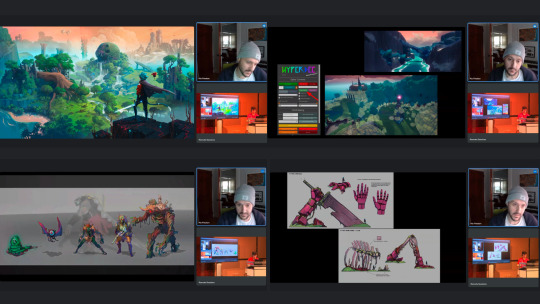
We were very fortunate this year that even though Gamescom / devcom was one of thsoe conventions that returned to an in-person format this year, they were able to accomodate our Founder / Creative Director Alx Preston's remote talk From Pixels to Polygons – Bringing the Hyper Light Universe into the Third Dimension. They decided to make an exception to the in-person only format this year due to Alx's specific health considerations.
But maybe a hybrid format should be the norm, and not the exception?
The Power of Representation and Diversity
One of the most valuable assets of the gaming industry is its diverse and passionate community. Gamers, creators, and developers hail from various backgrounds, cultures, and perspectives, enriching the industry with fresh ideas and innovative concepts. Embracing this diversity fosters creativity and leads to games that resonate with a broader range of players. But for this diversity to flourish, the voices and viewpoints of all members of the community need to be heard.
Accessibility as a Cornerstone of Inclusion
International conventions like Gamescom attract attendees from around the world, turning them into melting pots of ideas and creativity. However, the barrier of physical attendance can inadvertently lead to exclusion. Not everyone has the financial means, the physical health, or the time to journey halfway around the globe to participate in such events. This exclusion can inadvertently stifle unique perspectives and novel insights that could otherwise contribute to the growth of the industry.
The Crucial Role of Remote Presentations
Live remote presentations offer a solution that bridges the gap between physical presence and accessibility. By allowing speakers to present their ideas, projects, and perspectives remotely, conventions can ensure that individuals who might not be able to attend in person can still contribute meaningfully. Here are a few compelling reasons why this approach is essential:
Global Representation: Remote presentations empower voices from different continents, cultures, and backgrounds to participate and share their experiences, especially including folks from foreign countries who might encounter time or money difficulties getting visas to travel. This widens the scope of perspectives and ensures a more holistic representation of the gaming community.
Inclusivity: Everyone should have an equal opportunity to engage with the industry they love. Remote presentations provide a level playing field for those with limited physical abilities, financial constraints, or geographical limitations.
Time and Resource Efficiency: For busy professionals, remote presentations eliminate the need for extensive travel and time away from work or other commitments. This encourages a more diverse pool of experts to contribute without sacrificing their personal and professional obligations.
Reduced Environmental Impact: International travel carries a significant carbon footprint. Embracing remote presentations aligns with sustainability efforts and demonstrates a commitment to reducing the environmental impact of such events.
Technological Advancements: With the rise of high-quality video conferencing tools, remote presentations can be seamless and engaging. This eliminates potential technical barriers and ensures that remote speakers can effectively communicate their ideas.
Looking Ahead: A More Inclusive Gaming Community
In conclusion, the gaming industry's continued growth hinges on the cultivation of diverse ideas and perspectives. International conventions like Gamescom play a pivotal role in this process by providing a platform for individuals to share their insights. However, it's crucial to acknowledge the limitations that physical attendance imposes on accessibility and representation. By embracing live remote presentations, and offering a hybrid format, these conventions can pave the way for a more inclusive and vibrant gaming community.
In a world where technology connects us across continents, it's only fitting that the gaming industry utilizes these tools to break down barriers and amplify voices. By making remote presentations a staple of game conventions, we celebrate the richness of our community while ensuring that everyone has a seat at the table, regardless of their location, resources, or physical abilities.
Thank you so much to Nico Balletta and the devcom / Gamescom team for giving us the chance to share our projects with the world. Here's to an amazing Gamescom 2023!
#hyper light breaker#gamedev#hyper light drifter#public speaking#devcom#gamescom#gamescom 2023#accessibility#livestream
95 notes
·
View notes
Text
Hyper Light Breaker is coming Fall 2023.
youtube
#hyper light breaker#gameplay trailer#video games#coming soon#open world#multiplayer#roguelike#Youtube
372 notes
·
View notes
Text
Pangea: Creating A Multiplayer Rogue-lite With Endless Open Worlds
We’ve shared extensively about our tech art strategies and proc gen processes in both a recent Heart to Heart with Len White and Christian Sparks as well as on our dev blog. We’ve also discussed our environment art works in progress in a different Heart to Heart with Will Tate and on our blog as well.
That was all months ago; often, a few months can mean a lifetime in game development.
Original Vision
Years ago now, when Alx was ideating on the design pillars of the game, the question that came to mind was “what would you do in an open world you’d never see again if you die?”
With that in mind, we made decisions in the early days of our game to try for a more reasonable approach of this idea as we built our systems, since it seemed insurmountable. So, we created an adjacent version, something that captured parts of this design ideal. We had a large, open biomes, but they were segmented in a stage-by-stage format to make it more feasible for us to build.
Over the course of development, we found that, as we continued to build the technology needed for these smaller open-biomes, that we could actually leverage the tools to make the original vision a reality. Thus, we shifted away from the more limiting and (ironically) more complex version of a stage-to-stage progression, and started on a “Pangaea Shift”.
The Shift
Pangaea is used as a code name, as we were essentially merging all of our stages into one larger map to create an open world.
This shift meant that we would mean that we lose some time up front reconfiguring some parts of the game to function in the ne structure, but gain time on the backend and a much more exciting game format to dive into. We were excited and scared, all at once.
This shift yields us:
Highly differentiated points of interest on a global scale, resulting in entirely new biomes to explore instead of sub-variations of the same biomes
Reduced per-level workload for Houdini, focusing on simpler, bolder biome elements since the context of other biomes being present shifted the dynamics of play so significantly
The ability to generate dynamic, global components that affect the whole run / playthrough, rather than just stage or biome-specific elements, opening up tons of exciting mechanics
A truly open world, procedurally generated, with biomes juxtaposed seamlessly on the same map
An open world you’ll only see once
It’s a thought that leads to a lot of questions and exciting ideas. How much do I explore this world? How much time do I invest, knowing I could die at any turn? What are the pressures driving me forward in this world? What’s new, exciting, different this time? What’s coming next?
These are all questions we ask and answer for development, and ones we are excited for you all to see the conclusions of for yourselves in Early Access and beyond!
Wrap Up
What do you think of our process shift? Share your feedback!
See you next time, Breakers!
-The Heart Machine Team
#hyper light breaker#procedural generation#proceduralart#gamedev#game design#game art#environment art#environment design
142 notes
·
View notes
Text
Hyper Light Breaker: Production Process
Check out our latest stream about our production process behind Hyper Light Breaker, with Senior Producer Lesley Mathieson.
youtube
Some takeaways from the December 9th Heart to Heart stream
Our approach to production tools and process has ever been “I want people to feel it's pretty to use, it's obvious, and they don't have to think about it too much.” - Lesley Mathieson.
“The least amount of friction is the most important thing when it comes to getting people to use tools consistently. Even if it's a janky system, what we really need is for people to consistently look at what's going on.” - Alx Preston
Some of the tools we use are:
Tom’s Planner, an online Gantt chart maker
HacknPlan, a game design project management tool
MantisHub, a bug and issue tracker
50 notes
·
View notes
Text
Hyper Light Breaker: Animation Process
Our wonderful Lead Animator, Chris Bullock, shares some in-depth info on our animation process and what’s involved in getting our Leaper to this point:
youtube
What is Rigging?
Rigging is the process by which we take a 3D model and give it the ability to deform over time.
Most often this is done by giving it a virtual skeleton (or armature in sculpture terminology), and then attaching controls that allow the animators to move the skeleton, almost like strings on a marionette. But now there are also other techniques that have been used in Film, TV, and Commercial work for years that are starting to make their way to games. For example: Blendshape deformations are where the 3D model’s deformation is sculpted manually, then blended between the base model and the Blendshape(s).
The Bone Rig / Skeleton Hierarchy
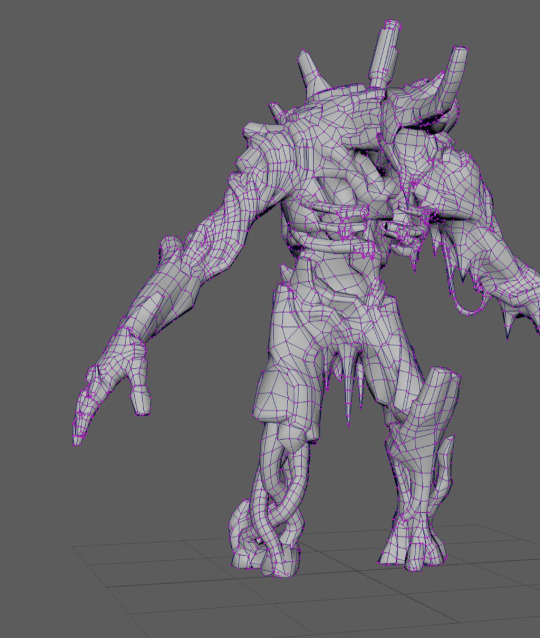
Here, we can see the character mesh’s points (vertices) in magenta, edges in dark blue, and then the polygons shaded in gray.
As we can see, here, a character’s mesh is made up of a series of points (a.k.a. vertices) as the fundamental building blocks (magenta dots in above image), along with edges that connect the points, which are then filled-in with polygons. By adding a hierarchy of special objects called “bones” (or “joints” as they are, technically, more accurately called in some software packages) that often roughly resembles an actual skeleton for the character or creature, we’re able to get the model to deform and animate without having to move every single point on the model by hand every frame of an animation. It’s easier to move a few dozen to a few hundred bones on the character than it is to animate tens-of-thousands to millions of points on the mesh.
In order to do this, we need to tell each point on the model which bones it should inherit its movement from, and how much influence each bone has on that vertex. There’s a lot of math that goes into how these transformations are actually carried out, but fortunately, we have tools at our disposal that we don’t need to assign all of this data one point at a time, which actually makes this “skinning” process more of an artistic process than a technical one—defining which parts of the model move together, to give it more of a solid feel, and which parts have a “softer”/”fleshier” feel to them.

Here we can see our bone objects in yellow and magenta along with our base mesh.
The Animation Control Rig
To make things even simpler to animate the bones, rigging will often involve adding Animation Controls, which allows animators to manipulate a series or collection of bones together as a single “system”, or to isolate movement of a bone in a non-hierarchical manner, or in a different manner from the way the bone hierarchy was setup (more on this below). The time saved during animation, when multiplied across a team of animators and total number of animations needed, well offsets the extra time it takes to setup this animation control rig.
Currently, this is most often being done in separate software from the game engine: software such as: Blender, Autodesk Maya, Autodesk Motionbuilder, Autodesk 3D Studio Max, SideFX Houdini, etc. Game engines, such as Unreal Engine 5, are starting to allow the Animation Control Rig to be created directly inside their own editors.

Here, we can see the animation controls (in blue, red, cyan, magenta, orange, and yellow) along with the base mesh and skeleton.
FK – Forward Kinematics – We use this term when talking about a collection of objects being manipulated in a direct parent-child hierarchical manner. Let’s say we have two objects: Object A and Object B. Let’s say that Object A is Object B’s “parent”, and Object B is Object A’s “child”. This means that whenever Object A is moved, Object B will move along with it, keeping the same offset from Object A as it did from the start. However, when Object B is moved, it has no affect on Object A’s position in the scene. We can see this demonstrated in the video below with the Red chain of bones. You can see how as each object in the chain is selected and manipulated, it only affects the objects below in the hierarchy. This is the way that the character’s skeleton would animate if we had no Animation Control rig. So, moving the hips would mean that we would have to move the limbs the opposite amount if we wanted them to stay planted while the hips move. This is called counter-animating, and is something we will often go through great lengths to avoid doing.
IK – Inverse Kinematics – With body parts such as the arms and the legs, we often find it easier to deal directly with the positioning of the ends of the chain of bones, and want any bones that are between the ends to automatically bend in order to achieve the positional goals of the end bones. This is done through a computation technique known as IK. This is demonstrated with the blue chain of bones in the video, below. Notice how we have two control objects that we manipulate directly, and they indirectly control the chain of bones.
youtube
These are just the two most common of the myriad of ways of controlling the way that something animates. The number of ways that objects can be controlled are near limitless, and new techniques are being discovered/invented all the time.
The Game Engine
Once we have our character modeled, rigged, and animated, we need to get all that data into the game engine, somehow. This is done through an export/import process. Typically, the character mesh and skeleton data is exported separately from the animation data. The character’s mesh data and the skeleton (including the skinning relationship) typically get exported together. In our animation source asset files, any animation data is stored on the Animation Controls. However, the only thing that the game engine cares about is the animation that’s applied to the skeleton hierarchy—it does not care about the Animation Control data at all. So, often what happens is that the animation gets “baked” to the skeleton as a part of the export process—i.e. it just sets a keyframe for every bone in the skeleton hierarchy for every frame in the animation timeline. In the game engine, the animation data is then re-applied to the skeleton, which, in turn gets applied to the mesh, which makes our character move, finally!
We’re also able to setup relationships between bones inside the game engine, which allow us to drive the motion of certain bones based on the movement of other bones. In Figure 2, for instance, the bones in magenta are controlled by the bones in yellow. The reason we do this in the game engine, instead of animating them, and then exporting them, is to allow those bones, specifically, to react to the way the character behaves in-game, rather than adhering to prescriptive movement (a.k.a. “canned animation”)—this helps makes everything feel a lot more alive and reactive.
Wrap Up
This covers some of the basics of the rigging process, and why it’s so important in a modern game production pipeline. Without this process there is no way we would see the quality of deformation and animation in the games we love.
Let us know…
What do you think of the animation / rigging process as a whole? Is it art? Is it math? Does it seem fascinating or boring?
90 notes
·
View notes
Text
Heart 2 Heart: Hyper Light Breaker Animation w/Chris Bullock + Sean Ward
youtube
Some highlights from the August 12th Heart to Heart stream
(thoughtfully compiled by Polare)
An early animatic of the HLB reveal trailer
Character animations for Hyper Light Breaker and Solar Ash
The sword (being used by the promotional Blu character) is a "base weapon"
Bosses will be big, but not Solar Ash big
Jar Jar Binks (from Star Wars) means a lot to Alx
We are using Autodesk Maya for animation software
In Hyper Light Breaker, the companion floats around with your health bar
#hyper light breaker#hyper light drifter#solar ash#animation#game animation#game art#3d animation#Youtube
27 notes
·
View notes
Text
Hyper Light Breaker: Meet Blu
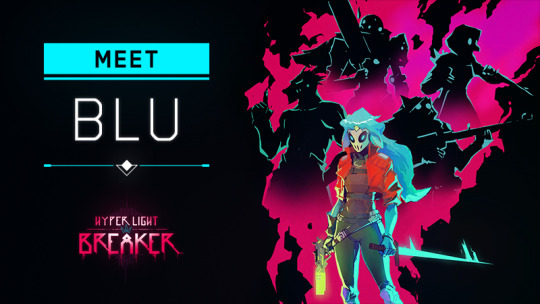
The Northern Realms are brutal. They’re cold and harsh and demanding.
This is a species (nicknamed “Blu”) from the mountainous north, where the roughness of existence leaves them generally well-suited for action and adventure. It’s a natural step for them to become Breakers.

Species, you say?
…now would be a good time to mention that we will have a limited form of CHARACTER CREATION in Hyper Light Breaker!
WHY CHARACTER CREATION?
Originally, we were planning on creating discrete characters for Hyper Light Breaker. This character had a backstory and a somewhat rigid, predetermined personality and play style.
As we continued development however, our animation department advocated that it would both be far more efficient and lend flexibility to the player experience to instead introduce character creation into the game. We converted the character of “Blu” to a species.
As our Animation Lead, Chris Bullock, puts it, “we decided to have one character "archetype", with a single, larger set of animations that could use any combination of weapons, in order to separate the gameplay from the look a little more. The hope was that instead of doing 5 sets of animations, thus requiring one for each character class where each character had a smaller set of animations that they needed, we could reduce animation scope down significantly by sticking with the single archetype.”
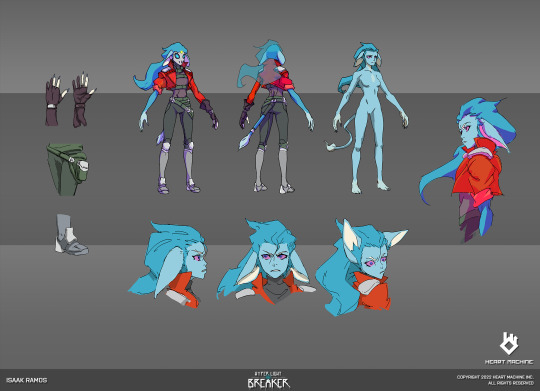
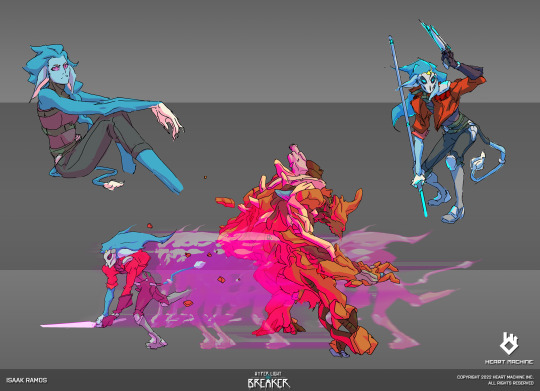
ABOUT BLU
They’re sinewy and fierce, careful but playful and fun, and very clever.
Our Character Concept Artist, Isaak Ramos, worked closely with Alx to develop out facial expressions, outfits, looks, and poses for this species.
Take a look at these original concepts from Alx:
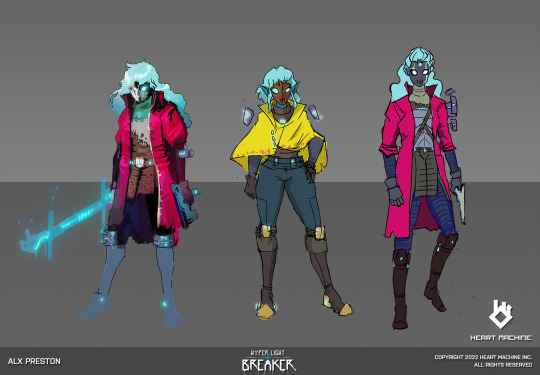
EVO”BLU”TION - OUR CONCEPT ART PROCESS

Based on Alx’s initial concept art, Isaak makes adjustments and explorations, expanding on the original concepts. He shares a few key components and considerations:
EXPLORATION: Alx will let me know if he's happy with where his initial sketches are or if he's wanting to explore more directions. In the case of the Leaper, for instance, my main objectives were to flesh out the forms since Alx's concept was already on the money. With Blu, there was a solid foundation to jump from, but we still wanted to explore and solve some important elements to the design.
STYLE: With Blu, we wanted to solve the top by going with a biker jacket or trench coat. I tried some poncho-looking garb, something in the direction of Sergio Leone character. Those kinds of wearables present their own technical obstacles, so we shifted to something more manageable. The short biker jacket came about as I shifted to thinking of a character that was more nimble and athletic. Something along the lines of Canti's jacket (FLCL) with a Han Solo mood.
POSES + REFERENCES: As production goes along, the poses become more standard as I get the rad sculpts in from John DeRiggi and Jack Covell (character artists) to draw over. As much as I like figuring out poses, it’s better to draw over the approved proportions for the playable characters to maintain continuity and speed. For NPCs and Humanoid Enemies, my pose reference generally comes from fashion models. For the sketches and gestures, sometimes I'll go in without a reference, or I'll browse my personal library of references that I've gathered over the years. There are so many pose resources out there now. Weapon references range from museum display images to blocking things out in 3d. Outfit references usually come from a 500 hour Pinterest deep dive, ha!
ITERATING: Alx will go over his initial design and lore thoughts with me, so I've always got a good direction to go on from there. The rest of a character's vibe will flesh out in my head as I gather references. Blu's vibe shifted as our design goals called for different references, for instance. My personal view of the character’s attitude shifted from swift and stoic to nimble and determined as we went along. I imagined a blend of Trinity (Matrix) and Driver (Drive) as I worked on the later concepts.
FEEDBACK: We've formed a great pipeline where I can get solid feedback from the character centric departments. Part of that process involves me checking in with John DeRiggi (Lead Character Artist), and he's been a rock for me as we check in daily. Alx and I have always overlapped a good amount with our tastes, so a momentum is always sustained. Feedback from design and animation is always crucial too... it's all a team effort. Every concept is the culmination of good ideas and notes from across the board!

Fascinated by the concept art part of our dev process? Check out our previous piece where John DeRiggi shares our character art process! Or stay tuned for more :)
LET US HEAR FROM YOU!
Are you excited about the shift to character creation?
What do you think of this species and all their varying looks?
#hyper light breaker#game art#gamedev#character art#character design#concept art#game concept art#dev blog
371 notes
·
View notes
Text
Proc Gen / HyperDec: Part 1
HyperDec - Intro

Originally, before it was called HyperDec, the procedural “decking” system was built out to be able to evaluate the height of terrain at a given XY position & procedurally populate those spaces with props, using seed-informed deterministic random value selections for things like position, rotation, and scale, as well as parametric variation for things like space between props, maximum count, height and slope ranges, spawn area, etc.
From there, we wanted to explore applying artistic intentionality with props/clusters of props, being able to define “child spawns” that would anchor themselves around spawned instances. Pieces had filters for what kinds of surfaces they could and couldn’t spawn on, as well as custom avoidance filters and world-aligned texture masks, so users could parameterize relational behaviors between types of props, all of which were piped into a global HISM array.
youtube
youtube
After proving out simply laying out these pieces & giving them relational considerations, we moved onto zone targeting. In addition to randomized terrain on each run (more on terrain from Len) we wanted to have distinctive zones with unique props in each. Thanks to some very clever programming from Peter Hastings, Senior Gameplay Engineer, we were able to very efficiently read zone data encoded into world-aligned textures, and filter placement accordingly.
Artists and designers could create Data-Only-Blueprint assets that would contain primary and secondary assets to spawn, and their parameters for placement on the terrain. This workflow of randomized terrain with zone identifications became the foundation of our procedural decking paradigm.
Initially, this paradigm worked out well. But over time, we ran into issues when trying to implement at scale.
A Setback
The implementation we had started to run into issues as it continued to grow. Rather than only placing static props using this system, we began utilizing it for placement of gameplay objects, applying more robust filtering for things like flatness detection, and our evaluation of terrain was happening at runtime per-prop, with prop counts getting up into the 70K - 100K range, which meant that the startup time for each run took longer and longer.
We also ran into issues with balancing density & variation with replication for multiplayer; all of these tens of thousands of objects needed to consistently show up on every player’s instance. Having all procedural placement done on the server and then passing that enormous amount of data to players on begin play was unfeasible, and so instead we would only have the server spawn gameplay relevant pieces, and then each connected client would receive a seed number from the server to feed into the client-side placement of props. Utilizing the same seed across all clients meant that even though they were spawning objects locally, they would all spawn with the same transforms informed by the seed.
While we were able to achieve a satisfying amount of variation and distinction, it became clear that the increasing generation time wouldn’t be sustainable long-term.
Rethinking Our Design Paradigm
Tech Art & Engineering sat down and re-thought our design paradigm for procedurally generated content in the game, and wound up completely re-working our implementation from the ground up.
We were able to move away from a solely-blueprint-driven pipeline for procedural decking, leveraging faster C++ execution, thanks to some awesome effort put in by Justin Beales, Senior Gameplay Engineer. We also moved the per-prop terrain evaluation from runtime to design-time. This allowed us to pre-determine placement of objects and then feed very simple data into a runtime system that grabbed the objects and their intended locations and place them accordingly. Each stage’s variants would have coinciding data to reference, and using a DataTable to layout objects & parameters, we could “pre-bake” candidate points for each object type in the editor, and then save that data for quick reference on begin play. So while there are a limited number of variants as a whole, the selection of candidate points from the list could be randomized with a seed, meaning that the same variant could have unique prop/gameplay layouts every time.

Now that we had generation in a better spot, we set out to expand on the artistic intentionality of the pieces being spawned. It became clear over time that the use of anchor-clustering & avoidance distances would not be enough to make these levels look less like math in action and more like art. This idea and conversation led to the creation of HyperFabs, which are spawned just like regular props via HyperDec, but have some more advanced logic & artistic implications.
HyperFabs
HyperFabs take the concept of Prefabs (prop or object arrangements saved as a new object for re-use) and add some additional utility & proceduralism to them.
The overall idea is that artists can lay out arrangements/mesh assemblies, that are intended to represent a small part of what would normally be a hand-decorated level. They then can use a custom script we’ve built to store those meshes in a generated Blueprint asset, that can then be placed on the terrain. The center point of the actor will align to the terrain, but then based on rules exposed that artists can tweak and assign to components/groups of components using Tags, the individual pieces in the HyperFabs will also conform to the terrain surrounding the actor’s center point in the world. It takes our original idea of relational spawning, but allows artists to lay out these relations through traditional level design tools instead of strictly through DataTable parameters.

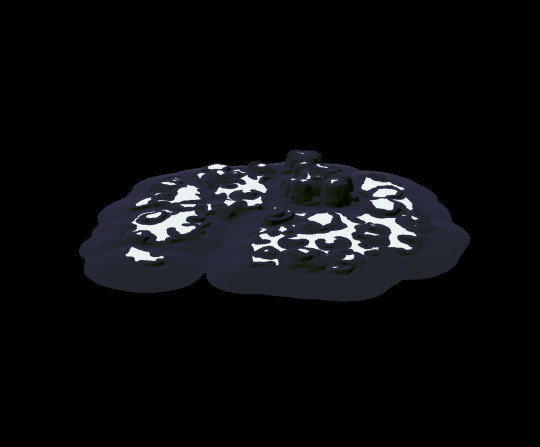
A boulder assembly turned into a HyperFab, made by Will in Enviro
It doesnt have to just be for small arrangements though; entire city blocks have been baked into a HyperFab, which conforms to varying terrain as expected.

A city block assembly turned into a HyperFab, made by Wolf in Enviro
The script for baking HyperFabs from mesh assemblies is smart enough to know when to use static mesh components versus mesh instancing, and it also has a utility to merge stacked/co-dependent objects into new static mesh assets, which helps with performance & automation.
On to Part 2...
And for more on this, check out this Heart to Heart talk with our tech artists:
youtube
85 notes
·
View notes
Text
Proc Gen / HyperDec: Part 2
Other cool bits
Shoreline Generation
A neato bit of tech I worked on before we used terrain variants was shoreline generation. Since terrain was being generated using a voxel system, each playthrough generated terrain that was completely random. (But also much harder to control/make look nice like our new approach!) This meant that we couldn’t pre-determine shoreline placement, either through splines, decals, or shader stuff.
After a bit of research, I learned about Jump Flooding, which is an algorithm that can generate a distance texture between bits of data in a texture in UV space. In the case of shorelines, I captured an intersection range of the terrain, and used that as a base-mask. That mask was then jump-flooded to give us a gradient, which could be fed into the UV channel of a basic waves-mask texture that ran perpendicular to the wave lines direction. Using some additional time math and noise modulation, waves could pan along that distance gradient, with shape and body breakup, controls for distance-from-shore, wave count, and initial capture depth.
youtube
Flatness Detection
Another challenge we ran into for procedural placement was flatness-range detection; some objects had platform-like bases that needed an acceptable range of flatness so that they weren’t perched awkwardly on the side of a cliff or floating on little bumps in the terrain. The first iteration for flatness detection used traces from randomly selected points in a grid formation, comparing the height offset averages, allowing for a variable number of failure tolerances and grid resolution, before determining if a point was flat enough.
youtube
While this approach did find flat areas, it was costly & prone to prolonged searching resulting in a block in the generation process while platforms found their place. After we moved candidate point determination to design time, we reworked the search function to use the terrain point data in a similar grid-check fashion, using grid space partioning to speed up the referencing of bulk points, which led to this fun little gif of the proof-of concept, showing an object finding approximate-nearest-neighbors with no collision/overlap checks, just location data.
While this did divert the computational cost of determining flatness over distance from runtime to design time, it was still very slow and presented a blocker to design & environment when pre-baking asset candidate points. After a bit of research, jump-flooding came to the rescue again.
The workflow for flatness-range detection works in a series of steps. First you get a normal-map of the terrain you’re evaluating, and mask it by slope, with anything being below a configurable slope value being flat, and anything above it being too steep.

White areas are flat, black areas are too steep or below shoreline height
We then invert this output to provide a sort of “cavity mask” of areas that were flat enough for placement. But we needed to be able to define how far from the nearest non-flat area a point was, so that we didn’t pick a point that was flat enough at that point, but not flat over the range that equaled the size/footprint of the object we were searching for. To solve for this, we jumpflood that slope/cavity mask, and then transpose the 0-1 values represented in the output-textures’ UV space into the world-space equivalent, based on the size of the terrain. This gave us a distance mask that we could then threshold, returning us to the yes-or-no mask configuration that could be read at each point-evaluation

Because all of these steps are running with shader calculations instead of collision queries or trace loops, the time to find flat-range points for assets decreased so much that the generation time is nearly indistinguishable when baking points with and without flatness checks. Yay shaders! Here are some fun gifs of the values for distance & slope being changed when creating a flatness mask.


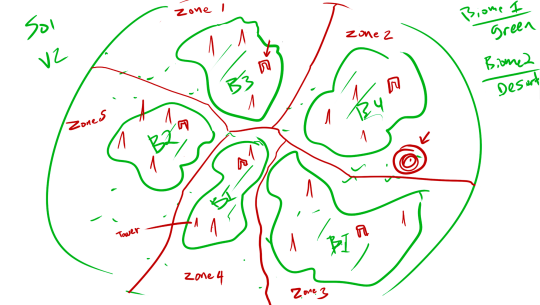
Breaker Terrain Generation Basics
The Hyperdec terrain process generates the foundational landscapes upon which all other art and gameplay assets are placed. The ideal for a rogue-like would be that every run of every stage is completely unique in decking AND landscape. However, pretty early on we ruled out completely procedural landscape generation simply because of the R&D time it would have entailed. We also had the notion that our gameplay would require some very tight control over the kinds of hills, valleys, waterways, and other landscape features that emerged. In a fully procedural landscape system, running in seconds as a player waited, we might get landscapes that just plain broke gameplay at times; this was unacceptable. So we went with semi-procedural.
Our approach is to generate a large, though not infinite, collection of terrain meshes off-line that, when combined with our highly randomized Hyperdecking system, can give the impression of limitless, fresh gameplay spaces every time you play. Initially we explored voxel-based terrain, since it was an artist-friendly way to quickly build interesting terrain shapes. This was eventually abandoned as the run-time implications of voxels were an unknown and we didn’t have the R&D time available to ensure their success.
Work continued with algorithmic island generation spearheaded by Peter Hastings. Many of the features present in this early work exist in our current terrain as well.

Procedural Island Generation, Peter Hastings
At some point it was clear that iteration and experimentation would put serious strains on the purely algorithmic approach. This led to adopting the procedural tool Houdini as the master terrain generator. This was especially useful since we could directly translate all the algorithmic work into Houdini and then further refine the topology in later parts of the Houdini network. First algorithms were directly re-written in python and then later in Houdini’s native Vex language for speed. Further, Houdini is effective at generating lots of procedural variations once a network is generating solid results on a smaller scale. Our goal is to have at least 100 variations of each stage to draw from during play and using Houdini allows a single network to drive all variations.

A bird’s eye view of a Houdini sub-network generating a component of the terrain

One of the current terrain variants for one stage, without any hyperdecking
For many of our stages each terrain is effectively an island that’s composed of sub-islands which are each assigned a “Zone”. A Zone is basically like a biome in that it is intended to have a look and feel clearly distinct from other zones. They are intended to look good but also help the player navigate and get their bearings as they move around the play space. In order to provide these features in every terrain variant a combination of noise fields and specific scattering of necessary topological features occurs in the Houdini network. Each stage has a different take on this basic formula and R&D is ongoing on how to get more compelling, interesting caves, hills, nooks and crannies without creating game-breaking problems (like inescapable pits, for example).

Visualizing a walk through the Houdini processing chain that converts a circle into terrain.
The animated image above shows one processing chain that starts with a basic circle geometry delineating the overall footprint of the island then, via a chain of surface operators, eventually ends up as playable terrain. Many of the operations involve random noise that contributes to the differences between variations. Both Houdini height fields (2D volumes) and mesh operators are employed at different points to achieve different results. The initial circle is distorted then fractured to yield the basis of a controllable number of separate sub-islands. Signed distance fields are calculated from the water’s edge (z=0) to produce the underwater-to-beach transition slopes. More specific mesa-type shapes are scatter-projected into the height field to yield controllable topology that plays well compared to purely noise-generated displacements. In the final section, geometry is projected at the boundary area into the height field as a mask, distorted via noise fields and displaced to create the stage’s outer perimeter. The full chain of operations can generate a large number of unique terrains that all exist within constraints set out by game design.
Another feature that exploits the fact that our terrains are not pure height fields is cave tunnels and caverns. These are generated as distorted tube-like meshes that are then subtracted from a volume representation of the above mesh. We are excited to push cave-tech (tm) in the future to generate some interesting areas for discovery for the player.
Unfortunately, to produce production quality terrains the resolution of the resulting mesh needs to also increase, which is starting to slow Houdini down compared to the early days when everything processed so briskly. These are relatively large meshes which are getting converted back and forth between mesh, height field, and voxel representations to get the job done. As production moves forward and we start generating all the variants needed for gameplay the plan is to offline processing to a nightly job on a build machine so no one has to sit at their screen for hours watching the wheel spin.
Articles & Sources:
Jump Flood Process in UE4:
Flatness Detection Abstract:
Grid Space Partition Process:
https://gameprogrammingpatterns.com/spatial-partition.html#:~:text=Our grid example partitioned space,contains many objects%2C it's subdivided.
Wrap Up
As you can see, our team has spent a considerable effort executing on thoughtful procedural generation in order to make the flow of game levels feel coherent and intentional.
Want more stuff about procedural generation? Len also did this talk on tech art in Solar Ash!
Let Us Hear From You!
What do you think of what you’ve seen (and heard) so far?
Are you a tech artist or aspiring to be one? How would you have tackled these issues?
And for more on this, check out this Heart to Heart talk with our tech artists:
youtube
43 notes
·
View notes
Text
Hyper Light Breaker: Meet Melee Wretch & Leaper
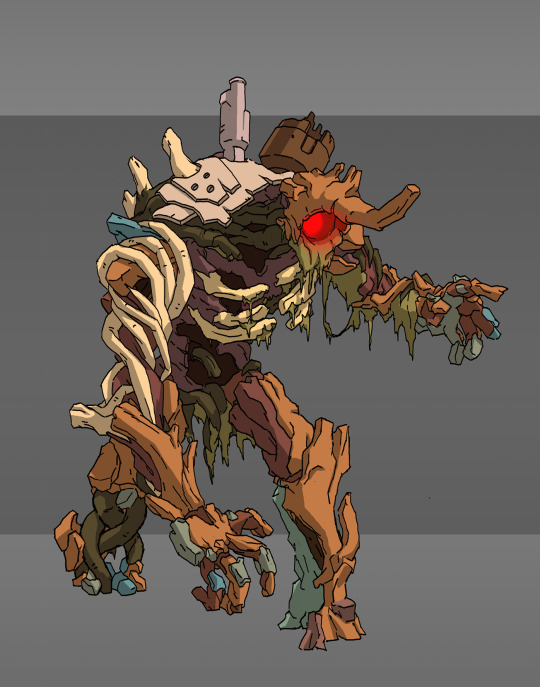
Meet Melee Wretch

Character Art by John DeRiggi
Wretches are a monstrous mutated soldiers.
Original Concept Art by Alx Preston
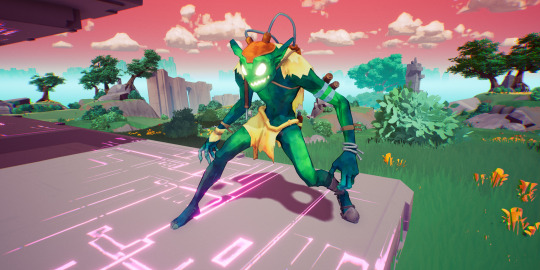
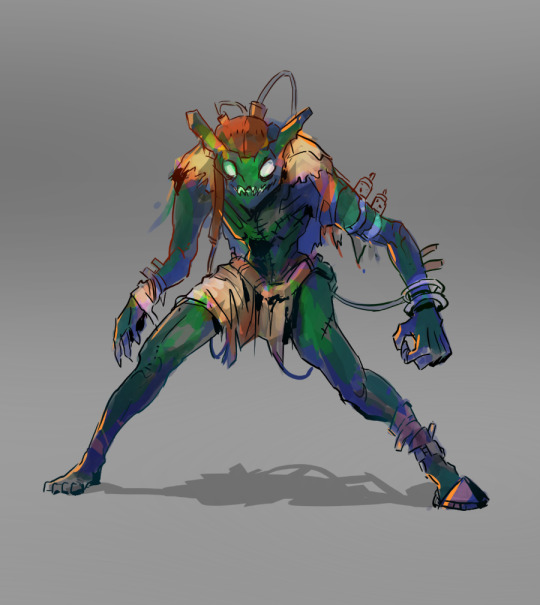
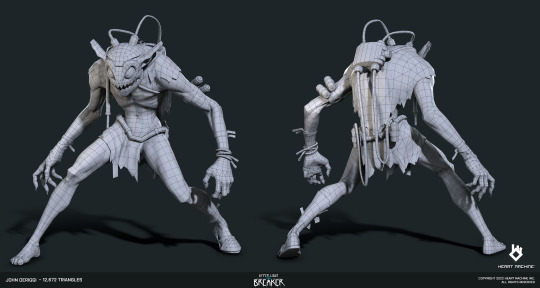
Meet Leaper


Character Art by Jack Covell
Leapers are rare prototype soldiers who have undergone body modification experiments.

(left) Original Concept Art by Alx Preston; (right) Final Concept Art by Isaak Ramos
Our Character Art Process + Inspirations
John DeRiggi, Lead Character Artist, shares a bit about the character art process:
Heart Machine has a history of creating vibrant, colorful worlds that often deviate from current games. True to this goal, Hyper Light Breaker characters are inspired by traditional cel animation like Miyazaki and Studio Ghibli combined with a watercolor painting approach. Hopefully you can see this in the concepts and 3D models of the Melee Wretch and Leaper enemies.
A key ingredient here is the character’s material and its reaction to light. Games can sometimes use materials included with a game engine but often a custom material is needed to achieve the game’s artistic vision. Since graphics programmers and technical
artists create the code behind materials, a custom material from scratch requires their time.
Because we are still a smaller studio, our technical resources are often constrained, and we could not devote this larger chunk of custom material time on Breaker. We are therefore using a
new material on the Unreal Engine Marketplace, called Stylized Rendering System. This gives us the base for our cel shaded look in various light and shadow conditions.
Our character art team can then customize this material and create our cel-shaded, watercolor look with a combination of hand-painted and procedural textures in Substance 3D Painter. This tool allows us to paint like traditional artists in 3 dimensions on a sculpture but do so digitally in our intended style goals for Breaker. When these textures combine with the cel-shaded material properties, we are able to achieve a really fun result!

What's up Next?
On the rigging / animation side, we'll be sharing soon what Chris Bullock, Lead Animator, and his team worked based on these characters, all the decisions and trade-offs that had to be considered. Stay tuned!
61 notes
·
View notes
Text
Heart to Heart w/Will Tate: Environment Art for Hyper Light Breaker
Alx sat down with Will Tate, Lead Environment Artist on Hyper Light Breaker, to talk about game art, careers in environment art, and more!
youtube
Environments will have day/night lighting cycles
Hyper Light Breaker became an idea before HL was done
Winter area was confirmed (winter areas are also Alx's favorite kind of area)
Plus some previews of the hub, and stage 1 and 2 of the world:
youtube
youtube
youtube
16 notes
·
View notes
Text
Hyper Light Breaker: Gun Iteration
The craft of making games is an iterative one. You rarely get something right on the first (or even tenth!) go, and often there's a fair amount of discussion that goes into a finalized asset that winds up in a released game. Here's an example of how such a conversation goes.
John DeRiggi, our Lead Character Artist who modeled the gun in this video, shares a bit of his process:
What reference material were you working off of?
I was primarily working from Danny Moll's awesome concepts. Danny based his concepts on Alx Preston's initial concept sketches. I used a few references of actual guns for thinking through the forms from other angles.


What was your thought process?
First, I closely matched the concept from the side view of the weapon first.
Then, I created appropriate depth and bevels to each part as needed for a believable representation of this concept in 3D, matching the style choices created by the concept artist.
Tell us more about the iterations and considerations here.
These guns are currently in a blockout state (rough) to primarily create the intended silhouette and large forms. Doing this blockout first for any assets allows us to iterate faster and earlier in case art direction needs to change after seeing the initial forms in 3D. This avoids loads of lost time if an asset needs to be scrapped. It also allows us to make the big decisions first, and therefore save time reworking a completed production asset with refined forms, details, textures, materials, etc.
Let us know what you think of this weapon and our dev process!
33 notes
·
View notes

Text
Heart to Heart w/Kim Belair: Narrative for Hyper Light Breaker
We had the pleasure of being able to interview Kim Belair, Co-Founder + CEO of Sweet Baby about her agency’s work on Hyper Light Breaker for the past year, narrative writing for games, hiring and career paths in game writing, and more!
youtube
Watch Alx Preston sit down with Kim for the latest in our Heart 2 Heart Series.
Here are some highlights from the stream, compiled by our wonderful mod Polare.
SweetBaby has worked on HLB for a year.
Story details from Hyper Light Drifter may be "pulled into" Breaker's story, but it is not a continuation of Drifter’s story nor a sequel.
Easter Eggs are more than likely to appear.
One goal is to make the co-op and single player story experiences "seamless”.
"Empathy" is a word to help convey HLB's tone.
Not traveling to HLD locations, "different story, different land".
HLB will likely not have voice acting.
PLUS check out some exciting new game art drops!


112 notes
·
View notes