
Last Seen Blogs

flyingsnake0
FlyingSnake

khayman69
Khayman

fodyfamily
Daily Eating Delicious Fast Food Make Our life Happy and Refresh

why-doesnt-anyone-stop-me
Love Conquers All☂︎

erogenousmind
Erogenous Mind
Text
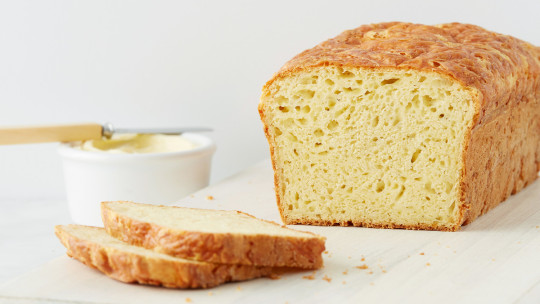
Healthiest Bread at Panera
The healthiest bread at Panera should be easy to find since the actual name of Panera is Panera Bread.
When you walk into a Panera all you see is bread (and cookies and muffins) before you get to order. Because I had posted: Which is the Healthiest Bread at Subway, I thought it would be a good idea to check out Panera.
Panera is famous for soups, salads, and sandwiches and for making fast food that is healthier and fresher than the competition. I have visited to define The Perfect Order at Panera (with Smart Points).
Now, with the advent of touch screen ordering - you know all of your choices when it comes to the bread for your sandwich.
When I visited the store, I didn’t even see a person near the check-out counter. I simply ordered on the screen, grabbed a coffee mug, and waited for my sandwich. I then wondered if I wasted my money paying for the coffee since there was no one to see me grab a mug (but I do not condone stealing).
I do wonder how they know if you paid for your drink but maybe they don’t care?
The healthiest bread you can buy is a 100% whole grain loaf. It should have 4 grams of fiber or more per serving and less than 5 grams of added sugar. You would think that Panera would offer 100% whole grain because it is so popular with the healthy crowd.
I chose the Whole Grain Pan Loaf since it was the only whole grain choice for my sandwich on the screen. Here is the nutritional information for one slice:
130 calories, 1 g fat, 0 g saturated fat, 26 g carbohydrates, 2 g sugar, 6 g protein, 3 g fiber, 240 mg sodium, 4 Freestyle SmartPts
One thing you notice right away is the fiber content is lower than it should be. This “whole grain” is not 100% whole grain and none of the breads at Panera are 100% whole grain.
You can tell by just looking at it that it is not a 100% whole grain loaf as it is quite fluffy. My primary bread is a sprouted wheat type so I am not used to fluffy.
But, the bread does well on added sugar. Two grams is great!! My only concern is the sodium which seems really high. Two slices will put 580 mg in your body which is high for bread. Once you add bacon to your sandwich, you are in high salt heaven.
How did it taste? It was okay. I found the consistency a bit gummy and the flavor was bland (even with all that salt).
Go ahead and choose the whole grain option when you are looking for the healthiest bread at Panera.
Do not order a sourdough bread bowl (670 calories and 1160 mg of sodum!), the honey wheat loaf (not whole grain and 4 grams of sugar) or the cinnamon raisin swirl bread (12 grams of sugar per slice!!).
What do you order when you go to Panera? Are you surprised that there is no 100% whole grain option?
Other posts you might like:
Source: https://snack-girl.com/snack/healthiest-bread-at-panera/
0 notes
Text
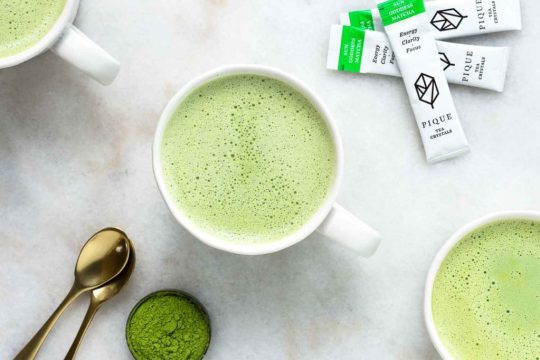
Matcha Green Tea Latté

Matcha green tea is a vibrant green powder made from young, green tea leaves. It’s traditionally used ceremonially in Japan, but it’s also a popular flavoring for sweets like these matcha blueberry popsicles as well as other treats and drinks. And a matcha green tea latté is a particularly popular morning drink.
Matcha is typically made by whisking powdered green tea into hot water where it forms a delicate and slightly bitter brew. When you make a matcha green tea latté, you blend matcha powder with warm milk and froth them together to form an ethereally creamy morning drink.
In most matcha lattés you’ll find at local coffee shops, culinary matcha powder is blended with a significant amount of granulated sugar, and then frothed with steamed milk. Sugar counteracts the matcha’s naturally bitter undertones, and makes the drink sweet and dessert-like. Starbuck’s version, for example, packs a whopping 32 grams of sugar – or just shy of what you’ll find in a can of soda.
While matcha itself is fairly nutrient-dense, and particularly rich in chlorophyll and catechins which act as natural detoxifiers that help to reduce oxidative stress among other benefits, adding sugar to matcha certainly counteracts some of its benefits. So, make it at home. You’ll be able to control how additional sweetener you add, if any at all, and it’ll be less expensive than buying it at a coffee shop.
How to Make a Matcha Green Tea Latté
At its simplest, a matcha tea latté needs only matcha powder and milk. You can also add sweeteners like honey, or superfood boosters like collagen peptides, spirulina, or royal jelly if you like. And while matcha lattés are typically made with milk, you can also substitute light coconut milk, macadamia milk or another non-dairy alternative.
You can make a matcha latté on the stove by whisking matcha powder into milk as it warms; however, for a truly frothy and perfectly blended version, you should pick up a milk frother like this one. After adding the matcha and milk, all you need to do is press a button, and it’ll blend, warm and froth your latté beautifully.

Print
<![CDATA[ .tasty-recipes-image float: right; .tasty-recipes-print-button background-color: #666677; display: inline-block; padding-left: 1em; padding-right: 1em; padding-top: 0.5em; padding-bottom: 0.5em; text-decoration: none; a.tasty-recipes-print-button color: #fff; a.tasty-recipes-print-button:hover color: #fff; .tasty-recipes-rating.tasty-recipes-clip-10 -webkit-clip-path: polygon(0 0, 10% 0%, 10% 100%, 0% 100%); clip-path: polygon(0 0, 10% 0%, 10% 100%, 0% 100%); .tasty-recipes-rating.tasty-recipes-clip-20 -webkit-clip-path: polygon(0 0, 20% 0%, 20% 100%, 0% 100%); clip-path: polygon(0 0, 20% 0%, 20% 100%, 0% 100%); .tasty-recipes-rating.tasty-recipes-clip-30 -webkit-clip-path: polygon(0 0, 30% 0%, 30% 100%, 0% 100%); clip-path: polygon(0 0, 30% 0%, 30% 100%, 0% 100%); .tasty-recipes-rating.tasty-recipes-clip-40 -webkit-clip-path: polygon(0 0, 40% 0%, 40% 100%, 0% 100%); clip-path: polygon(0 0, 40% 0%, 40% 100%, 0% 100%); .tasty-recipes-rating.tasty-recipes-clip-50 -webkit-clip-path: polygon(0 0, 50% 0%, 50% 100%, 0% 100%); clip-path: polygon(0 0, 50% 0%, 50% 100%, 0% 100%); .tasty-recipes-rating.tasty-recipes-clip-60 -webkit-clip-path: polygon(0 0, 60% 0%, 60% 100%, 0% 100%); clip-path: polygon(0 0, 60% 0%, 60% 100%, 0% 100%); .tasty-recipes-rating.tasty-recipes-clip-70 -webkit-clip-path: polygon(0 0, 70% 0%, 70% 100%, 0% 100%); clip-path: polygon(0 0, 70% 0%, 70% 100%, 0% 100%); .tasty-recipes-rating.tasty-recipes-clip-80 -webkit-clip-path: polygon(0 0, 80% 0%, 80% 100%, 0% 100%); clip-path: polygon(0 0, 80% 0%, 80% 100%, 0% 100%); .tasty-recipes-rating.tasty-recipes-clip-90 -webkit-clip-path: polygon(0 0, 90% 0%, 90% 100%, 0% 100%); clip-path: polygon(0 0, 90% 0%, 90% 100%, 0% 100%); .tasty-recipes-nutrition ul list-style-type: none; margin: 0; padding: 0; .tasty-recipes-nutrition ul:after display: block; content: ' '; clear: both; .tasty-recipes-nutrition li float: left; margin-right: 1em; .tasty-recipes-plug text-align: center; margin-bottom: 1em; display: -ms-flexbox; display: flex; -ms-flex-align: center; align-items: center; -ms-flex-pack: center; justify-content: center; .tasty-recipes-plug a text-decoration: none; box-shadow: none; .tasty-recipes-plug a img width: 150px; height: auto; margin: 5px 0 0 8px; display: inline-block; @media print .tasty-recipes-no-print, .tasty-recipes-no-print * display: none !important; /* Tasty Recipes simple recipe card styles */ .tasty-recipes-display border: 0.15em solid #ededed; padding: 1.5em; margin-bottom: 1em; .tasty-recipes-plug margin-bottom: 1em; .tasty-recipes-display ul, .tasty-recipes-display ol margin-left: 0; .tasty-recipes-display h2 font-weight: 400; text-transform: lowercase; padding-top: 0; .tasty-recipes-details font-size: 0.8em; .tasty-recipes-label color: #797B7C; .tasty-recipes-details ul li list-style-type: none; .prep-time, .total-time, .cook-time display: inline-block; width: 20%; margin: 0.8em 0; vertical-align: top; .tasty-recipes-print-button margin-top: 0.5em; margin-right: 0.5em; padding: 0.5em 1em !important; float: right; font-size: .9em; font-weight: 800; background-color: #797B7C !important; border: none !important; .tasty-recipes-image border-left: 1.5em solid rgba(0,0,0,0); .tasty-recipes-rating a text-decoration: none; .tasty-recipes-rating p margin-bottom: 1rem; display: inline-block; .tasty-recipes-rating .rating-label font-style: italic; font-size: 0.8em; .tasty-recipes-notes margin-bottom: 1rem; .tasty-recipes-nutrition padding: 0.5em; border-top: .15em solid #ededed; .tasty-recipes-nutrition ul text-align: center; .tasty-recipes-nutrition ul li list-style-type: none; font-size: 0.8em; margin-left: 0; width: 30%; .tasty-recipe-ingredients h3, .tasty-recipes-ingredients h3, .tasty-recipe-instructions h3, .tasty-recipes-instructions h3, .tasty-recipes-notes h3 font-weight: 200; margin-top: 0.6em; margin-bottom: 1.2em; text-transform: lowercase; .tasty-recipe-ingredients h4, .tasty-recipes-ingredients h4, .tasty-recipe-instructions h4, .tasty-recipes-instructions h4 font-size: 1.2em; font-weight: 700; text-transform: lowercase; color: #797B7C; .tasty-recipes-description p font-size: .8em; font-style: italic; .tasty-recipes-nutrition h3 font-size: 1em; text-align: center; margin-top: 1em; .tasty-recipes-notes h3 font-size: 1.2em; .tasty-recipes-notes p, .tasty-recipes-notes ul font-size: 0.8em; .tasty-recipes-keywords p font-size: .8em; margin-top: 1em; margin-bottom: 1em; .tasty-recipes-entry-footer text-align: center; padding-top: 1rem; .tasty-recipes-entry-footer p margin-bottom: 0; .tasty-recipes-source-link text-align: center; ]]>
Matcha Tea Latté
Matcha tea lattes are creamy and milky with the faint bittersweet notes of green tea. You can sweeten them with honey or other sweeteners, or drink them plain.
Author: Jenny
Cook Time: 5 minutes
Total Time: 5 minutes
Yield: 1 serving
Instructions
Pour the milk into a milk frother, like this one. Sprinkle the matcha over the milk, and turn on the frother until the milk is warmed, and the matcha is fully dissolved.
Serve warm.
Notes
Add-ins for your Match Tea Latté: You can add collagen peptides, vanilla bean powder, spirulina, or honey.
Dairy-free alternative: If you’re dairy-free by necessity or choice, try substituting 12 ounces light coconut milk for the full-fat milk.
Did you make this recipe?
Tag @nourishedkitchen on Instagram and hashtag it #nourishedkitchen
Where to Buy Matcha for Lattés
Matcha is very fine, powdered green tea made from young leaves that is traditionally produced and used in Japan. There are several grades of matcha with ceremonial grade matcha being of the highest quality.
Tea can uptake heavy metals from the soil, so you want to purchase a very high-quality tea. You can purchase a quadruple-screened, ceremonial grade matcha here.
Our Other Favorite Morning Drinks
If you like matcha lattés in the morning, you might also like some of our other favorite morning drinks too!
Chai-spiced Butter Tea is vibrant and nourishing, enlivened by the flavor of sweet spices like cloves and coriander.
Mexican-Style Hot Chocolate made with dark chocolate, warm milk and just a hint of spice.
Supergreen Morning Tonic is perfect in the spring and a vibrant morning juice with wheatgrass, mint and apple.
Golden Milk is another deeply nourishing morning drink that’s spiked with antioxidant-rich turmeric.
Love it? Share it.
Source: https://nourishedkitchen.com/matcha-tea-latte/
0 notes
Text
Pie Baking Masterclass & Retreat - sold out!
I'm so excited to announce that this October 14-15, Susan Spungen and I are hosting a two-day Pie Baking Masterclass and Retreat in East Hampton!
We will gather at Susan’s light-filled home in Long Island during one of the most beautiful times of year to bake, harvest, share farm fresh meals, and most importantly demystify homemade pie crust so you can impress all of your friends and family this holiday season and hone those skills you’ve always longed to master.
All skill levels are welcome. This will be a perfect opportunity to enjoy fall on Eastern Long Island and polish your skills so you feel confident in your holiday pie baking and pie crust skills.
Overview
Baking Lessons - We will each demonstrate our favorite pie crust techniques both by hand and using a food processor, and show you how we use them in sweet and savory treats all season long. We’ll cover the basics, like proper rolling technique, how to use a French rolling pin, how to keep your dough at the right temperature, how to pick up dough to transfer it, and so much more! We’ll show you blind baking techniques, decorative pie crusts, and traditional lattice topped pies. Then we will let you loose in the kitchen to bake your own pie or galette to take home. You will receive one-on-one instruction from each of us.
Farm Visits - Fall in the Northeast is a beautiful and abundant time in the orchards and fields. We will visit a local pick-your-own apple orchard for perfect baking apples, have dinner at Amber Waves, and stop by Quail Hill Farm for greens and herbs to make into savory galettes.
Fresh Seasonal Meals - We will gather together around the table for one breakfast, two lunches, apertivo hour, one dinner, and snacks along the way all made from fresh local ingredients.
Photography and Styling - While this isn’t a photography workshop specifically, we will all want to share our creations so we’ll spend a bit of time photographing our beautiful work to share on social media and chatting with Julie Resnick of @thefeedfeed, who will join us for a meal.

Source: http://www.apt2bbakingco.com/home//pie-baking-masterclass-and-retreat
0 notes
Text
Sabudana (Tapicoa) Bhel, Chaat
Sabudana Bhel this is a delicious appetizer or also can be served with afternoon tea. Sabudana Bhel or I like to call this chaat is an elegant looking dish, that will sure to impress all your family and friends.
Method
Wash sabudana (tapioca) changing the water 2-3 time and soak with one cup of water, soak 8 hours or more. Sabudana will become all most four time in volume and will be soft.
Heat the oil in a frying pan on medium heat. Test the heat by adding one cumin seed to the oil; if seed cracks right away oil is ready. Add cumin seeds and mustard seeds after seeds crack add turmeric, lower the heat to low. Add sabudana, and salt. Keep stir frying until sabudana becomes translucence, looks like pearls. This should take about another 4-5 minutes. Stir gently and making sure tapioca doesn’t get sticky and stuck to each other. Turn off the heat, and drizzle 3-4 drops of lemon juice and stir.
Transfer sabudana to a wide bowl stir for few minutes with fork making sure sabudana pearls are separated and not sticky. Serve the sabudana at room temperature.
Add 1/2 teaspoon of salt and green chilies to cubed potatoes, mix it well and set aside.
Assembling the Sabudana Bhel, in a serving platter spread the cooked sabudana, sprinkle the roasted peanuts, over peanuts sprinkle the potatoes, then aloo lacha, some more peanuts and drizzle the chutney.
Recipe Notes
Suggestion, this is a easy recipe, you can prepare every thing in advance, cooked sabudana can be refrigerator for up to a week. Aloo Lacha and tamarind chutney can be stored for months.
Please Subscribe to my YouTube channel

Source: http://www.manjulaskitchen.com/sabudana-tapicoa-bhel-chaat/
0 notes
Text
Our Best Apple Recipes to Go Beyond Pie
Bonnier Corporation Privacy Policy
This policy was last updated on May 16, 2018.
At Bonnier Corporation, your privacy is important to us. This Privacy Policy applies to all of the products, services, and websites offered by Bonnier Corporation and its subsidiaries or affiliated companies (collectively, "Bonnier").
To better protect your privacy, we provide this notice explaining our privacy practices and the choices you can make about the way your information is collected and used by Bonnier.
Bonnier acts as a “data controller” for the purposes of the EU’s General Data Protection Regulation. Bonnier has appointed a Data Protection Officer for you to contact if you have any questions or concerns about Bonnier’s personal data policies or practices. The Data Protection Officer’s contact information is as follows:
Jeremy Thompson, General Counsel
Bonnier Corporation
460 N. Orlando Ave., Ste. 200
Winter Park, FL 32789
[email protected]
If you have any questions about this Privacy Policy, or to check your information to verify, update or correct it, please write to us via e-mail at [email protected], or via postal mail at:
Privacy Department
Bonnier Corporation
460 N. Orlando Avenue, Suite 200
Winter Park, FL 32789
You may also ask for a summary of the information that we have retained, how we have used it, and to whom it has been disclosed. For your protection, we may require that you authenticate your identity before we provide you with any information.
Note: For questions related to your magazine subscription, please visit the respective magazine’s customer service website.
An overview of the information that Bonnier may collect
You are able to take advantage of many Bonnier products, services, and websites without providing any information that personally identifies you by name, address, or other personally-identifying information. We only collect personally-identifying information when you voluntarily submit it to us.
Sometimes, we need personally-identifying information in order to provide you with the products and services that you request. Depending upon the product or service, we may ask you for a variety of personally-identifying information. This might include, for example, your name, address, e-mail address, telephone number, gender, and birth date. We may also ask for other information about you, such as your credit card information (when you are making a purchase), interests, income, or education level. We consider certain identifying information "sensitive." This includes your credit card number, income level, or any other information that would normally be considered confidential. Some types of personal information will NEVER be requested or collected, such as information on your race or ethnic origin, political opinions, trade union memberships, religious beliefs, health, sex life, or sexual orientation.
You may choose not to provide us with any personally-identifying information. In that case, you can still access and use many portions of our websites; however, you will not be able to access and use those portions of any Bonnier website that require your personal information.
Many Bonnier websites include community features, such as online forums and message boards. Information that is posted in these areas becomes public information and the use that any third party makes of this information is beyond our ability to control. You should exercise caution before disclosing any personally-identifying information in these public venues. If you elect to submit content that includes information that can be used to identify you, you must assume that the content can and will be displayed on any website on the Internet.
At some Bonnier sites and through certain promotions, you can submit personally-identifying information about other people. For example, you might submit a person's name and e-mail address to send an electronic greeting card; or, if you order a gift online or offline and want it sent directly to the recipient, you might submit the recipient's name and address. Some Bonnier websites also provide referral services to help you inform a friend about our websites, products, or services. The types of personally-identifying information that we collect about other people at pages like these may include the person's name, address, e-mail address, or telephone number. We will only ask you for the information about your friend that we need in order to do what you request.
Our properties may feature Nielsen proprietary measurement software, which will allow you to contribute to market research, such as Nielsen TV Ratings. To learn more about the information that Nielsen software may collect and your choices with regard to it, please see the Nielsen Digital Measurement Privacy Policy at http://www.nielsen.com/digitalprivacy.
We allow third-party companies to serve ads and/or collect certain information when you visit our web site. These companies may use information you have shared (e.g., click stream information, browser type, time and date, subject of advertisements clicked or scrolled over, e-mail address) during your visits to this and other Web sites in order to provide advertisements about goods and services likely to be of greater interest to you. Our partners use this information to recognize you across different channels and platforms over time for advertising, analytics, attribution, and reporting purposes; any information collected is stored in hashed or non-human-readable form. These companies typically use a cookie or third-party web beacon to collect this information. To learn more about this behavioral advertising practice or to opt-out of this type of advertising, you can visit http://www.networkadvertising.org or http://www.aboutads.info/choices.
Bonnier websites sometimes may offer contests, sweepstakes, or promotions that are sponsored by or co-sponsored with identified third parties. By virtue of their sponsorship, these third parties may obtain personally-identifying information that visitors voluntarily submit to them in order to participate in the contest, sweepstakes, or promotion. Bonnier has no control over the third-party sponsors' use of this information. If a third-party sponsor beyond our control will obtain information that you supply us, we will notify you at the time we collect the information from you. For certain promotions, only those who provide us with the requested personally-identifying information will be able to order products, programs, and services, or otherwise participate in the promotion's activities and offerings.
Some of our websites contain links to other sites. By clicking on these links, you will leave the website operated by Bonnier and this Privacy Policy will no longer apply. These other sites' information practices may be different than ours. You should consult the other sites' privacy notices, as we have no control over information that is submitted to, or collected by, these third parties.
How we use the information we collect
We use the personally-identifying information that you provide us to fulfill your requests for our products, programs, and services, to respond to your inquiries about offerings, and to offer you other products, programs, or services that we believe may be of interest to you. We sometimes use this information to communicate with you, such as to notify you when you have won one of our contests, when we make changes to subscriber agreements, to fulfill a request by you for an online newsletter, or to contact you about your account with us. We do not use your personal information to make automated decisions.
We may syndicate the publicly available content of our community areas to unaffiliated third-party websites, using RSS or other technologies. The information you have shared in the community areas may be included in this syndication.
We will use the personally-identifying information that you provide about others in order to provide the products or services that you have requested; for example, to enable us to send them your gifts or cards. If you provide us someone else's personally-identifying information for referral purposes, we may use that information to invite them to visit our websites or to provide them information about our products or services.
If you provide us with your e-mail and/or postal address, we may include that address in e-mail and/or postal address lists that we sell, trade, or rent to third parties. These lists will never contain sensitive information. If you do not wish for your e-mail or postal address to be shared with companies not owned by Bonnier who want to market products or services to you, you have the opportunity to opt out, as described below. You may also opt out of the receipt of any marketing materials from Bonnier as described below.
We may transfer your sensitive personally-identifying information to other Bonnier offices for internal management and administrative purposes. In addition, your personal data will be transferred to other Bonnier offices where necessary for the performance or conclusion of our contractual obligations to you or for your benefit. Transfers of personally-identifying information may also be made where necessary for the establishment, exercise, or defense of legal claims. We do not transfer personal information internationally.
Bonnier will only share your sensitive personal information with outside companies or individuals in any of the following limited circumstances:
When we use trusted businesses or persons to process personal information on our behalf. Before sharing any personal information with outside parties, we require that these parties agree to process such information based on our instructions and in compliance with this Privacy Policy and any other appropriate confidentiality and security measures.
When we have a good faith belief that access, use, preservation, or disclosure is necessary to (a) comply with applicable law, regulation, or legal process; (b) enforce the applicable Terms of Service or other agreements and policies on the Company's Websites; (c) detect, prevent, or otherwise address fraud, security, or technical issues; or (d) protect against imminent harm to the rights, property, or safety or Bonnier, its users, or the public as required or permitted by law.
When you consent. Before we share your sensitive personal information outside of the previously listed circumstances, we will ask you for permission first. Please note that this only applies to sensitive information, as defined above.
We may also use, transfer, sell, and share aggregated, anonymous data about our users for any legal purpose, such as analyzing usage trends and seeking compatible advertisers and partners. In no event will this aggregated data contain any information that could be used to identify individual users of our products or services.
How we protect the safety and integrity of the information we collect
We take appropriate physical, electronic, and procedural measures to safeguard and protect your personal information. We use a variety of security measures, including encryption and authentication, to maintain the confidentiality of your personal information. We store your personal information on systems behind firewalls that are only accessible to a limited number of persons, each of whom is required to keep the information confidential. We also take appropriate measures to secure the transmission of sensitive personal information from your computer to the Company's computers. When you transmit sensitive personal information to us, like credit card information, we offer the use of a secure connection to our servers. To the extent you select the secure connection method or your browser supports such functionality, all credit card account information that you supply is transmitted via secure encryption technology. Regardless of these measures, no system connected to the Internet or data transmission sent over the Internet can be guaranteed to be 100% secure. We will provide notice if we become aware of any security breach that may affect any sensitive personal information pertaining to you that we have stored on our systems.
Bonnier employees, agents, and contractors who have access to personally-identifying information are required to protect this information in a manner that is consistent with this Privacy Policy and may not use the information for any purpose other than to carry out the services they are performing for Bonnier. These individuals are bound by confidentiality obligations and may be subject to discipline, including termination and criminal prosecution, if they fail to meet these obligations.
Bonnier only collects personal information that is relevant to the purposes for which it will be used. Though we do take appropriate steps to review and update the information that we store to ensure that it is accurate, complete, and current, we also depend on you to update or correct your personal information when necessary.
You may correct or delete any or all of the personal information you have provided to us at any time. Many of our websites provide means to review and update the personal information that you have provided on that website. To inquire about personally identifiable information that Bonnier has collected about you, or about other ways to correct factual errors in that information, please send us an e-mail at [email protected]. (Note: Do not use this email address to send questions about your subscription. Instead, please visit the respective magazine’s customer service website.) To protect your privacy and security, we will take reasonable steps to help verify your identity before granting access or making corrections. We will decline to process requests where we cannot verify the identity of the requester. We may also decline to process requests that are automated, repetitive, systematic, or impractical, or that might jeopardize the privacy of others.
In some limited circumstances, such as to resolve disputes, troubleshoot problems, and enforce our policies, we may retain some of information that you have requested us to remove. Therefore, you should not expect that all of your personal information will be completely removed from our databases in response to your requests.
We only use the information we collect for purposes consistent with this policy. If we propose to use your personal information for purposes beyond that explained in this policy, we will provide appropriate notice before doing so and we will provide you with the means to opt out of those uses. We will not use your sensitive personal information for any purposes other than those described in this Policy unless we have obtained your consent.
Your privacy options
If you prefer not to receive e-mail communications from other companies, you may choose to remove yourself from any e-mail lists that we provide to third parties for marketing purposes by sending us an e-mail at [email protected]. You will still receive information from Bonnier and its various brands, but we will not share your address information with anyone else.
If you prefer not to receive postal communication from other companies, you may choose to remove yourself from any postal mailing lists that we provide to third parties for marketing purposes by sending us an e-mail at [email protected], or writing us at P.O. Box 6364, Harlan, IA 51593-1864. You will still receive information from Bonnier and its various brands, but we will not share your address information with anyone else.
We only want to communicate with you if you want to hear from us. If you prefer not to be contacted at all, you may opt out of receiving any communications from us at any time by notifying us at [email protected]. You may also notify us by sending mail to the following address:
Online Marketing Department
Attn: Privacy Preferences
Bonnier Corporation
460 North Orlando Avenue, Suite 200
Winter Park, FL 32789
In all requests, please tell us what communications you would like to opt out of, what means we have been using to contact you (such as your e-mail or postal address), the date of your request, and a way to reach you in case we need to personally contact you in an effort to comply with your request. We reserve the right to send you certain communications, such as technical alerts, without offering you the opportunity to opt out of receiving them.
Enforcement and Compliance with this Privacy Policy
We take our Privacy Policy seriously and we regularly review our own compliance with this Policy. If you have any questions or concerns about this Policy, or if you think that we have used your personal information in a manner inconsistent with this Policy, please contact us at:
Privacy Department
Bonnier Corporation
460 North Orlando Ave., Suite 200
Winter Park, FL 32789
If we receive a complaint from you, we will contact you in an attempt to address your concerns. If we are not able to resolve a complaint, we will participate in appropriate independent recourse mechanisms as necessary.
Bonnier Corp. Website Data Disclosure
This policy was last updated on May 25, 2018
Bonnier Corp. and its brands use cookies to identify your individual device so that we and our third-party partners can efficiently target you with content and advertisements that will be relevant to you, based on the pages you visit on our site(s) and other websites across the internet.
Bonnier may collect information such as the type of browser you use, your operating system, your IP address, the type of device you are using to access the site, and the domain name of your Internet Service Provider. This information, by itself, does not permit individual identification, meaning that you will remain anonymous. However, if you elect to provide us with personally-identifying information during your visit, that information may be linked to your IP address, or to your email address where we may have that on file through other Bonnier Corp. products or services.
When you visit our websites, we and our third-party partners send cookies — small, removable data files – to your computer. We use cookies to uniquely identify your browser, which allows us to enhance and personalize your online experience at Bonnier websites. For example, cookies allow us to recognize you when you return to a website and present relevant content to you when you visit. Most browsers are initially set up to accept cookies, but you can configure your browser to warn you when cookies are sent, or to refuse all cookies. Some of the features and services of Bonnier websites may not operate properly if your cookies are disabled. Cookies, by themselves, do not provide us with any personally-identifying information.
On our websites, we may also use tiny graphic images called pixel tags, web beacons, or clear gifs. These tiny images help us to analyze our users' online behavior and collect other data, such as page views or advertising responses. Pixel tags also allow us to send you email in a format that you can read, and let us know when you have opened an email message from us. Pixel tags may also be used to deliver cookies. Some of our websites also use third-party advertising companies to serve ads when you visit. These companies may use non-personally-identifying information about your visits to this and other websites in order to provide advertisements about goods and services of interest to you.
We work with reputable third parties that provide data tracking and collection technologies in order to:
Present or serve the advertisements you may see at Bonnier websites;
Deliver and track email communications;
Process purchase orders through e-commerce transactions;
Fulfill print and digital subscription orders; and
Provide marketing leads to third-party organizations (where you have agreed to allow us to do so).
These companies may collect information about you on our behalf. We require that these parties agree to process any such information based on our instructions and in compliance with this Privacy Policy and any other appropriate confidentiality and security measures.
We allow third-party companies to serve ads and/or collect certain information when you visit our website. These companies may use information you have shared (e.g., click stream information, browser type, time and date, subject of advertisements clicked or scrolled over, email address) during your visits to this and other websites in order to provide advertisements about goods and services likely to be of greater interest to you. Our partners use this information to recognize you across different channels and platforms over time for advertising, analytics, attribution, and reporting purposes; any information collected is stored in hashed or non-human-readable form. These companies typically use a cookie or third-party web beacon to collect this information. To learn more about this behavioral advertising practice or to opt-out of this type of advertising, you can visit www.networkadvertising.org or www.aboutads.info/choices.
You may correct or delete any or all of the personal information you have provided to us at any time. To inquire about personally identifiable information that Bonnier has collected about you, or about other ways to correct factual errors in that information, please send us an e-mail at [email protected].
If you have previously accepted Bonnier Corp.’s use of cookies, but now wish to reject that instead, please visit our Site Opt Out page.
For information on the data we store and how we use your data, please view our Privacy Policy.
Source: https://www.saveur.com/consent.php?redirect=https%3a%2f%2fwww.saveur.com%2four-best-apple-recipes-to-go-beyond-pie%3fdom%3drss-default%26src%3dsyn
0 notes
Text
Lemon Herb Garlic Butter Shrimp
Lemon Herb Garlic Butter Shrimp – Plump and juicy shrimp packed with incredible flavors and ready in just 10 minutes! Quick and delicious shrimp with a simple garlic butter sauce is proof that it doesn’t take much to make a darn good recipe in just minutes!
Garlic butter shrimp with lemon and herbs is a seafood recipe filled with perfectly bright and fresh flavors. Garlic + butter has always been my favorite combination for seafood – actually, for ALL FOOD – but it’s especially wonderful over shrimp. Have you tried my Garlic Butter Shrimp and Rice, yet? Please DO.
SO easy to throw together, this shrimp coated in the best lemon garlic butter sauce is a simple recipe guaranteed to impress! If you want an oven method for a similar dish, get my recipe for Lemon Garlic Herb Shrimp in Packets.
HOW TO MAKE LEMON HERB GARLIC BUTTER SHRIMP
Start with melting some butter, then add minced garlic and raw, deveined shrimp.
Season shrimp with salt, pepper, and sweet paprika; cook for 2 minutes per side.
When shrimp start to turn pink, add butter, lemon juice and herbs; fresh thyme or fresh basil and parsley is what I prefer, but you can use whatever fresh herbs you like.
When shrimp is completely pink, remove from heat. DO NOT overcook. If cooked for too long, they will turn rubbery and that’s definitely not a good thing. All in all, shrimp needs only 4 to 5 minutes to cook.
Taste for seasonings and adjust accordingly. I ALWAYS add more lemon juice. It’s never enough. 🤷♀️
Thus, with the best flavors and quickest prep time, Lemon Herb Garlic Butter Shrimp is an easy recipe that comes together in very little time and can be served over anything. Or, over nothing! Just you, the skillet with shrimp, and a fork. Happy times. 🍤
Besides, it’s LOW CARB and Keto-Friendly, so, you can, like, eat the whole thing. 😉
HOW LONG DOES IT TAKE TO COOK RAW SHRIMP?
Shrimp needs only 4 to 5 minutes to cook in a skillet. Cook shrimp until it is completely pink and opaque, and there are no more grey or bluish bits.
COOK’S NOTES FOR SUCCESSFUL SHRIMP
Use fresh ingredients; fresh shrimp, fresh lemon juice, and fresh herbs.
Buy shrimp that’s already been shelled and deveined.
Prep all your ingredients before you get started because this recipe comes together real fast.
WHAT TO SERVE WITH SHRIMP
To keep it low carb, you can serve this garlic butter shrimp over spiralized zucchini – get your ➡️ SPIRALIZER ⬅️ here. Also, you can serve shrimp over some real pasta, mushroom rice, or with roasted vegetables and a side salad.
MORE SHRIMP RECIPES
ENJOY!
TOOLS USED IN THIS RECIPE
Lemon Herb Garlic Butter Shrimp
Plump and juicy shrimp packed with incredible flavors and ready in just 10 minutes!
Course: Appetizers, Dinner, Side Dish
Cuisine: American, Mediterranean
Keyword: easy shrimp recipe, keto dinner idea, lemon herb garlic butter shrimp, low carb seafood recipes, shrimp dinner recipe
Servings: 4 serves
Calories: 306 kcal
Ingredients
1.5 to 2 pounds fresh jumbo shrimp, peeled and deveined, tail left ON
4 tablespoons butter, divided
4 cloves garlic, minced
1/2 teaspoon salt
1/4 teaspoon fresh ground pepper
1 teaspoon sweet paprika
2 tablespoons fresh lemon juice
2 tablespoons chopped fresh herbs
Instructions
Using paper towels, pat dry shrimp, thoroughly; set aside.
Set a large skillet over medium high heat and melt 3 tablespoons butter.
Stir in garlic and cook for 1 minute.
Add shrimp; season with salt, pepper, and paprika.
Cook shrimp for 2 minutes per side.
Add remaining butter, lemon juice, and fresh herbs; stir and cook for 1 more minute, or until butter is melted and shrimp is completely pink and opaque.
Remove from heat; taste for seasonings and adjust accordingly.
Serve.
Recipe Notes
Store leftovers in an airtight container and keep in the fridge for up to 3 days.
Nutrition Facts
Lemon Herb Garlic Butter Shrimp
Amount Per Serving
Calories 306 Calories from Fat 144
% Daily Value*
Fat 16g25%
Saturated Fat 8g40%
Cholesterol 459mg153%
Sodium 1714mg71%
Potassium 200mg6%
Carbohydrates 3g1%
Fiber 1g4%
Sugar 1g1%
Protein 37g74%
Vitamin A 595IU12%
Vitamin C 11.2mg14%
Calcium 270mg27%
Iron 4.3mg24%
* Percent Daily Values are based on a 2000 calorie diet.
Want To Save This Recipe?
SUBSCRIBE TO GET FREE UPDATES & A FREE ECOOKBOOK!
GET AN EMAIL WHEN THERE'S A NEW RECIPE
Source: https://diethood.com/lemon-herb-garlic-butter-shrimp/
0 notes
Text
Layered Chicken Taco Salad
Layered Chicken Taco Salad is an easy and delicious way to serve taco salad. It is perfect for feeding a crowd!
Taco salad is a great meal to serve anytime of year, but since it does not require the oven it is especially nice during the hot summer months.
There are many versions of taco salad and many ways to change it up. Today I am sharing a version that I recently made for my husband’s office lunch meeting.
This taco salad contains the basic ingredients. Meat, beans, cheese, lettuce, tomatoes, and toppings, but I changed up how I serve it.
I layered it in a 9×13 casserole type pan and it might forever change the way I serve taco salad. Or at least it will change the way I serve taco salad to a crowd or take to a potluck.
I have served taco salad layered in a large bowl or trifle dish. It works great that. But it can be hard to get all the way to the bottom of the bowl.
Often times when taco salad is layered in a bowl, you get a lot of one layer and not so much of another. Layering it in a 9×13 type pan changes that.
It is all the same layers, but served in shallow pan to make serving easier. This allows you to get the right amount of each layer. It was a simple change that made a big difference.
My version uses cooked chicken and black beans, but you could easily use a different kind of meat or a different kind of beans.
You can serve it as is or with tortillas or tortilla chips. No matter how you serve it, it makes taco salad for a large group so easy and delicious.
Yield: 8 servings
Quick and easy lunch or dinner perfect for anytime of year!
Prep Time 15 minutes
Total Time 15 minutes
Ingredients
4-6 cups chopped or shredded lettuce
4 cups cooked shredded chicken
1 can black beans, rinsed and drained
2 cups shredded cheese
2 tomatoes chopped
guacamole or avocado if desired
¾ cup catalina dressing
¾ cup salsa, mild, medium, or hot depending on how spicy you want it.
Tortilla chips, sour cream, additional salsa for serving.
Instructions
In a 9x13 pan or casserole type dish layer lettuce, shredded cooked chicken, beans, cheese, tomatoes, (and guacamole if using.)
In a small bowl combine catalina and salsa. Pour over salad. Or serve dressing on the side for everyone to put on their salad.
Serve with tortilla chips, sour cream, additional salsa, etc.
Nutrition Information:
Yield:
8
Serving Size:
1
Amount Per Serving:Calories: 430 Total Fat: 24g Saturated Fat: 9g Trans Fat: 2g Unsaturated Fat: 13g Cholesterol: 79mg Sodium: 935mg Carbohydrates: 27g Fiber: 10g Sugar: 10g Protein: 30g
Source: https://www.lynnskitchenadventures.com/layered-chicken-taco-salad/
0 notes
Text
Chicken Tortilla Soup + Weekly Menu
We had no real weekend plans and yet the weekend went by in a blur. Friday teased us with some lovely temperatures – there was a fire pit and a beer involved in my Friday evening and so, it was perfect. Especially since all of this was happening while the sun was still out.
There had been chatter about snow on Saturday but I didn’t believe it. I chose not to believe the rumor mill/weather man. I recently washed winter jackets and stored them away with the hope that they’d fit the girls for next season. Alas, around noon, the snow started falling. There were daffodils on my counter and snow falling big, fluffy flakes that were accumulating on trees, roofs, and grass.
I wanted to cry. But it didn’t stop Mark from continuing on a pub run with friends. So off they went while I happily hunkered down for some tennis watching and a long Peloton ride. When Piper was done with her nap, we ventured out to meet up with our rowdy bunch.
From there, the weekend was more or less over, it seemed. Sundays are all about church, grocery shopping, hockey, and prepping for the week ahead. But because the weather perked up and the snow melted away, we scheduled a playdate at the park after t-ball practice was cancelled. The girls were a mess – Piper had sand everrrrrrrrywhere.
For the little bit of time I was as productive as I should have been today, I planned this week’s menu. Except I had no clue what to include. I want to grill, but sadly, soup may be more apropos. It’s Michigan…we take it day by day.
As I sat down to blog tonight, I had no clue what I was going to come up with. I have several recipes on my SD card ready to go, but I had forgotten about this one! Maybe if I post my last “winter meal” before May it will mean that winter will ACTUALLY stay away? Probably not. And for that reason, remember this recipe. My coworker said it was the best Chicken Tortilla Soup she’s ever had and I very much so agree. You’ll love it, too…no matter the weather!
Chicken Tortilla Soup
Author: Nicole Morrissey
Prep time: 5 mins
Cook time: 40 mins
Total time: 45 mins
Serves: 8 servings (1½ cups + toppings)
Ingredients
Soup:
8 (6-inch) corn tortillas
2½ tsp olive oil
4 garlic cloves, minced
4 cups low-sodium chicken broth
3 cups canned tomato sauce
1 lb boneless, skinless chicken breasts
1 (15 oz) can black beans, drained and rinsed
1½ cups frozen corn
2 Tbsp chopped chipotles in adobo
1 tsp ground cumin
¾ tsp chili powder
½ tsp salt
ground black pepper, to taste
Toppings:
2 avocados, sliced
⅓ cup finely chopped red onion
⅓ cup finely chopped cilantro
8 lime wedges from 1 lime
Instructions
Cut 4 of the tortillas into thin strips. Roughly chop the remaining tortillas.
Heat 1 teaspoon oil in a large pot or Dutch oven over medium-high heat. Once hot, add half the tortilla strips and cook for 4-5 minutes or until golden. Remove to a paper towel-lined plate. Repeat with 1 teaspoon oil and remaining tortilla strips.
Add remaining ½ teaspoon oil to the pot and add the garlic; saute 30-60 seconds or until fragrant. Add the chopped tortilla,s chicken broth and next 9 ingredients (through pepper). Stir and bring to a boil. Reduce heat to medium-low and cover with a lid. Cook for 25-30 minutes, stirring occasionally.
Remove chicken to a cutting board and shred between two forks; return meat to the pot. Stir and serve hot with toppings.
Nutrition Information
Serving size: 1½ cups + toppings Calories: 286 Fat: 8.5 Carbohydrates: 38.0 Sugar: 5.0 Sodium: 923 Fiber: 10.0 Protein: 20.0 Cholesterol: 36
3.5.3251
Weekly Menu: April 28th – May 2nd
Be well,
Source: https://preventionrd.com/2019/04/chicken-tortilla-soup-weekly-menu/
0 notes
Text
8 Clever “Cheat Codes” That Will Make Your Real Life Less Difficult
You know those little tips and tricks that help make situations in your day-to-day life a little easier? Many people call them “life hacks,” but I don’t think that term is the best fit. While I don’t know any hackers personally, I have a feeling that computer hacking isn’t exactly a walk in the park! I also have a feeling that hacking takes time and effort (like most things do).
That’s why I always felt that those little tips and tricks were closer to “cheat codes” than hacks! Remember video game cheat codes? Back when my kids were little, they spent hours and hours playing games on the original Playstation. Some games had cheat codes, and if you knew a cheat code and entered it just right, you could get an advantage in the game that made it easier to play. (Do games still have cheat codes? I can’t keep up anymore!)
<![CDATA[.player-position padding-left:0px !important; padding-right:0px !important; padding-bottom:0px !important; .copy padding: 12px !important; font-weight: 700; font-size: 15px !important; ]]>
In today’s blog post, I thought I’d share a few of my favorite “cheat codes” for real life! Just like those cheat codes my kids used to use, these tips offer advantages that can make your day-to-day life a little bit easier. (And if you have a favorite tip or trick like these you’d like to share, swap your cheat codes in the comments at the bottom of this post!) :-)
1. Sunday Sandwich Prep
Save yourself time and stress throughout your work week by making all your lunch sandwiches on Sunday night! It’s easy enough to do, but the key is to leave the bread out of the equation to prevent it from getting soggy. Instead, just assemble the insides of your sandwiches!
Grab a couple of slices of cheese, some deli meat, plus your condiments like mayo and mustard. Layer your meat and condiments between the two slices of cheese, then pop it all into a sandwich bag and put it in your freezer. Repeat for all the sandwiches you’ll eat that week.
Then when you’re leaving for work in the morning, just grab a bag of prepped sandwich fillings out of the freezer. Grab a couple of pieces of bread, put it all in your lunchbox, and you’re ready to go!
2. Skip The Previews
Some DVDs and Blu-Rays will play previews or ads before they start your movie. But you can skip them by pushing a few buttons on your remote! Just hit Stop, Stop again, then Play to skip the ads and get straight to the movie. (And if hitting the Stop button twice doesn’t work, try hitting it three times. That usually does the trick!)
3. Keep Your Night Vision
It takes time for your eyes to adjust to both the light and the dark, depending on the environment. This can be a problem at night when you need to turn on a light for just a moment to find something! But you can keep your “night vision” by keeping one eye closed when you turn on the light. Once you turn it off, your eyes will have a much easier time adjusting back to the darkness.
4. Execute Perfect High Fives
Have you ever gone in for a high five and missed completely? It’s pretty embarrassing! But there’s an easy way to nail those high fives every time—keep your eyes on the other person’s elbow! I don’t understand exactly how this works, but it totally does. No more high five do-overs!
5. Warm Up Your Butter Knife
The next time you’re making yourself some toast, place your butter knife on your toasted bread right after it comes out of the toaster. The heat from the toast will warm up your butter knife! Then when you go to butter your toast, your warm knife will slice through the butter like… well, butter! (It makes the butter much easier to spread too.)
6. Prevent Lid Leakage
Every disposable coffee cup has a seam where the paper overlaps, and if that happens to line up just right with the lid of the cup, it nearly always leaks as you drink it. Instead, line the lid up so the hole is on the opposite side of the cup from where the seam is. It only takes one second to do, and you can enjoy your coffee free from leaks and dribbles!
7. Avoid Dry-Erase Disaster
When using dry erase boards, it’s almost inevitable that someone will eventually write on it with permanent marker by accident. But instead of messing with cleaners, there’s a much simpler way to remove permanent marker from a dry-erase board!
Just write over the permanent marker with a dry-erase marker. Both the dry-erase marker and permanent marker will come off together with an eraser!
Related: 19 Simple Ways To Remove Permanent Marker From Anything
8. Cure Your Hiccups
Nobody knows exactly why hiccups occur, but everyone knows that they are really annoying! But you can usually get rid of them by doing the following breathing exercise.
First, exhale all the air from your lungs, then inhale as slowly as possible until your lungs are full. Hold your breath for as long as you can, then exhale all that air back out as slowly as possible. This is usually all it takes to get rid of a run-of-the-mill case of hiccups!
What’s your favorite cheat code for real life?
Source: https://www.onegoodthingbyjillee.com/8-cheat-codes-for-real-life/
0 notes
Text
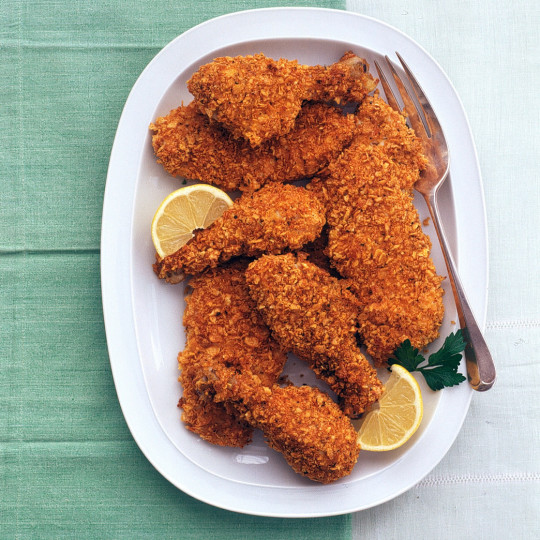
Tex-Mex chalupas
For a Texan, one of the finest things in life is gathering at a Tex-Mex table with friends and family, sharing stories as we dip our chips, being cautious when warned about the hot plates, and enjoying the occasional serenade from a band of guitar-wielding mariachis. For many Texans, the comfort of a meal at your local Tex-Mex spot is pure joy.
Of course, nothing beats a home-cooked meal, though for me a close second is a visit to a beloved Tex-Mex restaurant. Indeed, when I’ve been away, Tex-Mex is often my first meal when I return. And if I’m dining with my mom, then she will most likely be ordering a plate of chalupas, a favorite of hers.
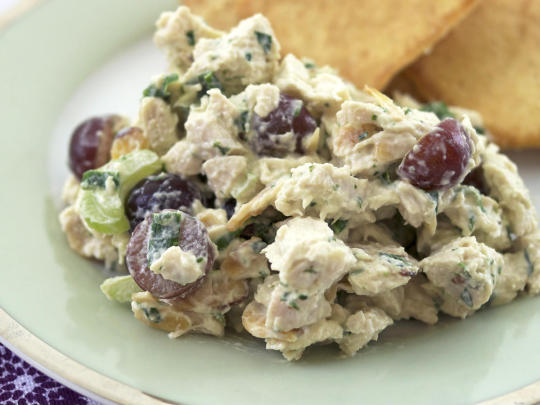
A chaulpa is a fried tortilla layered with refried beans, shredded lettuce, diced tomatoes, and a sprinkle of shredded yellow cheese. This is its most basic incarnation, though it can easily be enhanced with a dollop of guacamole or a scoop of protein such as taco meat or shredded chicken.
Chalupas have been appearing on Texas menus since the 1930s and are a classic addition to the cuisine’s canon. Like most Tex-Mex dishes, chalupas have a Mexican counterpart, in which—depending on what part of Mexico you encounter it—the foundation is flat, as it is in Texas, or formed into a canoe shape, hence the name, which means canoe in Spanish.
In Mexico, the toppings can vary from only salsa to a variety of meats, or even a stack of pickled vegetables. In Texas, however, the chalupa traditionally follows the pattern of tortilla, refried beans, lettuce, tomato, cheese, and perhaps guacamole and/or a protein. You may think of it was one large nacho and this would not be incorrect.
In Texas, you will sometimes encounter the same dish with the name tostada or tapatia. If you were to ask me what is the difference, I will admit I haven’t discerned that quite yet. Clearly, a road trip for more experiential research is in order! Though no matter its name, a crisp fried corn tortilla layered with toppings is always refreshing and good.
Now, the key to satisfying, heart-warming Tex-Mex is to fix the dishes with care and use quality ingredients. Chalupas, while not complicated, are no different. For instance, while it’s an easy dish to prepare, attention to detail is the difference between a so-so chalupa and one that is truly exemplary.
For instance, it’s important to fry your own tortillas. Sure, it’s smothered in toppings but the true connoisseur can tell the quality of the chalupa’s foundation. The refried beans should have flavor. And I don’t think additional proteins are always necessary, but if you do add meat, insure it’s well seasoned. Likewise, using fresh produce makes a huge difference.
As a home-cooking advocate, I do feel the best food comes from your own kitchen but sometimes you just want your your combo plate without having to fuss with making it. Though matter where you gather, when the food is less than satisfying, if the company is good and the atmosphere lively, then a Tex-Mex meal is always an excellent way to share time with those that you love.
—————
Would you like more Homesick Texan? Well, I’ve started offering additional recipes for paid subscribers to help with the costs of running the site. While I’m not taking anything away, if you’d like to support Homesick Texan and have access to exclusive, never-seen-before subscriber-only posts, please consider becoming a member; annual subscriptions are as low as $25. Thank you for reading, your consideration, and your support!
—————
Ingredients
Oil for frying
8 corn tortillas
Salt
2 cups refried beans
1/4 pound cheddar cheese, shredded
2 cups shredded iceberg lettuce
1/2 cup diced grape tomatoes or 1 ripe plum tomato, diced
Guacamole, for serving
Sliced pickled jalapeños, for serving
Salsa, for serving
Instructions
To make the fried tortillas, pour enough oil in a heavy skillet to come up 1/2 inch up the sides and heat to 350°F, about 5 minutes. If you don’t have a thermometer, you can test the temperature by sticking a wooden spoon into the oil. If it bubbles around the spoon, it should be ready for frying. Line a large plate or sheet with paper towels.
Fry the tortillas on each side until crisp and lightly browned, about 1 minute. Drain the fried tortillas on paper towels and lightly salt.
If not already warm, heat up the refried beans.
To assemble the chalupas, spread each fried tortilla with 1/4 cup of refried beans. Top with lettuce, tomatoes, and shredded cheese. Serve with guacamole, pickled jalapeños, and salsa on the side for garnishing.
Source: https://www.homesicktexan.com/2019/05/tex-mex-chalupas.html
0 notes
Text
Spinach And Artichoke Quinoa Salad
posted on September 12, 2018 by Averie Sunshine
Spinach And Artichoke Quinoa Salad – All the flavors of classic spinach and artichoke dip are in this HEALTHY salad!! The only thing that’s missing is tons of fat and calories! FAST, EASY, naturally gluten-free, vegetarian, and tastes DELISH!!
Recently I was having a spinach and artichoke dip craving but wanted to partake in a healthier version. I don’t know about you, but I can sit down with a restaurant-sized bowl of spinach and artichoke dip and eat the entire thing myself along with a half pound of bread and tons of tortilla chips.
And wash it down with plenty of margaritas. So good but not something I should do often.
MY OTHER RECIPES
Fast, Easy, Healthier
This naturally gluten-free and vegetarian salad made with quinoa is just the ticket to put a healthier spin on classic spinach and artichoke dip.
It’s easy, ready in 25 minutes, and gives you all the flavors you’re looking for minus some of the guilt. It’s creamy, cheesy, has texture from fresh spinach and artichokes, and it’s oh so good.
The Spinach And The Artichokes
You can’t have spinach and artichoke anything without, well obviously, spinach and artichokes.
I used fresh spinach and although it wilts some after coming in contact with the warm quinoa and lightly caramelized onions, it retains a better texture than frozen spinach. I didn’t want the pulverized texture of frozen spinach here either.
For the artichokes I used frozen artichoke hearts that I thawed. If you have a Trader Joe’s in your area, I love their frozen artichokes. I always have them on hand and toss them in everything from salads to on the grill when I’m grilling other veggies.
Although jarred artichokes in oil, or artichokes that you’ll often find at the olive bar of most major grocery stores would be fine, they’re greasier and saltier than what I was looking for.
What Else Is In The Salad
A mixture of Greek yogurt, mayonnaise, and Parmesan cheese tie everything together and lend creaminess and a perfect amount of saltiness to the salad.
I use 0% fat Greek yogurt, light mayo, and real Paremesan cheese. Don’t buy the green stuff in the can. You could use sour cream rather than Greek yogurt if you prefer.
A Healthy Secret
But I’ll tell you a secret. I liked this salad just as much before I added the Greek yogurt, mayo, and Parm as I did afterwards.
Sure, they lend a creaminess and a richness that you can’t get without them. But if you’re in the mood for something ultra light and fresh like I am many times, go ahead and skip them or use less.
And at that point, the salad is vegan and super healthy but it’s still so satisfying.
Other favorite quinoa recipes:
30 Best Easy Healthy Salads – Break out of your salad rut with these amazing salads! Fast, easy, and flavorful! You’ll want to put them into your regular rotation!
Garden Fresh Quinoa Salad – Loaded with everything fresh, light, healthy, and summery! Great for parties, potlucks, and lunch boxes because there’s no mayo! Make this easy and flavorful dish before summer disappears!
Lemon, Sun-Dried Tomato, and Almond Quinoa Salad – Fast, easy, and fresh! Bright flavors and loads of texture! This clean-eating salad keeps you full and satisfied! Healthy never tasted so good! No mayo and great for outdoor events or lunch boxes!
Tomato, Mozzarella, and Basil Quinoa Salad – Trying to keep meals healthier and lighter? Make this easy, refreshing and satisfying salad!

Spinach And Artichoke Quinoa Salad
Yield: serves 6
Total Time:25 minutes
Prep Time:10 minutes
Cook Time:15 minutes
Spinach And Artichoke Quinoa Salad – All the flavors of classic spinach and artichoke dip are in this HEALTHY salad!! The only thing that’s missing is tons of fat and calories! FAST, EASY, naturally gluten-free, vegetarian, and tastes DELISH!!
Ingredients:
3 tablespoons olive oil
1 large or extra-large yellow onion, peeled and diced small
1 cup quinoa
1 1/4 cups water
2 tablespoons apple cider vinegar
2 tablespoons lemon juice
1 teaspoon salt, or to taste
1 teaspoon teaspoon freshly ground black pepper, or to taste
3 cups fresh spinach (3 heaping handfuls)
12 ounces artichoke hearts, halved if they’re very large (I use frozen that I thaw first, artichokes in oil that have been drained may be substituted)
2 to 3 green onions, sliced into thin rounds
1/2 cup plain Greek yogurt (I use 0% fat, sour cream may be substituted)
1/3 cup mayonnaise (I use light)
1/2 cup shaved or grated real parmesan cheese, or as desired
Directions:
To a large skillet or saucepan, add the olive oil, onions, and cook over medium-high heat, stirring occasionally, until onions have softened and just begin to lightly caramelize, about 7 minutes.
Add the quinoa, stir it into the onions, and let it toast for about 30 seconds.
Add the water, apple cider vinegar, lemon juice, salt, pepper, stir to combine, reduce the heat to low, cover pan, and cook for about 12 to 15 minutes, or until all liquid has been absorbed.
Transfer quinoa and onions to a very large bowl, and add the spinach, artichokes, green onions, Greek yogurt, mayonnaise, and and stir to combine.
Add the parmesan and stir to combine.
Taste and check for seasoning balance, adding salt, pepper, and an additional dollop of Greek yogurt or mayo if desired. Dish can be served warm and immediately or stored in an airtight container in the fridge for up to 4 days.
Adapted from Lemon, Sun-Dried Tomato, and Almond Quinoa Salad and Garden Fresh Quinoa Salad
Only Eats
Recipe from Averie Cooks. All images and content are copyright protected. Please do not use my images without prior permission. If you want to republish this recipe, please re-write the recipe in your own words, or simply link back to this post for the recipe. Thank you.
Related Recipes
30 Best Easy Healthy Salads – Break out of your salad rut with these amazing salads! Fast, easy, and flavorful! You’ll want to put them into your regular rotation!
Lemon, Sun-Dried Tomato, and Almond Quinoa Salad – Fast, easy, and fresh! Bright flavors and loads of texture! This clean-eating salad keeps you full and satisfied! Healthy never tasted so good! No mayo and great for outdoor events or lunch boxes!
Garden Fresh Quinoa Salad – Loaded with everything fresh, light, healthy, and summery! Great for parties, potlucks, and lunch boxes because there’s no mayo! Make this easy and flavorful dish before summer disappears!
Tomato, Mozzarella, and Basil Quinoa Salad (GF) – Trying to keep meals healthier and lighter? Make this easy, refreshing and satisfying salad!
Tabbouleh – Never had it? Think couscous or quinoa mixed with vegetables, herbs, lemon and olive oil! Easy, no cooking required, healthy, and packed with so much flavor! Great for outdoor events because there’s no mayo!
Source: https://www.averiecooks.com/spinach-and-artichoke-quinoa-salad/

0 notes
Text
Buffalo Chicken Cauliflower Rice Bowl from Kalyn’s Kitchen (Slow Cooker or Pressure Cooker)
This Low-Carb Buffalo Chicken Cauliflower Rice Bowl features Slow Cooker or Pressure Cooker Buffalo Chicken served over cauliflower rice for a low-carb meal in a bowl that’s healthy and delicious. And you can make this tasty buffalo chicken in an Instant Pot as well if you prefer!
Click here to see the Top 20 Slow Cooker Chicken Dinners!
Click here to see The Top 20 Instant Pot Chicken Dinners!
Over at Kalyn’s Kitchen I’ve updated this favorite Buffalo Chicken Cauliflower Rice Bowl to remind you that you can make the buffalo chicken in a slow cooker or in the pressure cooker / Instant Pot! I came up with this recipe when I was a little obsessed with slow cooker buffalo chicken, and I absolutely loved this Buffalo Chicken Cauliflower Rice Bowl. We enjoyed it served with some crumbled blue cheese over the top, but a dollop of sour cream or plain yogurt would also be delicious to cool down the heat from the buffalo chicken.
I made the buffalo chicken mixture for this recipe nice and saucy, so the juice will run down a bit a flavor the cauliflower rice, for a delicious and healthy low-carb meal. And if cauliflower rice doesn’t sound like your idea of a good time, go ahead and eat this delicious chicken over regular rice. If you’re a Buffalo Chicken fan like I am, hope you enjoy!
Ingredients for Low-Carb Buffalo Chicken Cauliflower Rice Bowl:
chicken breasts
homemade chicken stock or canned chicken broth
poultry seasoning
garlic powder
onion powder
Franks Red Hot Sauce or Buffalo Wing Sauce
olive oil
Worcestershire sauce
Green Tabasco sauce or hot sauce of your choice
sweetener of your choice
1 large head cauliflower
garlic cloves
salt and fresh ground black pepper
thickly sliced green onion
crumbled blue cheese
Get complete instructions for Buffalo Chicken Cauliflower Rice Bowl from Kalyn’s Kitchen.
If you’d prefer to make this tasty buffalo chicken in a pressure Cooker or Instant Pot, use the chicken from Pressure Cooker Low-Carb Buffalo Chicken Tacos with the cauliflower rice bowl from this recipe.
Recommended Slow Cooker or Pressure Cooker Size:
I used my Crock-Pot 3-1/2-Quart Slow Cooker to make the chicken in this recipe. If you’re using the Instant Pot Option I’d use a 6 Quart Instant Pot.
Still Hungry?
Check out the Chicken Recipes for more slow cooker or pressure cooker chicken dinner ideas.
(Visited 1,065 times, 1 visits today)
Source: https://www.slowcookerfromscratch.com/slow-cooker-buffalo-chicken-cauliflower-rice-bow/
0 notes
Text
How to Make Cauliflower Rice
You can find cauliflower rice in most grocery stores these days, but if you’ve never made (or eaten) it, learning how to make cauliflower rice may seem difficult or time consuming. But trust us, it’s easy peasy! We’re offering two different methods on how to make it, giving you all the tips you need to know about storing it and letting you in on our favorite way to cook it up.
Cauliflower Rice How To
Cauliflower rice is not new to this site, in fact we’ve been talking about it for years. But we realized that there wasn’t one comprehensive guide here that tells you all you need to know about cauliflower rice, whether you are new to adding it to your meals or you’ve been eating it for a while but buying it in the store. So we’re filling you in on all the cauliflower rice knowledge we’ve gained over the years!
Ready? Let’s dig in!
Why eat cauliflower rice?
If you’ve never eaten it before, you may be wondering what it is and why you should eat it. Putting it simply, cauliflower rice is rice-sized pieces of cauliflower that is cooked and served in place of regular rice.
When compared to regular white or brown rice, cauliflower rice is:
Grain-free
Low-carb
More nutrient dense
Fast to cook (5 minutes only!)
Why make cauliflower rice at home?
It’s easy!
It’s inexpensive.
Some recipes actually do best with finally made cauliflower rice versus store-bought larger pieces, like our ‘Everything Bagel’ Topped Cauliflower Rolls, Cauliflower Hash Browns (Keto!), and Cauliflower Pizza Bites (Gluten-Free and Grain-Free)! These recipes call for VERY FINE cauliflower rice that can only be achieved at home.
Does is taste good?
To be clear, cauliflower rice does not taste like white rice. It surely taste like cauliflower. So if you are strongly opposed to the taste of cauliflower, this is not the rice alternative for you. But if you like or don’t mind cauliflower, much like white rice, it takes on the flavor of whatever it is served with, such as this Paleo Asian Beef, Fried Rice, Chicken and Broccoli or Stir Fry.
Making Cauliflower Rice:
While we definitely love using the food processor to make cauliflower rice as our preferred method, if you don’t have one you can just as easily use a box grater.
How to make cauliflower rice with a food processor:
Cut the cauliflower into 2” florets (making sure they are all similar in size). Add the florets to the food processor and pulse 7-9 times until they are all broken down into “rice sized” pieces.
How to make cauliflower rice without a food processor:
Cut the stem out of the cauliflower and cut the cauliflower into 4 pieces. Using the larger holes in the box grater (the ones you would typically use to grate cheese), grate the cauliflower.
Freezing Cauliflower Rice
Just like you can buy frozen cauliflower rice at the store, you can make your own at home and freeze it. It’s truly cheaper and we do prefer the quality of cauliflower riced at home (though we buy our fair share at the store too, since it is so readily available). Place your riced cauliflower in a bag or container and freeze for around one month. It’s easiest if you freeze it in the portion you are most likely to use. We find that about 4 cups uncooked cauliflower rice is a generous portion for 2 people.
How long will it last in the refrigerator?
Uncooked riced cauliflower will keep about 5 days in a closed container or bag in the refrigerator. Cooked cauliflower rice will last about 3-4 days.
Best Ways to Cook Cauliflower Rice
We love using a nonstick skillet to quickly cook up cauliflower rice, with a touch of garlic powder and salt that is then topped with a few pieces of thinly sliced green onion. Scroll down for the entire recipe.
Recipes to use Cauliflower Rice
How to Make Cauliflower Rice
Ingredients
1 medium head cauliflower (about 16 ounces)
1/2 tsp salt
1/2 tsp garlic
1 green onion, sliced thin
Directions
Using a food processor: Cut the cauliflower into 2” florets (making sure they are all similar in size). Add the florets to the food processor and pulse 7-9 times until they are all broken down into “rice sized” pieces. Using a box grater: Cut the stem out of the cauliflower and cut the cauliflower into 4 pieces. Using the larger holes in the box grater (the ones you would typically use to grate cheese), grate the cauliflower.
You can store uncooked cauliflower rice either frozen (for up to 1 month) or in the refrigerator for 5 days.
When ready to cook: Heat a large pan of medium heat (we like using our nonstick skillet here). Once hot and then add cauliflower “rice” with ½ teaspoon salt and ½ teaspoon garlic powder. Cook until the cauliflower is tender about 5-6 minutes. The longer you cook it, the more water it will exude.
Garnish with green onion and serve immediately, or let cool and place in the refrigerator for meal prep. Cooked cauliflower rice will last about 3-4 days.
Loading nutrition data...
There may be affiliate links in this post! By clicking on them, or purchasing recommended items I may receive a small compensation, at no cost to you! However, I only recommend products I absolutely love and use in my own home! Thank you for supporting Lexi's Clean Kitchen when you shop! See my privacy policy for more information about this, the information we save, and more!
Source: https://lexiscleankitchen.com/how-to-make-cauliflower-rice/
0 notes
Text
Tangy Vegan Potato Salad
What to buy
Ajvar (Red Pepper Spread)
Ajvar is a tangy, pepper-based spread or relish that often contains eggplant and garlic as well as spices, vinegar, and oil. You can find jars for only a few dollars at World Market or Middle Eastern groceries, or buy online if you have trouble locating it elsewhere.
Buy Now ›

Source: https://www.chowhound.com/recipes/vegan-potato-salad-32084
0 notes
Text
How to Make Sweet Potato Toast
We’re diving in to How to Make Sweet Potato Toast today because they are our new favorite breakfast, snack, or lunch and can guess they’ll be yours too! Sweet potato toasts are easy to make, nutrient-dense, and there are so many options to shake up your toast topping game. Sweet potato toast is a great fiber-rich, gluten-free, Whole30 approved, and vegan healthy toast replacement! PLUS, they are super easy to make!
How to Make Sweet Potato Toast
Making sweet potato toast is about to become your new favorite breakfast, snack, lunch, or hey, even dinner! These Pinterest-worthy lower carb “toasts” have been making the rounds lately. What is sweet potato toast? Well basically they are cooked slices of sweet potato that are a great nutrient-dense alternative to regular toasted bread that can hold a hefty portion of toppings. Did we mention they are also delicious? Today we’re diving into all the details on How to Make Sweet Potato Toasts for our ongoing How to Wednesday series and sharing our favorite topping choices as well!
What kind of sweet potatoes are best?
Look for large round sweet potatoes! These work best because you can get good slices out of them. Curved ones, or oddly shaped ones, aren’t great for toast because you’ll waste more of the sweet potato when you’re slicing them up!
What are the different kinds of sweet potatoes?
Well this isn’t the most straightforward question! These day the grocery stores can sell a few different types of sweet potatoes and sometimes they are labeled yams (but apparently they’re not actually yams?). For this purpose the best type of sweet potato is usually labeled as a Garnet Yam, but a Beauregard or a Jewell Sweet Potato will work best too.
Garnet Yams are actually sweet potatoes and they are the best choice for sweet potato toast.
Japanese Sweet Potatoes and Hannah Sweet Potatoes: These two look different on the outside, with the Japanese having a purple skin and the Hannah having a tan skin but they are both similar on the inside with starchier yellow flesh. We don’t recommend these for sweet potato toast.
Purple Sweet Potato: This has a very starchy firm purple potato. While delicious, we also don’t recommend this type for sweet potato toast.
How do you easily cut up sweet potatoes
There are two options for slicing up the sweet potatoes. You can either use a mandolin, though it will need to be a good quality one with a sharp blade. Or use a sharp knife! If you are a little unsteady with your knife skills, slice of a piece of the sweet potato so you can rest it on that fast surface for safer cutting.
Do you peel sweet potatoes?
Peel the sweet potato if desired! The skin is edible, but can be rough and fibrous, so if you are concerned with texture you can peel the skin off. The most important thing is to aim to make them all the same size. For sweet potato toast, we find it’s easier to leave the skin on because it helps the sweet potato keep it’s shape.
Why we aren’t making sweet potato toast in the toaster
We know this method is out there–but we don’t recommend it. It takes too long to cook the sweet potato in the toaster (unless you are using a powerful toaster oven) so we recommend using the oven bake method first, and then to reheat you can use a toaster to warm it up and get it slightly crispy.
There really are endless options for topping the sweet potato toast. You can go with savory or sweet, or even make a DIY sweet potato bar and let your loved ones make their own!
Savory Ideas:
Cream Cheese, Lox, Red Onion, Tomato slices, and Capers: Kite Hill is a great dairy-free alternative for cream cheese.
Tuna Melt or Chicken Salad Melt: Place your favorite tuna salad or chicken salad on your sweet potato toast, top with slices of tomato and cheese, then place under the broiler, for about 1 minute, until cheese is melted!
Loaded Avocado Toast: In the LCK cookbook, there is a killer avocado toast that recipe that can be used here! You can use that topping, or make a quick smashed avocado topping: Smash your avocado, sprinkle some salt, red pepper flakes, garlic granules and squeeze of lime juice! Then top with crispy chickpeas, everything bagel seasoning, and some sriracha!
Sweet Ideas:
Nut Butter, Banana, and Cacao Nibs: You can use any type of nut butter or sunflower seed butter here and add in fresh banana and cacao nibs for crunch or regular chocolate chips. Sprinkle with some chia seed or flax seed for some extra fiber.
Nutella with Berries and Shredded Coconut: We have a homemade Nutella recipe, but go ahead and buy store bought chocolate hazelnut spread if you need–there are a couple of different options out there. Top with berries of choices and shredded (or toasted) coconut for some crunch.
How to Reheat:
This recipe makes a large make ahead batch for the week. To reheat as needed either stick it in a toaster, a toaster oven until hot and edges are crispy. It’s best to top as needed (like regular toast) but you can prep one for lunch to reheat at work later and reheat like any other food, though the sweet potato won’t be crispy.
If you like this how to, check out these others:
Ingredients
2 large, uniform sweet potato or yam
1 tablespoon avocado oil, or spray
1 teaspoon salt
Directions
Preheat an oven to 425ºF and line a baking sheet with parchment paper.
Scrub and wash and dry the sweet potato clean.
Cut off the tips of the sweet potato.
Using a knife (or alternatively a mandolin) slice the sweet potato into 1/4" thick pieces. Discard the end pieces that have the most bit of skin.
Lay on parchment paper with room in between and either spray or brush avocado oil on both sides. Sprinkle with salt.
Bake for 5 minutes, then flip and back for an additional 5 minutes. The sweet potato should be fully cooked through, meaning you can easily stick a fork through it, but not overcooked that it would fall apart when you picked it up.
Either use immediately with toppings of choice, or cool completely before moving to an air tight container and storing in the fridge. Use within 3-5 days.
To re-heat as needed for topping either stick it in a toaster, a toaster oven until hot and edges are crispy.
Recipe Notes
See post for inspiration on how to top your sweet potato toasts.
If topping and reheating outside of the home a toaster oven or microwave will work.
Loading nutrition data...
There may be affiliate links in this post! By clicking on them, or purchasing recommended items I may receive a small compensation, at no cost to you! However, I only recommend products I absolutely love and use in my own home! Thank you for supporting Lexi's Clean Kitchen when you shop! See my privacy policy for more information about this, the information we save, and more!

Source: https://lexiscleankitchen.com/sweet-potato-toast/
0 notes
Text
Gluten-Free Blueberry Protein Pancakes with Collagen Compote
The story of how Charlie and I met is pretty standard: through a mutual friend. The story of how we fell in love is a lot more colorful.
Sadly, it doesn’t involve him making me gluten-free blueberry pancakes. It wasn’t until a few years into our relationship that both of us realized his full potential as The Pancake Man.
Instead it involved lobster, rosé and extreme gastrointestinal problems.
The latter luckily did not outweigh the former, and hence, a romance ensued and the rest is history.
I do want to touch on those less scrapbook-worthy moments today, though. Since the elopement, you all have been asking about our early courtship. And if I’m being honest about those circumstances, there’s no way to get into them without also talking about the state of my gut when we met.
So let’s do this…
What’s most fitting about our elopement being on July 4th weekend is that we’ve long considered the holiday our infatuation-eversary.
Back in 2013, I had tagged along with a group of friends for a long weekend in Rhode Island, including my friend Sarah, whose birthday dinner a few months prior was the first time Charlie and I had had a conversation. (We’d both heard about each other for years, and apparently met several times that neither of us remembers).
Halfway through the weekend, our host ended up having last minute family members show up to take her extra rooms and we effectively either had to go back to New York or find a new place to stay in the area. Sarah called Charlie, who said we were welcome to crash at his house up the street.
That evening, he planned an elaborate sit-down lobster dinner for fifteen people, all gathered around a makeshift plywood table in his backyard. The meal, though charmingly misguided in execution, reminded me a lot of my early days cooking for friends out of my tiny Manhattan apartment. Back then my love of food had nothing to do with nutrients: it was all about the nourishment of the surrounding company and a meal’s ability to put your own special brand of love on the plate for all to share.
I could see that Charlie understood this. That night, he slept on the couch in the living room and gave the four ladies his bedroom. It was such a kind gesture. My host was also classically handsome and just aloof enough to make me crave his attention even more than the rosé or lobster.
If you’ve read The Wellness Project, then you also know that weekend coincided with a real crossroads in my health journey.
I was starting to take my Hashimotos more seriously and seeing a militant Greek endocrinologist. But I was still feeling torn between observing her lifestyle extremes and having fun. That weekend, though, between all the rosé I drank and the frosting I licked off the flag cake, you wouldn’t have been able to tell. Clearly, I had chosen fun.
And if the lead-in to this story was any indication, I also clearly paid the price for it.
The next day I awoke to a whole storm of bodily fuck-you’s. While the rest of the group nursed their hangovers with mimosas and Cards Against Humanity, I remained upstairs in Charlie’s bed in the fetal position treating my hot flashes with an ice pack wedged in my bikini top, and making emergency trips back and forth to the bathroom that was being shared with seven other people.
Though I was practically a stranger, Charlie came up periodically to check on me.
“We have lots of stuff in the medicine cabinet if you’re not feeling well,” he said, perching just close enough on the bed to set off another round of hot flashes, of the romantic variety.
“Do you want me to see if I can dig up some Pepto?”
I thanked him and said I was fine. It would pass. The only thing that could have made me feel any worse was imagining Charlie breathing the fumes in that wing of the house.
Once I was out of the woods, my stomach cramps were replaced by a more lasting, burning embarrassment. I wasn’t quite sure if my flirtations had been reciprocated the night before, but I figured my state of hot mess that day would have successfully nipped any future possibility of romance in the bud.
After all, the laws of attraction don’t usually include a clause about diarrhea.
It would take many more months until I learned just how much of his own gut baggage Charlie brought to our relationship, and that he of all people was unfazed by mine. Which, believe it or not, is indeed relevant to this gluten-free blueberry pancake recipe.
The last few years of our love have involved a lot of pancakes. They’ve also involved a lot of joint work on our guts. Because though we’ve been lucky enough to find life partners who are sympathetic and supportive of each other’s bathroom misfortunes, we’d both prefer not to have them in the first place.
One of my tactics since my SIBO diagnosis has been using collagen peptides to rebuild my gut lining. I’ve been adding Great Lakes collagen to my smoothies and my tea lattes and my soups. But I’ve been trying to find other habitual ways to get a dose of collagen. And a few pancake Sundays ago, I thought to myself…um, hello!
Charlie is a purist when it comes to his secret pancake recipe. So it took my actually stealthily mixing in 1/4 cup of collagen into the batter when he wasn’t looking to update the recipe. The end result doesn’t taste any different. I would argue that they’re even fluffier! And in this version, you get double duty with more collagen in the compote.
I’m actually quite proud of this gluten-free hack. Most of the time, compotes use a little flour or cornstarch to thicken the mixture. Now I just use collagen, which has the added benefit of making sauces slightly more gelatinous, while adding even more protein to your pancakes.
Read on for the recipe, and stay tuned for a longer recap of our elopement, which luckily involved only the best kind of butterflies in our tummies!
With health and hedonism,
Phoebe
This healthy blueberry pancakes recipe has everything going for it: dairy-free, gluten-free, and packed with collagen peptides for added protein.
Instructions
In a medium mixing bowl, whisk the almond milk, egg, vanilla, and coconut oil until combined. Add the pancake mix and 1/4 cup of Great Lakes Gelatin Collagen Hydrolysate. Whisk until smooth, adding a splash or two more almond milk if the batter is too thick. You’re going for the texture of a smoothie, not porridge.
Heat a 5-inch cast iron skillet over a medium-high flame. Lightly brush the pan with coconut oil. Add 1/3 cup of batter to the pan and arrange 7 or so blueberries on top. Cook until the pancake pulls away from the sides of the pan and begins to bubble towards the center, about 2 minutes. Flip and cook for another minute on the second side, until puffed and lightly browned. Remove to a plate and repeat with the remaining batter. You should have 6 thin pancakes in total.
Meanwhile, place 1 1/2 cups of the blueberries, 2 tablespoons maple syrup, and 2 tablespoons water in a small saucepan. Bring to a simmer over medium heat and cook, uncovered, until the berries have released their juices and begun to breakdown into a thin jam, about 5 minutes. Stir in the remaining collagen and set aside.
Serve the pancakes drizzled with the compote, and garnished with the remaining blueberries. Serve alongside maple syrup and butter or ghee.
This gluten-free protein pancake recipe is brought to you in partnership with my friends at Great Lakes Gelatin. All opinions are my own (duh). Thank you for supporting the brands that make this site (and my gut healing) possible!
Source: https://feedmephoebe.com/gluten-free-blueberry-protein-pancakes-recipe/
0 notes
Text
Garlicky Feta Dip
Garlicky Feta Dip. This simple, creamy dip is tangy, garlicky, and always a crowd-pleaser.
James now calls this “Trust Your Gut Dip”, which is probably a catchier name for it, truth be told.
The story behind it is that I’ve been making this Garlicky Feta Dip for years– I first posted it back in 2014– and because my friends have eaten it so many times, I was asked to bring it along with me to a big birthday party. Take a mental note: If you do make this dip for your friends, you will probably be asked to make it again. Often.
Luckily, the dip is incredibly easy to whip together (literally the ingredients are whipped together in the food processor), so it’s a relief when people request it rather than one of my more involved recipes. And they do request it enough that I’ve made it countless times now, and it’s always a hit. There really was no reason I should ever mess with the recipe.
But of course I did anyway.
I bought a ridiculous amount of feta cheese because I wanted to make a massive bowl of feta dip, complete with homemade za’atar topped pita chips and bruschetta. It would be the star of the party and take me under an hour to prepare, including making the chips and toasting the bread. That’s the best kind of recipe, isn’t it?
Except this time, I figured I’d try using olive oil instead of Greek yogurt to get the dip to the right consistency. One less ingredient to pick up from the store! I’d read other recipes that used olive oil from some well-respected chefs and foodies, and even though I was hesitant about it, I was sure that “the experts” wouldn’t lead me astray. It’d all be great.
Narrator: It would not be great.
When made with olive oil, my normally delicious and creamy feta dip took on an oily texture (surprise, surprise) and the flavor of the olive oil overpowered the feta. And instead of testing a small batch first like a logical woman, I wasted all of my ingredients by making the whole huge amount at once. Not to mention, starting over from scratch when I’m already such a procrastinator would usually mean that I’d be super late to the party. But I couldn’t come empty-handed.
Cue the freak-out.
I’m going to jump to the happy ending real quick and tell you that I was able to run to the grocery store, totally restart, make the dip and the chips, get ready, and still leave for the party with time to spare. Like I said, it’s a good thing that this dip is so easy and quick to make!
But before all that, I definitely was panicking a bit. Apparently I kept mumbling “I should have trusted my gut” under my breath. I knew I should have just stuck with the Greek yogurt from the get-go! Anyway, that is how this Garlicky Feta Dip earned the nickname of Trust Your Gut Dip.
Moral of the story: If it ain’t broke, don’t fix it. Oh, and trust your gut.
Speaking of guts, you’re going to want to fill yours with an insane amount of this dip. I usually serve it with pita chips, crackers, and pretzels, but I also love to spread it on toasted bread or bagels. Seriously, if you have any leftovers and you get the opportunity to smear it on a warm everything bagel the next morning, it’s like heaven. Heeeeaven. Especially if you’re a huge feta fan like me. And there’s cream cheese in here too, so it’s like your familiar spread with some exciting additions.
Aside from the feta, Greek yogurt, and cream cheese, the Garlicky Feta Dip also features plenty of garlic (obviously), lemon juice, and fresh dill in the mixture. I like to top it with additional dill and some other herbs like basil or parsley, as well as lemon zest for added brightness, chopped roma tomato, the tiniest pinch of crushed red pepper flakes for heat, and…
Olive oil. Gasp.
Replacing the Greek yogurt was a no-go, but the tiniest drizzle on top is a really nice addition.
But realistically, you can go as over-the-top with toppings as you’d like or you can serve the Garlicky Feta Dip as simply as you’d like. I guess I’d say that you should just trust your gut.
Print
<![CDATA[ .tasty-recipes-image float: right; .tasty-recipes-print-button background-color: #666677; display: inline-block; padding-left: 1em; padding-right: 1em; padding-top: 0.5em; padding-bottom: 0.5em; text-decoration: none; a.tasty-recipes-print-button color: #FFF; a.tasty-recipes-print-button:hover color: #FFF; .tasty-recipes-rating.tasty-recipes-clip-10 -webkit-clip-path: polygon(0 0, 10% 0%, 10% 100%, 0% 100%); clip-path: polygon(0 0, 10% 0%, 10% 100%, 0% 100%); .tasty-recipes-rating.tasty-recipes-clip-20 -webkit-clip-path: polygon(0 0, 20% 0%, 20% 100%, 0% 100%); clip-path: polygon(0 0, 20% 0%, 20% 100%, 0% 100%); .tasty-recipes-rating.tasty-recipes-clip-30 -webkit-clip-path: polygon(0 0, 30% 0%, 30% 100%, 0% 100%); clip-path: polygon(0 0, 30% 0%, 30% 100%, 0% 100%); .tasty-recipes-rating.tasty-recipes-clip-40 -webkit-clip-path: polygon(0 0, 40% 0%, 40% 100%, 0% 100%); clip-path: polygon(0 0, 40% 0%, 40% 100%, 0% 100%); .tasty-recipes-rating.tasty-recipes-clip-50 -webkit-clip-path: polygon(0 0, 50% 0%, 50% 100%, 0% 100%); clip-path: polygon(0 0, 50% 0%, 50% 100%, 0% 100%); .tasty-recipes-rating.tasty-recipes-clip-60 -webkit-clip-path: polygon(0 0, 60% 0%, 60% 100%, 0% 100%); clip-path: polygon(0 0, 60% 0%, 60% 100%, 0% 100%); .tasty-recipes-rating.tasty-recipes-clip-70 -webkit-clip-path: polygon(0 0, 70% 0%, 70% 100%, 0% 100%); clip-path: polygon(0 0, 70% 0%, 70% 100%, 0% 100%); .tasty-recipes-rating.tasty-recipes-clip-80 -webkit-clip-path: polygon(0 0, 80% 0%, 80% 100%, 0% 100%); clip-path: polygon(0 0, 80% 0%, 80% 100%, 0% 100%); .tasty-recipes-rating.tasty-recipes-clip-90 -webkit-clip-path: polygon(0 0, 90% 0%, 90% 100%, 0% 100%); clip-path: polygon(0 0, 90% 0%, 90% 100%, 0% 100%); .tasty-recipes-nutrition ul list-style-type: none; margin: 0; padding: 0; .tasty-recipes-nutrition ul:after display: block; content: ' '; clear: both; .tasty-recipes-nutrition li float: left; margin-right: 1em; @media print .tasty-recipes-no-print, .tasty-recipes-no-print * display: none !important; .tasty-recipes border: 5px solid #0f6179; margin-top: 6em; margin-bottom: 4em; font-family: Montserrat; .tasty-recipes-print-button display: none; .tasty-recipes-image-shim height: 69.5px; clear: both; .tasty-recipes-entry-header background-color: #0f6179; color: #FFF; text-align: center; padding-top: 35px; padding-bottom: 1.5em; padding-left: 2.5em; padding-right: 2.5em; .tasty-recipes-entry-header.tasty-recipes-has-image padding-top: 0px; .tasty-recipes-entry-header .tasty-recipes-image float: none; text-align: center; transform: translateY(-115px); margin-bottom: 1em; /* Decide if we need this */ .tasty-recipes-entry-header .tasty-recipes-image img -webkit-border-radius: 50%; -moz-border-radius: 50%; border-radius: 50%; border: 5px solid #0f6179; height: 150px; width: 150px; .tasty-recipes-entry-header h2 font-size: 1.75em; font-weight: 400; text-transform: uppercase; margin-bottom: 0; text-align: center; color: #FFF; margin-top: 0; padding-top: 0; padding-bottom: 0; .tasty-recipes-has-image .tasty-recipes-entry-header h2 margin-top: -135px; .tasty-recipes-entry-header hr border: 1px solid #e8f5f7; background-color: #e8f5f7; margin-bottom: 1em; margin-top: 1em; .tasty-recipes-entry-header .tasty-recipes-rating a text-decoration: none; text-decoration: none; border: none; .tasty-recipes-entry-header .tasty-recipes-rating a:hover text-decoration: none; .tasty-recipes-entry-header .tasty-recipes-rating-stars font-size: 1.375em; display: block; .tasty-recipes-entry-header .tasty-recipes-rating-stars span margin-left: .25em; margin-right: .25em; color: #FFF; .tasty-recipes-entry-header .tasty-recipes-rating-label font-style: italic; color: #e8f5f7; font-size: .6875em; display: block; .tasty-recipes-entry-header .tasty-recipes-details margin-top: 1em; .tasty-recipes-entry-header .tasty-recipes-details ul list-style-type: none; margin: 0; .tasty-recipes-entry-header .tasty-recipes-details ul li display: inline-block; margin-left: .5em; margin-right: .5em; font-size: .8em; line-height: 2.5em; .tasty-recipes-entry-header .tasty-recipes-details ul li.author, .tasty-recipes-entry-header .tasty-recipes-details ul li.total-time display: none; .tasty-recipes-entry-footer, .tasty-recipes-entry-footer h3 background-color:#0f6179; color: #fff; @media only screen and (max-width: 520px) .tasty-recipes-entry-header .tasty-recipes-details .detail-icon height: .8em; margin-top: .4em; .tasty-recipes-entry-header .tasty-recipes-details ul li font-size: .875em; line-height: 1.75em; .tasty-recipes-entry-footer h3 margin-top: 8px; margin-bottom: 8px; .tasty-recipes-entry-footer text-align: center; @media only screen and (min-width: 520px) .tasty-recipes-entry-header .tasty-recipes-details .detail-icon height: 1em; margin-top: .6em; .tasty-recipes-entry-header .tasty-recipes-details ul li font-size: 1em; line-height: 2.5em; .tasty-recipes-entry-footer img float: left; .tasty-recipes-entry-footer h3, .tasty-recipes-entry-footer p margin-left: 90px; .tasty-recipes-entry-header .tasty-recipes-details .tasty-recipes-label font-style: italic; color: #e8f5f7; margin-right: .125em; .tasty-recipes-entry-header .tasty-recipes-details .detail-icon vertical-align: top; margin-right: .2em; .tasty-recipes-entry-content padding-top: 1.25em; background-color: #e8f5f7; padding-bottom: 1em; display: inline-block; .tasty-recipes-entry-content .tasty-recipes-buttons margin-bottom: 1.25em; margin-left: 1.25em; margin-right: 1.25em; .tasty-recipes-entry-content .tasty-recipes-buttons:after content: " "; display: block; clear: both; .tasty-recipes-entry-content .tasty-recipes-button-wrap width: 50%; display: inline-block; float: left; box-sizing: border-box; .tasty-recipes-entry-content .tasty-recipes-buttons a text-transform: uppercase; text-align: center; display: block; color: #FFF; background-color: #9fc0c9; font-size: 1em; line-height: 1.375em; padding-top: 1em; padding-bottom: 1em; font-weight: bold; margin-top: 0; border: none; border-radius: 0; text-decoration: none; .tasty-recipes-entry-content a img box-shadow: none; -webkit-box-shadow: none; .tasty-recipes-entry-content .tasty-recipes-buttons a:hover background-color: #ec3022; text-decoration: none; .tasty-recipes-entry-content .tasty-recipes-buttons img vertical-align: top; .tasty-recipes-entry-content .tasty-recipes-buttons img.svg-print, .tasty-recipes-entry-content .tasty-recipes-buttons img.svg-pinterest height: 1.25em; margin-right: .375em; margin-bottom: 0; background: none; display: inline-block; .tasty-recipes-entry-footer background-color: #0f6179; padding-top: 25px; padding-bottom: 20px; padding-left: 40px; padding-right: 40px; .tasty-recipes-entry-footer img height: 65px; width: 75px; .tasty-recipes-entry-footer h3 color: #fff; margin-bottom: 2px; margin-top: 0; font-size: 22px; line-height: 36px; .tasty-recipes-entry-footer p margin-bottom: 0; color: #FFF; font-size: 12px; .tasty-recipes-entry-footer p a color: #FFF; text-decoration: underline; .tasty-recipes-entry-footer:after content: " "; display: block; clear:both; @media only screen and (max-width: 520px) .tasty-recipes-entry-header .tasty-recipes-details .detail-icon height: .8em; margin-top: .4em; .tasty-recipes-entry-header .tasty-recipes-details ul li font-size: .875em; line-height: 1.75em; @media only screen and (min-width: 520px) .tasty-recipes-entry-header .tasty-recipes-details .detail-icon height: 1em; margin-top: .6em; .tasty-recipes-entry-header .tasty-recipes-details ul li font-size: 1em; line-height: 2.5em; .tasty-recipes-entry-header .tasty-recipes-details .tasty-recipes-label font-style: italic; color: #9fc0c9; margin-right: .125em; .tasty-recipes-entry-header .tasty-recipes-details .detail-icon vertical-align: top; margin-right: .2em; .tasty-recipes-entry-content padding-top: 1.25em; .tasty-recipes-entry-content .tasty-recipes-buttons margin-bottom: 1.25em; margin-left: 1.25em; margin-right: 1.25em; .tasty-recipes-entry-content .tasty-recipes-buttons:after content: " "; display: block; clear: both; .tasty-recipes-entry-content .tasty-recipes-button-wrap width: 50%; display: inline-block; float: left; box-sizing: border-box; .tasty-recipes-entry-content .tasty-recipes-buttons a text-transform: uppercase; text-align: center; display: block; color: #FFF; background-color: #9fc0c9; font-size: 1em; line-height: 1.375em; padding-top: 1em; padding-bottom: 1em; font-weight: bold; margin-top: 0; border: none; border-radius: 0; text-decoration: none; .tasty-recipes-entry-content a img box-shadow: none; -webkit-box-shadow: none; .tasty-recipes-entry-content .tasty-recipes-buttons a:hover background-color: #ec3022; text-decoration: none; .tasty-recipes-entry-content .tasty-recipes-buttons img vertical-align: top; .tasty-recipes-entry-content .tasty-recipes-buttons img.svg-print, .tasty-recipes-entry-content .tasty-recipes-buttons img.svg-pinterest height: 1.25em; margin-right: .375em; margin-bottom: 0; background: none; display: inline-block; @media only screen and (min-width: 520px) .tasty-recipes display: inline-block; .tasty-recipes-entry-content .tasty-recipes-button-wrap:first-child padding-right: .625em; .tasty-recipes-entry-content .tasty-recipes-button-wrap:last-child padding-left: .625em; @media only screen and (max-width: 520px) .tasty-recipes-entry-content .tasty-recipes-button-wrap width: 100%; .tasty-recipes-entry-content .tasty-recipes-button-wrap:nth-child(2) padding-top: 1em; .tasty-recipes-entry-content h3 text-transform: uppercase; font-size: 1.1em; color: #fff; background-color: #0f6179; padding: .5em; margin-bottom: 1.5em; margin-left: -1.25em; margin-right: -1.25em; text-align: center; .tasty-recipes-entry-content h4 font-size: 1em; padding-top: 0; margin-bottom: .75em; margin-top: 1.5em; .tasty-recipes-entry-content hr display: none; .tasty-recipes-description h3 display: none; .tasty-recipes-entry-content .tasty-recipes-description, .tasty-recipes-entry-content .tasty-recipes-ingredients, .tasty-recipes-entry-content .tasty-recipes-instructions padding-left: 1.25em; padding-right: 1.25em; .tasty-recipes-entry-content .tasty-recipes-description p margin-bottom: 1em; text-align: center; .tasty-recipes-entry-content .tasty-recipes-ingredients ul, .tasty-recipes-entry-content .tasty-recipes-instructions ul list-style-type: none; margin-left: 0; margin-bottom: 1.5em; padding: 0; .tasty-recipes-entry-content .tasty-recipes-ingredients ul li, .tasty-recipes-entry-content .tasty-recipes-instructions ul li margin-bottom: .625em; list-style-type: none; position: relative; margin-left: 2.5em; line-height: 1.25; font-size: .9em; .tasty-recipes-entry-content .tasty-recipes-ingredients ul li:before, .tasty-recipes-entry-content .tasty-recipes-instructions ul li:before background-color: #9fc0c9; -webkit-border-radius: 50%; -moz-border-radius: 50%; border-radius: 50%; height: .5em; width: .5em; display: block; content: " "; left: -1.25em; top: .375em; position: absolute; .tasty-recipes-entry-content .tasty-recipes-ingredients ol, .tasty-recipes-entry-content .tasty-recipes-instructions ol counter-reset:li; margin-left: 0; padding: 0; .tasty-recipes-entry-content .tasty-recipes-ingredients ol li, .tasty-recipes-entry-content .tasty-recipes-instructions ol li list-style-type: none; position: relative; margin-bottom: 1em; margin-left: 2.5em; line-height: 1.25; font-size: .9em; .tasty-recipes-entry-content .tasty-recipes-ingredients ol li:before, .tasty-recipes-entry-content .tasty-recipes-instructions ol li:before content:counter(li); counter-increment: li; position: absolute; background-color: #9fc0c9; -webkit-border-radius: 50%; -moz-border-radius: 50%; border-radius: 50%; height: 1.45em; width: 1.45em; color: #FFF; left: -1.25em; transform: translateX(-50%); line-height: 1.5em; font-size: .6875em; text-align: center; top: .1875em; @media only screen and (max-width: 520px) .tasty-recipes-entry-content .tasty-recipes-ingredients ol, .tasty-recipes-entry-content .tasty-recipes-instructions ol margin-left: 0; .tasty-recipes-entry-content .tasty-recipes-ingredients ol li, .tasty-recipes-entry-content .tasty-recipes-instructions ol li .tasty-recipes-entry-content .tasty-recipes-notes padding: 1.25em; .tasty-recipes-entry-content .tasty-recipes-notes clear: both; padding-top: 0; .tasty-recipes-entry-content .tasty-recipes-notes ol counter-reset:li; margin-left: 0; padding: 0; .tasty-recipes-entry-content .tasty-recipes-notes p, .tasty-recipes-entry-content .tasty-recipes-notes ul li, .tasty-recipes-entry-content .tasty-recipes-notes ol li background-color: #FFF; padding-left: 1.5625em; padding-right: 1.5625em; padding-top: 1.25em; padding-bottom: 1.25em; position: relative; -webkit-clip-path: polygon(20px 0, 100% 0, 100% 100%, 0 100%, 0 20px); clip-path: polygon(20px 0, 100% 0, 100% 100%, 0 100%, 0 20px); margin-bottom: 1.5em; @media only screen and (min-width: 520px) .tasty-recipes-entry-content .tasty-recipes-notes p, .tasty-recipes-entry-content .tasty-recipes-notes ul li, .tasty-recipes-entry-content .tasty-recipes-notes ol li padding-left: 2.5em; .tasty-recipes-entry-content .tasty-recipes-notes p:before, .tasty-recipes-entry-content .tasty-recipes-notes ul li:before content: "i"; display: block; background-color: #0f6179; -webkit-border-radius: 50%; -moz-border-radius: 50%; border-radius: 50%; height: 1.3em; width: 1.3em; font-size: .75em; line-height: 1.3em; text-align: center; color: #FFF; position: absolute; left: 1.167em; top: 1.9em; .tasty-recipes-ingredients clear: both; width: 30%; float: left; .tasty-recipes-instructions width: 70%; float: right; .tasty-recipes-ingredients h3 margin-left: -1.25em; margin-right: -1.25em; .tasty-recipes-ingredients ul, .tasty-recipes-ingredients ol, .tasty-recipes-ingredients p, .tasty-recipes-ingredients h4 margin-left: 0; .tasty-recipes-instructions h3 margin-right: -1.25em; margin-left: -1.25em; border-left: 1px solid #fff; .tasty-recipes-instructions ol, .tasty-recipes-instructions ul, .tasty-recipes-instructions p, .tasty-recipes-instructions h4 border-left: 1px solid #ededed; padding-left: 2em; margin-top: 0; margin-bottom: 0; margin-left: 0; padding-bottom: 1em; .tasty-recipes-entry-content .tasty-recipes-notes ol li:before content:counter(li); counter-increment: li; position: absolute; background-color: #0f6179; -webkit-border-radius: 50%; -moz-border-radius: 50%; border-radius: 50%; height: 1.45em; width: 1.45em; color: #FFF; left: 2em; transform: translateX(-50%); line-height: 1.5em; font-size: .6875em; text-align: center; top: 2em; .tasty-recipes-entry-content .tasty-recipes-notes p:last-child margin-bottom: 0; .tasty-recipes-nutrifox text-align: center; margin: 0; .tasty-recipes-nutrifox iframe width: 100%; display: block; margin: 0; .tasty-recipes-entry-content .tasty-recipes-nutrition padding: 1.25em; color: #0f6179; .tasty-recipes-nutrition .tasty-recipes-label font-style: italic; color: #9fc0c9; margin-right: .125em; font-weight: 400; .tasty-recipes-nutrition ul text-align: center; .tasty-recipes-nutrition li float: none; display: inline-block; line-height: 2em; /* Print view styles */ .tasty-recipes-print-view .tasty-recipes-entry-content .tasty-recipes-ingredients, .tasty-recipes-print-view .tasty-recipes-entry-content .tasty-recipes-instructions box-sizing: border-box; .tasty-recipes-print-view .tasty-recipes-print-button display: relative; .tasty-recipes-print padding:0; .tasty-recipes-print-view .tasty-recipes margin-top: 1em; .tasty-recipes-print .tasty-recipes-entry-content background-color: transparent; .tasty-recipes-print .tasty-recipes-entry-header background-color: inherit; color: inherit; padding-bottom: 0; padding-left: 1em; padding-right: 1em; .tasty-recipes-print .tasty-recipes-entry-header .tasty-recipes-image float: right; transform: none; .tasty-recipes-print.tasty-recipes-has-image .tasty-recipes-entry-header h2 margin-top: 0; .tasty-recipes-print .tasty-recipes-entry-header h2 color: inherit; margin-bottom: .5em; .tasty-recipes-print .tasty-recipes-entry-header hr display: none; .tasty-recipes-print .tasty-recipes-entry-header .tasty-recipes-rating-stars span color: #000; .tasty-recipes-print .tasty-recipes-entry-header .tasty-recipes-details ul padding: 0; clear: both; .tasty-recipes-print .tasty-recipes-entry-header .tasty-recipes-details ul li line-height: 1.5em; .tasty-recipes-print .tasty-recipes-entry-header .tasty-recipes-details .detail-icon display: none; ]]>
Ingredients
6 ounces feta cheese, crumbled
4 ounces cream cheese, softened
1/3 cup Greek yogurt
3 cloves garlic, minced
1/4 cup chopped fresh dill, or to taste
1 tablespoon lemon juice, plus lime zest, to top
Kosher salt and black pepper, to taste
1 Roma tomato, diced
1 pinch of crushed red pepper, to top (optional)
Fresh herbs, to top
Olive oil, to top
Pita chips, pretzels, bruschetta, or crackers, to serve
Instructions
Combine the feta, cream cheese, greek yogurt, garlic, dill, and lemon juice in the bowl of a food processor or blender. Taste and season with Kosher salt and black pepper, as desired.
When well-combined, scoop into a bowl and top with lemon zest, tomato, a pinch of crushed red pepper, fresh herbs, and a very light drizzle of olive oil.
Serve cold with pita chips, pretzels, bruschetta, or crackers, to dip.
Before you dig in, show it off!
If you made this recipe, take a photo! Tag @hostthetoast on Instagram & hashtag it #hostthetoast. It'll automatically show up on the You Made It page!
Get recipes delivered hot & fresh to your inbox!
Source: http://hostthetoast.com/garlicky-feta-dip/
0 notes