
thumbgarden
ThumbGarden
Under the expert advice of ThumbGarden, make your gardening easy.
You can grow your own food, become, gardening tips, gardening tool reviews, planting guide at a professional self-cultivation, create a natural and happy home.
Follow us: https://www.thumbgarden.com
191 posts
Don't wanna be here? Send us removal request.
Last Seen Blogs

heeeeena
és mondd, mit értem el?

random-tuesdays
Random Tuesdays

drammatico-commedia-italia
Maschile plurale Streaming (Sub ita) Uscita 15 febbraio 2024

puranami
✿ Purrrambles ✿

feryviquezmr-blog
Sin título
Text
7 Easy Vegetables for Beginners

7 Easy Vegetables for Beginners
Tired of store-bought vegetables that are full of chemicals, sluggish, and tasteless? Create your own garden on your plot or balcony and grow healthy vegetables that are easy to maintain and grow fairly quickly. Here are seven plants that require little care and are easily adapted to almost any type of habitat. In this ThumbGarden article, we'll discuss seven vegetables for beginners that are easy to grow in the garden or on the balcony.
Lettuce
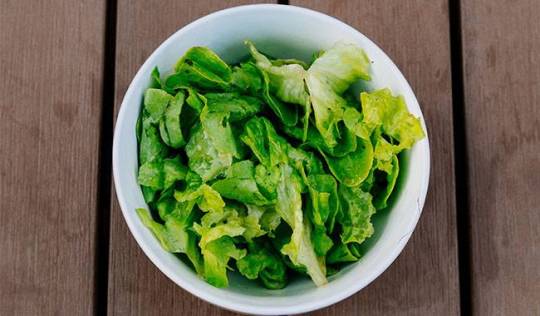
Lettuce - 7 Easy Vegetables for Beginners
There is a huge variety of salad plants, but the best choice for small areas is leaf lettuce, which is very easy to keep and requires little care. Leafy lettuce can even be grown indoors.
A quick guide to growing lettuce
- Plant lettuce in early spring and mild fall weather. This nutrient-rich leafy green is an excellent choice for in-ground gardening, raised garden beds, and containers.
- Space lettuce plants 6 to 18 inches apart (depending on variety) in an area with full sun, rich, well-drained soil, and a pH between 6.0 and 7.0.
- Improve native soil by mixing in a few inches of aged compost or other rich organic matter.
- Well-watered lettuce grows young leaves, so water whenever the top inch of soil becomes dry to maintain consistent moisture levels.
- Keep weeds out and water longer by using a thick layer of mulch made from finely ground leaves or bark.
- Promote excellent leaf production by regularly feeding water-soluble plant foods.
- Once they are large enough to eat, start harvesting leaf lettuce from the outermost leaves.
Peas
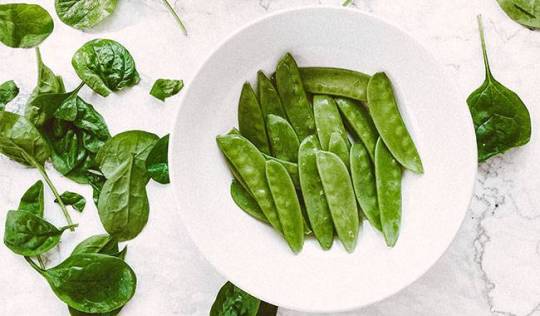
Peas - 7 Easy Vegetables for Beginners
Peas are another easy vegetable to grow. The good thing about peas is that they grow very fast. Soak the seeds in warm water for a few hours or overnight before planting so they can germinate as quickly as possible.
A quick guide to growing peas
Sow seeds 4-6 weeks before the last spring frost date, when the soil is cool or has reached the desired temperature: peas planted in cold (40°F) soil will germinate slowly; peas planted in soil at least 60°F (but not more than 85°F) will catch up.Snow will not harm emerging pea plants, but a few days in teeny temperatures may. If the first peas don't make it, be prepared to plant them again. Or, try starting your peas in a cold frame.The second round of peas can be planted in late summer or early fall, about 6 to 8 weeks before your first fall frost date.More Related Information About Grow Peas
Cucumbers
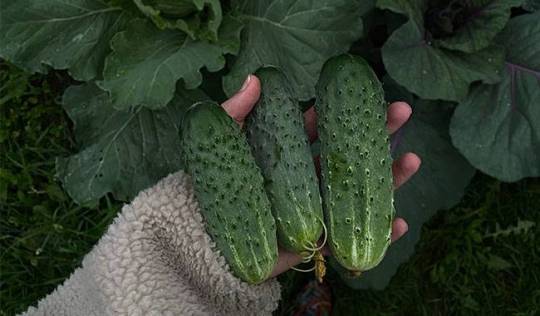
Cucumbers - 7 Easy Vegetables for Beginners
Cucumber is the most popular vegetable for many people. It can be grown without much effort, but it needs warmth and moisture. It can even sprout on your balcony and give a wildlife look at your front door.
A quick guide to growing cucumbers
- Plant cucumbers when the average daily temperature reaches 70 degrees Fahrenheit.
- Space cucumbers 36 to 60 inches apart (12 inches for lattice plants) in an area with full sun and fertile, well-drained soil (pH 6.0 to 6.8).
- Improve native soil by mixing in a few inches of aged compost or other rich organic matter.
- Cucumbers will grow quickly without care. Make sure they receive an inch of water each week.
- Make the most of your food-growing efforts by feeding your plants regularly with water-soluble plant foods.
- When the soil is warm, add a layer of straw mulch to keep the fruit clean and to help keep slugs and beetles away.
- Harvest cucumbers when they are big enough to eat.
More Related Information About Grow Cucumbers
Sorrel

Sorrel - 7 Easy Vegetables for Beginners
Sorrel is a green and very useful vegetable that is easy to preserve is sorrel. It grows very fast and is easy to grow from seed.
A quick guide to growing Sorrel
To plant Sorrel, sow new seeds 2-3 weeks before the last frost date. Seeds can be sown continuously until late July with a regular supply of fresh foliage.Sow new seeds in a clean tray filled with fresh general-purpose compost. Water lightly with a fine spray. Keep the trays in a bright location until they germinate.When the seedlings are large enough to handle, you can separate them. Plant the healthiest seedlings into 2-inch pots and plant Sorrel on top. as the seedlings grow, they will need to be transplanted into larger and larger pots. Eventually, each seedling will be placed in an 8-12 inch pot.
As the Sorrel grows, you can continue to place young Sorrel into pots as part of a container garden or transplant them into the garden.You can also sow the seeds directly into the ground. Use a fork to turn the soil over before sowing to a half-inch depth. Try spacing the seeds 2-3 inches apart. Space each row 18-24 inches apart.
Radish
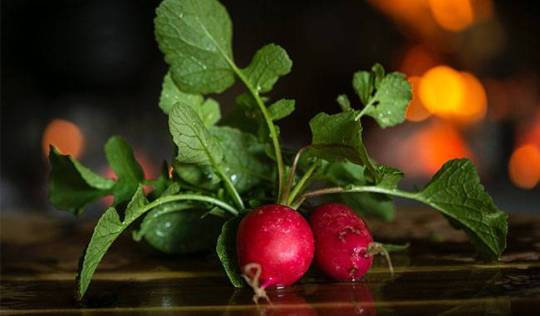
Radish - 7 Easy Vegetables for Beginners
Radishes grow very well from seed and do not require much care. Radish needs a lot of water to grow. If you want to grow it indoors, plant it in a deep vase.
A quick guide to growing radishes
Choose a sunny spot that gets at least six hours of sunlight a day. If radishes are planted in too much shade, or even where neighboring vegetable plants shade them, they will focus all their energy on producing larger leaves. Until the soil (roots do not grow well in compacted soil) and remove any rocks. If the soil is clay, mix in some organic matter to loosen and improve drainage. If you are planting a longer variety (such as 'White Icicle'), do so until the depth is 8 inches.Add organic matter before planting, but also avoid using fresh fertilizers or manure with high nitrogen content; overly rich soil will promote dense foliage at the expense of radish roots.
- Radish seeds have a fairly long shelf life. Don't be afraid to plant radish seeds that are up to 5 years old. Everything may not germinate, but you will have plenty to germinate.
- Sow the seeds directly outdoors about 1/2 inch deep and cover loosely with soil. Space them 1 inch apart in 12-inch rows. Water thoroughly, to a depth of 6 inches.
- Sow another round of seeds every 10 days or so, so that you can harvest radishes continuously in late spring and early summer while the weather is still cool.
More Related Information About Grow Radish
FAromatic Herbs
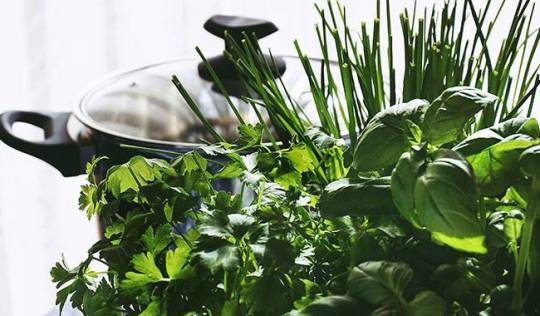
Herbs - 7 Easy Vegetables for Beginners
Aromatic herbs such as mint, ginger, thyme, basil, etc. can be cultivated in a plot or on a windowsill. Herbs like these usually only need watering and plenty of light.
Types of herbs
Herbs not only provide delicious fresh flavor for the cook, but they look great too! Take your cooking to a whole new level by planting them in garden beds, borders, pots, and window frames. If you give your herbs the best start, you'll get plenty of produce and few pests or problems.There are two main types of herbs: annuals, such as basil, which grow and die in the same year; and perennials, such as rosemary, which is a woody shrub that can live for many years.
- Annual herbs have a specific growing season. Buy them as seedlings in the spring or fall and harvest them a little at a time until they start to flower. When they bloom, they are about to sow and die, so harvest the whole plant and save it (see below).
- Perennial herbs become a garden staple and are always on hand when you need twigs or leaves to flavor a soup, stock, or casserole. They require annual pruning and spring and fall applications of controlled-release fertilizer.
More Related Information About Grow Herbs
Scallion
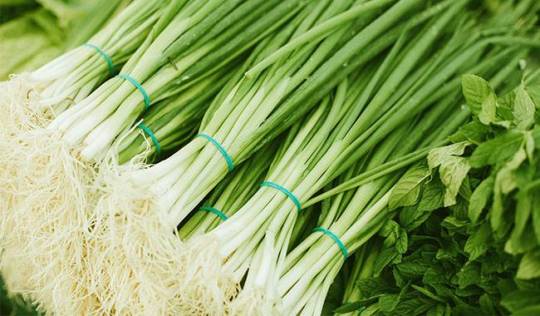
Scallion - 7 Easy Vegetables for Beginners
Put a few discarded Scallion bulbs in a pot or scatter a few seeds and you'll always have a fresh bunch of Scallion on the table.
Sow Scallion seeds indoors
- For best results, sow seeds indoors 8-10 weeks before the last heavy frost.
- Sow thinly and cover with ¼ inch of seed starting formula. Keep moist and maintain a temperature of about 60-65 degrees Fahrenheit.
- Seedlings emerge in 7-14 days.
- Once seedlings emerge, provide ample light on a sunny windowsill or plant 3-4 in. seedlings under a fluorescent plant light that is turned on 16 hours per day and 8 hours per night. As the plants grow, raise the light. Incandescent bulbs don't work because they get too hot. Most plants need a period of darkness to grow; do not leave the light on for 24 hours.
Seedlings do not need much fertilizer and are fed at 3-4 weeks of age with a ferment solution (half the concentration of complete houseplant food) according to the manufacturer's instructions.
- Seedlings in the garden are about as thick as a pencil after the risk of severe frost. Seedlings need to be "hardened" before planting in the garden. Move the seedlings outside for a week in a sheltered place to acclimatize them to outdoor conditions. Be sure to protect them from the wind and hot sun first. If there is a threat of frost at night, cover the container or bring it indoors and then remove it again in the morning. This hardening process strengthens the cell structure and reduces transplant shock and sunburn.
- Choose a sunny spot where you have not planted Scallion the previous year.
- Apply a balanced fertilizer and work in the soil before planting. scallion prefers a pH of 6.0-7.0.
- Scallion prefers well-drained organic soil. Add organic matter to the soil at least 6-8 inches deep, remove stones, and level smooth.
- Space them 2-3 inches apart in 1-2 foot rows.
Sow Scallion in the garden
- Once the soil is ready for tilling, sow directly in the garden in early spring and then again in the fall.
- Choose a sunny spot where you have not planted foreign Scallion the previous year.
- Apply a balanced fertilizer and work in the soil before planting. scallion prefers a pH of 6.0 - 7.0.
- Scallion prefers well-drained organic soil. Add organic matter to the soil at least 6-8 inches deep, remove stones, and level smooth.
- Sow seeds thinly in rows 1-2 feet apart and cover with 1/4 inch of fine soil. Firm lightly and keep evenly moist.
- Seedlings emerge within 7-14 days.
- Thin seedlings to about 2 inches apart when they are 1-2 inches tall.
Although these vegetables are easy to grow, they do require a little care. Don't forget to water them and remove weeds. Make sure the air in the unit is not dry, and in the garden, cover your pets if there is frost.
#ThumbGarden #Garden #Gardening #Annuals #Care #Inspired #Perennials #Plantcare #Tips #Vegetablegarden #Vegetablepatch #Vegetables
Author: Ms.Geneva
Link: https://www.thumbgarden.com/7-easy-vegetables-for-beginners/
Source: ThumbGarden
The copyright belongs to the author. For commercial reprints, please contact the author for authorization, and for non-commercial reprints, please indicate the source.
Read the full article
4 notes
·
View notes
Text
9 Good Reasons to Grow Your Own Seedlings
9 Good Reasons to Grow Your Own Seedlings
First-time gardeners often ask, "Do I have to grow my own seedlings, or is it easier to buy them at the market? To which an experienced gardener might reply, "Without a doubt, you should!" This confidence stems from the experience we have gained over the years and the desire to see the best plants on our plots. There's also the fact that the season starts earlier, which makes us even more eager to "dig in". I'll tell you why it's worth growing your own seedlings in this ThumbGarden article.Usually, we grow tomatoes, cucumbers, peppers, eggplants, zucchini, and nutmegs by raising seedlings. The rest of the crops are simply sown in the open. However, onions, herbs, and peas can also be planted as seedlings. Cultivated through seedlings of basil, celery, mint, sumac, parsley, and many other cultures, today there are about 180 of them! The number of these seedlings is very large. It is easier to list those that are not grown through seedlings.Sunflowers, radishes, carrots, beet, and potatoes are usually not grown through seedlings. The usual room conditions are also not particularly suitable for growing cabbage shoots.However, even here there are some artisans. The temperature regime for cabbage seedlings during the day should be within the following parameters: 64 °F (18-20 °C) before germination, 42-50 °F (6-10 °C) from germination to the first leaves, and 46-50 °F (8-10 °C) at night, otherwise, the plants will pull out. Refrigerators can help with this problem by keeping the seedlings in the refrigerator overnight.To prevent the germination of radish seedlings after transplanting to the open ground, seeds of varieties that do not germinate easily should be sown. They are sown in fine mesh boxes or egg cartons and are also kept at 41-50°F (5-10°C).Potatoes are cut into wedges and germinated in the cups. However, do not attempt to grow carrots as seedlings. If the central root is damaged during transplanting, it will produce ugly fruit. And it is impossible not to damage it because it will soon reach the bottom of the pot.Young sunflower shoots can withstand light frosts well, so it makes no sense at all to grow sunflowers through seedlings. So, what makes experienced gardeners start the gardening season by sowing seedlings in winter?
1. Early harvest
The main reason experienced gardeners recommend planting seedlings is the possibility of an earlier harvest. Plants start their growing season indoors when outdoor conditions are not yet suitable, develop to a certain stage, and when the weather warms up, they are transplanted to greenhouses or open fields and start flowering and fruiting in a short time. In this way, they are harvested 2-3 weeks earlier than if they were sown directly in the bed.This factor is especially important in areas with short summers when most crops have little time to mature during the warm summer months. Growing cucumbers, tomatoes, herbs, and other vegetables through sprouts not only gives you a "quick" harvest but also extends the growing season of the plants. This means more fruit!
2. Variety
A second very important benefit of having your own seedlings is the ability to grow exactly the varieties you are interested in, rather than those offered by the local seedling market where varieties are usually very scarce. Modern breeding companies and numerous collectors of tomatoes, cucurbits, and various exotic species now offer a variety of familiar vegetable crops and exotic species. And all of these can be grown in your vegetable garden if you sow seedlings.
3. A chance to find your own, better
Experienced gardeners build their crop collections precisely through trial and error, annual trials, and selecting the best varieties. By trying different varieties on their plots, they not only have the opportunity to grow unique products not available on the market but also to find those vegetable varieties and hybrids they like that grow best in specific conditions - in the available soil, in the local climate, with proper care.
Grown in Your Vegetable Garden if You Sow Seedlings
4. Protect valuable varieties
By growing your own seedlings, it is easier to preserve valuable varieties or hybrids that have sparse seeds or do not germinate well in the open air. It is easier to grow plants from very small seeds that require very good soil preparation, watering with a sprayer, and greenhouse conditions.
5. Harvest from a two-year crop
Another major advantage of planting seedlings is that you can get a full two-year crop of plants in the first growing season. These crops include mustard, leeks, thyme, parsley, celery, and a range of flowering crops.
6. Quality of seedlings
The quality of purchased seedlings is often a controversial issue. Many gardeners remember how whiteflies, spider mites, thrips, and nematodes, not to mention various plant diseases, took up residence in their beds along with market-bought tomatoes, cucumbers, strawberries, or flower seedlings.Not all seedling sellers are self-aware. Inexperienced gardeners may encounter plants with overly dry roots, broken growing points, obvious signs of fungal disease, or even the wrong variety.
7. Cost savings
Seedlings of some crops are quite expensive. This is especially true if you need a large number of plants. By growing these crops yourself, you can get the right amount of planting material at a lower economic cost.
In addition, if your goal is high-quality planting material, you can choose to grow in individual pots (cups), observing the necessary agricultural practices, which give the plants a better potential than potless cultivation.
8. Relatively low seed consumption
When sowing some crops in open spaces, it is recommended to increase the seed rate by 5-15%. This is because not all seeds will take off and some will be weaker and more likely to be discarded. By planting our own seedlings, we reduce seed consumption and have the opportunity to get stronger plants by creating the best conditions for their development.
9. Transplanting in the comfort of open spaces
In order to buy seedlings on the market, we need to set aside some time. And the purchase process itself requires not only financial means but also physical strength. You have to admit that going to the market or garden store during mass planting is a very tedious activity. It is not uncommon for us to return home exhausted and put off planting the plants we bought until tomorrow, which may be a week away.Plants with closed root systems are only stressed by changing conditions during storage, while seedlings with open root systems are more stressed, get sick after planting, develop less, and are harvested later.By growing our own seedlings, we are able to grow them at our convenience, saving us the effort of extra travel. We make sure it has been sufficiently hardened. If we transplant from solid plants, we reduce the drying time of the roots and thus get healthier plants.
#ThumbGarden #Garden #Gardening #Care #Garden #Germination #Plantcare #Seedlings #Seeds #Sprouting #Tips
Author: Ms.Geneva
Link: https://www.thumbgarden.com/9-good-reasons-to-grow-your-own-seedlings/
Source: ThumbGarden
The copyright belongs to the author. For commercial reprints, please contact the author for authorization, and for non-commercial reprints, please indicate the source.
Read the full article
1 note
·
View note
Text
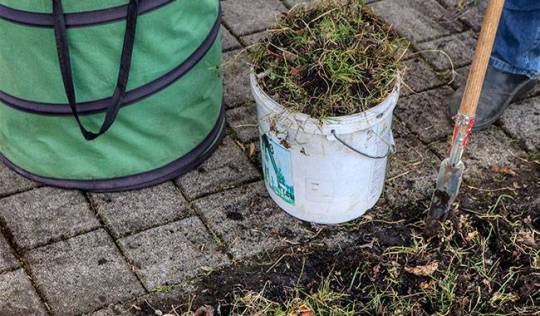
5 Tips for Cleaning Weeds in Your Garden

5 Tips for Cleaning Weeds in Your Garden
What do we know about weeds? They are our enemy! They clog flower beds, prevent crops from growing properly, prevent us from harvesting, and ruin the appearance of gardens, vegetable gardens, flower beds, and our nerves. But maybe we don't need to fight them? Why not just let them grow? But no! Weeds are indeed unwelcome guests in our gardens, and they can be much more harmful than they appear at first glance. According to some studies, weeds cause more damage to cultivated plants than disease, insects, and hail combined. What are the dangers of introducing weeds into cultivated plants and what are the consequences of weed overgrowth? Let's wait and see! You will learn 5 Tips for Cleaning Weeds in Your Garden in the ThumbGarden article.
Clearing weeds - Cultivated Plants' Competitors in Terms of Nutrition, Water, and Light
Weeds are the first and foremost competitors of cultivated plants in terms of nutrition. No matter how much fertilizer we apply to the bed, if weeds grow on it, the crop will get far less nutrients than they could. This is because these "uninvited guests" can absorb 20-50% more nutrients than cultivated plants. And certain weeds, such as creepers, absorb 2-5 times more nutrients from the soil than any crop, thus severely depressing our crops.In addition, weeds are competitors for sunlight. Due to their high growth potential, over or just competing with the crop, they shade the crop with their stems and leaves. Shaded cultivated plants often exhibit mechanical tissue underdevelopment and lodging. Carbon dioxide assimilation (oxygen and carbon uptake) and consequent reduction in organic matter accumulation. Poorer quality of fruits (including less sugar and lower starch content), especially in combination with lack of light and lack of nutrients.Another disadvantage of the presence of weeds in cultivated crops is the shading of the soil. As the soil is covered by weeds, its temperature drops by 34-41 °F (1-5 °C), which in turn slows down the activity of the soil biota, which is responsible for processing soil organic matter into plant-available nutrients.Cultivated and weedy plants also compete when it comes to soil water depletion. Some weeds, such as blue cornflower, can consume 1.5 to 2 times more water than weeded crops due to their root systems. As a result, the cultivated plants we grow are not only not getting water, but also not getting nutrients, because it is in the dissolved form that nutrients enter their tissues.Therefore, if weeds are not treated, they reduce the quality and quantity of our crops. An average weed infestation can reduce yields by 20-25% and a severe infestation can reduce yields by 50-70%, sometimes even 100%.
Sources of Disease and Pests
Another problem exacerbated by weeds is the spread and accumulation of plant diseases and pests. For example, couchgrass is an intermediate host for yellow rust, stem rust, and crown rust of cereals. Shepherd's purse, wild radish, and common bittercress are hosts for white mold, cabbage wilt, and powdery mildew. Beargrass is a major food plant for potato moth and Colorado potato beetle, and a breeding ground for viral diseases of potato and tomato.
Weeds Make It Difficult to Care for Our Plants
In addition to weeds overwhelming cultivated plants in terms of nutrients, water, and sunlight, they also make it difficult to care for plants. For example, climbing weeds such as field snail and buckwheat wrap their stems around agricultural plants, causing them to fall over and making weeding, loosening rows, and harvesting more difficult. Parasitic weeds, such as codling moths, also feed on the photosynthetic products of their hosts, depleting them and killing them.
Hazards to Allergy Sufferers and Pets
Hazards to Allergy Sufferers and Pets
There are over 1,000 species of weeds in the United States, with only 20-30 common weeds. And not all of them suppress only cultivated crops. For example, ragweed, mugwort, ladderwort, and wild hemp can all cause allergic diseases in humans. For example, buttercup yellow and caustic, wood thistle, spiny and common cocklebur, cabbage, straight plantain, swamp cowslip - about 400 weeds can endanger domestic animals.
Weeds Can't Be Killed!
So, why do humans fight weeds but can't get rid of them? Because weeds have some biological characteristics that allow them to spread rapidly, adapt to different environmental conditions, and compete with cultivated plants.
- Weeds are very prolific. If a bush of wheat can provide about 100-150 seeds, a single flower of dandelion forms more than 200 seeds, a field snail - from 500 to 10 thousand seeds, creeping grass - up to 10 thousand, pink sedge - up to 40 thousand, white crane grass - up to 500 thousand. Many plants reproduce not only by seeds but also asexually. For example, couch grass, field horsetail, hogweed, awnless mallow, and sorghum Aleppo rapidly occupy the territory due to their rhizomes. Root weeds, such as field sow thistle, field creeper, field thistle, creeper, and Morrocan, are unabashedly vicious weeds.
- They possess amazing seed and fruit survival rates. For example, hogweed seeds germinate for up to 10 years, creeping sedge - for up to 12 years, pink sedge - for up to 20 years, and creeping sedge - for up to 50 years.
- Most weeds have special devices for spreading on their seeds - flies, prickles, spines, anchors, awns, and bristles. Thus, dandelion, goat thistle, and goat thistle are spread with the help of flies. Some weeds spread with the help of creeping worms, such as wild carrot, bellflower, cleaver broom, burdock, and cocklebur. The seeds of some weeds are so small that they can be easily carried by the wind without any device.
- Seed maturation and germination are not the same. In the case of white marigolds, for example, the seeds are divided into three groups. The first group consists of large brown seeds that germinated in the fall of the year the plant was fertilized. The second group consists of small brown seeds. They germinate only after stratification, that is, in the second year of weed fertilization. And the third group is small black seeds. These do not germinate until the third year. The same is true for Galinzoga (Gallant soldier), whose seeds germinate immediately as soon as they fall on the soil, while others germinate gradually, taking 5-8 years.
- They have absolutely no requirements for their growing conditions. While cultivated plants need care, weeds have the ability to replace their competitors and have access to everything they need to live. They are usually frosted tolerant - field broom flowers will bloom even if it snows in the yard. Drought tolerant - mugwort and yarrow. They can grow in any type of soil and adapt easily to environmental changes.
#ThumbGarden #Garden #Gardening #Care #Diseases #Garden #Lawncare #Lawngrass #Lawnweed #Mowing #Pests #Plantcare #Pruning #Tips
Author: Ms.Geneva
Link: https://www.thumbgarden.com/clearing-weeds-in-your-garden/
Source: ThumbGarden
The copyright belongs to the author. For commercial reprints, please contact the author for authorization, and for non-commercial reprints, please indicate the source.
Read the full article
0 notes
Text
How to Prepare Seedbeds for Spring Sowing

How to Prepare Seedbeds for Spring Sowing
Soon, the long-awaited spring will arrive, the snow will melt and fresh, renewed earth will emerge. This means the gardening season is about to begin. But before you "move" any seedlings or seeds onto your plot and put them to work on your summer chores, you need to prepare your beds so they can provide you with the richest, most nutritious and delicious harvest possible. You will learn How to Prepare Seedbeds for Spring Sowing in the ThumbGarden article.
Preparing the Right Program
Of course, the list of tasks for preparing your beds for the season may vary. Much will depend on the specifics of your plot, its location, the specific soil, and what kind of crops you plan to grow. However, there are a few "must-haves" - things you can't afford to be without when preparing your seedbeds. There are a few things you need to do first.
Assess the Situation
Before you start your spring work, you need to make sure the soil is ready. The easiest and most proven way to do this is to take a small piece of soil in the palm of your hand and try to crumble it. If, despite your efforts, the lump still sticks to your hand, then now is not the time to work. If the lump of soil immediately crumbles into dust - alas, you are too late, the soil has dried out too much and you will have to water before preparing the bed. However, if the soil has disintegrated into small fragments, it's time for spring tillage.
Digging out the Soil
Of course, it is best to dig out the plots in the fall after the harvest. However, if for some reason this is not possible, you should start digging in the spring. In the spring, the soil should be tilled to a depth of 6 inches (15 cm), always turning the soil layer sufficiently so that the lower part of the soil rises to the top.
Application of Fertilizers and Soil Conditioners
Apply fertilizers and soil amendments at the same time as digging (or raking if you are not digging in the spring). Their composition depends on the soil conditions of the plot and the crops that will be grown in your beds.For example, garlic likes compost and fertilizers such as calcium superphosphate. Potatoes will grow well in soil that has been dug twice, in the fall and spring, and can also be fertilized with nitrogen. Cucumbers can be well supported by adding plenty of humus or compost to the planting hole, while carrots and onions feel comfortable in soil with added sand.However, there are some fertilizers that are recommended for application in the spring, regardless of your planting schedule. These are mainly nitrogen fertilizers that promote vigorous crop growth, but also include potassium and phosphorus fertilizers. Introduce compost or humus 3-4 weeks before planting. Compost can also be used.
Loosen the Soil
After digging, the soil should be loosened to ensure the necessary moisture and air exchange. Do not dig too deep - a layer of 2-4 inches (5-10 cm) is sufficient. It is also important at this stage to remove any weed roots from the previous year so that they do not germinate and become competition for future "residents" of your beds.
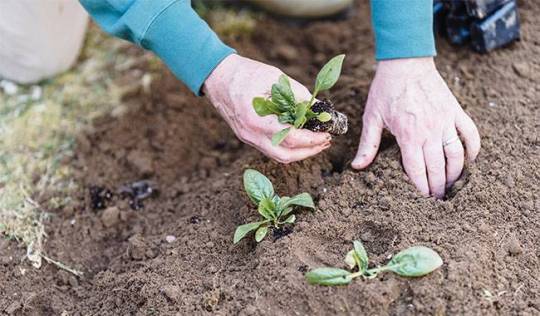
Shaping of Seedbeds

Shaping of Seedbeds - How to Prepare Seedbeds for Spring Sowing
Once the soil is ready, it just needs to be leveled and the beds can be shaped. The shape of the bed can be a classic rectangle or creative, as long as the width of the bed does not exceed 40 inches (1 meter) - so that you do not have problems with weeding, watering and other gardening tasks.You can limit yourself to the classic seedbed, or you can choose other options, such as a raised seedbed, which is shaped with special borders and ranges in height from 8-35 inches (20-90 cm). Such beds not only have an attractive and neat appearance, but they also increase yields, protect crops from temperature fluctuations and are easy to maintain - you don't have to bend down to loosen or weed, and the weeding area is greatly reduced.
Lifecycle of the Perfect Bed
In addition to the jobs you simply can't live without, there are small "fly in the ointment" that can make your job in the field easier and your seedbed more "productive".
How to Make the Bed "warm"?
If the soil is not yet ready for tillage, but you want to start planting early so you can harvest more crops this season, you can employ a little trick: cover the soil with a black non-woven material such as film or spunbond. The black actively "absorbs" the rays of even the cool spring sun, and the thick material creates a powerful greenhouse effect that warms the soil more quickly.There are other ways to do this. For example, you can spread peat on top of the snow crumbs on your plot - this also warms the soil so you can plant earlier.Another "warm bed" secret that some gardeners use is to create a water buffer. You will need to fill 0.4-0.5 gals (1.5-2 liters) dark plastic bottles with water and alternate these "buffers" with young shrubs at planting time. The bottles should be dug to the same depth as the planting material. Of course, this method will have little effect on the soil warming process, but will protect the roots from weather changes because of the good thermal conductivity of the water.If you want the soil to warm up faster and protect your plants from the vagaries of the weather, a good solution is to create raised beds on your plot. These beds allow the soil to warm up faster and also protect your crops from temperature fluctuations. As a result, seeds can be planted earlier and yields increased by 1.5 to 2 times while labor is greatly reduced.However, it is important to recognize that warmer soils do not raise air temperatures, so early planting should be preferred to cold-resistant varieties - and planting more "vulnerable" crops is best postponed until warmer days.
Planting on Schedule
Any experienced gardener knows the importance of crop rotation. To avoid soil depletion, you need to alternate planting with different vegetable and garden crops as needed. For example, legumes enrich the soil with nitrogen, which is good for some other plants.But sometimes, especially for owners of large plots of land, it can be difficult to remember "what grows where and when" in the garden. To avoid confusion, it is advisable to draw a planting plan each year and save it for the future so you know exactly what crops were planted in which parts of the vegetable garden in previous years.Raised beds are also a great help here: they don't need to be reshaped every year, they are long-lasting and can withstand several years of use. So, if you make several of these beds for different crops, you will have less difficulty in planning your planting for the next year.
Preparing for the Gardening Season
The value of shoveling beds in preparation for planting is not news to anyone. But not all gardeners know that digging up the road can be beneficial - it removes weed roots, making it easier for you to weed later.It is then recommended to lay mulch material over the path to prevent weeds from growing and to keep moisture in the ground. Organic materials such as sawdust and inorganic materials such as pebbles, gravel or other types of mulch can be used for this purpose.If you have organized raised beds, these will also make it easier for you: you won't have to work hard to control weeds in the aisles because they won't grow through the walls and threaten your crops. This means it's enough to mow away unwanted growth from time to time, or even to limit yourself to weeding.
How to Protect Seedbeds from Returning Frost

How to Protect Seedbeds from Returning Frost
A return frost is a short-term drop in temperature below 32 °F (0°C) that sometimes occurs in late spring or even early June. The danger is that plants have "woken up" by this time, sap has begun to flow actively and in some crops, flowering has begun. During a frost, the cell sap freezes, ruptures the membrane walls of the stem and kills the plant.There are several basic ways to protect vegetable crops from frost damage, the simplest of which is the use of protective shelters, basically small temporary greenhouses. These can be made of convenient materials, such as plastic buckets or metal frames wrapped in polyethylene film.Another method is a chimney. A slow-setting fire is built on site to create a smoke screen that protects plants from frost. Water sprinkling can also be used - sprinkle water on plants a few hours before frost. As the temperature drops, the water evaporates, smoothing out the effects of temperature fluctuations.Tall beds can also help in this situation - with the right fencing material, these beds are built to protect the plants from sudden temperature fluctuations themselves, including from frost. And, if you combine raised beds with other methods of protection, you won't have to worry about frost return - your beds will almost certainly be protected.
How to Choose the Box Material for Your Raised Beds
Boxes and enclosures for raised beds are made of wood, metal or plastic materials. Wooden fencing is the most budget-friendly solution, and many gardeners don't even consider other options. But this is futile - unfortunately, such fences for seedbeds are extremely short-lived. A box made of untreated wood won't last long, and once treated, the material will no longer be environmentally friendly and may pose a threat to your plot.
Metal fencing is more durable, but metal is very sensitive to temperature changes - it tends to overheat and cool quickly, creating temperature fluctuations at the root system and hindering favorable plant development. In addition, 0.8 mm thick and thicker metal panels are quite expensive (thicker panels are not practical to buy because they are not very stable), and the edges of the panels are sharp and can be dangerous if left untreated. This is even more risky if you plan to bring your children to the cottage.A good solution is to choose a plastic box for the bed. This material will not rot and moss and mold will not grow on it, in addition, this box is simple enough to install and even easier to take care of. The only thing you should be aware of is the certificate that guarantees the environmental safety of the product: unfortunately, not all manufacturers are able to provide these certificates.If you want reliable, practical and environmentally friendly high bed enclosures, we recommend you to pay attention to ready-made bed boxes of the brand "ThumbGarden". They are made of eco-friendly polymer material, so they do not cause any damage to the plot, crops, pets. Such boxes are sturdy and durable - they will serve you for at least 10 years, they will not burn and are not afraid of rotting and settling.Even beginners can assemble these beds - detailed, easy-to-follow instructions will save you the hassle of installation. It's also easy to disassemble and reassemble in a different location if you decide to change the layout of your plot.The ThumbGarden Raised Seedbed is suitable for installation outdoors or in a greenhouse. The basic fencing kit allows you to form a seedbed 8 inches (20 cm) high and up to 40 inches (1 m) wide, while the extension kit allows you to extend the length of the box almost indefinitely. They can be purchased at any time from the ThumbGarden online store.Preparing seedbeds for the garden season can be a hassle. But if you do it right, you can make your plot's green inhabitants as comfortable as possible, and your dream crop won't be long in coming.
#ThumbGarden #Garden #Gardening #Care #Garden #Germination #Guide #hotbed #Howto #Inspired #Plantcare #Seedlings #Seeds #Sprouting #Tips
Author: Ms.Geneva
Link: https://www.thumbgarden.com/how-to-prepare-seedbeds-for-spring-sowing/
Source: ThumbGarden
The copyright belongs to the author. For commercial reprints, please contact the author for authorization, and for non-commercial reprints, please indicate the source.
Read the full article
0 notes
Text
The Sunshine Time Implication on Vegetable Growth
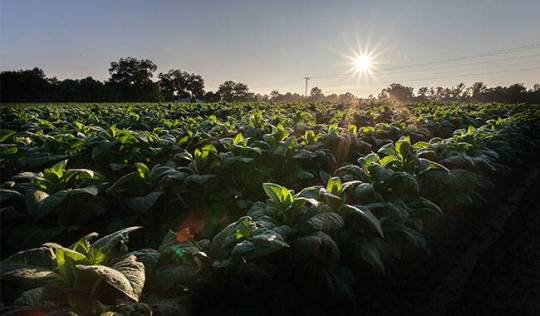
The Sunshine Time Implication on Vegetable Growth
Vegetable crops have a rather complex response to long daylight hours. The duration and intensity of light have a significant impact on the development and yield of vegetable crops. Vegetable crops can be divided into three categories: long daylight hours, short daylight hours, and neutral daylight hours. You will learn about The sunshine time Implication on vegetable growth in the ThumbGarden article.
Vegetable Crops with Long Sunlight Duration
The list of these crops is quite extensive. This includes all types of cabbage, celery, spinach, sorrel, parsnips, dill, onions, lettuce, radishes, turnips, carrots, rutabaga, vegetable peas, and table beets.For flowering and fruiting, these crops require more than 13 hours of long daylight hours. When the days are short, only plant organs such as roots, shoots, and leaves are growing. With longer daylight hours, these plants begin to form reproductive organs such as flowering stems and form fruits and seeds.Therefore, it is important to follow the recommended spring planting dates for these crops. Delayed planting, known as late sowing, can result in a premature start of the stem stage (bud formation), leading to a reduction in yield or total loss of the crop.Long-day vegetable crops can also be successfully sown in the second half of July. With this type of sowing, vegetables such as radishes, lettuce, broccoli, kohlrabi, and green onions do not bloom and produce high yields when the long daylight hours are naturally shortened.
Important Information to Know - Vegetable Growth
Breeders create varieties and hybrids based on the response of each crop to sunlight. In addition, varieties and hybrids have been created for some crops that respond to sunlight. In the case of onions, for example, there are long-sun, short-sun and neutral varieties. Therefore, by sowing the right varieties according to the recommendations, it is possible to significantly increase the yield.
Vegetable Crops with Short Sunshine Hours
These crops include corn, beans, sweet and hot peppers, squash, zucchini, eggplant, and passion fruit. The short daylight hours do not exceed 12 hours of daylight. These plants need this day in the initial stages of vegetation, but after that, they thrive in long daylight hours. If the recommended sowing times are observed, the plants will flower, produce fruit sooner and yield more.
Vegetable Crops That Remain Neutral to Daylight Hours

Vegetable Crops That Remain Neutral to Daylight Hours
This group includes watermelon, asparagus, some bean varieties, tomatoes, and cucumbers - all of which were bred in the temperate and northern latitudes of the country. This type of vegetable grows well on both long and short days. When sowing seeds, the growing season must be taken into account so that the plants have time to form a complete and high-quality crop.An important result of the work of breeders in California has been the development of malleable vegetable crop varieties and hybrids that can grow and produce crops under different lengths of daylight.The radish varieties "Red Radish", "Carmen" and "Carmelita Hybrid" can be sown from early spring to late fall. They do not even flower in the summer but produce beautiful root vegetables.For the earliest sowing, 'Duro, Lyubava, Korund, Sora' are the best. When the weather is warm, they can be sown from the end of April. The maturity period is 18-20 days. These are very high-yielding varieties, up to 5 kg/1 m2.The "Octave" variety sown in August is in the best condition. It will take longer, about 40 days, but it will give you very tasty rhizomes without bitterness or hollowness. It can be stored in the refrigerator for 2-3 months.
#ThumbGarden #Garden #Gardening #Care #Garden #Plantcare #Tips #Vegetablegarden #Vegetables
Author: Ms.Geneva
Link: https://www.thumbgarden.com/implication-on-vegetable-growth/
Source: ThumbGarden
The copyright belongs to the author. For commercial reprints, please contact the author for authorization, and for non-commercial reprints, please indicate the source.
Read the full article
0 notes
Text
How To Prune Plants In Autumn

How To Prune Plants In Autumn
Pruning trees and shrubs is an important part of garden maintenance. Without it, you won't have a good harvest, and you won't keep your trees healthy. Therefore, a sharp pruner and a handy garden saw should be a gardener's best friend and always be in a state of readiness. In this article, you will learn how to prune plants in the fall.
TYPES OF PRUNING
Generally speaking, pruning can be divided into three main types: formative, hygienic, and rejuvenating. Each of them has its own purpose and is carried out according to certain rules and at a certain time.Formative pruning aims at shaping the tree and is more often applied to young plants. But not only that, but It also includes pruning and thinning. It increases the light penetration inside the canopy, improves its aeration, controls growth, and stimulates the development of fruit and lateral branches.In most cases, it is used in spring, but for some shrubs, it is recommended to use it in autumn. In addition to the above, it can include the removal of shoots that grow into the canopy, droop towards the ground and intertwine with each other.Sanitary pruning includes the removal of diseased, broken, and dry branches. It is performed regardless of the season (spring, summer, and autumn), since the quality of the harvest and the development of the plant, and sometimes the length of its life, depending on the timeliness of the applied method.The purpose of rejuvenation pruning is to stimulate the growth of new shoots and free the plant from shoots that have lost their flowering potential. It varies from crop to crop. It is usually done in spring. In autumn, it should be done only in the south and in berry bushes.
HOW TO PRUNE PLANTS IN AUTUMN
As mentioned above, autumn pruning is not acceptable in all regions. Winter conditions in the northern and central regions are quite harsh, so if trees there are pruned in the fall, the wood in areas cut during a sustained frost will dry out, and the bark will freeze, which has a detrimental effect on the entire plant. One and two-year-old seedlings are at risk of dying.However, sanitary pruning, including removing pests, diseases, dryness, and damaged branches, can also be done in the fall in these areas.In the South, not only is fall pruning not contraindicated, but it is recommended for spring stress relief. However, if miniature areas are exposed to longer frosts and temperatures below 23 °F (-5°C), you should postpone the work until spring.
WHAT CAN I PRUNE IN THE FALL?
More or less tolerant of pre-winter pruning are frost-resistant and low-growing fruit varieties. Recommended crops for fall pruning include gooseberries, currants, honeysuckle, raspberries, blackberries, grapes (in shaded areas), lemongrass, mangosteen, and cranberries.
Fall pruning of gooseberries and currants
Some people prefer to prune gooseberries and currants in the spring, but these crops bloom early, so pruning in the spring is risky for them.Fall pruning of gooseberries and currants involves removing branches that bend to the ground, grow inward, and have outlived their reproductive age. If the plant has been badly neglected, rejuvenate it in the first fall and finish its formation the following fall. An important rule is not to remove more than a third of the branches at a time.
When rejuvenating currant bushes, remember that it is better not to exceed 4-5 years for fruiting branches of black currants and up to 8 years for red currants. In the latter case, it is possible to partially rejuvenate them by transferring them to the part of the branch that still can produce a crop.Gooseberry branches can bear fruit in 10 years, but only young branches can produce large fruit. Therefore, if the bark of a branch is very dark, cut it off to make room for new branches. To obtain high yields, everything older than 5 years should be removed from the gooseberries.When cutting gooseberries and currants, check the plugs carefully - if you find black middle parts on the twigs, cut them off completely and burn them, as this is a sign of an infestation of current grass.
Fall pruning of raspberries and blackberries
Fall pruning should also be done on raspberries, but only if the raspberry trees are not cleaned up earlier for some reason. Shorten new shoots, remove old knotty shoots and shoots that thicken the bush.In cold climates, it is not uncommon for all parts of some varieties to be removed. However, modern recommendations direct gardeners to more convenient and productive methods of shaping the crop in summer and spring.On the other hand, blackberries need to be pruned in the fall. After harvest, they are pruned with no more than 10 branches per bush, clearing out the fruiting shoots, pruning out the stems with immature wood, and shortening the rest by 30% for the next year to stimulate peduncle formation.
Autumn pruning of grapes
The autumn pruning period is mainly recommended for northern regions. Pruned grapes are easier to cover in the winter and easier to care for in the spring.After the first light frost, you can reduce weak perennial branches, shorten mature annual branches to 2-6 buds (depending on variety, branch thickness, and growing area), and form a replacement. Allow young plants to form in the spring.
Prune lemongrass and kiwi in the fall
Fall is also the best time to cut back on lemongrass and kiwifruit. During this period, they are thinned, peeled, and shaped.
Fall pruning of honeysuckle
Honeysuckle is also pruned in the fall. They are thinned, and shoots older than 7 years are removed - leaving a stump of about 2 inches (5 cm) for regrowth.
Fall pruning of snowberry
If you have laurel in your garden, you can also prune it in the fall. Dry, damaged, and stunted branches are removed.
Fall pruning of fruit trees
Although it is recommended to prune fruit trees in the spring, you can still do some pruning in the fall. First, this involves cutting off dead branches. Second, branches that are heavily shaded have a poor crop.Such branches are hard to find in the spring, but they will be easier to see in the fall when the fruit is harvested. However, considering that new wounds are conductors of cold, living but non-fruitful branches should be pruned into spikes about 6 inches (15 cm) high, which should be completely removed in spring.

What Can I Prune In The Fall
FALL PRUNING RULES
Before you decide to do fall pruning, you should wait until the sap flow stops, easily recognized by the falling leaves. But you can't put it off too late.If restorative techniques have been implemented on berry trees since the fall, they should receive special attention in the spring.
GENERAL PRUNING RULES
There are also some general rules of pruning which, if applied, will ensure correct pruning of the branches, overgrowth as quickly as possible and make the gardener's job easier.
- Pruning shears and saws must always be kept sharp and disinfected.
- When removing large branches, cut them into rings, leaving no stump at the cut, but cutting evenly and cleanly along the trunk or scaffold branches without affecting the rings.
- When cutting thick branches or twigs, first make a felling notch below the planned cut and then file down the branch from above. This not only makes the process easier and faster (the branch deflects under its own weight, helping the blade to penetrate deeper), but it also prevents the bark and wood layer under the cut from being torn.
- When cutting old or thick shoots at the roots, hold the secateurs at the proper level with one hand, parallel to the ground, and with the other hand, keep the branch strictly perpendicular to the direction of the cut.
- When caring for trees, do not make more than two large cuts at a time.
- Trim the cuts with a saw, smooth them out with a sharp knife, and apply garden varnish.
- When pruning, remember that the harder you cut, the more new shoots you will get, and vice versa.
- If several branches compete and develop in the same direction, the weaker branches should be removed and the stronger ones guided to develop evenly in the space already provided.
- Pruning work should be done only during the dormant period, but at a temperature of at least 17 °F (-8 °C).
More Related Information About Prune Plants
#ThumbGarden #Garden #Gardening #Autumn #Care #Evergreens #Garden #Howto #Inspired #Largegarden #Mediumgarden #Outdoorgarden #Overwinter #Plantcare #Pruning #Shrubs #Smallgarden #Tips #Urbangarden
Author: Ms.Geneva
Link: https://www.thumbgarden.com/how-to-prune-plants/
Source: ThumbGarden
The copyright belongs to the author. For commercial reprints, please contact the author for authorization, and for non-commercial reprints, please indicate the source.
Read the full article
#Autumn#Care#Evergreens#Garden#Howto#Inspired#Largegarden#Mediumgarden#Outdoorgarden#Overwinter#Plantcare#Pruning#Shrubs#Smallgarden#Tips#Urbangarden
0 notes
Text
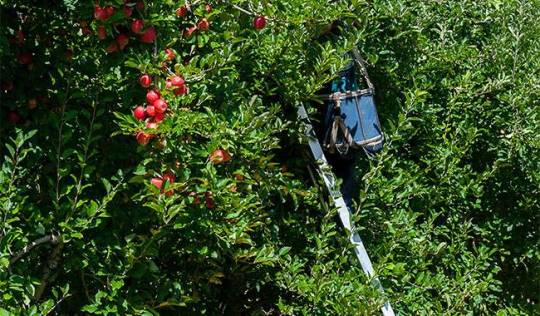
How to Plant and Care for Apple Trees in Spring

How to Plant and Care for Apple Trees in Spring
The most popular and beloved fruit tree, the apple tree, requires a special approach to everything. This includes when sowing seeds. Spring, which is good for increasing your variety collection, doesn't last long. However, spring is the main planting time for apple trees in the Midlands, giving the plants the best chance to be ready for winter. Choosing the right location for your apple trees in the orchard is just the beginning, although it is very important. When planting apple trees in spring, it is worth remembering the rules of procedure and care, which will help seedlings to take root quickly. You will learn How to Plant and Care for Apple Trees in Spring in the ThumbGarden article.
When Can I Plant Apple Trees in the Spring?
In the central and northern regions, spring is the main and most "reliable" planting period for apple trees. The permissible planting date for apple trees is determined by the weather and the type of sapling selected for each particular year. The season begins when the snow melts and the soil warms up; for intermediate zones, it starts around March.When purchasing open apple trees, the risk is higher and more care and attention should be taken when planting. As a standard, apple seedlings should be sold in a dormant state, so they should be planted in a dormant state - before the buds have swollen. The period before sap activity begins is the safest time to plant apple trees.All plantings during the seedling growing season should be considered emergency and experimental. The longer you delay planting, the more the buds swell and the more active the growing season, the greater the risk of losing the plant and the more dependent the apple tree will be on care and watering.If you purchase seedlings that are flowering and growing leaves, keep in mind that seedlings will be extremely difficult to acclimate, problem plants will become sick and weaken as they enter the overwintering season, and their development will be compromised.For container seedlings with closed root systems, things are much easier: they can be planted at any time, even in May or early summer. If you don't forget to water, the seedlings will grow so quickly that you will hardly notice the transplanting. The later you want to plant your apple trees, the more important it is to choose seedlings with sheltered roots.
How Do I Store and Transport Young Seedlings?
The process of purchasing healthy apple seedlings is a special adventure every time. From choosing a reliable variety and place of purchase to carefully checking and verifying the condition of roots, shoots, signs of cheating, or improper maintenance, there are many nuances to be aware of if you follow basic rules and follow logic rather than impulse, it's hard to go wrong. But when the long-awaited apple tree is already yours, the hard part is just beginning. After all, the sapling still needs to be finished and preserved at planting time.If you choose apple trees in containers, you don't need to worry about transporting and storing them before planting. These seedlings can even endure a long wait for the right weather and location to be ready. Just water (but not flood) the seedlings as needed, and don't let the soil dry out completely.Apple trees with an open root system are more difficult to preserve. It is recommended to plant them on the day of purchase. The roots will dry out quickly and any delay will kill the seedlings. They should not be left in the air for even half an hour. The roots can be wrapped in a damp cloth or paper towel and placed in a plastic bag. Even better, fill the bag with damp sawdust, lime, or coconut fiber and dip the roots into the "filler. Tightly closed bags will allow the seedlings to survive transport. If you cannot plant them on the same day, you can protect the roots with putty and keep them in a cool place for a few days.
- Mix the substrate and clay with water in equal parts to form a thick sour cream-like "bolt".
- Thoroughly coat all roots with the combination, dipping and spreading by hand if necessary.
- Do not allow the putty to dry and soak the roots in sawdust or an inert base.
- Carefully wrap the rhizome in burlap or heavy cloth and tie a plastic bag around it.
- Store the seedlings in as cool a place as possible until travel.
If the pit is not ready and the seedlings need to wait more than 5 days, bury them in a cool and shaded area of the garden.
What Should I Do if the Planting Site is Not Ready?

What Should I Do if the Planting Site is Not Ready
Apple trees, like other fruit trees, are planted in pre-prepared planting pits. The best option for spring planting is to do all the work in the fall, i.e. in October. At least, the pits should be prepared as soon as the soil thaws and mechanical tillage becomes possible. The soil should have time to settle and "settle". The critical period is 2 weeks; the ideal period is 1.5 months.The basic requirements for apple trees are simple: they are not suitable for cold winds, lowlands, uplands or strong shade. The ideal location is sheltered, open and sunny to the north, on the south side of houses, fences, outbuildings, on southern slopes, etc.For neighboring fences, walls, buildings and utilities, leave 40-60 inches (1-1.5 m) for dwarf and colony apple trees, 80-120 inches (2-3 m) for medium growth, and 13 feet (4 m) for taller ones. The distance between plants depends on the size of the tree. For low-growing apple trees, it is about 80 inches (2 m) in the row and 13 feet (4 m) between rows, and for tall-growing apple trees, it is 16 feet (5 m) and 23 feet (7 m), respectively.Apple trees should not be planted next to apricots, peaches, cherry plums, walnuts, raspberries and heather (including blueberries). Mixed orchards can consist of cherries, plums, pears and cherries.Planting holes should be large enough that the roots of even the strongest cultivars can fit freely into them. The standard for apple trees is a depth of 23-27 inches (60-70 cm) and a width of about 31 inches (80 cm). A depth and width of only 20 inches (50 cm) is sufficient for colonizing cultivars. If there is a risk of stagnation and waterlogging, an additional drainage layer should be added to the depth.There is nothing unusual about preparing a tree hole for the apple tree itself.
- Separate the top layer of fertile or topsoil (about the bayonet of a spade) from the bottom layer and pile it on different sides.
- Apply organic fertilizer to the topsoil - 1.5 to 2 buckets or 66-88 lbs (30-40 kg) of compost (humus can be substituted) and 150 to 200 g of grass ashes; do not mix, you can simply layer the organic matter with the soil.
Whether or not to use mineral fertilizers is a matter of personal choice. Natural tillage is limited to organic matter, while conventional tillage necessarily includes phosphorus and potassium fertilizers. When planting apple trees, you can apply half a cup (100-150 grams) of potassium chloride and 1-1.5 tablespoons of calcium superphosphate. Limit yourself to a reasonable amount and do not use 800-1000 grams of phosphorus fertilizer at a time, as some instructions suggest.It is worth noting, however, that mineral fertilizers are hardly needed in the early stages of tree growth; they can leach into the lower layers of the soil and increase the risk of root scorch. Regular annual fertilization is a better way to apply fertilizer than putting large amounts in the soil at planting time.When filling the planting pit with soil, be careful to shrink it and form a mound of 6-10 inches (15-25 cm). If the soil is too heavy or sandy, its composition must also be adjusted according to the general principles of soil improvement: adding clay to sandy soil and sand to clay.
How Do I Prepare My Soil for Planting Apple Trees?
In addition to the indispensable spade, you will need other helpers when planting apple trees.
- Sharp and convenient pruning shears.
- Standard bucket.
- Stakes, about 60 inches (1.5 meters) high, which will protect the seedlings from the strongest winds, and soft ropes for tying them.
- Labels or tags (if you are growing an apple tree, you can leave it unlabeled, but it is better to label the plant species at once).
Seedlings in containers should be watered liberally, preferably the day before planting, so that the soil is moist but not soggy. Seedlings with open roots should be immersed in water, soaking the roots in moisture for several hours. If the seedlings are very dry, soak them whole and check the condition of the bark. Inspection of the roots will reveal any damaged, rotten, broken or dry roots that need to be removed or trimmed back to healthy tissue with a secateurs or sharp knife. If the roots are too long, shorten them.When planting in the spring, it is a good idea to soak the roots in a clay paste (cover with soil to prevent the acidified mixture of soil and clay from drying out).
How to Plant Apple Trees Correctly in Spring?
Luckily or not, in apple tree planting itself, everything has a standard. For different seedlings, the basic principles differ only slightly. When planting container apple trees, it is not necessary to remove all the soil from the planting hole, but only to make a hole slightly larger than the container. On the other hand, for bare-root apple trees, a full, deep planting hole is needed to allow the roots to extend more easily.
- At the bottom of the hole, lay a mound of substrate, place the seedling on top and insert a peg in the middle. The safest option is to put three nails around the planting hole, but in a sheltered area, one nail will suffice.
- Place the sapling carefully on the mound, 2 inches (5 cm) or more from the stake, spreading out all the roots, making sure not to break them. Using your hands, gradually fill the space between the roots with soil, tamping the soil down slightly and making sure the root neck stays about 2 inches (5 cm) above the soil - not to be confused with the grafting site - in an arc 2-6 inches (5-15 cm) from the root neck. You can simplify the procedure by pouring out a bucket of water first, refilling the soil before the water is absorbed, letting it settle a little, and compacting it with the palm of your hand on top.
- Make an irrigation hole and soak the soil deeply with 2-3 buckets of water.
- Cover the root zone with soil to a height of 2-4 inches (5-10 cm), leaving a small circle of about 4 inches (10 cm) around the trunk (compost, peat, humus, dry soil - the best mulch is the one you have).
- Tie the seedling to the stake to complete the planting (non-angular, figure-of-eight).
How to Prune the Planted Apple Trees?
How to Prune the Planted Apple Trees
Pruning is required for both annual and biennial apple trees. Its main purpose is to restore the balance between above- and below-ground parts and to improve rooting capacity. But the first pruning also sets the tone for the formation of the entire canopy. At a height of 30-40 inches (80-100 cm), annual seedlings without side shoots are cut off and the boom is set.Branching seedlings are stripped of very low branches up to 20-27 inches (60-70 cm) are removed), all other branches are shortened by one-third or slightly shorter, and a layered canopy is immediately established - with the longest branches at the bottom and the central leader branch 6-8 inches (15-20 cm) high above the upper lateral branches.Uniform, clean-cutting rules are standard: trim the cut with a sharp tool a few millimeters above the buds and trim the lateral branches facing outward above the buds.
What Can I Do to Help My Apple Trees Adapt to Their New Location?
Mulching is the first and most important step when planting apple trees. This is not only because mulch prevents water evaporation and frost return, but also stabilizes conditions. A protective layer prevents overheating and prevents soil compaction. But there are ways to help young apple trees besides mulching.
- Pay attention to precipitation to avoid complete drying of the soil and lack of moisture (2-3 maintenance waterings in spring and the same watering in summer will be sufficient).
- Loosen the soil regularly and keep it from being compacted.
- Do not allow weeds to loosen.
Most importantly, do not rush to fertilize, let the seedlings use the fertilizer placed in the planting hole and do not start regular fertilization until the following spring, and even then, only when there are signs of poor growth.
#ThumbGarden #Garden #Gardening #Best #Care #Diseases #Drought #Evergreens #Fertilize #Fruits #Garden #Guide #Heatresistant #Howto #Orchard #Organics #Pests #Plantcare #Pottedplants #Soils #Tips #Trees #Watering
Author: Ms.Geneva
Link: https://www.thumbgarden.com/how-to-plant-and-care-for-apple-trees/
Source: ThumbGarden
The copyright belongs to the author. For commercial reprints, please contact the author for authorization, and for non-commercial reprints, please indicate the source.
Read the full article
#Best#Care#Diseases#Drought#Evergreens#Fertilize#Fruits#Garden#Guide#Heatresistant#Howto#Orchard#Organics#Pests#Plantcare#Pottedplants#Soils#Tips#Trees#Watering
0 notes
Text
The Top 5 Winter Sowing Vegetables

The top 5 winter sowing Vegetables
One of the most valuable qualities of a successful gardener is a good allocation of work and time. There is always a lot of work to be done on the ground, so doing certain things in the fall can help relieve some of the stress of spring. But what can make working in the spring easier? The answer is - winter sowing!
WHAT IS WINTER SOWING?
The definition of what is winter sowing is right there in the name of agricultural practice - winter sowing. This means that sowing seeds into seedbeds at a stable air temperature of 32 °F (0 °C) and soil temperature of 35-39 °F (2-4 °C) is called "winter sowing". In different climatic zones, this moment arrives at different times, if it is around the end of October in one place and in November in others.
WHAT ARE THE BENEFITS OF SOWING WINTER CROPS?
The benefits of sowing vegetables in winter are quite extensive and worth, not overlooking.
- firstly, it is 2 to 3 or 4 weeks earlier than spring sowing.
- secondly, it is more resistant to back frosts, diseases, and pests.
- third, it saves a lot of time in spring projects.
- Finally, by the possibility of repeated sowing, the yield is greater in the same area.
WHAT CAN BE SOWN IN WINTER?
There is a wide selection of crops to sow in the fall. These include spinach, lettuce leaves, radishes, parsnips, dill, beet, carrots, mustard, leeks, cucumber grass, cauliflower, parsley, rhubarb, cauliflower, red kale, and Peking cabbage.You can also sow garlic and shallots in the winter, and for those who like to grow herbs, you can sow sage, chamomile, and valerian.
HOW DO I SOW SEEDS IN LATE FALL?
To ensure that there are no problems with winter sowing, you should be prepared as early as late September or early October. Preparation includes digging, fertilizing, bed preparation, selecting seeds, and purchasing planting materials.A fall sowing site should be sunny, wind-free, and high - unaffected by stagnant spring moisture.Choose seeds wisely: buy varieties that are tolerant of low temperatures and flowering, require shorter daylight hours, and have an early maturity period.Apply organic and compound fertilizers to winter crops, but be sure to focus on the crop that will be sown.Sowing should begin when the temperature stabilizes near the zero scales of the thermometer, usually during the first-morning frost. However, you should not rush sowing - if the soil freezes and then thaws, it may provoke the seeds to germinate and then die.If it is too late, you can also sow seeds during a light frost, but not in the soil of the bed, but in a dry, loose soil prepared in advance. This usually consists of equal proportions of river sand, humus, and garden soil.Winter sowing increases the seeding rate by 25-50% compared to the usual recommendations.The sowing depth depends on the soil type: on light soils, sow 0.2 inches (0.5 cm) deeper than usual.And in any case, winter sowing should not be watered. However, care must be taken to mulch the soil.
CROPS WINTER SOWING IN WINTER
Growing winter garlic

Growing winter garlic
There are two methods of planting winter garlic. They differ in the depth to which the cloves are embedded and therefore in the time of work.The traditional method is to deepen the planting material to a depth of 1-2 inches (2.5-5 cm), 2 to 3 weeks before the onset of persistent cold weather. In the central region, it is the end of September and in the south and west, it is the beginning of November.The second method is the deep planting method. The practice is to penetrate the cloves 4-6 inches (10-15 cm) so that they can be worked from mid-August to mid-October. However, it is more efficient in colder climates, as it works best.However, the choice of planting method is not 100% successful. Prepare a garlic bed correctly. An important rule here is not to allow the application of manure under culture, because this fertilizer reacts to the rapid growth of leaves, the formation of loose heads, and instability to diseases.Fertilize garlic beds with ash, well-decomposed garden compost - 6.6-8.8 Lb (3-4 kg) per 11 sq. ft., and mineral fertilizers such as nitroglycerin (20-30 g per 11 sq. ft.). If the soil is acidic - introduce it under precursor lime, clay soils - under dredged sand. Dry as well as moist clay soils are not suitable for growing garlic.When planting, it is better to choose the largest, perfectly healthy, and approved varieties of cloves. Before planting, you should disinfect the planting material with a 0.1% solution of manganese.It is also important to observe crop rotation in order to grow this crop successfully. Do not plant garlic after onions and potatoes, which like potassium as much as this crop and are affected by the same diseases, but after cucumbers, squash, peppers, tomatoes, and eggplants. If garlic is still planted on garlic, the bed should be sown with vetch after the last harvest, and then the green blocks should be incorporated into the soil.A common layout for garlic beds is 4x6 inches (10 x 15 cm).More Related Information About Planting & Growing Garlic
Winter planting of onion seedlings
Overwinter planting of sown onions works well, especially in colder areas, not only for earlier harvest but also for higher yields. Bulbs planted in the fall are less affected by onion fly and false powdery mildew and are easier to weed. And since great effort is necessary to keep planting material until spring, purchased seeding material should be sorted and prepared for planting immediately.The conditions for planting seedlings coincide with those for growing garlic in winter, but onions can wait for a little if it is necessary to choose which culture to give time to first. There is no difference in the choice of the location for planting onions. However, the soil in the onion bed should be well settled at the beginning of the work, so it should be prepared 2 to 3 weeks in advance. There is no exception to the recommendations of the previous generations.For a successful onion harvest, it is best to choose special winter varieties for fall planting and be sure to choose healthy planting material. In addition, if there is a choice, you should plant sharp varieties - they overwinter well, do not germinate, and are the same size by harvest as when planted in the spring.Overseed, there are 4 sections: 0.4-0.6 inch (1-1.5 cm) in diameter, 0.6-1.2 inch (1.5-3 cm), 1 inch (2.5 cm) or more and 0.4 inch (1 cm) or less (oats). Each plant has its own characteristics and therefore is grown separately.The first part - up to 0.6 inches (1.5 cm) in diameter and oats are the best choice for overwintering sowings because they do not produce shoots and therefore disturb the gardener less. They should be planted at 1.2-6 inches (3 x 15 cm) and should be planted to a position at the head that is suitable for the variety.Seedlings of 0.6-1.2 inch (1.5-3 cm) size are usually planted for early emergence. In this case, it is either planted compactly or in clutches of 3 bulbs each.Bulbs larger than 1.2 inch (3 cm) in diameter are planted in a pattern of 3-4 x 6-8 inch (8-10 x 15-20 cm).Seedling depth is determined by the size of the 3 bulbs plus approximately 0.6 inches (1.5 cm), or the height of the bulbs multiplied by 3, plus 0.8-1.2 inches (2-3 cm) of ground cover.More Related Information About Planting & Growing Onion
Sowing carrots in winter
Carrots are also suitable for sowing in winter.Preparing a bed for it, you should remember that this culture prefers loose soil and absolutely does not tolerate undecomposed organic matter (fertilized beds can be used for carrots only for 2-3 years).Therefore, it is better to dig on the soil, bringing ashes, fertilizers (for example, calcium superphosphate - 20-25 grams per 11 square feet, potassium chloride - 10-15 grams) or mature manure (3-5 kg per 11 square feet), adding sand if the soil is heavy, and if it is acidic - lime or dolomite powder. Let the soil settle, and with the arrival of a stable low temperature (2-4 °C) start sowing.Cucumbers, potatoes, onions, cabbage, and cucumbers should not be used as a pre-crop for carrots. For a successful harvest, choose early and medium maturing varieties for sowing, or select varieties that can be sown in winter. It is even better if the seeds are granular and - very importantly - dry.
When planting carrots in winter, the sowing rate increases by about 20-25% (about 1 gram per 11 square feet) while providing a deep well-1.5-2 inch (4-5 cm) and furrow spacing of 8-10 inch (20-25 cm).If sowing during light frosts, fill the furrow with a pre-prepared dry soil substrate or simple, pre-screened garden soil and cover the bed with soil after sowing.When sowing carrots in autumn, it should be remembered that the storage rate of overwintered crops is low, so do not occupy large areas with them.More Related Information About Planting & Growing Carrots
Sowing beet in winter

Sowing beet in winter
Since beets have a fairly long growing season, up to 130 days for some varieties, planting in the fall is recommended. Seeds can be sown when the weather outside becomes steadily colder, with temperatures of 24-28 °F (-4 to -2°C), and in some climatic zones, as early as the end of October or the beginning of November. The most important rule here is to sow the seeds when they will not germinate, but only swell, otherwise they will die.When sowing in winter, choose special cold-resistant varieties or early varieties that are resistant to germination. Seeds are sown dry, about 1-2 inch (2.5-5 cm) deep, 2-4 inch (5-10 cm) apart, in rows 12-15 inch (30-40 cm) apart.Before sowing, the seedbed should be fertilized with organic fertilizer (5 kg per 11 sq. ft.) and phosphorus and potassium fertilizer (15 g per 11 sq. ft.) and if the soil is acidic - make dolomite powder - 1.3 Gal (5 liters) per 11 sq. ft.It is mandatory for beet and to comply with the crop rotation. It can not be planted after carrots and cabbage, it is recommended to plant after tomatoes, onions, cucumbers, potatoes, and peppers.In order to get a harvest a week earlier in the seedbeds sown in winter, you can cover the beetroot with a film and remove it when the first shoots appear.Do not start planting beets in large quantities from autumn, as they do not have a high shelf life.More Related Information About Planting & Growing Beet
Sowing parsley, dill, and other vegetables in winter
When sowing parsley and dill in autumn it is necessary to follow the same rules as for sowing other crops in winter: dig out the bed in advance and fertilize it, sow the seeds after the frost, slightly increase the depth and sowing rate, and cover the plot with a dry substrate after the work is done.Sowing parsley, forming rows 8-10 inches (20-25 cm) apart, the depth of its seeds can vary from 0.4-0.6 inches (1-1.5 cm). Fall dill is sown to a depth of 1 inch (2.5 cm), leaving 8 inches (20 cm) between rows. The predecessor of the umbrella plant cannot be a plant of the same family - parsley, carrot, cumin, fennel - but it can be cucumber, cabbage, potato, zucchini.In addition to parsley and dill, the following crops can be sown for winter: celery, spinach, rhubarb, cucumber grass, parsley, salad mustard. As with all other winter crops, they will germinate well before spring planting and will be a joy to remember to do the right thing.More Related Information About Planting & Growing Parsley and dillMore Related Information About Planting & Growing Vegetables
#ThumbGarden #Garden #Gardening #Garden #Glossary #Howto #Inspired #Outdoorgarden #Overwinter #Seedlings #Seeds #Terminology #Tips #Winter
Author: Ms.Geneva
Link: https://www.thumbgarden.com/winter-sowing-vegetables/
Source: ThumbGarden
The copyright belongs to the author. For commercial reprints, please contact the author for authorization, and for non-commercial reprints, please indicate the source.
Read the full article
2 notes
·
View notes
Text
What Is Organic Farming

What Is Organic Farming
What is organic farming? Today, the phrase "organic farming" is not only a household word but the cause of much debate. Some say it is a particularly correct farming method, while others believe it is only partially correct.
Let's look at what organic, natural, or nature-based farming (its synonyms) is and what its principles are.Organic farming has several other synonyms: ecological farming, organic farming. Organic or natural farming focuses on the health of the ecosystem, soil, plants, animals, and humans.
A LITTLE HISTORY OF ORGANIC FARMING
The theory of organic farming is not as new as it may seem, and similar advances in chemical pesticides occurred in the 1940s, leading to the decade known as the "pesticide era." These new farming techniques, while beneficial in the short term, also had serious long-term side effects, such as soil sloughing, erosion, and an overall decline in soil fertility, as well as health concerns about the toxic chemicals entering the food supply. In the late 1800s and early 1900s, soil biology scientists began to seek ways to remedy these side effects while still maintaining high yields.In 1921 Albert Howard, the founder and pioneer of the organic movement, and his wife Gabrielle Howard, an accomplished botanist, founded the Institute of Plant Industry to improve traditional farming practices in India. Among other things, they brought improved tools and improved husbandry methods through scientific training; and then developed protocols for crop rotation, erosion prevention techniques, and the systematic use of compost and fertilizer by combining aspects of traditional Indian methods. Spurred by these experiences in conventional agriculture, Albert Howard returned to England in the early 1930s, where he began to implement organic farming systems.Several organic farming books reveal principles and evidence that show that a thinning approach to the soil is less invasive to nature, less time-consuming, and ultimately more productive than intensive farming systems.Definition: Organic farming is defined as the production of crops, animals, and other products without synthetic fertilizers and pesticides, genetically modified species or antibiotics, and growth-promoting steroids or other chemicals.The research on natural agriculture did not stop there. This is not to say that it has been popular over the years, it has always had proponents and detractors, but research has been ongoing and has proven time and again that careful treatment of the soil leads to truly meaningful results. Thus, what organic farming means today can be expressed in the following terms.
- Protecting and maintaining the natural fertility of the soil.
- Protection of the ecosystem.
- Preservation of the natural fertility of the soil, protection of the ecosystem, and friendly to the environment.
- Harvesting with much lower input costs.
BASIC METHODS OF ORGANIC FARMING

Basic Methods Of Organic Farming - What Is Organic Farming
Based on the above, the principles of organic farming become clear.
- Reject deep tillage.
- Reject mineral fertilizers.
- rejection of pesticides.
- Promotion of microorganisms and worms.
Rejection of deep tillage
This rejection of deep plowing of the soil is based on the understanding that the upper layers of the soil are home to a large number of organisms that not only produce humus but also improve soil structure. Plowing and deep digging destroy their habitat conditions, altering the microbial composition of the topsoil and, with it, the natural ability to maintain soil fertility, increasing the risk of weathering and leaching of elements important to plants.The negative effects of this cultivation technique do not appear immediately, but after a few years, making it necessary to apply mineral fertilizers and other chemicals to keep yields at appropriate levels.According to conservation agriculture, the soil should not be turned over but should be loosened to a depth of no more than 2-2.7 inches (5-7 cm) - preferably 1 inch (2.5 cm).
Rejection of mineral fertilizers
The rejection of mineral fertilizers is based on the realization that almost all fertilizers (substances added to the soil to replenish missing nutrients) have a hidden aftereffect. Under their influence, the acidity in the soil is gradually altered, the natural cycle of substances is disturbed, the species composition of soil organisms is changed and the soil structure is disrupted.In addition, certain mineral fertilizers have a negative impact on the environment (air, water) and the plants themselves, thus affecting product quality and human health.Organic farming replaces the use of fertilizers with glycosides, mulches, composts, and other organic products.
Avoiding the use of pesticides
No herbicide, pesticide or fungicide is non-toxic. They are all toxic substances (for this reason, there are strict regulations on the use of pesticides) and tend to accumulate in the soil in the form of residues.Thus, for example, it has been calculated that the percentage of yield loss can reach 25% in the subsequent crop rotation due to using some herbicides under the main crop.Nature-based agriculture recommends measures to prevent diseases and pests, but if the problem is not prevented, folk remedies or biological agents should be used.
Encouraging the growth of microorganisms and worms
The promotion of microorganisms and worms in organic farming is based on the fact that these soil inhabitants are directly involved in soil formation. Thanks to microorganisms and larger inhabitants of the soil (worms, bugs, spiders), mineralization of organic residues, the transformation of vital nutrients, fight against pathogenic microorganisms, pests, improvement of soil structure, and many other things lead to a soil characterized by health.Healthy soil is the basis for healthy plants, able to resist adverse climatic events, diseases, and pests.To achieve this principle, Natural Agriculture recommends using organic matter, EM preparations, and the avoidance of deep digging to improve soil fertility.More Related Information About Gardening Beginners
#ThumbGarden #Garden #Gardening #Funfacts #Garden #Interesting #Livewell #Mentalhealth #Organics #What #Why
Author: Ms.Geneva
Link: https://www.thumbgarden.com/what-is-organic-farming/
Source: ThumbGarden
The copyright belongs to the author. For commercial reprints, please contact the author for authorization, and for non-commercial reprints, please indicate the source.
Read the full article
0 notes
Text
The 8 Rules To Let You Bumper Harvest Next Year

The 8 Rules To Let You Bumper Harvest Next Year
Many novice gardeners become complacent in late fall and leave their flower beds until spring. However, those of us who have been tending the soil for years know that the garden's condition going into winter will largely determine next year's harvest and bumper harvest. Therefore, before you can afford to rest, you need to perform some agronomic practices that will be the basis for good development and fruiting of vegetable crops and less trouble next year.
Rule 1. Cleanliness!
The main rule to get a high yield with minimum labor is neatness! Just how meticulously we clean our beds determines to a large extent the disease and pest infestation of the beds. Most of these enemies of the gardener do not just infest the plants during the season but stay on the plant fragments, successfully overwintering and infecting the crop in the following seasons.Thus, crop residues, weeds, and wind-blown debris may accumulate in the bed even if the current year's harvest has been carefully harvested. These should be collected and carefully composted before winter, and diseased plant parts should be removed from the plot or burned.
Rule 2. Dig in the fall to prepare the soil for spring planting
In addition to cleaning up the surface soil, the soil needs to be turned in the fall. Many gardeners argue about this, but if you look at the benefits of fallowing, it seems to be beneficial and not harmful. Why?The soil freezes better, which is good for preventing fungal, viral, and bacterial infections and insect pests that spend the winter in the soil. It becomes more oxygenated. It is looser. Gives the snow better adhesion on top of the snow. Absorbs spring moisture better. Some of the weed seeds that fall on its surface during the growing season come to a depth where they cannot rise. And in spring, it is easier to take care of seedbeds that have been treated since autumn.In addition, it is recommended to apply basal fertilizer, lime, clay, and other soil amendments under autumn digging. Only in the fall can the topsoil be deepened for soil amendment.Fall tillage, especially on heavy clay and acid soils, cannot be replaced by spring tillage because the challenges and advantages are different. Only on light soils can this agricultural practice be abandoned in favor of spring work, with surface loosening instead of fall digging.A.What is the correct way to loosen soil in autumn?
To achieve maximum results with fall digging, it is necessary to prepare well in advance.
- The first stage - clearing the plants planted in the bed
- Phase 2 - Surface loosening to provoke a new round of weed growth.
- Phase 3 - Pre-winter digging itself.
Fall tillage usually takes place at the end of September (where winter starts earlier) and continues until the end of October (where fall temperatures gradually rise). The main thing is to find the right time before the rainy season starts.The soil coming out of the shovel is not loosened but left there in clumps. In this case, it can freeze better, accumulate more snow and, where there is a slight slope, retain the spring meltwater.The depth of excavation depends on the ploughing layer. Usually, it is about 8 inches (20 cm), but in general, it should be between 6-13 inches (15-35 cm).On soils that need to be improved every three years, the excavation depth should be increased by 1-2 inches (2.5-5 cm), and the soil layer must be turned, and fertilizer applied.On well-tilled soils, the soil layer should not be turned during fall digging.
Rule 3. Disinfection
It often happens that the crop in the seedbed is so badly damaged by disease that the soil must be decontaminated. A good solution here is to not only dig deep into the soil but also to sow spiderwort (e.g. white mustard), apply semi-decomposed cow manure, spread ash, treat the soil with any microbial preparation and scald the soil with boiling water.If possible, you can incorporate nutrients from marigolds into the soil. In the absence of these things, spread straw around the bed and burn it.There are chemicals for soil disinfection, but they must be used very carefully: bleach - apply 6 months before planting at a rate of 100-200 grams per 11 square feet, Bordeaux mixture and 2% copper sulfate - use no more frequently than once every 5 years due to the copper content.
Rule 4. Fall fertilization
As mentioned above, the best time to apply basic fertilizer to your vegetable garden is when you dig in the fall. During this period you can add organic fertilizers, phosphorus, and potassium, and if necessary, lime, deoxidizer, clay, and sand.When applying organic fertilizer, cow manure is the best choice. Spread it on the surface of the bed at 6.6-13 Lb (3-6 kg) per 11 square feet and turn it over thoroughly, burying it in the soil the same day to a depth of 6 inches (15 cm).The results of manure application can be observed within 4-7 years (depending on soil type), so it is not necessary to apply every year but should be done every 3-4 years. In addition, not all crops respond well to it, so it is applied under the most responsive crops - potatoes, cucumbers, cabbage, tomatoes.A more effective option is a combination of organic and mineral fertilizers. But here we must remember that it does not make sense to apply nitrogen fertilizers under fall digging, only phosphorus, and potassium groups. Potassium sulfate can be a good choice here - it contains calcium, magnesium, and no chlorine and can be applied to all soils. It is suitable for light sandy and sandy loamy soils, calimag. Phosphate fertilizers - calcium superphosphate, phosphate powder.Narrow compound fertilizers marked "Autumn" are a very good choice for the late autumn application. Today you can find them on the market, not only with recommendations for use under specific crops but also in packages labeled "for strawberries" and "for grapes." This makes the choice easier and ensures the correct application.
Rule 5. Warm seedbeds
With a good host, nothing goes to waste. Therefore, when the harvest of plant trimmings is nearing its end, many gardeners make up a warm bed. Plant debris, fallen leaves, and cut branches go into the dug trenches. In the winter, it all decomposes and becomes great nourishment for the plants.

Winter Will Largely Determine Next Year's Bumper Harvest
Rule 6. The earth must not be barren
In areas exposed to strong winds, on slopes, and where the soil is already in need of renewal, it is a good idea to use green manure planted in winter. This could be winter wheatgrass, winter rye, winter comfrey, or oats.In addition to the fact that their roots will loosen the soil and their vegetation will make an excellent organic fertilizer, these crops provide other benefits: they will retain snow on the soil surface, protect the soil from leaching and weathering, and protect plants (such as strawberries) from spring frosts that return.
Rule 7. Winter sowing
It is a good idea to consider planting winter crops early in the winter. Cultivars planted in the fall will emerge two weeks earlier, producing hard, disease-resistant seedlings, saving you time in the spring, and allowing you to reseed. The most common crops to sow in the winter are carrots, beets, lettuce, dill and parsnips, winter garlic, and onions.Do not start seeds in winter conditions until thermometer readings have stabilized around 32 °F (0°C) and continue sowing in a pre-prepared seedbed until the first steady frost.
Rule 8. Crop Rotation
Finally, there is crop rotation. The condition of the soil, the number of weeds in the garden, the prevalence of pests, the propagation of bacterial and fungal diseases, and the need for fertilization all depend on the degree of thought and observation given to it.So if you don't have one, then in the fall, when the beds are empty, you should have the patience to pick up a pen, study the characteristics of your crops, and develop a crop rotation plan.More Related Information About Harvest
#ThumbGarden #Garden #Gardening #Bordeauxmixture #Care #Garden #Guide #Harvest #hotbed #Inspired #Outdoorgarden #Plantcare #Techniques
Author: Ms.Geneva
Link: https://www.thumbgarden.com/bumper-harvest-next-year/
Source: ThumbGarden
The copyright belongs to the author. For commercial reprints, please contact the author for authorization, and for non-commercial reprints, please indicate the source.
Read the full article
0 notes
Text
How to Stratification Seeds at Home

How to Stratification Seeds at Home
After harvest, when the crop needs to be propagated, the gardener leaves some seeds for sowing. No matter how good the weather is, immediate sowing will not form seedlings. This is because the germ of a seed necessarily goes through a dormant period. The length of the dormancy period is determined by the seeds' physiology, the plant's growing season (which begins in spring and ends in autumn). If all types of crop seeds were germinated immediately in the fall, the plant would die due to weather conditions incompatible with the life of the young germ.There are special chemicals in seeds that block developmental mechanisms. These substances are called growth blockers or inhibitors. Gradually, their number in the seeds decreases and the inhibitors are replaced by other chemicals called growth promoters, which are used to influence the physiological processes in the seeds. They awaken the embryo from dormancy (hibernation) and include developmental mechanisms that ensure germination, growth, and plant development. This is when stratification seeds are needed, and how to do this at home is described in this article.
WHY IS THE STRATIFICATION SEEDS PROCESS NECESSARY?
The process of transition from a dormant to an active state under the influence of external influences on the seed is called stratification seeds. In fact, stratification seeds prepare the embryo for development. Seeds undergoing stratification seeds treatment require certain conditions: favorable ambient temperature and humidity. These lead to softening, cracking, and hardening of the seed's hard shell. Under the influence of moisture, the seed swells and begins the physiological process of converting complex, high molecular weight organic substances into simpler substances available for embryonic nutrition.Without stratification, seeds do not germinate, especially in the case of sudden changes in temperature and humidity conditions in the central and northern regions. In areas with little change in climatic conditions, seeds do not need a dormant period and reproduce year-round.Most plants have stratification seeds for between 1 and 6 months, but some perennial crops have stratification seeds for up to 2 years (Table 1). Stratification seeds are also required for most flowering crops, especially when sown in spring, some of which are listed in Table 2.The main purpose of stratification seeds is to shorten the dormancy period under artificially created conditions and awaken the growth and development of embryos, i.e., to emerge seedlings quickly before the target date.Table 1: Timing of low-temperature stratification of perennial crops
CultureDuration of stratification, daysApricot80-100, 120-150Quince70-90Cherry plum120-180, 130-150Barberry, honeysuckle75-90Hawthorn, viburnum210-240Common cherry, chokeberry150-180Felted cherry100-120Walnut50-80Pear75-100Strawberry20-30Cotoneaster, rosehip75-90Schisandra Chinensis90-120Magonia, grapes, prince120-140Almond50-70, 120-140Peach100-120Plum, blackthorn, rowan120-180, 150-180Bird cherry, lilac, aconite, catchment, hosta, anemone30-50Timing of low-temperature stratification of perennial crops
TYPES OF STRATIFICATION SEEDS
In practice, there are several types of stratification seeds that are used.
- Cold.
- Warm.
- Combined.
- Staggered.
The need, duration and type of stratification seeds are usually indicated on the seed package or the manual. Dried seeds that have had organic residues removed should be placed in the stratification seeds process. Otherwise, they will rot in a humid environment (apples, pears).
Cold stratification seeds
The cold stratification seeds method is usually applied to perennial seed crops with a clear distinction between cold and warm periods, ending the growing season in autumn. This type of stratification seeds is required for crops in temperate regions. Seeds are placed at air temperature of 32-39 °F (0-4ºС) and humidity of 65-75%.The duration of stratification in these cases can be 1-6 months. It is used for seeds, drupes, some vegetables, flowers and other crops. If plants do not pass the cooling stage, they may not germinate in the spring. In other words, stratification mimics the winter sowing of some crops, when conditions are provided for embryos to rest and subsequently awaken to growth and development.Some seeds that require a temporary stay at low temperatures may also germinate without stratification. However, in this case the seedlings will be sparse and unfriendly (buckthorn, honeysuckle, strawberry).
Warm stratification
Warm stratification differs from Cold stratification in that it is short-lived. Vegetable crops are usually subjected to Hot, Warm stratification. Dry seeds can be kept in an anaerobic state for a long time. But raising the temperature to 64-71 °F (18-22 ºC) and the humidity to no less than 70% will awaken the life process. For example, soaking tomatoes, peppers, cucumbers, and eggplants in warm water and leaving them in a warm place will cause the seeds to emerge from the disease after a day or two.
Combining stratification seeds
The combined stratification method is applied to tightly matured seeds and crops from some regions where it is necessary to simulate the seasons to improve germination rates. These are usually seeds of perennial plants with thick skin and dense flesh (hawthorn, lingonberry, snowberry, yew, apricot, plum).
Hawthorn and rhododendron seeds require a long (7-8 months) stratification period. To soften the hard shell and awaken the germ, the seeds are first cultivated in containers at 68-77 °F (20-25ºС) for 4 months, then in the cellar or the shade at 32-41 °F (0-5ºС) stratification seeds for 5-6 months. For yew and some maple species, a warm stratification period of 1-1.5 months is sufficient, and then the seeds are placed on Cold stratification seeds.
Stage stratification seeds
This is the most complex type of multi-stage stratification of seeds. It consists of several cycles with low and high temperatures. For example, the seeds of some peony species and cation are stored several times at alternating high and low temperatures.Primroses, watercress and ocotilloes were repeatedly frozen. Before sowing, their seeds were placed in water at room temperature of 64 °F (18ºC) during the day and kept in the refrigerator overnight for 5-7 days. In this case, the seeds germinated at a high and friendly rate.
METHODS OF STRATIFICATION SEEDS AT HOME
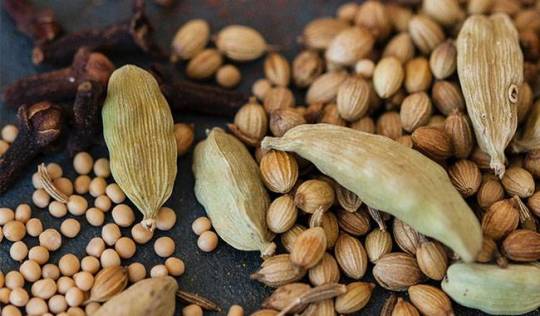
Methods Of Stratification Seeds At Home
Dry stratification seeds
- The seeds to be stratified should be previously purified. Soak in a 0.5% manganese solution for 0.5 hours. Then rinse with a small amount of water at room temperature. After they are dry, they are placed in polyethylene bags, marked in detail with the species, variety, and date of stratification. Place the bags in the upper level of the refrigerator or in a room with a temperature of 32-37-39 °F (0-3-4ºC) before sowing.
- Place the sterilized dry seeds in flax or polyethylene bags in a plastic container with a tightly closed lid and secure with tape. Bury the bag in the snow until it melts. As it warms up, move it to the bottom of the cellar or refrigerator until sowing.
The phenomenon of stratification seeds in cabbage sprouts
Ideal for Cold stratification seeds at home.Separate late-ripening cabbage from the head. Cut the roots. Chop the core of the core. Fill the container with seeds. Tightly seal and tape the lid from the remains of the core. The "goblet" with the seeds (like our ancestors did with gold coins) we bury vertically in a hole in the ground as deep as a shovel bayonet.
We covered it with dirt. We set a numbered marker, and in the diary, we write down under its number information about the seed, indicating the type and variety of the crop, the time of planting, and the end of stratification. In spring, when the topsoil warms up to the desired temperature of the crop, the seed stems are dug up and sown on the prepared beds.
Wet stratification seeds
- Grinding. Prepare the substrate in a container, which can be coarse river-washed sand, decayed sawdust, peat, moss. It is very important that the seeds are thoroughly cleaned of organic residues, sterilized, and dried. The container should be filled with 2/3 of the moist substrate. Spread out the prepared seeds and cover them with the substrate. While moistening the substrate, it is treated with a bio fungicide to prevent fungal infection: trichothecene, phytosporin, and others. The treatment is usually indicated on the package. Cover the container with a lid and place it in a plastic bag to keep it moist. Place the packaged container on the bottom shelf of the refrigerator. The temperature should be between 37-39 °F (3-4ºС). At the end of the stratification seeds period, the bags should be transferred to a lower temperature of 33 °F (1ºC). In addition, the containers are regularly checked to monitor the condition of the seeds and, if necessary, to moisten the substrate.
- Stratification in cloth rolls. Spread a thin layer of moss or cotton wool on a natural cloth strip 4-5 inches (10-13 cm) wide and 12-14 inches (30-35 cm) long. Carefully place the seeds. Bend the long side of the cloth strip, which will cover the seeds on top, and roll it into a roll. Tie it up and soak it in water to absorb the water. Carefully squeeze out any excess water. Wrap the roll in a cellophane bag and place it on the bottom shelf of the refrigerator. Label or number each roll and describe it in detail in your garden journal. Systematically check the humidity of the rolls during stratification seeds. Check the condition of the seeds. If a fungal infestation is found, clean, disinfect, dry, and repeat the entire stratification seeds process on new material.
WINTER SOWING
Some crops are sown and planted in the soil in autumn (overwintering), and stratification seeds are performed under natural conditions (winter garlic, herbs, certain salad varieties).There are other ways to perform stratification seeds besides the above-mentioned methods. Remember! Stratification seeds will save you from suffering from low or no seedlings in spring.More Related Information About Seeds
#ThumbGarden #Garden #Gardening #Garden #Germination #Glossary #Howto #Inspired #Seeds #Sprouting #Techniques #Terminology #Tips #What #Why
Author: Ms.Geneva
Link: https://www.thumbgarden.com/how-to-stratification-seeds/
Source: ThumbGarden
The copyright belongs to the author. For commercial reprints, please contact the author for authorization, and for non-commercial reprints, please indicate the source.
Read the full article
0 notes
Text
How To Fertilize Outdoor Vegetable Plants In Summer
How To Fertilize Outdoor Vegetable Plants In Summer
To welcome the summer and help the plants develop a good harvest, it is necessary to make the necessary preparations during the winter.
- check the garden pharmacy and buy the missing mineral fertilizers, including compound fertilizers with trace elements additives.
- separate additives of microelements, which are not yet traditional in vegetable production - iodine and boric acid, drinking soda; for fertilizers, natural yeast, some biological preparations are needed; from the fall, you should prepare stocks of ash from burning wood waste and other organic debris.
You should also review the layout of vegetable crops in the rotation of vegetable garden crops. Identify those crops whose stages and application times coincide (e.g., the germination stage in the first 10 days of May and the germination stage in the second 10 days of June).All the preparation will free up summertime to spend directly on the implementation of the planned work, whose timing is best planned for weekends (so that there is an opportunity to "catch up slowly"). This article describes when and how to fertilizer is related to fertilization issues.
MAJOR FERTILIZER APPLICATIONS - FALL AND SPRING
You usually apply major fertilizer doses and types in the fall or are divided into fall and pre-sowing/spring prep. But these nutrients may not be enough for plants, especially those that form a lot of biomass and yield. To not deplete the soil by turning it white over time, nutrients must be returned to the soil. And this must be in the form of organic matter, which certain soil microbial communities can break down into a chelated salt form that can be used by plants.
TYPES OF NUTRIENTS DURING THE GROWING SEASON
During the growing season, foliar and root nutrients are primarily used. Root applications usually use a water-soluble compound fertilizer in solid or dissolved form, while foliar applications - only working solutions are used.When using liquid fertilizers for root application, the solution must be washed off the plant to prevent the burning of the above-ground parts. Root fertilization is done in the first half of the summer until the rows and row spacing are closed, then switch to foliar application to green plants only.Foliar fertilization is done throughout the growing season.
TYPE OF FERTILIZER
During fertilization, plants should be provided with the nutrients they need most at certain stages of growth. The best fertilizers are ammonium nitrate, potassium sulfate, potassium nitrate, double calcium superphosphate, urea, and micronutrients.Currently, the production of mineral fertilizers is balanced with the needs of certain crops. Tomatoes, cucumbers, beans, peas contain potassium, molybdenum, magnesium, boron for production in root crops, vegetables, etc.
WHAT CROPS SHOULD I NOT FERTILIZE?
When preparing for summer, it is important to clarify which fertilizers will be applied (root application, foliar application), at which stage, and a general list of fertilizer mixes.Fertilizers should not be applied to vegetable and fruit or spice crops during the summer season. Basic fertilizer applications (radish, leek, dill, parsley, and others) are sufficient.
FERTILIZATION STAGES FOR OUTDOOR CROPS
Traditionally, root nourishment is carried out in the following stages
- On the 10th-12th day of mass germination of sown vegetable crops.
- 2 weeks after sowing of seedling crops grown in open fields
- At the germination stage - early flowering.
- After flowering.
- At the oviposition stage.
- At multiple harvests (cucumber, tomato, bell pepper, eggplant) - after the next fruit harvest.
Foliar spraying is usually done 5 to 6 days after root spraying.Emergency foliar sprays are applied when the crop is visibly hungry, which is determined by the condition of the above-ground parts, especially the leaves.The best application times are before 10 a.m. and after 3 p.m.The recommended fertilizer application system for crop groups is aimed primarily at beginning growers. Experienced growers often have their own ideas about the timing and method of fertilizer application.
TRADITIONAL FERTILIZATION SYSTEM
Apply ammonia at a rate of 8-12 g per 40inch (1 m) extension during the stage of heavy germination of vegetable crops. Fertilizer is applied in the middle of the row spacing and covered with a layer of soil, followed by irrigation. If soil fertility is poor, it is more practical to apply nitroglycerin at the same rate.Open vegetable crops are first applied at a rate of 10-15 g of nitrobenzoin per 40inch (1 m) extension, followed by watering and mulching.During the next stages of plant development, fertilizer is applied according to the planned stages. Vegetable crops require the most nutrients during the germination stage, the growth of above-ground parts, and the fruit growth stage. During these periods, feeding is mandatory and includes foliar sprays. The following is a list of summer foliar sprays by crop group.
Summer feeding of pumpkin plants
Cucumbers, zucchini, potatoes, and squash are first fertilized with a dry nitrogenous fertilizer or nitro phosphate fertilizer at the stage of 3-4 leaf spread, about 2-3 grams per bush for cucumbers and 3-4 grams for the rest of the pumpkins. Diammonium hydrogen phosphate can be diluted. Dissolve 25-30 g of fertilizer in 2.5 Gal (10 liters) of water and apply 0.4-0.5 Gal (1.5-2 liters) per 11 square feet of soil to the roots with a watering can.The second fertilizer application should be made during the germination period, preferably with a straw ash application between the rows or with a solution of organic matter. If the soil is 70-80% covered with green blocks of plants, infuse 2 cups of grass ash in 2.5 Gal (10 liters) of water for 2 days and water with a watering can without nozzle, trying to get under the bushes. You can add ideal or other micronutrient preparations to the ash infusion. If organic fertilizer is available, dilute 1.1 Lb (0.5 kg) of manure or chicken manure in 2.5 Gal (10 L) of water and leave it for 1-2 days, watering at the roots. After fertilizing, make sure to wash the manure off the leaves.After flowering at the stage of heavy ovary growth, pumpkin plants are fertilized with nitroglycerin, a mixture of urea and potash, using potassium sulfate. Apply 6-10 grams of fertilizer per 11 square feet. Foliar applications with micronutrient solutions can be made 4-6 days after each root application, according to the recommendations for solution preparation.
Fertilization of eggplants
Tomatoes, bell peppers, and eggplants should be fertilized with nitrate or other compound fertilizers at all stages during the period from May to June. During this period, foliar sprays must be made with Kemira solution preparations with added boric acid. Fertilization with slurry or chicken manure dissolved in 2-2.5 Gal (8-10 liters) and 3-4 Gal (12-15 liters) of water, respectively, produces good results.More recently, unconventional solutions with benefits for nightshade have appeared in the recommendations. Dissolve 30 drops of iodine, one teaspoon of anhydrous boric acid, and one dessert spoon of anhydrous baking soda in 2.5 Gal (10 liters) of water. One tablespoon of ammonium nitrate may be added. Stir the mixture thoroughly and treat the plants. Starting in July, fertilize nightshade with a phosphorus-potassium fertilizer (dry fertilizer), placed between the rows at 30-40 g/extended 40inch (1 meter) or 40-60 g/11 square feet. Fertilizing with natural yeast solution - 100 g per 2.5 Gal (10 liters) of water - is effective. The best way to fertilize plants is with 0.25-0.4 Gal (1-1.5 liters) of yeast solution.
Fertilization of potatoes
Potatoes do not like fresh organic fertilizers and need phosphorus and especially potassium fertilizers most during the growing season and during crop formation.All necessary fertilizers should be applied directly to potatoes starting in autumn or before planting tubers. The best fertilizer is Kemira, but if not available, nitrocellulose can be applied before planting. The application rate at planting is 60-80 g per 11 square feet. If fertilizer is applied directly during planting, the rate is 15-20 g per hole. Fertilizer is mixed with soil in the hole. 3-4 weeks later, fertilize with nitrocellulose at a rate of 30-40 g/11 sq. ft. The next fertilizer application should be made at the tuber growth stage.
Fertilization of legumes
Vegetable peas, beans, and chickpeas are crops that consume large amounts of nutrients per unit of a crop formation. Therefore, they are usually fertilized with complete fertilizers (nitro fertilizers, other compound fertilizers) during 15-20 days of the whole vegetative period. The preparation "Giant" has a good effect on this group of plants.Leguminous plants need sufficient amounts of potassium in the soil, which is used by the crop to deliver nutrients to the forming crop. It can be mixed with potassium sulfate as a foliar spray (1-2 spoons per bucket of water). After flowering, you can also apply foliar fertilizer with straw ash or straw ash binder.
Fertilization of Cruciferous
Cabbage, cauliflower, and other types of cabbage need increased amounts of nutrients from the head formation stage.Early-stage cabbage does not require any fertilizer. Mid- and late-stage cabbage is fertilized with nitrocellulose added with trace elements 10-15 days after planting in the open ground. Dilute 3-4 tablespoons of fertilizer in 2.5 Gal (10 liters) of water and pour over the root zone along the contours of the plant. This was followed by watering and mulching. The second is best done with animal or plant organic matter at the stage of beginning to curl cabbage, but only if 20-30 g of calcium superphosphate is added to a solution of cow or poultry manure per bucket.The organic matter is diluted in the ratio of 1 part of manure to 10-15 parts of water. Every 3-4 weeks, 2 additional foliar sprays of phosphorus and potassium fertilizer should be applied using water-soluble calcium superphosphate and 20-25 grams of potassium sulfate per bucket of water. The easiest way to fertilize cabbage is to use Kemira Universal, Crystalline, or Crystalline. In addition to the basic elements, these fertilizers contain boron, manganese, molybdenum, zinc, and magnesium, which are essential for the formation of complete cabbage.

When And How To Fertilizer & Related To Fertilization Issues
HOW CAN YOU KNOW WHAT A PLANT IS LACKING?
Sometimes the nutrients that have been given do not improve the plant's condition. In this case, the crop may be deficient in micronutrients. It is easy to determine this by looking at the condition of the leaves.
- Manganese deficiency will show up as yellowing of the leaf edges from old to young leaves.
- Iron deficiency, on the other hand, will cause the leaves to turn yellow between the veins; the discoloration starts from the young leaves and gradually spreads from the top of the young leaves to the older leaves in the stem of the plant.
- General leaf chlorosis (unnatural light green color of the leaf surface) indicates nitrogen deficiency.
- Magnesium deficiency can be easily recognized by the yellowing of the edges of the flakes with a reddish-purple tinge; gradually, the leaves become spotted and fall off.
- Phosphorus deficiency is manifested as a bronze color on the leaves and potassium deficiency as a purple-blue color; the plant begins to lag behind other healthy shrubs of the corresponding crop.
- Zinc deficiency inhibits the development of stems; the internodes of the shrubs are not developed and become a "rosette."
- Lack of calcium causes the death of growing points; sometimes, it persists, but the ovaries fall off.
- Loss of chlorosis can also be observed in boron deficiency.
Once you have determined from the plant's appearance that it is deficient in a certain element, it is best to contact the nearest laboratory and have the soil and plant analyzed. If this is not possible, treat 1-2 plants with a trace element solution and monitor the plants' response. If these signs disappear, it means that this specific micronutrient is missing.Prepare the solution according to the recommendations and spray it on the plants or apply it under the roots. Remember that disturbances in the ratio of various elements in fertilizers can also lead to disturbances in their delivery to the plant. For this reason, it is better to use ready-to-use multi-nutrient fertilizers than to make your own complex fertilizer mixtures.More related information about fertilize#ThumbGarden #Garden #Gardening #Care #Fertilize #Howto #Largegarden #Mediumgarden #Outdoorgarden #Plantcare #Smallgarden #Smallspaces #Tips #Urbangarden #Vegetablegarden #Vegetablepatch #What #Why
Author: Ms.Geneva
Link: https://www.thumbgarden.com/how-to-fertilize-outdoor-vegetable/
Source: ThumbGarden
The copyright belongs to the author. For commercial reprints, please contact the author for authorization, and for non-commercial reprints, please indicate the source.
Read the full article
#Care#Fertilize#Howto#Largegarden#Mediumgarden#Outdoorgarden#Plantcare#Smallgarden#Smallspaces#Tips#Urbangarden#Vegetablegarden#Vegetablepatch#What#Why
0 notes
Text
How to Save Seeds - Storing Vegetable Seeds For Next Year

How to Save Seeds - Storing Vegetable Seeds For Next Year
The work of fall is done. The garden is ready for the next season. Now is the time to prepare for the spring work by raising seedlings and sowing early crops in open fields, greenhouses, and conservatories. In the winter evenings, with the sound of rustling rain in the south or snowfall in the central and northern regions, you can start the sowing process.Usually, after all, harvesting is done in late fall, gardeners compile a list of crops, check the relevant localities for varieties of seeds or hybrids available, and choose to buy and sow planting material based on neighbors' descriptions or stories. In this article, you will learn how to save seeds - storing vegetable seeds at home until next year?Remember! Only if the seeds are stored properly can you grow healthy seedlings that will germinate in due time. Therefore, it is necessary to know the changes in biochemical processes during the storage of seeds, conditions of storage, economic durability (germination rate) of seeds of various crops. Violation of storage rules will lead to a sharp decrease in the germination rate, the defeat of various diseases, and as a result, a low-quality yield at high material and labor costs.
BIOCHEMICAL PROCESSES IN SEEDS DURING STORAGE
A distinction is made between the biological and economic longevity of seed germination capacity. Biological longevity is of primary interest to biological scientists, but economic longevity is of continuing interest to practical workers. It is the economic longevity that determines the conditional germination capacity of seeds, which decreases dramatically if storage requirements are not met.
Causes of reduced germination
The main causes of loss of seed germination are thought to be increased moisture content in the seed and air and increased temperature in the room where the seeds are stored.Seeds are very hygroscopic. They can absorb water vapor from the air and release water vapor-like moisture into the environment. Under optimal conditions, a healthy equilibrium "respiration" of seeds (how much goes in and how much comes out) occurs. The level of this equilibrium respiration depends on the biological characteristics of the seed and is determined by the composition, size, and density of the seed coat in terms of starch and crude fat content.When seeds are between 6-12% water, their respiration is negligible. A 1-2% increase in moisture content sharply increases the intensity and temperature of seed respiration. Biochemical processes begin, leading to a loss of dry matter. As a result, the germination rate decreases sharply, seeds become moldy and may rot and die, or the germination rate is greatly reduced.For example, in cabbage, a 2% increase in optimum seed moisture can speed up respiration 27 times, and a 4% increase can speed it up 80 times. In fact, seeds begin to germinate untimely and, of course, die. The optimum storage temperature for most crops in the Cruciferae, Pumpkin, and Nightshade families is 50-53 °F (10-12ºC) with no more than 60% relative indoor humidity.For Umbelliferae, Celery, Liliaceae, Pumpkin, some Cruciferae, and Solanaceae, the humidity should be reduced to 50% during storage without changing the temperature. Sufficiently dried seeds do not lose their ability to germinate and store well at winter temperatures of 23-33 °F (-5 to 1ºC).
METHODS OF STORING SEEDS
Seeds can be stored both indoors and outdoors.With the open method, seeds are stored in containers for the entire period, easily allowing air and moisture to penetrate the seeds. Such containers are made of natural fabrics - flax or jute, sewn-in 1-2 layers (tops, sacks, bags, etc.).Using the closed storage method (which is less common), the seeds are placed in a moisture-proof container. The soft container has 2 layers. The upper layer is usually made of fabric, and the inner layer is polyethylene. The moisture content of the seeds in the polyethylene liner does not exceed 6-9%. The polyethylene liner with seeds is tied tightly to prevent moisture penetration, while the upper fabric liner is only tied tightly or with side ears.
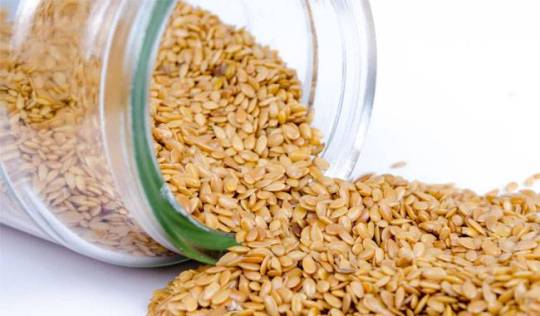
In This Article, You Will Learn How To Save Seeds
WHERE TO STORE SEEDS AT HOME?
At home, seeds are best stored in thick paper bags in plastic containers or small jars. Seeds that are not completely used can be left in the bags you bought, carefully rolled up to prevent moisture. The best way to store them is to put some dry flour, cornstarch, or other moisture-absorbing material in the bottom of a glass jar. Place the bag on top and close the lid tightly.It is best to store the seeds in the bottom of the refrigerator or a separate cool room. Some sufficiently dried seeds (dill, fennel, carrot, parsley, lettuce leaves) can be conveniently stored in glass jars. In dense foil bags, seeds can suffocate and lose their germination ability or die completely within 1-2 years.
HOW LONG WILL GERMINATED SEEDS LAST?
The germination of seeds is indicated on the label, along with the name, year of collection, and grade. This information is necessary to obtain fully grown seedlings, as storage beyond this time will greatly reduce their germination capacity, and the seedlings will have very low immunity to pests and diseases.The grade indicated on the label describes the germination rate of the seeds. Grade 1 seeds have the highest germination rates, ranging from 60-95% for various crops. Grade II seeds have a germination rate of 40-85%. Germination rates will help gardeners determine the density of their crops more accurately.If stored properly, seeds of vegetable crops maintain a high germination rate during the following periods.1-2 years: celery, chives, parsnips, corn, onions, leeks
2-3 years: lovage, parsley, dill, spinach, sorrel, leeks, coriander,
3-4 years: lettuce, carrots, sweet peppers, black onions, fennel, peas,
3-5 years: kohlrabi, turnips, beets, cauliflower, eggplant,
4-5 years: tomatoes, radishes, rutabagas, white cabbage, broccoli,
4-6 years: beans, Wild bean,
6-8 years: cucumbers, squash, squash, melons, watermelons.There is no limit to the germination time of the above spicy (green) and vegetable crops. For well-dried seeds, temperature fluctuations are not terrible, but if the moisture content of the seeds will be higher than the critical value, at low temperatures, due to the disturbance of the respiratory rhythm, the seeds will mold (receive more than they can give up), and then the germination retention time will be drastically reduced. Under optimal conditions, seeds can survive for another 3-5 years, and some (tomatoes) for 10 years.
A FEW RULES TO KEEP IN MIND
Put seeds bought from the counter in the winter immediately in the refrigerator or a cold place. In a warm room, the cold packets will collect condensation, which can affect the moisture content of the seeds.In northern areas, it is best to buy seeds from the previous year's crop. Due to the shorter summer, the seeds did not mature at harvest and ripened prematurely indoors. As a result, the germination rate and germination energy (survival rate) of freshly harvested seeds are lower.In the south, the difference in germination rate of 1-2-year-old seeds is almost indistinguishable. However, freshly purchased seeds should be heated at home at a temperature no higher than 86-95 °F (30-35ºC) before being put into storage.More Related Information About Seeds
#ThumbGarden #Fresh #Garden #Howto #Inspired #Overwinter #Store #Techniques #Tips #Vegetablegarden #Vegetablepatch #Winter
Author: Ms.Geneva
Link: https://www.thumbgarden.com/how-to-save-seeds-for-next-year/
Source: ThumbGarden
The copyright belongs to the author. For commercial reprints, please contact the author for authorization, and for non-commercial reprints, please indicate the source.
Read the full article
1 note
·
View note
Text
How To Grow Basil Planting, Growing, Caring, And Harvesting

How To Grow Basil Planting, Growing, Caring And Harvesting
The family has a lover, a healer, and a baker. And it's all about him too, basil. It is a wonderful herb, known since ancient times, and a medicinal plant that should be in every home and every garden. It is a low maintenance crop, and I want to exclaim: "You don't have basil in your garden yet? Then we're coming to you with seedlings!", in this article, I will describe how to grow basil: planting, growing, caring and harvesting.
BASIL DESCRIPTION
Basil is an annual and perennial herbaceous semi-shrub that grows freely in tropical and subtropical regions. There are more than 70 species of this crop, but about 9 species are grown on an industrial scale for the production of Basil's spices and expensive oils. In the country, it is mostly grown in the Caucasus and some southern republics.In some European regions, it often adorns the windowsills of rural houses. Meanwhile, since ancient times, Basil has been considered the "king of spicy herbs" for its strong and peculiar aroma, which can turn any of the most boring dishes into a wonderful dinner masterpiece and cure any disease. A variant of the word "Basil" in some parts of Europe translates to "a fragrance worthy of a king."
THE MEDICINAL AND CULINARY PROPERTIES OF BASIL
Basil is a must in every garden because of its unusual medicinal and culinary properties. Basil's chemical composition contains a large number of essential oils, the main components of which are camphor (50-80% depending on the species) and other terpenes. Camphor is used in official medicine as a remedy for cardiac arrest, asphyxia, epilepsy treatment, etc. The highest content of essential oils is found in the leaves (up to 6.5%) and inflorescences (up to 3.5%). Therefore, for medicinal purposes, only these organs of the plant do not have stems.Basil contains rutin, phytocide, ascorbic acid, vitamins PP, A, B2. It is often used in folk medicine to treat acute respiratory infections and bronchitis. Basil can be used as an antifungal and antibacterial agent for sore throats and bad breath, including tooth decay. Even adding small amounts of Basil to food helps lower blood cholesterol, prevents the appearance of tumors of various etiologies, and prevents the appearance of early aging and memory loss. It improves memory and brain activity, some gastrointestinal disorders, removes toxins from the body, and normalizes the nervous system.The significant advantages are Basil and in cooking. Adding it to vitamin salads, first and second courses, and sauces promote better digestion of food. The original flavor and tea have a soothing, calming effect.
Eastern folk healers once considered Basil a unique plant that could cure any ailment, and Basil tea was relegated to the elixir of youth because of its effects on the body. Basil was used to making the famous Basil Hayden's wine. It is also used in perfumes. However, do not overuse it, especially when using Basil for medicinal purposes. It has contraindications related to thrombophlebitis, hypertension, and other diseases.
THE PECULIARITIES OF BASIL CULTIVATION
Basil is grown in a place where it can grow for 3-4 years and then needs to be changed in the bed because of the risk of infection by specific fungi that accumulate over years of constant cultivation. The most common variety used for home cultivation is the aromatic or common Basil. Sometimes it is also called camphor Basil.
BRIEF DESCRIPTION AND CULTIVARS
Basil and its homegrown varieties are annual crops with herbaceous stems. The root system stays in the topsoil. Therefore, Basil needs regular watering, but not too much. The stems are 4-sided and 14-24inch (35-60 cm) tall, depending on conditions. It is a strong tiller, forming 12-15 lateral stems each. The leaves are petiolate and ovate. The tips of the leaves are pointed. Their color varies from green to dark purple. The pigment on the leaves travels throughout the plant. The flowers are small and clustered in spikes. The corolla is white, pink, and light purple. The plant usually blooms from July to September. The vegetative period from seedling to mature takes 60-100 days.
- Christmas Basil - Christmas Basil has 2-inch glossy green leaves, and purple flowers that add a fruity flavor to salads and drinks, and the plant is beautiful in the landscape. A beautiful border plant that averages 16 to 20 inches tall.
- Cinnamon Basil - This variety has a pleasant aroma and spicy flavor. A beautiful 25 to 30-inch tall plant with dark purple stems and flowers accented with small smooth leaves, this is my favorite basil for fresh arrangements, fruit salads, and garnishes.
- Dark Opal Basil - A must-have in my garden, Dark Opal Basil adds color to fresh summer floral displays and depth to dry arrangements and wreaths. Beautiful and spicy in salads or garnishes, it can also be made into pesto to add unexpected color and flavor to your pasta or Italian toast. These plants are attractive in herb gardens and range from 14 to 20 inches in height with purple stems, flowers, and leaves.
- Holy Basil - Holy Basil is a revered plant in Hinduism and is also known as Holy Basil or Tulsi. Its leaves can be used to make tea to boost your immune system. It is a beautiful plant in the garden with mottled green and purple leaves that grow to about 12 to 14 inches tall.
- Lemon Basil. This variety can be added liberally to salads and fish dishes. Lemon basil sprigs are especially delightful in a cup of iced tea on a hot summer day. 20 to 24-inch plants are light green with white flowers and 2.5 inch long leaves.
- Lime Basil - Compact 12- to 16-inch plants with small green leaves and white flowers. This variety's lime scent and flavor make it perfect for fish and chicken dishes. A simple syrup added to Lime Basil is a delicious addition to tea and margaritas.
- Spicy Bush Basil - A lovely addition to basil gardens, Spicy Bush Basil has small leaves on small, mounding plants that are perfect for potting or arranging in a bonsai-like fashion in the garden. Just a few of these flavorful leaves are needed to add a splash of flavor to a sauce or soup. These plants are soft green, about 8 to 10 inches tall and wide, with leaves 1/2 to 1 inch long.
- Purple Ruffles Basil - A feathery variation on the dark opal, purple ruffles add another dimension to a landscape, floral arrangement, or decoration. It has the same flavor as opal and can be used in a similar manner. It is a 16- to 20-inch tall plant with leaves 2 to 3 inches long.
- Sweet Basil - This basil variety is great for Italian sauces and soups and for making pesto. Varieties include Genovese, Napoletano, Italian Large Leaf, and Lettuce Leaf. Plants are 14 to 30 inches tall and are prolific in hot, sunny locations. The first four leaves are often harvested to keep the plants growing and sweet.
- Sweet Thai Basil - An Asian variety with a distinctive, spicy, anise-clove flavor that is very different from the common sweet basil, Sweet Thai Basil is a must-have in Asian cuisine and is a great addition to the herb garden with its aroma and color. It has purple stems and flowers with green foliage up to 12 to 16 inches tall.
Put Basil in pots in the fall for fresh, fragrant greens and beautiful ornamental plants all winter long.
HOW TO GROW BASIL PLANTS

How To Grow Basil Plants
Predecessors and neighbors
In homes where Basil is used in many dishes and harvested in the winter, the crop can be grown in a separate bed. Basil grows very well in mixed beds and can also be used as a compactor. Basil is a thermophilic crop. It absolutely cannot tolerate cold temperatures and has died at 30°F (-1°C.) Basil is best grown in a crop rotation so that it is not shaded by tall neighbors, but they provide protection from wind and drafts.Soil type does not matter, but Basil needs organic matter and grows better behind organic precursors. The best precursors and bed neighbors are nightshade, chard, beans, onions, and carrots. Basil is poorly tolerated next to cabbage, radishes, and turnips. Beets and beans are neutral to it when grown in mixed beds as predecessors are undesirable. Basil does not tolerate nearby marigolds. They suppress its "subtle nature."In the south, Basil can be grown by direct sowing in the soil from seed, in colder areas by the nursery, while in the north, it can only be grown by potted cultivation in protected or flat areas.
Soil preparation
When planting outdoors, dig the soil in autumn, preferably without turning it (especially in poor soils). On soils deprived of organic matter, dig half a bucket of humus, a tablespoon of calcium superphosphate, and a teaspoon of any potash for every 11 square feet dug. In the spring, loosen the bed by 4-6inch (10-15 cm) before sowing or planting seedlings.
Sowing Basil seeds outdoors
It is more practical to track sowing dates by temperature regime. The soil in the 4-6inch (10-15 cm) layer where the root system resides should be warmed to 53-57°F (12-14°C), and the air temperature should not fall below 59°F (15°C). At low temperatures, Basil takes a long time to germinate and develop poorly. The soil for sowing should be carefully leveled and furrowed at 4-6inch (15-20cm) intervals to a depth of 0.6-0.8inch (1.5-2cm). Trenches are moistened.Seeds can be sown dry or pre-soaked in a rooting solution for 3 hours. Postemergence care includes weeding and loosening the soil until the rows are closed and watered. When watering, a thin, flexible tube is used to run a slight stream of water under the roots. If water gets on the leaves, part of the crop will die. Water only with warm water (water from wells and boreholes heated in the sun).
Seedling cultivation of Basil
In the central and northern regions, Basil is cultivated by seedlings. Seeds are sown in the third month of March or the first month of April. In northern areas, seedlings can be sown 1-2 weeks later to avoid overgrowth.Prepare a soil mix or buy ready-made soil for sowing. Plant seedlings in a standard seedbox or other containers. Wet the potting soil before sowing. Sow seeds directly into the ground or furrow at 0.2-0.4inch (0.5-1 cm) and cover with sand or fine mulch, preferably with dark film. Sprouts appear on days 4-5 at 68-77 °F (20-25 °C). After germination, the film is removed, and the box with the seedlings is placed closer to the light. A special temperature regime for seedlings is unnecessary, but the room temperature should be at least 62 °F (17 °C). Soil should be moist (not wet).Sprouts should be spaced 0.8-1.2inch (2-3 cm) between plants in the row. At the stage of 2-3 true leaves, break the seedlings into individual pots or boxes, leaving 2-2.4inch (5-6 cm) between plants. If the plants look normal, do not fertilize them. If they are wilted, elongated, and weak, prepare a solution of nitroglycerin (10 g/1.3 Gal warm water) and carefully water the seedlings under the roots after picking. To make Basil plants more luxuriant, the tops should be pruned at the 5 leaf stage.About 7-8 days before planting, harden the 40-50 day old seedlings in a cooler room or aeration (in a greenhouse). They should be planted in the ground at the beginning of June. Seedlings should have 5-6 normally developed true leaves. The planting scheme is row spacing with 10inch (25 cm) between rows and 12inch (30 cm) between shrubs in a row.

I Will Describe How To Grow Basil
BASIL CARE
During the first 2 weeks after planting, water Basil constantly and in small amounts. The rest of the time, water as needed. The soil under Basil should be kept weed-free and plastic at all times. Plants should be pruned, as overgrown plants can cause fungal infestations of gray mold. To add foliage, remove emerging inflorescences from young plants. Removing inflorescences promotes the formation of young shoots and keeps the leaves juicy. The green leaves on flowering plants are bitter. Those below begin to turn yellow and dry out.
PROTECTS PLANTS FROM DISEASES AND PESTS
Basil is quite resistant to diseases and pests. It is a good repellent to flies, mosquitoes, five-spotted ladybugs, and other pests. Sometimes aphids, spider mites, and small field insects attack young seedlings. The chemical should not be used on green crops. Plants can be sprayed with onion peel infusions or other non-toxic herbs. It is best to treat with biological agents. They are harmless to humans, animals, and beneficial insects. Such preparations include Bitoxybacillin. They can be sprayed on young plants. Over time, Basil plants will exhibit repellent properties, and aphids and spider mites will perish.If left unmaintained, Basil can develop blackleg, fusarium, and gray rot (overgrowth, overwatering, high humidity in the greenhouse, etc.). In this case, preventive measures will help, mainly by removing diseased plants, drying the topsoil, and treating them with biological agents. The dilution and the number of treatments are indicated on the package or in the recommendations.
HARVESTING BASIL
The quality of harvested greens is not limited. When greens form 4-4.7inch (10-12cm) above ground, remove individual leaves as needed for fresh use or winter storage. Leaves and inflorescences are best frozen but can also be dried in the shade by spreading a thin layer on a towel or tablecloth (not film). The dried leaves are ground and stored in glass jars with lids. A few bushes are left until the end of the growing season to collect seeds. The seed pods are harvested as they begin to ripen in the brush of the lower seeds. They take on a brown color. Seeds are stored in a dry place for 4-5 years, which keeps them from germinating.
BASIL IN THE LANDSCAPE
Basil belongs to the category of ornamental foliage plants. It can be grown as a border plant to shade the edges of beds. It combines beautifully with bluebonnets, groundnuts, oregano and mint, and hostas. It coexists well with young roses and protects them from aphids.More Related Information About Planting & Growing Basil Plants#Botanicalgarden #Care #Diseases #Edible #Evergreens #Harvest #Herbal #Howto #Inspired #Largegarden #Mediumgarden #Organics #Outdoorgarden #Pests #Plantcare #Smallgarden #Smallspaces #Spices #Tips #Urbangarden #Vegetablepatch
Author: Ms.Geneva
Link: https://www.thumbgarden.com/how-to-grow-basil/
Source: ThumbGarden
The copyright belongs to the author. For commercial reprints, please contact the author for authorization, and for non-commercial reprints, please indicate the source.
Read the full article
#Botanicalgarden#Care#Diseases#Edible#Evergreens#Harvest#Herbal#Howto#Inspired#Largegarden#Mediumgarden#Organics#Outdoorgarden#Pests#Plantcare#Smallgarden#Smallspaces#Spices#Tips#Urbangarden#Vegetablepatch
0 notes
Text
Nutritional Value Of Lentils, Planting, Care, And Harvest
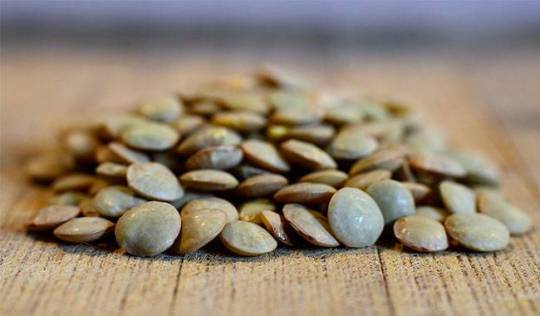
Nutritional Value Of Lentils, Planting, Care, And Harvest
Peas and beans once replaced lentils, also part of the legume family, from the food market. Today, this unique product - in a way, a newcomer to the domestic market - is making a comeback in our kitchens. Known for their medicinal and taste properties, lentils have been widely used in food since ancient Egypt, replacing many types of vegetarian dishes. It was considered food for the rich and inaccessible to the common man. Lentils are loved for their variety of flavors, ease and speed of preparation, and satiety (feeling of fullness) without overeating. Let's get to know this crop starting with its beneficial properties. This article will teach you about the nutritional value of lentils, growing, caring, and harvesting of lentils.
USEFUL PROPERTIES OF LENTILS
Nutritional Benefits
Lentils are genetically adapted to the human digestive system. They contain high amounts of complex proteins and carbohydrates, thus ensuring a lasting feeling of satiety. A 100 g plate of lentils provides only 250-295 kcal. This protein is easily digestible (60% by weight) and can replace meat, especially when dieting.It is digested better and faster and does not leave undigested stuff to rot in the stomach, causing heaviness and unpleasant belching. One serving of lentils can satisfy 90% of an adult's daily folic acid requirement.100 grams of lentils contain no more than 1 gram of fat. With this amount of fat - you won't gain extra weight, but you will feel full, beautiful, and healthy. Replace lentils with noodles and porridge, and you will see that it was not without reason that Esau gave up his birthright in his time for lentil stew.To understand the valuable properties of lentils, list the macro and micronutrients contained in these beans: calcium, magnesium, sodium, potassium, phosphorus, chlorine, sulfur, iron, zinc, aluminum, manganese, copper, selenium, cobalt, chromium, molybdenum, iodine, boron, silicon, nickel and titanium.Lentils contain vitamins A, PP, E, B1, B2, B5, B6, B9 (folic acid), beta-carotene.The popular claim that chocolate contains 5-hydroxytryptamine also applies to lentils. Lentils contain the amino acid tryptophan, which is metabolized in the body into serotonin, the so-called "happiness vitamin." Serotonin affects mental stability, stamina and reduces periods of depression.
Therapeutic properties of lentils
- Lentils never accumulate nitrates, nitrites, radionuclides, and other substances toxic to human health, regardless of the growing conditions.
- Lentils strengthen the heart muscle and are involved in the hematopoietic process.
- They lower blood sugar levels. Lentil dishes are indispensable food for diabetics.
- Mashed potatoes, soups, and porridges are used in dietary therapy for ulcers and colitis.
- Even after heat treatment, lentils retain isoflavones, important substances for women's health. They have a negative effect on cancer cells that cause breast cancer, significantly reduce the risk of cardiovascular disease, improve arterial elasticity and thus lower blood pressure, inhibit platelet activity, etc.
However, when incorporating lentils into your diet, do not forget the contraindications.
- in the case of kidney and genitourinary diseases.
- In liver diseases.
- In case of dysentery and gastrointestinal disorders.
- In the case of the acute stage of hemorrhoids.
- in case of gout.
- can reduce the absorption of certain vitamins and minerals.
Remember! It's all good in moderation. Lentils are not supposed to be gluttonous.
Why is this crop so attractive, and why should you include it in your garden and summer house rotation?
BOTANICAL DESCRIPTION OF LENTILS
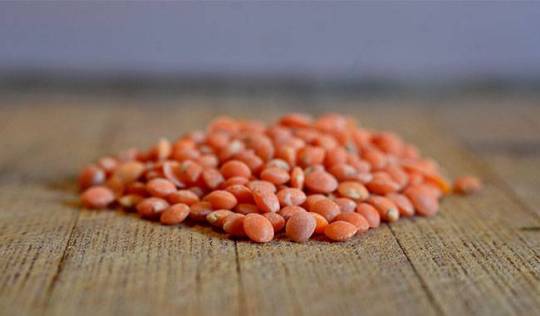
Biological Characteristics Of Lentils - Nutritional Value Of Lentils
Common lentil is an annual herb with a height of 12-24 inches (30-60 cm). During growth and development, it forms a small shrub with slender, 4-headed erect stems that are sometimes semi-sloping or fully sloping. The stems of the lentil have a reddish hue and are covered with short, semi-hard hairs. The leaves are compound, paired petioles with varying numbers of leaflets.There is a simple or branching tendril at the base of the petiole. There are stamens, the shape and size of which (as well as the leaves) vary from species to species. Lentils have short flower stems with 1-4 small butterfly-like white flowers and less frequently blue-blue or purplish-blue flowers.The fruit of the lentil is a single-nested bean, double-leaved, diamond-shaped, elongated, and prone to dehiscence when the crop is overripe. The seeds (1-3) are flat or round. The seeds come in a variety of colors, yellow, green, pink, red, gray, brown, and black, with a dotted, mottled marbling pattern. The lentil has a taproot and sparsely branched leaves.The common lentil, or edible lentil, or cultivated lentil (Lens culinaris) is a species of the genus Lentil (Lens) in the family Fabaceae (Leguminosae).
BIOLOGICAL CHARACTERISTICS OF LENTILS
The commonly cultivated lentil is subdivided into two subspecies.
- Large-seeded (slab) lentils, which are used as food.
- Small-seeded lentils, which are mainly used as protein-rich feed.
Unlike other legumes, lentils have relatively low heating requirements. Seeds germinate at 37-39 °F (3-4 °С). When 4 inches (10 cm) of soil is heated to 44-50 °F (7-10 °С), fast and rapid sprouting appears on the 6th-7th days. At lower temperatures sprouting appears on the 8th-12th days. Lentil sprouts can withstand frosts down to 23-26 °F (-5 to -3 °С). The optimal temperature for the growing season varies between 53-70 °F (12-21 °С).Since lentils grow slowly before flowering, they need constant protection from weeds and an increased water supply.Lentils start flowering on the 40th-45th day. From flowering to harvest, it outperforms other legumes in terms of drought and heat resistance. This characteristic allows lentils to be grown in dry areas.Lentils grow well on moderately fertile, friable, permeable soils, forming fairly high yields: chestnut and light pods, loamy, sandy loam soils, rich in calcium compounds.Lentils do not tolerate heavily compacted soils (chernozems), saline soils with low air exchange, acidity, and high groundwater content. On soils rich in humus and nitrogen, it forms mainly abundant asexual propagules. The maturity of the beans is not fixed, and their taste and quality characteristics decrease.Lentils form nitrogen-fixing nodules in their roots, enriching the soil with nitrogen.
Growing lentils
There is another feature to consider to make lentils grow and produce to the owner's satisfaction. They are a long daylight crop and even 9-10 hours of daylight will not allow for proper development, let alone crop formation and maturity.
The place of lentils in the crop
If the garden is divided into seedbeds and the order of crops is observed, lentils are excellent precursors to potatoes, tomatoes, eggplants, bell peppers, corn, carrots, beets, garlic, and other non-legume crops. Conversely, lentils do not need precursors, but the field must be free of weeds. It is best to put them back after 5-6 years to avoid infestation and accumulation of nematodes in the soil.
Preparing the soil for lentils
As a nitrogen store, lentils do not tolerate high levels of nitrogen in the soil. Therefore, it should not be included in the crop rotation until 2-3 years after manure application. If only mineral fertilizers were applied in previous years, the soil should be limed to remove accumulated acidity.The soil should be amended in the fall with phosphate fertilizer (35-40 g/11 sq ft) and potash (20-30 g/11 sq ft) and re-tilled to a depth of 10-12 inches (25-30 cm).For poor soils, add 20 grams of phosphate and 20 grams of potash per 11 square feet to the fall fertilizer application in the spring. If the soil is nutrient-poor, no fertilizer should be applied in the spring.
Seed preparation for lentils
Lentil varieties have a growing season of 2.5 to 4 months (75 to 115 days). To stay within sunlight hours, it is best to germinate lentil seeds before planting to shorten the time before planting.Cover some hard surfaces with 2-3 layers of absorbent material, moisten with warm water, sprinkle a thin layer of seeds, cover with a damp cloth, and place in a warm place. Moisten the bedding and seeds 2-3 times a day. When the seeds germinate en masse, they are ready for sowing.
Sowing lentils
Once the soil in the 4 inches (10 cm) layer warms up to 44-46 °F (7-8 °С), you can start sowing lentils. Early sowing gives higher yields and is more resistant to pests and diseases.When sowing, soil moisture is very important. Therefore, in dry spring, it is better to water the furrows before sowing.Sow lentil seeds in rows, leaving 2-3 inches (5-8 cm) in each row and 4-6 inches (10-15 cm) between rows. The average depth of seed sowing was 2-2.3 inches (5-6 cm). The sowing area was lightly compacted to allow better integration with the soil. New shoots appeared on days 7-12.
Nutrition of lentils
Nourish lentils twice on poor soil. The first time the nutrient solution is given before flowering. The second time is when the beans are loaded. The best fertilizer is a micronutrient fertilizer, which contains water-soluble phosphorus and many micronutrients, including boron and molybdenum. Deficiencies in these micronutrients can cause the crop's growing points to die.In addition, molybdenum deficiency reduces the ability of bacteria to absorb nitrogen from the air and fix it in the nodules of the roots and then in the seeds. A micronutrient fertilizer can also be applied as a spring application in place of phosphorus and potassium fertilizer by applying 200-300 g/ha of wood ash in the soil between rows of shallow cultivation before lentil flowering.
Care and watering of lentils
Care during the growing season includes keeping the soil loose and free of weeds. During the flowering season, it is obligatory to remove lentils from Mikania micrantha, which can clog cultivated planting sites. It is very easy to distinguish between the two. The vetch flowers are dark pink and reddish-purple, while the flowers of lentils are white and pale pink.Water lentils in moderation as needed before flowering. During the flowering period, provide adequate water, but do not over-water as this will cause fungal and bacterial diseases of the root system and the molded beans. After that, lentils require little or no watering.
Pest and disease protection for lentils
With high soil and air humidity, lentils are usually damaged by fungal and bacterial diseases (gray mold, fusarium, rust, powdery mildew, anthracnose, etc.). Insect pests include various types of aphids, grub moths, meadow moths, lentil weevils, etc. The main measure of weed protection is the correct and timely performance of all agrotechnical operations during sowing and care of the crop.Only biological agents can be used for plant treatment. Biological agents such as "Phytosporin," "Trichodermin," etc., are particularly effective against diseases and pests. The dosage and duration of treatment are specified in the recommendations for each agent. Biological preparations can be used at any stage of plant development up to harvest. They are harmless to humans and animals.

Harvesting And Storing Lentil Crops - Nutritional Value Of Lentils
HARVESTING AND STORING LENTIL CROPS
Lentils do not mature at the same time. Maturity starts from the beans below. When 2/3 of the bush is mature, the beans can be harvested. The bush is cut off at ground level, leaving the roots in the soil. Lentil bushes are harvested in the morning when there is dew to minimize the loss of beans from cracking. They were bundled into small bunches and hung in a ventilated place under the roof to dry. After a few days, the beans are threshed.Once threshed, the lentils are cleaned of impurities, dried in the sun, and immediately packed in glass or metal containers, tightly sealed to prevent moisture. Beans are hygroscopic and will soon absorb moisture and begin to mold and rot. If beans are stored in cardboard boxes or canvas bags, they should be placed in a dark, cool, dry, well-ventilated room.
More Related Information About Planting & Growing Beans Plants#Benefits #Care #Edible #Fresh #Funfacts #Glossary #Harvest #Interesting #Nutritionfacts #Nutritionalvalue #Plantcare #Store #Terminology #Vegetablegarden #VitaminAuthor: Ms.Geneva
Link: https://www.thumbgarden.com/nutritional-value-of-lentils/
Source: ThumbGarden
The copyright belongs to the author. For commercial reprints, please contact the author for authorization, and for non-commercial reprints, please indicate the source.
Read the full article
#Benefits#Care#Edible#Fresh#Funfacts#Glossary#Harvest#Interesting#Nutritionfacts#Nutritionalvalue#Plantcare#Store#Terminology#Vegetablegarden#Vitamin
0 notes
Text
How To Grow Pumpkins - Planting, Growing, Care, Varieties
How To Grow Pumpkins - Planting, Growing, Care, VarietiesDespite the beauty of this sun-drenched berry, not all gardeners grow pumpkins. And for a good reason! It is an excellent dietary product that does not require much agronomic effort to grow. It is known to be widely used in folk medicine. The medicinal properties of the crop are recognized by official pharmacology. Ornamental plant. This is an opportunity not only to decorate your plot but also to occupy open space. This article will explain how to grow pumpkins, as well as related growth, care, and pumpkin varieties.Archaeologists have discovered the oldest domesticated pumpkin seeds in Mexico's Oaxaca Plateau. Pumpkins are believed to have originated in Central America more than 7,500 years ago. The original pumpkin bore little resemblance to the sweet, bright orange variety with which we are familiar. The original pumpkins were small, hard, and bitter-tasting. Rather than taking advantage of the pumpkin's nutrition and readily available seeds, pre-Columbian indigenous people grew pumpkins for their pulp. They were one of the first crops to be grown for human consumption in North America. Because of their firm, thick flesh, pumpkins proved to be ideal for storage during cold weather and times of scarcity. Forming up to 551 pounds (250 kilograms) of fruit under optimal conditions, pumpkins also bring unprecedented yields per fruit to farmers in mild and warm regions of the U.S. Pumpkins come in all shapes and sizes, from a few ounces to 2,300 pounds (over 1,000 kilograms). This master list provides characteristics and culinary suitability for each. If you want to find the best pumpkin or winter squash to make pumpkin pie, carve, decorate, store for later use, make cookies, pumpkin spice muffins, soups, stir-fried, or bake!CHEMICAL COMPOSITION OF PUMPKINThis vegetable crop of pumpkin contains up to 11% of sugar and 6-20% of starch. The pulp is rich in vitamins, including "B1", "B2", "B5", "C," "E," "PP," "K," and contains potassium, magnesium, calcium, iron, and trace elements, including copper, cobalt, zinc, and others. The list of useful substances contained in fruits includes pectin, fiber, protein, enzymes. Seeds with fatty oils containing 40-48% organic acid glycerides (including linolenic, oleic, palmitic, and stearic acids) are particularly useful.The seeds, especially after heat treatment, have a distinct aroma of essential oils and resinous substances. They contain phytosterols, cucurbitacins, carotenoids, and other useful substances. Pumpkin flowers are known to be equally rich in useful substances. They can be used as medicine or as food. They quickly restore lost strength, especially in the spring when immunity is reduced, and vitamin deficiencies are present.USES OF PUMPKINThe fruits and seeds of pumpkin have many useful medicinal properties. Pumpkin pulp is an indispensable product in diseases of the gastrointestinal tract and pancreas. Ophthalmologists recommend a pumpkin diet for patients with certain vision problems. Pumpkin is one of the indispensable dietary products used in metabolic disorders of various etiologies, obesity. The seeds are classified as a natural aphrodisiac with rejuvenating properties due to their high zinc content.Natural compounds, vitamins, flavonoids slow down the aging process and have a positive effect on male libido. By the way! Pumpkin seeds are second only to oysters in zinc content, which is necessary for men to increase testosterone. Adults and children have a healthy thyroid gland responsible for the body's immunity.Doctors recommend eating 50-60 pumpkin seeds a day. Women are the basis of natural cosmetics, used in rejuvenation, cleansing masks, tonic, creams, refreshing lotions, formulas to remove freckles and age spots. Pumpkin pulp is a champion of iron and is recommended for the treatment of anemia. A great anti-helminthic agent.The medicinal value of pumpkin and the breadth of its uses in folk and official medicine is incalculable. But pumpkin is also a great gastronomic product: a basis for pumpkin porridge, a filling for cakes, baked in the oven, in vitamin fresh salads, in the form of pumpkin juice. Pumpkin is an integral part of a large number of national dishes.TYPES AND SPECIES OF PUMPKINThe scientific name for pumpkin is Cucurbita pepo. We have included the closely related giant pumpkin (Cucurbita maxima) and the winter pumpkin (Cucurbita moschata) because they are often used interchangeably in cooking and decoration. Pumpkins prefer a long (60 to 130 days), warm growing climate with ideal temperatures of 68°F to 90°F (20°C-32°C); however, hot, humid climates make them susceptible to fungal infections. They need full sun and fertile, well-drained soil.- Giant pumpkins are the huge pumpkins you see loaded on trucks for display. A typical contest winner weighs over 1,000 pounds (450 kg)Jack O Lantern pumpkins were developed for size and high roundness, but their grainy texture and lack of flavor make them less suitable for cooking. They will make but one pie or eat pumpkin.Pie pumpkins, eating pumpkins, and winter squashes, are a huge variety of shapes, colors, sizes, textures, and flavors.GROWING PUMPKINSPumpkin is an annual plant with climbing stems. It can climb with tendrils on supports on the ground. The flowers are yellow, large, and have separate sexes. Pollination is cross-pollination. The fruits of the vegetable crop range from 1.1 Lb (0.5 kg) to 44-66 Lb (20-30 kg). According to media reports, some giants reached 617 Lb (280 kg), while a student in Bavaria grew a pumpkin weighing more than 1212 Lb (550 kg), thus setting a European record.Requirements for the environmentPumpkin is a heat-loving plant. The soil needs to be warmed to 59°F (15°C) at sowing, and fruit formation begins at 59-62°F (15-17°C). It readily tolerates high temperatures of 77-86°F (25-30°C). During the growing season, it forms a large above-ground portion. The stem can reach 16-23 feet (5-7 meters). To provide itself with water, additional root systems appear on the pumpkin stems. Pumpkin plants prefer the sun but can also tolerate shade (shade tolerance).ForebodyWhen cultivating pumpkin in a crop rotation, potatoes, cabbage, and early tomatoes are the best precursors. Pumpkins are sown late in the field, so the open space in early spring can be occupied by early crops - radishes, salads, onions for vegetables, etc. It is best to plant 2-4 shrubs outside the crop rotation, along fences, near pergolas and trellises in no-man's land. By clinging to the supports, pumpkins will dignify the plot by covering the outer walls and other inconvenient places with decorative greenery.Preparing the soil and sowing the pumpkin in the cropDue to its large foliage, pumpkin has a high demand for nutrients. Therefore, if you want to prepare a pumpkin patch in the fall, you should fertilize it well. Pumpkins are particularly responsive to organic matter. Starting in the fall, you must make sure to add humus, compost, or humus at 1.5-2 buckets per 11 square feet and 50-60 grams per 11 square feet of nitrocellulose under re-cultivation.Sow pumpkins in the open ground after mid-May, but more practically (in the region) when the 4inch (10 cm) layer of soil is heated to 57-59°F (14-15°C). It is best to sow the seeds in a square neck fashion, leaving 20-24inch (50-60 cm) between each row and row. Seeds are sown into 1-2inch (2.5-5 cm) layers with 1-2 seeds in each layer. After germination, remove weak plants.Prepare the soil and sow pumpkins outside the crop rotationIf pumpkins are planted outside the crop rotation, the soil can be left unprepared from the fall. Before planting, make 1/4 bucket of humus or mature compost and add 30 grams of urea or nitrocellulose to individual plots 15-23inch (40-60 cm) in diameter. Dig the mixture by mixing it with the soil, but preferably without turning the layers, and pour in half a bucket of water. After soaking, plant 2 seeds at a distance of about 4-6inch (10-15 cm) to a depth of 1-2inch (2.5-5 cm). Sometimes 2 seeds are planted in a hole, but the weaker one is removed after germination.Preparing the soil and planting pumpkin seedlingsIn areas with short warm periods, pumpkins can be grown in the open through seedlings. Pumpkin taproots are not resistant to picking, so seedlings should be grown in peat soil pots or other containers with removable bottoms so that the integrity of the root system is not disturbed when transplanted into the open ground. Plant seedlings in pots one month before planting in the open (roughly in May). Place the pots in a warm greenhouse or at home.Care is carried out as usual. After the start of sustained warm weather (roughly in the first half of June), the seedlings will be moved outdoors. Sometimes seedlings can be planted outdoors in advance. In this case, plants are covered with crop cover nonwoven fabric or other material to prevent possible frost or a sudden drop in temperature. Pumpkins are a heat-loving crop and do not tolerate frost, even if it is a small frost.When planting young seedlings in the ground, prepare wells in advance, spacing each row 27-35inch (70-90cm) apart. The width of the rows should be at least 40inch (1 meter) apart. Planting schemes may vary, but the density is 1-2 plants per 16-21 square feet. Apply 1/3 bucket of humus and 30 grams of nitrocellulose to the prepared holes. After mixing, pour 0.25-0.5 Gal (1-2 liters) of warm water and submerge the nursery pots (peat soil) in the soil slurry. If the container is different (plastic cups), cut the sidewalls and gently move the seedlings into the holes. Mulch the soil around the planted seedlings.How To Grow Pumpkins - Pumpkin CarePUMPKIN CARECare for open ground pumpkins is to keep the area free of weeds, constantly loosen the soil until it is completely covered by the pumpkin pieces on the ground, fertilize and water, and prevent pests and diseases. Separate the formed, growing pumpkins from the soil with bedding (cardboard or other material).Fertilization- Pumpkins should be fertilized for the first time at the stage of 3-5 true leaves. Apply 5-7 grams of nitrocellulose per shrub under the roots and 10 grams per shrub in poor soils. On moist soils, add fertilizer by loosening the soil layer by 2-2.8inch (5-7 cm) if the soil is dry, water after application.- The second application of fertilizer is made when the stalks begin to form. Apply 10-15 grams of nitrocellulose to each bush, depending on the fertility of the soil under irrigation.- Between applications, 2-3 cups of wood ash can be applied every 11 square feet. Vegetable gardeners practicing on poor soils recommend a solution of 0.5 Gal (2 liters) of cowpea per bush at the beginning of vegetation and 0.8 Gal (3 liters) during the heavy fruit ripening stage. The solution is prepared at a ratio of 1 part cowpea for every 9-10 parts water.WateringThe large above-ground flora and the formation of large fruits require large amounts of water. Due to the structure of the tissue, pumpkins do not retain water on the ground but immediately evaporate through the leaves, creating a local greenhouse effect and increasing air humidity. Be careful! If watering is sparse or the soil is too dry, especially during flowering, pumpkins will stop forming female flowers. It is best to water between the rows, soaking the soil deeply. In the initial stages of development, the soil should be covered not to lose moisture or become hot in the sun.There is one peculiarity when watering. Pumpkin does not tolerate cold water. Therefore, it cannot be watered from artesian wells or other cold sources. The irrigation water must be at least 68°F (20°C). Remove any weeds from above the pumpkin planting site before irrigation.PROTECTION FROM DISEASES AND PESTSRoot rot, false and true powdery mildew, Rhizoctonia, and phytophthora are the most common in pumpkin plants. To combat them on private plots, only biological agents that are not harmful to human and animal health should be used. It is better to prepare a tank mixture of biological fungicides. In the mixture, they are effective against rot diseases and repellents. Among other biological agents, plant proteases, gliadin, exogenous proteases, etc., are effective against the above-mentioned diseases. However, biological agents do not produce the desired effect after a single application. Treatments with mixtures and single biological agents applied several times throughout the vegetation period are effective. Fogging solution is sprayed every 10-12 days throughout the summer season.Among the pests, the following suckers - melon aphids, spider mites - cause significant damage. Biting are moths, meadow moths, and moth larvae, caterpillars from the soil - iron nematodes, etc. Biological insecticides protect plants and soil by repeated treatment without causing harm to humans and animals: Bitoxybacillin.Dosage and treatment can be found on the package or in the accompanying documentation. When purchasing a biological preparation, be sure to check the expiration date. If you use a biological preparation, its effect lasts for 10-12 days. This is a period during which treatment must be repeated. Biological preparations must not be stored together with chemical preparations. Such an arrangement will kill the live crop.This Article Will Explain How To Grow PumpkinsFOOD VARIETIES OF PUMPKINThere are five common varieties of Cucurbitaceae: ficifolia (chilacayote squash and Malabar gourd), maxima (Hubbard, 'Lakota,' buttercup, and winter squashes), mixta (cushaw squash), moschata ('Shakertown Field' and 'Long Island Cheese' pumpkins), and pepo (jack-o'-lantern varieties, delicata squashes, ornamental gourds).- Jack-Be-Little - As cute as their name implies, these edible, palm-sized mini-fruits become more uniform as they ripen. They are perfect for personal table setting or small space decor (along with other mini pumpkins like Baby Boo, Munchkin, or Sweetie Pie).Field Trip F1 Hybrid - These orange gourds weigh 5 to 7 pounds each and have long, sturdy stems that are perfect for kids to grab and go.Rouge Vif D'Etampes - This classic heirloom was called the most popular pumpkin in the Paris market in the 1880s by the famous French seed company Vilmorin. Its name translates to "bright red from Etampes," a nod to the medieval town south of Paris where it was grown for the market. Its charming shape and color make it an extraordinary decoration for fall displays. More than just a beautiful pumpkin, this variety is the standard for French soups.- Jarrahdale - This Australian heirloom is flavorful, almost stringless, and tasty, with colors ranging from grayish to blue-green. Other notable blues are the light blue Blue Max, Kabocha and Kakai (all popular in Japan), and Blue Lakota, a flat sphere shape.- Baby Boo - These spooky white beauties are known for their long, distinctive handles, often in warm shades of green, as well as their bright white hues and excellent shapes. This pumpkin is perfect for creating decorative holiday or seasonal displays with lots of contrasting colors. The color of this pumpkin will not change easily with sun or frost. Other notable white pumpkins are Lumina, Sirius, and Super Moon.- Fairytale - Also known as musquee de Provence, they are dark leafy and very popular. Chefs love their sweet, creamy flavor.Long Island Cheese - The color of this pumpkin resembles light cheese, hence the name. This medium-sized pumpkin usually weighs about 10 pounds, has slight ribs, and is known for its sweeter flavor. This classic pumpkin dates back to the 19th century.- Galeux d'Eysines - This gorgeous French heirloom makes a flat globe with a salmon peach rind. The knobby, shell-like bumps on this French heirloom (also known as galeux d'Eysines) are caused by the accumulation of subcutaneous sugar.- Tandy F1 Hybrid - This understated variety has pale walnut skin, a slightly oval shape, and strong green stems.- Black Futsu - This rare Japanese specialty is known for its distinctive black, warty skin and fresh, nutty flavor. The bright orange flesh is firm in texture, sweet and buttery when roasted, and lightly fruity when eaten raw. Delicious shredded and quickly salted in a winter salad. They ripen in winter storage when the green halo between the flesh and the skin disappears, and the skin changes from black to maroon.- Warty Goblin F1 Hybrid - Dare to put your little hands on this creepy performer with its scary, lumpy warts that pop out on shiny skin.- One Too Many F1 Hybrid - A round white fruit with red veining, it looks like bloodshot eyes the next morning; hence its cheeky name.Cotton Candy - The glowing ghosts of the pumpkin world, they even have white flesh under their white shells.The diversity of pumpkin varieties makes it possible to choose an ideal variety that is sweet, sturdy, resistant to pests and diseases, and does not require any treatment. Detailed characteristics when choosing a variety can be found in the relevant vegetable catalogs.HARVESTING AND STORING PUMPKINSPumpkins have a long shelf life without losing their flavor. Some varieties can be stored for up to a year under optimal conditions. The varieties that can be stored are those with large fruits. Nutmeg varieties, through the variety development process, have lost their storability. They will not be stored for more than 2 months. This should be taken into account when storing, and varieties with a shorter shelf life should be used first.The time of harvesting is indicated by the rich color and the dried shoots of the crop. Harvest in warm, dry seasons before the onset of frost. Frozen gourds damaged by machinery should be used immediately for processing and winter storage. When harvesting squash, leave a 2-3inch (5-8 cm) stalk to avoid compromising the integrity of the fruit. If the weather is gloomy and rainy, store the harvested fruit in a closed, dry room, dry them in the sun and then put them away for storage.The products can be stored in different places (sheds, attics, kitchens, storage rooms). Storage conditions: temperature at least 50°F (10°C), dry room. Frozen products store well. Sliced pumpkin can be used gradually.More Related Information About Planting & Growing Pumpkins Plants#Benefits #Best #Care #Diseases #Fertilize #Fresh #Garden #Harvest #Howto #Largegarden #Mediumgarden #Nutritionfacts #Nutritionalvalue #Outdoorgarden #Pests #Plantcare #Protein #Soils #Store #Tips #Urbangarden #Vegetablegarden #Vegetablepatch #Vitamin #WateringAuthor: Ms.GenevaLink: https://www.thumbgarden.com/how-to-grow-pumpkins/Source: ThumbGardenThe copyright belongs to the author. For commercial reprints, please contact the author for authorization, and for non-commercial reprints, please indicate the source.
Read the full article
#Benefits#Best#Care#Diseases#Fertilize#Fresh#Garden#Harvest#Howto#Largegarden#Mediumgarden#Nutritionfacts#Nutritionalvalue#Outdoorgarden#Pests#Plantcare#Protein#Soils#Store#Tips#Urbangarden#Vegetablegarden#Vegetablepatch#Vitamin#Watering
0 notes
Text
How to Prepare Rich Gardening Soil For Seedlings
How To Prepare Rich Gardening Soil For SeedlingsThe crops are harvested, and it's time to prepare for next year. The novice gardener sighs more freely. All the basic work is done. The only thing left to do is buy seeds and plant them in cups, in the ordinary soil of their garden. They were very surprised when the tomato seedlings did not germinate, but an unknown weed did. The mistake of such gardeners is that they try to feed the seedlings with coarse grains instead of baby food. Seedlings need a different soil mixture. Such mixtures can be bought ready-made in specialized stores, but it is better to prepare your own rich gardening soil.REQUIREMENTS FOR SOIL FOR VEGETABLE SEEDLINGSOrdinary garden soil is not suitable for sowing. The components of the future mixture must be prepared from autumn onwards. Prepare it in dry weather to avoid soil infections and the full development of pests.You need 1-3 buckets of potting soil mixture for single-family seedlings, so it is not difficult to collect several components in different containers and store them away from autumn rains.The basic requirements for the soil mixture are light, breathable and permeable, porous, rich in organic matter, and mineral nutrients in the form of available basic fertilizer salts and trace elements. The pH of the mixture should be 6.5-7.0, i.e., it should be neutral acidity. From autumn onwards, in separate containers.- Humus (decayed manure) or bio-humus soil.- Forest leaf or turf soil.- garden soil from your own garden, from a place where no herbicides, fungicides, or other chemicals have been used.- Sifted wood ash.- Straw or sawdust (non-coniferous), perlite, expanded clay, or hydrogel for loosening the soil.Replenish your home remedy kit with mineral fertilizers and trace element ingredients. Purchase biological preparations that prevent soil infections and pests. The mixture should contain a large amount (up to 30%) of loosening agents so that the weak root system of seedlings does not encounter resistance when growing into the soil.PREPARING A UNIVERSAL POTTING SOIL MIXTURE FOR SEEDLINGSDuring your free time in winter, prepare potting soil mixtures from the materials you have prepared. The simplest universal soil mixture can be made from 3-4 ingredients.- 1 part of soil with leaves (decayed leaves) or turf soil- 2 parts of mature humus. Do not use manure, even semi-rotted manure, as it may burn the young roots of the awakening germ. Weathered, non-acidic peat (topsoil) or bio-humus can be used instead of humus.- 1 part sifted river sand or sawdust to loosen the mixture.Thoroughly mix the mixture and place it in a container (bag, box) for purification. Sterilize the soil mixture by getting rid of weed seeds, soil pests, and diseases.PURIFICATION OF THE SOIL MIXTUREThe purification of the prepared soil mixture can be carried out in several ways, including- Freezing.- Steaming.- Calcination (hardening).- Curing the mixture.In southern regions, thermal sterilization by steaming or baking is preferable, while in northern regions, sterilization by icing is easier. By wrapping with the preparation, the soil is well purified. It is better to use biological agents, manganese, which is harmless to humans and animals.FreezingWith the arrival of frost, the container with the mixture was taken outside under a shelter to prevent snow. The mixture is left outdoors for 3-5 days. Under a permanent frost of 5-77 °F (-15-25 ºС), most pests and some weed seeds die. After frosting, the container is placed in a warm room with temperatures of 64-71-77 °F (18-22-25ºС).Keeping alive, the seeds and pests start to live actively. 10 days later, put the container with the soil mixture back into the frost. This process should be repeated 2-4 times. During this time, the majority of weeds and pests will die.SteamingOne month before planting, the soil mixture is steamed in a water bath, which can be done in several ways.Pour the mixture in small portions into a strainer lined with gauze or other fragile cloth. Cover the colander with a lid and place it over a container (bucket or pot) with a small amount of boiling water. Depending on the size of the colander, steam for between 10-15 minutes and 30-45 minutes.Pour the water into the bottom of the pot and place an elevated rack. Place the potting soil in an old, fine-perforated bag on the rack. The steam from the boiling water steams the mixture for about 1-2 hours.Spread the steamed, moist soil in a thin layer on paper or cloth and air dry until mature. A properly dried soil mixture should easily break up into small loose particles that feel somewhat like velvet when opened in the palm of the hand after squeezing.Calcination (hardening)Moisten the potting soil and spread a 2-2.3 inch (5-6 cm) layer of soil on a tray. Heat in an oven heated to 104-140 °F (40-60ºС) for 30-40 minutes. Then cool.Curing mixturePour the prepared soil mixture into a container. Prepare manganese solution at the rate of 3 g per bucket of water. Sprinkle the mixture with the manganese solution and mix it thoroughly. Spread out for drying.After all types of disinfection, treat the dried soil mixture with an antifungal biocide (Trichodermin) and biopesticide. To restore the useful microflora, we use a working solution of the dried preparation. After application, the soil mixture is slightly moistened. In a warm, moist environment, useful microorganisms proliferate and destroy the remnants of the pathogenic microflora.It Is Better To Prepare Your Own Rich Gardening SoilPREPARING CONTAINERS FOR SOWING SEEDSPrepare containers for sowing seeds in the 3rd decade of January. For sowing, you can buy 50g plastic or polyethylene cups, peat, and peat blocks. You can save money and make your own cups (in a small box with a film covering the bottom) out of thick paper without a bottom and make humus or peat soil cubes with a cross-section of 2-2.3 inches (5-6 cm) to 2.7-4 inch (7-10 cm).FERTILIZATION OF THE PREPARED SOIL MIXTURECropsThe composition of the soil mixtureAdditives (per bucket of soil mixture)Seed sowing datesCucumbersa. Universal mixture (in parts): 1 leaf or sod land, 2 mature humus, 1 sand, 1 sawdust or perlite。b. Sod land (1 part), compost, or humus (1 part).a. 1 glass of ash, 15 g each of urea, superphosphate, and potassium sulfate。b. 8-10 g of ammonium nitrate, 10-15 g of superphosphate, 10 g of potassium sulfate, 10 g of dolomite flour。Early April - mid-MayEggplants, tomatoes, sweet peppersa. Universal mixture (in parts): 1 leaf or sod land, 2 mature humus, 1 sand, 1 sawdust or perlite.b. Garden soil (2 parts), humus (2 parts), peat (1 part), rotted sawdust (0.5 parts).a. Ash (0.5 cups), 20-25 g of superphosphate, 10-15 g of urea or potassium sulfate.b. 8-10 g of ammonium nitrate, 80 g of superphosphate, 20-30 g of potassium sulfate.Mid-March - eggplants and peppers, end of March - early April - tomatoes.Tomatoesa. Humus (1 part), peat (1 part), turf soil (1 part), rotted sawdust (1 part).a. 1.5 cups of ash, 20-25 g of urea, 60 g of superphosphate, 20 g of potassium sulfate.Mid-March, eggplants and peppers, end of March - early April - tomatoes.Cabbagea. Universal mixture (in parts): 1 leaf or sod land, 2 mature humus, 1 sand, 1 sawdust or perlite.b. Sod land (20 parts), ash (5 parts), lime (1 part), sand (1 part).a. 15-20 g of ammonium nitrate or urea, 20-25 g of superphosphate, 10 g of potassium sulfate, 25 g of dolomite flour or lime.b. Without additives.February - early cabbage, mid-March - medium.Fertilization of prepared soil mixturesUSING STORE-BOUGHT SOIL AND HOW TO IMPROVE ITMaking your own basic potting soil mixture for seedlings is not a complicated task, but it does take some time. Therefore, some gardeners, often beginners, buy ready-made potting soil. However, when buying ready-made soil, you cannot be sure that it is a high-quality product. It may be overly acidic, have a high percentage of low-lying peat, may not be purified, which means fungal microbiota will certainly be present, and so on. Therefore, when buying a ready-made substrate, you must be careful.- Check its acidity, even if it is positive, by adding 2-3 tablespoons of dolomite powder or a small amount of quicklime.- Perform the purification procedure using one of the above methods.- If the potting soil mixture contains a lot of peat, add some garden soil (about 30-40% of the purchased soil mass) if necessary.- After adding garden soil and other ingredients, add some hydrogel in order to moisten the potting soil sufficiently. It will increase in volume 200-300 times in a moist environment, so do not overdo it.For each bucket of such a soil amendment mixture, add 20-30 grams of all-mineral fertilizer (NPK, nitrogen, phosphorus, and potassium). Remember! The procedure of improving the purchased potting soil mixture will be rewarded with quality seedlings. If you rely solely on the goodwill of the grower, you may end up with no seedlings.More Related Information About Gardening Tips#Fertilize #Garden #Hardening #Howto #idea #Inspiration #Inspired #Organics #Soils #Techniques #TipsAuthor: Ms.GenevaLink: https://www.thumbgarden.com/rich-gardening-soil/Source: ThumbGardenThe copyright belongs to the author. For commercial reprints, please contact the author for authorization, and for non-commercial reprints, please indicate the source.
Read the full article
0 notes