#terrain building
Text
Out in the desert, no one can find you... (Hex Tiles 1)
A sharp wind whistles through the desert dunes, bringing no reprieve to the travelers following the thin paths left out in the sand. Don't drink from the river — the plants that grow along its shores contain toxins that could leave a grown man coughing up blood, and chemical spills float through the current. A faraway road carries the rare drone-tank, long abandoned from any sort of human use.
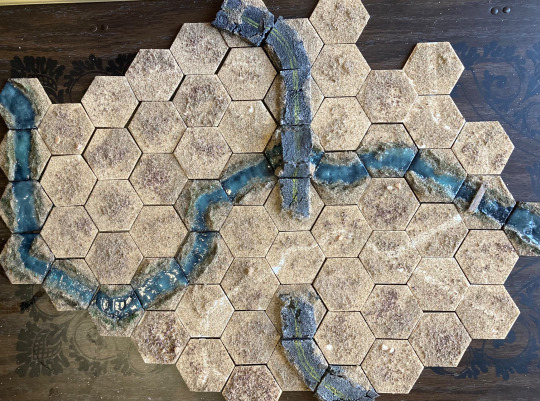
My newest hobby, to distract myself on months when the purse is a bit too tight to be buying plastic crack from Games Workshop, is to build modular hex tiles! It's super easy — I pick up a hundred of these wooden MDF tiles from Amazon for $10 (they're advertised as 2", but they're 1.75" from tip to tip, and each side is 1"), grab any spare craft supplies I have lying around, and get to work! They're super quick (this first batch of one hundred took me around a week) and they open the door to a lot of cool experimentation. A lot of this is inspired by the work of u/Marcus_Machiavelli over on Reddit, who makes these fantastic modular hive city components that I hope to someday be able to emulate.
I'm making these for two purposes, neither of which I've put in practice yet but I'm hoping to get to do at some point. They're for:
Any mass-battle games played at 6mm. This could also work for Adeptus Titanicus or the upcoming Epic reboot that Games Workshop is working on.
Tactical TTRPGs like Lancer that are played with large beings, who can operate on a 6mm scale.
Once I get some games in with them, I'm sure I'll encounter future problems and reassess how I approach them. But for now, this is what I've got!
I Hate Sand
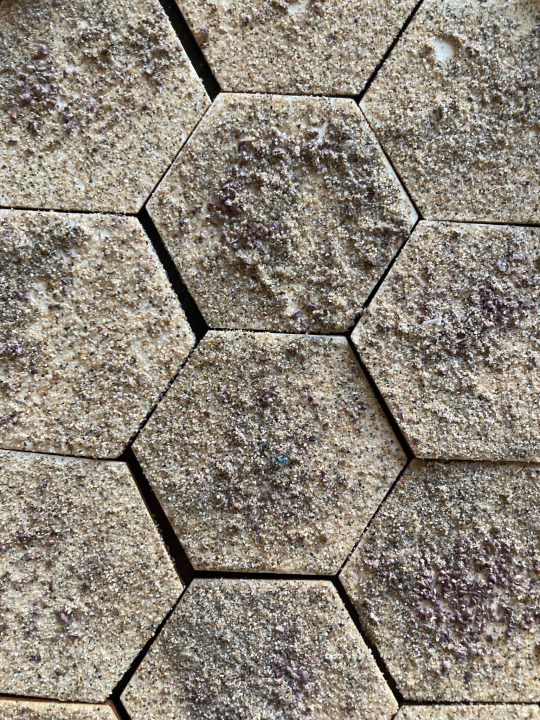
The first set of tiles I made, to serve as the backdrop for the rest of them, are these sand tiles. I chose to make this a desert (and thus make a bunch of sand tiles) because I already had some sand lying around, and because it's really cheap and easy to work with. Be careful though! Anakin was right; sand sucks. Try and pick up a finer grain than what I went with, apply the sand in a more-controlled location than I did, and secure it better than I did too. But here's how I did them:
Coat the surface of the hex with a mix of PVA glue and water.
Sprinkle on a light dusting of gravel or small rocks.
Apply a thick coat of sand on top of the gravel.
Knock off excess sand and recycle it for next time.
Spray with 1-2 layers of varnish. (I would recommend a sealant instead, but I didn't have any at the time)
For the ones with little paths on them, I painted the path on with White before applying the gravel or sand, and it shows through well enough! The paths are unnecessary — they're a fun experiment, but I don't think I'll be making more of them in the future.
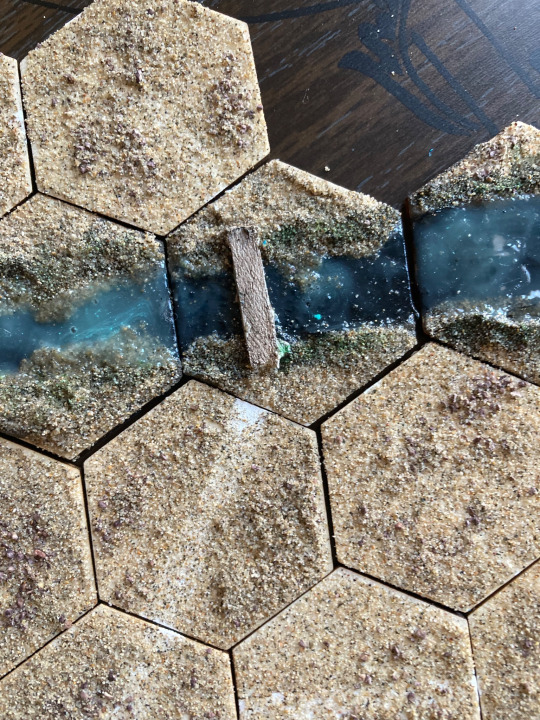
The Gurgling Creek
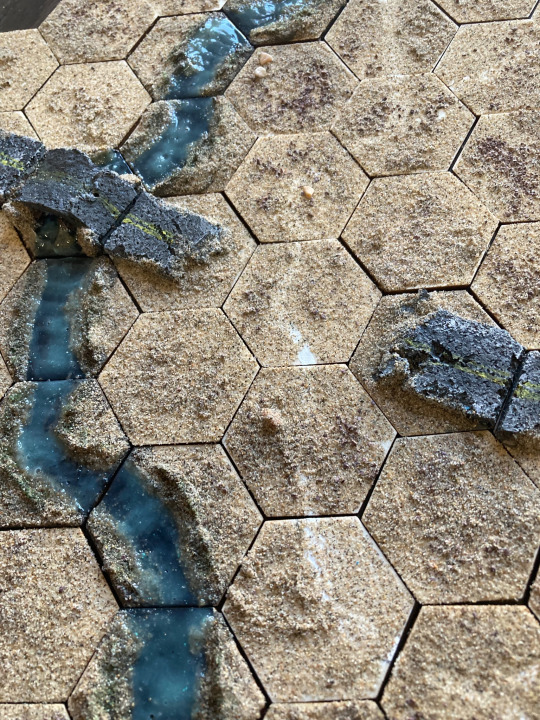
Making the river tiles was a bit more involved, but still pretty easy. The method I came up with I think looks a lot better than just painting on water, and is a lot easier to work with than resin or water effects.
Use some kind of texture gel to build up the riverbanks, trying to have them end around 1/4" on the sides of the tiles where you want your river to connect.
Paint a strip Black where you want the river to flow, running from one edge to another.
Apply sand as before, everywhere except where you painted the black. (If you're worried about fucking this up, you can swap the order)
Varnish (or use sealant) as before.
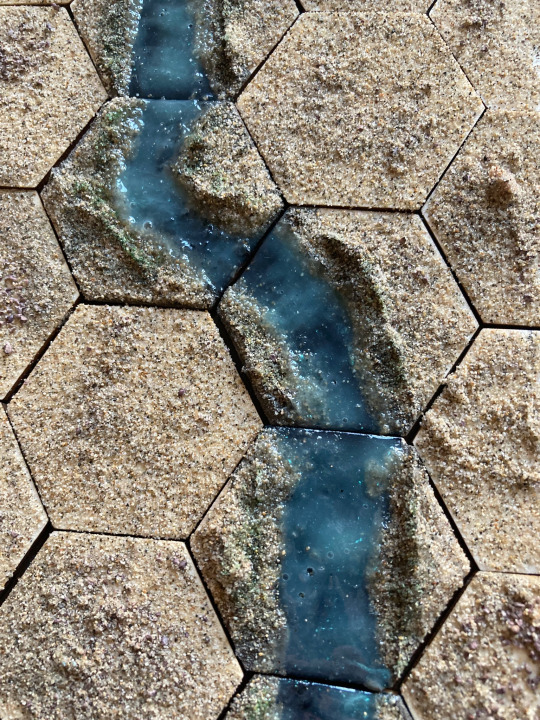
Take some gloss mod podge and mix it with a light blue paint, and apply in large goopy quantities everywhere you want water to be. Leave overnight to dry. (If you want the river to be less cloudy, apply many thin coats of mod podge instead, letting each layer dry before applying the next)
As an extra, stipple green along the edges of the water and use a dark green wash to create patches of vegetation.
The river pieces are my favorites, and I'm the most proud of them. The tiny bridge was a thin strip of balsa wood, painted white and then washed black. It turned out fine.
I did a solid mix of straight river pieces and curving river pieces. If I was going to do it again I'd make more curving pieces than straight river pieces, because the curving ones make more sense for how rivers work.
The Road To Nowhere

These road tiles turned out really well, perfect for a run-down highway in the middle of nowhere. Here's how I made them:
Take a piece of corkboard and cut it down to be 1.75" long and 1" wide.
Glue it on a hex with the two edges of the corkboard touching two sides of the hex.
Go at the edges with a knife, making it all worn down and busted up.
In some of these spots, I fucked up and glued the corkboard on wrong. To fix that, break off a chunk and reposition it so it'll connect correctly. This will look like a big fat crack in the middle of the road, which is perfect.
Coat in a layer of mod podge or PVA glue. Leave to dry.
Once dry, paint the cork entirely Gray.
Drybrush White onto the corkboard, focusing on the edges and exposed spots.
Paint two thin yellow lines along the middle of the road. (These are optional, but they do a lot to make the 6mm scale convincing)
Apply sand, as before, onto the ground and up the sides of the road, so it looks like the road is emerging from the sand. Maybe apply some sand in a couple spots in the cracks to make it look like the sand has gotten in there.
Varnish and/or sealant, as before.
Apply a Black wash to the road. (There's a lot of tricks here! If you want the yellow stripes to be more vibrant, you can only paint them on after the first black wash. You can also target spots of sand on the road to make it look like it's asphalt runoff, soaking black into the cracks.)
Apply a second Black wash to the road.
The bridge was a bit more complicated, and took some finicky positioning and a trip to Kung-Fu Tea.
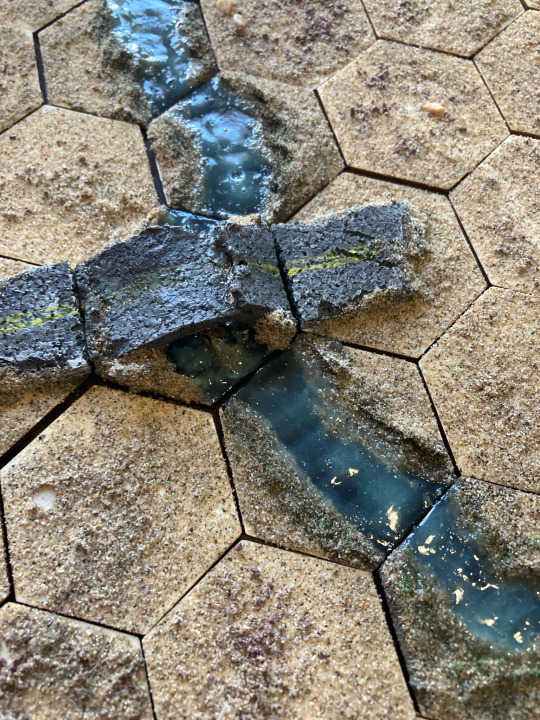
Take a boba tea straw and cut it into 1" segments, then cut them in half, gluing them to the middle of the hex as culverts.
Take corkboard and glue it over the culverts, bending it so it meets the two edges you want the bridge to run along. If it breaks, that's okay — this is a crumbling, middle-of-nowhere bridge.
Use texture gel and spare corkboard to fill in the gaps.
Use texture gel to define the steep edges of the river. Apply a little bit in between the culverts.
Do all the road steps to the road part of the bridge, and all the river steps to the river part of the bridge.
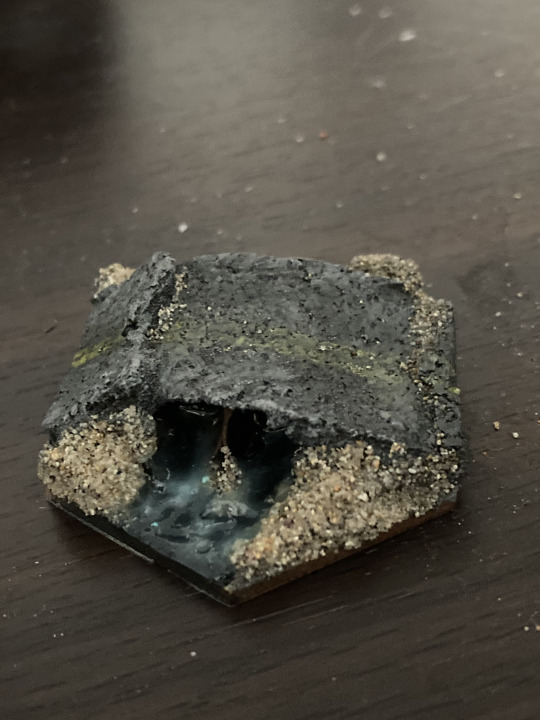
I'm exceedingly proud of the bridge hex. It turned out perfectly, and feels very emblematic of what I want this project to be like.
Why You, Too, Should Make 6mm Terrain
6mm terrain is amazing to make. Mistakes look like part of the landscape or the brain smudges them over due to the small size, and small changes look like fascinating little details. It really opens the imaginative space and I absolutely adore working at this scale. Plus I'm developing a ton of experience with various materials I've never worked with before, so I get to enjoy the triumph of carving foam or corkboard. It rules! I might even try to make a 28mm bridge after the success I had making a 6mm one.
My future plans for this project include cliffs, craters, 3D-printed shantytowns, and overpasses. But all that is for a later date — for now I'm gonna rest on my laurels, and spend the rest of the evening reconfiguring various tile combinations and cackling like a mad scientist.
161 notes
·
View notes
Text
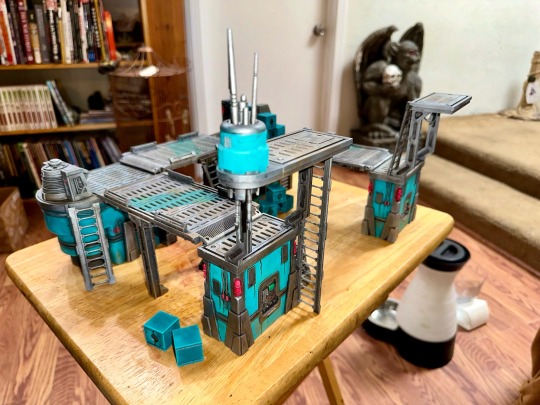
Took some time to paint my Shatterpoint terrain. I wanted something brighter than the sandy-desert theme of the box art. My goal was to have something bright but lived in.


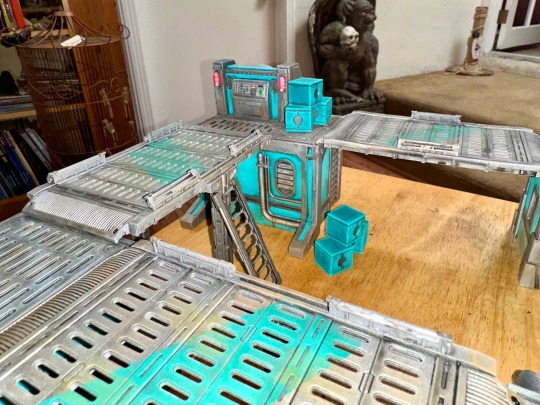

#miniatures#minipainting#painting#miniature painting#miniaturepainting#terrain#atomic mass games#painting miniatures#star wars shatterpoint#shatterpoint#Shatterpoint terrain#star wars miniatures#painting terrain#terrain building#miniatures game#miniature games#tabletop miniatures
47 notes
·
View notes
Text


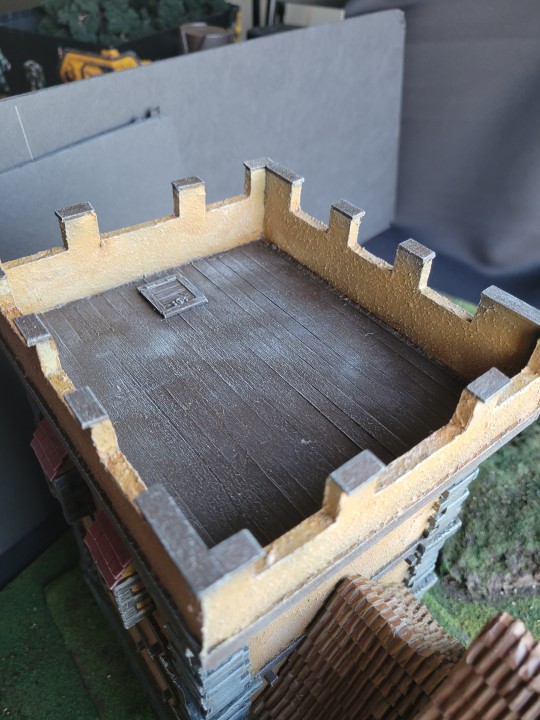
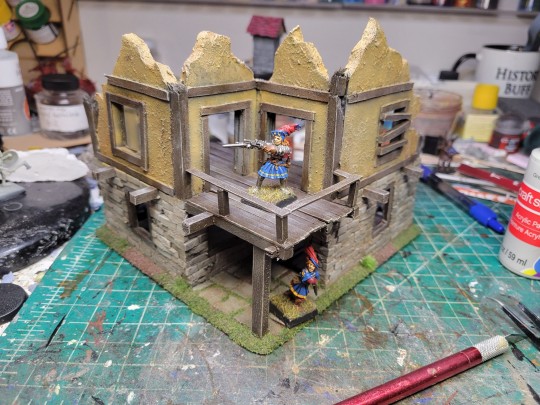
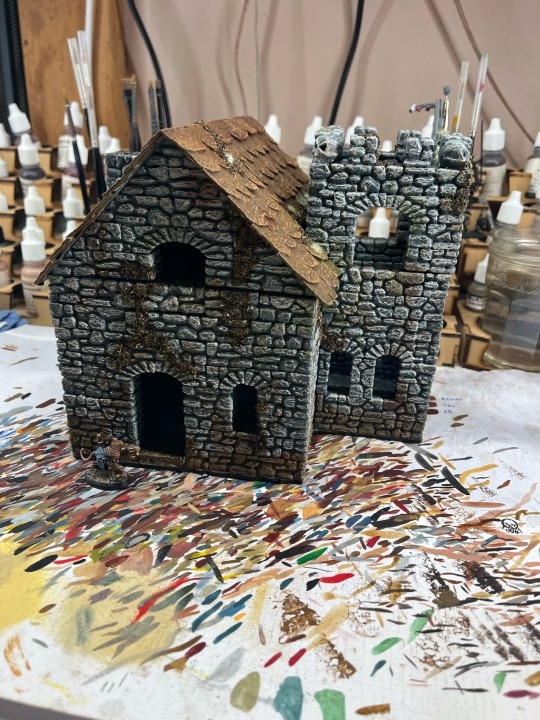
I don't think I ever posted pictures of the completed project here, so take this. My attempt to recreate the fortified manor house GW used to sell

56 notes
·
View notes
Text
Continued on with some oil washes. I’ve only just started experimenting with them. After some false starts and failures, I think less is more with oils. When they are quite diluted they give a great, subtle effect.
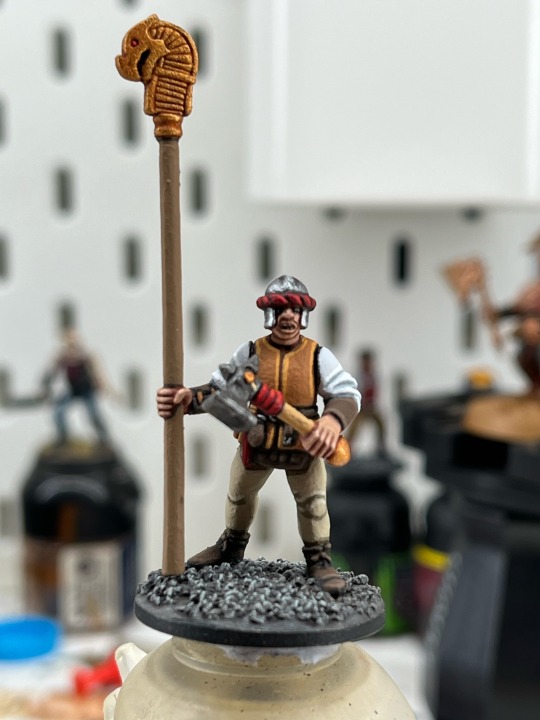
Got some mini painting in too, today. Finished off the white undershirt.
He’s going to be a Youngblood in my Reiklander warband.
I decided to make my Youngbloods a banner bearer and musician. This won’t have any effect in-game, but will make them stand out on the table.
Plus, they’ll fit in nicely should I want to expand my force for something like Saga: Age of Magic.
Hobby Streak - Day 05
46 notes
·
View notes
Text
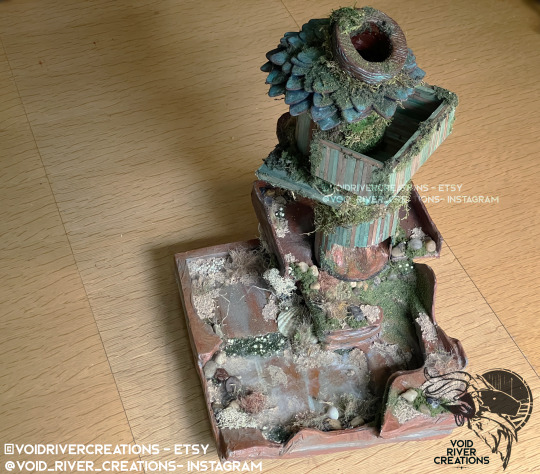


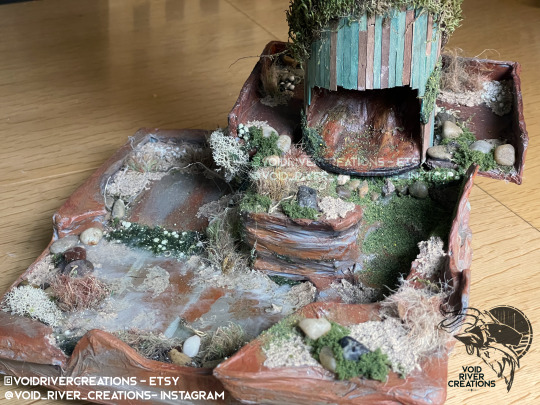
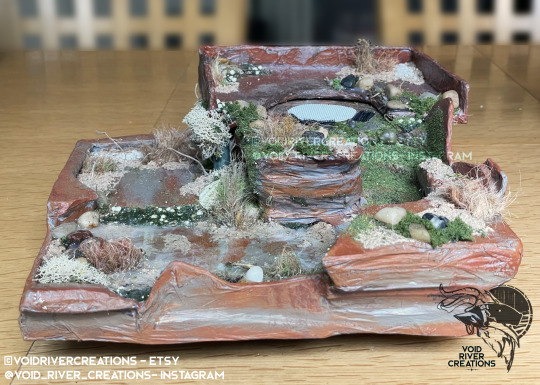
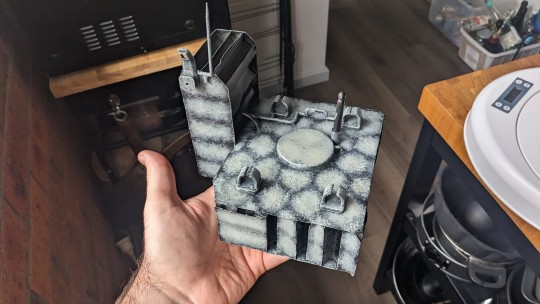
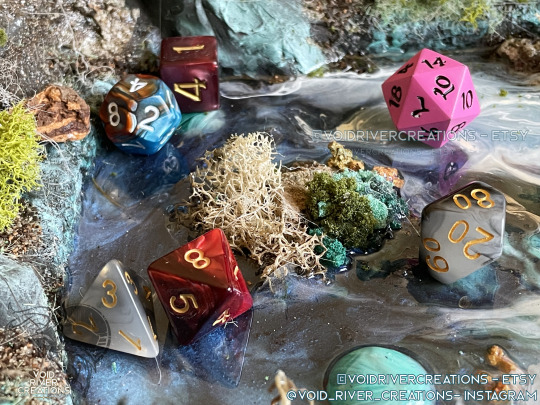
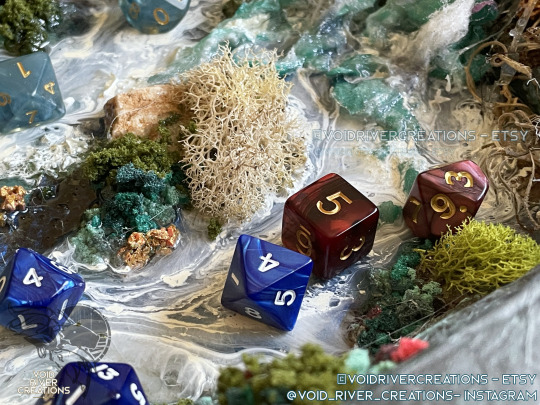
One project done. Another dice tray with a detachable tower.
Having to do some measurements before it's on my Etsy.
Have more photos to edit for another tower+tray combo and some trays.
------
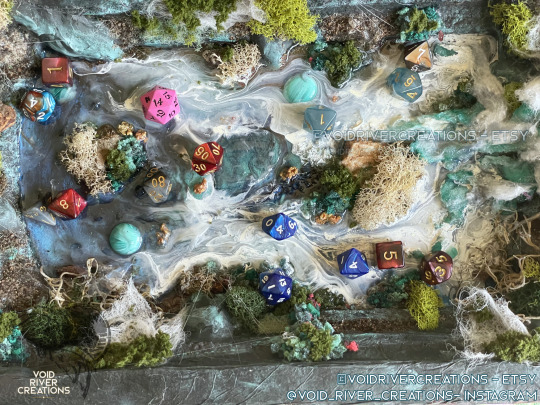
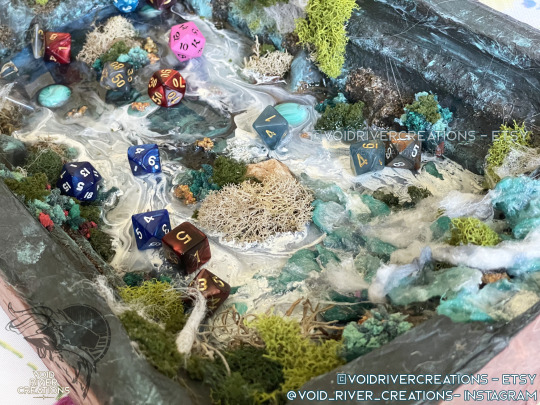
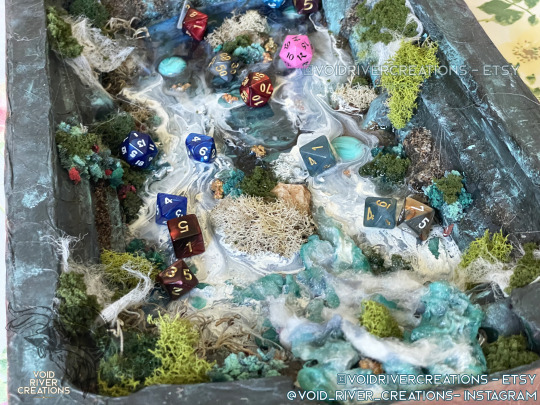
Officially on my Etsy now.
A desert/canyon-themed tray and tower. Mostly light, when the tower isn't attached. Could set it on a shelf and use it as decoration!
The tower is detachable via Velcro. Velcro is to give the dice tower added stability.
Sometimes dice may jump past the barrier depending on how they come out of the tower.
*Dice in photo not included.
The approximate size of the dice tower is:
Length - 5.5 inch/13.97 cm
Width - 7.5 in/19.05 cm
Height - 10 inches/25.4 cm
The approximate size of the tray is:
Length - 12 inch/30.48 cm
Width - 11.25 in/28.575 cm
Height - 3.75 inches/9.525 cm
Height with tower - 13.75 inches/34.925 cm
#handmade#terrain crafting#terrain building#crafts#dice tower#dice tray#dice#terrain making#dnd#ttrpg#dnd dice tower
60 notes
·
View notes
Text

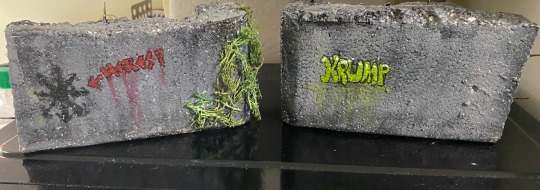

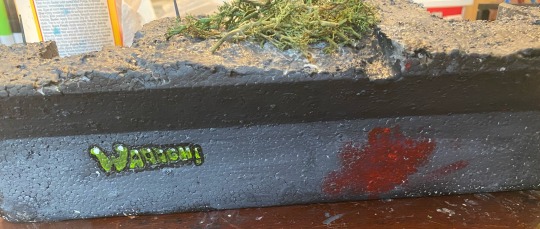
Some examples of Warhammer 40K terrain I’ve built!
11 notes
·
View notes
Text

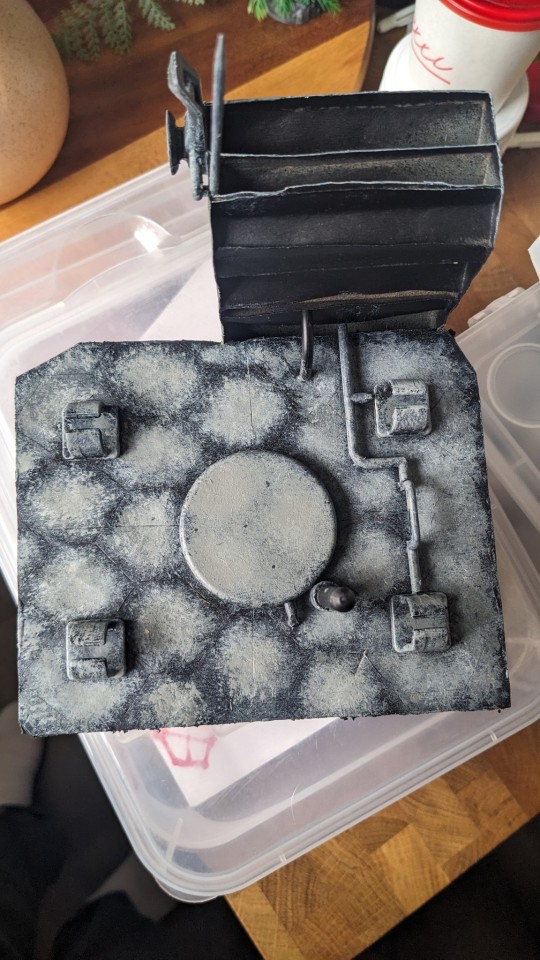
WIP trashbashed building: trying to get a "concrete" look but we'll see how it goes
6 notes
·
View notes
Photo
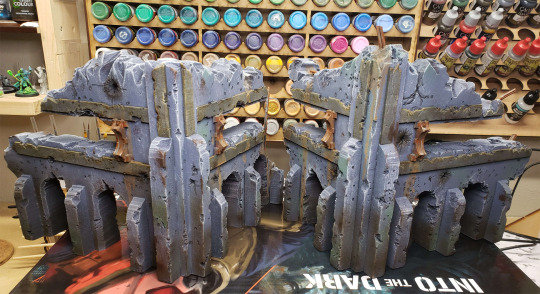


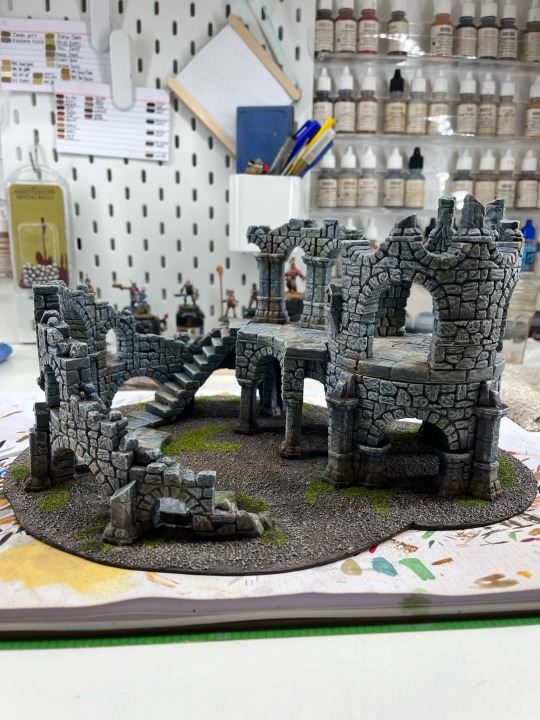
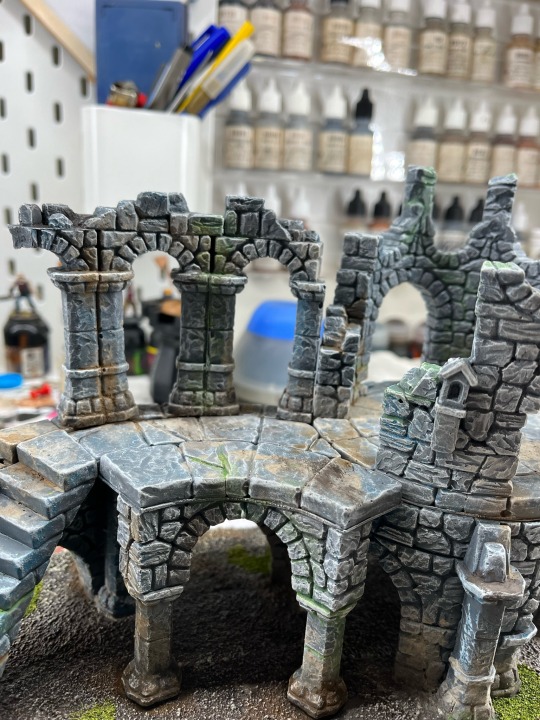
haven’t posted a project in a bit, so this is a terrain piece I just completed.
3 layer ruins - they connect on one side to form one large piece if desired.
18 notes
·
View notes
Text
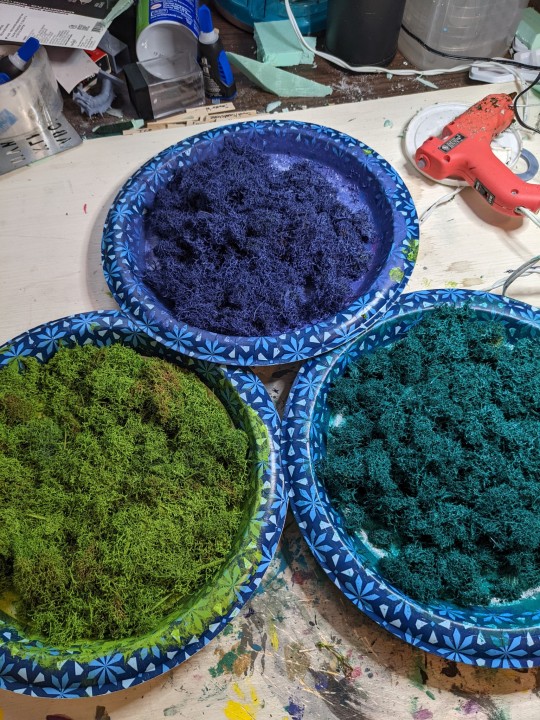
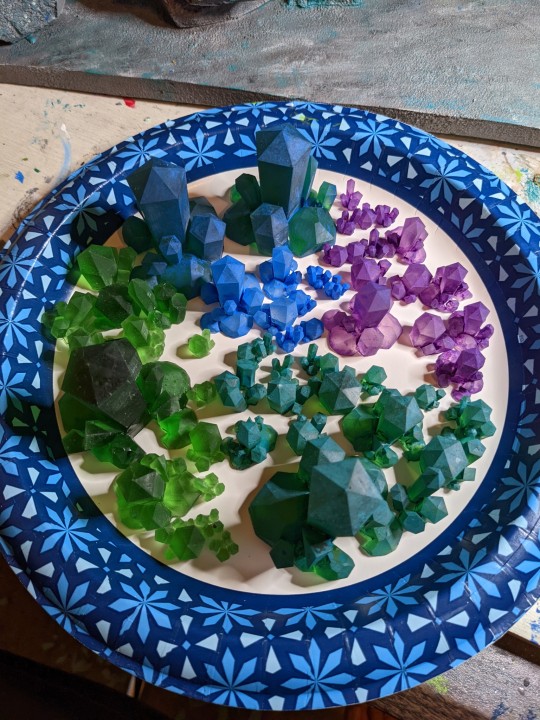
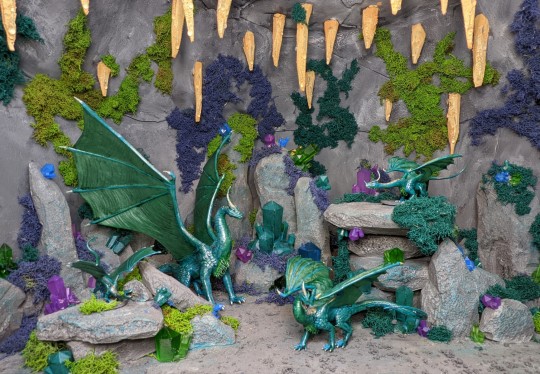
From start to finish, here's the process of my Moonstone Dragon cave. It's made mostly of insulation foam, and then the crystals I 3D printed and then painted along with the moss. Otherwise, I used lots of dry brushing to get the stone look I wanted.


3 notes
·
View notes
Text
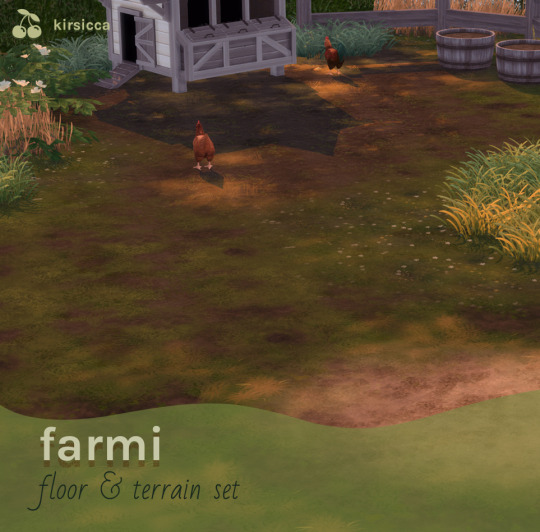
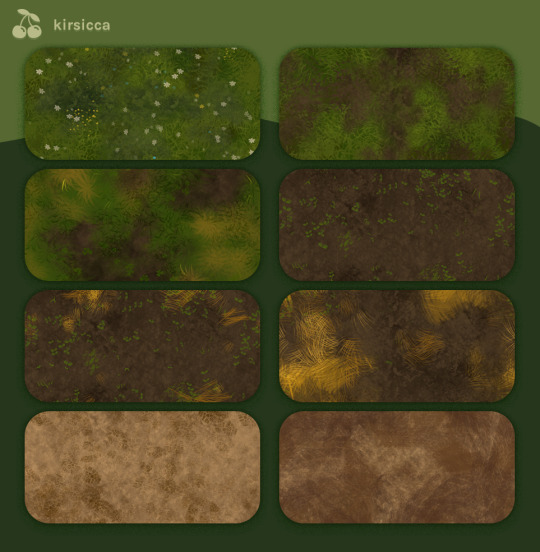
farmi set
♡ d o w n l o a d ♡
Set of 8 different floors & terrains for all your rustic needs!
#ts4#the sims 4#ts4cc#ts4 cc#ts4 maxis match#maxis match#ts4 custom content#s4cc floor#s4cc terrain#my cc#s4cc build
3K notes
·
View notes
Text
anybody know what the best way to clean ttrpg terrain you crafted?
I don't have a place to store mine that prevent them from getting dusty yet.
0 notes
Text
Another railroad diorama from the California State Railroad Museum in Sacramento, I really appreciate how dirty this scene in, catching the nature of the coal transport, along with the little details of the coal chutes and graffiti. The story this scene is telling is magnificent.
St. Clair Northern
Irv Schulz’s HO gauge St. Clair Northern layout is a beautiful example of the Great Lakes hauling railroads of the 1890s. The structures are authentic for the 1890s, and the locomotives and rolling stock are all based on actual 1890s railroad equipment. Notice Irv’s beautiful scratch built ships. They are accurate representative models of the real ships that once hauled iron ore on the Great Lakes.


#painting miniatures#miniatures#terrain#miniature painting#minipainting#terrain inspiration#terrain building#railroad museum#scale model railroad#model railroad#model railway#railroad#railway#diorama
28 notes
·
View notes
Text

I did get this done this week
33 notes
·
View notes
Text

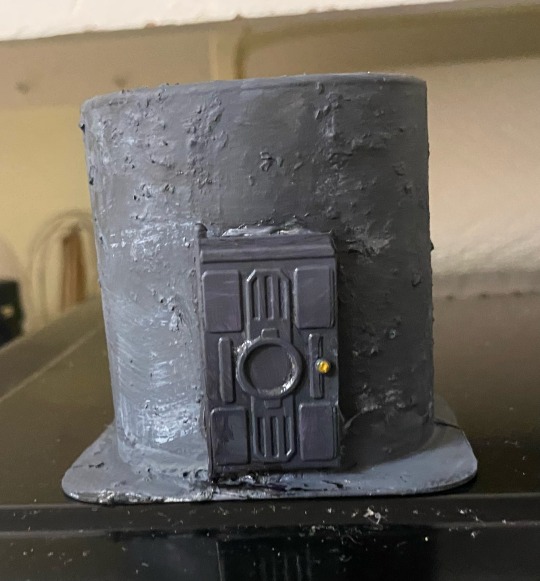
Continued on with the Forgotten Tower project. Dry brushed the base.

Experimented with using tile grout for weathering. Very happy with the result, looks suitably grungy and easy to work with.
Also finally finished another Hirst Arts project, the Warlock House. Final varnish coat and added some dead grass. Ready for the table now!!
Hobby Streak - Day 02
29 notes
·
View notes
Text


Another tray up on my Etsy. Price $85USD. Links in bio/blog.
This is a fairly big rolling tray as I repurposed a broken styrofoam tray. Great for a shared group tray or you have a bunch of dice you want to roll!
*Dice in photo not included.
The approximate outer size of the dice tray is:
Length - 10in/25.4cm
Width - 16.75in/42.545cm
Height - 3.25in/8.255cm
The approximate inner size(rolling area) of the dice tray is:
Length - 6in/15.24cm
Width - 11.5in/29.21cm
Height - 2.5in/6.35cm
#dice#dice tray#terrain building#terrain crafting#terrain making#dnd#ttrpg#dnd dice tray#etsy#dice holder#crafts
43 notes
·
View notes
Last Seen Blogs

captainstephane60
Sans titre

sharkandjellyfishliker
HIGH PRESSURE WASHING MACHINE

spaltenlecker
Unbetitelt

matchaicons-blog
~ matcha icons ~

tilsavmigration
Tilsav Migration & Education | Education Consultants Melbourne |