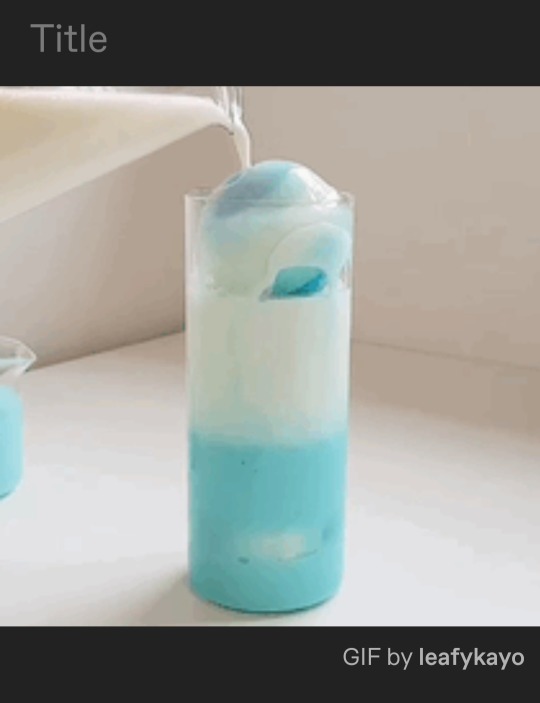
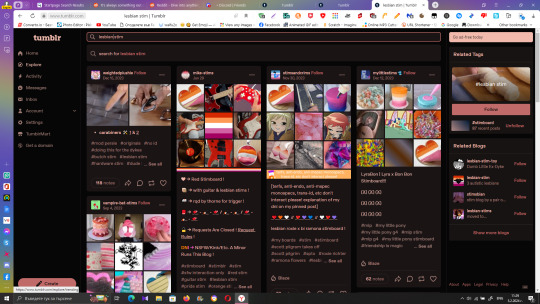
#stimboard tutorial
Note
How Do You Make Stimboats?
How To Make Stimboards
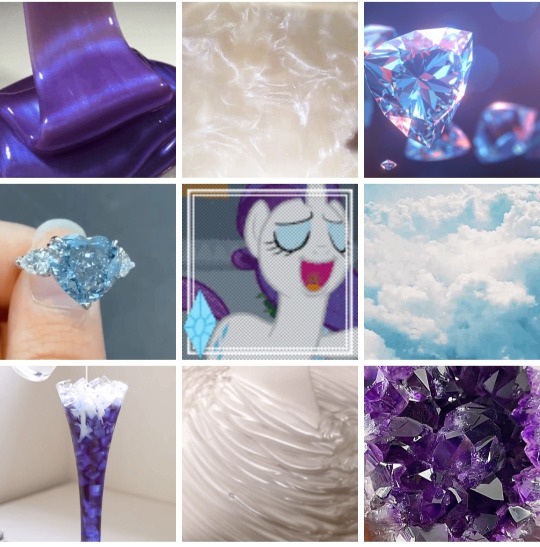
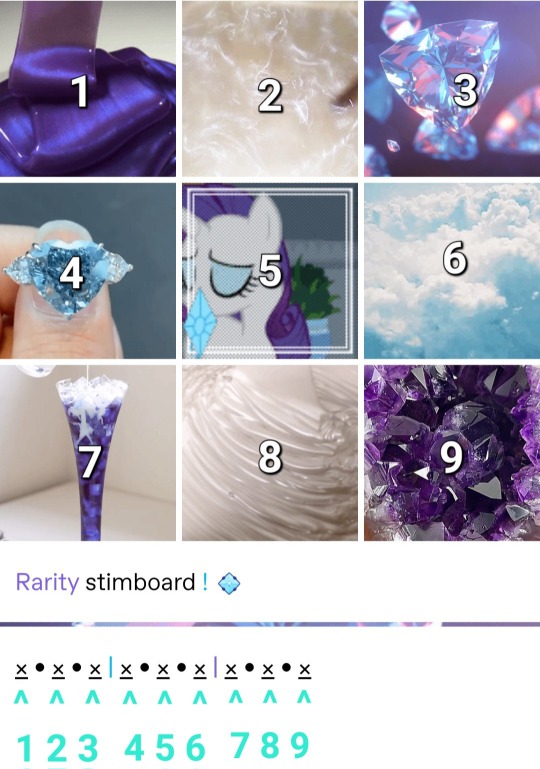
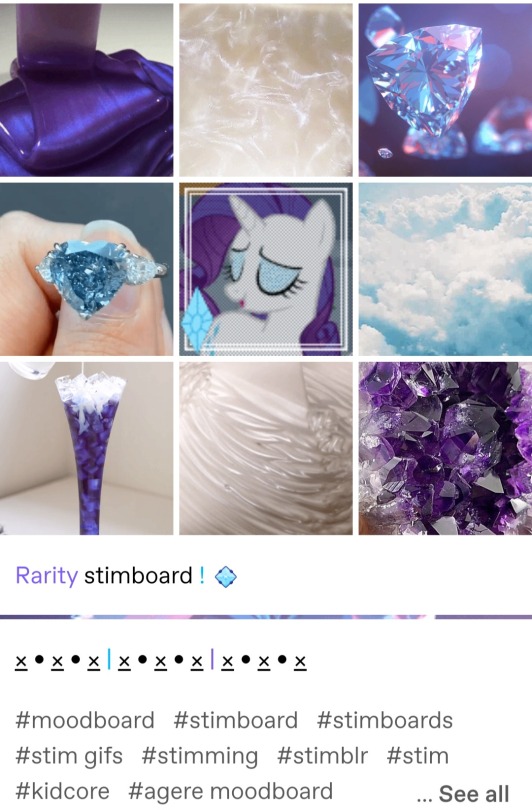
First we pick a theme. For example, let’s say we want to make a purple stimboard. You would first find yourself a purple gif!
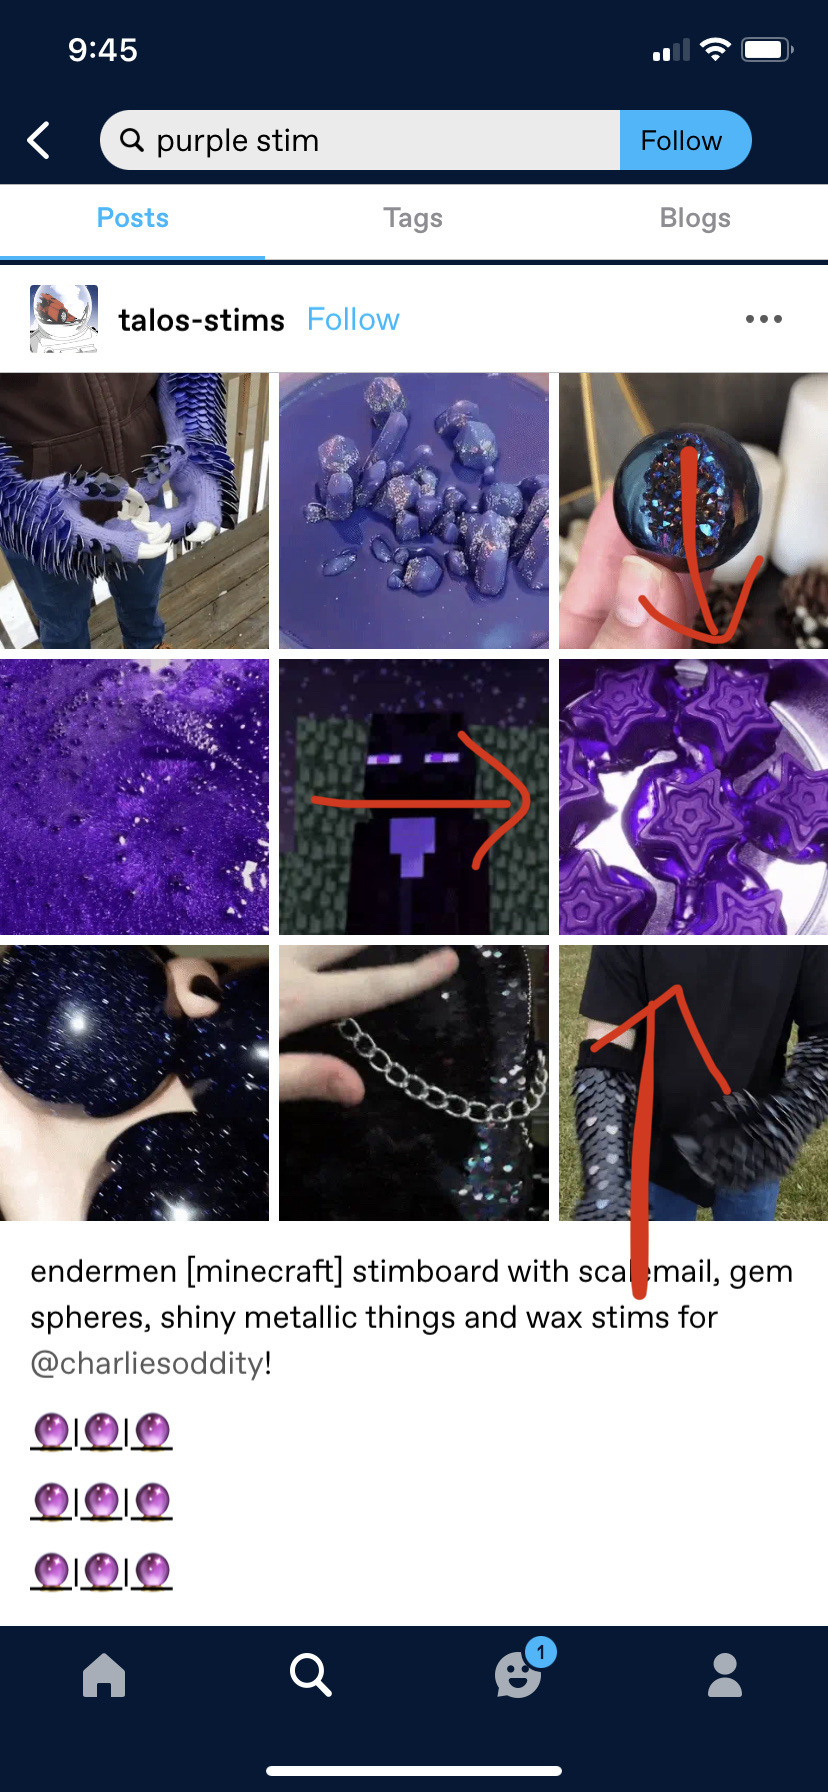
I like this purple star gif from this user’s stimboard, so I am going to copy the link for the whole stimboard and paste it in Discord! I have a specific channel in a personal server for this.
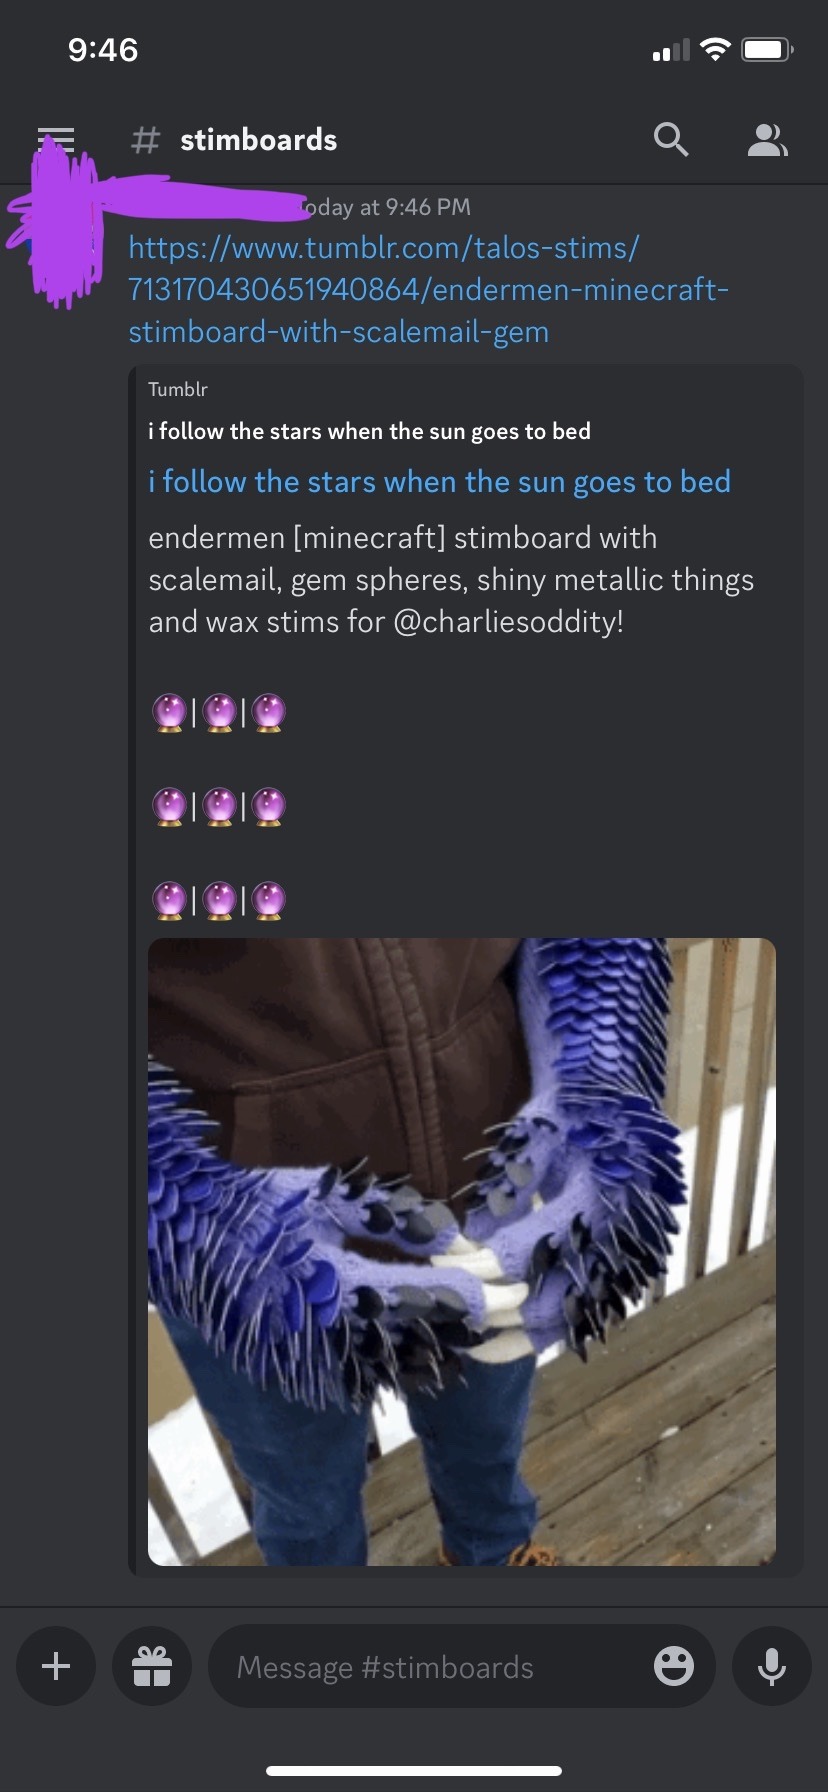
If you don’t use discord, I’m sure there are other methods for saving your links, such as a Google doc. You will need these stimboard links later.
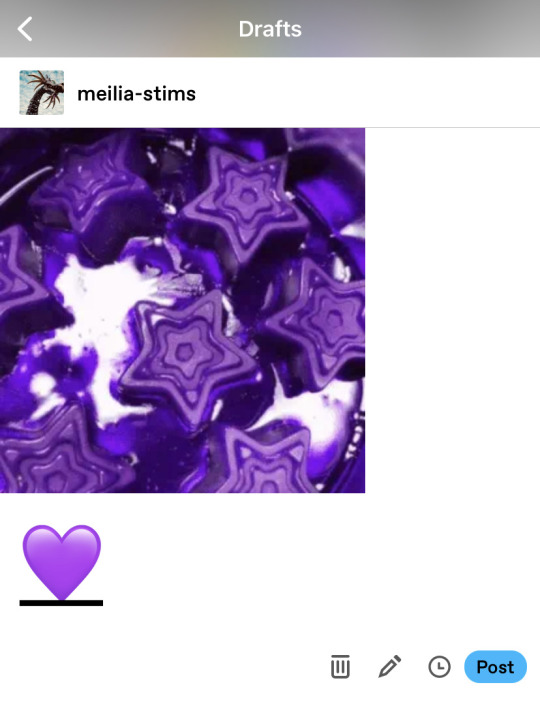
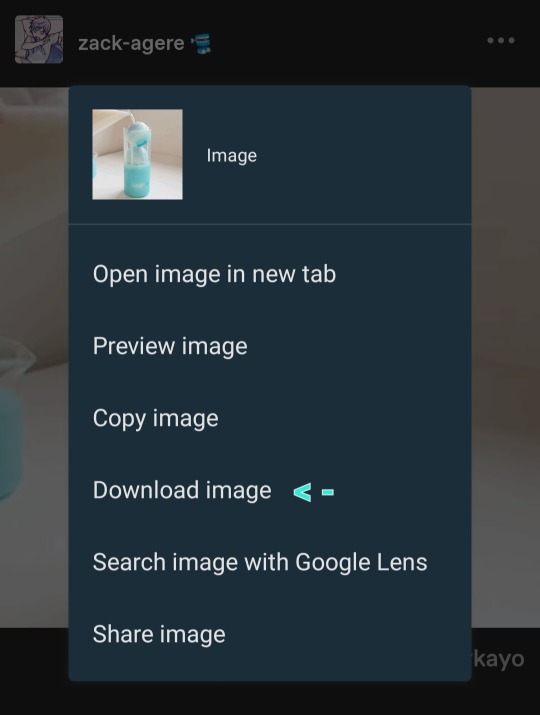
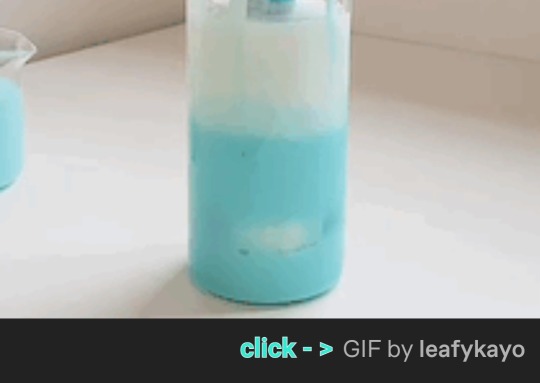
Next, I open the stimboard link through Discoed and save the gif I want to my camera roll, like so.

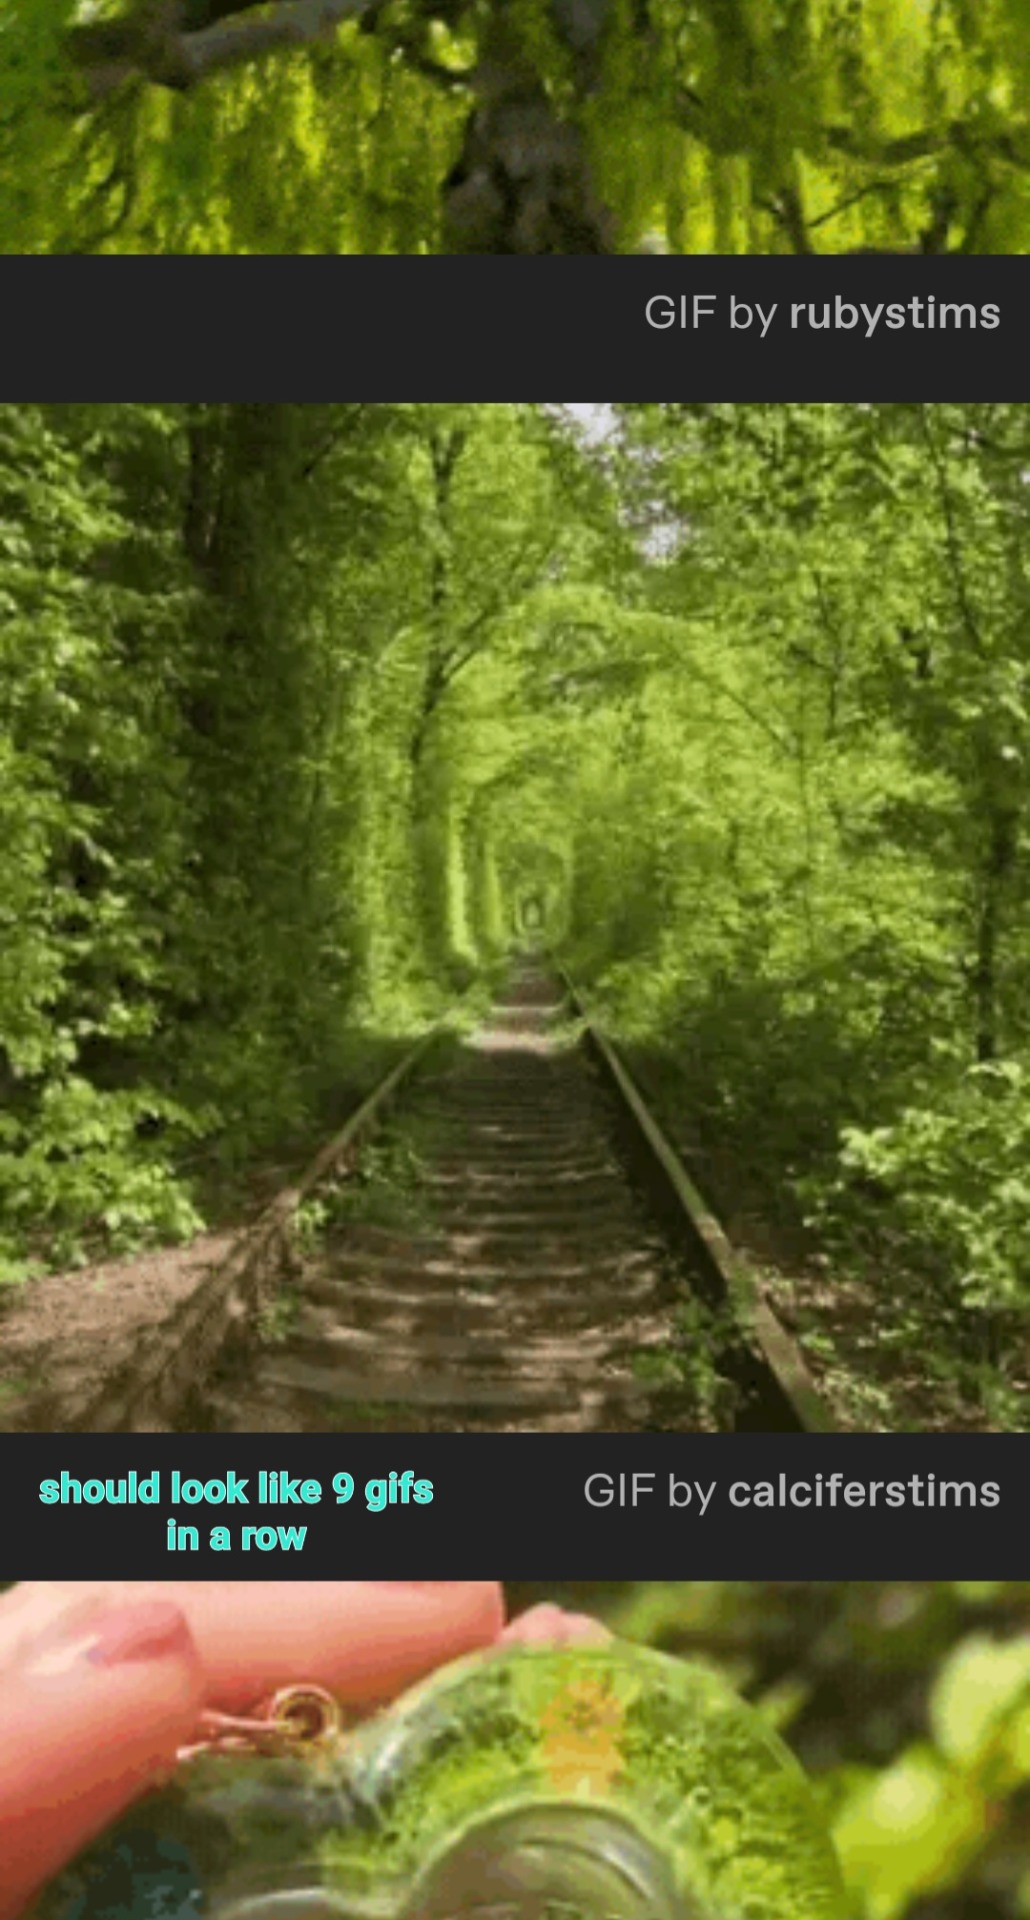
After that we put the gif in our stimboard! Most stimboards are made up of nine gifs, but for the sake of convenience, I’m just going to show how to credit a single gif.

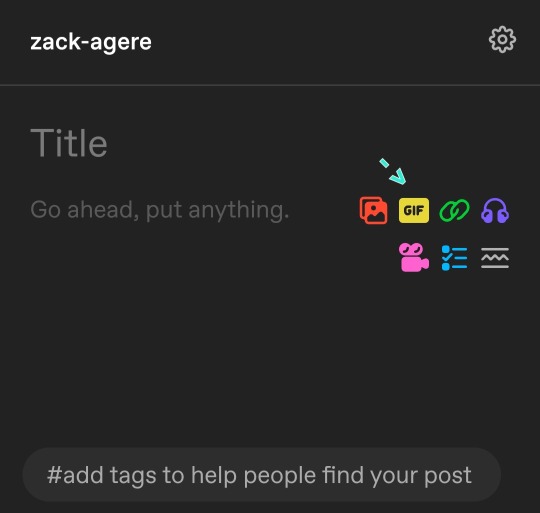
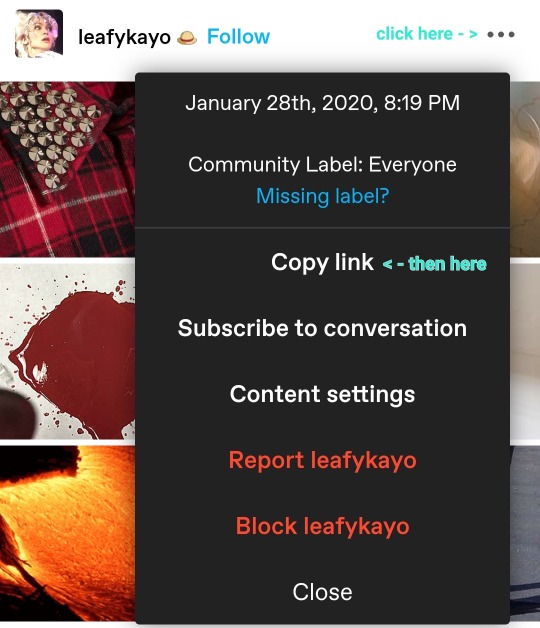
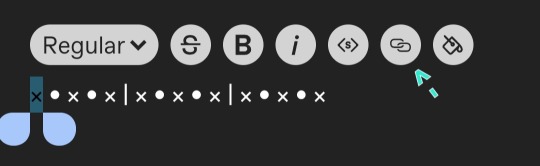
Choose an emoji (I’m using the Purple Heart 💜), or a simple “X” and highlight it. Click the insert link button. This is where you will need your stimboard link.


Copy the stimboard link and paste it in that box, and click “Add Link”

Once you’ve done that, the emoji or “X” should have a line under it like this;
And that’s how you credit your gifs! Do this nine times (I usually save nine gifs at once to save time, rather than literally repeating these steps over and over) and you’ll have yourself a typical 3x3 stimboard!
Hope this helps! I’ve never made a tutorial before. Good luck and happy stimming!
65 notes
·
View notes
Note
Hey!!! How are you?
How do you make stimboards?
Do you have a source for stims other than Tumblr?
heya, anon! we are doing well!
so, i'll start on a tutorial in a second, but I'll answer your second question first.
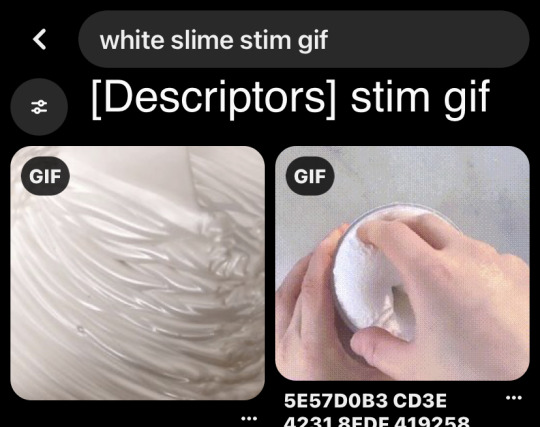
i guess the only suggestion i'd have for stims from outside of tumblr, is just general gif websites. tumblr is very much the best place to find stims though. there isn't really a specific source for stim gifs other than tumblr.
also, i will preface this with the fact this will most likely be for pc editors only. i have no idea how much of this works on mobile. i’m really sorry about that.
anyway, onto the tutorial!
How To Make Stimboards
1. find + download your stims.
so, you’ve got your character or your theme, and now you need to find the good stims. what terms do you search, what things do you look for. i’ll tell ya.
tumblr tip!!!!! ~ when you search on tumblr, don’t click enter after typing, look at the search and pick the option under ‘go to #tag’. you’ll see more posts that way!
for specific aesthetics, it is very easy to just search up ‘’aesthetic’ stim’ (eg ‘light academia stim’, ‘kidcore stim’) and then just go through and find neat stims you feel fit.
you can do this tip with pretty much anything else, like colours, specific stims, etc.
the best stims to use is subjective, so there isn’t really a rule to it. just pick what you think is best.
so, when i pick my stims, i:
find a stim i like and download it. i usually save it in a specific folder for gifs.
i then like the post, so that i can refer back to it later when i credit the gif sources.
i then find another stim i like, download it, like it, etc etc, until i have eight stims.
2. converting your gifs from webp to gif.
so, tumblr has an annoying habit of downloading everything as webp, so here’s the work around i use. you have to do this individually for all the gifs. you can find bulk converters, but i’ve found they ruin the quality of the gifs, so i use this method.
i start off on this page, though resizing your stims isn’t required. i go for 250 x 250 px.
once you’ve done that, do not download the gif, instead go to the button next to it, to GIF.
if this doesn’t appear, that means tumblr downloaded it as a gif and you can download it and move on! this can sometimes happen, but check all your stims.
when you click on that, you come to another bit of the website. this is actual part where you convert from webp to gif.
all you have to do is click the convert button and redownload the gif! and you’re done!
3. (optional) editing your gifs!
if you pick stims that all fit together pretty well, you can just move on to 4. but, if you picked a few stims that don’t fit together colour wise, etc, i’ll tell you how to fix that!
there are a few ways to make your stims look cohesive.
for matching colours, go for hue or colour layers! these are a very easy way to make your gifs match. but, they might not work as well on stims with hands, stims with multiple colours, etc.
experiment with other things! if your stims are too bright or loud, lower the saturation; if your stims are too dark or too light, mess with the brightness!
this is all trial and error, i’ll be honest. but if you can’t find a solution to a problem, don’t worry. chances are, no one will take notice of it in the finished post. trust me.
4. making the middle icon!
you can do this at any point in the project; honestly, we tend to do this first, so we know how to make the stims look when we edit them. but, you can do it whenever.
these are easy, just go about them as if you were making a regular icon! i usually go for a smaller icon size, and make them simpler than my usual icons, but its really up to personal preference.
5. compiling your post!
we have tips on stimboard composition you can find here! but otherwise, this step is pretty easy. add them all to your post and align them into the three grid you usually see.
now, you can type in your title, add any comments you want to make, and then pick how you are going to lay out your credits!
6. credit
so, on the stimboards you usually see around, you will see a line of emojis or symbols, with links. this is where they found the stims they used!
pick your symbols/emojis! lay them out in three’s, representing the layers of your stimboard.
refer back to the posts you liked earlier when picking your stims. and find where the link for that specific gif is on that post. its usually pretty obvious which one it is.
you might have to click through a few different web pages to find the original creator, but the best way to tell if its the original poster, is if it links back to youtube, or instagram, instead of tumblr.
if the link goes to a dead blog/link, go back and credit the last post you saw it on.
then, go back to your post and copy that link into the symbol that represents that specific stim.
do this for all your stims!
7. tagging
tagging stimboards is like tagging most other posts, but there are a few things that are reccomended!
first tag your usual edit/fandom stuff, then the specific stims used.
this is because, its common for people in the stimming community to block tags of the stims they do not like, so make sure to tag the specific stims.
after that, tag things like hands, knives, etc! this is for the same reason as above.
and you are done! well done, you created your first stimboard! they are a little time consuming, but really, really fun. i hope this was helpful!
56 notes
·
View notes
Text

Coping with the new Tumblr Mobile image layout (outdated)
Tumblr has once again made a bad decision. As you may know gifs in mobile now work different and many stimboards/moodboards have been ruined by it. Here are some tips to make your boards consistent on both mobile and web.
Why is this happening?
Tumblr mobile now show images as their real size. Before if you have a 600x600px image beside a 400x400 one the images would scale down perfectly since they had the same aspect ratio. Now if you have a 600x600px image beside a 400x400 one the images will be disproportionate to each other throwing off the whole board.
About moodboards
With moodboards I'd personally recommend just compiling them all in one big image then posting that image to Tumblr. This protects your board from current and future Tumblr tomfoolery. I personally use Photopea to make mine but other popular sites include: Canva, Picsart and Ibis Paint. Also you should export your big image as a png since they are higher quality and compress better.
Here is a template for a moodboard layout but you can make your own if you want special layouts or want to make it fancy.
About stimboards
Stimboards require a much more tedious process. You will now have to resize all your gifs and central image to be the exact same size being the same aspect ratio doesn't cut it anymore. I'd recommend going with 300x300px or 350x350px since 400px is where a good amount of gifs start to go over the file size limit (10MB).
For resizing I'd recommend using EZgif it is your best ally when it comes to editing gifs.
What about my old boards?
They're kinda messed up forever now. Unless Tumblr fixes their mistake or adds an option for different ways to display images in a post. If you want to redo them I would hold off for now since this is a relatively new update and it only affects mobile so there is a chance it will be undone.
#sharing my light : tutorials#stimboard#moodboard#stimboard making#moodboard making#stimboard tutorial#moodboard tutorial#tumblr image update#image size update#image update
11 notes
·
View notes
Text
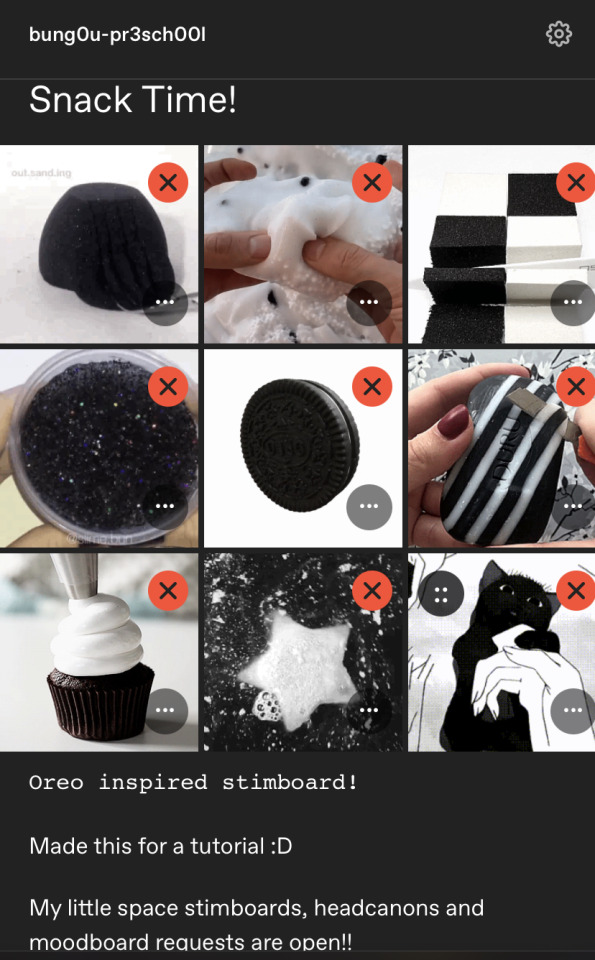
How I make my stimboards !

(also here's a link to someone else's explanation incase you don't understand mine)
This was asked by @mothmans-problem-child so here it is ! (under the cut, it's kinda long)
Step 1 : make a post and go to the gifs section
Step 2 : put what you're looking for in the search tab

Step 3 : scroll until you find a gif you like and tap it (should look like this after you tap it)
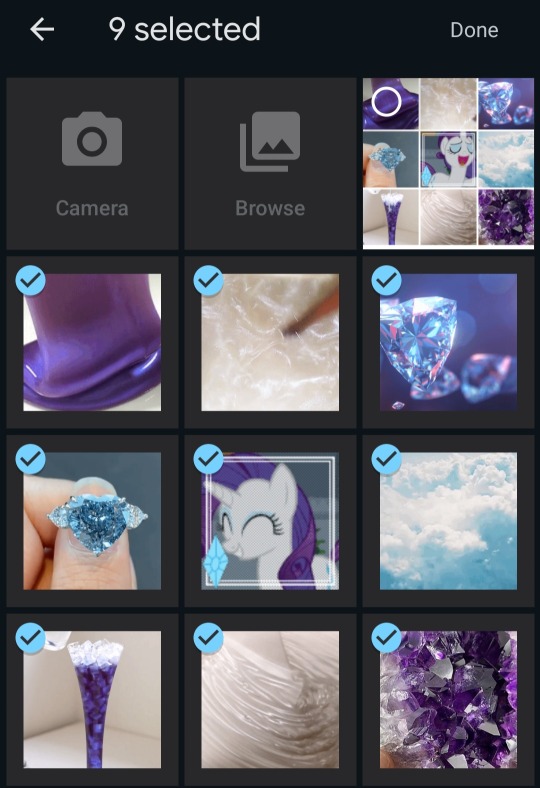
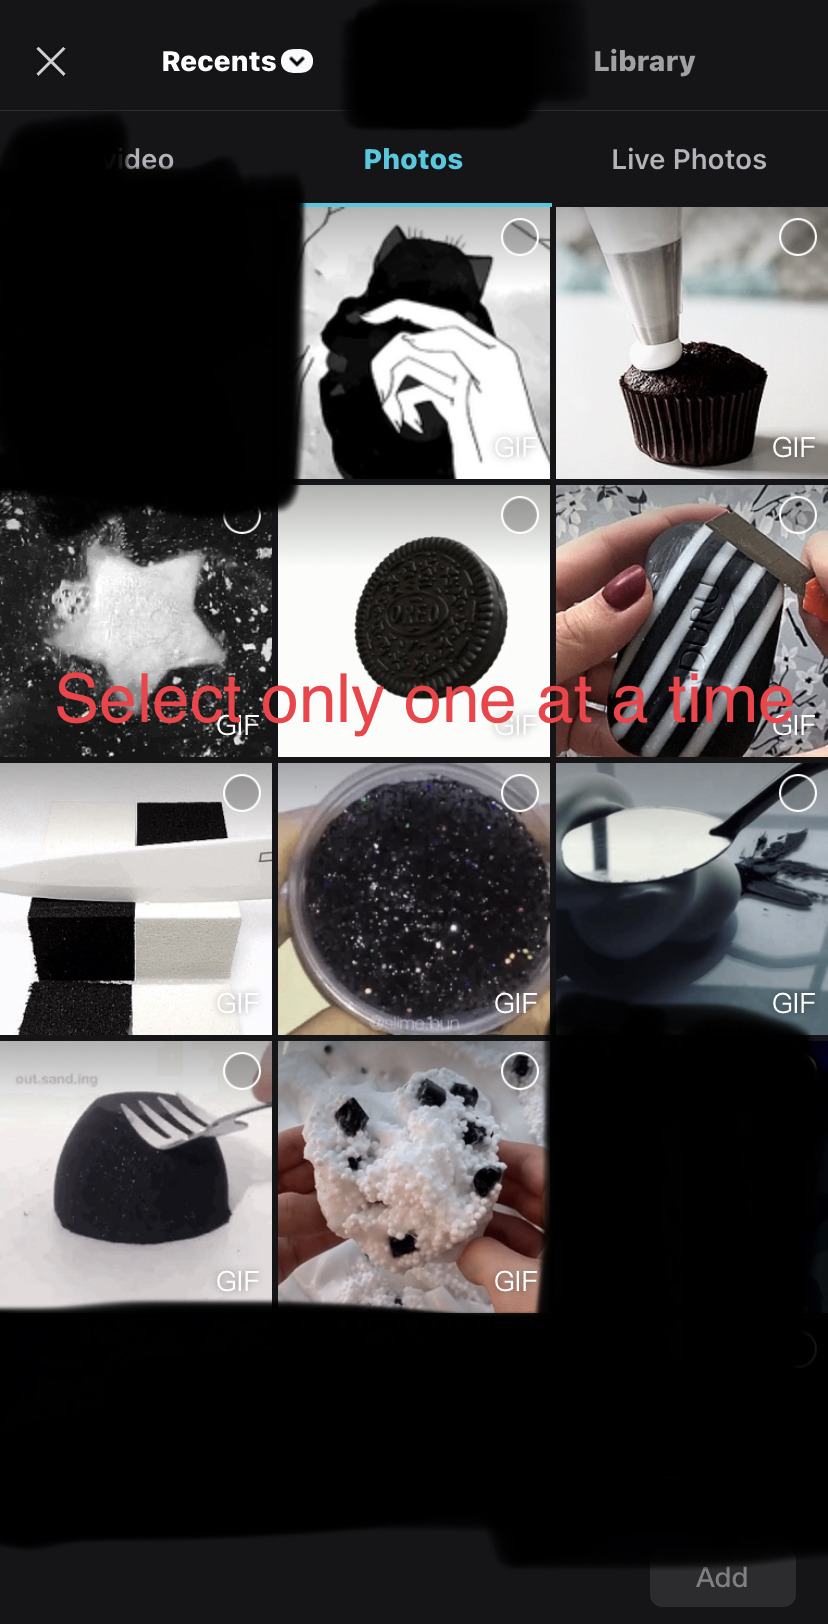
Step 4 : do this until you have 9 gifs
Step 5 : download them all in the correct order (on mobile you have to download the images you want on top last, and the ones on the bottom first, if it's your first time it'll probably take a few tries)
Step 6 : go to the image add button and select all 9 gifs (should end up like the right image)
Step 7 : click on the "gif by" part (this is for the credits)
Step 8 : press copy link (the gif came from someone else's board, so we link to their post)
Step 9 : insert the link onto an emoji / letter / word
Each letter / emoji / word needs to have the links in the correct order
Step 10 : add tags
Done : it should look something like this at the end !
Extra : I colour my text and add a divider just to make it look better :)
Note : I hope this is a good enough explanation, and don't be too worried if your first few don't look perfect, you'll get better over time if you continue making them !
71 notes
·
View notes
Text

READ CARRD BEFORE FOLLOWING! 16+, younger may interact, but may not follow. RUNS ON REQUESTS + QUEUE. get some of my PSDs here.
persistent ask game:
🏳️🌈 + [character name] for a pride headcanon edit
[x] or [y] to make me choose between whatever to edit
favorite out of [group (can be a bunch of characters or an established group / unit) ] for an edit of my fav
[color hexcode] for a character i associate w that color
#{info}#tag directory:#{psds}#{edits}#{icons}#{stamps}#{layouts}#{gifs}#{stimboard}#{aesthetics}#(for aes / mood boards)#{rentry graphics}#and for everything else:#{asks}#{tutorials}#{posts}#(for me talking)
10 notes
·
View notes
Text
How to make a stimboard/source gifs! (Tutorial for beginners on PC)
Hello guys, today i'll be showing you how to make a stimboard & source gifs
My english isn't good bcuz i am not a native speaker, please correct my grammar in the comments!
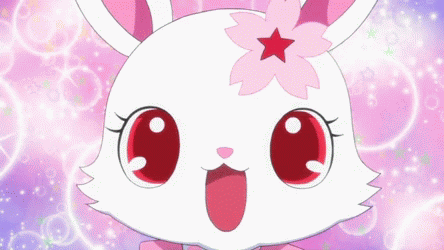
First, go to the search bar & type "*insert colour or thing here* stim"
I'll be using pink, orange & lesbian as examples.

Then, reblog them to your blog (it will be an important step later on) and download the gifs you want
Step 2:
Arrange the gifs however you want! :D (It has to be in a 3x3 square like this)

Now adding the credits..
First, do your crediting system like this for example: x/x/x/x/o/x/x/x/x
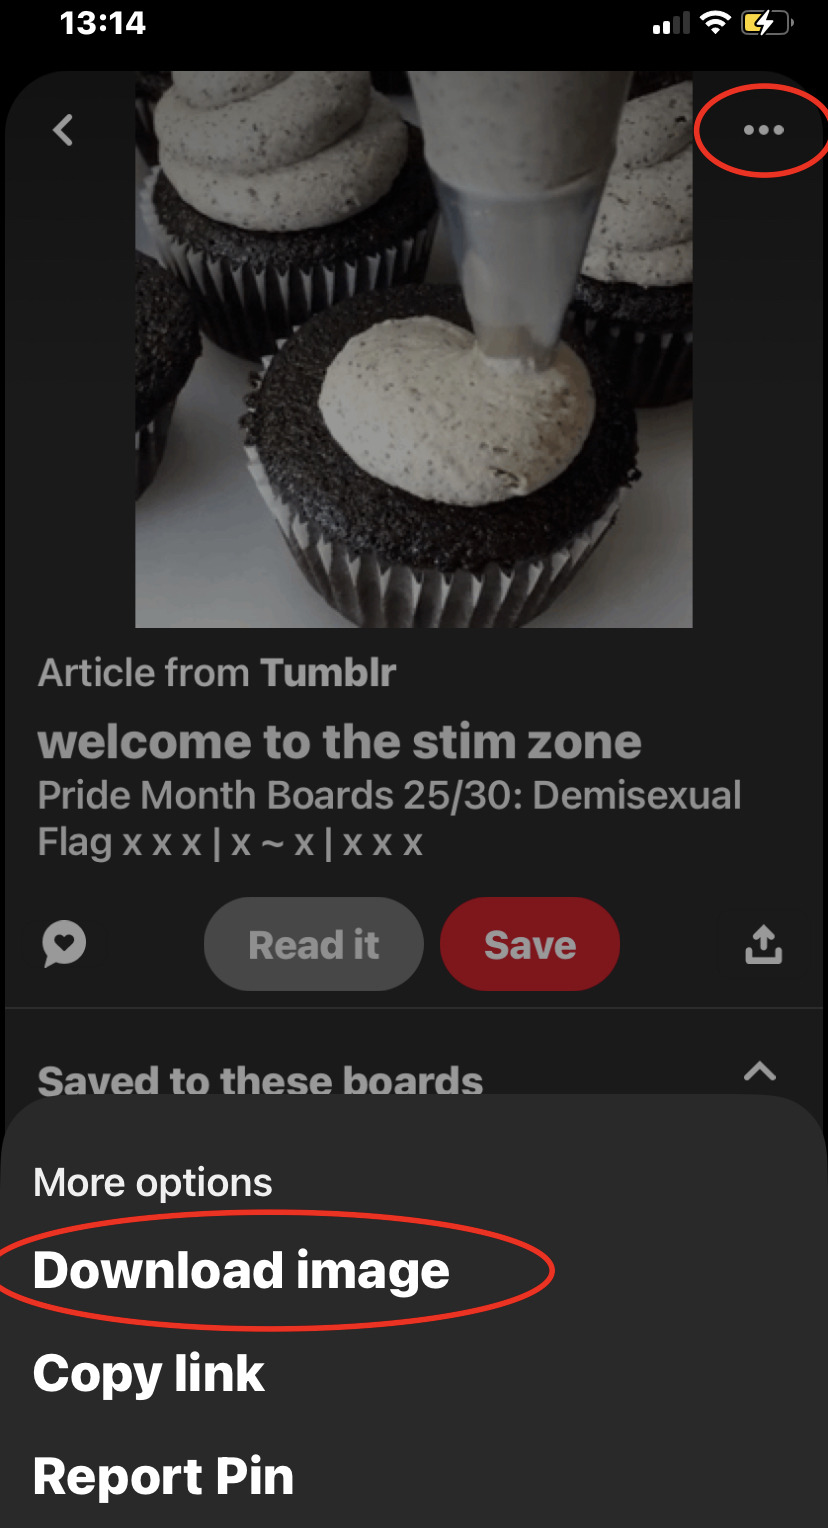
After you reblogged the gifs you wanted, click on the arrow (share)
After clicking on it, you will see a button called "copy link"
copy the link & repeat the process for all of your gifs
To source a gif, highlight any of the x's and click this option & paste in your link. Repeat the step until you fill all of the x's (and the o if you have a center gif)
Optional: You can put a DNI (Do not interact) banner or even id the gifs! :D
Hope this tutorial is helpful for you :3
9 notes
·
View notes
Note
hey, ik this is kinda dumb but i was trying to make a stimboard account of my own but i can't work out how to arrange the gifs and stuff :( do i do it on mobile or pc?
Hi! Thank you for asking!!! Your question isn’t dumb at all
I do all my stimboard making on my phone!
I use only Pinterest, CapCut and of course, Tumblr!
Here’s a step-by-step guide to how I make stimboards!
I start off on Pinterest. I search using colours and stims that I wanna search for and add ‘stim gif’ to the end, or sometimes just ‘gif’ if I’m looking for gifs of characters or from shows! (Sometimes if I can’t find the result I’m looking for, I result to using Google)
When I find a gif I like, I click the 3 dots in the corner of the gif and download it!
After that, if I find one of the images isn’t a perfect square, just so that the result is more neat, I go to CapCut to correct it! (Tumblr does automatically set your images to similar sizes but it can make the images more rectangular if the sizes aren’t all right and I prefer having perfect squares but it’s up to you!
This is a visual guide to how I do the CapCut editing


I actually forgot to do it here but remember to remove the CapCut watermark at the end! I really hope that visual guide made sense, I really should make a whole separate post for that lol
For the uploading to Tumblr, what I do is pretty easy! I usually add the top caption first but then I go on a separate line and select all 9 gifs that I decided to use! I usually try to visualise what order they’ll be in as I select them (the first thing you select will be top left, fifth will be middle and last will be bottom right) but you can always reorganise them! I find that trickier though… But Tumblr should automatically put everything into a nice, square, stimboard shape!
After that, I add the sub-caption and anything else I want to say!
I then finish it off with my banner thingy and the tags I wanna use (I usually use my usual agere tags followed by stimboard and theme tags!)
Then my stimboard is off and posted!
(For moodboards I do a similar thing but instead of using ‘stim gif’ at the end, I usually use ‘aesthetic’, and I search for ‘deco pacifier’ pics on Pinterest and such! I also just use my photo gallery to edit all the pics into squares since CapCut isn’t needed)
I hope this made sense, sorry it took so long ❤️
#age regression#agere blog#sfw agere#age dreaming#agere community#actually autistic#age regressor#agere caregiver#autism#sfw age regression#tutorial#agere stimboard#stimboard#agere moodboard#age regression moodboard#moodboard
2 notes
·
View notes
Text
collab!!

Later this week we'll be collabing with one of your favorite slime brands! Repost with your vote and see if your shop wins!
#slime#clear slime#slime stim#slime tutorial#stimboard#slimestimboard#blueslime#slimecollab#slime creators
0 notes
Text

PSDs For Dummies <3
— as written by a dummy
hello dear readers and welcome back to canarysage, the world’s least comprehensive tutorial blog. today, we’re back at it again with photopea for dummies, and we’re tackling something i probably should have done first: psds.

example psds are: 1 (@cutesiplushi) 2 (@didlivio) & 3 (@lumieron)
what is a psd?
excellent question, dear reader! psd stands for photoshop document, and it’s a type of file format (like .png or .gif) that allows you to store a project’s individual layers! it’s a file format that, for obvious reasons, is exclusive to photoshop and photopea.
in editing circles, psd has become shorthand for filter. people use psds to save configurations of adjustment layers that are then used to filter images consistently, without having to remake them every time. when someone posts a psd, they’re posting a folder (hopefully it’s in a folder) with their specific set of adjustment layers for anyone to use!
where can i get psds?
right here on tumblr! check your favorite edit blogs, as they may have posted some, or search ‘free psd’ or ‘psd coloring’ in the search function. tumblr doesn’t allow you to upload psds directly, so you’ll be redirected to a site outside tumblr. probably either deviantart, google drive, or ko-fi, all of which are easy to use. deviantart requires you to have an account to download anything (luckily, an account is free!) and ko-fi may require you to pay money. google drive doesn’t have a search function in and of itself, but it’s extremely easy to download off of.
also, shameless self plug, but i post psds right here on canarysage! i personally use deviantart, but again, an account is free. if send me an ask, i may be able to provide you with a google drive link, if you ask really nicely (。•̀ᴗ-)✧
and of course if you don’t want to use someone else’s psd, you can always make your own.
how do i use a psd?
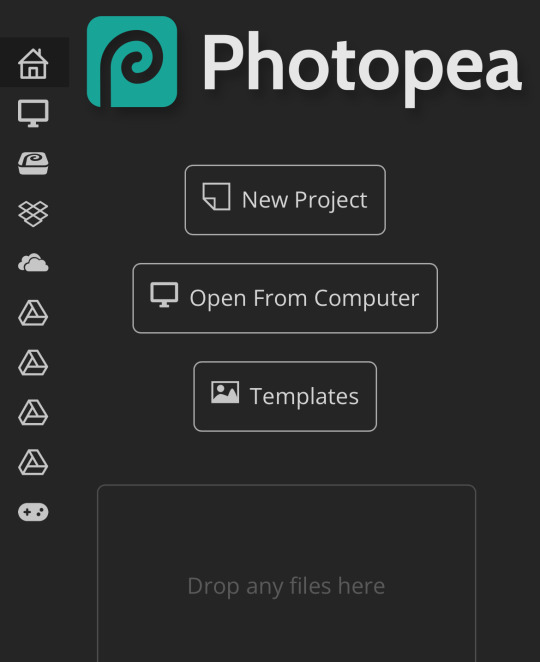
once you have a psd of your choice downloaded, open up photopea! or photoshop, if you’re rich like that.
once you open photopea, click this here button right in the middle of the screen, the one that says “open from computer”
from there, go to choose files and open up your psd! depending on from whom you got it, psds will look different once you open them. i’m using one of my own as an example.

you can see there’s two layers in my psd, a folder, and an image. the image is just for me so i know which psd this is once i save it—i like to save all my psds with images of real people so i know how it looks on moodboards or stimboards.
the folder is the important part here, that’s where the adjustment layers are contained. to transfer a psd, you can either go to file > new
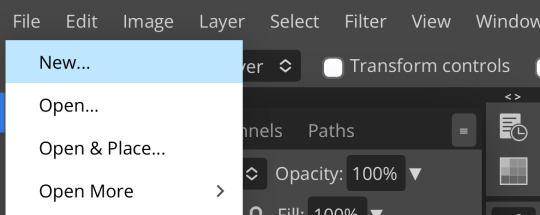
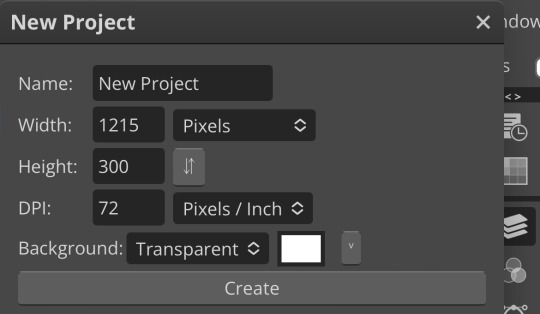
which lets you start an entirely new project, or you can open an image using file > open
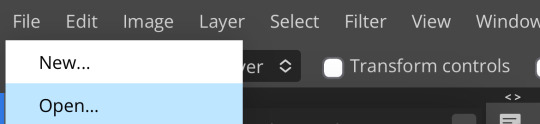
which will give you the image you selected.
as an aside, if you’re opening a psd and you already have a project in progress, make sure to click file > open and not file > open & place, as open & place won’t give you the adjustment layers.
then to move the folder, go to layer > duplicate layer into while having selected the folder (just tap on it, that will make it a lighter gray to show it’s selected) and duplicate the folder into whatever your image is
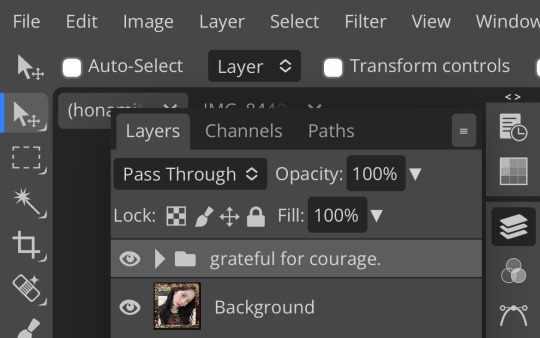

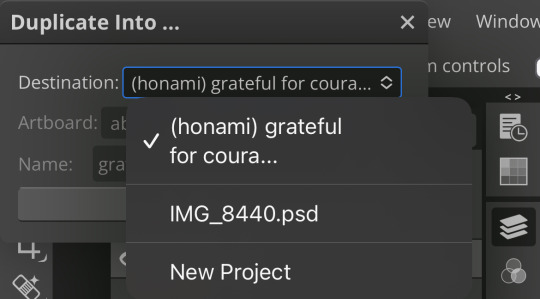
i’m moving mine to a random image of honami i found which is why it’s named like that. once the folder’s duplicated into your project, go over and take a look!
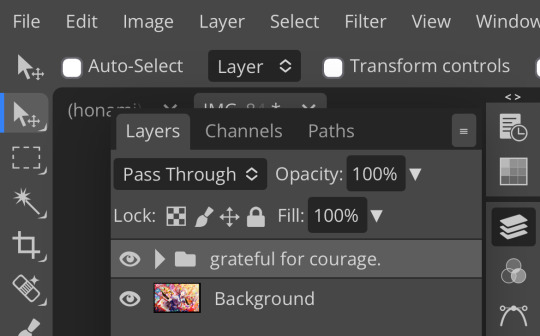
you should now see something like this! ensure that the folder is on top, as otherwise the adjustment layers won’t work.
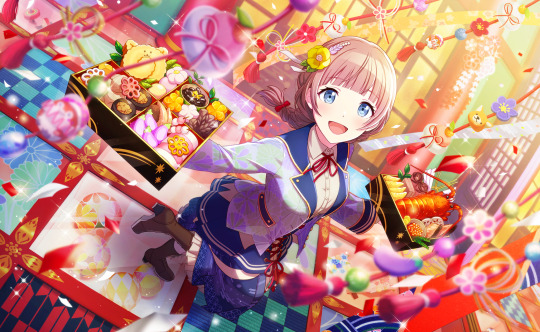
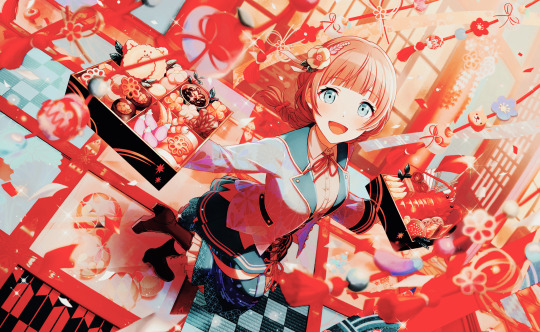
here’s the difference between the unfiltered image and the image with my psd!
to save images in photopea (like i did just now) go to file > export as > (your preferred file format)
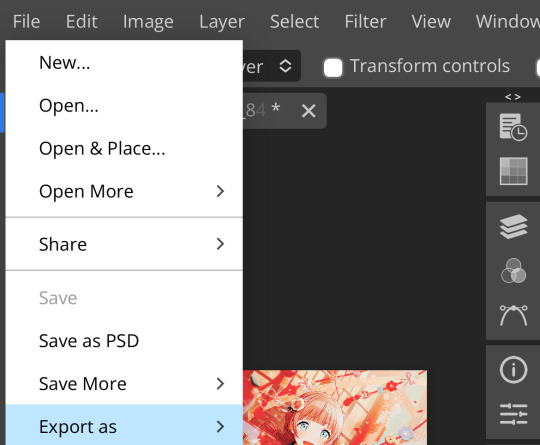
which will pull up something like this
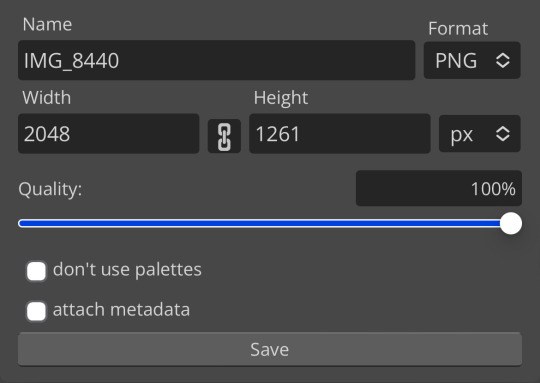
i recommend either saving as a png (for still images) or as a gif (for… gifs) but that’s up to you! in order to save a psd, go to file > save as psd! that will save your project to your device
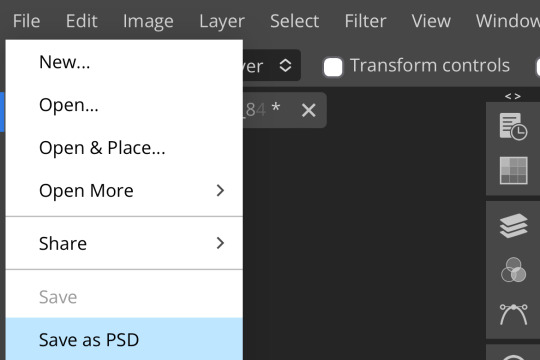
bear in mind that tumblr doesn’t accept psds as a file format, so if you’re going to post an edit, you have to save it as something else. also, don’t just save other people’s psds and claim them as your own—psds take a lot of time, effort, and skill, like any other art form.
can i make my own psds?
100% yes! i can’t give you a step-by-step process unfortunately, as there really is no one way to make psds. i recommend familiarizing yourself with adjustment layer and seeing what works.
shameless self plug again, but you can check out my other posts in this series to find out about some of the adjustment layers!
basically, i like to think of adjustment layers as a few different categories. light/darkness adjustments (ie: brightness/contrast, levels, curves, exposure, black & white, and threshold to a certain extent.) saturation adjustments (vibrance, hue/saturation.) color adjustments (hue/saturation, color balance, photo filter, channel mixer, selective color, gradient map depending on how you use it, and replace color.) and also, miscellaneous (posterize, which gives your images a pop-art crunchy kind of effect, invert, which… inverts your colors, and color lookup, which is a set of filters unto itself)
how you utilize adjustment layers is up to you! i personally like to use a variety and see what happens, my personal favorites being channel mixer, photo filter, and hue/saturation. you can also utilize blending modes (shameless self plug again,) or opacity.
if you have no idea where to start, you can look at other people’s psds to see their process. don’t copy or steal, for obvious reasons, but you can toggle layers on and off and see what happens and what each layer does.
making psds isn’t as intimidating as it sounds, you just have to start a project and start creating! it gets really fun once you get the hang of it (*'▽'*)
i don’t edit with photoshop or photopea, can i still use psds?
short answer: nope!
long answer: if you want use psds but you’re super used to ibis paint or whatever you currently use, have no fear! you don’t have to switch all your editing to photopea. you can make your main project in ibis or whatever as normal, then upload it to photopea and add a psd.
you can also make perfectly fine filters in ibis paint in your own right, with enough tweaking. there’s also apps such as polarr and picsart which come with filters, but i’ve never used them so i’m unable to vouch for how they work.
do i need to use psds when editing?
nope! psds are 100% optional. they’re a style like anything else—some people prefer them and some people don’t. it’s up to you.
did you genuinely write 1178 words answering questions no one asked?
yep.
what if i have a question you didn’t answer?
feel free to shoot me an ask! i don’t mind explaining further, and i promise i don’t bite. as with anything, this is just meant to explain to anyone who needs assistance—photopea for dummies by a dummy, after all. we can be confused together!
are you done now?
i am! congratulations for reading this far!
yours truly, canarysage
85 notes
·
View notes
Note
hey. Anon annoyed about a Stimboard blog denying requests for characters they don’t like.
It’s their blog and their boundaries. Don’t like it? Too bad. They can do what they want on their blog
THEY LITERALLY ARENT THE ONLY PERSON WHO MAKES STARKID BOARDS? Off the top of my head there’s my blog @/vampire-bat-stims AND @/stimboard-radio. If you want a stimboard of a character who’s on one blogs blacklist, go find a blog who is willing to do a board of that character. It’s not that hard
YOU CAN MAKE STIMBOARDS YOURSELF. It’s literally not that hard. Just remember to credit your gifs and we’re golden. There’s tons of stimboard tutorials out there if you don’t know where to start. It’s fun too! Don’t be mean about people’s boundaries when they refuse to make a stimboard for you. You can make your own
~~~
14 notes
·
View notes
Photo

Masterpost
here is where you can find all the posts/tutorials/etc we’ve done in the past! please check here before sending in an ask!
tutorials:
how to make shaped icons
how to make reply icons (+ tips)
how to make userboxes
how to make a transparent/render
how to make dividers
how to make dni banners
how to make coloured manga edits
how to make blinkies
how to make stimboards (+ where to find stims)
tips:
tips on layouts/headers
tips on keeping up motivation
tips on making interesting icons
tips on keeping up motivation when you aren’t getting requests
tips on preventing burnout
tips on making stimboards
tips on edits not turning out the way you want them to (and preventing burnout)
tips on how to get more requests
tips on reply icons
tips on making wallpapers/lockscreens
event ideas
questions:
what websites/apps are best for making moodboards?
what fandoms we are okay with making transparents for?
what apps can be used to change the colours of gifs?
do i have to show example of my edits when i ask for tips?
transparents:
requests:
pompompurin (sanrio) transparents
bug wire (wireland) transparents
misao (misao) transparents
es (alter ego) transparents
saiki kusuo (saiki k) transparents
douma (demon slayer) transparents
kalim (twisted wonderland) transparents
non-request:
tighnari (genshin) transparents
layla (genshin) transparents
genshin birthday transparents 1 2 3 4 5 6 7 8 9 10 11
448 notes
·
View notes
Text
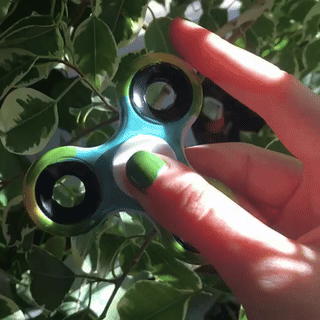
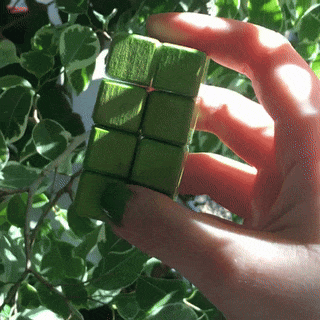
stimming in the sunlight by the plants🪴
the spinner has been painted with nail polish and the diy infinity cube is made based on this really cool tutorial!
ok to use in stimboards with credit
13 notes
·
View notes
Note
Hi! I was wondering how you make your gifs? I'm thinking abt trying to make some for funsies but idk where to even start
(Also, where do u get the videos for the gifs from? I know a lot come from Instagram but idk if I'm willing to make an account to make some stim gifs ajfjsjfjsjgjdjfj)
Okay so.
Firstly I won't link the sites because they change urls and get shut down a fair bit then replaced with dodgy websites. But type in '[website] video downloader' and you'll get a lot of results.
When you have your video you put in the URL in the download search video and download it.
-
When you have the video... Ezgif is the website to use. It's a bit complex to use but it's easier and free compared to a lot of others. You just choose the video then the duration of the GIF (I'd recommend 5-10 seconds but usually stick to under 8 depending on the frame rate) and then crop it and delete frames if you need to.
Sorry this isn't a whole tutorial, I will make one one day rn I am not making gifs but if you need help with anything specific lmk.
-
As for videos... I usually take stimboard requests and get people to be as specific as possible, then (because a lot of gifs have been used 500+ times /not neg) I look nor new videos. Tiktok is easiest to find videos on and you literally can type in 'pink slime' and find it. Instagram is harder to find specific stuff on so uh. Good luck, although the recommended tab gets more relevant the more you save so.
7 notes
·
View notes
Note
yo! Aspiring stimboard maker here and I just wanted to ask- how does one make sure that all the gifs in a board wind up where they need to be? Because to achieve the grid affect I have to upload all 9 gifs at once- how do you make sure stuff goes where it needs to (character art in the middle, etc)?
i'm not too good with explaining things without visuals, so here's a small tutorial, using my most recent board as example!
[i'm really only experienced with computer, so that's what this is based on-- if you need help making stimboards on mobile, i do know people who know how!]
i start out all my boards with the character art [which i edit in a background for myself]
then i go to find gifs-- but it's down here, since that's where i pasted it!
hovering over the image i can see these four dots. clicking and holding this button lets me drag the gif all over the post, above text and around other images!

the blue line there shows you where the gif is going to be placed
and ta-da! it's right where i want it, with little hassle
repeat this process a few times, dragging the gifs in the order you want around the main character image, and you have a stimboard!
hope that's helpful ^^ there's certainly other ways to do this, but that's the way i make em
8 notes
·
View notes
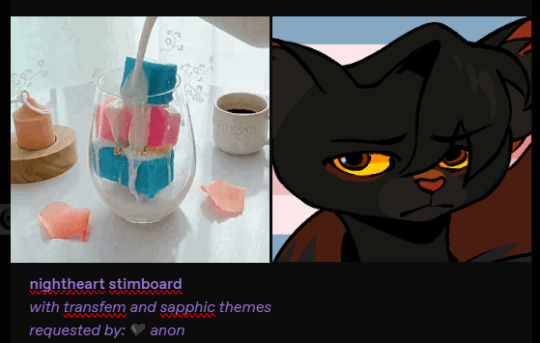
Note
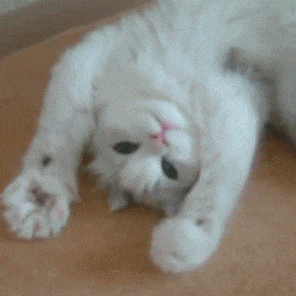
How do you make your stimboards? I've always been curious about the process
Hello ! I've never done a tutorial before, but I hope this one is helpful to you, Anon !
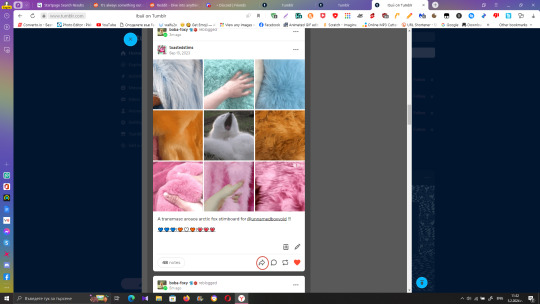
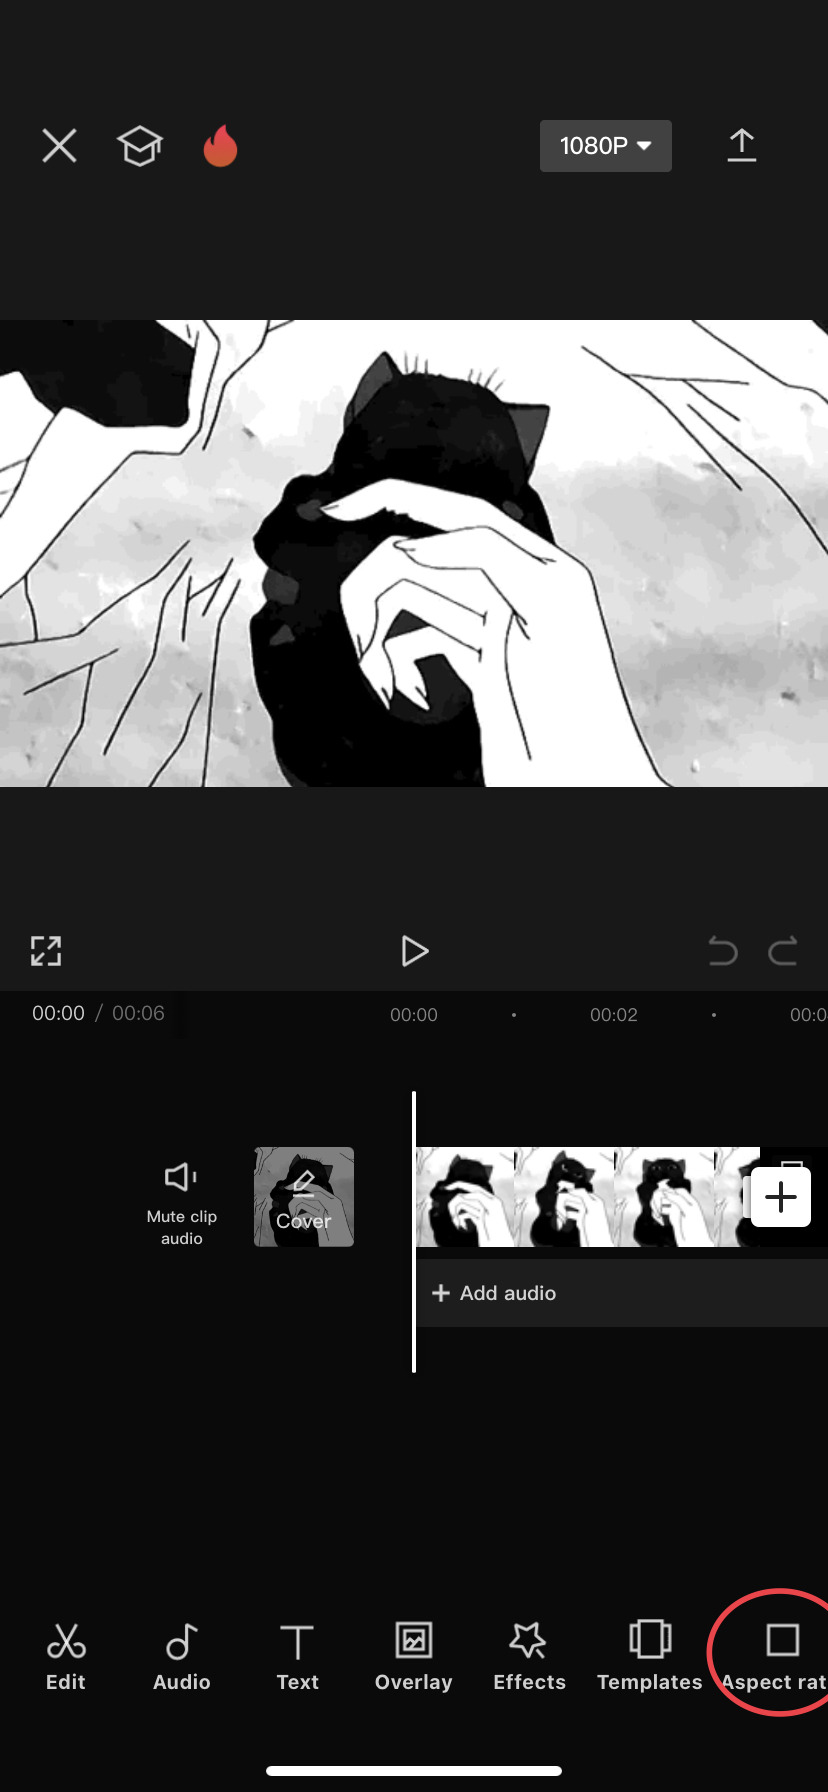
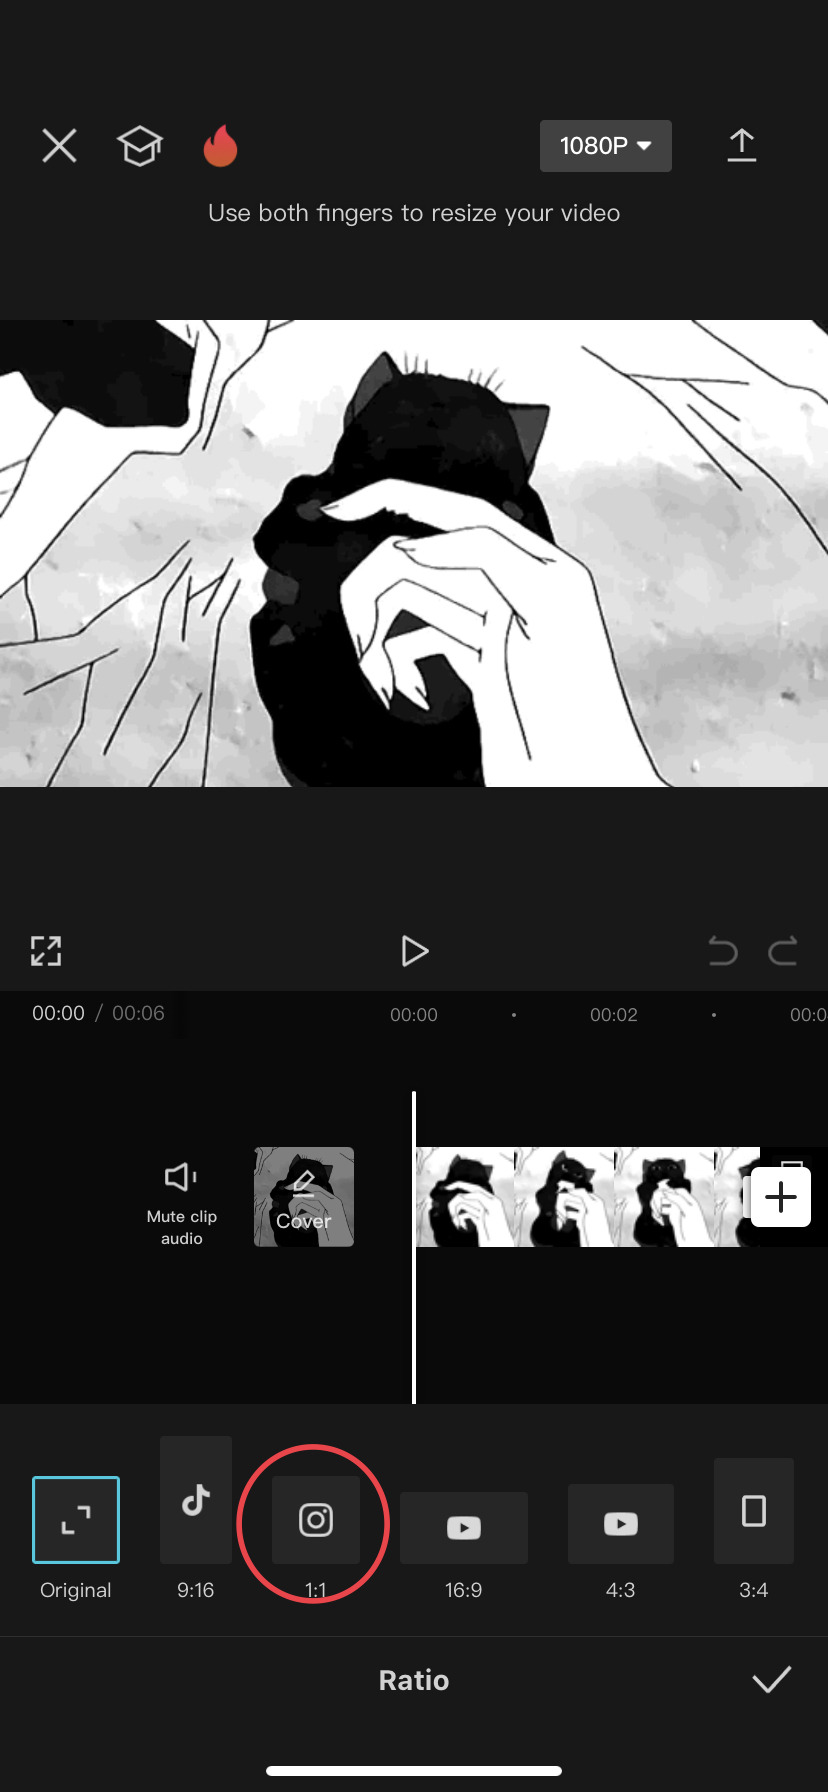
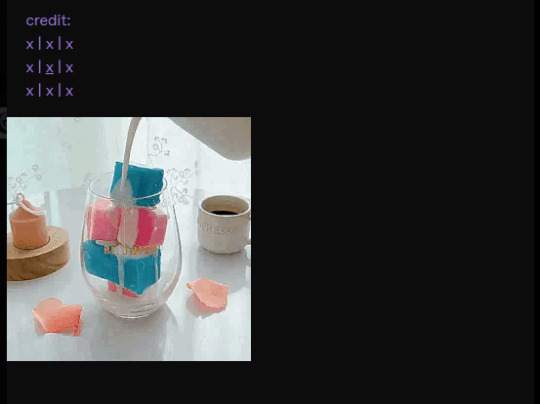
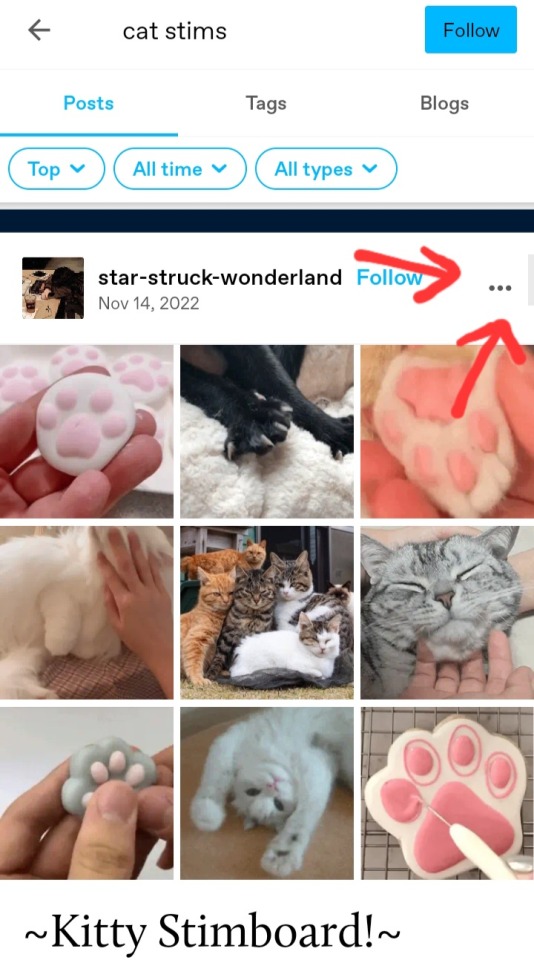
First we need to pick a theme for the gifs. Let's say cats ! Go to your Tumblr search bar and type in either "cat stim" or "cat stimboard" Now scroll and find a gif you like !
I quite like this kitty here with the happy paws !
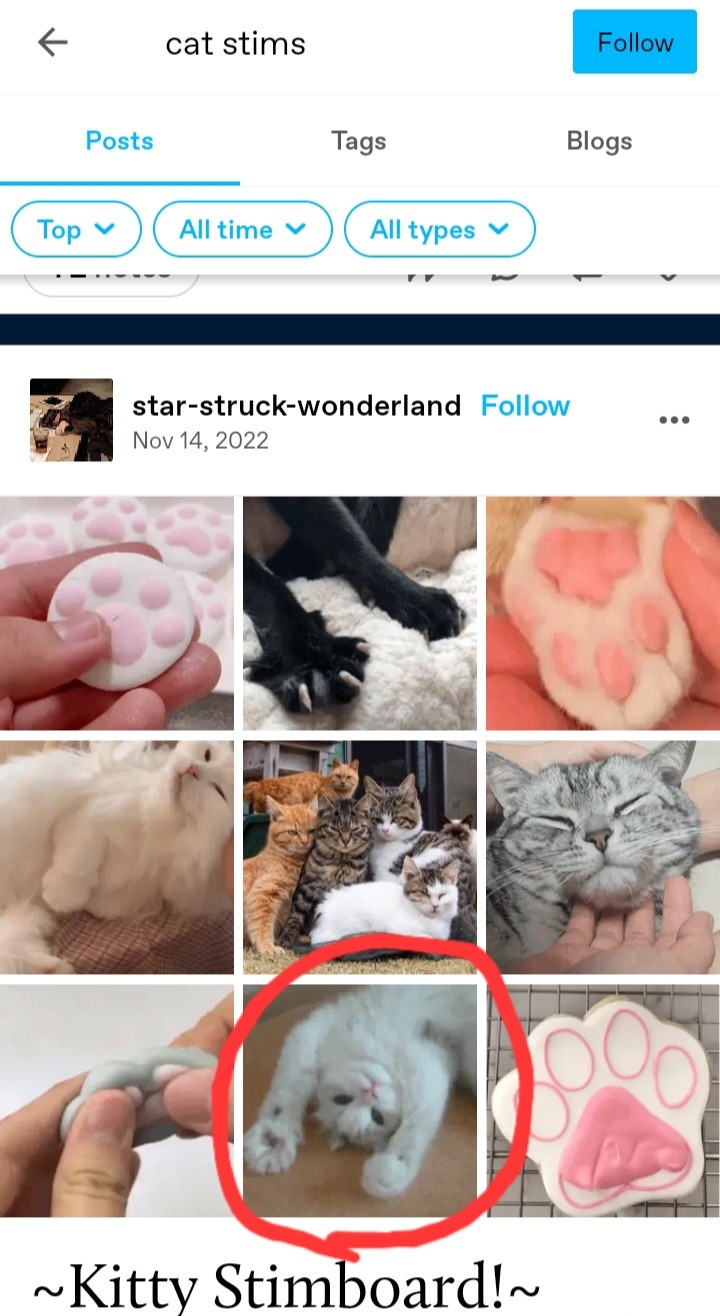
So I'm going to click and hold that gif until it gives me an option to download it. Click that !
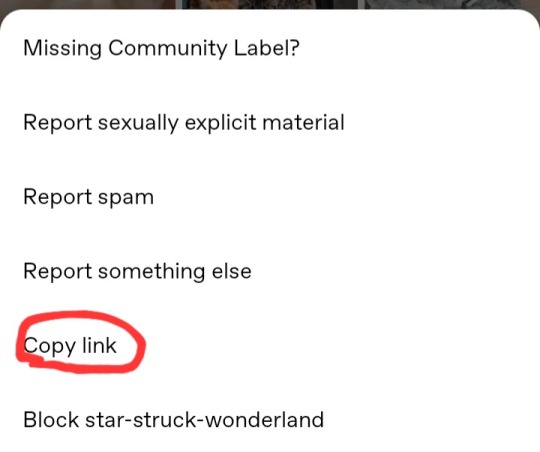
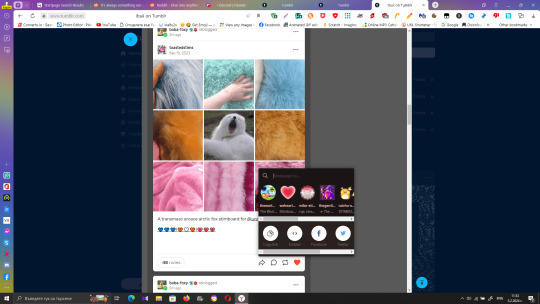
Next, click the three dots in the corner of the post, then click the "copy link" option and save it to your clipboard !
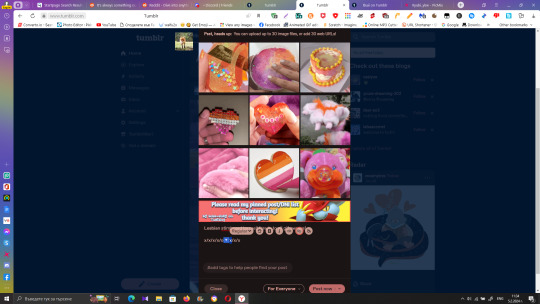
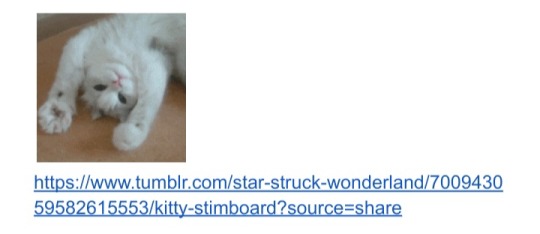
Next open up your notes app or a Google doc (or anywhere else you can insert a link/image) and paste the link in there ! (I also add the image on top of the link so I know they go together !)
Now stimboards are usually nine gifs, so repeat that process eight more times with other gifs that match your boards theme. (I'll just be doing one here)
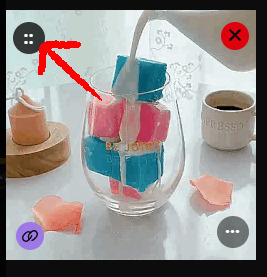
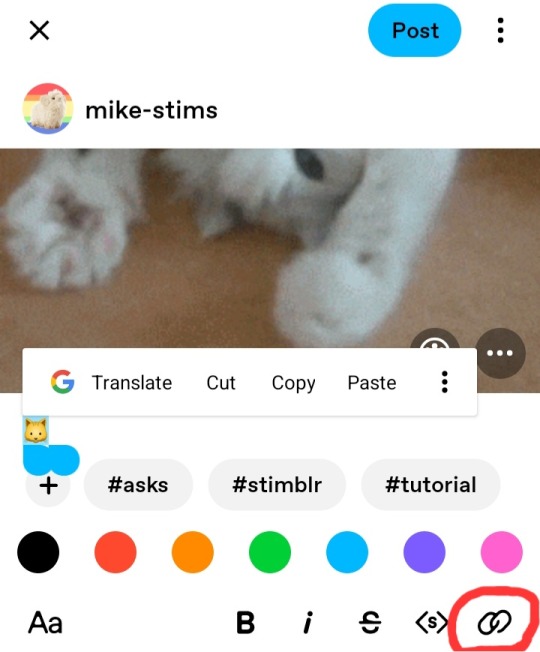
Once you have them all, insert the gifs into a Tumblr post by using the icon that looks like a picture of some mountains with a dot above them.
Once the image is in, you'll need to credit the source you got your image from! You can do this by either using an emoji or just typing an 'x', I'll use this emoji: 🐱 !
Type the emoji and then highlight it, once it's highlighted click the icon that looks like two chain links intertwined !
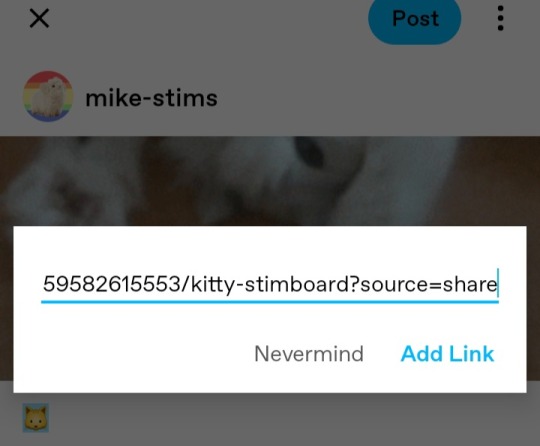
Insert the link that goes with the gif and click "Add Link" !
🐱
And boom ! There you go !
10 notes
·
View notes
Text
Bunny’s Buntravaganza 🐇

✨ For mental health reasons, I’ve decided I need to take a break from requests and focus on my own regression. But that doesn’t mean I don’t wish to see all of your experiences with regressing/dreaming/caregiving! That’s why I’ll be hosting Bunny’s Buntravaganza!
✨ This event is meant to showcase the wonderful creations of regressors, dreamers, caregivers, flips and syskids alike! Whether it be through icons, fanfics, art, stimboards, moodboards or flags, all forms of media are welcome! The focus is on illustrating how you regress/dream/care in your own unique way.
✨ Bunny’s Buntravaganza begins as soon as this is posted! The event does not have a definitive end date, I will announce when I sense it’s a reasonable time to conclude. If you wish to participate, please tag me in your post and I’ll reblog your creations! Take all the time you need, be self indulgent as possible and have an absolute blast stringing together your works of art!
✨ Here are a few prompts for inspiration:
Comfort characters
Plushies
Platonic caregivers/Sibling caregivers
Mogai terms
Based on your identity (i.e. agere aroace, gay caregiver)
Personal headcanons
Self ships
Animals
Video games
Books/Comic books
✨ Say you aren’t certain how to design icons, flags, stimboards or moodboards, here are a couple tutorials! x x x x x
✨ If you have any questions, please don’t be afraid to send an ask in my inbox or dm me! Again, please tag me in your posts if you wish for your creation to be shared! Please enjoy yourself to your heart’s content creating whatever you desire and know others are excited to see what you whip up!

#bunny’s buntravaganza#age regression#sfw agere#agere#fandom agere#agere icons#caregiver#petre#pet regression#fandom petre#fandom agedre#age dreamer#agedre#fandom petdre#pet dreamer#petdre#agere flips
119 notes
·
View notes
Last Seen Blogs

s-a-g-i
Diy diy diy!!!
hock145
Untitled
contentloadingandstuff
irregular posting page
captain-artblog
Procrastinating Art-Blog
bunnyheritageposts
Renowned Rabbit Content