#specifically in the lens of like. food and body image and weight
Text
sometimes i just wish so badly that my mom didn’t raise me bc i think if she didn’t then i wouldn’t hate myself as much as i do now
#in neg city#specifically in the lens of like. food and body image and weight#my mom can continue to say she’s only ever wanted me to be healthy but it doesn’t change the awful things she’d say or imply#to convince me to go to the gym w her. i just feel like i’ll never be enough to match her standards#so any iteration of me that remains fat will be bad. even tho i’m always going to be fat bc i was just Born Big#i’m never gonna be rail thin like my sister bc even at my skinniest i was still a broad and wide person#it’s just how i’m built! but i hate it!#and every day i’m alive is another day i just wish i was born someone else#hm. i should maybe go to bed before i start sobbing#can’t wait to bring this up to my therapist tomorrow!
0 notes
Text
Autism and body image issues
*disclaimer, I am not a professional, just an autistic person.
TW talk of body image issues and eating disorders.
For me, as an autistic person, body image has been a very overwhelming struggle in my life. Perhaps my biggest struggle.
Struggling with body image is by no means an ‘autistic struggle only’. I’m certain most people have experienced it in one way or another.
However - I feel like body image is a bit different for me as an autistic person, compared to a neurotypical/allistic person.
Being autistic for me means a few specific things.
My mind to body connection is very weak (Alexithymia). Not only do I feel disconnected from my emotions, but also sometimes my physical feelings of hunger, touch, temperature (hyposensitivity).
I do not recognise nor remember faces very well, including my own (Prosopagnosia).
My idea of gender and sexuality is very vague. Normal gender roles and beauty standards often don’t make much sense to me, but the rest of the social world doesn’t either, so it’s yet another a random set of rules I have tried to blindly follow.
All of these things are fairly common for autistic people to experience.
All of these factors tend to lead me (and I believe other autistics) to have a warped sense of self. I feel as though I look different every time I see my face. I don’t feel connected to my body in any meaningful way. This leaves me with the only way to, I guess, ‘see’ my body, is through the lens of hetero-normative beauty standards...
The only way I can remember what I look like is by remembering what ‘parts’ of me don’t fit the current beauty standard. The only way I feel connected to my body strongly is through rigorous exercise. The only way I could think of to present myself was through a tomboy aesthetic, as it seemed the closest to my personality type.
Of course, this was just another form of masking to hide my queerness and my disability (that I was not exactly fully aware of the existence of either).
To lead into masking more - it wasn’t enough that I was socially awkward. I also looked different AND my body didn’t seem to behave in the same way my classmates did.
One attempt at masking was to try and lose weight and become more ‘attractive’. As a child I was hardly overweight, maybe a bit of ‘puppy fat’. But somehow my mothers nagging, combined with my lacking physical abilities, had convinced me I was really really fat.
(Now, of course there is nothing wrong with being fat, but at the time I felt it was just another reason for people to dislike me)
To try and fit in better (mask), I wanted to become slimmer and more appealing. Not only this however, I also wanted to become less clumsy, less weak, less slow...
This, of course, lead me down a path of over-exercising and disordered eating. I was doing 3 different types of workouts a day, while only eating small amounts of food.
And to be honest, I thought I felt *good*. I didn’t realise that I was dizzy and tired all the time (alexithymia and hyposensitivity). I didn’t realise that I was slowly injuring my hypermobile knees. I didn’t know that I was doing anything wrong or ‘bad’ for me.
Because of my autistic black and white thinking, I found it hard to actually grasp the concept of ‘everything in moderation’. Exercise was good, so exercising a LOT must have been really good, right? Dieting was good, so eating as little as possible was the best course of action, right?
Well, after a few months of this my knees were destroyed (and I’m still sufferring the after effects to this day), my digestive system has been ruined and my ED triggered IBS.
And for all this sufferring, I didn’t fit in any better. I didn’t feel any better. I was slimmer but nothing had changed. I still hated my body, felt out of control and like I didn’t belong anywhere.
After a few years I have learnt self control.
I gained a lot of the weight I lost back. I now walk every day for 30 mins (low intensity) and do some strength training for 15 minutes 3x a week. I try to eat what my hypersensitivity with food will allow me too, while not over-doing it on the safe foods like chocolate and nuggets.
I feel as though my body image, although fluctuating, has basically remained the same.
I still feel as if I don’t belong in this body. It still, after 22 years of living, feels hard to control. It still feels as if I don’t look like myself. I still feel icky about gender and how I want to express it.
However, I do feel better now. I feel more optimistic about life.
When I was young, I spent hours every single day, thinking about losing weight. Fantasising about losing it over summer break and coming back to school looking completely different.
I remember working out to lose weight at as young as 10 years old.
I remember my first thoughts of wanting to lose weight at 6.
I have lived my whole life in a struggle with my body image and it’s likely that I will continue to struggle with it for many years to come.
However, I no longer think about this for hours. I no longer feel horrible about being myself. I just wish I was a bit different.
But anyway, I wanted to share all of this in hopes of connecting with other autistics. Maybe you can find something you relate to in this post.
But for now, take care <3
- salti
#autism#body image#neurodivergence#ASD#actually autistic#LGBTQ+#queer kids#autistic kids#eating disorder#ed recovery#unmasking autism#OC
11 notes
·
View notes
Text
Fic: Puppy On Board (3/?) - Ao3 link
Fandom: Legends of Tomorrow
Pairing: Mick Rory/Leonard Snart (currently gen)
Summary: In which life is Big, and Tough, and Extremely Frustrating - but mostly because Len is currently a goddamn puppy.
————————————————————————————–
On one hand (paw?), Len is pathetically grateful to be back with Mick once more. Just seeing his partner again, when he'd just about lost all hope, is everything he could've wanted and more.
On the other, though, does Mick really need to sleep for so long?
Clearly not.
It's unhealthy, that's what it is.
Len's doing Mick a favor when he sticks his nose into Mick's ear and slobbers on him till he wakes up.
Really.
No matter what Mick might be saying – or, more accurately, cursing.
"You want more to eat, huh?" Mick finally asks, rubbing his face.
Len totally woke Mick up out of concern for his health - but if more food is on the offer, well, you know, he’s not going to refuse...
He's a growing puppy, damnit.
"Food every two hours is apparently normal at your age," Mick said sleepily, heading to the kitchenette corner in his room. "So, I guess it ain't your fault."
Hmph. As if Len would be motivated by something so base as biology.
(Oh, but that milk is good. Hits the spot just right. God, he was so hungry.)
A satisfactory feeding later, Mick puts Len down on the ground and opens the door. "C'mon," he grunts, tossing on a robe - clearly a Legends-imposed requirement, because Mick still sleeps proudly nude as always. "I'd better get you out of here before you decide to piss."
Actually, on that subject, Len's pretty sure he saw - ah, good, there it is.
Mick's still rubbing the sleep out of his eyes, which is probably why it takes him a second to catch up to what Len is doing, and on what.
"Wait, no, puppy, that's Sara's - welp, nevermind, that's a lost cause right there." Mick sighs. "I'll tell Sara she needs to get a new pack before the next mission. And maybe clean this one. She'd better not try to make me clean it, when she shouldn’t have left it hanging around where a puppy in search of revenge could get to it..."
Len gives his best "I'm an innocent puppy, really" grin.
Mick gives him a beady-eyed glare. "Don't think I'm not onto you."
Len's smile fades for a moment, then comes back at twice the strength. Mick's figured it out? Already? Thank God! Maybe they can skip ahead to figuring out a good way for Len to communicate, or maybe even to turning him back into a human so that -
"You're trouble, that's what you are," Mick announces.
...oh.
Len whines and slumps down, a process that involves just giving up on this whole standing business and splaying out on all fours like the weight of the world has come crashing down on his puppy shoulders.
"Hey, I didn't mean that," Mick said, crouching down. "It's okay, you're a good boy deep down - yes, that's right, a good boy -"
Len is not a good boy.
Len isn't even a good puppy.
And he likes it that way, damnit! He's a bad, bad man! He’s a supervillain and proud of it, except that right now he's a goddamn puppy.
Near-newborn puppies are not, despite Len’s best efforts, very intimidating.
"C'mon, back to bed."
Fine. But only for a bit, and then Len's waking Mick up again out of sheer spite!
...and possibly hunger.
"Don't know what your mom was thinking letting you wander off this young," Mick comments.
Len nips at one of his fingers, aiming to get him with one of the few milk teeth that have fully grown in so that it will sting.
Don't talk about my mom like that. Not even you, Mick.
Mick chuckles and pets his head and yawns a bit, heading back to his room, his eyes already heavy.
Len huffs, then frowns, picking up a strange scent.
He cranes his neck as far out as he can, just barely able to see around Mick.
It's the new guy - Nate.
He's not doing anything, just standing there, staring blankly down the hallway. He doesn't move or say hi or anything - Mick clearly missed his presence there entirely, and Len would have, too, if his new sense of smell wasn't so strong.
Len yips a tentative greeting, giving a vague wag of the tail, but there's no response and anyway Mick is taking Len away at speed, so there's no time to investigate.
Weird.
Whatever, Nate's sleepwalking issue isn't Len's business.
A few hours later, the Legends all gather in the med bay, which seems to Len like a weird-ass place to meet given the existing presence of a bridge designed specifically for that purpose, but their intention quickly becomes clear.
"Surely the temporal energy doesn't keep you from doing a scan at all, right, Gideon?" Zari asks.
"I can do a surface scan," she says. "And determine health, albeit superficially. For some reason, my DNA scanners can't seem to make head or tails of him."
Head or tails. Heh. Because he has a tail now.
Len finds that said tail wagging in approval entirely without his consent.
He’s going to really enjoy the dog puns.
"Well, what's your verdict, then?" Sara asks.
"He's a very healthy male puppy, with no serious diseases or other issues that I can determine. Comparing his appearance to other images I have, I would estimate an age somewhere a little over two weeks old, though I'm unsure how much older given the temporal issue."
"What breed is he?" Nate asks, giving his fingers for a lick.
Len is tempted - so many interesting smells! - but he pointedly turns his back on Nate to give Zari's fingers some attention. He's pretty sure Nate was on the pro-castration side of things, even if he didn't speak up, and anyway it makes Zari laugh in delight and Nate mutter under his breath about favoritism and it's not even Amaya...!
So, you know, there.
"He appears to be a mix of breeds," Gideon announces.
"So, a mutt," Sara says. "He fits right in already."
"But what breeds?" Nate asks. "That could impact his behavior and needs and - stuff."
"Stuff," Amaya says, amused.
"Hey, I know something about dogs. Not much, I admit, but..."
"I believe there is a significant proportion of husky," Gideon says. "Thereby accounting for the coloration, general form, and blue eyes - though those might be a puppy feature that darken as he gets older."
"Those ears aren't even slightly husky," Amaya objects.
"That's correct - some sort of spaniel, I would estimate, given the size of his ears and - ah - their proportion to his body -"
Len'll grow into them.
"He'll grow into 'em," Mick says.
Len loves Mick. Wise man.
"Hold up," Sara says, eyeing the ears. "How big is he going to get? We don't have enough space for a full-on herding dog here -"
"Huskies are working dogs, not herding dogs, I think," Ray says helpfully from where he's lurking by the door. "And Mick can take him on walks around the ship, or outside once we land."
"If we take him outside, he'll get lost," Zari objects, reaching out to rub Len under the chin.
"He can barely walk or regulate his own temperature right now," Mick grunts. "Doesn't exactly seem like an urgent issue."
"Barely walking or not, he still made his way onto the Waverider," Sara reminds him.
"Should we chip him?" Nate asks.
Len sniffs. Nate's the one who ought to be chipped, what with that sleepwalking habit.
"Not at this age," Amaya says firmly.
"Perhaps a small collar could be fashioned," Gideon suggests. "And the tracking chip placed under the nameplate."
Len sighs noisily. It's not like he hadn't been expecting to be collared eventually, given his shape.
Luckily he didn't have any bad associations with collaring, unless you count a certain period of never-to-be-spoken-of-again bad fashion choices back in the 90s...
The Legends, however, met Gideon's announcement with an almost stunned silence.
"Oh, man," Nate says, breaking it after a moment, "his name. Mick, have you named him yet, or can we help?"
"Well..." Mick said cautiously.
"No, no, please, let us help!"
"I still get veto power," Mick warns.
What about Len? Len should get veto power.
Personally, he's quite fond of "Boss" as an acceptable dog-like name -
"How about Spot?"
For shame, Nate. He doesn't even have spots! Coloration markings, yes, but not spots.
"No, no, Nate, not Spot," Ray says. "He doesn't have spots."
At least Mr. Castration-Is-Good-For-Dogs has some decent opinions.
"He's more black-and-white," Ray continues. "How about Oreo? Or Newsie, short for newspaper?"
Ugh. Positive statement retracted.
"No," Mick says. "Just - no."
"How about Joe?" Amaya suggests. "Or - Carl, maybe? Oh, I know! Rex!"
Len puts his head down and covers his head with his paws, whining pathetically.
"I think even the puppy thinks that's a no go," Sara says, snickering. "Sorry, Amaya."
"It's okay," Amaya says. "He's cute enough; I'll forgive him anything."
Len's traitorous tail gives a wag at that.
"How about something more thematic?" Zari suggests.
"Thematic?" Mick asks, sounding skeptical.
Len's not sure why; he loves things with a theme. If he has to be Heatwave's dog, then he might as well get named something appropriate. Flame or Explosion or Heatpup something -
No.
Hot Dog.
He can just see it now in a newscaster voice: “Here comes Heatwave, famed supervillain, and his trusted sidekick, Hot Dog…!”
Len sniggers, though it mostly comes off as a dry sort of huffing.
...he'd better stop that before they decide to name after Muttley or something.
(He’s far more of a Dick Dasterdly!)
“I’ve got an idea,” Zari says.
"Oh?" Sara asks. “What were you thinking?”
"Well, Mick is going to be the primary owner, right?" Zari says with a shrug. "We could match the dog to the owner."
C'mon, make the Hot Dog joke! Do it! It's right there!
"Something heat related, you mean?" Sara asks. "To match 'Heatwave'?"
"No, that's too obvious," Zari says. "I was thinking more of a contrast - Snowflake, or Snowy -"
"Oooh, Frosty!" Nate exclaims. “Cold Miser!”
"Or you could do the exact opposite of Mick's," Amaya says, "and call him 'Coldwave' -"
"No," Mick says flatly. "Nothing with Cold."
Len had been pretty much in favor of the names, no matter how dumb - he loves a good cold pun - but Mick's voice...
He's in pain.
Len whines, pulling his head out from under his paws and trying to go to Mick at once. It's his fault Mick is in such pain, his fault, he was the one who abandoned his partner like that and therefore only he can make it right. He might not be able to fix it, he's too small to do that, but he'll go and snuggle him and lick him and nip at his fingers till he feels better -
On his hurried way over to Mick, though, Len trips.
Over his own goddamn ear.
"- sensitive subject," Sara is murmuring when Len goes flying, and then she's not murmuring, she's laughing.
Everyone is laughing.
Even Mick, which is Len's sole consolation. Maybe it wasn't exactly how he was thinking of cheering Mick up, but whatever, it worked.
"Maybe we should call him Floppy," Ray says. "After his big old floppy ears -"
Len rights himself and growls at Ray.
"Awww," Sara coos. "Lil puppy don't like that."
"You named your last pet after a musician, right?" Nate asks. "Guns and Roses? What about something else like that?"
"Oh, I know!" Ray exclaims.
Oh, God, no.
"You could name him Tevye! After Fiddler on the Roof! That's your favorite musical, right?"
...okay, that one's not too bad. At least it respects Len's Judaism.
(Does Len have to be circumcised again now that he’s been reborn? He really hopes not. That was one experience he was very happy to not be aware during.)
"Maybe Fiddler would be easier?" Zari suggests. "Or Fiddlesticks? I like Fiddlesticks."
"I already know what I'm gonna call him," Mick says. "I thought of it last night."
They all look at him, even Len.
He's still hoping for 'Boss'.
"That puppy's name is Trouble."
...yeah, that's fair.
----------------------------------------------------------------------------------------------
A/N: I wish to give full credit to everyone's wonderful suggestions in the comments to chapter 2, all of which were great and very fitting, and also extremely helpful for writing this chapter :) hopefully work will go quiet again and I'll be able to write more of this soon!
23 notes
·
View notes
Text
Kelly Ripa posts before-and-after family vacation photos that will stun you
New Post has been published on https://newsprofixpro.com/tekamedia/2019/06/28/kelly-ripa-posts-before-and-after-family-vacation-photos-that-will-stun-you/
Kelly Ripa posts before-and-after family vacation photos that will stun you

Kelly Ripa is currently on vacation with her husband, Mark Consuelos, and their three kids: Michael, 22, Lola, 18, and Joaquin, 16.
The daytime talk show host, 48, couldn’t resist but show off how much they have changed over the last decades while their dad …
Read More
Buy Now


Price: $238.00
Item specifics
Condition: Used :
An item that has been used previously. The item may have some signs of cosmetic wear, but is fully operational and functions as intended. This item may be a floor model or store return that has been used. See the seller’s listing for full details and description of any imperfections. See all condition definitions– opens in a new window or tab
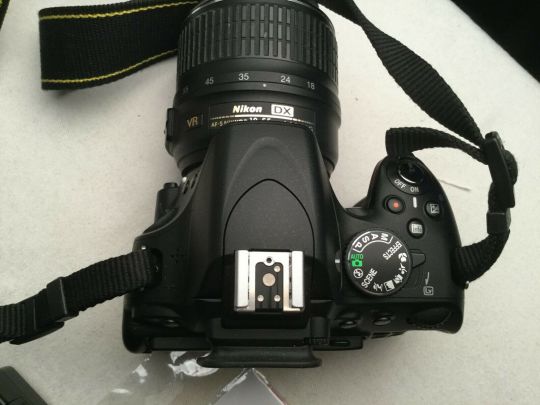
Seller Notes: “Shutter count is only 8100. Camera is in good condition with light wear on the body. free Nikon book, UV filter and cleaning supplies”
Weight: 19.7o.Z Custom Bundle: No Color:
Black
Type: Digital SLR Dimensions: 5Wx3.8 Hx1.7 D Inch Connectivity: USB Series: Nikon D Megapixels: 16.2MP Manufacturer Color: Black MPN:
25476
Brand:
Nikon
Battery Type: Lithium-Ion UPC:
0018208254767
About this product
Product Information The Nikon D5100 is a versatile piece of photographic equipment that produces remarkable image quality. It’s easy to use if you’re just starting out with photography, and it’s also a piece of gear that will continue to meet your needs as your skills become more advanced.The D5100 comes with a mode dial located on top of the camera. The dial lets you choose between several modes, including auto modes, priority modes, special effects modes, and scene modes. Some of the exciting options featured on these cameras are Night Vision, which takes detailed photos even when a setting is too dark to see with your own eyes, and Selective Color that hones in on and enhances specific colors. Color Sketch creates outlines of the people and objects in your photo for a cool effect. There are also Miniature and Selective Silhouette effects. The Auto ISO feature captures light over a wide range that varies from 100 to 25,600. Scene modes automatically adjust the camera’s settings to optimize your images depending on your subject. Choose among sports, close-up, and pet or child portrait modes. The candlelight scene setting is superb at capturing the candles on a birthday cake. There are additional custom auto settings for photographing food or autumn foliage. You can also take high dynamic range photographs with D5100 digital cameras. You can also put this Nikon into manual mode to set variables like light sensitivity, aperture, and shutter speed yourself. Using the Retouch menu, you can touch up your photos while they are still in the camera. This camera features a vari-angle LCD monitor that allows you to adjust the angle of the viewing screen to capture your subjects from practically any angle. Shooting overhead shots, low-angle shots, candid portraits, and even selfies is easy with a versatile monitor that can be angled, rotated, and folded.The D5100 uses a 16.2 megapixel CMOS chip sensor. This allows this DSLR to capture full-resolution stills at a speed of four frames per second. The CMOS chip also facilitates the capture of high-definition video. This Nikon uses high-frequency vibrations to keep the image sensor clean. You’ll never have to worry about dust specks ruining your photo when you use this camera. A powerful processing engine that uses EXPEED 2 technology backs the digital image sensor. The Nikon D5100 measures 5 inches by 3.1 inches by 3.8 inches and weighs 1.2 pounds. There are several shutter release modes to choose from. Quiet Shutter Release mode keeps camera sound to a minimum so you can photograph in quiet surroundings. This Nikon also features an Exposure Compensation setting that you access by pressing a button right next to the shutter release. The unit comes with a rechargeable lithium battery, neck strap, and a built-in flash.This Nikon camera body works with removable lenses, giving you a high level of control and flexibility over your SLR images. You can change your Nikon lens quickly and easily using the convenient lens alignment markers on the camera body. The D5100 allows you to have complete creative control over your images. Take great photos you’ll be proud to show off with the Nikon D5100 camera. Product Identifiers Brand Nikon MPN 25476 UPC 0018208254767, 0610563300877, 0610563300884 Model D5100 eBay Product ID (ePID) 101862773 Product Key Features Color Black Dimensions 5Wx3.8 Hx1.7 D Inch Series Nikon D Manufacturer Color Black Battery Type Lithium-Ion Custom Bundle No Type Digital SLR Connectivity USB Megapixels 16.2MP Dimensions Weight 19.7o.Z Width 5in. Height 3.8in. Depth 1.7in. Additional Product Features Light Sensitivity MAX 6400 Viewfinder Magnification 0.78x Approx. MAX Video Resolution 1920×1080 Features Af Tracking, Self Timer Red-Eye Reduction Yes Light Sensitivity 100-6400 Exposure Metering 3d Color Matrix II Exposure Modes Manual, Shutter-Priority, Automatic, Program, Aperture-Priority MAX Shutter SPEED 30 Sec Digital Video Format HD (High Definition), H.264, MOV, MPEG-4 Lens for Sd Body only Additional Features Af Tracking, Self Timer White Balance Manual, Fluorescent (Preset), Auto, Flash (Preset), Shade (Preset), Incandescent (Preset), Cloudy (Preset) Special Effects Color Sketch Supported Flash Memory SDXC Memory Card, SDHC Memory Card, SD Memory Card Flash Type Built-In Auto Focus Type TTL Phase Detection Exterior Color Black Viewfinder Type Eye Level Pentamirror Single Lens Reflex Battery Description EN-El14 Rechargeable Li-ion Battery Continuous Shooting SPEED 4fps Still Image Format Dpof, Exif 2.3, JPEG, Dcf 2.0 Sensor Resolution 16.2MP Operating System Supported Microsoft Windows 7 Analog Video Format NTSC Camera Type Digital SLR Display Type LCD Screen Size 3in. Sensor Type Cmos Camera Flash Features Slow Sync, Auto Flash, Red-Eye Reduction Viewfinder-Field Coverage 95% Approx. Flash Modes Rear Curtain Sync, Slow Synchro, Red-Eye Reduction Display Size 3in. Connector Types Type C Mini-Pin Hdmi Microphone Type 3.5mm Mic Input Focus Adjustment Automatic, Autofocus & Manual Focus
$238.00
End Date: Saturday Jul-27-2019 18:11:41 PDT
Buy It Now for only: $238.00
Buy It Now | Add to watch list
Buy Now
Price: $9.99
Item specifics
Condition:
New: A brand-new, unused, unopened, undamaged item in its original packaging (where packaging is
Brand:
Unbranded
Compatible Model: Universal MPN:
SZTDF808
Compatible Brand: For Android, For Apple, Universal Color:
Black
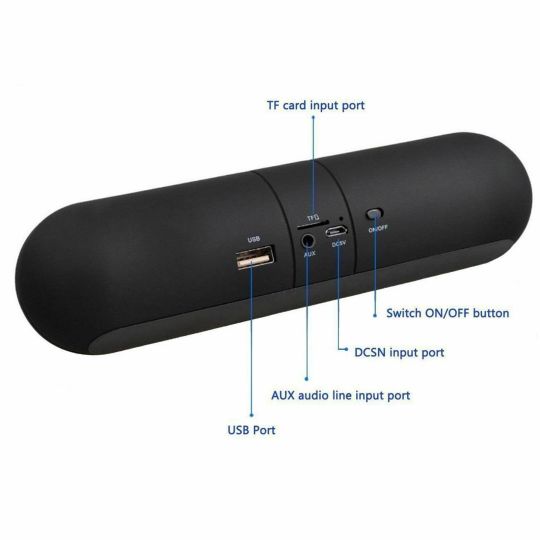
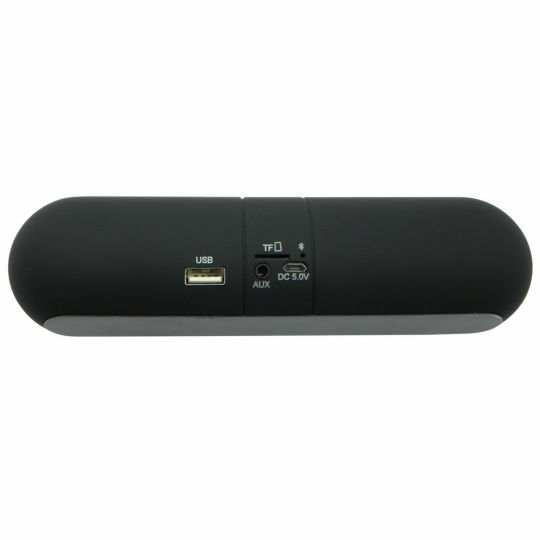
Wireless Technology: Bluetooth Modified Item: No Connectors: 3.5 mm Audio Jack, Aux, Mini USB, USB Custom Bundle: No Features: AM/FM Radio, Bluetooth, Built-In Amplifier, Line-in Jack, Rechargeable Battery, Stereo, Super Bass, USB Charging Port, Volume Control UPC:
Does not apply
About this product
Product Identifiers GTIN 6910088899592 eBay Product ID (ePID) 22022894182 Product Key Features Compatible Model Universal Color Black Features Super Bass, Built-In Amplifier, AM/FM Radio, Rechargeable Battery, USB Charging Port, Volume Control, Stereo, Line-in Jack Connectors Mini USB, USB, 3.5 mm Audio Jack, Aux Compatible Brand For Apple, Universal, For Android Wireless Technology Bluetooth
$9.99
End Date: Friday Jun-28-2019 2:56:44 PDT
Buy It Now for only: $9.99
Buy It Now | Add to watch list
0 notes
Photo

Travel Photography Gear Guide
Travel Photography Gear
I’ve been working as a travel photographer & blogger for 9 years, so I get a lot of questions about what kind of travel photography gear I use. Take a peek inside my camera bag!
Now, when you’re reading through this list, please keep in mind that I’m a working professional. I carry a lot of gear these days. More than I started with.
Most travelers don’t need backup cameras, drones, and multiple lenses.
If you’re just interested in a good portable camera for traveling, make sure to check out my complete guide to the best travel cameras for every budget.
I also share some more budget-friendly gear options at the end of this post. Enjoy!
My Travel Photography Gear (2019)
Shooting in Italy with my Sony A7R III
Sony A7R III – Main Camera Body
I was a Canon fanboy for years and started my backpacking adventures back in 2010 with the Canon 7D. However, when Sony came out with their smaller (and superior) mirrorless A7 line, I made the switch.
Since then I’ve been using Sony cameras & lenses for the past 4 years.
Sony’s camera & sensor technology is often ahead of its competitors these days — in fact, even Nikon uses Sony sensors in their cameras!
The Sony A7R III is built for high-end landscape photography with a massive 42.4-megapixel full-frame sensor. This sensor is HUGE! But the camera body isn’t, which is pretty incredible.
Frankly, this is far too much camera for most travelers though.
If you’d like examples of more budget-friendly options, make sure to read my tips for choosing the perfect travel camera.
My Travel Camera Lenses
Sony 16-35mm F2.8 – Wide Angle Lens
The 16-35mm F2.8 is the lens that’s on my camera 75% of the time. As a landscape photographer, I love shooting wide to capture as much of a big landscape as possible.
But you can also get decent portraits out of it zoomed in to 35mm and stopped down to F2.8. This lens works well for night and star photography too.
There is a less expensive version of this, the Sony 16-35mm F4 which is another decent option too.
Sony 24-70mm F2.8 – Medium Zoom Lens
Occasionally I need a little more reach. Or, I only have space for one lens (like on bigger hiking trips), and want the best of both worlds.
The 24-70mm F2.8 isn’t quite as wide, but often wide enough for most landscapes. With the added ability to zoom in to small subjects far away, or to compress the background making mountains “look” bigger.
This is also my go-to portrait lens for taking photos of people!
Sony FE 70-200mm F4 – Telephoto Zoom
The 70-200mm F4 is my wildlife photography lens. I don’t use it that often, and don’t bring it along on every trip either. If weight is an issue, it’s usually the first to be left behind.
But if I have a particular shot in mind that requires a telephoto, I’ll bring it.
By adding a Sony 2X extension on it, I can up the range to 400mm (which is great for safari photography).
My Backup Camera: Sony A6500
Sony A6500 – Backup Mirrorless Camera
For a long time, I only traveled with one main camera. But as I began working professional photography gigs, I realized that a backup camera was a wise investment.
When you’ve been hired for a photography project that pays 5-figures, the last thing you want is an accident or malfunction to leave you without any useable images for the client!
The Sony A6500 works with all my other Sony lenses, plus I use it as a portable vlogging camera.
It has a cropped (smaller) sensor, but has many of the same functions as my larger A7R III.
I also use it for shooting time-lapses while I’m working on other things, with help from Sony’s internal time-lapse software.
Sony 10-18mm F4 – Wide Vlogging Lens
The 10-18mm F4 is a cropped sensor lens that stays attached to my Sony A6500 body. It’s nice and wide for shooting selfie-style vlogging video, with fast autofocus.
Capture the Action with a GoPro!
GoPro Hero 7 – Action Camera
I’ve been using a GoPro since I started traveling 9 years ago. I’ve owned almost all the models! Currently, I travel with the GoPro Hero 7.
GoPro cameras are great at capturing hands-free action or “b-roll” and you can attach them to almost anything. Plus, they are waterproof and shockproof!
I use my GoPro for surfing, mountain biking, hiking, snowboarding, snorkeling, scuba diving, cliff jumping, interior and exterior moving-vehicle footage, and more.
GoPro Camera Accessories
Just owning a GoPro is not enough to get great images and video. The magic of these cameras is in the multitude of accessories that are available for them!
Handheld sticks, suction cups, clamps, head straps, mouth mounts — so many unique ways to attach a GoPro to something and get amazing footage.
Check out my complete guide to the best GoPro accessories for travel.
Traveling with a Drone
DJI Mavic 2 Pro – Flying Drone
The perfect tool for capturing aerial photography and video, while costing much less than renting a helicopter! Drones have really come a long way.
I couldn’t be happier with the new DJI Mavic 2 Pro (read my full review here).
It flies super fast, is extremely reliable, and shoots some very high-quality photos and video. Not to mention it folds up to fit in my carry-on bag!
The 360-degree sensors help stop you from running into things while flying, so you can concentrate on the shot. Active track and intelligent flight modes can do a lot of the work for you.
Remote Controller Sun Shade
I don’t own a bunch of accessories for my drone, but one important one is the DJI Mavic Sunshade. This allows me to see what I’m shooting on my iPhone screen, even in bright sunlight.
DJI Car Charger
Another drone accessory I bring with me on road trips is the car-charging adapter for DJI Mavic batteries. This ensures I always have a fresh battery ready to fly during epic travel photography road trips!
Peek Inside My Camera Backpack!
My Camera Bags
LowePro Whistler 350 – Camera Backpack
It took me a while to find a great camera backpack that I really loved, and I went through many different ones.
I finally found a winner in the LowePro Whistler 350. It holds everything I need it to, sits comfortably on my back, and has the perfect amount of weatherproofing and gear straps to tackle my typical outdoor adventures.
You can strap on a tripod, snowboard, hiking poles, ice-ax — anything really. While it comes with a rain cover, you really don’t need it because the bag itself is so water-resistant anyway.
There’s a dedicated laptop pocket, room for a jacket and snacks, plus it opens from the back for easy access on the ground. When the bag is fully loaded, it weighs about 24 lbs (11kg).
LowePro TopLoader Pro – Small Camera Bag
This is a smaller top-loading shoulder bag that’s large enough for a single full-size camera with a zoom lens.
You can also cram a 2nd lens into the side pocket if needed (or a GoPro, etc.).
I use this bag specifically for long-distance trekking adventures, where I need to carry a regular hiking backpack filled with food, clothing, and camping gear.
This little camera bag attaches up front to the backpack straps on my chest, for easy access to my camera and a balanced load for hiking long distances.
I use this setup when I need to travel light with a minimum amount of camera gear in the backcountry.
Lightweight Travel Tripods
My Camera Tripods
RRS TQC-14 – Full-Size Tripod
As a landscape photographer, a solid yet lightweight travel tripod is a key piece of my photography equipment.
I use my RRS TQC-14 to stabilize the camera in low light situations and with high f-stop settings (for maximum focus range). It allows me to get shots I just can’t achieve hand-held.
Sunsets, sunrises, the northern lights, star photography, and motion blurred waterfalls are just some of the situations where having a tripod is important.
I also use it to film myself for vlogs, as well as to shoot travel selfies when I’m hiking on my own. There are cheaper tripods out there though too, which I share in my guide to the best travel tripods.
Joby Gorillapod – Mini-Tripod
If I need to travel super light, for example on a long-distance camping & trekking adventure that will last multiple days, then I sometimes pack the Joby Gorillapod 5K instead of my full-size tripod.
At only 1.55 lbs, this thing is tiny. But the bendy legs allow you to attach it to objects for a higher perspective too. It’s strong enough to hold my large camera and works great as a “selfie stick” for shooting video too.
L-Bracket
This piece of metal attaches to the bottom of my large camera and allows for very quick changes from a landscape angle to portrait mode (long photos to tall photos) on my tripod.
In today’s Instagram world, where the 8×10 ratio is important, I try to shoot images of key locations in both landscape and portrait perspectives. I use the landscape style in my blog posts, and portrait style for social media (because they display better on smartphones).
Some of my Camera Accessories
Important Travel Camera Accessories
Peak Design Capture – Camera Clip
I love this thing so much! Basically, the Peak Design Capture Clip allows you to “clip” your camera onto your belt, or on the shoulder straps of a backpack, for easy access (and to keep your hands free).
I use it constantly for day hiking, walking around cities, and basically, anywhere I know I’ll want quick access to my camera. While I still use a camera strap sometimes, this is the primary way I carry my camera. You can even run with it!
HINT: If you have a larger camera, the Peak Design Pro Pad makes carrying it on your belt MUCH more comfortable.
Peak Design Leash – Camera Strap
When I’m not using my Peak Design camera clip mentioned above, I snap on this Peak Design Leash Camera Strap and sling it around my shoulders it like you’d wear a rifle.
The Peak Design system allows me to quickly remove the strap if it’s getting in the way, or snap it back on. Adjusting the strap length is also super fast. It’s pretty minimal and doesn’t take up much room in a bag.
External Microphones
For video, the internal microphones on cameras just aren’t very good. In fact, they’re pretty terrible. Because audio is SO important for creating a good video, I pack two different external microphones.
One is the Sennheiser MKE 400 Shotgun, which goes on the top of my camera. Great quality, and very small.
The other is the Tascam DR-TL Lavalier. This goes on my body, so I can get great audio even if the camera is far away, the room has a lot of echoes, or if it’s super windy out.
Hotshoe Flash
I own a Sony F43M flash, although I rarely take it with me on trips unless it’s for something very specific. Like maybe cave photography or nightlife.
LED Video Light
This tiny but powerful Aputure ALM9 LED Light mounts to the camera’s hot-shoe and allows me to shoot video at night. It takes up almost no space and can be recharged via USB cable.
Camera Lens Filters
Lens filters help you achieve certain photography effects that just aren’t possible with software yet. Think of them as sunglasses for your camera.
I carry a Hoya Fusion One Polarizing Filter to help reduce glare & reflections on water, glass (like through helicopter windows), and to darken up the blues and clouds in a sky.
I also carry a Tiffen Variable ND Filter (neutral density) which cuts down the amount of light going into the camera to different degrees, depending on how much you spin it. Why? To create special effects like motion blur in a waterfall, even when it’s sunny outside.
Wireless Intervalometer/Remote
One of my favorite pieces of gear is the Pixel TW-283 Wireless Remote & Intervalometer. This allows me to shoot time-lapses, or take photos of myself from up to 100 ft away from the camera.
You can set the timer to take photos all night while you sleep if you want to! They make different versions for different brands of camera.
Memory Cards
Because I shoot in RAW, with very large camera files, I use very fast memory cards. I own a mixture of Sony High-Performance 64GB and ScanDisk Extreme Pro 64GB class 10 cards which read/write at around 300 mb/s.
Spare Batteries
There is nothing worse than running out of battery power during an epic photography moment! That’s why I always carry spare batteries for my cameras.
I pack 3 batteries for my Sony A7R III, 2 for the A6500, 2-3 for the Mavic Pro, and 2 for my GoPro.
Portable Hard Drives
I travel with an Apple Macbook Pro 13″ with a 1TB SDD, which is usually plenty of room for the images & video I shoot on any given trip.
To back that up, I also pack a super small 2TB Scandisk Extreme Portable SSD. Once I get back “home”, I move everything over to a larger desktop RAID system.
Camera Rain Cover
Have you ever shot photos under a waterfall? Your camera will get soaked! While my Sony A7R III has decent weather sealing, in super bad weather, or under waterfalls, I throw on my Peak Design Shell Rain Cover.
Cold Weather Protection
I bought a cold-weather jacket for my camera last year, for a few winter projects I was working on. One camping on the ice in Manitoba, and the other snowmobiling through Russia.
It keeps your camera, batteries, lens, and your hands nice and toasty while shooting outdoors in below-zero temperatures.
Clear Accessory Pouches
I own a few Think Tank Camera Accessory Pouches to keep all my cables, battery chargers, and GoPro Accessories organized. The clear sides allow me to quickly figure out what’s inside.
Camera Maintenance Stuff
Camera Cleaning & Maintenance
Microfiber Lens Cloths
There’s nothing worse than a foggy or smudged camera lens! I pack no less than 3 of these 3M Microfiber Lens Cloths on every trip. Two go in my camera bag, one goes in my pocket for easy access.
I always end up losing them too, so it never hurts to have more than you need laying around.
Air Blower
The problem with changing your lenses on mirrorless cameras is that the mirror is exposed to the elements, and they’re a magnet for dust. Dust on your sensor leaves you with “dust spots” on your photos (or worse, video).
A few quick bursts of air with this Camera Air Blower on your sensor can help clear that dust away.
Sticky Sensor Stick
When the air blower doesn’t work, and the dust on my sensor is too stubborn to blow away, I break out the big guns, my Eyelead Sensor Stick. It’s kind of like a gummy bear on a stick that pulls the dust away.
Budget-Friendly Camera Kit Examples
Yes, I own a lot of camera gear now. But that wasn’t always the case.
When I first started traveling, all I used was a Canon 7D, a wide angle zoom lens, a tripod, and a GoPro.
If you are still new to travel and adventure photography, don’t get discouraged by this giant list of gear-porn that I’ve accumulated over the years!
I do this professionally and make decent money, so I can afford to go a little crazy.
For those of you traveling on a tighter budget, I’ve put together my ideal “starter travel photography kits” below — which won’t cost you an arm and a leg.
The Minimalist Backpacker Kit
Sony RX100 VA – Compact Point & Shoot
Joby Gorillapod 3K – Compact Tripod
Travel Photography Enthusiast Kit
Sony A6500 – Compact Mirrorless
Sony 18-135mm F3.5-5.6 – Travel Zoom Lens
Manfrotto BeFree – Aluminum Travel Tripod
LowePro Slingshot Edge – Mirrorless Camera Bag
Improving Your Travel Photography
Ok! That was a big post. But people kept asking about my gear, so there you go. :)
However please remember that gear isn’t everything.
The best way to improve your travel photography is to practice as much as possible and learn new skills.
Even after 9 years doing this, I’m still constantly learning techniques to get better.
First, if you don’t already edit your photos using software like Adobe Lightroom, I highly recommend you start.
For more quick and cheap ways to improve your travel photography, no matter what gear you use, make sure to read my full article here. ★
Enjoy This Post? Pin It!
READ MORE TRAVEL PHOTOGRAPHY ARTICLES
How To Choose The Best Travel Camera
Ultimate Adventure Travel Gear Guide
Best GoPro Accessories For Travel
DJI Mavic Pro Drone Review
Have any questions about my travel photography gear? What do you pack in your camera bag? Drop me a message in the comments below!
This is a post from The Expert Vagabond adventure blog.
0 notes
Text
The throat (Larynx) cancer, you need to know about

The throat (larynx) cancer what is cancer?
The throat (Larynx), throat is located just below. The larynx is made of cartilage and contains the vocal cords vibrating to produce sound when you speak.
The larynx is called laryngeal cancer or of developing cancer in this area.

The throat (larynx) cancer what are the symptoms?
Signs and symptoms of throat cancer may include the following:
Cough
I couldn't speak clearly like hoarseness or voice changes
Swallowing
Ear pain
Bump or a bruise that does not heal
Throat pain
Weight loss
When should you see a doctor?
If you notice any new signs and symptoms, the persistent, make an appointment with your doctor. Most of the symptoms of cancer of the larynx cancer-specific because it is not possible to research other, more common, causes of your doctor first.
The throat (larynx) cancer what are the causes?
Cancer of the larynx, throat occurs when your cells develop genetic mutations. These mutations uncontrolled growth of the cells and leads to healthy cells continue to live normally after the death of. The accumulated cells can create a tumor in the region of the larynx.
It is not clear what causes the mutations that cause cancer of the larynx. However, your doctor will identify factors that may increase your risk.
The throat (larynx) what are the types of cancer?
The larynx, the larynx is connected with a sound box that is located just below near.
Hypopharynx cancer (cancer laringofaringeal),at the bottom of your throat, the esophagus and the trachea, which is at the top right of the hypopharynx (laringofarenjit) begins.
Cancer of the glottisthe vocal cords, begins.
Cancer Supraglottikear cartilage your windpipe and food start at the top that prevents the escape of cancer that affects the epiglottis, which is the piece of includes.
Subglottic cancerof the throat at the bottom, at the bottom of the vocal cords starts.
The throat (larynx) cancer what are the risk factors?
Factors that increase the risk of throat cancer include the following:
Tobacco use including smoking and chewing tobacco,
Excessive alcohol use,
Human papilloma virus (HPV), also known as a sexually transmitted virus
Fruits and vegetables are not included in the diet
Gastroesophageal reflux disease (Gerd)
The throat (larynx) cancer, against which precautions can be taken?
There is a proven way to prevent the formation of throat cancer. However, to reduce your risk of cancer of the larynx:
You don't quit smoking or start smoking. If you smoke, you should stop. If you do not smoke, don't start. Quitting smoking can be difficult, for this reason, get help. Your doctor, medications, nicotine replacement products, such a strategy and consulting as many can tell you about the benefits and risks of smoking cessation.
For alcohol in moderation, if at all. If you choose to consume alcohol, so don't overdo it. This, in terms of healthy adults, over the age of 65 all men and one drink per day for women of all ages more than two drinks per day for men and 65 years of age and younger.
Choose a healthy diet with lots of fruits and vegetables.The vitamins and antioxidants in fruits and vegetables can reduce your risk of cancer of the larynx. Various colorful fruits and vegetables to eat.
Protect yourself from HPV.Some throat cancer, which is a sexually transmitted infection human papilloma virus (HPV) that is caused by it is believed. Limiting your number of sexual partners and using condoms you can reduce your risk of HPV. In addition, male children, female children and young women consider the HPV vaccine which is available for men and.
The throat (larynx) cancer is diagnosed how?
To diagnose throat cancer, your doctor may recommend the following:
For a closer look at your ears using a Fluoroscopic equipment.An Endoscopy your doctor for a closer look at your ears, during a process called fluoroscopy device, a special light (endoscope) may be of use. A small camera at the tip of the endoscope, the images are watched for signs of abnormality in your lungs, your doctor transfers to the video screen.
Other types of Fluoroscopic equipment (a laryngoscope) through your throat also can be placed. Your Doctor uses a magnifying lens to assist with analysis of your vocal cords. This process “preemptive” is called.
A tissue sample for examination is to be taken.If abnormalities are identified during an Endoscopy or laryngoscopy, your doctor a tissue sample (biopsy) of the inside of the device in order to take surgical instruments and fluoroscopy can spend. This sample is sent to the lab for testing. Your doctor might also be using a technique called fine needle aspiration, swollen lymph nodes, you may want to be taken a sample from.
Imaging tests.X-ray, computed tomography (CT), magnetic resonance imaging (MRI) and Positron Emission Tomography (PET) imaging tests that includes your doctor can help determine the extent of your cancer beyond the surface or your throat throat.
The throat (larynx) cancer spread (stage) is determined how?
Throat cancer has been diagnosed the next step after the cancer has spread (how much of the universe is the determination of. Knowing the stage helps determine your treatment options of the disease.
Expressed in Roman numerals from I to IV stages of cancer. There are specific criteria for each stage of throat cancer subtypes each. In general, stage I cancer of the larynx, throat, refers to a region limited to a smaller tumor. The next stage, stage IV being the most advanced stage, indicates a more aggressive cancer.
The throat (larynx) cancer treatment what are the options?
Your treatment options, The location and stage of cancer of the larynx, the cell type in which it is included, is based on many factors, including your general health and your personal preferences. Talk to your doctor the benefits and risks of each of your options. Together you can determine which treatment would be appropriate for you.
Radiation therapy
Radiation therapy radiation to the cancer cells by giving them to pave the way for X-rays and protons obtained from sources such as high-energy rays uses.
Radiation therapy can be applied with a large machine outside the body (external beam radiation) or radiation therapy cancer into your body (brachytherapy) may be provided with small wires and can be placed near radioactive substances.
The only treatment for early stage laryngeal cancer radiation therapy may be necessary. In the case of a more advanced stage laryngeal cancer, radiation therapy, chemotherapy or surgery can be combined with. At a very advanced stage larynx cancer, radiation therapy can be used to relieve and alleviate the signs and symptoms you more.
Surgery
Types of surgical operations that you can consider for your cancer treatment throat cancer depends on the location and stage. The available options within the following takes place:
Surgery for early stage laryngeal cancer.The surface of the vocal cords or the larynx, which is limited to cancer of the larynx, can be treated with endoscopic surgery. A hollow endoscope or surgical instruments to your ears and then your doctor can place a special laser that promotes from within. Using these surgical instruments, your doctor may be very superficial cancers or scrape or cut in the case of cancer the use of laser can vaporize.
Surgery where a portion or all of the larynx is removed.For smaller tumors, your doctor remove the affected section of the throat portion of throat cancer and leaves behind the maximum possible. Your doctor normal speech, swallowing and breathing can protect your ability.
Tumors spread to a wider area bigger and all may need to be taken for the throat. You then breathe in your lungs windpipe to a hole (stoma) that connects to (tracheostomy). All maranki is taken, you have several options to enable you to talk again. You can work with a speech pathologist to learn how to speak without a throat.
A portion of the neck of the receipt of surgery (laryngectomy).Smaller cancer of the larynx, your throat during surgery may require removal of only small sections. The piece was removed to allow the food to swallow in the normal way can be rebuilt.
Surgery where the cancerous lymph nodes are removed (neck dissection).The deep parts of your neck throat cancer if it spreads to your doctor to see if it contains cancer cells, the lymph nodes may suggest surgery to remove some or all of.
Surgery carries the risk of bleeding and infection. Other possible complications such as difficulty swallowing or speech, you were taken to surgery will depend on you.
Chemotherapy
Chemotherapy, the use of drugs to kill cancer cells. Chemotherapy often is used in conjunction with radiation therapy in the treatment of cancer of the larynx. Makes cancer cells more sensitive to radiotherapy and certain chemotherapy drugs. However, the merging of both treatments enhances the side effects of chemotherapy and radiation therapy. The effects of combined treatments that are likely to experience enough benefits to outweigh the side effects and if we can have talk to your doctor.
Targeted drug therapy
Flaws by taking advantage of specific targeted drugs that stimulates the growth of cancer cells, treat cancer of the larynx.
Cetuximab (Erbitux), in certain cases, approved to treat cancer of the larynx is a goal-oriented treatment. Cetuximab, although there are many healthy cells, cancer cells of the larynx is more common in which a protein stops the effects of certain types of.
Other targeted drugs are being investigated in clinical trials. In conjunction with targeted chemotherapy drugs or radiation therapy may be used.
Post-treatment rehabilitation
The treatment is usually cancer of the larynx in swallowing solid foods that require to work with experts in order to regain the ability to speak eat and it can cause complications. During and after throat cancer treatment, your doctor may require you to seek help on the following issues:
Difficulties in eating
Swallowing difficulties
Stiffness and pain in your neck
Speech problems
Your treatment your doctor will discuss potential side effects and complications.
https://www.orak11.com/index.php/what-is-skin-cancer/
Warning !
It is a proposal and Information article that has been compiled from different sources. There is no definitive diagnosis and treatment. Ask your doctor about any health problems. Remember, the treatment methods applied in health problems may vary according to the biology of individuals, hereditary characteristics, age, height, weight differences, allergic aspects and dozens of such conditions. Only your doctor can help you in the treatment of your health problems.
Read the full article
#canceroflarynxsymptoms#larynxcancer#larynxcancericd10#larynxcancersymptoms#Thethroat(larynx)cancerwhatiscancer?#throatcancer#throatcancercauses#throatcancercure#throatcancerfromhpv#throatcancerhpv#throatcancerlump#throatcancerpictures#throatcancersurvivalrate#throatcancersymptoms#throatcancersymptomsinwomen#throatcancertreatable#throatcancertreatment#throatcancertypes
0 notes
Text
Everything you should know about CBD-infused meals

From California to New York, infused meals have become a mainstay of today's cannabis culture, providing a focal point around which both enthusiasts and canna-curious may gather socially and learn about the plant. While THC-infused meals happen speakeasy style in states that have yet to pass adult use regulations, CBD-infused meals are ubiquitous, writes Danielle Guercio.
Excitement over the Farm Bill has only increased the popularity of CBD, which functions both as an antidote to THC-induced anxiety and as a non-intoxicating baby step into exploring cannabis wellness. CBD-infused dishes are accessible to almost every kind of diner.
From CBD-infused chocolates and sodas to gummies and powders, the skyrocketing demand for the cannabinoid has inspired many chefs to get creative in adapting it to their menus. To learn more about infusing CBD into our food — which, inevitably, means working in the cannabis plant's iconic flavor, thanks to a host of accompanying terpenes (aromatic compounds) — we asked a handful of cannabis entrepreneurs, creatives, and chefs to dish on what it's actually like to cook with CBD.
What’s the deal with dosage?
"Keeping control of your dose is crucial," says Ron Silver, chef/owner of Bubby’s in New York City and founder of Azuca, a CBD-infused line of syrups and edibles. “We look at CBD as medicine, and not something to be thrown around.”
Silver says this is important to remember, and that just because there isn’t a ‘high’ from CBD doesn’t mean it’s not doing something. “As a sort of guideline, 25 milligrams a day is a pretty solid dose," he says. "Not too small, and not too massive.”
But this isn’t the end-all-be-all in the dosing department, especially since we’re all composed differently. Silver calls this “the burning question” in the CBD field, stressing that anecdotal discussions may guide research around the topic. “One close family member of mine who suffers from rheumatoid arthritis found relief in taking a massive dose of CBD, 500 milligrams, and then a 25-milligram dose two times a day, with a day off a week to 'reset' his system," he told Civilized. "This is what he came up with through talking to others with similar issues and comparing notes.”
Not only does every body and its endocannabinoid system process cannabinoids differently, but there are also many different delivery methods for CBD, notes Rachel Burkons, co-founder of Altered Plates. There's also product quality to consider, she adds, as well as other cannabinoids and terpenes that may be present.
Burkons is part of the team that’s opening Chroma Lounge in West Hollywood, which will be among Los Angeles’ first cannabis consumption spaces. Working with cannabis and food, Burkons says she has yet to see an adverse reaction to "too much" CBD. "I think people should be able to move forward without fear," she says.
For those looking to collect data on their cannabis experiences, Goldleaf journals offer a method for everyone (daily consumers, chefs, patients, growers, and so on) to catalogue things like dosage, strain, consumption method, and how they're feeling from it all. "Everyone is different. Our metabolisms, body weights, endocannabinoid systems, and many other factors very much affect the way we handle cannabinoids of any kind," says Charles McElroy, founder of Goldleaf. "Be weary of any ‘universal’ doses.” He advocates for dosing just one item in a mixed-tolerance meal, so consumers of different experience levels can have more agency over how much they consume.
Ingredients and delivery methods
The ingredients used to infuse a dish with CBD can greatly impact how it affects the consumer. Some products are coconut oil-based, which means they're great for garnishing or dressing food, but less so for frying or roasting, as the direct heat could degrade the delicate compounds, leaving less for the body to absorb — and, not to mention, a nasty taste if you’re not careful.
Food hub Epicurious discussed this in a piece about incorporating CBD into meals. "Don't place CBD oil over direct heat," the article cautioned. "While warming the oil may increase its effectiveness, heating the oil too high can cause it to lose terpenes, volatile compounds that work in tandem with the CBD to increase the medical potency. Also, more importantly, it tastes absolutely foul.”
Without being heated or cooked, the contents of a prepared, packaged, product (should presumably) remain unchanged for the duration of the shelf life. One study on the degradation of CBD points out that when you alter cannabinoids with heat or acid, it could change the dosage, and you may no longer be able to tell how much CBD is in something.
Drinkable CBD products, depending on how they're made, may be digested as an edible or sublingual, which may make it a little easier to quantify the CBD than in tinctures and oils. “Beverages are a very good way of serving a controlled dose and being able to keep track ," Silver says.
CBD can penetrate the skin when applied topically, and it passes through the tissues of the mouth, throat, and esophagus when vaped or placed under the tongue in tincture form.
“Sublingual administration refers to holding the drug in the mouth to allow the drug to be absorbed into the well-vascularized mucosa under the tongue," according to an article in Psychology Today about medicating with cannabinoids. "Absorption is fairly rapid and flows directly into the superior vena cava, a large vein that takes the drug first to the heart and then quickly into brain.”
When cannabinoids are eaten, not all of them make it through our system, but there is still a benefit to edible CBD: “If you are determined to eat your drug in a brownie or cookie, the blood levels of CBD, but not THC, are increased when consumed with food or just prior to eating.”
Terps are the word
Present terpenes can change the effects, as well as the taste and sensory experience of a meal. Since terpenes are the building blocks of flavor, as Burkons puts it, they can be played with as you would play with flavors in regular cooking. “I love a nice flavor-match, but I do find that contrasting terpene profiles tends to be the most dynamic," she says. "I find it is helpful to have people think about these flavors through the lens of food: sweet and spicy; citrus and herbal; acid and umami. These flavor combinations are classic across all food categories and definitely work if you're looking to pair a cannabis terpene with a specific flavor profile in a dish.”
These scent and flavor compounds are a fundamental part of the whole plant extract, so using terpene-rich products could give you the entourage effect that our bodies love, using all of cannabis’ minor chemicals to interact with your system, not just CBD on its own.
Terpenes like limonene, found in citrus, and caryophyllene, found in pepper, are among the most commonly added to food — and they’re also found in full spectrum CBD extracts. Sometimes these are added separately, since terpenes can also come from food sources like lemon peels, or a sprig of rosemary’s pungent pinene.
All of the compounds must work together, Burkons says. "Similarly, due to the entourage effect, whole-plant derived terpenes can enhance or alter both the 'high' you'll get when consuming THC—and the efficacy of any medical benefits you're seeking in a CBD product.“
The terpenes can shift the consumer's experience — even with CBD as the primary cannabinoid, says Katie Stem, CEO of Peak Extracts. “I think of terpenes like color s— it really is better to go for complementary or similar," she told Civilized. "We have had the most success with the terpenes that taste more like food or flowers. With our chocolate, the most delicious have been the fruity, piney or spicy varieties.”
But Stem thinks each can have its home. Even the fuel-like diesel notes of some strains can meld with the right food, “They could be very successful with something like grilled or spicy foods, that have bold, savory flavors,” she says.
Stem described how terpenes come into play in Peak’s high-CBD, low-THC products, and being in a legal state, they’re able to manufacture cannabis-derived CBD (as opposed to hemp-derived). “There’s one that’s derived from indica that’s high in myrcene and geranyl acetate that I use in the evening or for relaxation, and the other is sativa derived and higher in things like pinene," she says. "They taste and feel different, even though none of them are intoxicating in the typical sense of the word.”
Right now terpenes are so new to the mainstream consumer that it's unlikely that they’ll be the chief focus of cannabis food for the time being, though some like those behind Prank Bar in Los Angeles are beginning to experiment with these flavors.
"The terpenes are what give THC and CBD nuance," says Stem. "They’re not just flavors, they change the way the cannabinoids interact with your body, right down to the receptors.”
If you want to experiment with CBD and terpenes, seek out full spectrum extracts over isolate, which is just the CBD compound without the other plant constituents. Single strain options are available in adult use states, like what Peak Extracts offers, while the prohibition holdouts will see more hemp products, like Azuca CBD Simple Syrup.
(Rights of the text go to 420intel.com. Image is from shutterstock)
Read the full article
0 notes
Text
Mister Oz
“What a pleasure to have you join us.” - Mister Oz

Real Name: Jor-El
Gender: Male
Eyes: Blue
Hair: White
Race: Kryptonian
Powers:
Kryptonian Physiology
Cosmic Awareness
Kryptonite Vision
Abilities:
Genius Level Intellect
Weaknesses:
Vulnerability to Kryptonite
Vulnerability to Red Solar Rays
Vulnerability to Magic
Vulnerability to Psionics
Universe: Prime Earth
Base of Operations:
Mobile
Krypton
Mars
Marital Status: Widowed (Lara Lor-Van; wife)
Occupation:
Scientist
Explorer
Terrorist
Citizenship: Kryptonian
First Appearance: Action Comics Vol 2 #3 (January, 2012)

Powers
Kryptonian Physiology: Under the effects of a "yellow" sun, The average Kryptonian possesses the potential for the following power set:
Solar Energy Absorption: Under optimal conditions, this is the main source of their super powers as they are contingent upon exposure to solar radiation from a yellow sun star system. Their biological make up includes a number of organs which lack analogues in humans and whose functions are unknown. It is believed that between one or more of these and their bio-cellular matrix, "yellow" solar energy is stored for later use. This allows for the use of these powers to fade when yellow solar radiation is not available instead of immediate failure.
Heat Vision: Kryptonians can, as a conscious act, fire beams of intense heat at a target by looking at it. Typically, the power is seen as two beams of red light emanating from the eyes. These beams can be made invisible, allowing the power to be undetectable. The maximum temperature of their heat vision is said to be around that of a nuclear detonation. They can also consciously determine the area affected, down to the microscopic level.
Super-Hearing: Kryptonian hearing is sensitive enough to hear any sound at any volume or pitch. With skill, practice, and concentration, they can block out ambient sounds to focus on a specific source or frequency. As such, they can identify a person by their heartbeat, or pick out a single voice in an entire city.
Enhanced Vision: Kryptonian vision processes the entire electromagnetic spectrum as well as allowing vast control over selective perception and focus.
Electromagnetic Spectrum Vision: Kryptonians can see well into most of the electromagnetic spectrum. They can see and identify radio and television signals as well as all other broadcast or transmitted frequencies. Using this ability, they can avoid detection by radar or satellite monitoring methods. This also allows them to see the aura generated by living thing.
Telescopic Vision: This is the ability to see something at a great distance, without violating the laws of physics. Though limited, the exact extent of the ability is undetermined. In function, it is similar to the zoom lens on a camera.
X-Ray Vision: This is the ability to see through any volume of matter except lead. Kryptonians can see things behind a solid, opaque object as if it were not there. They can focus this ability to "peel back" layers of an object, allowing hidden image or inner workings to be observed. The exact type of energy perceived - such as x-rays, cosmic rays, or some other energy invisible to normal humans - is unclear. This ability perceives an ambient energy source though, it does not involve the eye projecting a concentrated, possibly toxic, beam to be reflected back from objects.
Microscopic Vision: This is the ability to see extremely small objects and images down to the atomic level.
Infrared Vision: Kryptonians can see with better acuity in darkness, and to a degree in total darkness.
Flight: Kryptonians are able to manipulate graviton particles, in an unknown and apparently unconscious manner, to defy the forces of gravity. Under one Earth gravity, they are capable of speeds of multi-Mach speeds in Earth's atmosphere. Their control of their flight is very precise and they can perform aerobatic feats such as hovering, flying backwards and even lifting great weights while flying.
Invulnerability: The bodies of Kryptonians are nigh-invulnerable to extreme energy forces. In addition, their immune systems protects them from toxins and diseases. The most common explanations for this rely on the presences of a super-dense molecular structure, a supercharged bio-electric aura which acts as an invisible force field, or a combination of the two. With the aura, it is presumed to extend a few millimeters from the skin as well as within the body. A byproduct of the aura is that items close to the skin share their invulnerability. Using clothing as an example, loose fitting fabric would tend to shred or burn in adverse conditions, but skin tight outfits would not.
Superhuman Stamina: Kryptonians have the ability to maintain continuous strenuous physical action for an indefinite period of time. In theory they have unlimited stamina as their enhanced nourishment is produced from the yellow solar energy their cells process, which also provides the majority of the power for their superhuman abilities. However, their base physical structures do need to process food stuffs and they have a psychological need to eat and drink just as Earth humans do. They also require sleep on occasion so that they can dream. They can also hold their breath for an indefinite period of time.
Superhuman Strength: A Kryptonian develops enhanced physical strength after absorbing a sufficient amount of yellow solar radiation. This radiation interacts with the greater than human density, resilience and biological efficiency of their musculature to trigger superhuman levels. While the exact magnitude of their strength is unknown, it is generally accepted that it is sufficient to lift 100,000 tons or more. The specific range is unknown as a their strength, like their other powers, may fluctuate over time. Their strength is also more an act of conscious will on energy fields than actual physical strength. It is this act of conscious will that enables them to perform physical feats that are beyond the mere application force, such as moving a mountain top without said rock crumbling under its own mass. At full power, their normal strength levels are well into the multi-megaton range.
Superhuman Speed: Kryptonians are able to move at incredible speeds by sheer force of will. They can match most other speedsters in super-fast movements, reactions, and processes. They can use this power to disarm opponents without heightened reflexes, catch bullets or shrapnel or cross vast distances in seconds.
Superhuman Agility
Superhuman Reflexes
Super-Breath: Kryptonians are able to create hurricane force winds by exhaling air from their lungs. They can chill the air as it leaves their lungs to freeze targets in a variation sometimes called "freeze" or "arctic breath". They can also reverse the process and pull large volumes of air or vapor into their lungs.
Cosmic Awareness: Oz is aware of any alterations to the timeline.
Kryptonite Vision: Due to a slug of his radioactive homeworld lodged into his brain, Jor-El/Oz could emit and project kryptonite radiation-based optic blasts from his damaged left eye at will.

Abilities
Genius Level Intellect
Deception
Science
Tactical Analysis

Weaknesses
Vulnerability to Kryptonite
Vulnerability to Red Solar Rays
Vulnerability to Magic
Vulnerability to Psionics

History
Jor-El was a Kryptonian scientist and the father of Superman.

The Doom of Krypton
Jor-El was a prominent scientist on his home planet, Krypton. According to his research, Krypton would be destroyed in a great catastrophe. Unfortunately, the Kryptonian Science Council ignored his pleas for evacuation, later expelling him. Six months later, Jor-El's predictions were proven correct. Due to the ignorance of other scientists, no one was prepared to evacuate. He and his wife Lara Lor-Van shot their son Kal-El into space using their last remaining prototype spaceship. Afterwards, Kal-El landed on Earth, and grew up as Clark Kent.

Survival on Earth
As Krypton was crumbling, Jor-El was whisked away by an unseen force, and taken to Earth where he crashed in a war-torn nation. After being nursed back to health by locals, Jor-El saw first hand the atrocities of man, as a dictator usurped all of what the people owned, causing them to starve. After witnessing these atrocities, Jor-El was forced to watch the horrors of mankind over the centuries by the unseen being that saved him.

Becoming Mister Oz
Shortly after witnessing man's evils, Jor-El adopted the moniker of Mister Oz and began manipulating certain events from behind the scenes. He imprisoned Doomsday, Prophecy, Red Robin, and Batman of a possible future as they were causing timelines to unfold that weren't meant to. In Doomsday's case, it was also to keep him from killing Superman again. He also frequently either helped or hindered Superman and his family, executing his brother Zor-El, deeming it a mercy killing.

Fun Facts
As Mr. Oz, Jor-El took many prisoners and held them in captivity on an off-world base. These prisoners included Red Robin, Doomsday, the fifth dimensional imp Mister Mxyzptlk, the multiversal being known as Prophecy, and a version of Batman from an alternate future.
0 notes
Link
Written by R. Ann Parris on The Prepper Journal.
//
I generally agree with the premise that skills are far more important than stuff, and that knowledge weighs nothing. There are skills that benefit us, every single day and definitely in a disaster – on any scale. However, sometimes collecting knowledge can be a pricey and time-consuming prospect. That doesn’t mean we shouldn’t learn, but we need to prioritize as with anything else. We also have to honestly assess our preparedness level, plan, and current lifestyle. Pat’s Preparedness Arc is perfect for this.
Exceptions & Assessments
There are exceptions to some of what I’ll suggest. If you’re a wilderness adventure enthusiast or work in extremes, you already know it. If you truly have lots of free time but zero money after lots of cutbacks, and you have materials/resources lying around and don’t have to buy anything, okay.
If somebody is just into history, a reenactor, a hobbyist, I’m also not talking about that. Mental health clause – you need an outlet. However, interests are just interests and don’t belong in the “but it’s useful/preparedness” category of our time and financial budgets. It belongs under our entertainment budgets.
Please remember those caveats as you read the list. I’m talking about somebody learning from scratch specifically as a survival/preparedness skill in lieu of practicing, buying, or learning something else.
I also hear the argument put forth that somebody’s going to learn a skill or trade because then they can barter it. That is absolutely true in some cases (medical, mechanics, midwives). In others …
We have to ask ourselves: How many people who are preparing or not preparing are actually going to be around and need that particular skill? How do we plan to find those souls who are unprepared to do it themselves, but are expected to have surpluses worth our time and labor to trade for us?
Below are a few things I regularly see pushed as a must-have skill. I’ll break down the pro’s and con’s, and cover alternatives.

Image: How sustainable is our water plan – and our bodies – compared to our need to make soap or learn primitive fire making methods, or learning an already fairly common trade?
Alternatives After Assessment
Would it be better to develop the knowledge of how to find water by recognizing terrain and land cover patterns, a map of streams and springs in the area, and the physical strength to carry and drag water-level weight through woods, on crappy roadsides and ditches, and repeatedly lift buckets and containers out of a downed well or deep cut with cord, or over the side of a pickup?
Could we instead spend time locating buckets, storage totes, and barrels, the used and wrecked pieces of furniture and equipment on Craigslist and Freecycle to turn them into water catchment, and the afternoon or afternoons it takes to assemble them, to limit the amount of time we even have to go out hunting water?

We have to ask ourselves how important primitive skills are instead of something like wrapping a sprain.
Water is always going to be a focus for me, but there are other skills, too.
Gather wood for the stove/grill and practice cooking and canning on it. Learn hauling and tying knots, and practice felling, branch removal, and topping on consecutively larger trees. Learn to change your own oil and bike chain. Figure out how to unclog a drain using supplies and tools you already have on hand. Walk on the ditch verges and wooded hills to strengthen ankles.
We have to ask ourselves how important primitive skills are instead of something like wrapping a sprain, turning off water and gas mains, producing and finding food, mending a fence, sharpening a blade, rescuing a drowning/choking infant or child, and backing a trailer.
Fire From Scratch

If you happen to have a battery and steel wool, more power to you. It was never in my pack for fire tools.
Let’s start off with a super controversial one – yay!
First, I’m not talking about finding dry tinder in wet woods or making a feather stick. If somebody’s out in the woods regularly, the potential of injury in a downpour makes them worthwhile in the crisis stance. As a through packer (I think they call it ultralight now, but my bag was never light) and multi-day paddler, those are things that saved me time and energy for my hot meal.
I’m talking about Survivorman fire starting, primitive fire starting. If you happen to have a battery and steel wool, more power to you. It was never in my pack for fire tools.

Second, if you’re a remote-creek kayaker, canoe trekker, or a hiker, get a few pill bottles to stuff with wet-weather or DIY-coated matches and a few cotton balls or some dryer lint, and start wearing one around your neck and carrying one in a pants pocket. Get a ferro rod and block or a windproof cigar lighter, and replace the chain with 550 cord to wear on your belt or pants button or the snap of your life vest or knife. Keep another set duct taped to the bottom of your water bottle or glasses case.
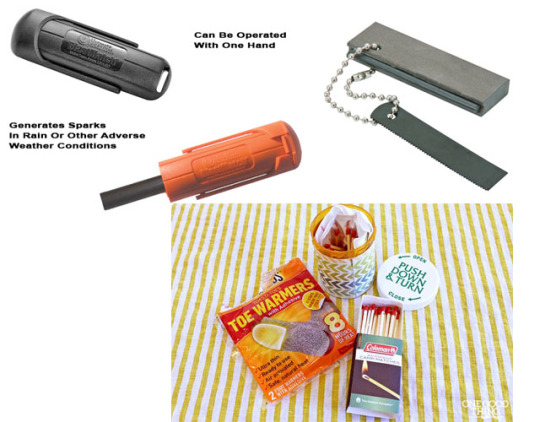
No belt or knife? No glasses? Don’t worry about fire from scratch then. It takes a long time to master starting a fire with a bow and starting it with a lens requires a lens. If you don’t have a knife to make shavings and the bow and start the notch, there’s a stick and another stick, and you’d be far better served spending the time making a cocoon-style debris hut.
Matches/Lighters versus Primitive Skills
People do get lost in the woods, and eventually we absolutely will run out of matches and lighters on a homestead.
We’ll run out of them faster if we’re using smaller fires for short periods and thus starting them regularly. They can break, leak, get wet and grody, and strike-anywhere are harder and harder to find so you have to figure on the striker strips getting worn totally smooth, especially if we buy the big bulk boxes.
Learning to find tinder in wet woods is time-consuming enough (and worth it for some/many).
If you’re only bugging-out to a BOL, not in an INCH situation, or if you’re a boater, fisherman, hunter, hiker, or outdoors enthusiast, throw in a cigar lighter so wind is less of a factor – they fit in a Gerber case inside bags or small plastic bottles with matches and other fire-starting materials pretty well.
For a homestead/bug-in situation, we can say three meals and a snack a day, plus morning coffee. Starting five fires is pretty generous and buys time for us to learn how to bank a fire for coals and keep one going.
Say it takes us a couple broken/burn-out matches to get one started, so we need three matches per fire. Using 15 a day for a year gives us a total of 5.5K matches.

Bricks of 100 small kitchen match boxes run $8-15 bucks each for 3.2K matches – two would cover our needs for $20-$30. My dollar store also carries match books cheaper (not my first choice).
Or we could buy one of those multi-pack bricks for $10-15, and hit Amazon for a 100-pack of disposable lighters for $20 and a set of three big boxes of 300 matches for $7-$10. That gives us 4K+ matches and 100 lighters for $37-45.
We can store them in our currently empty canning jars, or spend $5-6 at the dollar store to get candles or nail polish or lacquer to waterproof them and some baggies to keep them in. Strikers and blast matches, cigar lighters that work even in whipping Montana winds, run in the $4-$12 ranges.
Yes, it costs money. Yes, if you already have the knife, tromping into the woods to do it like Bear doesn’t.
Tromp into the woods learning to not make noise, recognize animal sign, and recognize landscape features that promise water instead.
There are multiple situations (and future practical, everyday skills) that benefit from that knowledge.
Soap – Making vs. Buying

Let’s start with the basics of soap. There’s a couple of modern recipes, and a link to the history. About halfway down, that one breaks soap making into three stages of lye, fats, and combination – which is where we’d be at a total pioneer homestead or “My Side Of The Mountain forever” INCH lifestyle.
http://www.diynatural.com/how-to-make-soap-2/ – cups conversion
https://thenerdyfarmwife.com/how-to-make-soap-with-milk/ – one of many for milk, still need oil
http://spadet.com/soap-making-history-and-techniques/ – from scratch
I’m going to discount any soap making as viably sustainable if it’s using a fat or oil that’s not locally produced. That’s including people who buy the glycerin soap blocks. (For soap making – no comment on other uses.)
That’s the whole argument about sustainable, colonial and primitive skills – they’re for when there is no store and we run out of things.
If you need palm oil, you’re storing something and you might as well store the finished product. (There are exceptions, like the many balms and other uses for various oils.)
Some basic soap-making starter kits are available for as little as $10-15. Better will run as high as you like. I couldn’t find one that already included a scale (soap making is one of those things that requires weights according to some experts, although others have converted recipes to volume).
$10-15 for a kit isn’t much, absolutely. However, soap requires those rendered animal fats or oils. Those aren’t in the kits, and some of the ones I’ve seen in recipes are pretty pricey.

Too, in a crisis, especially if we’re living off grass-fed livestock and wildlife and the diet food of garden produce, fats and oils are going to be precious to keep our bodies functioning.
There’s still tons of bar soaps available at the dollar store and <$1 at Walmart. Some are travel sized and singles in boxes. However, options are available in 2-packs and 3-packs of standard-sized bars. So for $10 I can get 18-27 bars of soap and still pay tax.
If I’m inclined, I can cut that down, get a bottle or two each of Dawn and pine cleaner for dishes and laundry, floors, and surfaces, and still get 14-18 bars of soap.
I once figured that between bathing and washing my hands and face, I run through a cake of soap a week, so I need more than $9-10 worth. I need more in the neighborhood of $20-$30, and about a shoebox of space. For laundry, surfaces and dishes for a year, and surface cleaning, depending on household, I need a couple of free liquor boxes and another $20-30 for liquid cleaners, even buying from the dollar store. (The dollar store is not the cheapest per ounce or most compact form, but they are incremental purchase and use sizes.)
Cost doesn’t apply for the folks who plan to have fatty pigs and cattle, and use their wood ash. For them, the comparison is strictly about time. For a lark, sure, jump one weekend. But weigh out what else could be learned, what other materials cost, and what family ties could be strengthened with a different activity.
Soap is compact. They are sensitive to dampness, so they need a Ziploc bag, lidded can, or plastic tub. There are environments where dry soaps melt, but most of North America could keep them in a shed. So will the ingredients for making soap, or finished homemade soaps.
Rendering suet for tallow

Some will still think it’s worthwhile. To each their own, but please refer back to the general premise and Pat’s arc to be sure it’s the best use of your resources and time as you stand now.
On the flip side, totally learn how to make suet and tallow if fatty animals and materials are present. They have a ton of uses, provide a storable sustainable fat source, and they fill very real needs in a self-sustainable lifestyle.
Treating Hides
Hides and making useful items from hides is 50-50 with me. On one hand, I know a woman who makes a bundle from it, and if you have rabbits or hunt deer, you have hides. On the other hand, should the world collapse to colonial and pioneer day levels if not the Dark Ages, lots of humanity will die fast enough for me to find underroos, sheets, work boots, and socks should I need to go out past my X date – they aren’t exactly the things being grabbed in today’s riots.

Photo from North American Bushcraft School
If it’s going to be a side business, sure, jump – after you do some market research. If it’s a niche market half-hobby, jump.
If it’s something on the to-do list because it seems like a great skill … maybe consider jumping on a maps website, finding farm fields and nearby specialty farms, making some non-nut cookies or muffins to carry, and sharing that you’re interested in breaking away from city life, would the nice farmer be willing to work out some kind of tag-along for labor deal so you can get a good idea of what’s involved.
Another option useful in disasters of all kinds is mapping power-line cuts to avoid traffic jams, snow and flood evacuation routes, and directions and A, B, C routes to and from kids’ schools and the school evac rally points.
Skills versus Stuff
Nine times out of ten, I would argue that knowing is better than having. However, there are exceptions – usually because of the time and-or resources they require, and sometimes because of the space.
There are lots of things that we should know just to be well-round humans, let alone homesteaders or – if inclined – nomads. However, sometimes we waste our precious resources learning something that only benefits most people during a very specific type of disaster, or a total breakdown and reversal that lasts for 5-10+ years.
Sadly, a lot of people who push and learn those lack the skills and supplies to survive long enough for some primitive skills to become valuable again. Some of those skills come at the cost of things that can benefit us, right now.
There are all kinds of things to do without spending more money or spending time on something with highly specialized skills and low-likelihood needs.
I figure I’ll get hate mail for the concept and for the specific few I listed. I just want people to weigh their to-do and to-learn lists so that they can prioritize based on where they already stand and where they want to go.
If there’s true need and potential – and sometimes there is – or it’s just a hobby, there’s nothing wrong with any of the primitive skills. I think most of us, though, have something we would be better served learning, practicing or building than the three listed.
If you liked this article, please rate it.
How did you like this article?
The post Skills-Stuff: When Stuff Matters More appeared first on The Prepper Journal.
from The Prepper Journal
Don't forget to visit the store and pick up some gear at The COR Outfitters. How prepared are you for emergencies?
#SurvivalFirestarter #SurvivalBugOutBackpack #PrepperSurvivalPack #SHTFGear #SHTFBag
2 notes
·
View notes
Text
How to start birding in any US city
Yes, hello, Mr. Cardinal. (Bruce Jastrow/Unsplash/)
If you enjoy spending time outside, consider bird-watching. It’s a four-season activity that will not only extend the amount of time you spend in parks or other green spaces, but also make you feel a little bit like a treasure seeker as you try to spot birds you know should be around (and find others you may not expect).
You can go birding any time of the year, but a good way to get hooked is to take advantage of the spring and fall migrations. During those bountiful times, hundreds of neotropical bird species rest and refuel in urban green spaces on their way to and from countries south of the US. Outside of the migration months, you can find resident birds in cities, too.
I’m by no means an expert birder, but since I launched myself into the birding world almost four years ago, I’ve gotten a good handle on the birds that call my region home and am making decent progress identifying those that are just passing through. Warblers are hard! Through it all, bird-watching has increased my affinity for the outdoors.
So whether you think all the little brown birds on your lawn are sparrows or are comfortable identifying a handful of common backyard birds, this guide to bird-watching in any US city will elevate your bird-spotting abilities.
Know before you bird
The first step on the path to birding is understanding which species are in your city at any given time. If you only take one thing away from this story, let it be this: bird knowledge is essential. I recommend eBird’s web-based Explore feature. You can search by species, region, or hotspot—a location where lots of birds have been observed—and can click on any listed bird for identification clues, photos, songs, and calls. Knowing the difference between complex songs and simple calls is like having a special tool in your kit; one that can help you predict a bird’s behavior.
Male birds sing frequently during breeding season as they seek to establish territory and attract mates, but some female birds sing, too. Research suggests that females sing less when they’re the primary nest caretaker, to reduce their chance of being found by predators. But when both male and female birds tend the nest, both seem to sing at the same rate. All birds, though, use calls to announce their location, the presence of food, to warn off intruders, and to alert other birds to the presence of predators. When you hear a jay’s raucous call, you, too, should look out for a bird of prey.
Once you’ve become familiar with the species in your city at the time you’re planning to go out, decide whether you’ll be birding alone or not. You can also use social media to see what’s been spotted locally. Birding groups and organizations often post photos on Instagram and Twitter, and some birders tag their images with #birdtwitter. Make sure to search using #yourlocation (replace with your actual location) to get the most relevant results.
Get the right gear
A field guide is essential to every birder, and binoculars are good to have, too. (Molly Adams/Feminist Bird Club/)
The basic tools for birding are not that expensive. You don’t necessarily need binoculars for your first casual birding experience, but I recommend purchasing a pair if bird-watching will be a regular pursuit. My starter pair was a Bushnell 7x35 that cost $23. If you’re unfamiliar with binocular specs, 7x is the power of magnification (objects will appear seven times closer) and 35 is the size of the lens (in millimeters). While magnification is self-explanatory, beginners should know that lens size determines how much light gets to your eyes. You want binoculars that let in a fair amount of light because you will see objects (and birds) more clearly, but larger lenses mean heavier binoculars. The goal is to strike a balance between lens size and overall weight. After seven months with my Bushnell, I decided I wanted greater magnification and focusing capabilities, so I did my homework and upgraded to a Celestron Nature DX 8x42 that cost $110. The Celestron is a little more than one ounce heavier than the Bushnell, but its ergonomic design makes it seem lighter.
You’ll also want to purchase a field guide. I recommend you get a regional one; it’ll be geared toward the birds you are most likely to see and weighs less than a comprehensive North American guide. I own the National Geographic Field Guide to the Birds of North America, but since I live in the Northeast, I rely on The Sibley Field Guide to Birds of Eastern North America. The most recent edition of the National Geographic guide contains more than 1,000 species, while the Sibley guide has 650. If you don’t want to buy a guide right away, check to see if your local library has any. To go paperless, try the free Merlin Bird ID app.
Solo bird-watching can be a peaceful activity. (Jean Shum/Jean Shum Photography/)
Birding alone
There is no stigma to birding alone. In fact, there are upsides. You set your own pace and can spot for as long as you want—just your lunch break or an entire weekend afternoon. Being alone also means you can spot spontaneously and your entire focus will be on the birds. You won’t have to make a date with a friend, go on a scheduled bird walk, or travel far from home, work, or school, either. As long as you have your binoculars, you can bird at any time, in any place.
Birding at home
You don’t even have to leave the comforts of home to bird-watch. If you have a yard, you can bring birds to you by creating a bird-friendly garden. Choose native plant species, which will act as a food source for native birds. They’ll also attract insects and the birds that feed on them. Planting native flora is a benefit on its own, as human activity has significantly reduced global plant diversity. Because plants are the backbone of many bird habitats, their loss has contributed to a massive 3 billion drop in the North American bird population since 1970. For just-right species for your locale, check out Audubon’s native plant database. The organization also provides tips for assessing your space and designing your garden.
Birding in groups
If you want company on your journey to becoming a birder, tag along with a birding friend on their rounds or sign up for an organized bird walk. For the latter, your local Audubon chapter is a good place to start, but local and regional parks also offer their own bird walks. Although a 2011 US Fish and Wildlife Service report described the average bird-watcher as a 53-year-old white woman with above-average income and education, the demographics of the birding world are changing. In the last decade, several organizations have launched to provide inclusive spaces for new and diverse birders and outdoor enthusiasts: Check out the Feminist Bird Club, Latino Outdoors, and Outdoor Afro.
Take it to the next level
Once you’re comfortable with the common birds in your area, challenge yourself to learn new species. Pick a site with habitats not found in your patch (the location you regularly visit to watch birds) and get to know the species that spend time there. If you often frequent an inland park that doesn’t have any bodies of water, for example, head to a river, lake, or beach to observe how waterfowl and shorebirds behave.
Another way to up your birding game is to become a species expert. Identify where your favorite bird hangs out and study its behavior for a year. Find where other birders have seen them, too, and observe them in those settings.
To be at the center of migration action, seek out a nearby destination birding spot such as a national wildlife refuge. A midwestern waterfowl hotspot, for example, is Quivira National Wildlife Refuge in Kansas, and cranes top the charts in Aransas National Wildlife Refuge in Texas. Northeast birders, meanwhile, flock to Cape May National Wildlife Refuge in New Jersey to see songbirds and shorebirds. You can also check out Cornell University’s BirdCast site for predicted bird fallouts (when inclement weather literally prevents birds from flying) and migration trends. It’s a good idea to use this forecast tool even if you’ll just be viewing birds in your favorite bird-watching location. Knowing which birds might be in your area can prime your brain to see them.
The perks of bird-watching
Just look at how cute this Eastern bluebird is. (Jean Shum/Jean Shum Photography/)
Bird-watching can also help you reap the benefits of being outdoors, which has been shown to improve human physiological and mental health. In general, viewing and spending time in nature can lead to lower blood pressure and a slower heart rate, shorter recovery times after surgery, and increased attention and focus. Research also shows that adults socialize more in greener spaces. Landscapes with more trees benefit children, too—they play more, and in more creative ways, in areas with more trees.
Honing in on wellbeing gains specifically attributable to birding, listening to birdsong can not only improve concentration and reduce stress, but hearing certain types of bird sounds can boost your attachment to nature.
You won’t be the only beneficiary of your newfound pastime, either. Any bird data you collect and share is a boon for both scientists and birds. The information you share with “citizen science” projects like eBird is used in conservation research and policy and, if bird-watching is a form of monitoring species, birding is an act of stewardship as defined by the US Forest Service—you’re taking care of the world around you. It’s a lot more than simply looking at birds.
0 notes
Text
The Truth about Energy Balance and Fat Loss
When it involves physique change, there’s no matter extra polarizing than “calories in vs. calories out.” Some argue it’s the be-all and end-all of weight reduction. Others say it’s oversimplified and misguided. In this text, we discover each angle of the controversy from “eat less, move more,” to hormonal points, to diets that supply a “metabolic advantage.” In doing so, we reply—as soon as and for all—how vital energy in vs. energy out actually is. And talk about what it means for you and your purchasers.
++++
“You’re either with me, or you’re against me.”
Everyone’s heard this one. But do you know the well being and health business has its personal model of the saying? It goes: “You’re either with me, or you’re stupid.”
I child, in fact!
But this type of binary mindset does gas loads of heated debates. Especially relating to one matter specifically: “calories in vs. calories out,” or CICO.
CICO is a straightforward method of claiming:
When you absorb extra power than you burn, you acquire weight.
When you absorb much less power than you burn, you drop some weight.
This is a basic idea in physique weight regulation, and about as near scientific truth as we are able to get.
Then why is CICO the supply of a lot disagreement?
It’s all in regards to the extremes.
At one finish of the controversy, there’s a gaggle who believes CICO is simple. If you aren’t shedding pounds, the reason being easy: You’re both consuming too many energy, or not transferring sufficient, or each. Just eat much less and transfer extra.
At the opposite finish is a gaggle who believes CICO is damaged (or perhaps a full fantasy). These critics say it doesn’t account for hormone imbalances, insulin resistance, polycystic ovary syndrome (PCOS), and different well being issues that have an effect on metabolism. They typically declare sure diets and meals present a “metabolic advantage,” serving to you drop some weight with out worrying about CICO.
Neither viewpoint is totally flawed.
But neither is totally proper, both.
Whether you’re a well being and health coach tasked with serving to purchasers handle their weight—otherwise you’re making an attempt to learn to do this for your self—adopting an excessive place on this matter is problematic; it prevents you from seeing the larger image.
This article will add some nuance to the controversy.
I’ll begin by clearing up some misconceptions about CICO. And then discover a number of real-world examples exhibiting how far-right or far-left views can maintain of us again.
Rethinking widespread misconceptions.
Much of the CICO debate—as with many different debates—stems from misconceptions, oversimplifications, and a failure (by each side) to discover a shared understanding of ideas. So let’s begin by getting everybody on the identical web page for a change.
CICO goes past meals and train.
There’s an vital distinction to be made between CICO and “eat less, move more.” But individuals, particularly some CICO advocates, are likely to conflate the 2.
“Eat less, move more” solely takes under consideration the energy you eat and the energy you burn by way of train and different day by day motion. But CICO is basically an off-the-cuff method of expressing the Energy Balance Equation, which is way extra concerned.
The Energy Balance Equation—and subsequently CICO—contains all of the complicated interior workings of the physique, in addition to the exterior elements that in the end impression “calories in” and “calories out.”
Imperative to this, and infrequently ignored, is your mind. It’s always monitoring and controlling CICO. Think of it as mission management, sending and receiving messages that contain your intestine, hormones, organs, muscular tissues, bones, fats cells, exterior stimuli (and extra), to assist steadiness “energy in” and “energy out.”
It’s one hell of an advanced—and delightful—system.
Yet the Energy Balance Equation itself appears to be like actually easy. Here it’s:
[Energy in] – [Energy out] = Changes in physique shops*
*Body shops refers to all of the tissues out there for breakdown, comparable to fats, muscle, organ, and bone. I purposely haven’t used “change in body weight” right here as a result of I wish to exclude water weight, which may change physique weight impartial of power steadiness. In different phrases, water is a complicated, confounding variable that methods individuals into pondering power steadiness is damaged when it’s not.
With this equation, “energy in” and “energy out” aren’t simply energy from meals and train. As you possibly can see within the illustration beneath, every kind of things affect these two variables.
When you view CICO by way of this lens—by zooming out for a wider perspective—you possibly can see boiling it right down to “eat less, move more” is a big oversimplification.
Calorie calculators and CICO aren’t the identical.
Many individuals use calorie calculators to estimate their power wants, and to approximate what number of energy they’ve eaten. But generally these instruments don’t appear to work. As a end result, these people begin to query whether or not CICO is damaged. (Or whether or not they’re damaged).
The key phrases listed below are “estimate” and “approximate.”
That’s as a result of calorie calculators aren’t essentially correct.
For starters, they supply an output based mostly on averages, and might be off by as a lot as 20-30 % in regular, younger, wholesome individuals. They might fluctuate much more in older, scientific, or overweight populations.
And that’s simply on the “energy out” facet.
The variety of energy you eat—or your “energy in”—can also be simply an estimate.
For instance, the FDA permits inaccuracies of as much as 20% on label calorie counts, and analysis reveals restaurant vitamin data might be off by 100-300 energy per meals merchandise.
What’s extra, even should you had been capable of precisely weigh and measure each morsel you eat, you continue to wouldn’t have a precise “calories in” quantity. That’s as a result of there are different confounding elements, comparable to:
We don’t soak up all the energy we devour. And absorption charges fluctuate throughout meals varieties. (Example: We soak up extra energy than estimated from fiber-rich meals, and fewer energy than estimated from nuts and seeds.)
We all soak up energy uniquely based mostly on our particular person intestine micro organism.
Cooking, mixing, or chopping meals typically makes extra energy out there for absorption than might seem on a vitamin label.
Of course, this doesn’t imply CICO doesn’t work. It solely means the instruments now we have to estimate “calories in” and “calories out” are restricted.
To be crystal clear: Calorie calculators can nonetheless be very useful for some individuals. But it’s vital to concentrate on their limitations. If you’re going to make use of one, achieve this as a tough start line, not a definitive “answer.”
CICO doesn’t require calorie counting.
At Precision Nutrition, generally we use calorie counting to assist purchasers enhance their meals consumption. Other occasions we use hand parts. And different occasions we use extra intuitive approaches.
For instance, let’s say a shopper desires to drop some weight, however they’re not seeing the outcomes they need. If they’re counting energy or utilizing hand parts, we’d use these numbers as a reference to additional scale back the quantity of meals they’re consuming. But we additionally would possibly encourage them to make use of different methods as an alternative. Like consuming slowly, or till they’re 80 % full.
In each case—whether or not we’re speaking numbers or not — we’re manipulating “energy in.” Sometimes instantly; generally not directly. So make no mistake: Even once we’re not “counting calories,” CICO nonetheless applies.
CICO would possibly sound easy, but it surely’s not.
There’s no getting round it: If you (or a shopper) aren’t shedding pounds, you both have to lower “energy in” or enhance “energy out.” But as you’ve already seen, which will contain excess of simply pushing away your plate or spending extra time on the health club.
For occasion, it could require you to:
Get extra high-quality sleep to higher regulate starvation hormones, enhance restoration, and enhance metabolic output
Try stress resilience methods like meditation, deep respiratory, and spending time in nature
Increase your day by day non-exercise motion by parking the automotive a couple of blocks away out of your vacation spot, taking the steps, and/or standing when you work
Trade some high-intensity train for lower-intensity actions, so as to support restoration and scale back systemic stress
Improve the high quality of what you’re consuming, versus lowering the amount. This can will let you eat extra meals with fewer whole energy
Tinker with the macronutrient make-up of what you eat. For instance: consuming extra protein and fiber, or growing carbs and reducing fat, or vice versa
Experiment with the frequency and timing of your meals and snacks, based mostly on private preferences and urge for food cues
Consider briefly monitoring your meals consumption—through hand parts or weighing/measuring—to make sure you’re consuming what you suppose you’re consuming (as carefully as moderately doable)
Evaluate and proper dietary deficiencies, for extra power throughout exercises (and in on a regular basis life)
Consult along with your doctor or specialists if constant life-style adjustments aren’t transferring the needle
Sometimes the options are apparent; generally they aren’t. But with CICO, the solutions are there, should you hold your thoughts open and study each issue.
Imagine your self a “calorie conductor” who oversees and fine-tunes many actions to create metabolic concord. You’re on the lookout for something that might be out of sync.
This takes plenty of observe.
So, to assist, listed below are 5 widespread power steadiness dilemmas. In every case, it is perhaps tempting to imagine CICO doesn’t apply. But look a little bit deeper, and also you’ll see the ideas of CICO are at all times current.
5 widespread power steadiness dilemmas.
Dilemma #1: “I’ve been eating the same way forever, but suddenly I started gaining weight.”
Can you guess what occurred?
More than seemingly, “energy in” or “energy out” did change, however in a method that felt uncontrolled or unnoticeable.
The wrongdoer might be:
Slight will increase in meals consumption, attributable to adjustments in temper, starvation, or stress
An enhance within the quantity of power absorbed—attributable to new treatment, an unknown medical situation, or a historical past of persistent weight-reduction plan
Physiological adjustments that resulted in fewer energy burned throughout train and at relaxation
The onset of persistent ache, upsetting a dramatic lower in non-exercise exercise thermogenesis (NEAT)
Significant adjustments to sleep high quality and/or amount, impacting metabolic output and/or meals consumed
In all of those instances, CICO continues to be legitimate. Energy steadiness simply shifted in refined methods, attributable to life-style and well being standing adjustments, making it onerous to acknowledge.
Dilemma #2: “My hormones are wreaking havoc on my metabolism, and I can’t stop gaining weight. Help!”
Hormones seem to be a logical scapegoat for weight adjustments.
And whereas they’re in all probability to not blame as typically as individuals suppose, hormones are intricately entwined with power steadiness.
But even so, they don’t function independently of power steadiness.
In different phrases, individuals don’t acquire weight as a result of “hormones.”
They acquire weight as a result of their hormones are impacting their power steadiness.
This typically occurs throughout menopause or when thyroid hormone ranges decline.
Take, for instance, triiodothyronine (T3) and thyroxine (T4), two thyroid hormones which can be extremely vital for metabolic perform. If ranges of those hormones diminish, weight acquire might happen. But this doesn’t negate CICO: Your hormones are merely influencing “energy out.”
This could appear a bit like splitting hairs, but it surely’s an vital connection to make, whether or not we’re speaking about menopause or thyroid issues or insulin resistance or different hormonal points.
By understanding CICO is the true determinant of weight reduction, you’ll have many extra instruments for attaining the end result you need.
Suppose you’re working from the false premise hormones are the one factor that issues. This can result in more and more unhelpful choices, like spending a big sum of cash on pointless dietary supplements, or adhering to a very restrictive eating regimen that backfires in the long term.
Instead, you already know outcomes are depending on the truth that “energy in” or “energy out” has modified. Now, this variation might be attributable to hormones, and if that’s the case, you’ll should make changes to your consuming, train, and/or life-style habits to account for it. (This may embody taking treatment prescribed by your physician, if acceptable.)
Research suggests individuals with gentle (10-15% of the inhabitants) to reasonable hypothyroidism (2-Three%) might expertise a metabolic decelerate of 140 to 360 energy a day.
That might be sufficient to result in weight acquire, or make it tougher to drop some weight. (One caveat: Mild hypothyroidism might be so gentle many individuals don’t expertise a big shift in metabolic exercise, making it a non-issue.)
What’s extra, ladies affected by polycystic ovary syndrome, or PCOS (about 5-10%), and people going by way of menopause, may additionally expertise hormonal adjustments that disrupt power steadiness.
So, it’s vital to grasp your (or your shopper’s) well being standing, as that may present precious details about the distinctive challenges concerned and the way you must proceed.
Dilemma #Three: “I’m only eating 1,000 calories a day and I’m still not losing weight!”
So what provides?
The conclusion most individuals leap to: Their metabolism is damaged. They’re damaged. And CICO is damaged.
But right here’s the deal: Metabolic injury isn’t actually a factor. Even although it could appear that method.
Now, their power steadiness problem might be associated to a hormonal situation, as mentioned above. However, when somebody’s consuming 1,000 energy a day however not shedding pounds, it’s often attributable to one of many two causes that comply with.
(No matter how easy they sound, that is what we’ve seen time and again in our teaching program, with over 100,000 purchasers.)
Reason #1: People typically underestimate their calorie consumption.
It’s simple to miscalculate how a lot you’re consuming, because it’s often unintentional. The commonest methods individuals do it:
They underestimate parts. (For instance, with out exactly measuring “one tablespoon of peanut butter,” it would truly be two, which provides 90 energy every time you do it)
They don’t observe bites, licks, and tastes of calorie-dense meals. (For instance, your child’s leftover mac and cheese may simply add 100 energy)
They don’t document all the pieces within the second and neglect to log it in a while
They “forget” to depend meals they’d wished they hadn’t eaten
Don’t consider this is usually a massive situation?
A landmark research, and repeated comply with up research, discovered individuals typically underestimate how a lot they eat over the course of a day, generally by greater than 1,000 energy.
I’m not bringing this analysis as much as recommend it’s not possible to be lifelike about portion sizes. But should you (or your purchasers) aren’t seeing outcomes on a low-calorie eating regimen, it’s value contemplating that underestimation could also be the issue.
Reason #2: People overeat on the weekends.
Work weeks might be disturbing and when Friday night time rolls round, individuals put their guard down and let free.
(You in all probability can’t relate, however simply strive, okay?)
Here’s the way it goes: Let’s say an individual is consuming 1,500 energy a day on weekdays, which might give them an approximate 500-calorie deficit.
But on the weekends, they deviate from their plan just a bit.
Drinks with buddies and some slices of late night time pizza on Friday
An further massive lunch after their exercise on Saturday
Brunch on Sunday (“Hey, it’s breakfast and lunch, so I can eat double!)
The remaining tally: An further four,000 energy consumed between Friday night time and Sunday afternoon. They’ve successfully canceled out their deficit, bumping their common day by day energy to 2,071.
The upshot: If you (or your shopper) have slashed your energy dramatically, however you aren’t seeing the anticipated outcomes, search for the small slips. It’s like being a metabolic detective who’s following—maybe actually—the bread crumbs.
By the best way, if downtime is downside for you (or a shopper), now we have simply the treatment: 5 shocking methods to ditch weekend overeating.
Dilemma #four: “I’m eating as much as I want and still losing weight, so this diet is better than all the others!”
This is perhaps the highest cause some individuals reject CICO.
Say somebody switches from a eating regimen of largely processed meals to 1 made up of largely entire, plant-based meals. They would possibly discover they’ll eat as a lot meals as they need, but the kilos nonetheless soften away.
People typically consider that is because of the “power of plants.”
Yes, crops are nice, however this doesn’t disprove power steadiness.
Because plant meals have a very-low power density, you possibly can eat lots of them and nonetheless be in a calorie deficit. Especially in case your earlier consumption was stuffed with plenty of processed, hyperpalatable “indulgent foods.”
It feels such as you’re consuming far more meals than ever earlier than—and, actually, you actually is perhaps.
On high of that, you may additionally really feel extra satiated due to the amount, fiber, and water content material of the crops.
All of which is nice. Truly. But it doesn’t negate CICO.
Or take the ketogenic eating regimen, for instance.
Here, somebody may need an analogous expertise of “eating as much as they want” and nonetheless shedding pounds, however as an alternative of plant meals, they’re consuming meat, cheese, and eggs. Those aren’t low-calorie meals, and so they don’t have a lot fiber, both.
As a end result, loads of low-carb advocates declare keto presents a “metabolic advantage” over different diets.
Here’s what’s almost definitely taking place:
Greater consumption of protein will increase satiety and reduces urge for food
Limited meals selections have reduce out a whole bunch of highly-processed energy they may have eaten in any other case (Pasta! Chips! Cookies!)
Reduced meals choices can even result in “sensory-specific satiety.” Meaning, if you eat the identical meals on a regular basis, they might grow to be much less interesting, so that you’re not pushed to eat as a lot
Liquid energy—soda, juice, even milk—are typically off-limits, so a higher proportion of energy are consumed from strong meals, that are extra filling
Higher blood ranges of ketones—which rise when carbs are restricted—appear to suppress urge for food
For these causes, individuals are likely to eat fewer energy and really feel much less hungry.
Although it may appear magical, the keto eating regimen ends in weight reduction by regulating “energy in” by way of quite a lot of methods.
You would possibly ask: If plant-based and keto diets work so nicely, why ought to anybody care if it’s due to CICO, or for another cause?
Because relying on the particular person—meals preferences, life-style, exercise degree, and so forth—many diets, together with plant-based and keto, aren’t sustainable long-term. This is especially true of the extra restrictive approaches.
And should you (or your shopper) consider there’s just one “best diet,” you might grow to be pissed off should you aren’t capable of stick with it. You might view your self as a failure and determine you lack the self-discipline to drop some weight. You might even suppose you must cease making an attempt.
None of that are true.
Your outcomes aren’t eating regimen dependent. They’re habits dependent.
Maintaining a wholesome physique (together with a wholesome physique weight) is about growing constant, sustainable day by day habits that show you how to positively impression “energy in” and “energy out.”
This is perhaps achieved whereas having fun with the meals you like, by:
Eating till you’re 80% full
Eating slowly and mindfully
Eating extra minimally processed meals
Getting extra high-quality sleep
Taking steps to cut back stress and construct resilience
It’s about viewing CICO from 30,000 toes and determining what strategy feels sane—and achievable—for you.
Sure, which may embody a plant-based or a keto eating regimen, but it surely completely won’t, too. And you already know what?
You can get nice outcomes both method.
Dilemma #5: “I want to gain weight, but no matter how much I eat, I can’t seem to.”
The CICO dialog doesn’t at all times revolve round weight reduction.
Some individuals wrestle to achieve weight.
Especially youthful athletes and people who find themselves very, very lively at work. (Think: jobs that contain guide labor.)
It additionally occurs with those that try to regain misplaced weight after an sickness.
When somebody deliberately eats extra meals however can’t pack on the kilos, it could seem to be CICO is invalidated. (Surprise.)
They typically really feel like they’re stuffing themselves—“I’m eating everything in sight!”—and it’s simply not working. But right here’s what our coaches have discovered:
People have a tendency to recollect extremes.
Someone may need had six meals in in the future, consuming as a lot as they felt like they might stand.
But the next day, they solely ate two meals as a result of they had been nonetheless so full. Maybe they had been actually busy, too, in order that they didn’t even suppose a lot about it.
The first day—the one the place they stuffed themselves—would seemingly stand out much more than the day they ate in accordance with their starvation ranges. That’s simply human nature.
It’s simple to see how CICO is concerned right here. It’s lack of consistency on the “energy in” a part of the equation.
One answer: Instead of stuffing your self with Three,000 energy in the future, after which consuming 1,500 the following, goal for a calorie consumption simply above the center you possibly can keep on with, and enhance it in small quantities over time, if wanted.
People typically enhance exercise after they enhance energy.
When some individuals all of a sudden have extra out there power—from consuming extra meals—they’re extra prone to do issues that enhance their power out. Like taking the steps, pacing whereas on the cellphone, and fidgeting of their seats.
They would possibly even push tougher throughout a exercise than they’d usually.
This might be each unconscious and refined.
And although it would sound bizarre, our coaches have recognized this as a authentic downside for “hardgainers.”
Your cost: Take discover of all of your exercise.
If you possibly can’t curtail a few of it, you might have to compensate by consuming much more meals. Nutrient- and calorie-dense meals like nut butters, entire grains, and oils may help, particularly should you’re challenged by your lack of urge for food.
Three methods to recreation the system.
Once you settle for that CICO is each complicated and inescapable, you might end up up in opposition to one quite common problem.
Namely: “I can’t eat any less than I am now!”
This is likely one of the high causes individuals abandon their weight reduction efforts or search around in useless for a miracle eating regimen.
But listed below are three easy methods you (or your purchasers) can use to create a caloric deficit, even when it appears not possible. It’s all about determining which one works finest for you.
Maximize protein and fiber.
Consuming increased quantities of protein will increase satiety, serving to you’re feeling extra happy between meals. And consuming increased quantities of fiber will increase satiation, serving to you’re feeling extra happy throughout meals.
These are each confirmed in analysis and observe that can assist you really feel extra happy total whereas consuming fewer energy, resulting in simpler fats loss.
This recommendation can sound trite, I do know. In truth, sometime when there are vitamin coach robots, “eat more protein and fiber” will in all probability be the very first thing they’re programmed to say.
But the reality is, most individuals making an attempt to drop some weight nonetheless aren’t centered on getting loads of these two vitamins.
And you already know what? It’s not their fault.
When it involves diets, nearly everybody has been informed to subtract. Take away the “bad” stuff, and solely eat the “good” stuff.
But there’s one other strategy: Just begin by including.
If you make a concerted effort to extend protein (particularly lean protein) and fiber consumption (particularly from greens), you’ll really feel extra happy.
You’ll even be much less tempted by all of the meals you suppose you ought to be avoiding. This helps to mechanically “crowd out” ultra-processed meals.
Which results in one other massive profit: By consuming extra entire meals and fewer of the processed type, you’re truly retraining your mind to want these indulgent, ultra-processed meals much less.
That’s when a cool factor occurs: You begin consuming fewer energy with out actively making an attempt to—slightly than purposely limiting as a result of you need to.
That makes weight reduction simpler.
Starting is straightforward: For protein, add one palm of comparatively lean protein—rooster, fish, tempeh—to 1 meal. This is past what you’d have had in any other case. Or have a Super Shake as a meal or snack.
For fiber, add one serving of high-fiber meals—specifically greens, fruit, lentils and beans—to your common consumption. This would possibly imply having an apple for a snack, together with a fistful of roasted carrots at dinner, or tossing in a handful of spinach in your Super Shake.
Try this for 2 weeks, after which add one other palm of lean protein, and yet one more serving of high-fiber meals.
Besides all of the upside we’ve mentioned up to now, there’s additionally this:
Coming to the desk with a mindset of abundance—slightly than shortage—may help you keep away from these anxious, pissed off emotions that usually include being disadvantaged of the meals you like.
So as an alternative of claiming, “Ugh, I really don’t think I can give up my nightly wine and chocolate habit,” you would possibly say, “Hey, look at all this delicious, healthy food I can feed my body!”
(And by the best way, you don’t even have to surrender your wine and chocolate behavior, no less than to not provoke progress.)
Shift your perspective.
Imagine you’re on trip. You slept in and missed breakfast.
Of course, you don’t actually thoughts since you’re relaxed and having a good time. And there’s no cause to panic: Lunch will occur.
But because you’ve eliminated a meal, you find yourself consuming a couple of hundred energy lower than regular for the day, successfully making a deficit.
Given you’re in an surroundings the place you’re feeling calm and pleased, you hardly even discover.
Now suppose you get up on a daily day, and also you’re actively making an attempt to drop some weight. (To prepare for trip!)
You would possibly suppose: “I only get to have my 400-calorie breakfast, and it’s not enough food. This is the worst. I’m going to be so hungry all day!”
So you head to work feeling burdened, counting down the minutes to your subsequent snack or meal. Maybe you even begin to really feel disadvantaged and depressing.
Here’s the factor: You had been in a calorie deficit each days, however your subjective expertise of every was fully completely different.
What should you may alter your pondering to be extra like the primary situation slightly than the second?
Of course, I’m not suggesting you skip breakfast on a regular basis (except that’s simply your choice).
But should you can handle to see consuming much less as one thing you occur to be doing— slightly than one thing you need to do—it could find yourself feeling lots much less horrible.
Add exercise slightly than subtracting energy.
Are you an individual who doesn’t wish to eat much less, however would fortunately transfer extra? If so, you would possibly have the ability to make the most of one thing I’ve referred to as G-Flux.
G-Flux, also called “energy flux,” is the entire quantity of power that flows out and in of a system.
As an instance, say you wish to create a 500-calorie deficit. That may like this:
Energy in: 2,000 energy
Energy out: 2,500 energy
Deficit: 500 energy
But it may additionally appear like this:
Energy in: Three,000 energy
Energy out: Three,500 energy
Deficit: 500 energy
In each situations, you’ve achieved a 500-calorie deficit, however the second lets you eat lots extra meals.
That’s one advantage of a higher G-Flux.
But there’s additionally one other: Research suggests should you’re consuming meals from high-quality sources and doing quite a lot of exercises—power coaching, conditioning, and restoration work—consuming extra energy may help you carry extra lean mass and fewer fats.
That’s as a result of the elevated train doesn’t simply serve to spice up your “energy out.” It additionally adjustments nutrient partitioning, sending extra energy towards muscle progress and fewer to your fats cells.
Plus, because you’re consuming extra meals, you might have extra alternative to get the portions of nutritional vitamins, minerals, and phytonutrients you want so as to really feel your finest.
Win. Win. Win.
To be clear, it is a considerably superior technique. And as a result of metabolism and power steadiness are dynamic in nature, the effectiveness of this technique might fluctuate from individual to individual.
Plus, not everybody has the power or the need to spend extra time exercising. And that’s okay.
But by being versatile along with your pondering—and prepared to experiment with alternative ways of influencing CICO—you will discover your personal private technique for tipping power steadiness in your (or your purchasers’) favor.
If you’re a coach, otherwise you wish to be…
Learning find out how to coach purchasers, sufferers, buddies, or members of the family by way of wholesome consuming and life-style adjustments—in a method that optimizes power steadiness for every distinctive physique, character, and life-style—is each an artwork and a science.
If you’d wish to be taught extra about each, take into account the Precision Nutrition Level 1 Certification. The subsequent group kicks off shortly.
What’s all of it about?
The Precision Nutrition Level 1 Certification is the world’s most revered vitamin training program. It provides you the data, techniques, and instruments it’s good to actually perceive how meals influences an individual’s well being and health. Plus the power to show that data right into a thriving teaching observe.
Developed over 15 years, and confirmed with over 100,000 purchasers and sufferers, the Level 1 curriculum stands alone because the authority on the science of vitamin and the artwork of teaching.
Whether you’re already mid-career, or simply beginning out, the Level 1 Certification is your springboard to a deeper understanding of vitamin, the authority to educate it, and the skill to show what you already know into outcomes.
[Of course, if you’re already a student or graduate of the Level 1 Certification, check out our Level 2 Certification Master Class. It’s an exclusive, year-long mentorship designed for elite professionals looking to master the art of coaching and be part of the top 1% of health and fitness coaches in the world.]
Interested? Add your title to the presale record. You’ll save as much as 30% and safe your spot 24 hours earlier than everybody else.
We’ll be opening up spots in our subsequent Precision Nutrition Level 1 Certification on Wednesday, April eighth, 2020.
If you wish to discover out extra, we’ve arrange the next presale record, which supplies you two benefits.
Pay lower than everybody else. We wish to reward people who find themselves keen to spice up their credentials and are able to decide to getting the training they want. So we’re providing a reduction of as much as 30% off the overall value if you join the presale record.
Sign up 24 hours earlier than most people and enhance your probabilities of getting a spot. We solely open the certification program twice per 12 months. Due to excessive demand, spots in this system are restricted and have traditionally bought out in a matter of hours. But if you join the presale record, we’ll provide the alternative to register a full 24 hours earlier than anybody else.
If you’re prepared for a deeper understanding of vitamin, the authority to educate it, and the skill to show what you already know into outcomes… that is your likelihood to see what the world’s high skilled vitamin teaching system can do for you.
The post The Truth about Energy Balance and Fat Loss appeared first on Weight Loss Fitness.
from Weight Loss Fitness https://weightlossfitnesss.info/the-truth-about-energy-balance-and-fat-loss/
0 notes
Text
What’s In My Camera Bag? A Travel Photography Gear Guide
Travel Photography Gear Guide
Travel Photography Gear
I’ve been working as a travel photographer & blogger for 9 years, so I get a lot of questions about what kind of travel photography gear I use. Take a peek inside my camera bag!
Now, when you’re reading through this list, please keep in mind that I’m a working professional. I carry a lot of gear these days. More than I started with.
Most travelers don’t need backup cameras, drones, and multiple lenses.
If you’re just interested in a good portable camera for traveling, make sure to check out my complete guide to the best travel cameras for every budget.
I also share some more budget-friendly gear options at the end of this post. Enjoy!
My Travel Photography Gear (2019)
Shooting in Italy with my Sony A7R III
Sony A7R III – Main Camera Body
I was a Canon fanboy for years and started my backpacking adventures back in 2010 with the Canon 7D. However, when Sony came out with their smaller (and superior) mirrorless A7 line, I made the switch.
Since then I’ve been using Sony cameras & lenses for the past 4 years.
Sony’s camera & sensor technology is often ahead of its competitors these days — in fact, even Nikon uses Sony sensors in their cameras!
The Sony A7R III is built for high-end landscape photography with a massive 42.4-megapixel full-frame sensor. This sensor is HUGE! But the camera body isn’t, which is pretty incredible.
Frankly, this is far too much camera for most travelers though.
If you’d like examples of more budget-friendly options, make sure to read my tips for choosing the perfect travel camera.
My Travel Camera Lenses
Sony 16-35mm F2.8 – Wide Angle Lens
The 16-35mm F2.8 is the lens that’s on my camera 75% of the time. As a landscape photographer, I love shooting wide to capture as much of a big landscape as possible.
But you can also get decent portraits out of it zoomed in to 35mm and stopped down to F2.8. This lens works well for night and star photography too.
There is a less expensive version of this, the Sony 16-35mm F4 which is another decent option too.
Sony 24-70mm F2.8 – Medium Zoom Lens
Occasionally I need a little more reach. Or, I only have space for one lens (like on bigger hiking trips), and want the best of both worlds.
The 24-70mm F2.8 isn’t quite as wide, but often wide enough for most landscapes. With the added ability to zoom in to small subjects far away, or to compress the background making mountains “look” bigger.
This is also my go-to portrait lens for taking photos of people!
Sony FE 70-200mm F4 – Telephoto Zoom
The 70-200mm F4 is my wildlife photography lens. I don’t use it that often, and don’t bring it along on every trip either. If weight is an issue, it’s usually the first to be left behind.
But if I have a particular shot in mind that requires a telephoto, I’ll bring it.
By adding a Sony 2X extension on it, I can up the range to 400mm (which is great for safari photography).
My Backup Camera: Sony A6500
Sony A6500 – Backup Mirrorless Camera
For a long time, I only traveled with one main camera. But as I began working professional photography gigs, I realized that a backup camera was a wise investment.
When you’ve been hired for a photography project that pays 5-figures, the last thing you want is an accident or malfunction to leave you without any useable images for the client!
The Sony A6500 works with all my other Sony lenses, plus I use it as a portable vlogging camera.
It has a cropped (smaller) sensor, but has many of the same functions as my larger A7R III.
I also use it for shooting time-lapses while I’m working on other things, with help from Sony’s internal time-lapse software.
Sony 10-18mm F4 – Wide Vlogging Lens
The 10-18mm F4 is a cropped sensor lens that stays attached to my Sony A6500 body. It’s nice and wide for shooting selfie-style vlogging video, with fast autofocus.
Capture the Action with a GoPro!
GoPro Hero 7 – Action Camera
I’ve been using a GoPro since I started traveling 9 years ago. I’ve owned almost all the models! Currently, I travel with the GoPro Hero 7.
GoPro cameras are great at capturing hands-free action or “b-roll” and you can attach them to almost anything. Plus, they are waterproof and shockproof!
I use my GoPro for surfing, mountain biking, hiking, snowboarding, snorkeling, scuba diving, cliff jumping, interior and exterior moving-vehicle footage, and more.
GoPro Camera Accessories
Just owning a GoPro is not enough to get great images and video. The magic of these cameras is in the multitude of accessories that are available for them!
Handheld sticks, suction cups, clamps, head straps, mouth mounts — so many unique ways to attach a GoPro to something and get amazing footage.
Check out my complete guide to the best GoPro accessories for travel.
Traveling with a Drone
DJI Mavic 2 Pro – Flying Drone
The perfect tool for capturing aerial photography and video, while costing much less than renting a helicopter! Drones have really come a long way.
I couldn’t be happier with the new DJI Mavic 2 Pro (read my full review here).
It flies super fast, is extremely reliable, and shoots some very high-quality photos and video. Not to mention it folds up to fit in my carry-on bag!
The 360-degree sensors help stop you from running into things while flying, so you can concentrate on the shot. Active track and intelligent flight modes can do a lot of the work for you.
Remote Controller Sun Shade
I don’t own a bunch of accessories for my drone, but one important one is the DJI Mavic Sunshade. This allows me to see what I’m shooting on my iPhone screen, even in bright sunlight.
DJI Car Charger
Another drone accessory I bring with me on road trips is the car-charging adapter for DJI Mavic batteries. This ensures I always have a fresh battery ready to fly during epic travel photography road trips!
Peek Inside My Camera Backpack!
My Camera Bags
LowePro Whistler 350 – Camera Backpack
It took me a while to find a great camera backpack that I really loved, and I went through many different ones.
I finally found a winner in the LowePro Whistler 350. It holds everything I need it to, sits comfortably on my back, and has the perfect amount of weatherproofing and gear straps to tackle my typical outdoor adventures.
You can strap on a tripod, snowboard, hiking poles, ice-ax — anything really. While it comes with a rain cover, you really don’t need it because the bag itself is so water-resistant anyway.
There’s a dedicated laptop pocket, room for a jacket and snacks, plus it opens from the back for easy access on the ground. When the bag is fully loaded, it weighs about 24 lbs (11kg).
LowePro TopLoader Pro – Small Camera Bag
This is a smaller top-loading shoulder bag that’s large enough for a single full-size camera with a zoom lens.
You can also cram a 2nd lens into the side pocket if needed (or a GoPro, etc.).
I use this bag specifically for long-distance trekking adventures, where I need to carry a regular hiking backpack filled with food, clothing, and camping gear.
This little camera bag attaches up front to the backpack straps on my chest, for easy access to my camera and a balanced load for hiking long distances.
I use this setup when I need to travel light with a minimum amount of camera gear in the backcountry.
Lightweight Travel Tripods
My Camera Tripods
RRS TQC-14 – Full-Size Tripod
As a landscape photographer, a solid yet lightweight travel tripod is a key piece of my photography equipment.
I use my RRS TQC-14 to stabilize the camera in low light situations and with high f-stop settings (for maximum focus range). It allows me to get shots I just can’t achieve hand-held.
Sunsets, sunrises, the northern lights, star photography, and motion blurred waterfalls are just some of the situations where having a tripod is important.
I also use it to film myself for vlogs, as well as to shoot travel selfies when I’m hiking on my own. There are cheaper tripods out there though too, which I share in my guide to the best travel tripods.
Joby Gorillapod – Mini-Tripod
If I need to travel super light, for example on a long-distance camping & trekking adventure that will last multiple days, then I sometimes pack the Joby Gorillapod 5K instead of my full-size tripod.
At only 1.55 lbs, this thing is tiny. But the bendy legs allow you to attach it to objects for a higher perspective too. It’s strong enough to hold my large camera and works great as a “selfie stick” for shooting video too.
L-Bracket
This piece of metal attaches to the bottom of my large camera and allows for very quick changes from a landscape angle to portrait mode (long photos to tall photos) on my tripod.
In today’s Instagram world, where the 8×10 ratio is important, I try to shoot images of key locations in both landscape and portrait perspectives. I use the landscape style in my blog posts, and portrait style for social media (because they display better on smartphones).
Some of my Camera Accessories
Important Travel Camera Accessories
Peak Design Capture – Camera Clip
I love this thing so much! Basically, the Peak Design Capture Clip allows you to “clip” your camera onto your belt, or on the shoulder straps of a backpack, for easy access (and to keep your hands free).
I use it constantly for day hiking, walking around cities, and basically, anywhere I know I’ll want quick access to my camera. While I still use a camera strap sometimes, this is the primary way I carry my camera. You can even run with it!
HINT: If you have a larger camera, the Peak Design Pro Pad makes carrying it on your belt MUCH more comfortable.
Peak Design Leash – Camera Strap
When I’m not using my Peak Design camera clip mentioned above, I snap on this Peak Design Leash Camera Strap and sling it around my shoulders it like you’d wear a rifle.
The Peak Design system allows me to quickly remove the strap if it’s getting in the way, or snap it back on. Adjusting the strap length is also super fast. It’s pretty minimal and doesn’t take up much room in a bag.
External Microphones
For video, the internal microphones on cameras just aren’t very good. In fact, they’re pretty terrible. Because audio is SO important for creating a good video, I pack two different external microphones.
One is the Sennheiser MKE 400 Shotgun, which goes on the top of my camera. Great quality, and very small.
The other is the Tascam DR-TL Lavalier. This goes on my body, so I can get great audio even if the camera is far away, the room has a lot of echoes, or if it’s super windy out.
Hotshoe Flash
I own a Sony F43M flash, although I rarely take it with me on trips unless it’s for something very specific. Like maybe cave photography or nightlife.
Camera Lens Filters
Lens filters help you achieve certain photography effects that just aren’t possible with software yet. Think of them like sunglasses for your camera.
I carry a Hoya Fusion One Polarizing Filter to help reduce glare & reflections on water, glass (like through helicopter windows), and to darken up the blues and clouds in a sky.
I also carry a Tiffen Variable ND Filter (neutral density) which cuts down the amount of light going into the camera to different degrees, depending on how much you spin it. Why? To create special effects like motion blur in a waterfall, even when it’s sunny outside.
Wireless Intervalometer/Remote
One of my favorite pieces of gear is the Pixel TW-283 Wireless Remote & Intervalometer. This allows me to shoot time-lapses, or take photos of myself from up to 100 ft away from the camera.
You can set the timer to take photos all night while you sleep if you want to! They make different versions for different brands of camera.
Memory Cards
Because I shoot in RAW, with very large camera files, I use very fast memory cards. I own a mixture of Sony High-Performance 64GB and ScanDisk Extreme Pro 64GB class 10 cards which read/write at around 300 mb/s.
Spare Batteries
There is nothing worse than running out of battery power during an epic photography moment! That’s why I always carry spare batteries for my cameras.
I pack 3 batteries for my Sony A7R III, 2 for the A6500, 2 for the Mavic Pro, and 2 for my GoPro.
Portable Hard Drives
I travel with an Apple Macbook Pro 13″ with a 1TB SDD, which is usually plenty of room for the images & video I shoot on any given trip.
To back that up, I also pack a super small 2TB Scandisk Extreme Portable SSD. Once I get back “home”, I move everything over to a larger desktop RAID system.
Camera Rain Cover
Have you ever shot photos under a waterfall? Your camera will get soaked! While my Sony A7R III has decent weather sealing, in super bad weather, or under waterfalls, I throw on my Peak Design Shell Rain Cover.
Cold Weather Protection
I bought a cold-weather jacket for my camera last year, for a few winter projects I was working on. One camping on the ice in Manitoba, and the other snowmobiling through Russia.
It keeps your camera, batteries, lens, and your hands nice and toasty while shooting outdoors in below-zero temperatures.
Clear Accessory Pouches
I own a few Think Tank Camera Accessory Pouches to keep all my cables, battery chargers, and GoPro Accessories organized. The clear sides allow me to quickly figure out what’s inside.
Camera Maintenance Stuff
Camera Cleaning & Maintenance
Microfiber Lens Cloths
There’s nothing worse than a foggy or smudged camera lens! I pack no less than 3 of these 3M Microfiber Lens Cloths on every trip. Two go in my camera bag, one goes in my pocket for easy access.
I always end up losing them too, so it never hurts to have more than you need laying around.
Air Blower
The problem with changing your lenses on mirrorless cameras is that the mirror is exposed to the elements, and they’re a magnet for dust. Dust on your sensor leaves you with “dust spots” on your photos (or worse, video).
A few quick bursts of air with this Camera Air Blower on your sensor can help clear that dust away.
Sticky Sensor Stick
When the air blower doesn’t work, and the dust on my sensor is too stubborn to blow away, I break out the big guns, my Eyelead Sensor Stick. It’s kind of like a gummy bear on a stick that pulls the dust away.
Budget-Friendly Camera Kit Examples
Yes, I own a lot of camera gear now. But that wasn’t always the case.
When I first started traveling, all I used was a Canon 7D, a wide angle zoom lens, a tripod, and a GoPro.
If you are still new to travel and adventure photography, don’t get discouraged by this giant list of gear-porn that I’ve accumulated over the years!
I do this professionally and make decent money, so I can afford to go a little crazy.
For those of you traveling on a tighter budget, I’ve put together my ideal “starter travel photography kits” below — which won’t cost you an arm and a leg.
The Minimalist Backpacker Kit
Sony RX100 VA – Compact Point & Shoot
Joby Gorillapod 3K – Compact Tripod
Travel Photography Enthusiast Kit
Sony A6500 – Compact Mirrorless
Sony 18-135mm F3.5-5.6 – Travel Zoom Lens
Manfrotto BeFree – Aluminum Travel Tripod
LowePro Slingshot Edge – Mirrorless Camera Bag
Improving Your Travel Photography
Ok! That was a big post. But people kept asking about my gear, so there you go. :)
However please remember that gear isn’t everything.
The best way to improve your travel photography is to practice as much as possible and learn new skills.
Even after 9 years doing this, I’m still constantly learning techniques to get better.
First, if you don’t already edit your photos using software like Adobe Lightroom, I highly recommend you start.
For more quick and cheap ways to improve your travel photography, no matter what gear you use, make sure to read my full article here. ★
Enjoy This Post? Pin It!
READ MORE TRAVEL PHOTOGRAPHY ARTICLES
How To Choose The Best Travel Camera
Ultimate Adventure Travel Gear Guide
Best GoPro Accessories For Travel
DJI Mavic Pro Drone Review
Have any questions about my travel photography gear? What do you pack in your camera bag? Drop me a message in the comments below!
This is a post from The Expert Vagabond adventure blog.
from Tips For Traveling https://expertvagabond.com/travel-photography-gear-guide/
0 notes
Text
Iloilo City, Philippines and Horta, Portugal Rock Painting
We Want You To Look Great, Check Out Our Style Ideas
It's challenging to get a closet of modern official clothes. You need to look at several things. These guidelines may help you understand trend, and help you make the very best options for you.
Extras are your best friend. You may consider any old clothing that would be very boring or plain by itself and attire it up with awesome components. Put the right pendant or brooch to some very little black gown, and you've used that LBD from typical to amazing in just two mere seconds flat.
If you have extremely dried-out skin, you may want to utilize moisturizer well before using your beloved fragrant merchandise. Doing this will assist the cologne or perfume continue to be longer on the body. It would operate best if you make use of an unscented moisturizer, therefore the smells don't compete or build a new, unpredicted scent.
Consider utilizing a semipermanent dye in case you have patches of gray in your locks. The grey will appear to be the same shade as your entire head of hair and may final about 2 months. If you want, while you can't truly reduce your own hair with this particular strategy, you may elect to darken your hair.
Continue to keep a pair of light, affordable ballet flats towards the bottom of your respective purse or attache case. In cases where you bust a back heel, develop a blister, or just need to give the feet a rest, you will be prepared with out compromising your personal style. Select a fairly neutral shade that matches the vast majority of your wardrobe to stop clashing.
If you have less heavy epidermis and/or lighter in weight eyes, usually do not wear your hair way too dark. While dark-colored locks looks nice on people who have dark-colored skin area and eyes hues, it would only get you to appear laundered out. Set some streaks in it to be able to lighten up them up in the event you have to darken your hair.
If you've grow to be quite tired of your clothing, a good design tip is always to begin testing your look. This can be achieved by simply trying out a fresh type of clothes that you've never ever put on just before for instance a scarf or particular kind of outfit. This will likely absolutely freshen up your clothing collection.
Just about the most slimming colors for almost any woman is black colored nonetheless, too much dark can make you seem drab. To avert this outcome, add a colorful blazer or scarf. Dress in sometimes a dark skirt or dark jeans using a strong colored blazer or blouse to produce attract the eye upward when you have an apple company-molded physique.
Be sure that you create a listing well before leaving to assist you take full advantage of your time and effort, in relation to shopping. This is significant to help you center on what you need to buy and assist you to stay away from goods which might be a complete waste of closet and funds place.
When you dried out hair, you should just pat or blot it dry with a soft towel as an alternative to rubbing hair having a bath towel. Rubbing tangles and splits hair and may even cause loss in your hair. While you are blow-drying out the hair, utilize a lower establishing and relocate the blow clothes dryer continuously so that you will don't fry one particular part of locks. Don't retain the blow dryer too shut because this could cause problems for the hair and also shed you.
When you purchase sun glasses, try to find support frames which will organize with your summer apparel. You ought to actually need only a few couples to get you through the entire year. You may use other accessories to highlight on your own. On the other hand, a particular place. A number of couples of tones are needless, and dear.
A good fashion suggestion for using white clothes is to be sure that it is far from see by way of in the sun. A number of illumination problems can cause them to become virtually see through, resulting in reason for probable humiliation, although many occasions, apparel may possibly seem to be harmless. Check oneself outside in a number of lighting effects problems, especially outdoors.
Thoroughly clean from the cabinet frequently. The old expressing "out with that old, in with the newest" has never been far more relevant than worldwide of design. Twice yearly, go through your dresser and donate those things that you simply haven't donned for a while. Like that, you possess room for more fantastic realizes, and someone else is taking advantage of your unwanted things.
Stick out by adopting your functions. Emphasizing exactly what makes you the individual you are sets you apart, even though some may possibly see great cheekbones or delivery spots as imperfections. People will keep in mind you for the "flaw" and might discover you more attractive for doing this. That sweet tiny mole or dimples may be your offering level.
Once annually clean out your jewellery compartment at the very least. Outfit jewellery can fall out of fashion very quickly, even though most pieces that are made from precious metal or that include treasured gemstones can endure changing trends. To make certain that's your cabinet will not be packed with out of date parts you ought to maintain your drawer fresh and prepared.
So many people are of the opinion that brilliant colours need to only be used in the spring and summer this is not accurate. It is actually properly fine to utilize happier colors during the cold months it is actually just a matter of the way you put them on. When vibrant sweaters are great, dazzling pants are certainly not!
Fill up your wardrobe with traditional sections. It can be alright if you wish to try out trends, but if you would like use a clothing which makes sense, be sure you hold the classics. You can also commit a little more on traditional items simply because you know they may final with your closet lengthier.
To protect yourself from dry skin, be sure to try to eat effectively. Dried-out skin might be caused by malnutrition and dehydration. It is essential to enjoy a well-balanced diet plan that contains healthful natural oils such as grapeseed, olive and flax seed essential oil. Beverage a lot of pure, filtered drinking water to stay hydrated and avoid dried-out skin.
When buying a jacket or cover, you need to pay attention to the amount of buttons. The switches on a jacket shirt must not exceed 3. Additionally, a coat with a few control keys need to just have the best-most option buttoned. It is an straightforward key to consider that can help keep you seeking modern throughout the day.
Follow these suggestions to freshen your personal style. When you do that, you can feel assured reaching anybody and departing a fantastic initial effect. Utilize the tips in this post to your daily life and not only will you will make an effective very first impression, you can make a memorable perception each day. rock painting ideas
Watch Your Entire world Via An Completely New Zoom lens With One Of These Tips
Although in the beginning understanding photography can feel challenging, once you know the basic techniques, using beautiful, interesting photos gets straightforward. With all the tips provided on this page, you may best your digital photography abilities and discover how to get pleasure from your pastime far more.
Attempt moving in even closer to your issue when you're taking photos. By taking photos from diverse ranges, you'll be capable of getting a few different viewpoints and some may come out a lot better than other people. Try and get in which the subject of your photo fulfills the whole viewfinder of your own video camera - this gives you considerably more information on the topic rather than just filler specifics.
Will not make changing your configurations too intricate. It is best to tackle adjustments one-by-one: expert gentle or emphasis, then discover ways to control shutter velocity. This will allow you to focus on capturing the picture, as an alternative to paying all your time fiddling with the camera when your topic just walks apart.
A dSLR is an important resource for yourself. SLR is short for "individual lens video camera." This type of camera enables you to see just what the camera views while you get your chance. Electronic SLRs, or DSLRs, also permit you to start to see the finished picture immediately to be able to see whether the picture was effective. Look for a DSLR that may be full frame, because this delivers the largest picture sensing unit, and so produces by far the most thorough images.
Usually, photography lovers only consider the track record within a scenery photo and forget about the foreground. The foreground could be the most looked at area as soon as the image comes out. To generate a frame that is hitting and improve the degree of your image, prepare the foreground of your photo.
In taking photos, make sure that your primary focus is around the good quality rather than the amount of the images which you get. It will always be better for you to get 15 excellent photos than one hundred average shots in one day. Quality is definitely the higher option.
Fully grasp and get to know the digital camera. Even though this sounds easy, many individuals have in no way even look at the instructions concerning how to function their video camera. Be able to comprehend and know the many functions and food list of each key into it in order that when you should utilize a specific work, you already know how to find it which your camera can accomplish it.
Consider photographs of your own souvenirs whenever you travel. You might put the souvenir near the shop you created the purchase. You might even frame it next to your resort pool area. This is certainly a terrific way to seize recollections and keep in mind in which you may have got a new a number of item from.
When you are performing a photo shoot, take a great deal of photos. With electronic digital pcs and digital cameras, you are able to take around endless images. You'll have an improved chance of obtaining good images when you take a lot more. And when you get terrible ones, all you need to do is hit remove to remove them.
Keep in mind that photography is a superb activity to rehearse by itself. Your pals might get impatient and speed you while you are composing your pictures. For those who have buddies who enjoy taking pictures, tend not to let their vision impact your own personal compositions. The social element of taking photos will come later on when you can try your images with the good friends.
Receive an additional display device by using a diffuser rather than the built in display function. These built-in flashes usually create a image appear really tough. Another display model offers a more natural factor in your pictures and allows you to modify them with no noises you will get when using another kind of display.
Pay careful focus to qualification when composing your photographs. Jumbled, messy bedrooms can damage a photo which will help prevent your issue from standing upright out. Also, including the smallest object inside range of the picture could be a distraction, getting from the key focus. Always produce a fast scan from the space or landscaping, then take away items that will detract from an usually excellent photo.
Acquire honest photos. Instead of taking posed photos, try taking photos of your subject matter with loved ones at your workplace or performing something they adore. Once your issue is secure they are more at ease and you will probably end up getting some exclusive photographs. This functions particularly nicely when trying to image youngsters.
When you find yourself getting photos of a thing that is full of life, like pets and folks, you must center on an area to help you effortlessly go on a photograph of which. The most effective region to concentrate on for dwelling and inhaling subjects will be the eyes. Attempt concentrating on their eyeballs and you may consider far better pictures.
You may begin taking far better images if you put in the devotion and time to take greater images. Will not simply take pictures since you can. Learn to increase each and every time you practice photographs by attempting to "finest" each and every photo. When you always keep at it, you may slowly and gradually see effects every time.
A great picture taking trick which can help you out is usually to snap a portrait at eyes degree to acquire a complementary picture. Prevent acquiring cool shots from substantial or low perspectives since these photographs can feel impersonal and peculiar. It's all a point of what you wish however.
When you plan a streets taking photos getaway, think about the course that you might consider ahead of making your home or accommodation. There are many exclusive and exquisite graphics to taking and record time to organize your course beforehand is going to make it simpler to get each of the shots you desire.
Photograph your subject matter in an surroundings where by they belong. You are certain to find that men and women are much more secure getting photographed in their comfort and ease areas and would seem stiff and not comfortable if you attempt to push them right into a studio environment. Let the youngsters enjoy and catch the photos if they are actually delighted.
Be sure that prior to starting getting into taking photos regularly that you simply entirely know how the digital camera functions and just what it is and it is not capable of doing. Digital photography is all about timing and in case you are fiddling with your digital camera from too little comprehending the way it operates, you are able to miss lots of photo options.
Picture taking can be a entertaining interest and then for some, it can be part of their work, as was explained at first from the article. Understanding picture taking is the simplest way to make sure that you take the most effective photographs possible. Use everything you learned from the earlier mentioned article, and commence using the very best images achievable!
0 notes
Text
Camera Gear: The Travel Cameras and Accessories to Buy
Updated: 12/2/2018 | December 2nd, 2018
Today, professional photographer Laurence Norah of Finding the Universe, continues his five-part series on taking better travel photos. Many of you are looking to improve your travel photography so Laurence is here to help us do just that. In this post, Laurence goes in-depth on how to pick the perfect travel camera and gear for your trip.
There is a belief that better photography gear will equate to better photographs. While this is certainly the case in specific situations, the reality is that it is the skill of the photographer that makes all the difference. A pro-level camera in inexperienced hands will likely result in worse photographs than those taken by someone using an iPhone.
Knowing how to compose a great photo and how to use your camera properly are the two most important parts of taking a great photo, with the camera gear itself coming next in importance after these two.
Sometimes, gear does make a difference, particularly for situations such as fast-moving subjects or when there is less light available, in which case you might need a camera with a bigger sensor or a lens with a wider aperture. This is why you often see sports or wedding photographers carrying such expensive-looking equipment. But for your average travel photograph, the gear isn’t going to be the definitive factor. Rather, it’s important to get the right gear for you, your budget, and your skill level.
How much money do you want to spend?
There’s no point spending time looking at gear that isn’t in your budget. Set yourself a budget before you begin, and don’t forget to factor in lenses, memory cards, spare batteries, filters, and other accessories.
There is a law of diminishing returns, with a sweet spot currently of around $500–1,000 USD for a solid setup that will do everything you need.
Consider these price guidelines for all the equipment you’ll need:
Budget: $150–300 USD
Value: $300–500 USD
Mid-range: $500–1,000 USD
High-end: $1,000+ USD
How much gear are you willing to carry?
Weight is a serious consideration, and you have to be brutally honest with yourself about what you are willing to carry with you. I’ve often met people taking pictures with their smartphone who say they have a nice expensive DSLR sitting back in their hotel room that was “too heavy to bring out today.”
If you’re not the kind of person who wants to carry a heavy device, then don’t buy one in the first place. The best camera is always the one you have on you, so if you think you’re going to mostly just be keeping it light, then just invest in a decent smartphone or simple point-and-shoot.
For reference, your smartphone probably weighs around 6 oz., a point-and-shoot 8 oz., a mirrorless system with a lens around 16 oz., and a full DSLR system around 30 oz. or more.
The heavier the equipment, the higher the quality of construction, particularly of the optical elements, leading to higher-quality images. However, unless you are planning on selling your work for high-resolution printing, the difference probably won’t be noticeable.
This is another moment to be honest with yourself. Learning how to use a camera properly takes time, and if you don’t want to do that, then don’t invest in an overly expensive or complicated camera.
I’ve seen people with rigs costing in excess of $5,000 USD, shooting away in auto mode and wondering why the folks with the iPhones are getting better results. More expensive gear does not automatically equate to better photos!
There’s no exact science to figuring out how difficult a camera is to use, but difficulty indicators include costing more, having more buttons, and having a massive manual. The more complicated the camera, the more control that you have, but the harder it will be to achieve good results without investing time and effort into learning.
11 Best Cameras for Travel
The main difference between camera types is the size of the sensor inside the camera — the larger the sensor, the better the camera will perform in lower light, and the bulkier and more expensive it will be.
The following list is roughly ordered by sensor size, from small (smartphones) to larger (SLRs).
Google Pixel 2: I’ve used a lot of Android phones over the years, and Google’s Pixel 2 is a beast when it comes to mobile photography. It offers full manual control, a super f/1.8 aperture lens, the option to shoot in RAW file format, optical image stabilization, and even pretty good performance in low light.(Smartphone, $629
iPhone X: I’ve never personally used an iPhone, but they are often lauded by friends as being superb for photography, with each iteration improving on the last. If you’re an Apple fan, you’ve probably already got one though. (Smartphone, $1,050)
Sony RX 100 V: While this is by no means a cheap point-and-shoot, it is generally reviewed as the best in its class. This is due to having a much larger sensor than other models, meaning that the image quality is a lot better. If price is an issue, check out previous versions which come in a bit cheaper. (Point and shoot, $895)
Canon Powershot Elph 190 IS: At the other end of the scale is this $100 USD point-and-shoot from Panasonic. It’ll get the job done, offers a 12x optical zoom, and will slip nicely into your pocket. Don’t expect National Geographic–quality shots though. (Point and shoot, $150)
Canon Powershot G9X Mark II: Though it sits between the above two options in price, the G9 X Mark II comes a lot closer to the Sony in terms of image quality. Excellent battery life, rugged construction, and Wi-Fi round out the feature set. (Point and shoot, $430)
GoPro Hero 7 Black: Despite other manufacturers’ attempts, there is only one option when it comes to action cameras, and that’s the GoPro. If the Hero 6 is too pricey, check out the Hero 6 which is very similar. (Action cam, $399)
Nikon Coolpix B700: Nikon has an excellent reputation for superzooms, and this model has a crazy 60x optical zoom. It’s a good value option too, with solid reviews, so I have no hesitation suggesting this as an option if you want an all-in-one with scope for more control over your photography. (Superzoom, $450) (Here are some more options to consider at different price points.)
Lumix GX7 or GX8: With a 16MP four thirds sensor, 4K video, touch screen, and Wi-Fi, the GX7 has everything you need for successful shooting with a mirrorless camera. (Mirrorless, $500-$1,200)
Alpha 6300 or A7R III: If you’re on a budget but want to get your foot in the door, the a6300 is the camera for you. For someone with a higher skill level (and significantly higher budget), the A7R III is a top-notch choice, offering a full-frame sensor, super fast processing, a secondary SD slot, and improved battery life. (Mirrorless, $900-$3,200)
X-T2: With an electronic viewfinder, flip-out screen, a secondary SD slot, and improved autofocus, this is a great mirrorless choice for anyone wanting a smaller camera but who still wants full manual control. (Mirrorless, $1,600)
Canon EOS 6D Mark II: I shoot with two of these cameras and am always impressed by their performance, particularly in low light. They are the lightest SLRs with a full-frame sensor, and also have Wi-Fi and GPS, the latter being particularly handy for travel. (DSLR, $1,600)
Getting the Best Travel Lens
If you are buying a mirrorless or SLR system, then you’re going to have to buy a lens. Consider spending at least as much on the lens as the camera body, if not more.
I suggest buying the camera body by itself and then buying a lens to meet your needs rather than the “kit-lens” that might come with it.
A lens has two specifications: focal length and maximum aperture.
The smaller the number of the aperture, the more light the camera will let in, allowing you to achieve various effects (as I described in the second post in this series).
The focal length is the zoom factor of the lens — the bigger the number in mm, the more magnification the lens offers; the smaller the number, the less magnification.
What to look for in a lens
For travel purposes, I’d advise buying two lenses:
A cheaper “prime” lens with a fixed focal length of around 50mm and an aperture of 1.8, perfect for portraits or food.
A good-quality “walk-around” zoom lens with a wide focal range to let you get everything from wide landscapes to close-up shots of people. Something in the range of 24-105mm would likely do.
The Best Trevl Photography Accessories
You must factor in some money for purchasing accessories when buying a camera. I’d suggest the following:
Spare battery: Most camera batteries last for 300-500 shots, so if you think you’ll be taking a lot of photos and might be away from power for a few days, a second battery could ensure that you don’t miss a moment. I’d advise buying the battery from your manufacturer to guarantee compatibility. Price: usually around $30 USD.
External hard drive: Depending on the capacity of your laptop, you might find you need an external hard drive to store your photos. I travel with three Transcend ruggedized hard drives and store backups of my photos across two of them, as well as synchronize them to a cloud-based backup when I have fast enough Internet. Price: currently around $99 USD for a 2TB model.
Filters: Lenses aren’t cheap. Pick up a relatively inexpensive UV filter for the front of your lens, and if you scratch it, you’ll just need to replace the filter rather than the whole lens. I would also suggest investing in a polarizing filter (as I mentioned in the second post in the series). Price: the larger the filter, the more expensive it is. $10–100 USD, with Hoya, B+W, and Tiffen being respectable brands.
Memory cards: Memory cards are cheap, so pick up one or two Class 10 32Gb or 64Gb cards that’ll let you keep shooting for ages. I’ve not found much difference between brands, and have never had a card fail in all my years shooting. Price: $30 USD for 64Gb.
Tripod: A tripod can really expand your creative possibilities, letting you take longer exposures and play with time. Even a small travel tripod can reap dividends for your travel photography. Again though, if you don’t think you’ll use it, don’t buy one. Price: $100 USD will get you a perfectly respectable model. I use the VEO range of Vanguard tripods, which fit nicely into a bag and weigh around 5 lbs, with prices ranging from $100 to $350 USD.
***
Never forget that the most powerful photography tool is you — not your camera! I traveled the world with an old 10-megapixel Canon Rebel SLR for years, producing both award-winning and income-generating photography from — by today’s standards — a very basic bit of kit.
It is far more important to invest time in learning how to take better photos than throwing money at gear. Do your research, figure out your personal travel style, and pick the gear that is right for you, based on weight, price, and your personal learning goals.
If that camera turns out to be a smartphone, awesome. The best camera for traveling is the one you are going to be taking with you whenever you walk out your door and head into the world and the one that fits your budget.
Laurence started his journey in June 2009 after quitting the corporate life and looking for a change of scenery. His blog, Finding the Universe, catalogs his experiences and is a wonderful resource for photography advice! You can also find him on Facebook, Instagram, and Twitter.
More Travel Photography Tips!
For more helpful travel photography tips, be sure to check out the rest of Laurence’s travel photography series:
Part 1 – How to Take Professional Travel Photos
Part 2 – How to Shoot the Perfect Travel Photograph
Part 3 – Best Camera and Gear to Get
Part 4 – How to Take the Perfect Photo: Advanced Techniques
Part 5 – 7 Editing Tips to Improve Your Travel Photographs
LEARN TO GET OUT OF AUTO!
If you are looking to really get into photography and want to master your camera and take amazing photos when you travel, Laurence and I have developed a comprehensive photography course that will get you out of auto and have your friends go “Wow! That’s really breathtaking!” in no time. Click here to learn more about the course and start today!
Book Your Trip: Logistical Tips and Tricks
Book Your Flight
Find a cheap flight by using Skyscanner or Momondo. They are my two favorite search engines because they search websites and airlines around the globe so you always know no stone is left unturned.
Book Your Accommodation
You can book your hostel with Hostelworld. If you want to stay elsewhere, use Booking.com as they consistently return the cheapest rates for guesthouses and cheap hotels. I use them all the time.
Don’t Forget Travel Insurance
Travel insurance will protect you against illness, injury, theft, and cancellations. It’s comprehensive protection in case anything goes wrong. I never go on a trip without it as I’ve had to use it many times in the past. I’ve been using World Nomads for ten years. My favorite companies that offer the best service and value are:
World Nomads (for everyone below 70)
Insure My Trip (for those over 70)
Looking for the best companies to save money with?
Check out my resource page for the best companies to use when you travel! I list all the ones I use to save money when I travel – and I think will help you too!
The post Camera Gear: The Travel Cameras and Accessories to Buy appeared first on Nomadic Matt's Travel Site.
from Nomadic Matt's Travel Site https://ift.tt/2DWKC35
via IFTTT
1 note
·
View note
Text
Camera Gear: The Travel Cameras and Accessories to Buy
Updated: 12/2/2018 | December 2nd, 2018
Today, professional photographer Laurence Norah of Finding the Universe, continues his five-part series on taking better travel photos. Many of you are looking to improve your travel photography so Laurence is here to help us do just that. In this post, Laurence goes in-depth on how to pick the perfect travel camera and gear for your trip.
There is a belief that better photography gear will equate to better photographs. While this is certainly the case in specific situations, the reality is that it is the skill of the photographer that makes all the difference. A pro-level camera in inexperienced hands will likely result in worse photographs than those taken by someone using an iPhone.
Knowing how to compose a great photo and how to use your camera properly are the two most important parts of taking a great photo, with the camera gear itself coming next in importance after these two.
Sometimes, gear does make a difference, particularly for situations such as fast-moving subjects or when there is less light available, in which case you might need a camera with a bigger sensor or a lens with a wider aperture. This is why you often see sports or wedding photographers carrying such expensive-looking equipment. But for your average travel photograph, the gear isn’t going to be the definitive factor. Rather, it’s important to get the right gear for you, your budget, and your skill level.
How much money do you want to spend?
There’s no point spending time looking at gear that isn’t in your budget. Set yourself a budget before you begin, and don’t forget to factor in lenses, memory cards, spare batteries, filters, and other accessories.
There is a law of diminishing returns, with a sweet spot currently of around $500–1,000 USD for a solid setup that will do everything you need.
Consider these price guidelines for all the equipment you’ll need:
Budget: $150–300 USD
Value: $300–500 USD
Mid-range: $500–1,000 USD
High-end: $1,000+ USD
How much gear are you willing to carry?
Weight is a serious consideration, and you have to be brutally honest with yourself about what you are willing to carry with you. I’ve often met people taking pictures with their smartphone who say they have a nice expensive DSLR sitting back in their hotel room that was “too heavy to bring out today.”
If you’re not the kind of person who wants to carry a heavy device, then don’t buy one in the first place. The best camera is always the one you have on you, so if you think you’re going to mostly just be keeping it light, then just invest in a decent smartphone or simple point-and-shoot.
For reference, your smartphone probably weighs around 6 oz., a point-and-shoot 8 oz., a mirrorless system with a lens around 16 oz., and a full DSLR system around 30 oz. or more.
The heavier the equipment, the higher the quality of construction, particularly of the optical elements, leading to higher-quality images. However, unless you are planning on selling your work for high-resolution printing, the difference probably won’t be noticeable.
This is another moment to be honest with yourself. Learning how to use a camera properly takes time, and if you don’t want to do that, then don’t invest in an overly expensive or complicated camera.
I’ve seen people with rigs costing in excess of $5,000 USD, shooting away in auto mode and wondering why the folks with the iPhones are getting better results. More expensive gear does not automatically equate to better photos!
There’s no exact science to figuring out how difficult a camera is to use, but difficulty indicators include costing more, having more buttons, and having a massive manual. The more complicated the camera, the more control that you have, but the harder it will be to achieve good results without investing time and effort into learning.
11 Best Cameras for Travel
The main difference between camera types is the size of the sensor inside the camera — the larger the sensor, the better the camera will perform in lower light, and the bulkier and more expensive it will be.
The following list is roughly ordered by sensor size, from small (smartphones) to larger (SLRs).
Google Pixel 2: I’ve used a lot of Android phones over the years, and Google’s Pixel 2 is a beast when it comes to mobile photography. It offers full manual control, a super f/1.8 aperture lens, the option to shoot in RAW file format, optical image stabilization, and even pretty good performance in low light.(Smartphone, $629
iPhone X: I’ve never personally used an iPhone, but they are often lauded by friends as being superb for photography, with each iteration improving on the last. If you’re an Apple fan, you’ve probably already got one though. (Smartphone, $1,050)
Sony RX 100 V: While this is by no means a cheap point-and-shoot, it is generally reviewed as the best in its class. This is due to having a much larger sensor than other models, meaning that the image quality is a lot better. If price is an issue, check out previous versions which come in a bit cheaper. (Point and shoot, $895)
Canon Powershot Elph 190 IS: At the other end of the scale is this $100 USD point-and-shoot from Panasonic. It’ll get the job done, offers a 12x optical zoom, and will slip nicely into your pocket. Don’t expect National Geographic–quality shots though. (Point and shoot, $150)
Canon Powershot G9X Mark II: Though it sits between the above two options in price, the G9 X Mark II comes a lot closer to the Sony in terms of image quality. Excellent battery life, rugged construction, and Wi-Fi round out the feature set. (Point and shoot, $430)
GoPro Hero 7 Black: Despite other manufacturers’ attempts, there is only one option when it comes to action cameras, and that’s the GoPro. If the Hero 6 is too pricey, check out the Hero 6 which is very similar. (Action cam, $399)
Nikon Coolpix B700: Nikon has an excellent reputation for superzooms, and this model has a crazy 60x optical zoom. It’s a good value option too, with solid reviews, so I have no hesitation suggesting this as an option if you want an all-in-one with scope for more control over your photography. (Superzoom, $450) (Here are some more options to consider at different price points.)
Lumix GX7 or GX8: With a 16MP four thirds sensor, 4K video, touch screen, and Wi-Fi, the GX7 has everything you need for successful shooting with a mirrorless camera. (Mirrorless, $500-$1,200)
Alpha 6300 or A7R III: If you’re on a budget but want to get your foot in the door, the a6300 is the camera for you. For someone with a higher skill level (and significantly higher budget), the A7R III is a top-notch choice, offering a full-frame sensor, super fast processing, a secondary SD slot, and improved battery life. (Mirrorless, $900-$3,200)
X-T2: With an electronic viewfinder, flip-out screen, a secondary SD slot, and improved autofocus, this is a great mirrorless choice for anyone wanting a smaller camera but who still wants full manual control. (Mirrorless, $1,600)
Canon EOS 6D Mark II: I shoot with two of these cameras and am always impressed by their performance, particularly in low light. They are the lightest SLRs with a full-frame sensor, and also have Wi-Fi and GPS, the latter being particularly handy for travel. (DSLR, $1,600)
Getting the Best Travel Lens
If you are buying a mirrorless or SLR system, then you’re going to have to buy a lens. Consider spending at least as much on the lens as the camera body, if not more.
I suggest buying the camera body by itself and then buying a lens to meet your needs rather than the “kit-lens” that might come with it.
A lens has two specifications: focal length and maximum aperture.
The smaller the number of the aperture, the more light the camera will let in, allowing you to achieve various effects (as I described in the second post in this series).
The focal length is the zoom factor of the lens — the bigger the number in mm, the more magnification the lens offers; the smaller the number, the less magnification.
What to look for in a lens
For travel purposes, I’d advise buying two lenses:
A cheaper “prime” lens with a fixed focal length of around 50mm and an aperture of 1.8, perfect for portraits or food.
A good-quality “walk-around” zoom lens with a wide focal range to let you get everything from wide landscapes to close-up shots of people. Something in the range of 24-105mm would likely do.
The Best Trevl Photography Accessories
You must factor in some money for purchasing accessories when buying a camera. I’d suggest the following:
Spare battery: Most camera batteries last for 300-500 shots, so if you think you’ll be taking a lot of photos and might be away from power for a few days, a second battery could ensure that you don’t miss a moment. I’d advise buying the battery from your manufacturer to guarantee compatibility. Price: usually around $30 USD.
External hard drive: Depending on the capacity of your laptop, you might find you need an external hard drive to store your photos. I travel with three Transcend ruggedized hard drives and store backups of my photos across two of them, as well as synchronize them to a cloud-based backup when I have fast enough Internet. Price: currently around $99 USD for a 2TB model.
Filters: Lenses aren’t cheap. Pick up a relatively inexpensive UV filter for the front of your lens, and if you scratch it, you’ll just need to replace the filter rather than the whole lens. I would also suggest investing in a polarizing filter (as I mentioned in the second post in the series). Price: the larger the filter, the more expensive it is. $10–100 USD, with Hoya, B+W, and Tiffen being respectable brands.
Memory cards: Memory cards are cheap, so pick up one or two Class 10 32Gb or 64Gb cards that’ll let you keep shooting for ages. I’ve not found much difference between brands, and have never had a card fail in all my years shooting. Price: $30 USD for 64Gb.
Tripod: A tripod can really expand your creative possibilities, letting you take longer exposures and play with time. Even a small travel tripod can reap dividends for your travel photography. Again though, if you don’t think you’ll use it, don’t buy one. Price: $100 USD will get you a perfectly respectable model. I use the VEO range of Vanguard tripods, which fit nicely into a bag and weigh around 5 lbs, with prices ranging from $100 to $350 USD.
***
Never forget that the most powerful photography tool is you — not your camera! I traveled the world with an old 10-megapixel Canon Rebel SLR for years, producing both award-winning and income-generating photography from — by today’s standards — a very basic bit of kit.
It is far more important to invest time in learning how to take better photos than throwing money at gear. Do your research, figure out your personal travel style, and pick the gear that is right for you, based on weight, price, and your personal learning goals.
If that camera turns out to be a smartphone, awesome. The best camera for traveling is the one you are going to be taking with you whenever you walk out your door and head into the world and the one that fits your budget.
Laurence started his journey in June 2009 after quitting the corporate life and looking for a change of scenery. His blog, Finding the Universe, catalogs his experiences and is a wonderful resource for photography advice! You can also find him on Facebook, Instagram, and Twitter.
More Travel Photography Tips!
For more helpful travel photography tips, be sure to check out the rest of Laurence’s travel photography series:
Part 1 – How to Take Professional Travel Photos
Part 2 – How to Shoot the Perfect Travel Photograph
Part 3 – Best Camera and Gear to Get
Part 4 – How to Take the Perfect Photo: Advanced Techniques
Part 5 – 7 Editing Tips to Improve Your Travel Photographs
LEARN TO GET OUT OF AUTO!
If you are looking to really get into photography and want to master your camera and take amazing photos when you travel, Laurence and I have developed a comprehensive photography course that will get you out of auto and have your friends go “Wow! That’s really breathtaking!” in no time. Click here to learn more about the course and start today!
Book Your Trip: Logistical Tips and Tricks
Book Your Flight
Find a cheap flight by using Skyscanner or Momondo. They are my two favorite search engines because they search websites and airlines around the globe so you always know no stone is left unturned.
Book Your Accommodation
You can book your hostel with Hostelworld. If you want to stay elsewhere, use Booking.com as they consistently return the cheapest rates for guesthouses and cheap hotels. I use them all the time.
Don’t Forget Travel Insurance
Travel insurance will protect you against illness, injury, theft, and cancellations. It’s comprehensive protection in case anything goes wrong. I never go on a trip without it as I’ve had to use it many times in the past. I’ve been using World Nomads for ten years. My favorite companies that offer the best service and value are:
World Nomads (for everyone below 70)
Insure My Trip (for those over 70)
Looking for the best companies to save money with?
Check out my resource page for the best companies to use when you travel! I list all the ones I use to save money when I travel – and I think will help you too!
The post Camera Gear: The Travel Cameras and Accessories to Buy appeared first on Nomadic Matt's Travel Site.
from Traveling News https://www.nomadicmatt.com/travel-blogs/best-travel-cameras-gear/
0 notes
Last Seen Blogs

somniumartz
tanginang buhay to
somniumartz
tanginang buhay to

rainbowdragons-216
PurpleFireflies

survivorindia
Tumblr Survivor India

justinbetts-blog1
Untitled