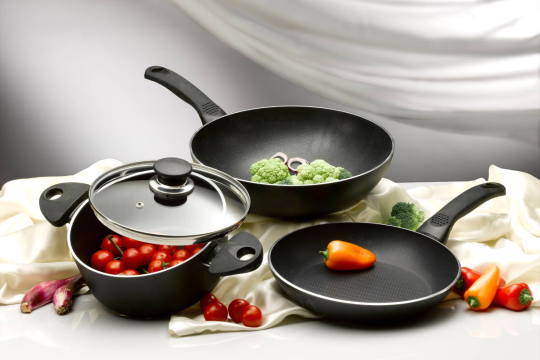
#nonstick skillet pots and pans
Text
Articles-1
Read another article about: non-stick fry panRead another article about: frying pan setRead another article about: stainless steel frying panRead another article about: electric frying panRead another article about: the best ceramic nonstick frying panRead another article about: the best nonstick skilletRead another article about: Cast iron frying panRead another article about: Cast iron…
View On WordPress
#best ceramic cookware sets#best pots and pans for gas stove#best skillet reviews#Kitchen cookware set#non stick fry pan#nonstick skillet pots and pans#pots and pans#Stainless steel frying pan
0 notes
Text
46 Best Ceramic Cookware in 2022 (reviews, opinions, prices)
46 Best Ceramic Cookware in 2022 (reviews, opinions, prices)
Are you looking for the best ceramic cookware set? Don’t worry anymore! As in this post, we have listed 46 models that are top-rated and liked by the people who use them.
Before you start, make a list of features you are looking for in ceramic cookware this way, choosing the best one for your needs from this list would be a lot easier. No matter what your requirements are, this list contains the…
View On WordPress
#best ceramic cookware set#best kitchen cookware#cast iron frying pan#Ceramic pot with lid#copper pot and pans set#frying pan#non-stick cookware sets#non-stick pot#nonstick skillet
0 notes
Text
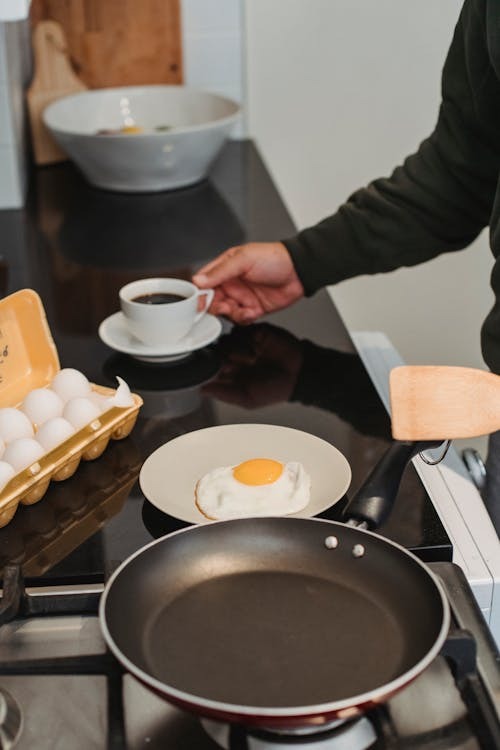
Can someone please invent a tool for me to put all the ingredients of a recipe into, and then the tool tells me what size pan/pot/mixing or salad bowl I need to use?
Wouldn’t mind answers like: No dumbass, that tiny pot you cook your 5 potatoes in doesn’t do it for the Girossuppe with 1 kg chicken, 1 liter broth, 550 grams of bell peppers, onion, garlic, heavy cream, a 400 g can of whole peeled tomatoes, and other stuff. Or: You want to fry 2 eggs, why do you think using a 12 inch skillet is a good idea? Grab that tiny nonstick instead!
7 notes
·
View notes
Note
top five kitchen items you can't live without? or ten if it's easier. personally i am so so so grateful for access to an enameled cast iron dutch oven and it makes me wonder what others use ?
oohhh that's such a good question!! im gna have to go to ten LOL
a good chef's knife !! i tend to heavily favor my knives and could run my kitchen w just one or two easily
a big heavy bottomed pot for sauces n pasta n soups, i'd love to have a dutch oven someday lol
cast iron skillet. it is divisive which style of frying pan is best, ppl tend to be deeply loyal to their favorites. i favor a cast iron for most things, especially searing meats, making dutch babies, pizzas, veggies, fried eggs, and so on !! my go-to!! also love that it can go in the oven reliably. but i'd be lying if i wasn't attached to all my pans :'')
stainless or carbon steel pan. has it's moments where it's the right tool for the job. i like these for making fish w a good crispy skin or emulsifying my pasta water w my pasta n sauce
nonstick pan. rare, but useful for things like scrambled eggs and pancakes, delicate things like that.
this is a recent discovery for me, but a food scale!! has been sooo useful for me i've eliminated the use of measuring cups n spoons in my practice (especially 4 baking!!)
a fish spatula!! she's multi-talented <3
tongs or metal chopsticks r saviors for me bc i intuitively want to just use my hands to flip everything and these r a decent substitute to save the tips of my fingers, also great for stirring and imo could sub for a whisk
a large cake pan!! versatile, can roast veggies or proteins in it, bake cakes or cookies, can be used in prep work. just a nice little extra thingy to have around
a set of mixing bowls in a WIDE range of sizes ! soooo nice to have many on hand when meals have multiple components
#i loved this question !!#im a collector of kitchen items so this was nice to be thoughtful and intentional abt what i use the most!!#asks
30 notes
·
View notes
Note
If you were a pot/pan, what kind of pot/pan would you be?
(for reference, I'd be a ten-inch cast iron skillet)
I like to think I would be a nine-quart soup pot so heavy-bottomed even a cream base never burned, wide enough to hold soup for all the neighbors, stainless steel so you can really scrub the grime off without damaging the finish, with those good stout double handles so your grip doesn’t slip.
In truth I’m probably more like a spindly little nonstick frying pan that scratches way too easily and heats quicker on one side than the other. But He who began a good work…
17 notes
·
View notes
Text
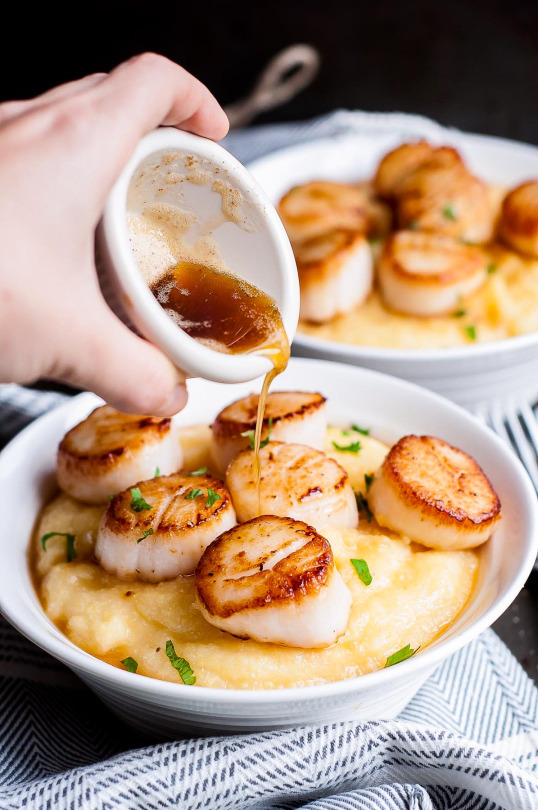
Brown Butter Scallops with Parmesan Polenta
Polenta:
1 cup medium grind cornmeal
3 Tbsp. butter
4 cups chicken broth or water
1 tsp. kosher salt
⅓ cup parmesan cheese, grated
Scallops:
1 lb. jumbo scallops
2 Tbsp. oil for frying (something high heat, like canola or grape seed oil)
salt and freshly ground pepper
Brown Butter:
3 garlic cloves, smashed
¼ cup butter
Polenta:
Boil the broth or water with salt in a medium pot. Slowly add the cornmeal, whisking constantly to avoid lumps. Bring water down to low and stir with the whisk until it just starts to thicken. Put the lid on over the pot and continue cooking for 20 minutes, stirring occasionally. Turn off the heat and add Parmesan cheese and butter. Stir to combine and pour into the serving plates.
Scallops:
Heat oil in nonstick skillet. Pat scallops as dry as possible, sprinkle with salt and pepper and add to the hot pan. After 2-3 minutes, flip them over and sear for another 30 seconds to a minute. Then place straight onto the serving plates over the polenta.
Brown Butter:
Put the smashed garlic cloves and butter in a clean skillet over medium heat and stir it while watching it closely – when the garlic starts to sizzle and the butter starts to look golden and foamy, remove from heat, discard the garlic and drizzle the butter over the scallops and polenta. Garnish dish with lemon and parsley.
#angelkin#food#dinner#gluten free#pescatarian#cornmeal#butter#meat#chicken#cheese#seafood#scallop#garlic#herokin#jellyfishkin#pantherkin#spring
6 notes
·
View notes
Photo

Three of Coins. Art by Kim Thompson, from Divine Your Dinner.
FORMING ALLIANCES
You’re ready to invite some fresh energy into your life. Though you don’t have the skills to do everything required to reach your goals, you can find others who can help. Be on the lookout for people who are adept at things you have less experience with. Bring them into your circle. Even if they’re not the best fit for what you’ve got going on now, they could prove to be an essential resource later on.
Working with others is not always easy, but when it clicks, there’s nothing better. Take these pot stickers: They bring baked potatoes, all the fixin’s, and pot stickers together into one beautiful form. They’re the perfect vehicle for showing off what great versatility you bring to the table.
MAGICKAL INGREDIENTS: POTATO, SCALLION (SEE ALLIUMS), GARLIC (SEE ALLIUMS), BLACK PEPPER
LOADED BAKED POTATO POT STICKERS
SIDE—MAKES 18 POT STICKERS
That's right, we took the best things about a loaded baked potato (i.e., everything) and stuffed them inside gyoza wrappers. As noted, this recipe makes 18 pot stickers, which will serve 2 as a main, 4 as a side, or 1 if you are Courtney.
The dipping sauce is a play on the black vinegar sauce you typically eat with dumplings, except with apple cider vinegar and a dollop of sour cream, because what’s a loaded baked potato without a dollop of the good stuff?
HOT TIP: IF YOU CAN’T FIND GYOZA OR DUMPLING WRAPPERS, WONTON WRAPPERS WORK. INSTEAD OF FOLDING THEM INTO HALF-MOONS, YOU’LL FOLD THEM INTO TRIANGLES.
DIPPING SAUCE
2 tablespoons sour cream
2 tablespoons soy sauce
2 teaspoons apple cider vinegar
2 tablespoons finely chopped scallion greens
POT STICKERS
1 (12- to 14-ounce) russet (baking) potato, peeled and quartered
2 slices bacon, cooked and finely chopped
⅓ cup shredded cheddar cheese
1 tablespoon finely chopped scallion whites
½ teaspoon minced garlic
½ teaspoon kosher salt
¼ teaspoon freshly ground black pepper
1 (10-ounce) package gyoza or dumpling wrappers
1 tablespoon canola or vegetable oil
1. MAKE THE DIPPING SAUCE: In a small bowl, combine the sour cream, soy sauce, vinegar, and scallion greens. Refrigerate to chill.
2. MAKE THE POT STICKERS: Boil the potato until fork-tender, about 15 minutes. Drain and return to the pot. Reduce the heat to medium-low for about 1 minute to cook off excess water. Remove from the heat and smash with a potato masher or a fork until smooth. Let cool for 15 minutes.
3. In a medium bowl, combine the bacon, cheddar, scallion whites, garlic, salt, and black pepper. Add the potatoes and mix until fully combined. Add salt and pepper to taste.
4. To assemble the pot stickers, lay the wrappers out on a clean work surface. Working with one wrapper a time, spoon a rounded teaspoon of filling onto the center. Using a pastry brush or your fingers, brush water around the edges, then fold the wrapper over the filling to create a half-moon, pinching the edges together to seal and crimp. Repeat with the remaining filling and wrappers.
5. In a medium nonstick skillet, heat the oil over medium heat. When the oil shimmers, add all of the pot stickers in an even layer and cook, without turning, until the bottoms are golden brown, 2 to 3 minutes. Carefully pour in ½ cup water and immediately cover with a tight-fitting lid. Reduce the heat to medium-low and steam the pot stickers until the wrappers have softened, 3 to 4 minutes. Uncover the pan, and cook until most of the water has evaporated, 3 to 4 minutes.
6. Serve immediately with the dipping sauce.
5 notes
·
View notes
Link
Top Kitchen Must-Haves of 2024: Cook, Bake, and Fry Like a Pro - https://tinyurl.com/269wnfnc
0 notes
Text
Are only four-digit cast iron pans considered good cast iron pans?
When it comes to casting iron pots, it is estimated that many beautiful cooks already have them, or are planning to have them. Indeed, as a “professional” or “amateur” cook, you should have a good cast iron pan in your pan collection. It is heavy and the price is higher than ordinary pots. This “double-height” bulk is exceptionally good at holding heat; we can heat it to higher temperatures than…

View On WordPress
#best ceramic cookware sets#best pots and pans for gas stove#best skillet reviews#Frying pan set#Kitchen cookware set#non stick fry pan#nonstick skillet pots and pans#pots and pans#Stainless steel frying pan
0 notes
Text
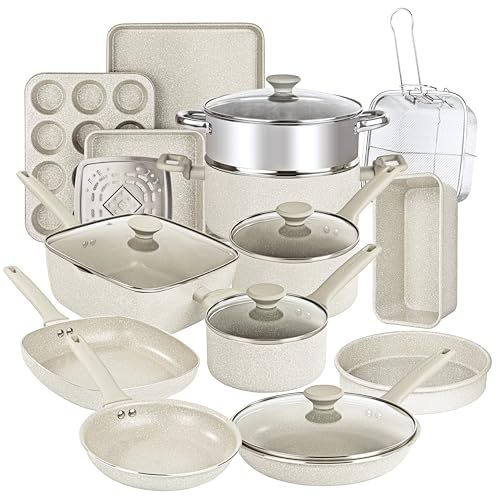
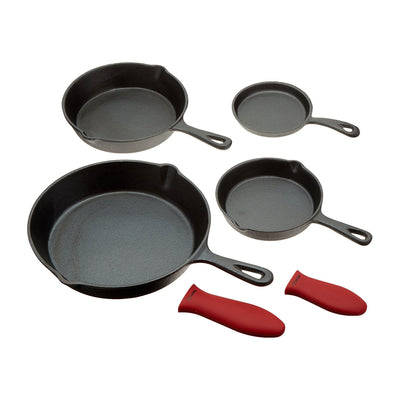
Granitestone 20 Pc Pots and Pans Set Non Stick Cookware Set, Kitchen Cookware Sets, Pot and Pan Set, Pot Set, Diamond Coated Nonstick Cookware Set with Lids, Healthy and Non Toxic, Dishwasher Safe
COMPLETE KITCHEN COOKWARE SET: Includes everything you need to completely outfit your kitchen and take cooking and baking to the next level, includes a full cookware set with frying pans, skillets, saucepans, stock pots with tempered glass lids, a deep frying and casserole pan with a steamer tray, fry basket and lid plus a complete PRO baking set with cookie sheet/jelly roll pan, loaf pan, muffin tin, square pan and more!
#Granitestone#20Piece#PotsandPansSet#NonStickCookware#KitchenCookwareSets#DiamondCoated#Nonstick#WithLids#HealthyCooking#NonToxic#DishwasherSafe
0 notes
Text
Replacing Your Teflon? Check Out These Amazing Skillet Options!
New Post has been published on https://thekitchnpro.com/replacing-your-teflon-check-out-these-amazing-skillet-options/
Replacing Your Teflon? Check Out These Amazing Skillet Options!
Are you tired of using your Teflon pans in the kitchen? While Teflon has been popular for many years now, so many people like yourself are looking to get away from the chemicals that are used in Teflon pans. A few people are nervous that non-Teflon pans will make their foods stick, but we are here to tell you that you have so many incredible options. So, if you are finally ready to toss your Teflon in the trash, you must check out all the other amazing skillet options.
What is Teflon?
Before we get into all the other amazing skillet options, we thought we would share what Teflon really is. This way you know exactly what you are using when you place food inside a Teflon pan. Every Teflon pan is coated with a material called polytetrafluorethylene, which is more commonly called PTFE. This synthetic chemical is made from fluorine and carbon atoms. Teflon has been around since the 1930s and it has long created the nonstick surface so many people love.
We mentioned above that many people are looking for other options when it comes to the pans they are using in their kitchen. Almost everyone wants to leave the chemicals behind and use pots and pans that still have a nonstick quality. Thankfully, we do have a few incredible options you will love.
Cast Iron Pans
Cast iron has been around for many years. In fact, if you went into your grandmother’s kitchen, you may find a cast iron pan from her grandmother’s kitchen! This material has gotten a bad rap over the years, because people think it is difficult to use. However, once you get to used to using cast iron, you will realize why it was the material of choice all those years ago!
A cast iron pan will never leach any chemicals into your foods. Iron is the only thing released from these pans and you can always use a little extra iron in your diet.
These pans are quite durable and will last forever if you take care of them properly. It is common for foods to stick to cast iron pans if the pan has not been seasoned properly. If you decide to use cast iron instead of Teflon, you must take the time to season your new pan. Then you must make sure it stays shiny and seasoned after every use. Yes, you may still have some stuck foods on it, but they will be minimal if your cast iron pan is seasoned properly.
Stainless Steel Pans
Stainless steel skillets, and other pots, are normally considered the best when it comes to cooking. However, there is nothing you can do to create a nonstick surface in these pans. There are no seasoning methods to use. The only way you can keep foods from sticking in stainless steel pans is to use a lot of cooking oil or water while cooking.
We don’t want to deter you from choosing stainless steel pans when you want to toss your Teflon pans. However, we want to make sure you understand that you must cook your foods a little differently when you use these pans. Especially since you want clean-up to be easier too.
Thermolon-Coated Pans
You may be starting to panic right now, because here we are recommending another pan coated with a material. However, Thermolon-coated pans are much different than Teflon. A Thermolon pan is coated with a patented ceramic material, which is what creates the nonstick surface. The downside to this new material is there are not enough studies to actually prove this material is safe to use for the long-term.
The items used to make the Thermolon coating are not well-known either. While it has been stated that carbon, oxygen, silica, and silicone are used for the Thermolon coating, no one is sure what other materials are in the actual coating.
Our Recommended Skillets for When You Want to Replace Your Teflon
We understand there are so many different skillets out there to choose from. This is why we wanted to share a few of our favorites with you!
Lodge Cast Iron Pans – You can never go wrong when you purchase a Lodge cast iron pan or even pot. These skillets are quite versatile, because they can be used on the stove, in the oven, on the grill, and even on an open fire when camping. Since all Lodge cast iron products are available pre-seasoned, you never need to spend hours seasoning your pan before using it.
WaxonWare Granite Ceramic Nonstick Frying Pan – If you are looking for a skillet that your eggs will slide right out of in the morning, this granite ceramic skillet is perfect. The surface of this skillet does not contain any PTFE, PFOA, APEO, or any other harmful chemicals. While this skillet states it can be washed in the dishwasher, we recommend only washing it by hand for the best results.
Nonstick Ceramic Copper Fry Pan – Some people love the benefits of a little extra copper in their food and that is where this nonstick skillet can help. The copper surface heats quickly, and retains heat, so your food cooks evenly and fast. Since the foods slide right out of this pan, cleanup is always a breeze.
GreenPan Lima Ceramic Nonstick Fry Pan – Some ceramic fry pans make it difficult to cook foods at higher temperatures, because the ceramic coating starts to wear off. You will never need to worry about that happening when you use this fry pan, because it has been designed to handle those higher temperatures.
Don’t stress if you are ready to replace your Teflon for another skillet, because there are so many incredible options out there for you to choose from! We recommend you choose a pan that has features that will work well for you and your cooking needs. After all, not every person loves the same types of pans, which is why there are always so many to choose from.
amzn_assoc_placement = "adunit0"; amzn_assoc_search_bar = "true"; amzn_assoc_tracking_id = "petraloby-20"; amzn_assoc_search_bar_position = "bottom"; amzn_assoc_ad_mode = "search"; amzn_assoc_ad_type = "smart"; amzn_assoc_marketplace = "amazon"; amzn_assoc_region = "US"; amzn_assoc_title = "Shop Related Products"; amzn_assoc_default_search_phrase = "cast iron skillet"; amzn_assoc_default_category = "All"; amzn_assoc_linkid = "04486618a9bde9b47badb2e7c1d9fe72";
0 notes
Text
How to Choose the Right Cookware: A Comprehensive Guide
Let’s embark on a culinary journey where we explore the art of choosing the perfect cookware for your kitchen. Whether you’re a seasoned chef or an aspiring home cook, understanding the nuances of different materials and designs will empower you to create delicious meals with confidence. So, grab your apron and let’s delve into the world of pots, pans, and skillets! Ready to upgrade your kitchen? Explore our wide range of high-quality cookware at U-Like. From stainless steel to nonstick, we've got you covered. Happy cooking!
0 notes
Text
Tavern Noodles
Serves 4 to 6
Ingredients: 1/3 Cup extra-virgin olive oil, 3 Large onions, halved from pole to pole and thinly sliced lengthwise, Kosher salt, 1 1/2 Teaspoons minced fresh rosemary or thyme, 2 Teaspoons pressed or grated garlic, 1/2 Cup dry white wine, 12 Ounces fettuccine, tagliatelle, or pappardelle, 3/4 Cup grated Parmesan, Freshly ground black pepper, 1/3 Cup chopped fresh parsley, 3 Hard cooked eggs, peeled and chopped
In a medium nonstick skillet over medium heat, warm 3 tablespoons of the olive oil until shimmering. Add the onions and 1 teaspoon salt and cook stirring frequently, until soft and light gold, 30 minutes. Add the rosemary and 1 teaspoon of the garlic and cook, stirring, until fragrant, 40 seconds. Add the wine, adjust the heat to medium high and cook stirring occasionally, until the liquid is reduced by half, 2 1/2 minutes.
While the onions are cooking, in a large pot over high heat, bring 4 quarts of water to a boil. Add 1 tablespoon salt and the fettuccine and cook, stirring occasionally to prevent sticking, until just barely al dente. Reserve 1 cup of the cooking water. Drain the pasta and return it to the pot. Adjust the heat to medium low add the onion mixture to the pasta toss and cook stirring constantly for 1 minutes. Remove the pan from the heat add the remaining 2 tablespoons plus 1 teaspoon olive oil remaining 1 teaspoon garlic the Parmesan and 1 teaspoon salt. Season with pepper and toss well. Add between 1/2 cup and 1 cup of the reserved cooking water to loosen the sauce and distribute the ingredients evenly. Add most of the parsley and toss. Adjust the seasoning with additional salt and pepper if necessary and transfer the pasta into a serving dish. Sprinkle with the chopped egg and remaining parsley before serving.
Source: Flavors of the Multiverse
0 notes
Text
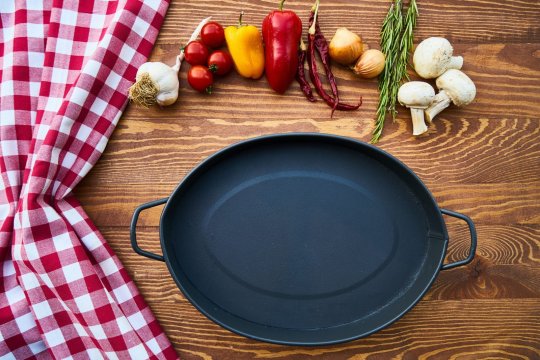
5 Best Ways to Season Your Cast Iron Cookware for Lasting Durability
Seasoning is crucial for turning new cast iron into nonstick wonders free of rust. This process of oil polymerization rejuvenates old cookware too. Check out these 5 effective methods for long-lasting cast iron seasoning at home:
1. The Traditional Oven Seasoning Method
One traditional route that works quite well is to season your cast iron using the oven. To begin, please preheat the oven to 375°F. Ensure that your cookware is completely clean and also dry. Using a towel or some paper, rub the cast iron bread pan surface lightly to make sure that it is clean and completely dry, then apply just enough oil (of your choice) on this surface. To prevent sticky or oily residue, you can use a paper towel to clean up any excessive oil. Put the cookware upside down in an oven, having a piece of aluminum foil or a baking sheet beneath to collect the drips. Then bake for about an hour and turn off the oven to let the cookware cool down inside. This technique is ideal for things such as a cast iron Dutch oven or a cast iron pizza pan.

2. Stovetop Seasoning Technique
Stovetop seasoning is quite a good alternative for a faster approach. Preheat your dry cast iron skillet in the medium heat of a stove. When hot, add a small amount of oil and coat it evenly with paper towels or even silicon sleeves to ensure safety. Put the skillet on the heat and allow it to smoke, then switch off until cool. Repeat this process 2-3 times. This approach is perfect for less large cookware like bread pan
3. Application of the Shortening for a Lasting Top Coat
Another common seasoning agent of cast iron is the shortening. It is highly smokeable, durable, and able to coat evenly. This should be followed by rubbing some shortening on the entire surface area of your cookware, the handle, and also the cookware lids.
Rinse the cookware and put it upside down in a preheated oven at 375°F with a baking sheet placed under the cookware. Bake this for one hour, then cool it in the oven. This is especially useful for cookware that is used on a regular basis, such as a cast-iron griddle.
4. Seasoning with Cooking Fats
If you like it natural, you can use cooking fats such as lard or bacon fat for the seasoning. In the case of these fats, after finishing cooking, while the pan is still warm, a paper towel is to be used to smear the fat so that it so thoroughly covers the entire surface to form a film.
Heat the pan on the stove until it starts smoking, and then let it cool down. This technique is ideal for an already well-seasoned cast iron cookware skillet or a cast iron pot, as it imparts a taste and also enhances the non-stick over the years.
Takeaway
Invest in high-quality cast iron cookware like those available at Crucible Cookware that imbibe seasoning integrity for decades. Be it cast iron skillets, Dutch ovens, or grill pans, their superior craftsmanship and pre-seasoning assist everyday nonstick cooking attempts.
0 notes
Text
Incredible mac n cheese
This recipe is not the cheapest, requires a lot of dish washing and time, but is delicious and very worthwhile if it can be managed.
Made about 5 generous entree servings for me, your mileage may vary. Could be a side dish and it would make more servings, but why on earth would you do that? Made to direction, this dish is a star.
Freezes and microwaves well.
I've tried to make the recipe as clear as possible and walk through every step of the process, so that anyone regardless of cooking experience can succeed.
Ingredience:
8 oz dry pasta of choice [recommended: rotini, fusilli, or similar. egg noodles acceptable but don't hold the sauce well itself but not an issue if meat present. not recommended: ziti, fetuccini, farfalle. any kind of relatively flat pasta will not hold sauce]
8 oz shredded mild easy melting cheese [borden easy melt shreds, pizza blend, quesadilla blend, american all good choices]
8 oz strong aged cheese [can be shredded or chopped into small pieces, can use multiple for enhanced flavor. smoked cheese is ideal. prefer cheddar but gouda or other strong cheeses would work for a different taste]
1 lb ground meat or meatless crumbles of choice [LOW FAT CONTENT. recommend at Least 80/20 beef, prefer 90/10 or less] Optional, but highly recommended
1 cup milk
1/2 medium yellow onion, white for stronger flavor
several cloves of garlic [recommend more than 1/2 bulb up to one whole bulb, per taste]
1/2 large hothouse tomato or equivalent
1 tbsp butter
salt and pepper
turmeric
optional: single drop of yellow mustard [i do not like mustard normally but it does enhance the flavor]
optional: soy sauce, worchestershire sauce, liquid smoke
Materials needed:
skillet, cast iron works excellent if available [to cook meat]
small stock pot [to cook pasta]
saucepan or stock pot [to cook sauce] It needs to be big enough to hold all of the sauce, pasta, and meat.
strainer [to drain pasta]
tool to stir meat [appropriate for your skillet. do not use metal utensil on cast iron or nonstick]
large spoon [to stir sauce]
Cutting board
flat edged knife
How to make it:
Slice up your ingredients in this order: tomato, garlic, onion, cheese. Set aside a small portion of the onion and garlic. Keep tomato and cheese in their own places. Onion and garlic may be combined
LOW AND SLOW
Begin heating skillet. [on a numbered stove, set between 3 and 4] Melt a small amount of butter [less than 1/2 tbsp] to grease the pan. If using cast iron, butter optional. If butter is limited but not using cast iron, it can be substituted for a small drizzle of oil. I prefer to use sunflower or canola.
When the butter/oil is crackling, or a drop of water in the skillet sizzles when dropped in, add the onion and garlic. Stir occasionally until all pieces are translucent.
Add in the pound of meat and break up. I like to slice perpendicular to the strands of meat [this can be done in the tray the meat comes in if you buy it in a tray] before dropping the meat in. Stir often, making sure ALL meat is browning well. When about half has browned, you can add a small drizzle of worchestershire, soy sauce, liquid smoke [any or all, I prefer all. for smoke, hickory or mesquite are best, pecan or applewood will be too sweet]. Salt and pepper to taste.
When almost all meat has browned, add in the chopped tomato. Continue cooking until ALL meat is thoroughly browned. [E-coli is no joke.]
Turn off heat, and let cool for a few minutes. Meat should then be drained, NOT into the sink, that's bad for the plumbing. I place a paper towel in the trashcan and drain onto it. Set aside meat mix.
In the stock pot, boil enough water to amply cover pasta, dash of salt may be added to the water if desired. When water is boiling, add pasta and cook to al dente instructions.
Strain pasta, rinse with cold water [halts the cooking process so noodles don't become overdone], strain again, and set aside.
In the saucepan, heat one cup milk. On a numbered stove, can set up to 4 to start.
Once milk has gotten very warm [you can hold your hand over it in the pot to check], add in 1 tbsp butter and allow to melt. Stir thoroughly to combine.
Add to the milk 1/4 tsp turmeric, drop of mustard, and salt and pepper as desired. Stir thoroughly.
Once milk is very hot, turn down heat, on a numbered stove turn to 3. Add the remaining garlic and onion, and let them simmer for a minute or two.
Begin adding strong cheese pieces. Do not put all in one pile, spread around the pan and allow some to melt before adding more. This process is slow and annoying. It's worth it. Stir often to ensure distribution of heat and check meltiness.
When all of the strong cheese has been added and melted, add the shredded mild cheese. Be sure to spread around the pan. Stir continually until all melted.
Once all cheese has melted, the sauce is ready. Turn to 'warm' or 'low' while combining. You will add the pasta and meat to the sauce, don't try to add the sauce to the pasta. Add your cooked pasta first, a little bit at a time and stir to coat. Once all pasta has been added, add in the meat mixture and mix it in. Turn off heat.
Serve and enjoy. Servings go farther than you might think, it's VERY heavy and hearty. If not putting in a serving dish or storing immediately, turn off heat, but turn on to warm periodically and stir to keep it from clumping up nasty and making cleanup harder.
Store leftovers, and wash sauce pan IMMEDIATELY. If you don't you Will regret it. It will be so much harder to clean once sauce remnants have solidified. Powerwash with very hot water as much as you can out of it with a sprayer, and soak in extremely soapy hot as possible water for 10-30 minutes if it doesn't all wash out. Good luck, it usually requires some scrubbing even after a soak.
Chef's notes:
Not sure this could really be translated into a fully vegan recipe. I also suspect from my experience with gluten free pasta, it would not work well as the noodles tend to be fragile.
Whole milk is my preference in this recipe, but as long as it has some fat content it should work well. If subbing the milk for a plant milk, use a thicker variety with higher fat content, like soy or oat. Almond milk would perform terribly due to its low fat content and usual runniness.
The absolute best version of this i have made I used: pizza blend shreds, 5 slices of Kroger Private Selection brand hickory smoked cheddar slices, and about 4.5 oz of Belton farm brand Smoked Red Fox red leicester cheese. Red leicester is a fantastic candidate in general due to its crumbliness and intense flavor.
This recipe could be made with 16 oz of velveeta and 2/3-3/4 cup milk, but it absolutely will not have the exceptional punch of using quality strong flavored cheese.
0 notes
Text
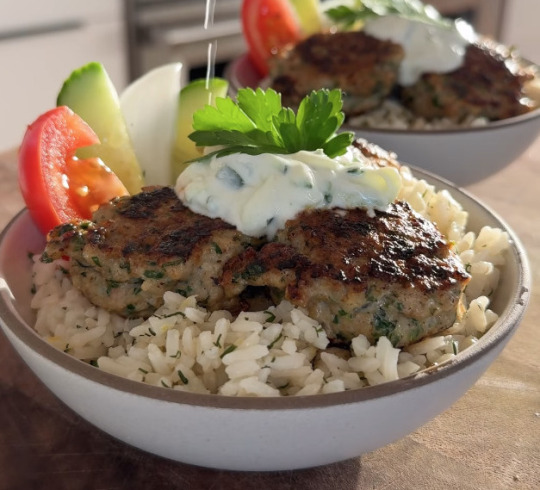
Chicken Kofta with Tzatziki and Lemon Dill Rice
1 lb Ground Chicken (96% lean, not breast)
1/2 Cup Yellow Onion, finely chopped
1/4 Cup Parsley, finely chopped
2 Tbsp Mint, finely chopped
3 Cloves Garlic, minced
1 Egg
1 Tbsp Coriander
1+1/2 tsp Cumin
1/2 tsp Cinnamon
1/4 tsp Cayenne Pepper
1 Pinch Cloves
1/4 tsp Black Pepper
1 tsp Kosher Salt
1 Tbsp Avocado or Olive Oil
For the Tzatziki:
1/2 a Large Cucumber, grated
2 Cups Greek Yogurt
1 Clove Garlic, minced
1 Lemon, juice
1 Tbsp Olive Oil
1/4 tsp Kosher Salt
For the Lemon Dill Rice
2 Cups Chicken Stock
1/2 tsp Salt
1 Clove Garlic, minced
1 Cup Long-Grain Rice
1 Medium Lemon, zest (~1 Tbsp)
2 Tbsp Fresh Dill, chopped
2 Tbsp Butter
Sliced Veggies
1/2 Cucumber, sliced
1/4 Yellow Onion, sliced
1 Tomato, sliced
Mix together ingredients for the tzatziki and set aside in the fridge
·To make the lemon dill rice, add the chicken stock, salt, and garlic to a small pot and bring to a boil; stir in the rice and then turn the heat down to low and cover and simmer for 20 mins (or until all liquid is absorbed); turn off the heat and stir in the lemon zest, dill, and butter
·For the chicken kofta, combine the ground chicken, onion, parsley, mint, garlic, egg, coriander, cumin, cinnamon, cayenne, cloves, salt, and pepper in a large bowl
·Preheat a large nonstick skillet over medium heat and add 1 Tbsp oil; place dollops of the chicken mixture (~1 heaping Tbsp each) onto the pan and cook for 2-3 minutes until browned; flip over and flatten slightly with the spatula, and cook for another 2-3 minutes until internal temp reaches 165F; repeat until all chicken is cooked
· Serve chicken kofta with lemon dill rice, tzatziki, and sliced veggies and enjoy!
🕒40 minute total prep + cook time
Recipe serves 2 people (rice and tzatziki can stretch to 4 people)
1 note
·
View note
Last Seen Blogs

daddyforu77
Mo. Daddy

hachiz4870
Untitled

kirkness
Kirkness Roofing

panharmonium
panharmonium

trash-queen-sass-queen-blog
Elisha