#myaccess
Text
Medicaid enrollees required to renew eligibility
The Medicaid renewal period is underway and will continue through May 2024.
WAUSAU – Aspirus Health reminds community members that states have started the process of checking everyone’s eligibility for Medicaid for the first time in three years. A federal provision that previously suspended Medicaid renewal (enrollment) requirements during the COVID-19 pandemic ended as of March 31.
The Medicaid renewal period is underway and will continue through May 2024. State…

View On WordPress
0 notes
Text
IDES1262 WEEK 10 - Completing the loop.
Over the past ten weeks, I have learnt a variety of skills that assist in communicating a design idea.
In the first few weeks, we practiced using pen and paper to draw basic shapes and objects to a high degree of accuracy. During this time frame, I also learnt about the usefulness of partial auxiliary views and how to draw in perspective. However, the perspective drawing task in week 4 was definitely one of the hardest tasks in this course. Whilst the other tasks so far simply just took a bit more time to do because of the sheer amount of measurements required, I genuinely struggled quite a bit to grasp the method of drawing in perspective. Though in the end, I managed to pull through after a few attempts and video tutorials.
Starting from week 6, we transitioned into the digital workspace. We learnt how to create digital renders of our design ideas and began trying out 3D modelling software such as 3DS MAX. Learning how to work digitally enabled me to create higher fidelity models and therefore improved my design communication skills. Whilst I am still not very familiar with 3DS MAX, I am able to acknowledge its ability in efficiently refining scanned models as well as creating organic shapes. It was quite unfortunate that I wasn't able to experience the scanning and 3D printing process being an online student, but it is definitely something that I am looking forward to in the future. Being a Mac user, it was quite frustrating to use 3DS MAX via MyAccess; it was fairly laggy and the response times were delayed. However, one cannot deny the usefulness of tools like 3DS MAX. As an alternative to 3DS MAX, I plan to try out Blender as it is available on Mac.
Overall, this course taught me a lot of essential skills regarding design communication. To be honest, I probably forgot some of the skills that I've learnt throughout the 10 weeks. However, because of my Tumblr blog posts, I will be able to quickly relearn a lot of the things that I may have forgotten. It was also super helpful that other classmates' blogs were available for me to see; I was able to learn from my peers as well.
I enjoyed learning a myriad skills from IDES1262 and can't wait to learn more!
15 notes
·
View notes
Text
Week 1 - Getting Started
INTRODUCTION
This week is all about getting started in Communications 2. There is quite a bit of set-up required so please make sure you follow the instructions given and ask for help early should you need it.
LEARNING OBJECTIVES
By the end of this week you should:
1. Gain an awareness of how the course is structured, the approach we will be taking and why.
2. Begin to develop and understanding of what sketch modelling is, and how you can use it in your design workflow.
3. Start to build familiarity with the tools of engineering drawing and how to use them to draw accurately.
PRE-CLASS ACTIVITIES
These activities are to be completed prior to the commencement of our live tutorial session on Friday:
1. Make friends with Moodle
Moodle will be your ‘go to’ for all things administrative, including general course information, information relating to assessments, weekly resources, announcements, virtual classroom access and lecture recordings.
If you haven’t already, login to Moodle and review the IDES1262 Course. Expand each of the tabs and take a good look around. Explore the active links (shown in blue). In particular, make sure you have read the Course Outline which is accessible through the Course Information tab.
2. Prepare your drawing equipment
You will be using your drawing equipment in the very first class so it is important that you have it ready to go on the day. You will need:
Tee square
Set squares
Sticky tape (removable tape is preferable)
Compass
Circle template
Mechanical drafting pencil
Eraser
Eraser shield
Fine-line ink pens
Scalpel / snap blade
Steel rule
Cutting mat
A3 bond paper
3. Complete the Week 1 reading
Please complete the assigned reading on Engineering Drawing (see Week 1 Resources tab on Moodle). It covers an introduction to engineering drawing equipment and standards.
4. Install required software
The software listed below are to be installed on your computers /devices. These are important resources to help you fully engage with the learning activities of the course. Next to each item of software is the week we will start using it. Make sure that you have installed and tested the software before class in the week indicated.
Adobe: Available through your Adobe CC subscription (free access with this subject)
Adobe Scan (phone): week 1
Adobe Photoshop: week 1
Adobe Camera RAW: week 1
McNeel & Associates (Rhino): You can access Rhino as a free subscription on a trial basis. If your trial has run out because you used it in Term 1, you will need to create another account using a different email address. Alternatively you can access it over the UNSW MyAccess virtual software portal. You can also purchase a student licence at a heavily discounted price from the developer if you like.
Rhino: Week 4
Autodesk: Sign up for a student account for free access to Autodesk software. If you are a Mac user, you may need to use 3ds Max over the UNSW MyAccess virtual software portal.
Fusion 360: week 8
3ds Max: week 8
IN-CLASS ACTIVITIES
Below is the schedule of activities we will be completing during our virtual class time:
1. Lecture: Course introduction & Methods of Communication
2. Activity: Student discussion
3. Lecture: Engineering drawing (part 1)
4. Exercise: Drawing instruments & geometric construction
In order to complete these activities you will need to have engaged with the Pre-Class Activities. Don't forget to have your drawing equipment set up and ready to use!
POST-CLASS ACTIVITIES
These activities are to be completed by the Monday evening evening following our virtual class:
1. Make sure that you can access the class blog
If you are having trouble, seek help immediately!
2. Make your first blog post
For your first blog post, write a brief introduction about who you are and tell the class something we might not know about you. Maybe it’s why you’ve chosen to study Industrial design, a new hobby you’ve taken up recently, or just something else you love doing in your spare time. Don’t over think it or spend too long – just a sentence or two is fine!
Say “hi” to a couple of your colleagues by adding a comment to their posts.
Note: Whenever you make a comment on another student’s post, hit the like button (heart icon). This is how we can track your comments and award you marks towards the peer engagement component of your assessment for this subject. Please do not like any posts that you do not write a comment on.
3. Make your second blog post
For your second blog post, follow the Typical Blog Post Format example on the O Week Resources tab on Moodle. This is the format we will be using each week. It should include the week and topic name as the tile, a short reflection and some images documenting your process creating the items in the class activity.
Base your reflection around on your learning experiences within Communications 2 this week. You might ask yourself:
What went well / what did I have difficulty with?
What did I enjoy / dislike?
What would I do differently if I had my time again?
What were some of the key things I learnt, or insights which I developed?
What led to those experiences or insights?
You can consider some or all of these, or any other questions which you believe are relevant. Try to write about 200 words.
Following this, post a series of images that help show the process you used to create the items you produced in the studio tutorial exercise.
NOTE: Please make sure you always make your blog posts to your own account, not the IDES1262 class feed.
4. Reply with a note on to two of your classmates’ blogs
You might make a comment that includes:
Identifying some aspect of their work you think they did particularly well at
Identifying something in common that you struggled with
Let them know how you have tried to overcome that struggle – maybe you found a resource, method or technique that was helpful?
Ask them if they have found a way to overcome something you struggled with
Note: Hit the like button on posts that you comment on so that we can track and award you marks for your feedback contributions.
ADDITIONAL RESOURCES
1. e-Portfolios
Our Tumblr blog is essentially what’s known as an e-portfolio. The following link gives some background on what they are and why they are useful in a learning and teaching context. Click here
2. Giving & receiving feedback
The ability to give and receive feedback is incredibly valuable and an integral part of learning. Like other complex skills, giving and receiving feedback requires knowledge and practice. Click here
3. An introductory video series on drafting tools - Drafting 101
The Drafting 101 video series gives a basic introduction into many of the most common drafting tools. Click here
4. Food for thought - The Power of Vulnerability, Brene Brown
Design (and creativity more generally) involves risk taking. It requires a willingness to put yourself ‘out there’ and to try things that may not work. You will get the most out of our blog if you allow yourself to be open and honest, whilst at the same time creating an environment where those around you feel comfortable to do the same. In this talk, vulnerability expert Brene Bown gives some insights from her research which you might find relevant and interesting. Click here
Feel free to connect these with any of your own experiences this week in your written reflection.
#ides1262 2022 Week 1
7 notes
·
View notes
Text
Week 9 - twisting proudly
This week's task was definitely one of the simplest ones, in spite of all the tech troubles that seemed to be plaguing us during class. I had some experience with dealing with myAccess file accessibility from a past course, so I was able to figure out moving things between Citrix and the desktop which made things a bit more doable.
I never got my own bottle scanned in the MCIC as I found it a lot simpler to create it from the ground up in Fusion, which I could then easily bring over into 3DS Max. I ended up choosing not to edit my own bottle, and instead used the provided perfume bottle because I felt it would be better to learn the process of taking a scan and making it usable.
Following the steps, I:
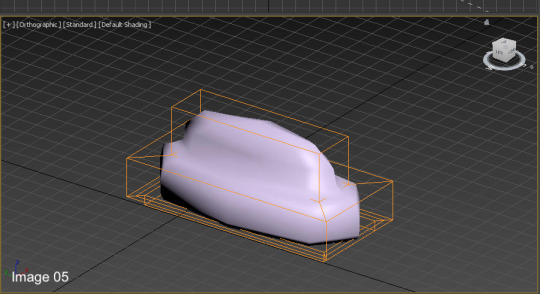
Rotated and then corrected the bounding box;
Smoothed and made the bottle nice and symmetrical - I actually found the 'optimize' tool was significantly better than the 'smooth' tool in terms of removing bumps and dents.
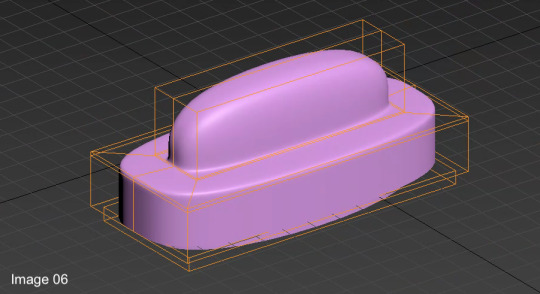
I then tapered and twisted the bottle, giving a fairly unusual shape that I was happy with. I'd already done a fair bit of experimentation with modifiers from Week 8, so I didn't feel the need to go too crazy this time round. Plus, if I'm going to print the bottle I wouldn't mind it being recognizable as a perfume bottle.
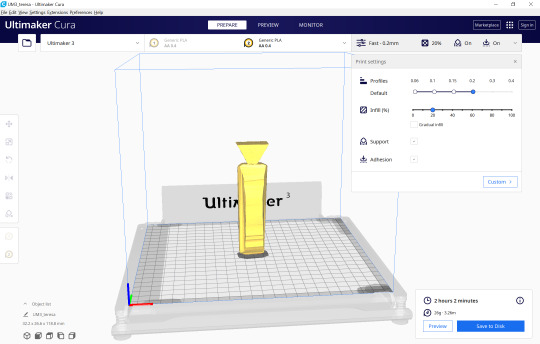
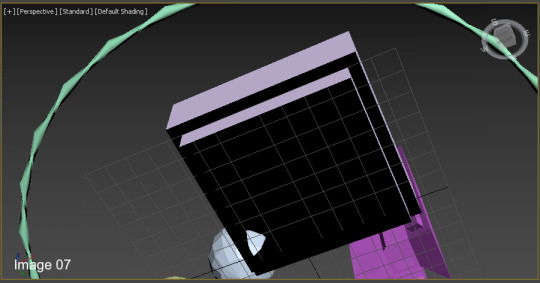
Finally I exported the file as an STL and set up my Cura to be ready to print. I won't actually print the file, but it's good to see the process from start to finish. I feel like I'd confidently be able to scan almost any object to edit and adjust to rapidly prototype more effectively than I have previously.
4 notes
·
View notes
Photo
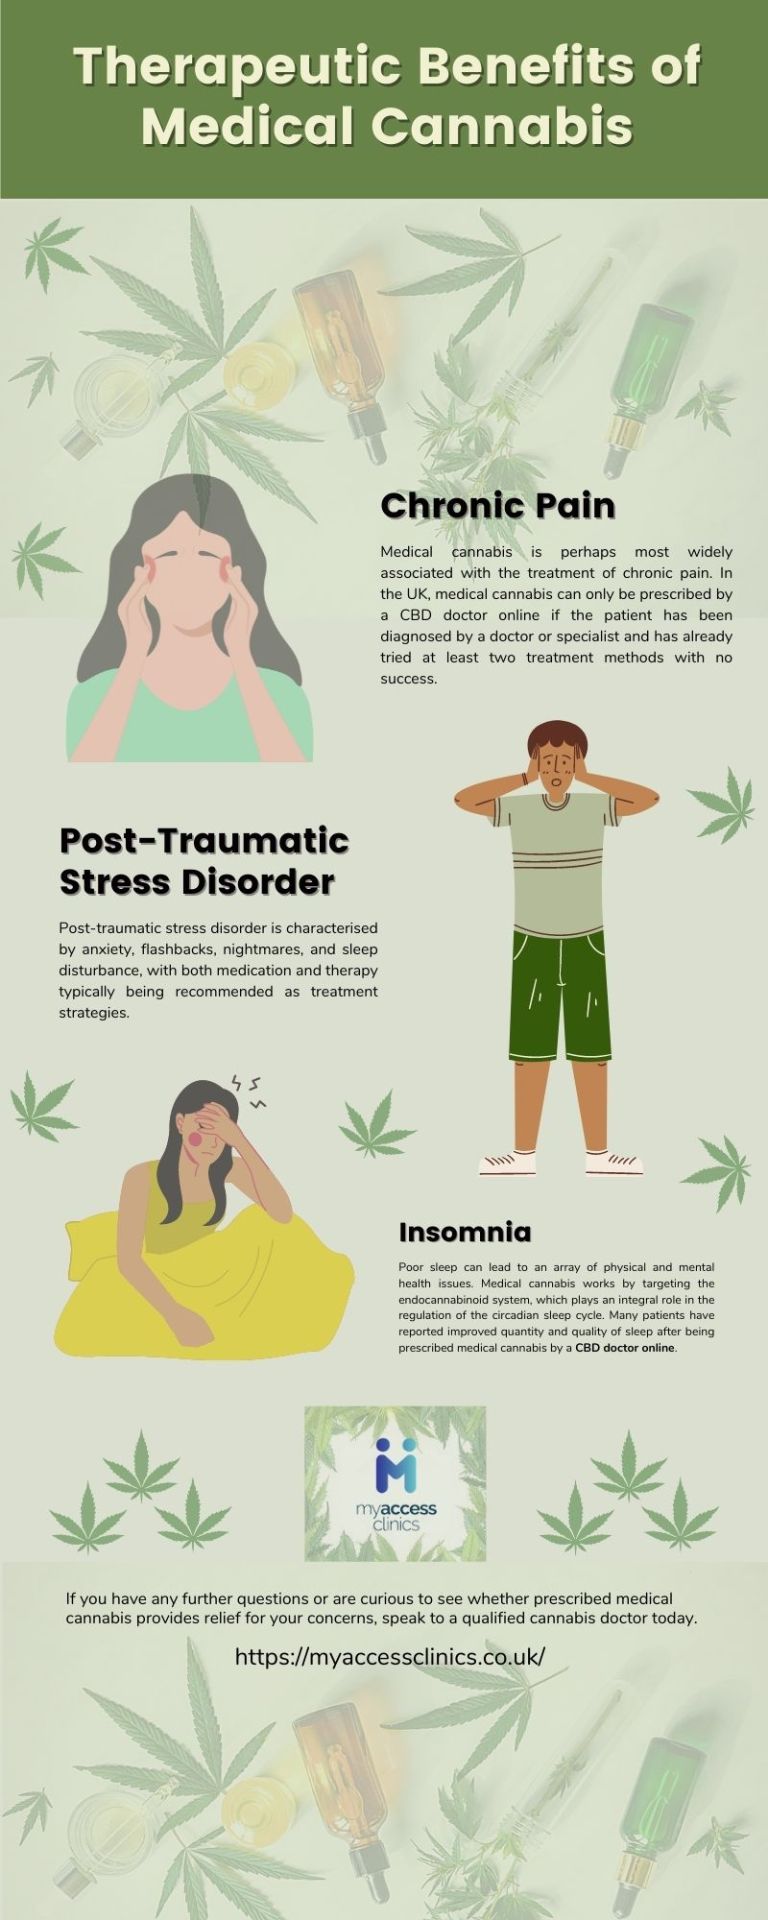
Therapeutic Benefits of Medical Cannabis - Myaccess Clinics
To gain a clearer picture of whether medical cannabis is right for you, it’s best to speak with an experienced medical cannabis doctor.
#medicalcannabisuk#medicalmarijuana#medicalcannabisdoctors#medicalcannabis#cbddoctoronline#medicalmarijuanauk
5 notes
·
View notes
Text
I can not log into myaccess fl
A) I understand you’re facing difficulties logging into your MyACCESS FL account. Here are some troubleshooting steps you can try:
1. Check the Basics:
Ensure Correct Login Credentials: Double-check your username and password, ensuring they are entered accurately, including uppercase and lowercase letters, special characters, and spaces if applicable.
Clear Cache and Cookies: Sometimes, cached…
View On WordPress
0 notes
Text
How To College of DuPage Blackboard Best Login
Through COD myACCESS, druggies from a council can do with COD BB Login step and can complete their workshop on the internet garçon.
Utmost druggies are then as they find trouble in penetrating their COD Blackboard accounts or pacing with the College of DuPage Blackboard Login step.
Now, if you're facing any of the same troubles or unfit to complete your work online on the College of DuPage myACCESS Blackboard accounts also you're at the right post.
1 note
·
View note
Text
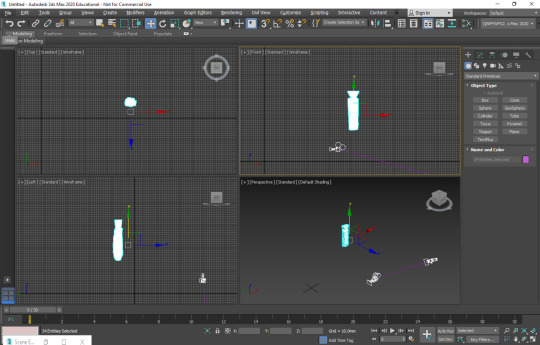
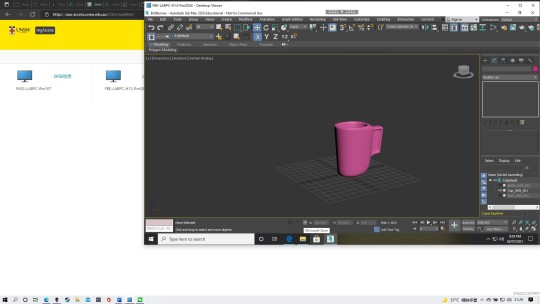
Week 9 - Preparing a 3D Scan for Printing
Pre-Class Activity
I agree with his statement that with presentation models you have to be more true to what you are depicting, however with sketch models you have a bit more freedom with what you want to depict. I remember when I began making my initial physical sketch models, I first focused on how I could shape the model in such a way that suited the hand. An example of this was in my Week 7 post where I created a model that was solely based on a smooth, round elliptical form; and on the other hand, forms where I chose to focus more on the elevation of elements and the aesthetics of design. Another similarity between his design process and mine was flexibility. In his cup design, he added a couple of holes in the handle to experiment and see what is the most suitable combination. Likewise, I experimented with switching bottle bodies, caps, and bases to analyse and see which combination was most effective in portraying my emotion (pride). A difference that I noted was the materials he selected when making his initial designs; they were often made from plastic or glass for a smoother finish. This implies that he uses 3d printing or similar avenues for curved projects in their initial stage, which may be more accurate and efficient.
Tutorial Planning
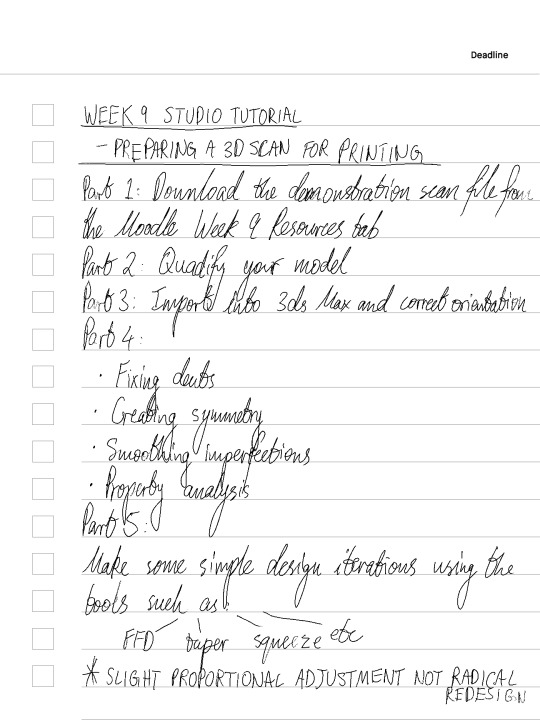
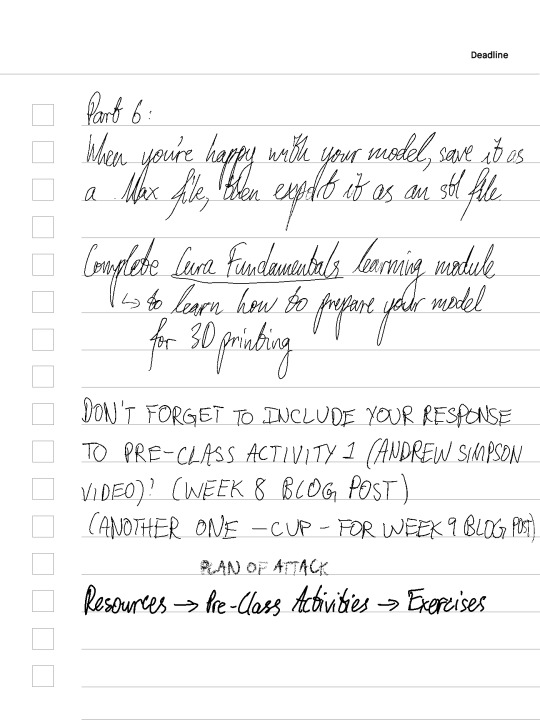
Tutorial Activity
A misconception that I had previously had was that you could only access Rhino locally. After this tutorial, I am now aware that it can also be accessed via myAccess UNSW.
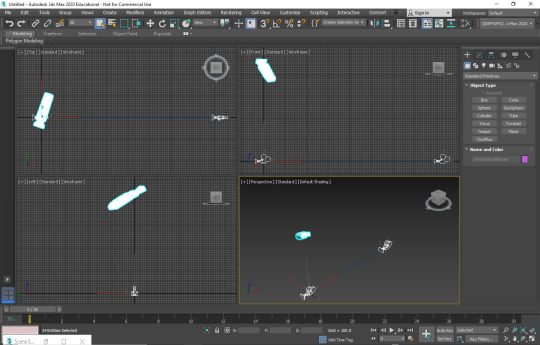
This exercise made me more comfortable with exporting 3D objects across applications, and aware of the limits and flexibilities of each. Quadifying a model is made possible through Rhino, whereas fixing indents and other imperfections can be managed in 3ds Max.
After doing this activity, I have come to the conclusion that it would be beneficial to see whether others also using myAccess to access 3ds Max, have had similar issues to what I have faced; and if not what are they doing differently. In my experience, the app repeatedly froze and was "not responding", it managed to lock me out of my own computer for a solid 20 minutes or so and I had difficulty locating my files after saving them. These technical difficulties reduce the reliability and efficiency of my workflow, hence I need to be on top of such difficulties in future circumstances. This can be achieved by seeking assistance and working together with those who are more proficient with the application from the beginning - so that I don't fall behind. I will hold myself accountable by ensuring that I am not surrounded by "brick walls"; and if I see one I get rid of it straight away.
On the whole, this exercise has made me aware of the ability to connect between physical and digital in ways that previously did not know were possible. Being able to 3D scan non-reflective models, alter them on 3D Max and Rhino, and reproduce them through 3D printing, allows designers to be more versatile in their model making; while developing and sustaining craftsmanship skills and technological skills simultaneously.
0 notes
Photo
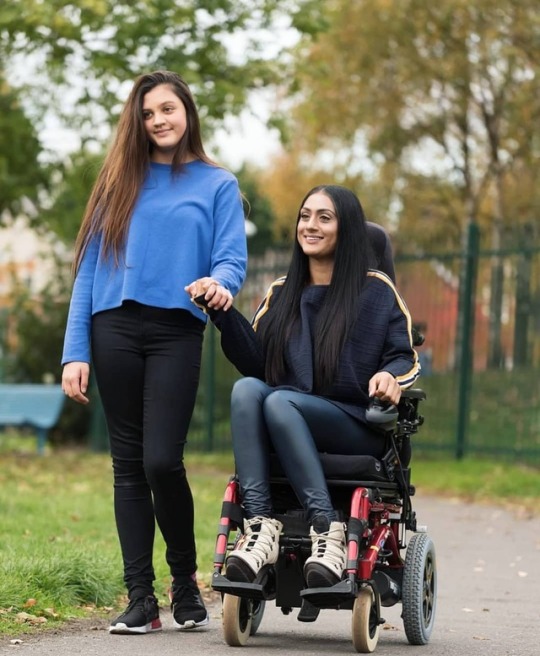
@myaccess_ is my movement Instagram pagefor the businesses&society to take wheelchair rights seriosuly to have access to all of birmingham and west midlands! Help me spread my mission and share your posts and i will put them on my story board! 2 POWERFUL INSPIRATIONAL WOMEN mission! One with invisble disability,one with visable disability. Both with a life time of adversities and one hell of Story! We both embrace our minds,bodies,souls ,entwining our passions and using our disabilities as driving force on all platforms to break barriers positively share our stories to help others and keep doing good for as long as we can. Your #voice is your freedom of speech that can be taken away. My VOICE gives me #Confidence to fight for my rights as a Woman,Mother,Disabled Human Being,British Indian,Former Police Officer. #HaveYourSay #ShoulderToShoulder #FreedomOfSpeech to make birmingham and all the businesses,roads,pavements, #wheelchair accessible! #motivationalquotes #positivethoughts #wheelchairbeauty #nickidonnelly #lifepositive #ootd #inspiration #motivation #familygoals #motd #blogger #myaccess #accessible #lovegreatbritain #birminghamblogger #fashion # #newlookfashion #bbcmidlands #birmingham #movement for #change # #equalrights #prideofbirmingham #prideofbritain https://www.instagram.com/p/BqTNfUHDP8W/?utm_source=ig_tumblr_share&igshid=1qr9wekaf9z38
#voice#confidence#haveyoursay#shouldertoshoulder#freedomofspeech#wheelchair#motivationalquotes#positivethoughts#wheelchairbeauty#nickidonnelly#lifepositive#ootd#inspiration#motivation#familygoals#motd#blogger#myaccess#accessible#lovegreatbritain#birminghamblogger#fashion#newlookfashion#bbcmidlands#birmingham#movement#change#equalrights#prideofbirmingham#prideofbritain
1 note
·
View note
Text
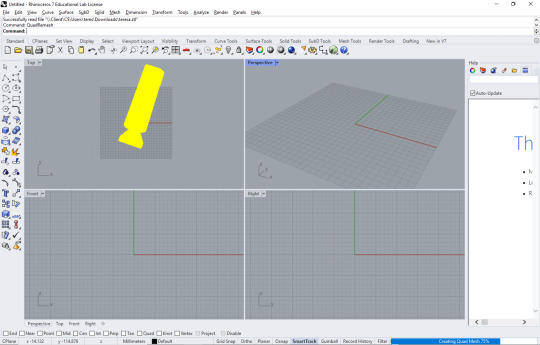
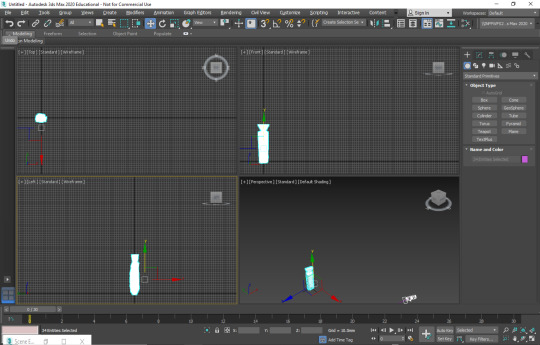
Week 9 - Prototyping
I was really keen to get into this week's content, as it felt as though the product was approaching its finished state. I had a pretty strong idea of the bottle concept I wanted to go with, so I used Rob's advice in the initial stages of the tutorial to make a template of the bottle on its top, front and side views (Image 1). I think that really paid its dividends as it allowed me to have a reference of the bottle's volume and size, but still allowed for a bit of creative freedom when creating the forms in Max.
After aligning my views and importing the reference images onto the planes of the box (Image 2), I started with the modelling of the front view. I found that working in one view at a time was the way to go, because it meant I didn't have to split my time between the three sides at once. I started with a plane and blocked out the outer edges of the form (Image 3), adding in the swift loops I learned from last week's tutorial, as well as the general navigation of the UI. I liked the amount of control I was starting to develop with 3ds Max, and I think that from last week, my skills have improved with more exposure to the program.
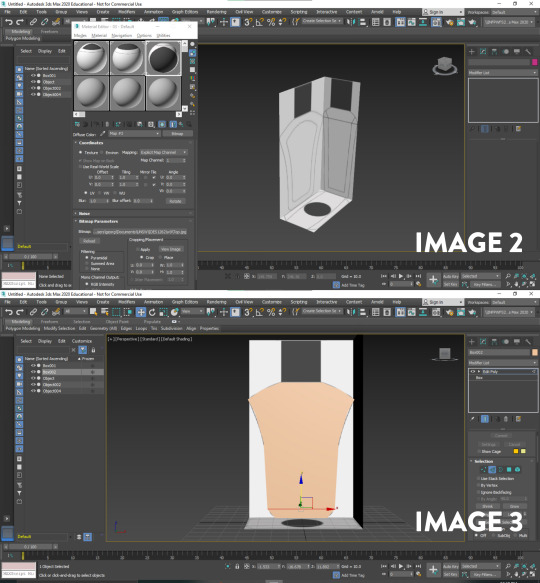
After the initial plane, I used the extrude tool to give it depth. When modelling, I decided to only focus on one half, and then mirror it over to the other side. I think its important to try and get concepts done as fast as possible, and I didn't want to overinvest on something that is meant to be experimental. I was having a lot of difficulty trying to connect the mirrored halves together into one solid mesh, so it took me a bit of time to find the answer on the Autodesk forums. I ended up finding a useful video on YouTube which instructed me to use the 'attach' tool when selecting both bodies to join them, and then bridging the edge loops together in the poly modelling tools. Although it was an arduous process, I think it was well worth the learning experience, and something which can be implemented into my workflow in the future to speed up my time modelling.
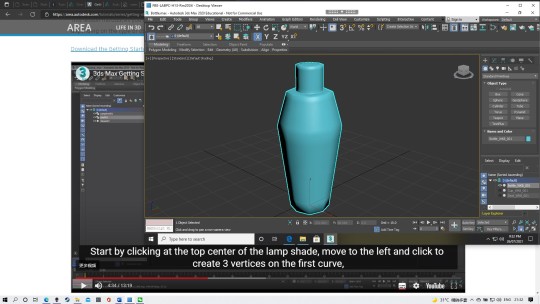
To create the taper on the side view, I used my discovery of the 'soft select' tool from last week to scale in the bottom section of the bottle (Image 4). I truly believe that the week 8 tutorial was pivotal in my understanding of the program, and it was really rewarding to use all of my experimentation practically. I then used the spline and lathe (Image 5 + 6) features to make the cap, tracing the reference image from the front view. I realised I forgot the bump at the top of the cap in the reference, so I added it into the lathe operation.


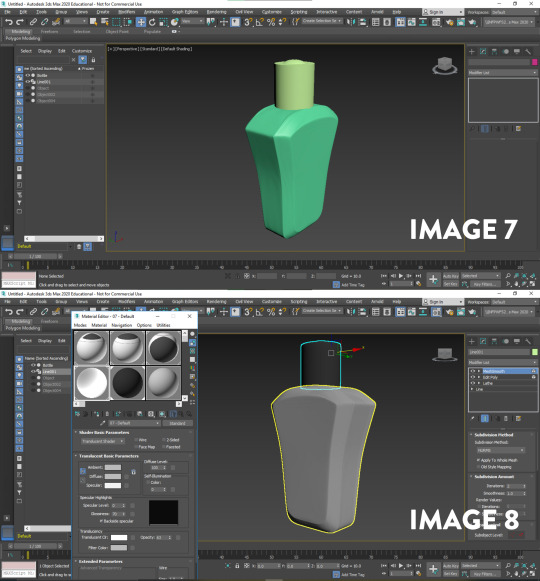
After the model was finished, I hid the reference layers (Image 7), and decided I wanted to work on rendering out my bottle design. I started by playing with the material editor in the Arnold rendering engine (Image 8). Before trying to play around with lighting and angles, I just wanted a base render of the bottle to see what the translucent material looked like. It was at this point that I ran into a sizeable issue. Using the MyAccess suite, 3ds Max was refusing to render anything out, and crashed multiple times before I gave up. Instead of trying to get the virtual machine to work, I switched to Blender on my PC. I was disappointed that I couldn't render anything through MyAccess, but I was comfortable with blender, and knew that I could make something which I was happy with.
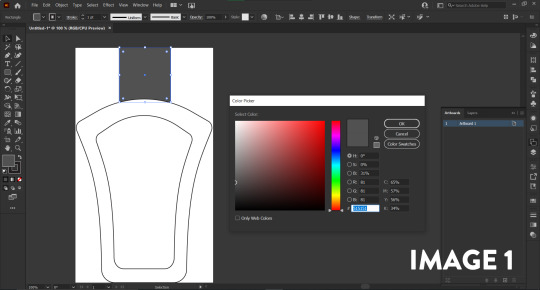
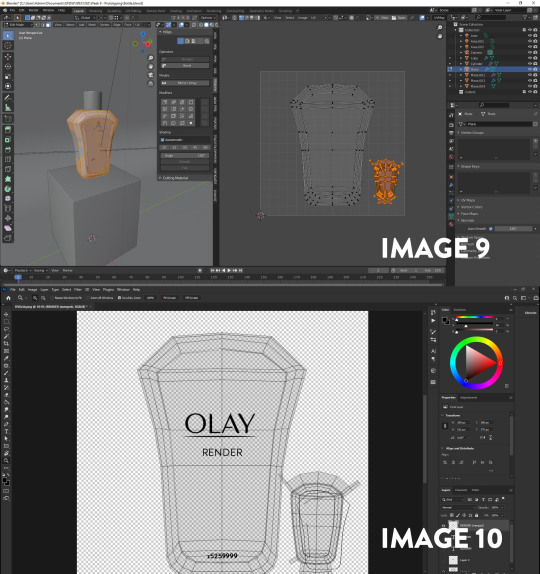
I made a small pedestal out of a cube, and placed a bevel modifier in the exact same way I would in 3ds Max. Since I had made the jump to Blender, I decided that I wanted to add some branding decals to the surface of the bottle to make it look realistic. After, I UV unwrapped the model, and designed the branding in Photoshop Images 9 + 10).
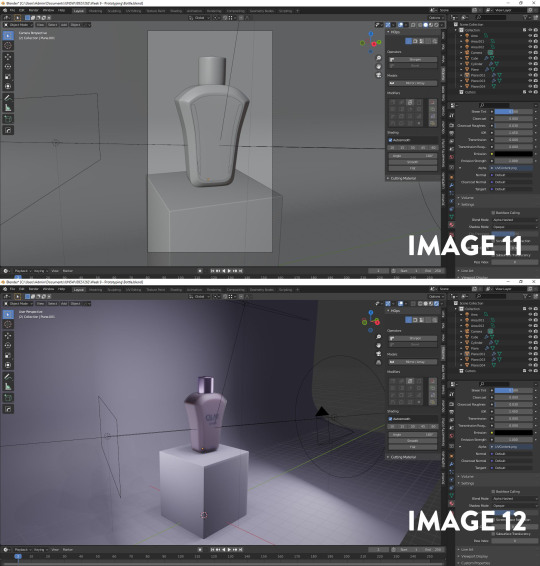
I applied some textures and shaders to the bottle after preparing the decals and UV's. Browsing on Pinterest for inspiration, I found a frosted plastic which I really liked, so I modified the default Principled shader (Like Blinn or Lambert in Arnold) to pass light through; duplicating and scaling the bottle's body to create the moisturiser inside. I set up the three point lighting and camera angles for rendering in Cycles (Image 11 + 12).
Overall I was extremely happy with how these turned out, but at the same time I was disappointed that I wasn't able to improve my rendering skills with 3ds Max. Despite not using Arnold/Max as the renderer, I still learned a lot about product rendering and staging; as it is something I haven't had to do often. If I could redo these exercises, I would definitely get 3ds Max up and running on a stable platform so that I could render it out. I would also try a few more bottle concepts, and utilise the mirror feature more efficiently now that I know how to use it.


Pre-Class Activity: Andrew Simpson Cup Case Study
I found it extremely insightful when Andrew spoke about the continual and ongoing nature of designing prototypes. Digital and Physical model making both provide the opportunity for rapid iteration and 'tweaking' of ideas. What resonated with me most was when he discussed the importance of weight, and how the object "sits in your hand". Like his cup model, I believe that the physical foam model was influenced by how the form felt in my hand when carving it out of the block.
One stark comparison between Andrew's workflow and my own in this instance was the materiality of his concepts. Obviously, his concepts had a greater range of physical materials and product concepts, but I did my best to simulate that in 3ds max and Blender. Being in lockdown, it is quite difficult to source different tools and methods of production; so I think digital modelling really shines in this instance. Being able to try different materials, colours, finishes with the click of a button really works well with Andrew's mindset of low fidelity and rapid changes. In design, nothing is a static feature; everything plays a role in the perception of the final product.
Watching this video before working on my models was valuable, because it taught me that it was ok to deviate from the initial concept, and to go back and changes to try and enhance the product. It is a goal of mine to become more proficient and confident in every stage of design, and I found it really interesting to gain wisdom from someone who has been in the industry for a lot longer than I have.
31 notes
·
View notes
Text
Week 8 CAD Modeling
When trying to do the CAD actives this week I felt very worried about the new software, but fortunately, my worries were proven quite unnecessary as I worked through, and it was an exciting journey.
Going through the online tutorials, I found the software not too hard to follow, maybe it’s because I found some similar features that existed in Fusion360 which I was familiar with. I realized in the past, tutorials weren’t as helpful since I’d forget the overload of functions being introduced. So this time round I made a note of all the things I found useful (image 1) .

I learnt how essential it is to declutter my workspace - since following the in class tutorial instructions to hide unneeded functions made the interface less intimidating instantly. I especially liked the modifier features of this software, the range and control made manipulating the model very intuitive. I did however have to mess around with the parameters in each one, sometimes getting unreasonable results, but ultimately it lead to more understanding. As I experimented, I realized how careful I was sometimes with the model, which is not a good sign for a designer, since designers should not be afraid to test and explore different things. So in the next parts I wanted to encourage myself to create random objects that were inspired by any shapes I come across (Image 1).
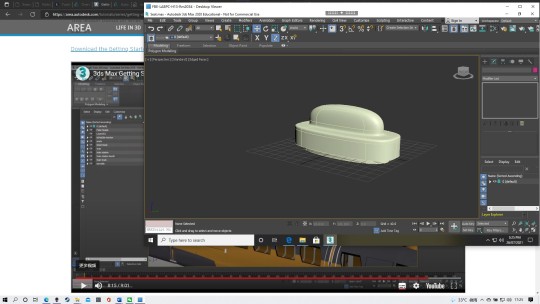
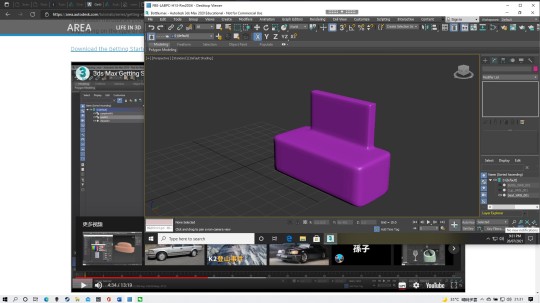
When following the next Autodesk tutorials, I built onto the models I was instructed to make based on my own understanding of how to use the application. The seat reminded me of the handle of a household product, so I transformed it into the handle of a window cleaner I saw. I also tried to model my own lamp from scratch, just when I felt more confident, the bevel produced an error. It took me 30min before I realized the chamfer was set to a value larger than the width can allow, so I fixed it and became more aware of the constraints some tools can have.

I then also moved on to making my airpod case, and found myself branching out to use more tools, but also using more suitable modifiers to efficiently create the shape needed (not using editable poly if its not needed yet).

My main takeaways this week:
I need to be more courageous and creative to become a good designer
Although cliche and obvious, practice makes perfect! It’s only been 1 week and I’ve grown a lot more comfortable with the application, and getting used to the UI.
Some tools have constraints, look out for them.
Get a PC soon to stop using myAccess ;( each change takes a 20second lag to appear and its too inefficient!
11 notes
·
View notes
Text
Week 8 - Digital Iteration
The first pre-class activity was to watch a video on the development of a razor. Andrew Simpson discussed the use low-fidelity and hi-fidelity models when prototyping the razor. A low-fidelity model is usually a very early prototype that doesn’t accurately represent what the final product will look like and rarely allows for user interaction. However, a hi-fidelity model is a prototype close to what the final product will look like and will perform its intended functions almost exactly.
In this week’s tutorial we were introduced to a new modelling software; Autodesk 3ds Max. I have previously worked with Autodesk Fusion360, Rhino and SketchUp, so this software was new to me. However, there are tools that can be found across all platforms such as offset, chamfer, bevel etc. After getting past the MyAccess drama, I was finally able to have a working version of 3ds Max and began with Part 1 of the tutorial. This was mainly getting used to the interface and learning to set up the viewports and units correctly.
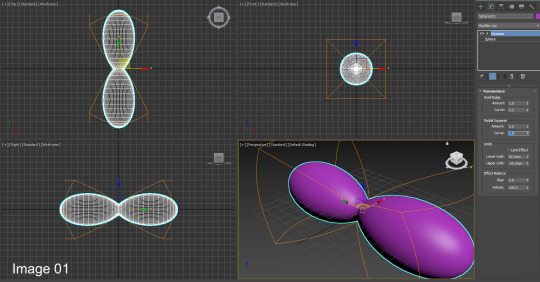
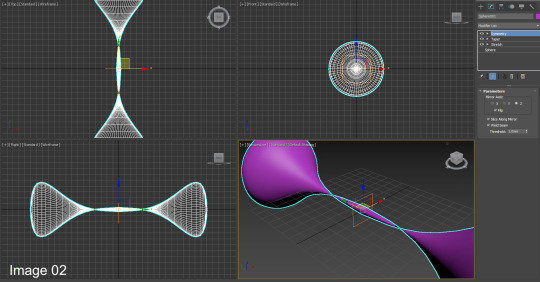
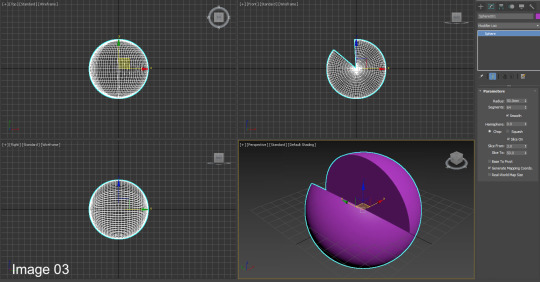
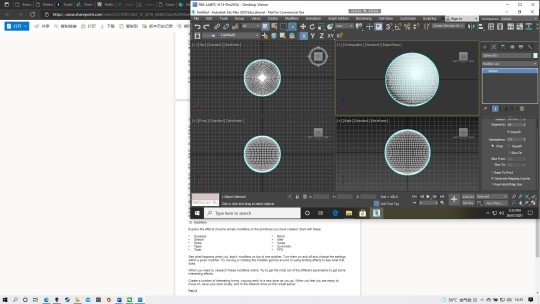
We then started playing around with the different tools such as gizmo, primitives, and modifiers. When experimenting with these different functions, it was interesting to see how changing the values of different elements could drastically change the shape and flow of an object(Images 01-03). For example, I used the melt function on my sphere and played around with the different values and eventually ended up with a donut shape. I also tried stacking the modifiers to see what effect that would have on the sphere. Overall, this section of the tutorial was quite straightforward and easy to follow (apart from 3ds crashing halfway through and not having saved my work).
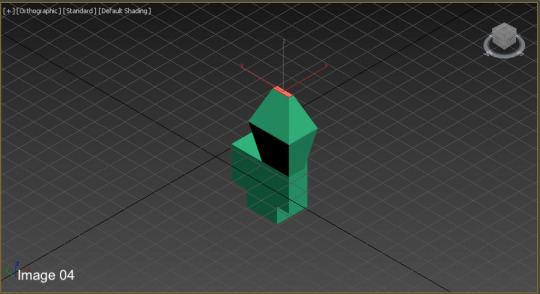
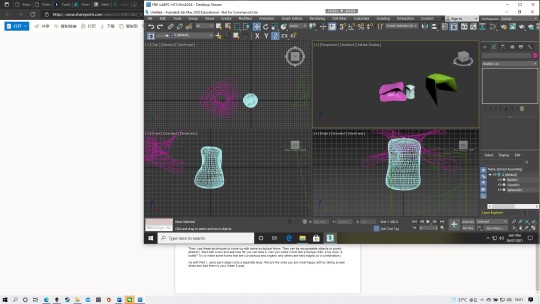
The second part of the tutorial was for creating our own abstract shapes (Image 08) using the new skills we had learnt in Part 1 and in the extra tutorial videos on Autodesk. I found this very enjoyable as I learnt neat shortcuts/tips to make a more aesthetic model. For example, by deleting and/or adding faces onto a polygon, you can create a smoother surface when using the NURMS function (Image 06).
However, next week’s task may be more difficult when we have to create the shape of our Olay moisturizer bottles. This week we were just playing around and creating things on the spot but now that we have a designated shape/design we need to produce, it may be more difficult to create the precise/accurate edges and curves.
11 notes
·
View notes
Text
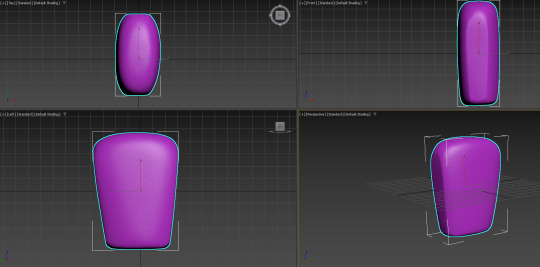
Week 9 Reflection
This week’s activity was to use Autodesk 3DS Max to create prototypes of the Olay bottle. From last week’s activity, having already being given a taste how this software works, I was a little excited to see what I could come up with.
My steps in creating my model was to simplify my workspace. Rob always advises to simply the workspace, which I have now really become a fan of. I used to be under the impression that having all tools out all the time would be useful if there came a time where I needed to use a certain tool. However, with the idea that sometimes less is more really made it easy to navigate through the interface. I felt that this made my work much more effiecient because I knew where everything was located.
Moving onto actually designing the bottle, I decided to start off with the most basic modelling method in the software – using basic shapes and modifiers. I thought that if I was able to create something satisfactory with these, it would make my work much easier and faster. (Coming back to the idea of efficiency and finding the best ways to accomplish the tasks.)
As I was working through the basic shapes and modifiers, my design was looking promising and I knew I was on the right path. As I was adding my finishing touches, MyAccess crashed and I lost my work, which was really really frustrating as it took me a lot of time experimenting with different shapes and modifiers to create that. However, to be fair, me knowing about the inconsistent nature of the programme, it was my mistake that I did not regularly save the file. Unfortunately, I also did not screenshot my process, which I thought I would do at the end (by reversing all my actions).
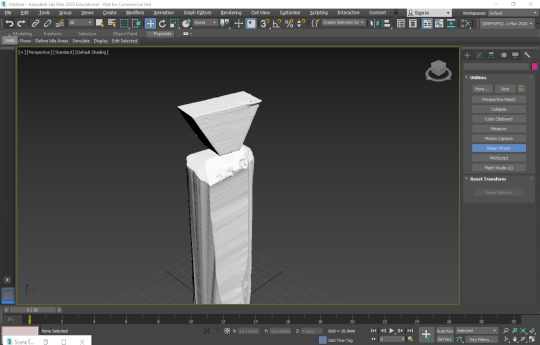
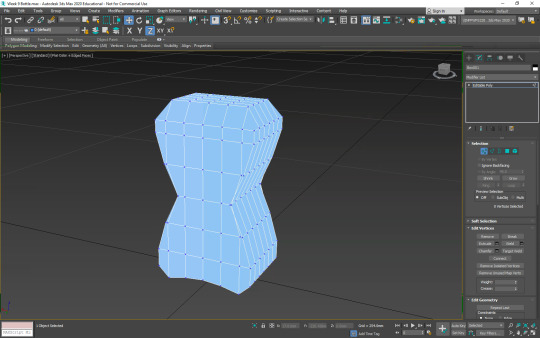
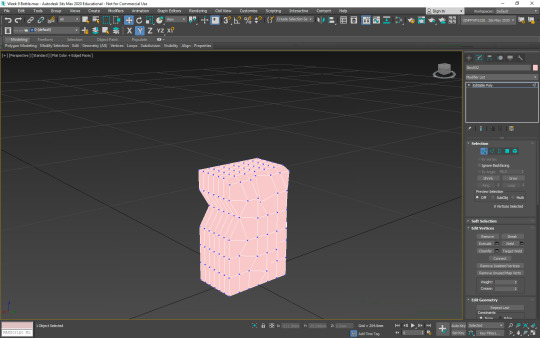
With that being said, I once again started, but this time I literally saved EVERY single change I made. This really came in handy because MyAccess crashed multiple times as I was working through the second time around and I didn’t have to worry about losing my work. Also, I thought this might be a good opportunty to try making the bottle with polygon modelling instead because I felt like redoing what I did for the first bottle would not make me better at using the software. Though I have already used polygon modelling in last week’s experimentations, the results I ended up with were by fluke and I wasn’t sure what I was doing half the time. So this time, I wanted to change the fluke to proper understanding.
Unlike working with basic modifiers, when working with polygons, I realised I had to add segments to adjust the shapes, and the more segments I add, the more detail I can create (and the more time it will take). I started off using 10x10x10 segments for the box, which I realised was way too much for what I was trying achieve and much more time consuming. Instead, reducing the secments to 6x6x6 gave me enough segments to work on details while also making the process a little faster.
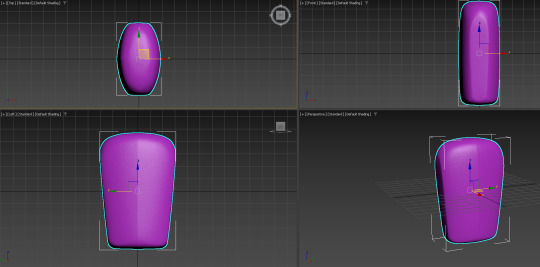
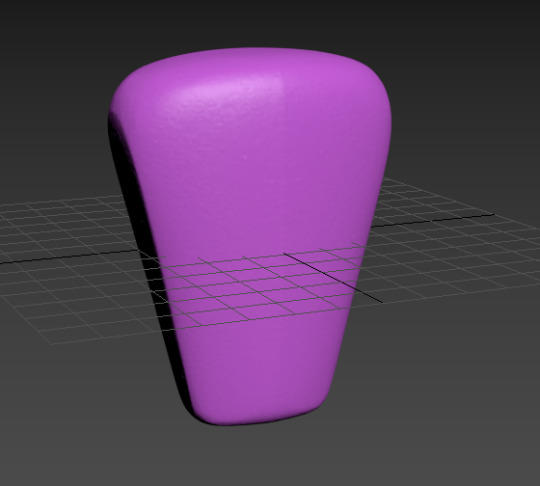
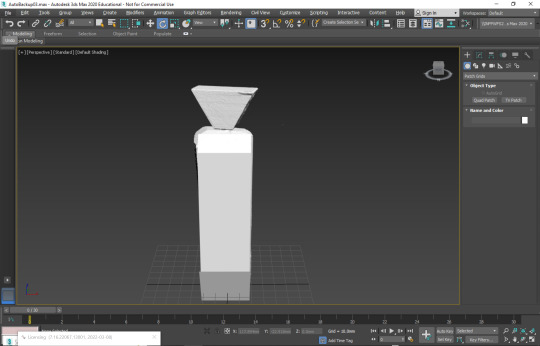
This was the final result.
Useing NURMS with 3 itterations to create a smoother looking body.
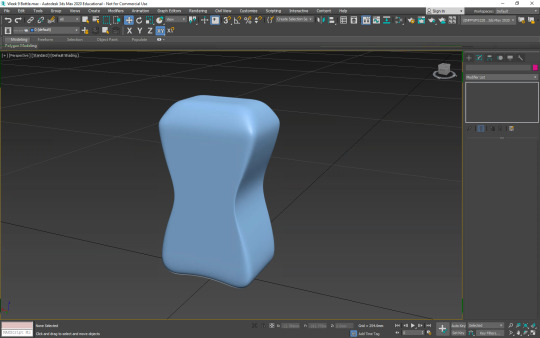
Final design with lid.
With this bottle, I am very satisfied with the outcome and it looks almost like how I imagined it to be. I also feel much more confident in my ability to use the software.
Another thing was that I figured out that I can make my design more accurately by typing in the adjustments into the respective x y z tab found in the bottom panel.
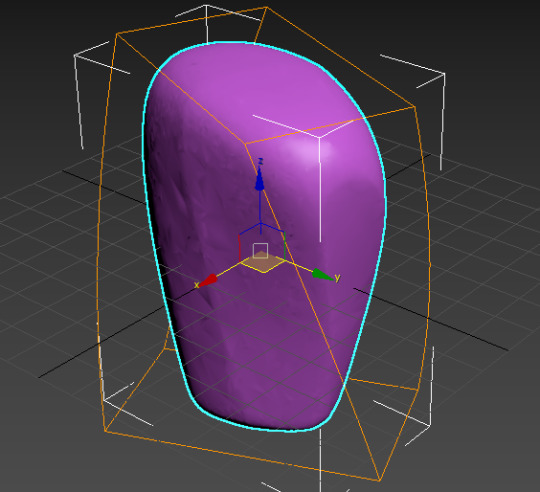
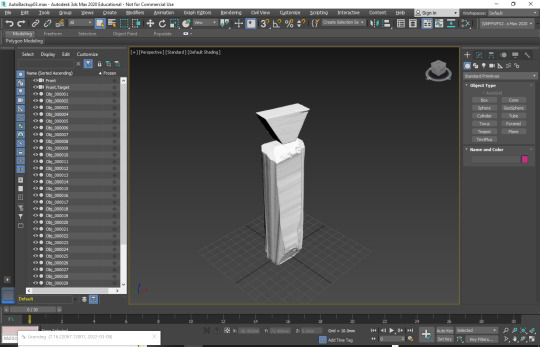
With my next bottle, I thought I would get a little more experimental with the design. I thought I would try to recreate an abstract female human figure – to direct the design for female audiences.
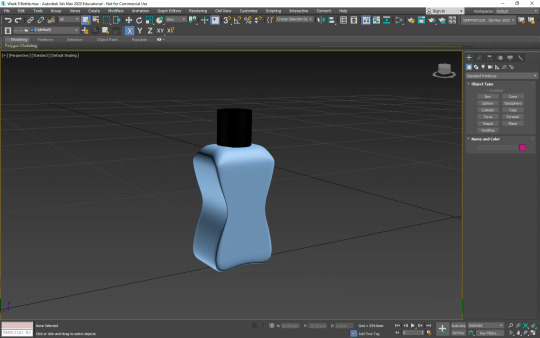
This was my result.
Useing NURMS with 3 itterations to create the organic shape.

Final design with lid.
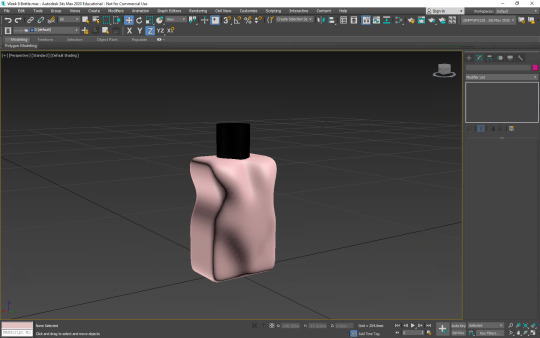
With this bottle, I am not entirely satisfied with the outcome, especially with the way the shape of the female body looks. In hindsight, I think possibly adding more segments to the original shape might have given me more precision in designing this.
Both designs together:
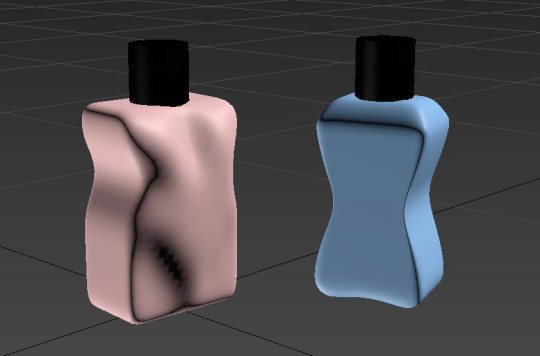
In all, this has been a good learning experience for me. I became much faster and I can now say confidently that from here on out, my work will not be a result of fluke, good or bad.
I am excited to continue learning this software and other CAD softwares too. These softwares are extremely important in today’s industry, and I can see why. These are powerful tools that, once mastered, can be extremely useful in designing.
6 notes
·
View notes
Text
Week 8 - Digital Models
INTRODUCTION
This week we transition from physical models to digital ones. Just as new workflows and creative possibilities opened up when we transitioned from hand to digital sketching, the jump from physical to digital models also presents new opportunities. Each method has particular strengths that we can take advantage of, and limitations that we need to be aware of.
The tools and processes you use as designers serve as conduits for your ideas; they support your ability get them out into the world. One of themes central to this course has been selecting the right tools and processes for the task at hand. To be able to choose well, you need awareness of the tools and processes available to you, and then to have the ability to use them. It is often the ability to fluidly jump between or even combine methods that opens up the most effective and creative pathways for the exploration, refinement and communication of our ideas. We continue to build on these themes this week.
LEARNING OBJECTIVES
By the end of this week you should be able to:
1. Have a conceptual understanding of the process for transferring a physical model into a digital environment.
2. Rapidly generate simple form iterations of a digital model
3. Output your digital model for use in other formats.
4. Identify some of the benefits and limitations of this process.
PRE-CLASS ACTIVITES
These are to be completed prior to the class time on Friday
1. Model making case study - Razor
Watch this video with Andrew Simpson from Vert design as he discusses the use of models in the development of a razor. Click here
In your Week 8 blog post, identify the important ways in which models informed this design process in ways that sketches and drawings alone could not. Give examples from Andrew's own explanation. What do you think Andrew means by "low-fidelity" and "hi-fidelity"?
2. Install 3ds Max on your computer / access via UNSW MyAccess
3ds Max is the software we will be using for our digital iteration exercise on Friday. You will need to install it locally on your computer (PC users) or access it virtually via the UNSW MyAccess site (Mac users). In both instances this needs to be done well ahead of the class so that you can gain some familiarity with it in activity 3 below.
If you have any installation issues, try to resolve them prior to class using your own online research, or by seeking help using the “Student Question & Answers” forum.
PC users:
As a student, you can access a free educational license for Autodesk products. If you don’t already have one, you will need to first create an Autodesk student account. Click here
Please follow the 3ds Max installation instructions on the Autodesk website. So that we can follow along together in class, please install the English version.
Mac users:
You will need to access 3ds Max via the UNSW MyAccess platform. Click here and follow the instructions provided.
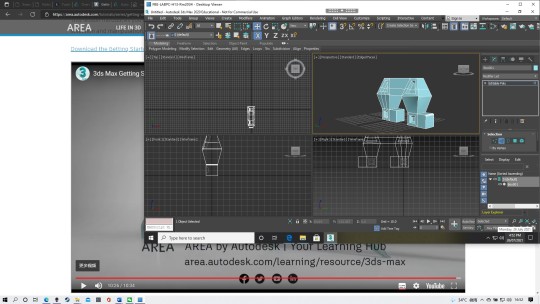
3. Get familiar with 3ds Max
We will be using 3ds Max to produce digital model iterations in the class activity on Friday so it is important to have some familiarity with the interface and basic features. To help with that, go to Autodesk’s “Getting Started in 3ds Max" page and watch the first 10 videos. These are short and shouldn’t take you too long. Make sure you download the Getting Started Scene Files (link on tutorial pages) so that you can work along. Click here
IN-CLASS ACTIVITIES
Below is the schedule of activities we will be completing during our virtual class time. In order to complete these activities you will need to have engaged with the Pre-Class Activities.
1. Week 7 review / questions and answer session
Please come prepared with your questions!
2. Lecture: Digital Models
3. Activity: Digital model making
POST-CLASS ACTIVITIES
These activities are to be completed by the Monday evening evening following our virtual class:
1. Finish the class activity to the best of your ability
2. Make your weekly blog post
Write a reflection on your learning experiences within Communications this week. You might ask yourself:
Have I achieved the learning objectives set for this week?
What went well / what did I have difficulty with?
What did I enjoy / dislike?
What would I do differently if I had my time again?
What were some of the key things I learnt, or insights which I developed?
What led to those experiences or insights?
You can consider some or all of these, or any other questions which you believe are relevant. Try to write at least 200 words.
Include a series of images and screen shots that help show the process you used to create the items you produced in the studio tutorial exercise.
***Don’t forget to include your response to Pre-Class Activity 1 (Andrew Simpson video)!!
ADDITIONAL RESOURCES
1. Autodesk 3ds Max Learning support
There are many support resources available to help you learn 3ds Max. The Pre-Class Activities introduced you to one site. Here are a couple of others that you might investigate:
Autodesk 3ds Max Support and Learning page
Forum, tutorials, documentation and self-guided courses.
LinkedIn Learning
Login through the UNSW LinkedIn Learning Portal and then search Autodesk 3ds Max.
2. Clay model making - automotive
Here is some inspiration from Mazda to take it to the next level. Click here
Here is another video from Jaguar. Notice the constant back and forth between the hand made and digital as they refine their designs. Notice how they are selecting whichever method best answers the design questions they need answered in order to push the design process forward to its resolution. Click here
...and at the risk of going down an automotive rabbit hole, here's one from Audi. Click here
0 notes
Text
Week 8 - Digital Models
This week the exercise is computer-based, and the tutor introduced software called 3ds Max. Even though it is a 3d modeling software just like Rhino that we learn from the last term, the ways to build models are quite different. After watching the videos of the Razor case study, I can see that models can provide the feeling of mass and size of actual products, which sketching and drawings alone could not. I think Andrew's meaning of "low-fidelity" and "hi-fidelity" is the precision that the product matches its design.
I choose to do this work on MyAccess because I haven't downloaded it online and I realized that it works quite smoothly on my computer, so I continue to work on it (I will download it before next week's class). The layout of 3ds Max is similar to the Rhino(4 different views to set), and there is much geometry provided for us to use.
By following the steps for part 1, I adjust the views of the 4 windows so the arrangement is similar to the orthogonal drawing from the past several weeks. The modifier provides multiple tools like FFD, Skew, and Squeeze, which help us form wonderful shapes from simple geometry shapes like spheres and boxes.
In part 2, by watching the videos of Modeling tools and polygon modeling, I create 3 different shapes with the NURMS tool. I found that it is a very wonderful tool to create a smooth surface just by making boxes and using the "swift loop" tool.
After making several models with 3dm Max, I think Rhino is better software for me. I found it is very hard to make an adjustment to the views(maybe I didn't get the trick to do it), and sometimes I didn't found the tools I want(Maybe because I am not familiar with this software). I will continue to discover this software, prepare for next week's task!
3 notes
·
View notes
Text
Medical Cannabis Professional At MyAccess Clinics
Medical cannabis is a promising treatment option for various health conditions, from chronic pain to anxiety. With its natural healing properties, medical cannabis may offer a safer, more effective alternative to traditional pharmaceuticals. Consult a medical cannabis professional at MyAccess Clinics to see if medical cannabis is right for you.

0 notes
Last Seen Blogs

i-have-inappropr0-thoughts
Not Necessarily
myssdepre
I won't judge. I promise.

edmundhoar
and breathe

betamacx
Betamacx

courtingcomedy
Courting Comedy