#mh custom
Text


This Deuce I drew in 2022 still get likes here sometimes, so I wanted to share with you that I actually repainted my new son following this old sketches I did. ^^
[I might paint the snakes later but he looks fine for now]
#art#artists on tumblr#my art#monster high custom#monster high dolls#monster high#monster high deuce#monster high g3#monster high gen 3#mh g3#mh custom#mh#custom doll#repaint#doll repaint#deuce gorgon
528 notes
·
View notes
Text
doll customizers i need your help!! i’m rerooting for the first time (specifically mh g3 ghoulia and frankie) and i’m having some trouble getting the hair out. i managed to get nearly all of it, but there’s a few strands that just won’t go! i’ve been mainly scraping the glue off, but when i scrape those last few spots it does nothing and i don’t feel any resistance. i’ve heard of people using nail polish remover to dissolve the glue and i’m thinking of trying that next. if anyone has any tips i’d really appreciate it!!
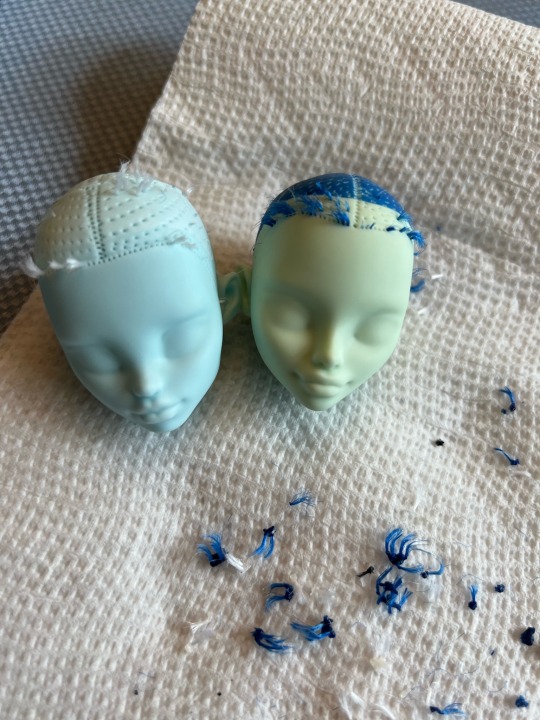
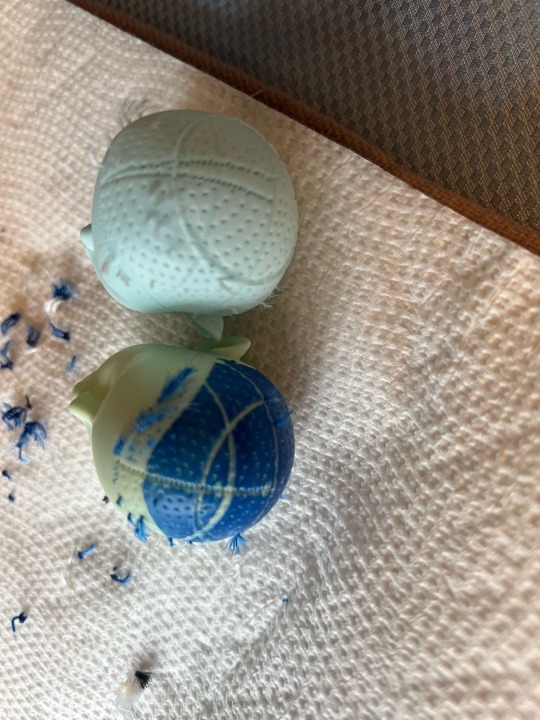
(sorry for the poor picture quality, but you get the idea)
#doll custom#doll customization#doll customising#ooak#ooak doll#doll reroot#monster high custom#mh custom#monster high ooak#mh ooak#monster high g3#mh g3#dollblr
20 notes
·
View notes
Text
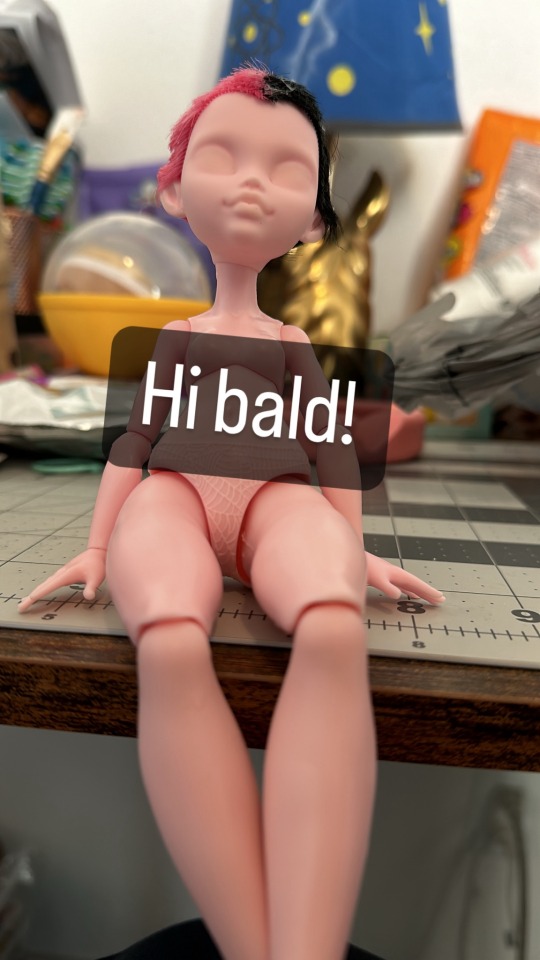
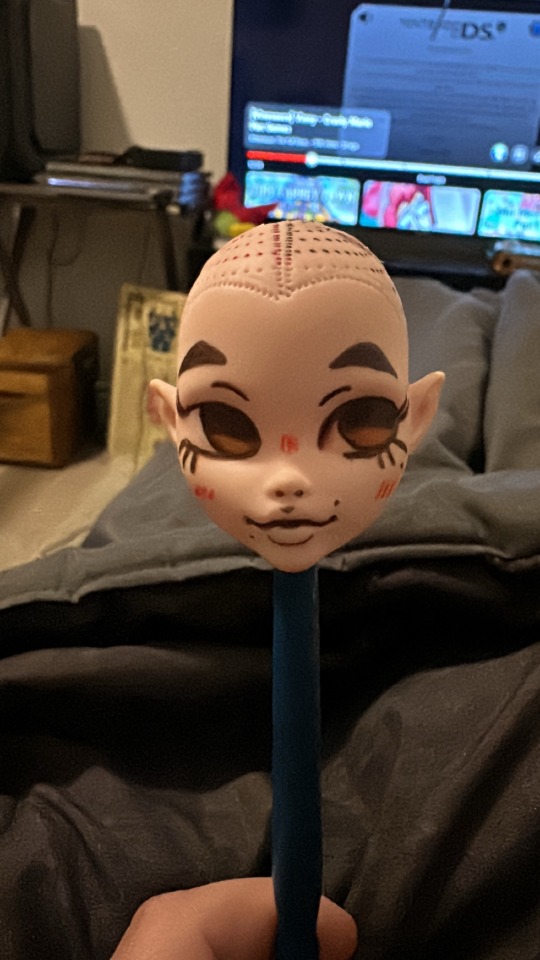
progress so far on my first custom. Base is a monster high g3 Draculaura! trying to have them finished in time for February vacation to Disneyland.
42 notes
·
View notes
Text


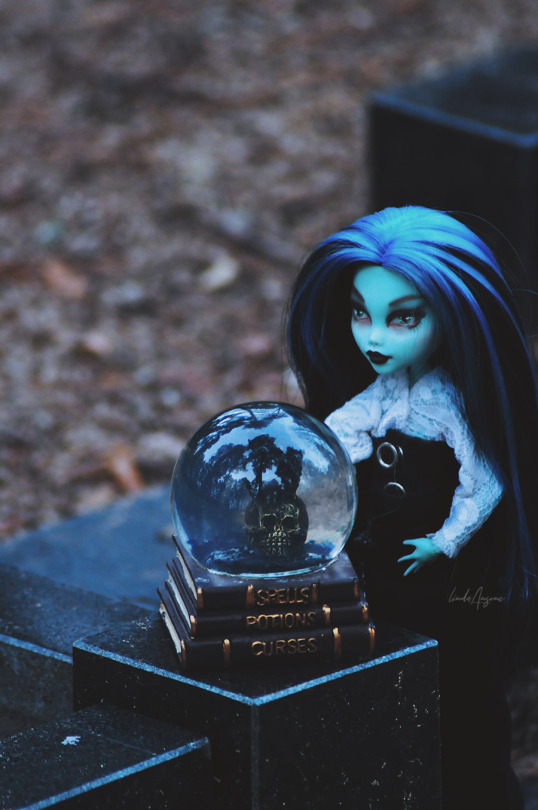

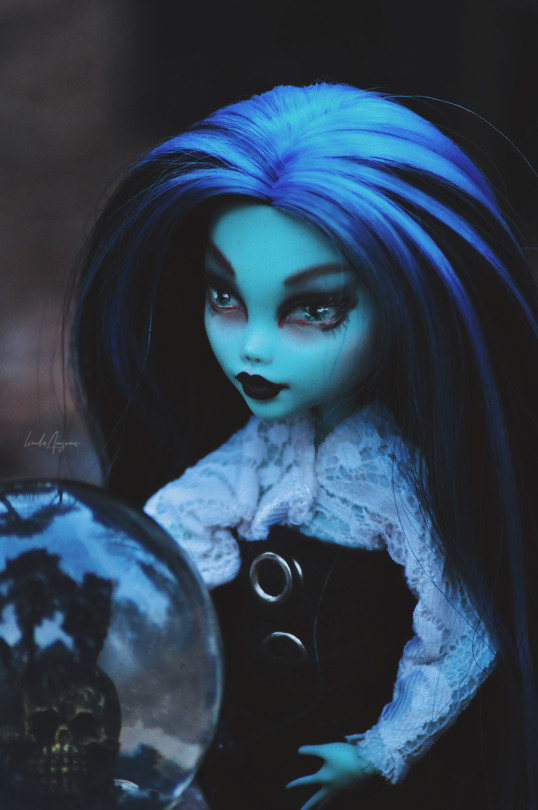
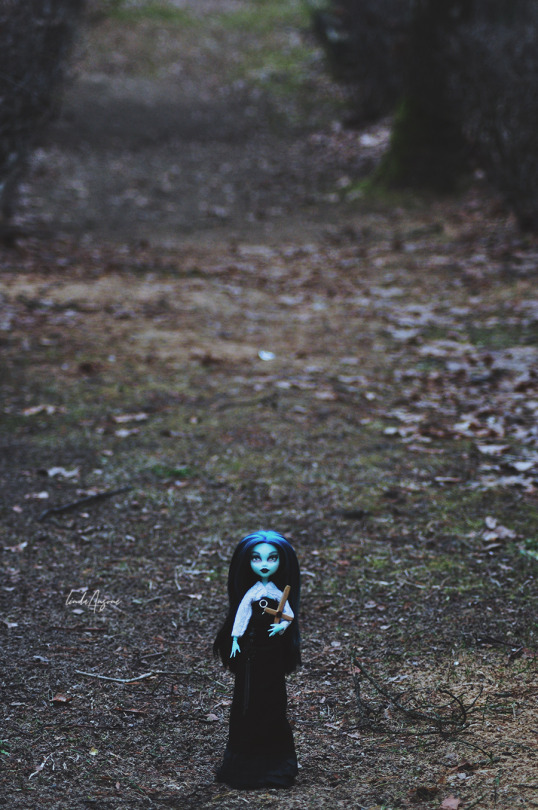
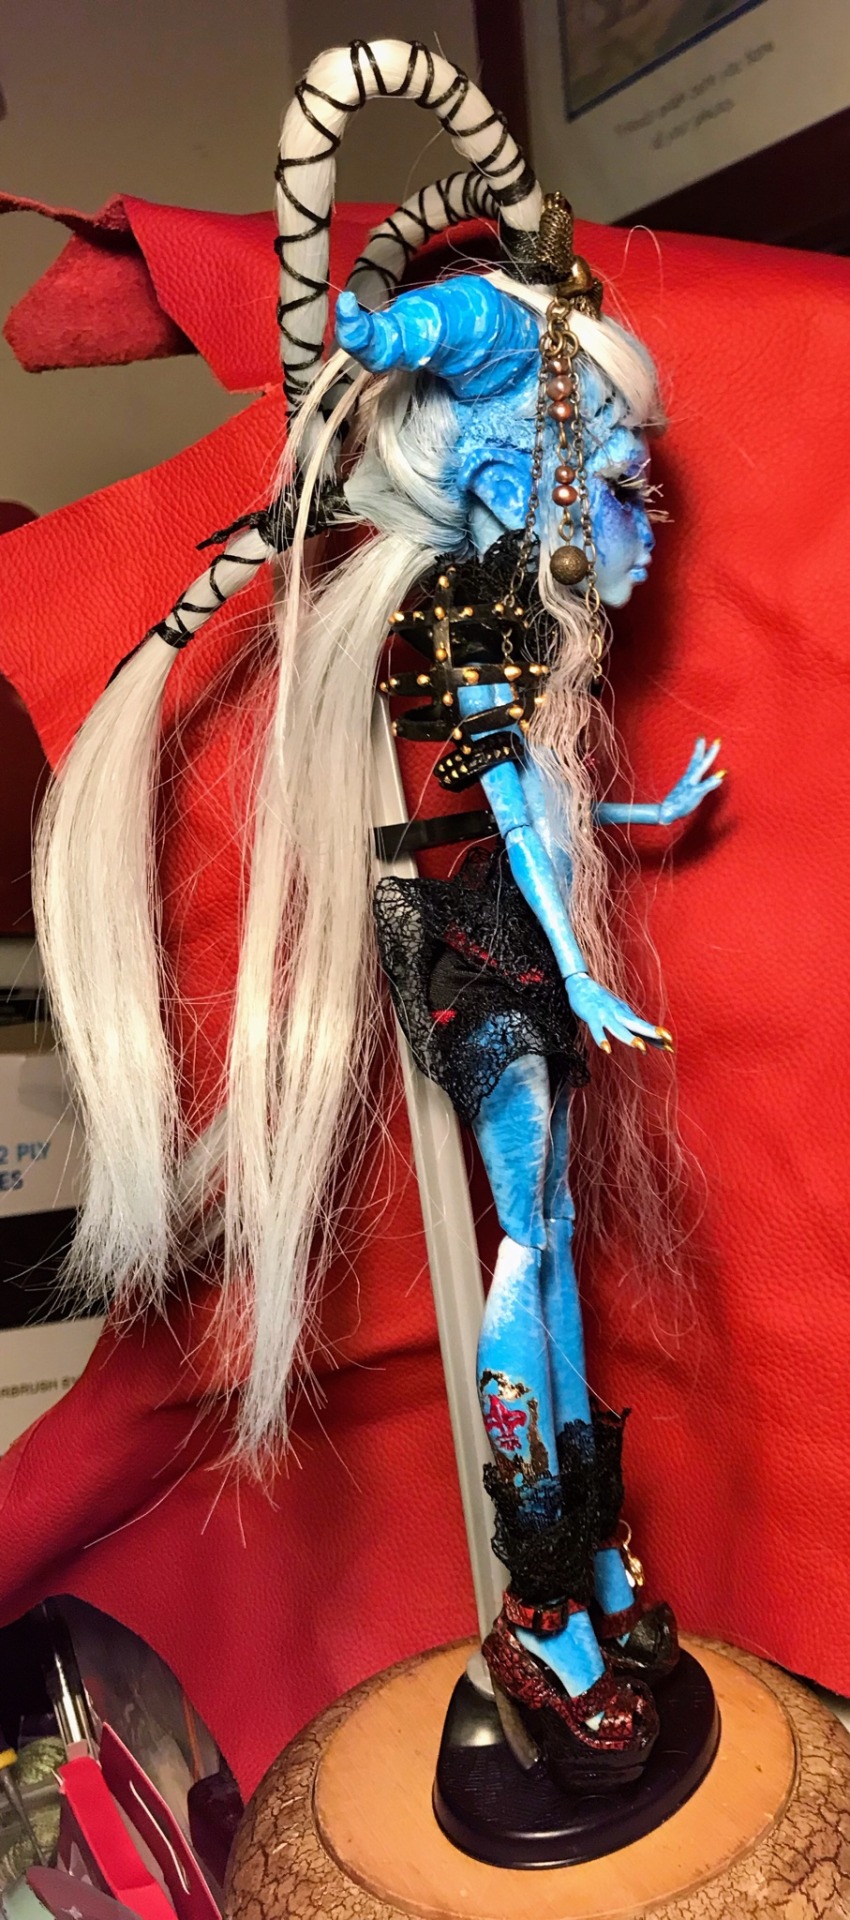
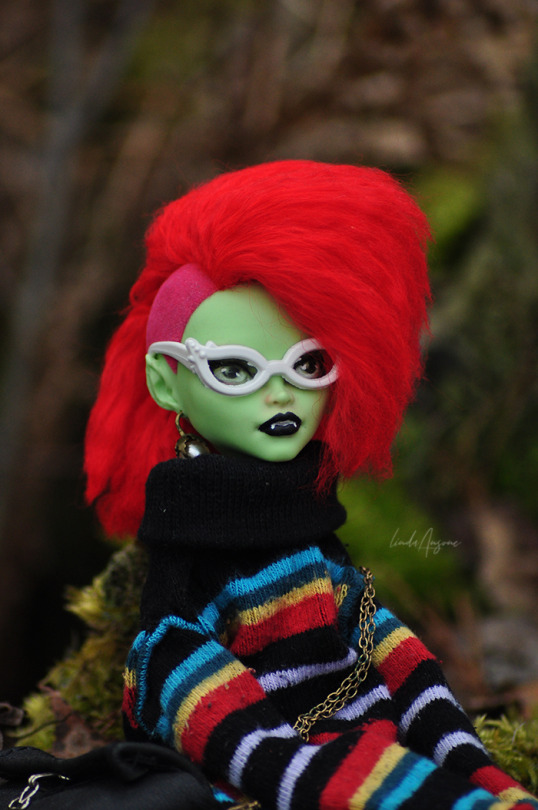
Something wicked this way comes...
#custom doll#dolls#doll photography#doll artist#mh dolls#mh custom#mh repaint#doll repaint#mh ooak#ooak doll#gothic#witch#witchcore#dark#she's definitely one of my faves#as you can tell by the amount of photos I take of her XD#original photography
15 notes
·
View notes
Text

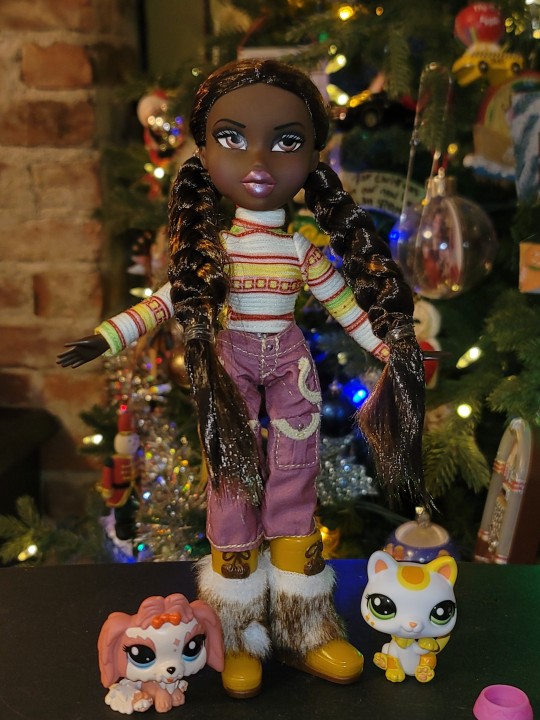
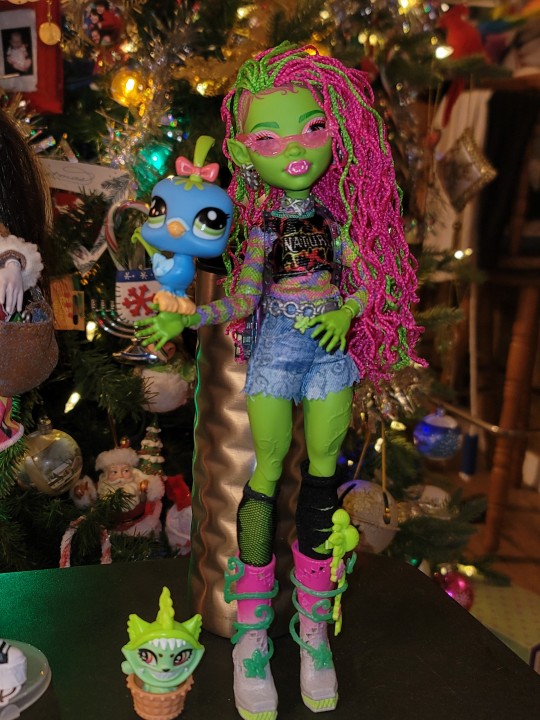

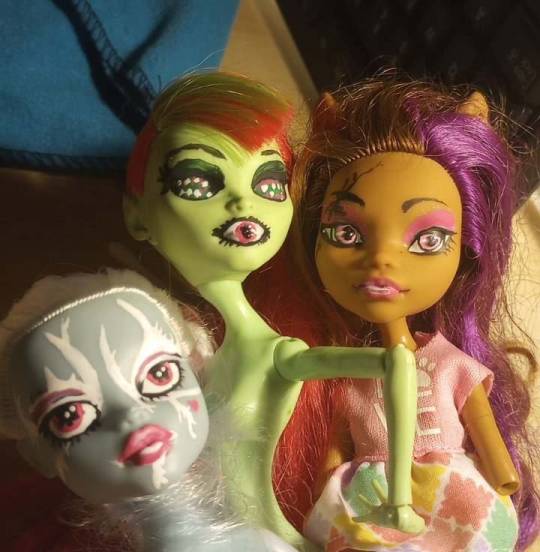
did a lil photoshoot with the dolls i got for Christmas before the tree was taken down! We have Felicia, Venus, some new LPS, and a customer G7 MH doll my best friend did of ME?! I love it so much, I put them in Felicias jacket and a fashion pack dress! Absolutely love these dolls so so much!
#monster high#dolls#felicia#bratz#bratz felicia#felica bratz#venus#venus mcflytrap#monster high custom#mh custom#lps#littlest pet shop#g3 mh#g3 monster high#lps g7
11 notes
·
View notes
Text


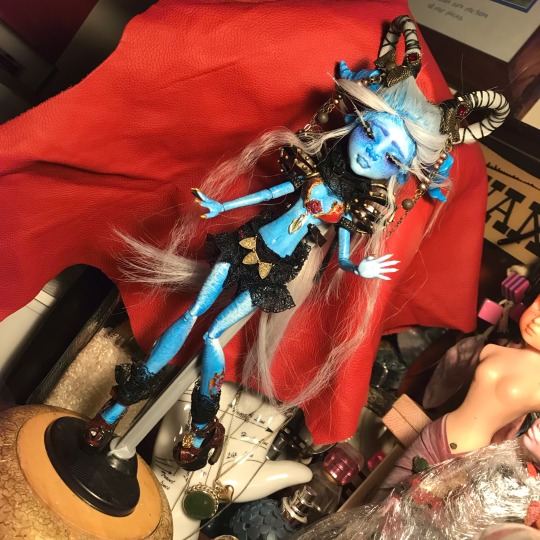
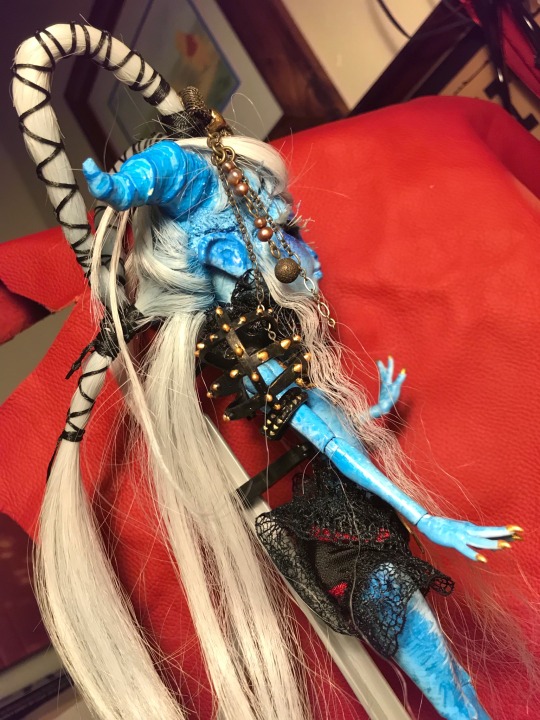

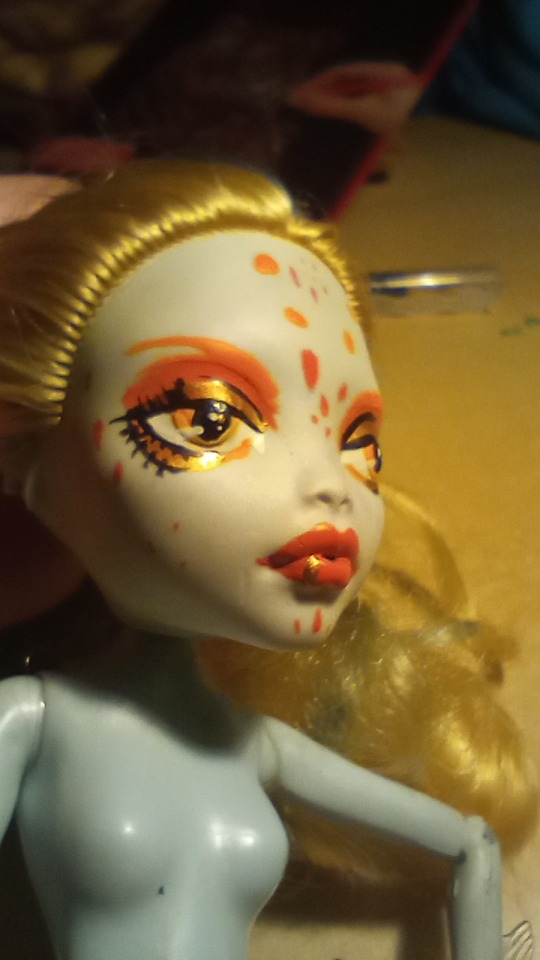
Last photos of her she finished!!
and for sale...
i almost want to keep her😪
First shes going on display with 3 others in a local store in my home town and i allso, (once my etsys set up) be putting any dolls i create in there aswell aswell as shoes and possibly other accessories for dolls🤔 will be adding info on my etsy once its opened. (once i get around to it) allready have vintage store online which i run and it takes up a alot of my time.
#art dolls#custom dolls#monster high doll#monster high shoes#monster high doll clothes#monsterhigh custom dolls#custom monster high#mh custom#ooak art dolls#dolls#dollcore#doll repaint#doll fashion#doll collection#plastic and vinyl dolls#ooak dolls#custom repaints monster high#everafter high repaints#doll modification
28 notes
·
View notes
Text
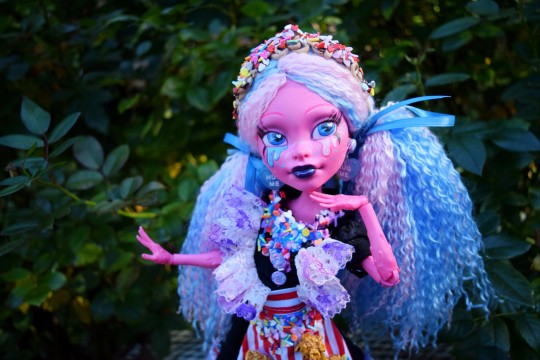
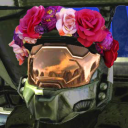
Gooliope Jellington: Sweet Screams Edition (October 2022)


Base Doll: Gooliope Jellington (Monster High G1)
Clothing Pattern: https://www.etsy.com/listing/265925128/carrolls-muse-dress-sewing-pattern-pdf?click_key=eb0f8b19429e89cab0b606c33a3316fc28733c91%3A265925128&click_sum=be6105e4&ref=shop_home_active_6
Sprinkles: https://www.etsy.com/listing/1281595779/fake-far-out-rainbow-mix-fake-sprinkles?transaction_id=3147439983
Caramel Popcorn:
Gooliope is one of my favorite Monster High characters, and Sweet Screams is one of my favorite lines. So it should come as no surprise that when a collab group opened up for redesigning the MH characters to fit your style, I was excited to partake! This is my first time working with a 17 inch doll, and it posed an interesting challenge! I gotta say, I loved working on a bigger face! I have another Gooliope, Draculaura, and Maddie Hatter of this size in my stock, to hopefully one day we'll do a project this large again. The trick is, it's gotta be a doll I'll want to have out all the time, since they're hard to store. So far this is the case for this one, she's so pretty, I don't see myself storing her too often. XD
My vision for this project was to deck her out in carnival sweet treats. Gooliope is a circus ghoul after all, so it stands to reason that those would be up her alley. I went with pink and blue on her hair and the ribbon details to represent cotton candy, there are buttons made of polymer clay that look like lollipops, and while it's hard to see, her heels are candy apples. She's decked out with a bunch of fabric paint to hold on the sprinkles and look like dripping icing, and then you have my favorite detail, the headband. You can't have a carnival without funnel cake, and adding a little chocolate ripple to it? And sprinkles? Oh man, -chef's kiss- perfection. The sprinkles were honestly a highlight for me. I normally don't use pieces from other crafters in my work, but when I wanted to add caramel corn to her apron (my other favorite piece next to the face), I figured hey, why not? Also, it's hard to see, but I added a bit of a color shifting glaze on her eyes before glossing them, and it's super pretty in person. Gosh, it is hard not to stare at her, I love her SO MUCH.
#doll custom#monster high doll#monster high custom#monsther high repaint#gooliope jellington#mh custom#doll repaint#doll customization#custom doll#ooak doll#ooak#doll photo#doll photoshoot#doll photography#monster high sweet screams
135 notes
·
View notes
Text
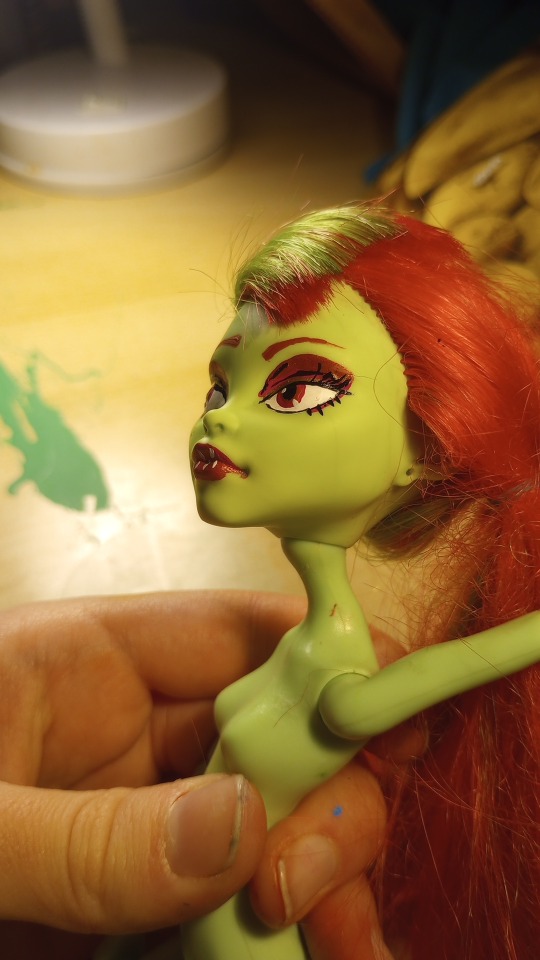
I be learning and practicing

4 notes
·
View notes
Text
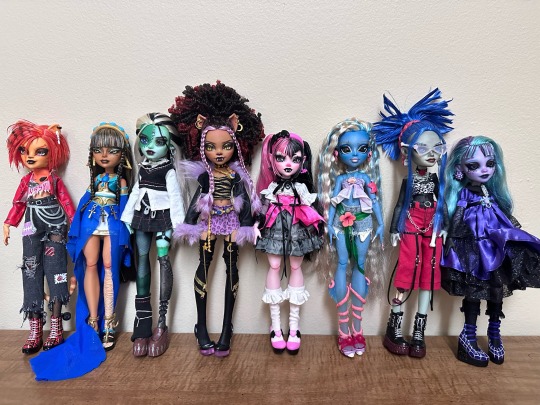
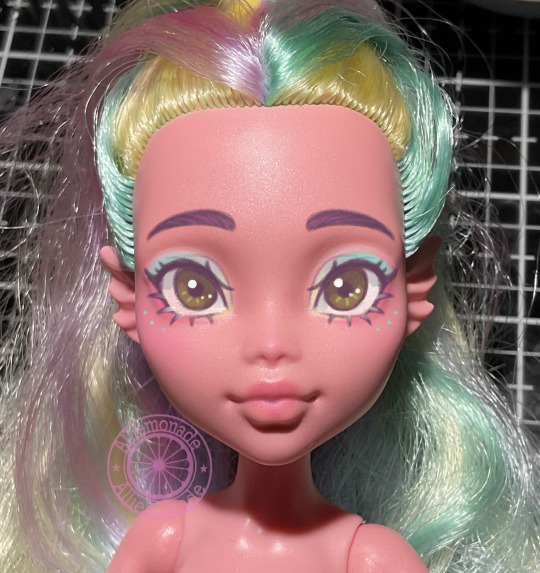
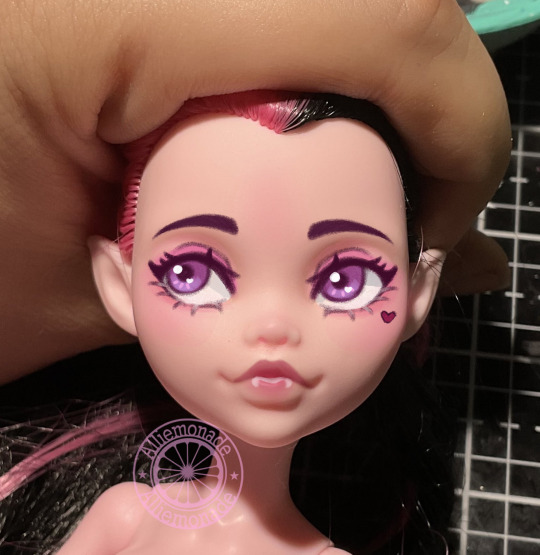
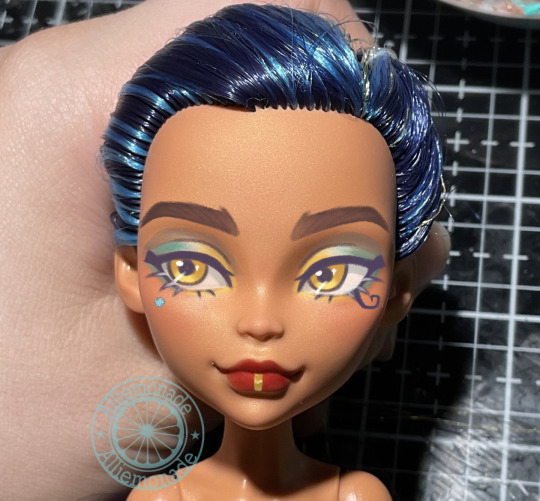
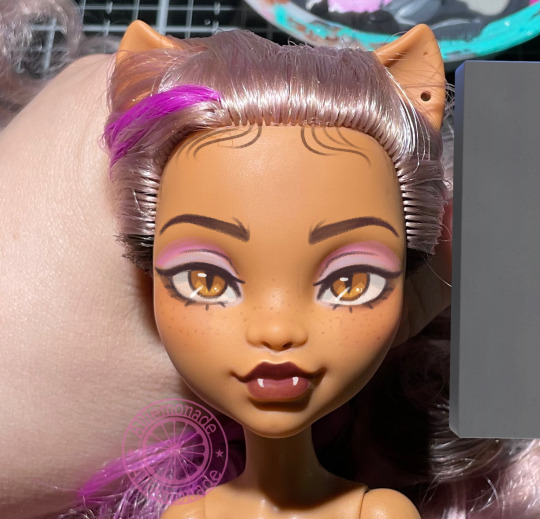
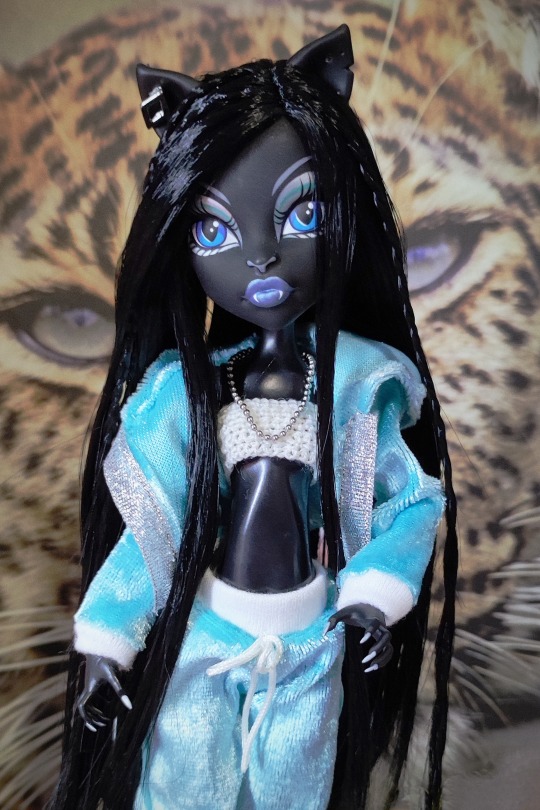
lineup of all my g3 ghouls so far🖤⚰️
#monster high g3#monster high#monster high dolls#custom doll#dollblr#mh#ooak doll#ooak#clawdeen wolf#frankie stein#draculaura#toralei stripe#ghoulia yelps#twyla boogeyman#lagoona blue#cleo de nile
2K notes
·
View notes
Text


I don’t really know if there’s a large custom doll community on Tumblr but I wanted to share my Frankenhooker custom I made from a super thrashed Frankie my friend gave me
#art#custom doll#ooak#ooak doll#monster high repaint#monster high#mh#repaint#frankie stein#frankenhooker#Elizabeth Shelley#skullector
473 notes
·
View notes
Text
MORE!!!
Also, my commissions are open if you want exclusive art and help an artist :]
#mh#mh g3#digital art#art#artists on tumblr#monster high#monster high reboot#monster high g3#monster high dolls#custom#mh custom#sketch#sketches#design#my art
211 notes
·
View notes
Text
:・゚✧:・.☽˚。・゚✧:・.:
#dollblr#dolls#mh#monster high#doll repaint#doll custom#ooak#doll collector#doll photography#my dolls
202 notes
·
View notes
Text
marble hornets bliinkiies!!!
made a couple for marble hornets!! my fav mediia fr <33 (no need to crediit just liike/reblog iif u use <33 :])


#cw flashing#flashing gif#marble hornets#mh hoody#hoody#mh masky#mh jay#jay merrick#alex kralie#mh alex#masky#masky mh#tim wright#brian thomas#marble hornets blinkies#blinkies#custom blinkies
664 notes
·
View notes
Photo


#monster high#venus mcflytrap#mh custom#mh doll#mh ooak#doll ooak#mh repaint#doll repaint#custom doll#doll#dolls#doll photography#original photography
68 notes
·
View notes
Text
Tutorial: MH Creepro neck and Arm fix

Posting this here because I keep getting questions about how I've been fixing my MH Creeproduction bodies to look a little less janky!
Most people already have these techniques in their arsenal (and can definitely do a better job than me) but I keep getting questions on Twitter about how I manage to fix mine so I figure I'd just post a tut on Tumblr that I can link to lol
This is an add-on to my previous post about the neck issue with both waves of Monster High Creeproductions in addition to another issue where the Creepro arms cannot lay flat against the sides of the body.
Tutorial below!
Supplies Needed:
-Shitty creepro body
-Some sandpaper, I've been using 320 grit
-Boiling water
We're going to start with the neck since that one is pretty quick.
This is the neck peg to start with, compared to an original G1 neck peg- the section we're concerned with is the circular peg right above the neck hole:

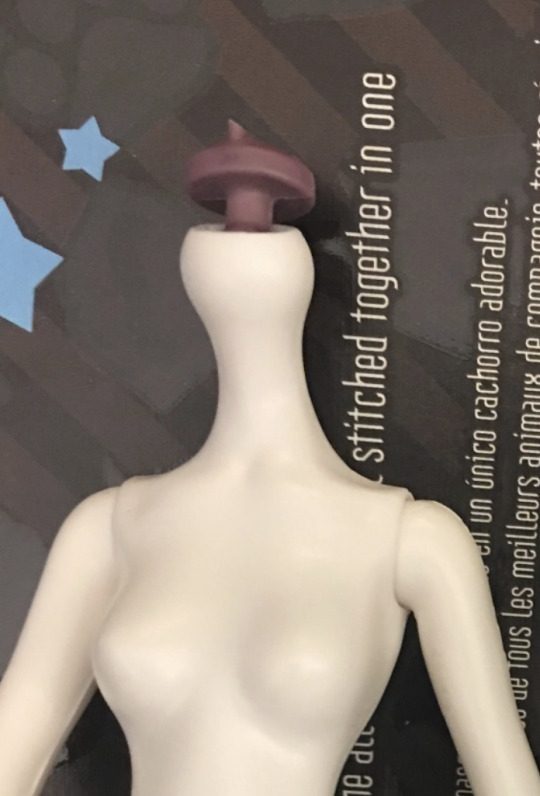
(Creepro on the left, original on the right)
the Creeproduction peg is significantly thicker, which is causing the head to sit lower on the neck and cause the vinyl to deform. We're going to fix that by sanding the underside of the neck peg until it's much thinner, but not quite as thin as the originals (since original g1 dolls frequently have loose necks lol)
First you'll want to cut out a rectangle of sandpaper and fold it in half; this is both to make the sandpaper less flimsy and also because the folded edge is good for sanding nooks and crannies.

Now you're going to sand all around underside of the circular neck peg shown here, until that whole circular peg is thinner:
Make sure not to use the folded edge of the sandpaper for this part of the tutorial, we don't want to accidentally carve into the "stem" of the neck peg and cause it to snap.
I like to sand off a bit, try the head on and then sand off a bit more if it's still not sitting as high as an original MH neck would. Make sure you're heating the heads prior to removal or you might break the neck peg.
And also chop off that stupid hook on the top of the circular peg, it does nothing but cause misery lol
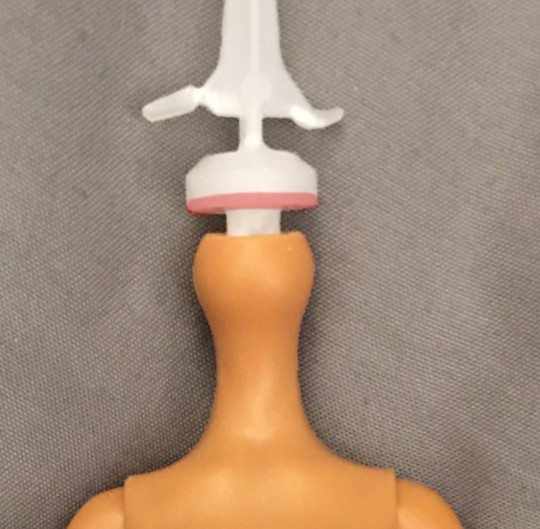
This is typically what it looks like when I've sanded it as much as I need to for most dolls:

(after on the left, before on the right)
Some characters have heads that sit much higher on the neck originally (like Spectra) so I'll sand off a lot more for them, but ymmv.
Now onto the body!
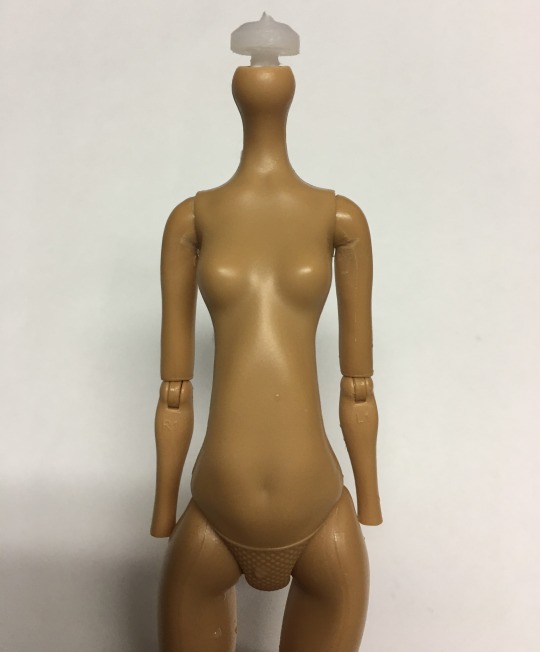
So, this is the Creeproduction body as-is:
This is the flattest I can get her arms to her sides. Some creepros can get them flatter, but not by much.
Original G1 body arms already tend not to lay flat enough in my experience, but Creeproduction bodies are even worse lol
We're going to fix that with sandpaper and boiling water!
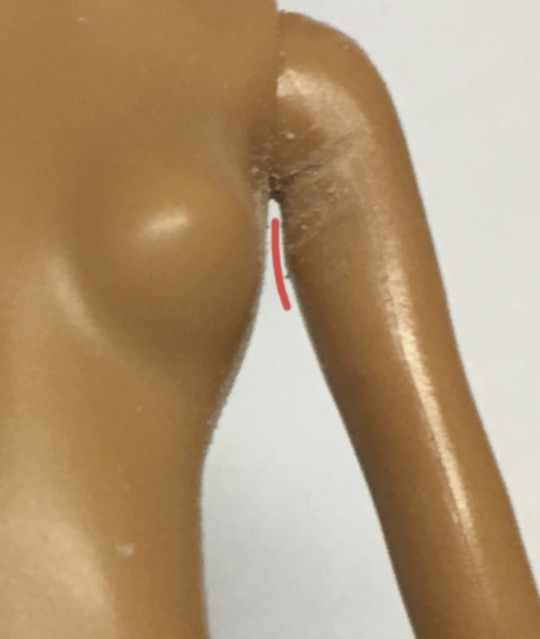
Provided below is an illustration of the general places that we are going to sand:

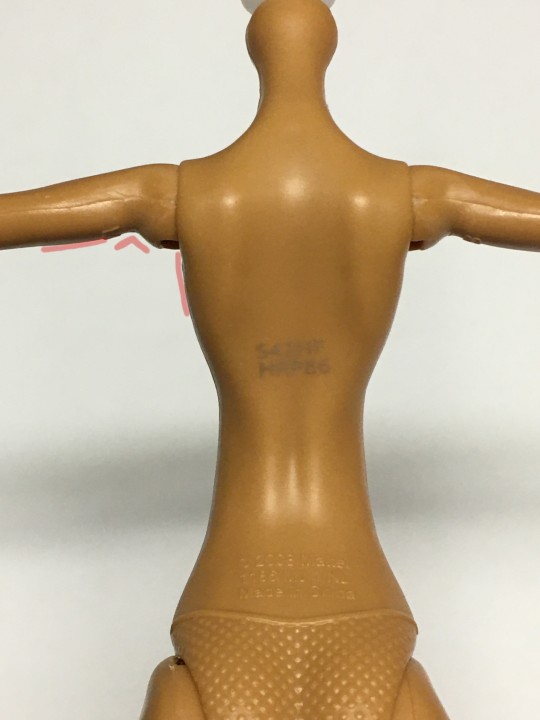
The notch under the ball joint of the arm, the area directly below the armpit and a tiny bit of the round area on the underside of the upper arm. We're going to sand a little off of each section.
For the notch in the arm, you're going to use the folded edge of the sandpaper to carve out the notch until it's a bit deeper than previously.
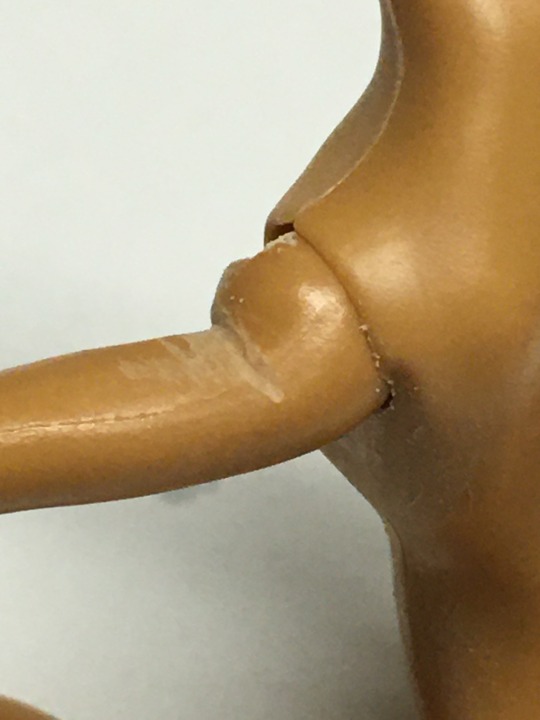
No, it's not pretty! Thank you for noticing lol
Next we're going to sand the armpit area, using the other edges of the sandpaper because we don't want to dig into the arm at all accidentally:


As well as this rounded area of the arm , not too much but enough to make it just a little flatter:
I left it raw to better show exactly where I'm sanding; most of the visible sand marks will disappear after washing but you can clean it up more with a finer sandpaper when you're done if you want. I'm just too lazy to do that lol
After all of that, your arm should sit more or less like the arm on the right (left unsanded for comparison)

Much better, but not quite there yet!
Modern G1 bodies have vinyl upper arms that are easy to manipulate with heat, so in order to get them as flat as possible we're doing to boil and reshape them.
I like to boil my water in the microwave, and then dip the entire upper torso into the water until the arms are super pliable. At this point I will pull them out, pinch the arms right up against the body with my thumb and forefinger and then run them under the tap until they set.
Your final result should look something like this:
And that's it! Hope that helps lol
Some shoddy before and after photos lol:


(Spectra was also rerooted lol)
123 notes
·
View notes
Text


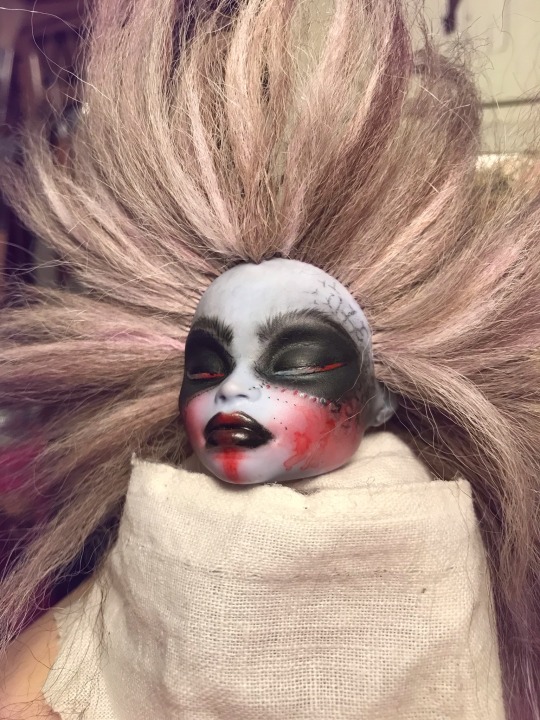
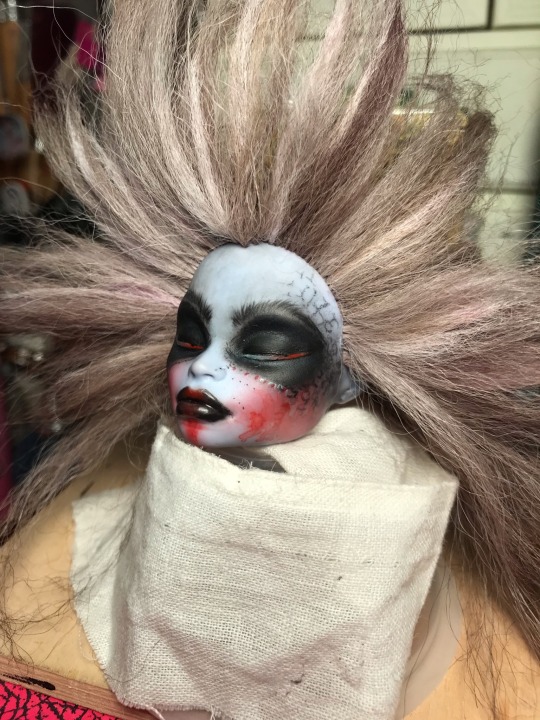
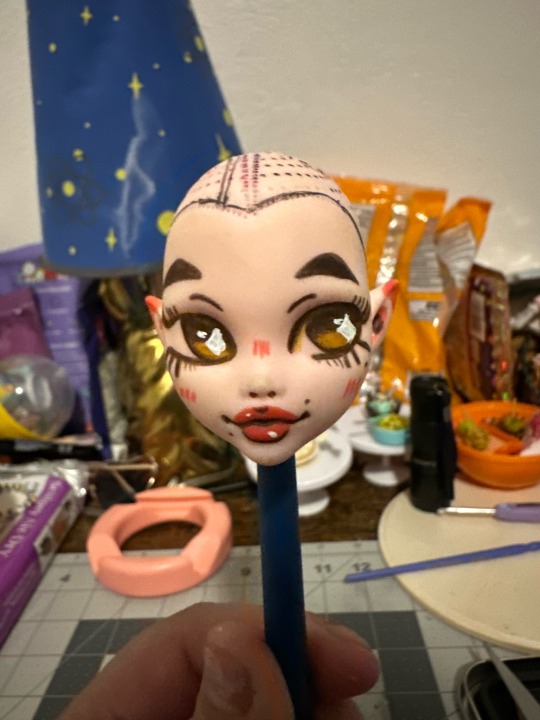
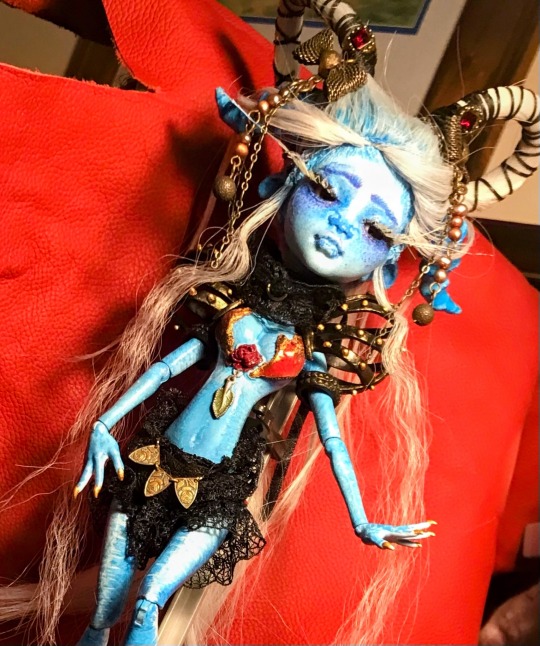
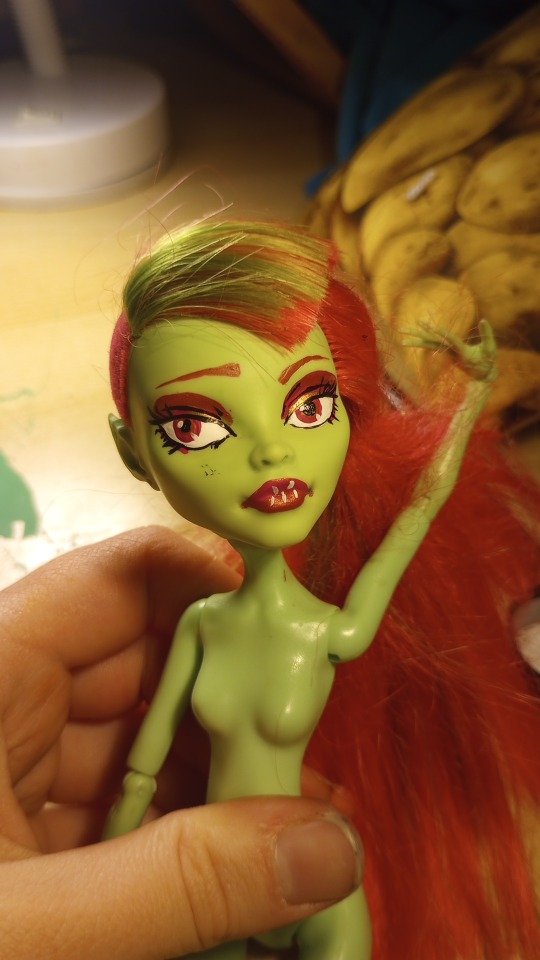
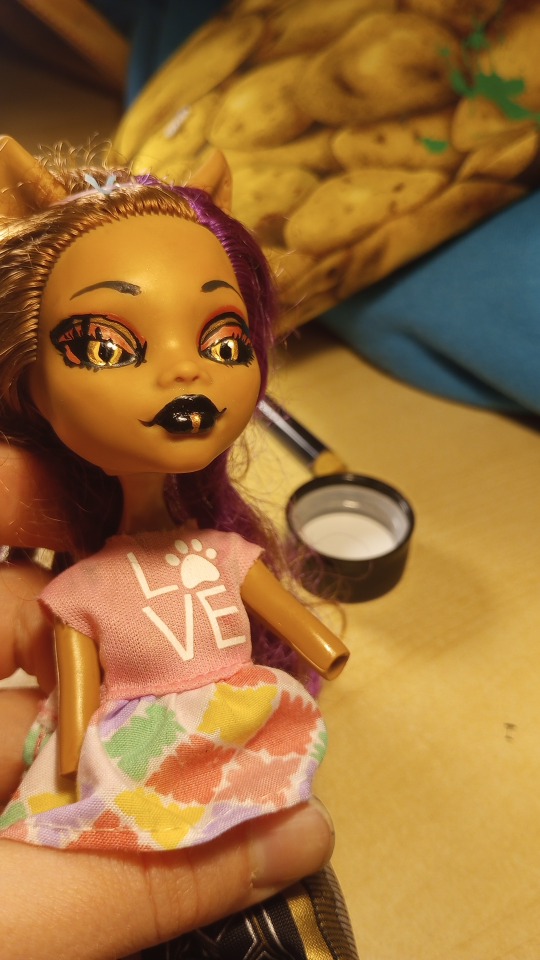
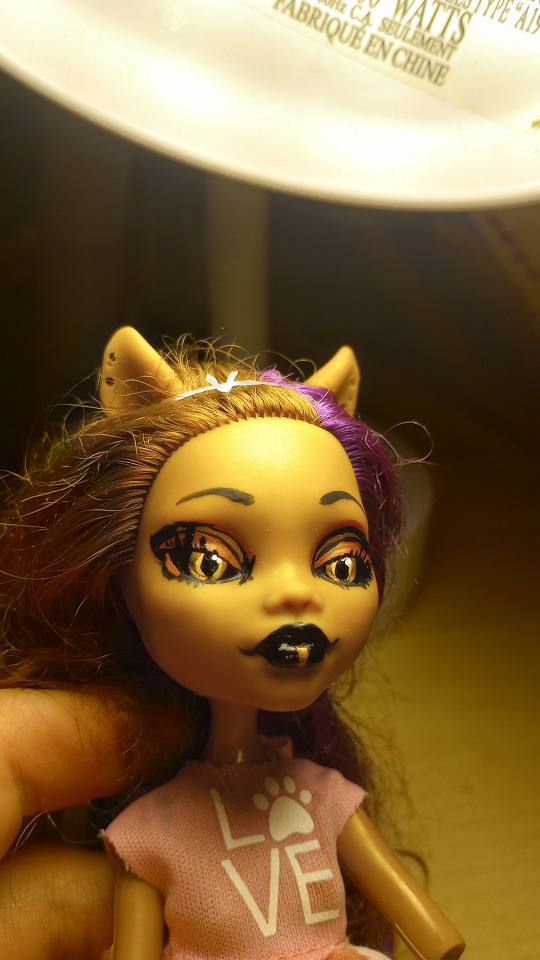
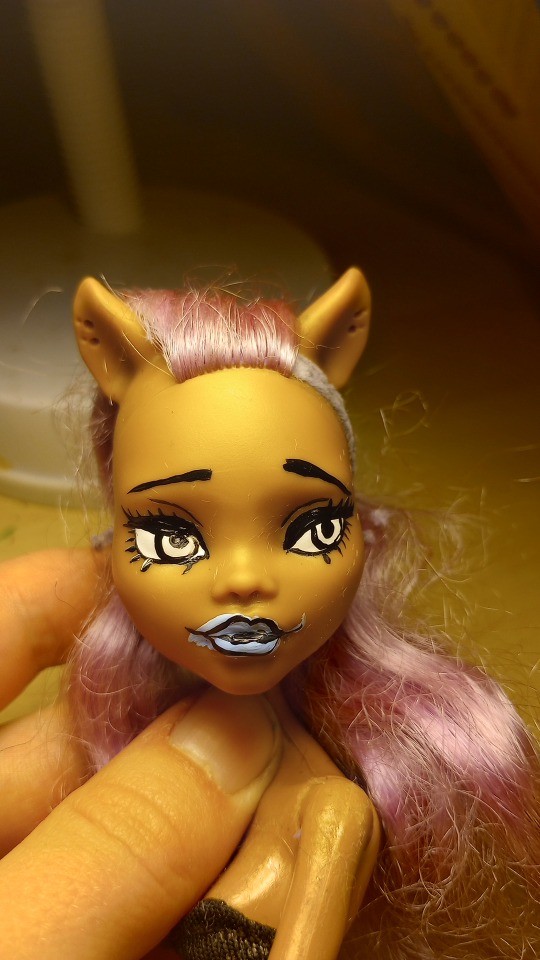
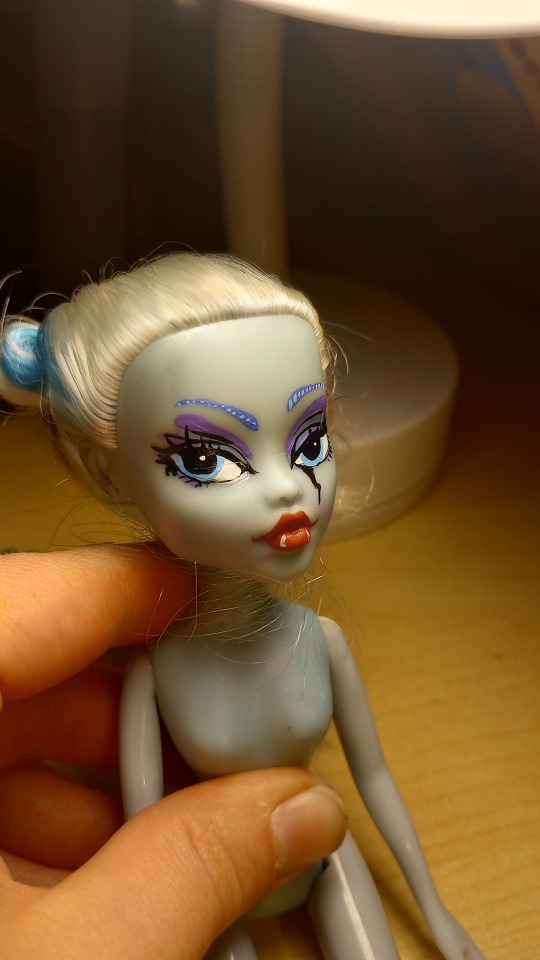
WIP
bit of an update
changed her eyes and an happier with the result altho i shouldve been more carefull and with the eyes as are a bit griity in spots.
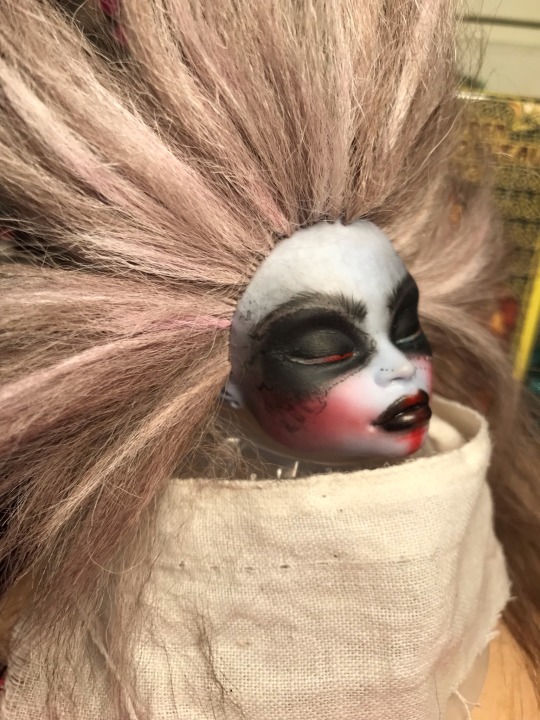
cant wait to start on her outfit design and making her accessories so her character comes to life.
#mh custom#WIll be eP#custom dolls#plastic and vinyl dolls#witches#art dolls#bjdplasticfantastic#monster high custom dolls#playline customised dolls#witch asthetic#wip#dolls#dollcore#fantasy art doll MH customs#repaint dolls#repaints mh doll face#frankie stein repaint custom
12 notes
·
View notes
Last Seen Blogs

rahulnsr
Vagaries Of Perception

womwhat
hi i blog about dan and phil

yourfavouritecharactersasdragons
Your Favs As Dragons
bloodgulchblog
I read Halo novels, AMA.

whysoo-serious
The musings of a madman