#geonodes
Text
youtube
This video shows the first 9 iterations of the Sierpiński Pyramid fractal (Aka Tetrix), Using a method where the previous iterations is scaled, copied, and then arranged back into a pyramid.
this video was made in blender using geonodes, the music is also by me.
#fractal#fractal art#mathematics#mathblr#blender3d#math#fractal geometry#geonodes#geometry nodes#geometry#sierpinski#tetrix#Youtube
23 notes
·
View notes
Text
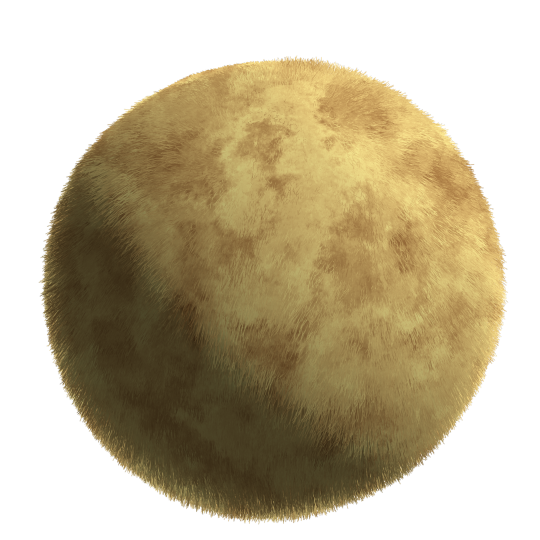
Stylized fur test in blender :3
#3d#3d art#blender 3d#Blender 3d#b3d#B3D#digital art#procedural art#geometry nodes#geonodes#blender#le arté#npr
20 notes
·
View notes
Text
here we go again! WIP
#b3d#blender#blender3d#brasil#digital art#3d art#brazilian artists#sao paulo#geonodes#procedural#proceduralart
5 notes
·
View notes
Text

Post-card 🐿️
Okay I'm part of FOUR projects that are all under NDA so I haven't had anything to post, but I guess I can show the submission that got me into school! Theme was "post-card to yourself in the future," so here's squirrel-me frantically hauling my current gear around!
I rigged the face for posing, but for fun I also tested what face tracking would look like lmao
At this point, modelling and texturing a squirrel took no time at all, but back then I hadn't tried GeoNode hairs yet, I'd only done my own geo setups from zero. Like the spruce branches here, they were for rendering textures for my Christmas trees, so I was able to reuse the setup!
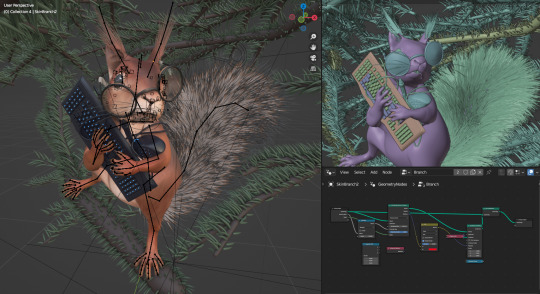
Figuring out the hair nodes + weird results from posing took some time, but in the end these worked way better than the old particle approach! Especially 'color distribution along the hair path' gave it that recognizable red squirrel tail.
The final card I submitted also had a 2D element to it to represent my digital drawing beginnings! I loosely painted over the render in my usual style, and printed the layers separately, ripping the 'drawn' version's paper along the paths I planned here:

And this is pretty much what the final A5 card looked like! The printer couldn't repeat the colors just as vibrantly, but hey, the teacher-judges liked it a lot, and I got in! (I was the only one with 3D background there anyway so I bet they wanted the variety lol)
2 notes
·
View notes
Text
Geometry Nodes Animation
#geometry#nodes#geonodes#cubes#animation#looping animation#art#artist#artwork#art on tumblr#artist of tumblr#3d#3d art#3d artwork#3d artist#3d render#3d blender#cycles render#blender cycles#blender art#blender animation#blender3d#made with blender#blender#blender community
7 notes
·
View notes
Text
Circular Point Extrusion
blndr/geo
With a concentric array of points as the foundation, the elements are extruded and then boolean cut.

0 notes
Text
Taking fun with Geometry Nodes in Blender
0 notes
Photo
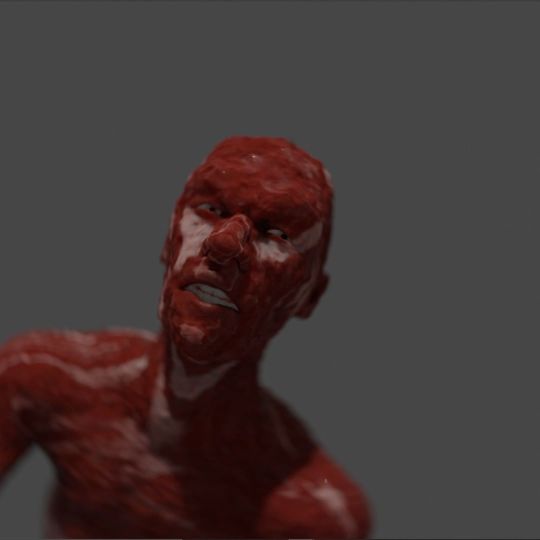
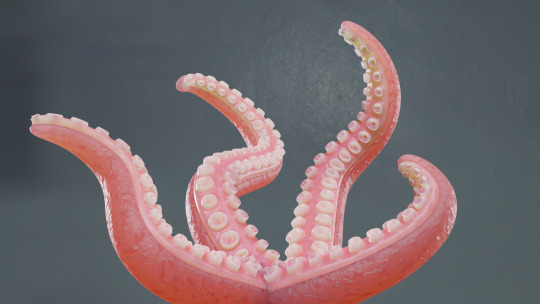
Nice to meat you! [Part VI] A making of the music video "Idylle au Saxifrage" @traitrecalin . For this last part, a check of the meat to rotten meat shaders, final version of the maggots growing on the rotten parts (2-3), some tests with @flip.fluids (4,6-9), hairs, and bones combustion with geonodes (8-9) . #blender #blender3d #blender3dart #makehuman #makehumancommunity #liquidesimulation #traitrecalin #musicvideo #makingof #proceduraltexture #blenderanimation #3danimation #motioncapture #geonodes #geometrynodes #flipfluids https://www.instagram.com/p/ClOOzkvtxyo/?igshid=NGJjMDIxMWI=
#blender#blender3d#blender3dart#makehuman#makehumancommunity#liquidesimulation#traitrecalin#musicvideo#makingof#proceduraltexture#blenderanimation#3danimation#motioncapture#geonodes#geometrynodes#flipfluids
0 notes
Text
blender 1 week progress, but in reality i would make so much more stuff if i wasnt playing civ6 like an insane person for the last 3 days
#so more like blender 4 day progress :p#yes im only doing tutorials rn but also yes geonodes already make me so powerful#aaaand posting this to keep myself accountable shh it makes sense in my mind#it makes me feel like i should make more stuff which I WILL#hopefully.#🗒#b
2 notes
·
View notes
Note
Wawa!
Now for real tho, how did You manage the iterator cube in the first place, I think My computer would explode just being near half the polygons
Have a 3d scug as a treat tho

Waw!
The question can be interpreted in three ways.
Technical:
just... Pain...I have an old 7th gen Intel i7, 16 gigs of ram, and RTX 3060. The thing is. When It comes to meshes, or hard surfaces (the polygons) blender is actually very good at handling a lot of them. But guess what blender does NOT like. Clouds, textures and displacments. I did the details in the cube first, and then sufferd through the pain and lag of clouds and textures.
Render times don't increase with polygons. This many poligons render a 1080p image in 40 seconds. You just have to be smart about hiding stuff you don't need when editing.
I can send you the model. It's really not a huge problem.

Creating detail kind of technical:
well it is indeed hand made. It doesn't take long if you blender very aggressively with energetic music. The first wall took me, ~30-40 hours. The second is barely visible so just a copy of that with modifications. I premade greebles and assets that I have later scatterd. You can see I reused a lot of stuff. In the project I am currently working on it will be different. But in this one, I tried to follow the doctrine of hiding the flatness of the cube. So it doesn't look like a cube with stuff on it, with fairly decent results. Made some holes some structures etc.. The plugins that I used mostly are discombulator, blenders inbuilt panel gen. And we'll uh. That's Pretty much it. Made a geonodes modifier, for the pipes. So it's easier, so that's a thing.
And the rest is just me trying to be creative and stuff.
The "how do I come up where goes what"
I domnt funkin know.
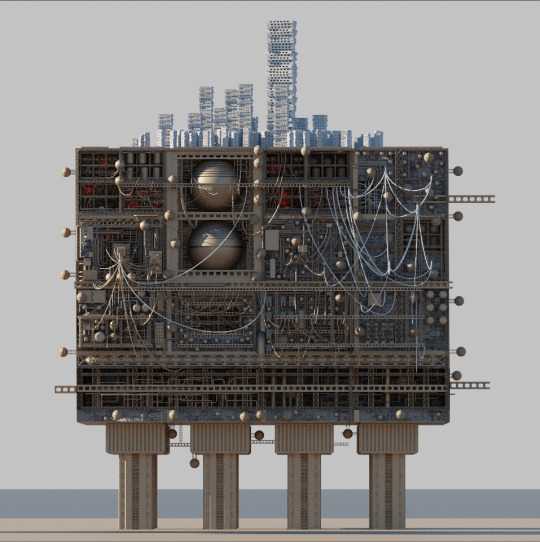
I'm an engineer. And that means I solve pracital problems. Such as, will this pipe going from here to here make sense? Or does it make sense to make this thing here if there is another nearby? I can barely be called an artist, or creative for that matter. I can't draw like at all,I just get anxiety when I try, I can't make anything that is alive in blender. Like genuenly anything.(including scugs :<). I am pretty darn new to blender with barely even 1 k hours. I looked at references of Cappins (the creator of the original 3d model found in OE.) Model, I got some inspiration from there.

Here is his model.
And here is mine ( low quality because I don't have the original on my phone)
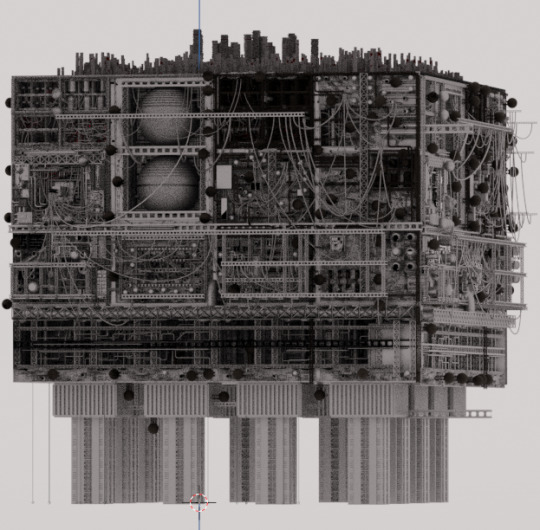
You can defenetly see the similarities. I took inspiration from a lot of the stuff on Cappins model. Unfortunately I for some reason never figured out that iterator cube is not a cube. It's a uh... Pancake shaped cube. What I also like a lot about Cappins model, is that it's very very well balanced. Perhaps some technical details are questionable but at that scale that can be ignored. I later talked with him. And he explained me the meaning of primary secondary and tertiary detail. Wich is actually very useful. Go google it if you draw or model. As for my model. I'm happy that people like it but I'm not happy how not canon it is compared to other iterators. Perhaps, it's an older model of an iterator. It took me nearly a third of the time cappin took to make his, that explains the quality difference. And we'll he had to start from scratch.
I hope that answers all the questions, otherwise ask again. It's not like I'm gonna go anywhere.
(also pls gimme de scug model if it's okay)
33 notes
·
View notes
Note
Your Korsica model looks really good, and the outlines are great! I was wondering how you did her outlines since the models don’t come with them when you download them into blender.
While there are methods to outline models in blender, I found out that unreal engine actually uses a whole separate mesh that is the outlines of the character. I personally haven’t figured out how to make an outline through making a whole new mesh like the unreal engine, but your model looks so good!
I just had to ask if you made a new mesh over the model for the outlines or used another method like geometry nodes or the inverted hull method.
Also, if you did figure it out by making a whole new mesh, could you share that secret? I’ve been trying to find out how to replicate the outlines by making another mesh, but the closest I’ve got was a vague and unhelpful post about it years ago. And even if you didn’t use a new mesh, I’d still like to hear how you went about making the outlines.
good news: the outlines do come with the models
I have tried everything you've described initially but I got lucky and figured this one out one day after a really good nap (ngl i've been pretty happy about it ever since).
The outlines are already here.
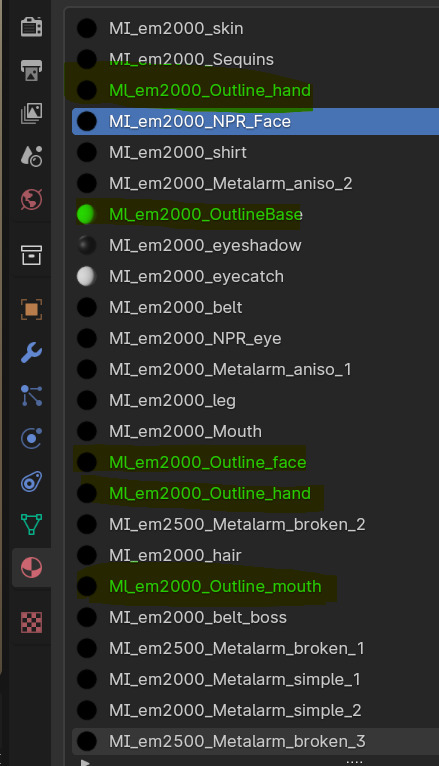
Select the mesh and go into Edit mode.

Go to the materials, click the material with 'outline' in its name and press Select, down at the bottom circled in red. It should select the corresponding mesh that is meant for the character/object's outline.

Right-click on the mesh, select Separate > Selection. Do that for all the materials with outline in its name.

I rename the separated meshes for cleanliness.

Then at this point you can add either a geonode or a Solidify for each of those objects. I do prefer geonodes but they both work. I use the one from Komikaze's shader pack because it's an easy drag and drop, then tweak settings like flipping normals, increasing the thickness and whatnot.

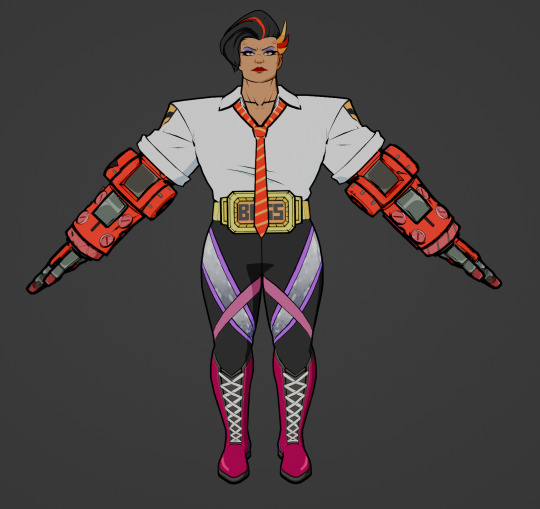
There you go :) I kept the outline on my Korsica model thin because they were a little distracting while I was doing my rigging lmao. But when I start learning 3D animation and rendering things, it's good to be able to adjust the outline thickness to whatever your needs are. Maybe even make a driver for the outline thickness to adjust based on camera location?
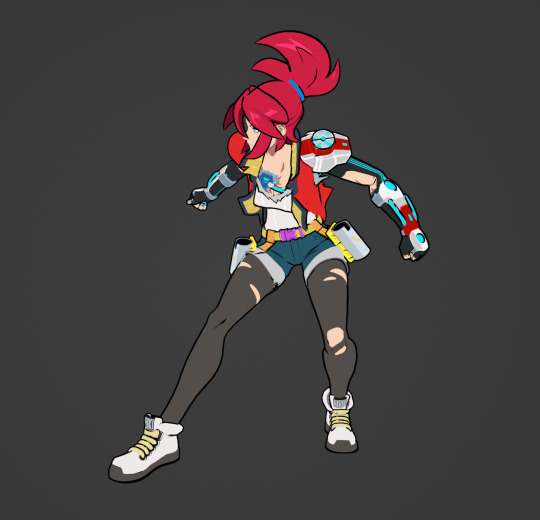
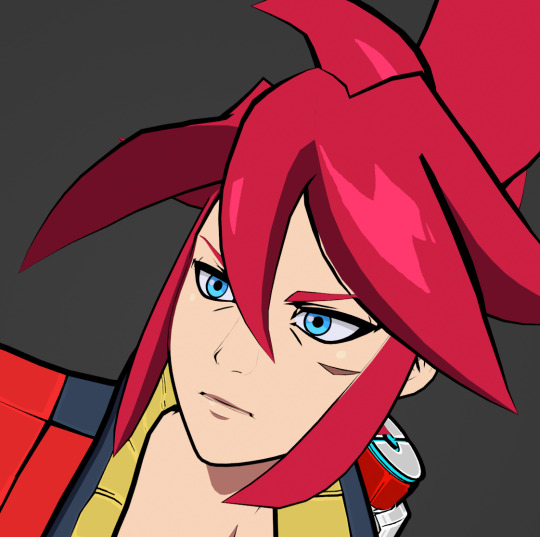
It's not a perfect solution. When you zoom into the character, there may be areas where the outline leaves gaps when thickness is set high, or there's an unwanted stray line (particularly in the face but I've also seen it in hair). But it's a great start. If you find anything about it to clean it up some more, feel free to dm me.
#blendering#inbox#if you check my blendering tag you can see that ive been trying to figure this out since the end of last year#it took months lol#there's still more improvement to be had#but i hope it helps you get started at least
10 notes
·
View notes
Text
magic effect, blender geonodes partical system. playing with a hybrid of Brownian motion and acreation diffusion, tring to make smoke and fire sims, but its produced a number of other cool effects.
this method uses an invisible layer of controller particles, and the visabale particles move to the closest one each frame.
Ive faked the motion blur, by rendering at a higher frame rate and overlaying the frames. it works, but at a heavy price for render time. geonodes isnt really compatible with any of the normal motion blurs in blender tho
3 notes
·
View notes
Text
yippie simulation nodes!
14 notes
·
View notes
Text
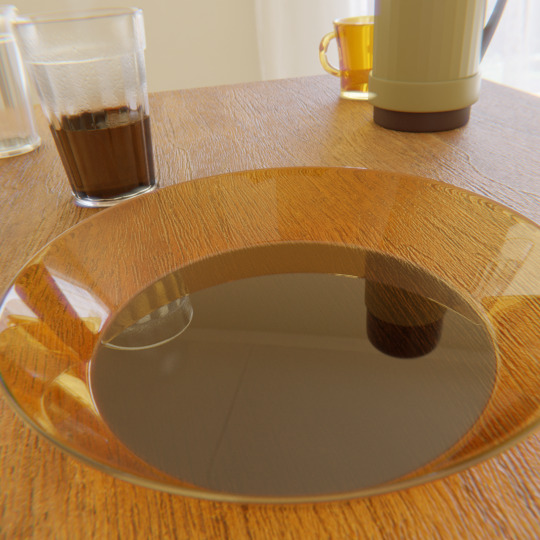


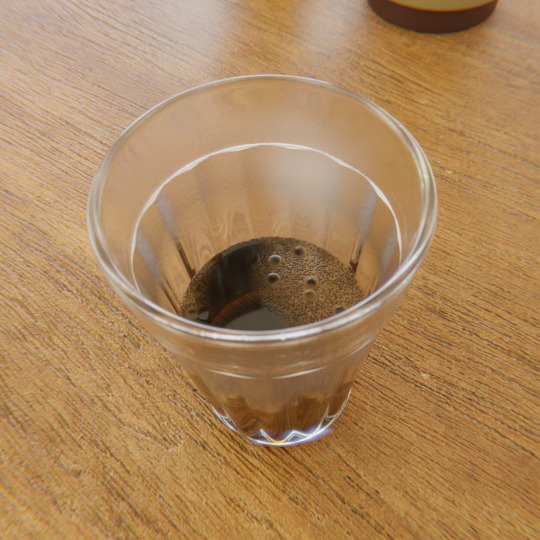


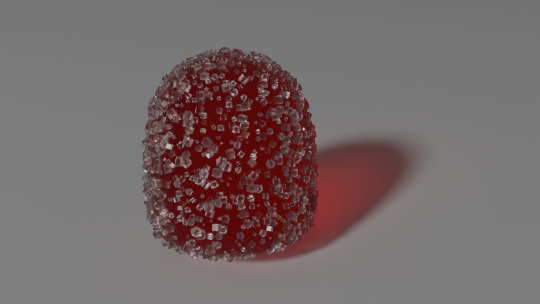
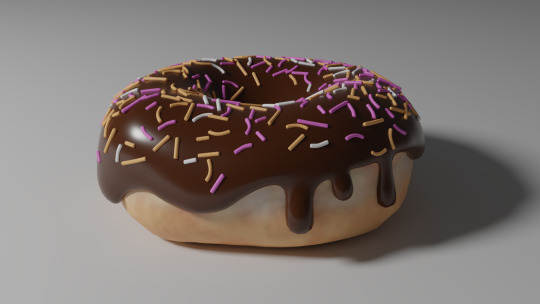
sonhos de minas - estudo procedural
yes! i think i'm done with this one.. a procedural physical simulation where the food and the coffee have also procedural textures 🌈
brazilian favorite way to drink coffee together with the best salty snack in the world
#b3d#blender#digital art#3d art#brasil#brazilian artists#geonodes#procedural#proceduralart#simulation#coffee#realistic
3 notes
·
View notes
Text

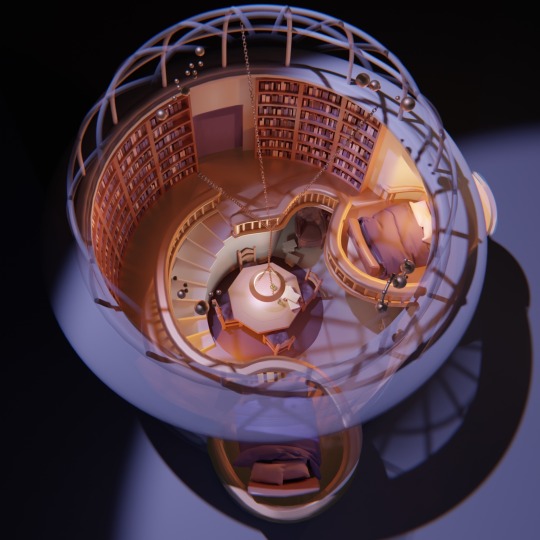
Max and David’s configured room from the Tapestry Series (by Henry Neff)
I’ve been kind of obsessed with this room since I read about it ~15 years ago. Here’s my take (modeled + rendered in Blender).
Additional Jargony Blender Notes Below
Bookshelves are a geonodes setup based around an accumulate field
Balcony and staircase are also geonodes instanced along a curve. I originally made them for other projects
Beds and curtains are a (kind of lazy) cloth sim.
For the curtains I used a grid with an armature pulling it shut
Pillows and comforters are blocks with pressure in the sim
The fade in effect is a transparent bsdf mixed proportional to view distance (w/ some other constants)
The chairs were sculpted in Zbrush a while back for a different project
In the gif, the constellations are curves with a staggered build modifier and follow path constraint. They’re in a 10 second loop that I rendered alone and composited into the room. Tumblr only shows the first part of the loop.
1st image has plants and some texture stuff painted in at the end for aesthetic
10 notes
·
View notes
Text
Selection Based on Raycast Object
geo/how/to
An animated object becomes the selection for the instances. To invert the selection plug "Is Hit" into "Pick Instance" instead.

0 notes
Last Seen Blogs

mpreg-celeb
Mpreg Celeb.

linds-art
Linds-art

badluv-bummies
< shinee 3

takumi-simp-supreme
I read Killer Killer and now can't shut up

raranhar
Mutiara Aulia Anhar