#foamboard prints
Text
Substrate Mounting Now Available
We're excited to launch our brand new Substrate Mounting service. You can choose four different substrates to mount your fine art and photographic prints on to, Display Card, Foamboard, Foamex in either black or white, and finally Dibond. Each substrate has different options for wall fixings including Velcro, Hangers and Subframes.

Ideal for temporary and permanent gallery exhibitions, interior design projects and more, we're pleased to be able to offer Substrate Mounting to you as another option to display your artwork.
Follow the link to find out more about this new exciting new service and the options available. If you have any questions, or would like a quote, please contact us.
0 notes
Text
Foamboard Printing Melbourne - High-Quality Prints for Your Business!
Discover top-notch foamboard printing Melbourne for vibrant and impactful displays. Our service ensures precision and quality, making your visuals stand out. Elevate your brand with our expert foamboard printing services in Melbourne. Fast, reliable, and cost-effective solutions for your business needs!
0 notes
Text
Posters
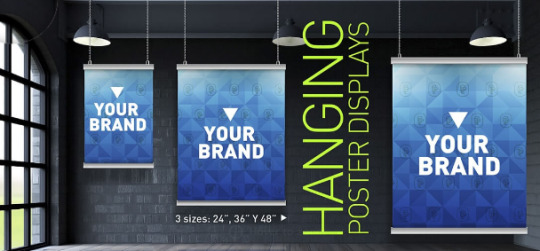
By including your posters and banners, you can promote your hashtags and products so that customers can directly grow the brand. Want to get people to visit your landing page? You can do this easily by putting a QR code on your posters that takes customers directly to the landing page. You can show off your business side and stand out.
#posters#banners#Online Printing Services#Printing Services#Custom Printing#Sticker Labels#Foamboard#Posters#Banners#Business cards#Acrylic Signs#Wedding Invitations
1 note
·
View note
Photo
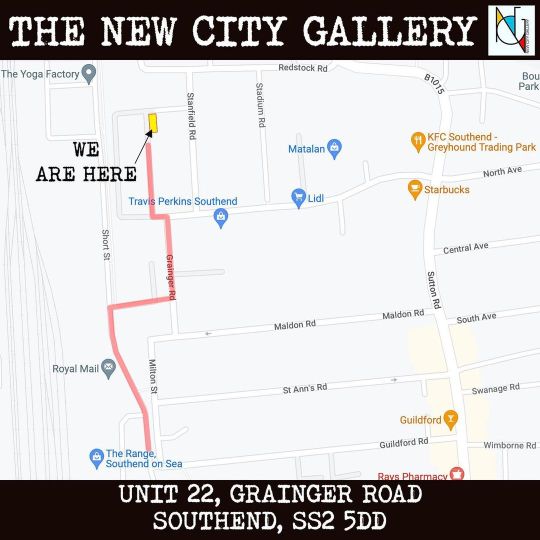
The New City Gallery will be open again tomorrow (Wednesday). I am exhibiting 6 of my 'Pixel' 60x45cm Forex board prints; 4 more went up Saturday, Clint Eastwood, and another that has never been exhibited before so you'll still have to visit to see it! 20% off orders to celebrate the gallery's opening group show, free delivery, contact me or see www.rocketfoot.co.uk for more details. Hope to see you there, please share and let everyone know about this great new art space. #rocketfoot #prints #foamboard #pixels #southend #specialoffer #clinteastwood #discount #photography #photographer #photooftheday #picoftheday #photo #art #NFT #exhibition #artshow #unit22 #moviestar @the_new_city_gallery https://www.instagram.com/p/CjTZGvJLvEa/?igshid=NGJjMDIxMWI=
#rocketfoot#prints#foamboard#pixels#southend#specialoffer#clinteastwood#discount#photography#photographer#photooftheday#picoftheday#photo#art#nft#exhibition#artshow#unit22#moviestar
0 notes
Note
Some time ago you mentioned you have a ton of Rapunzel art, and I remember seeing a New Dream wall painting too. Do you have some other New Dream or maybe Eugene art?? I need some inspiration XD
Also, thanks for the kind words about my URL on my last ask! <3
Oh man, I have So Much New Dream art (and a tiny bit of Eugene solo art). XD Some of it's official, some of it's fanart, a lot of it isn't even on my walls, because I don't have space, but I have every intention of putting it up someday. Prepare for a lot of art with brief explanations:
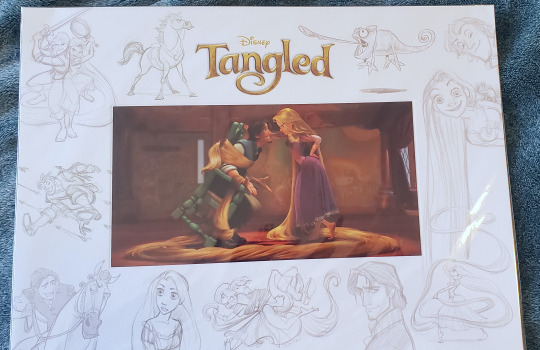
Bought at the Disneyland Resort in Anaheim, CA:
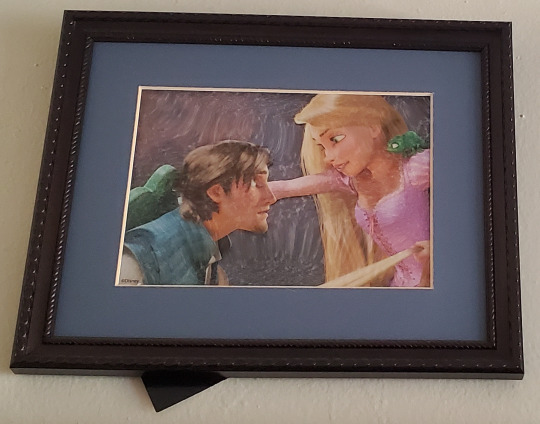
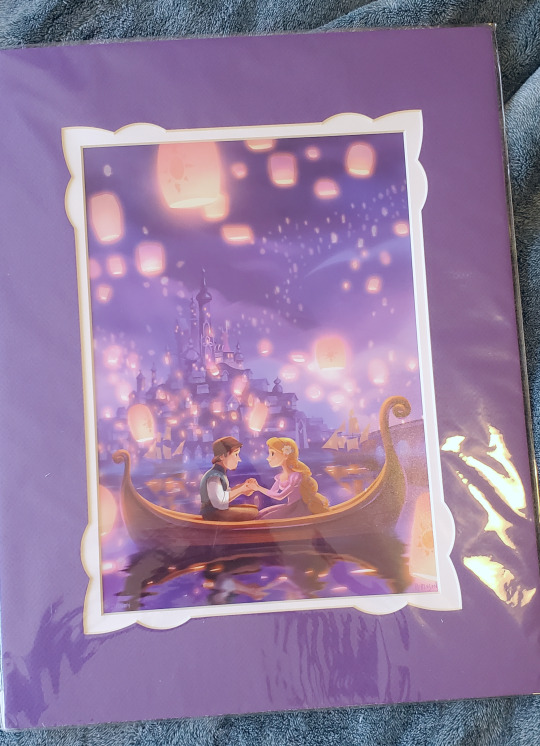

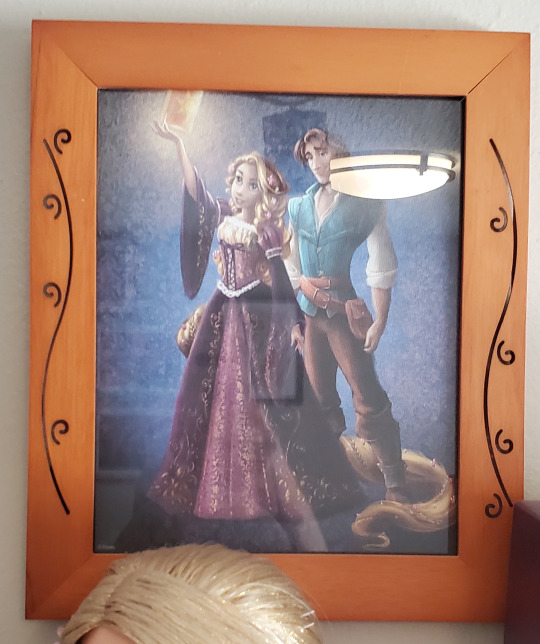
The top one was bought at Off the Page in California Adventure. It's actually got dimension, since Rapunzel and Eugene are cut out and raised on some thick foamboard. The bottom two were bought at Wonderground Gallery in Downtown Disney.
From Walt Disney World:

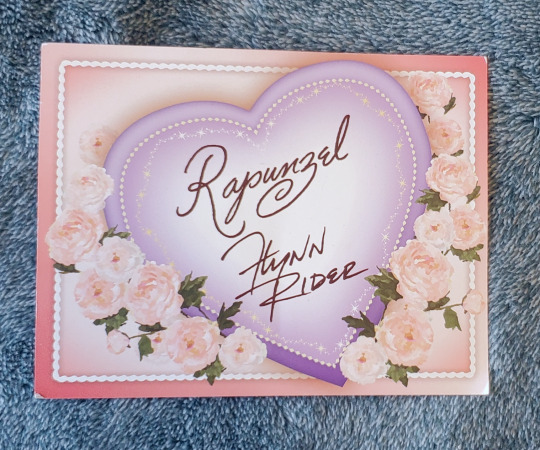
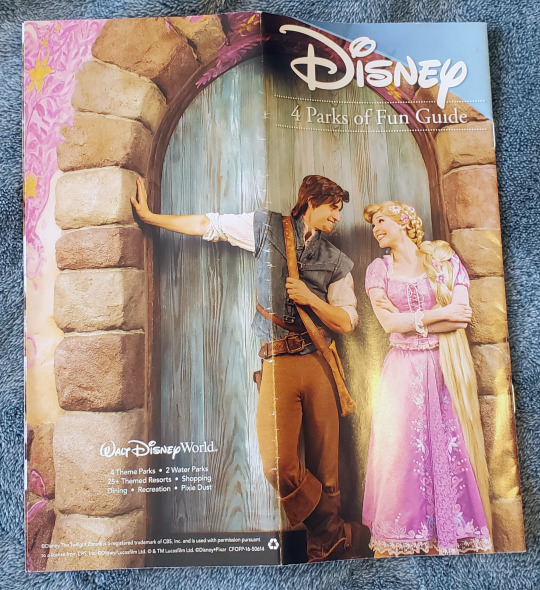
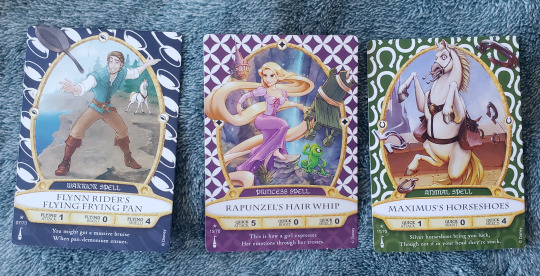
While I have not been to WDW since 1989, I have friends who go frequently, and over the years, they've picked me up stuff. Top left: a wet paint sign they used to use regularly (I'm sure they've change it by now). If the painters were working, and you asked nice, they'd often just give you one or more. I painted the frame, and my sister made the bead garland. Top right: A card handed out at a Valentine's Day event. The other side says "True Love". Bottom left: A parks map and guide. Bottom right: Tangled cards from the Sorcerers of the Magic Kingdom TCG that they no longer do.
Official art from various sources:


Top row: I don't remember the artist, I'm sorry. I've had it for years, though. 2nd row left: a lithograph print of the official art for the Disney Fairytale collection. 2nd row right: two (of five) lithographs that came with the pre-order of the blue-ray at the Disney Store. 3rd row left: a lithograph print of the official art for the Disney Fairytale Designer collection. 3rd row right: LE lithograph of concept art. I don't know what the lithograph was for, but I literally just bought it the other day off eBay. Bottom left (left): wedding silhouettes. Fanart, and unfortunately the artist closed their shop. Bottom left (right): The certificate of authenticity for the 17" Rapunzel wedding doll. Bottom right: two "wedding invitations" from the Disney Store from when Tangled Ever After was going to be released to video.
Briana Garcia:
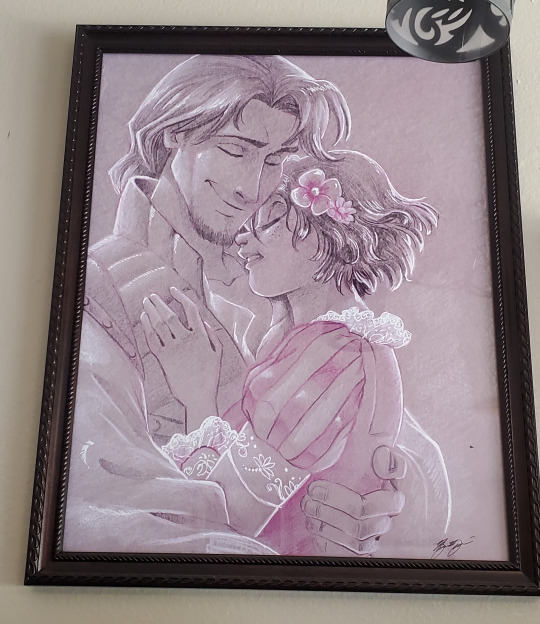
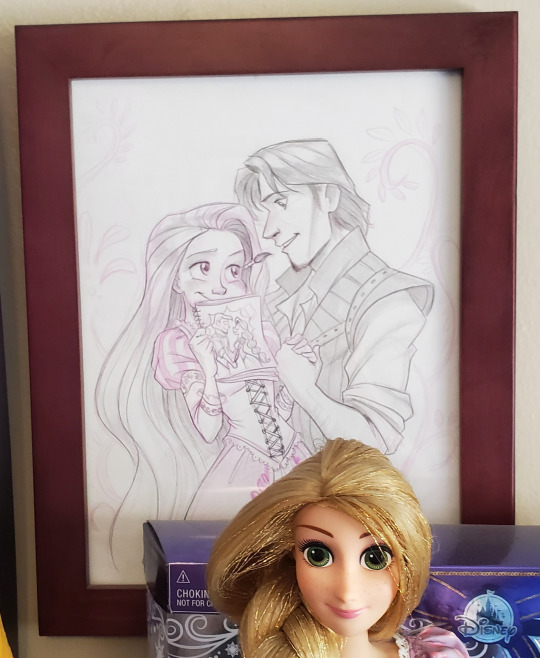
Left: she used to sell it as a print. Right: A one-of-a-kind gift that a friend got me.
Misc fanart and gifts:


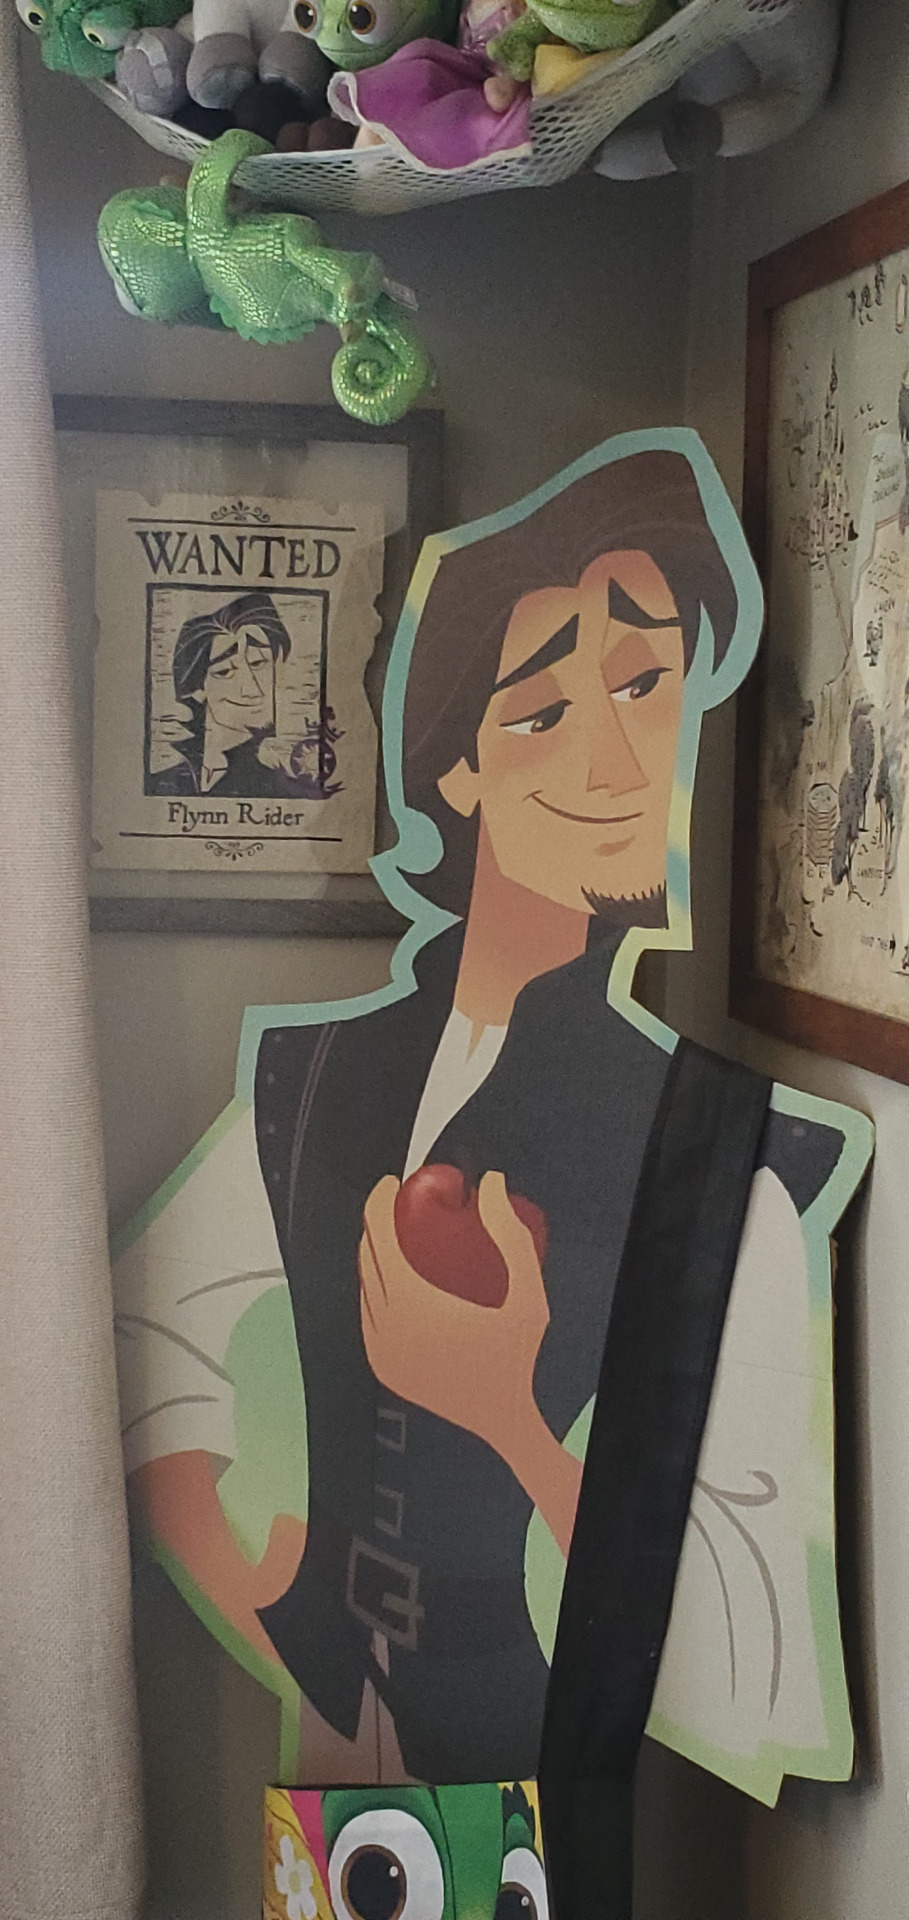


Top left: from that same out-of-business silhouettes artist (I glued them to the sparkly paper myself XD). Top right: a completely black-market print of the first Thomas Kinkade Tangled painting. Middle: This is actually highlighting the wanted poster, which I meticulously recreated. But hey! Life-size standee! Bottom left: a card from a friend. Bottom right: a sticker my boyfriend got me a few Christmases ago.
34 notes
·
View notes
Text
Not my fucking graphic designer ass trying to figure out what the PWI print is mounted on. For the record my bet would be foamboard bc that’ll be the best thing to eventually break through
#impact lb#tna lb#if it sounds like a gunshot when it gets broken I’ll know it’s gatorfoam#but I think it’s just. standard cheapo foamboard
7 notes
·
View notes
Text

Made myself a Cool Brick Background--this is just a brick texture (meant for 3D modeling, actually) printed out and glued on to foamboard. Same for the asphalt. :B I wanted some quick n dirty photo backgrounds that were more Cerise-appropriate.
2 notes
·
View notes
Text
I went to comic con this morning and unfortunately I have some thoughts
It was alright
It's MUCH better being slightly older than most fans of anything and also not knowing what most stuff is. I am Aware of some shows but mostly older ones and while I like some things I no longer care to make it my identity. This is the correct way to be because you get to learn straight into weird aunt energy and say "what a lovely outfit! Did you make it? It's beautiful!" As often as you like
I've never liked funko pops but seeing stacks and stack of them a lot with all the other tat people make about their shows really gave me a no hope for mankind (when it comes to plastic and consumerism) vibes.
Some GENIUS stall holder who care 0% for anything comic/show/fandom culture seeing weebs as a huge untapped market. Including henna artists, and slightly mystic leaning jewellery and print makers (there was a jeweller offering "personalised" moon charms that reflect what the moon looked like on a specific date. Many different nerds care about this). I really like henna so got a traditional hand design but they were doing all the small nerd things too.
Much of the cosplay reaffirmed my perfectionism and I've decided if you're going to dress up as someone you really gotta do it properly, or just a nod. Don't half ass it. Especially if you are doing face painting that has specific facial details. These have to be correct. I saw a she-ra flavoured mandalorian armour and an oogie boogie fairygodmother who we're only good because they were over the top and impeccably made. If they weren't it would have looked lazy. If you are a child and your costume is made you get a good star because great creativity it's wonderful to see you enjoying yourself.
I'm interested in cosplay from a technical perspective. I saw a woman with purple foamboard feathers that were attached to the base of the wing (on her back) with caribinas. Genius! Sturdy, easy and fast to use, and allow for motion. I would have liked to talk to some people about their costumes and how they made them but I'm shy and nerds can be a gamble on having normal interactions, especially if you're not part of the in-group who know what show they're referencing.
Two jobs that I would be EXCELLENT at and no one would employ me for are Queue planner (there was not enough allowance of how people move in groups or flow through spaces) and Guide (need to find a specific thing but forgot where it was? I will take you) because I have a near impeccable sense of direction and also care about organisation and storage, including that of people.
There is way too much pedophillic anime titty shows and art I need to kill some people.
I saw some guy in a costume who was wearing a Bluetooth speaker around his neck playing what sounded like a theme/opening song for something and I thought this was one of the most obnoxious behaviours I've observed in a while. Anytime he came close to anyone conversation became impossible. The poor stall holders.
2 notes
·
View notes
Text
RTWW Creating Props
I was really looking forward to creating the props for this film. As an artist myself I could be creative and stylish with how I wanted them to look. I appreciated the creative freedom that Luca gave me, and we were in contact during my process to ensure everything was in line with the script and characters.
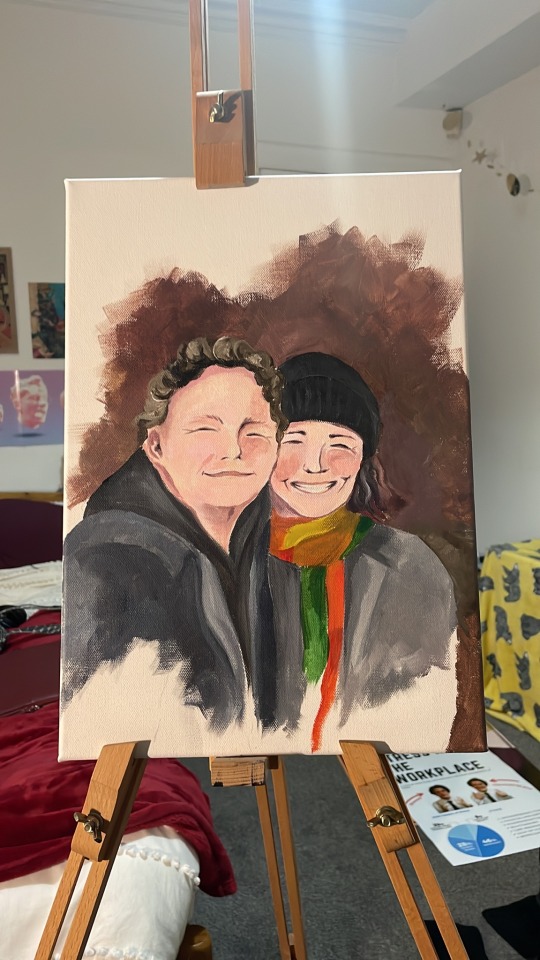
I had bought some canvases and some foam board from the art shop in Tollcross to get me started with Janet’s messy art studio part of the living room which I was to design. All the rest of her items I could use my own, paints, pallette, easel etc. I began on painting the photograph of the two actors the weekend before our shoot. It took me about three hours, and I was to make it look as though Janet was still working on it, unfinished. I also kept the palette that I used for the painting as the prop, as it had the same colours therefore looked believable.


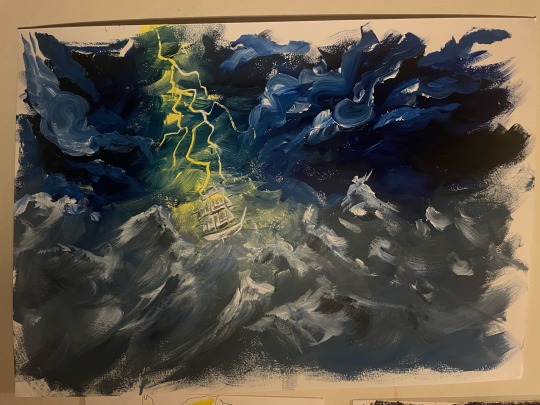
I then painted a couple of other pictures on A3 to decorate the walls, as if Buster has hung them up. I first did a storm, then a portrait of a bear. I wanted them to be strong, powerful pictures which reflects how Janet feels and how she channels this into her art. I think it portrays her fierce personality but also how she can hide away in her work.

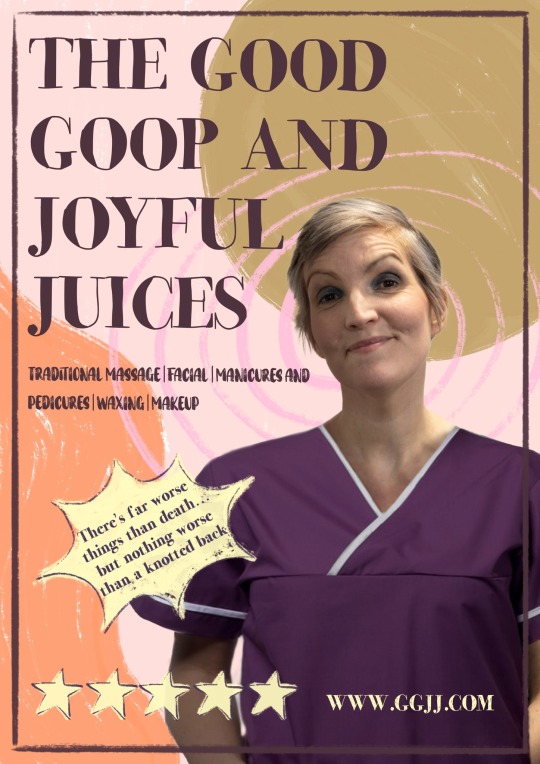
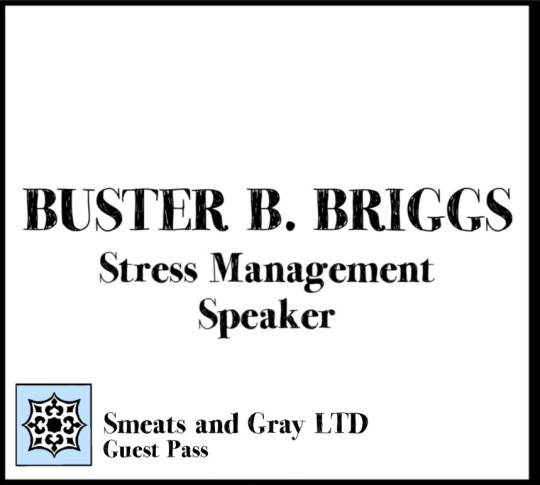
The posters were definitely a challenge to create. One, the Good Goop and Joyful Juices poster which had moving eyes, and two, Buster’s ‘Stress in the Workplace’ poster. The design for the GGJJ poster was to come across as friendly, bubbly and welcoming, with a headshot of Mrs Muskaan and originally two other masseuses. We decided to only use the headshot of Mrs Muskaan to make the practical side of things (with the eyes) easier. During one of the rehearsals, Luca took these photos with a variety of poses and angles for me to work with on the page. This was also done for the ‘Stress in the Workplace’ poster, with a series of phots of Buster looking happy and stressed out. The idea for this poster was to make it believable that Buster created it, slightly simple but getting the message across. I designed the graphics using Procreate and Canva on my iPad, then sent them off to a company called Out Of Hand Scotland to print off at our desired sizes. We chose A2 for Buster’s poster, as this was sensible for the indoor location and for a meeting, and A1 for the GGJJ, to make it stand out in our exterior location as well as big enough for the actor to stand with it and look through. I planned to use the foam board to make the GGJJ poster more tactile, as we were using it outside and has to be held by an actor. Then there was also the debate as to how was going to make the eyes move. I think the most sensible way of doing it was to cut a hole in the poster and have the actor look through. As the company I chose to print the poster was good quality, I only had one chance at cutting the hole right. After sticking the poster onto the foam board, I used a knife to shape a rectangle over the eyes of Mrs Muskaan. This was easier than cutting two circles over each eye, which also would have made it look quite scary. I kept the rectangle of poster/foamboard to the side, and fashioned a tab on the back of the poster so that it could be removed and replaced easily. This meant that in the shot, the actor who was standing behind the poster could remove it, look through, then put it back. This way we get an idea of how the poster looks, on top of the aspect of absurdity and humour.
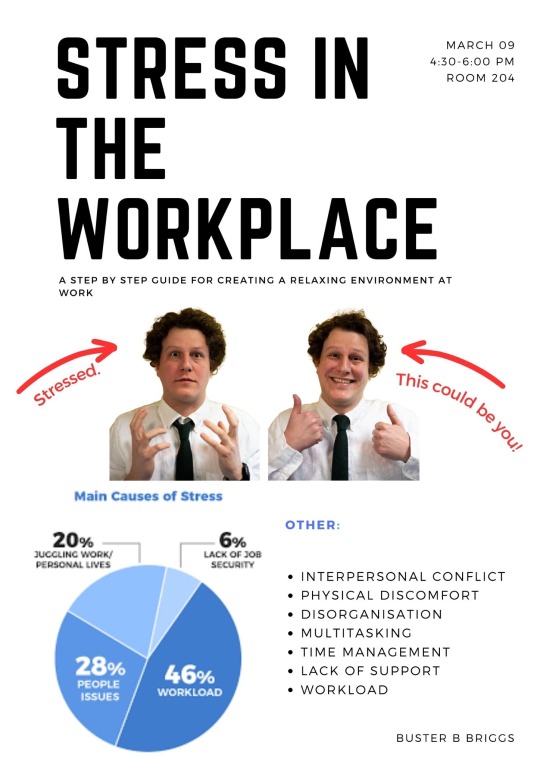

I was also to print out some items myself. For Buster, I found some online documents about stress in the workplace to scatter on his desk to show he has been working hard yet disorganised. I also had to print out his name tag to put into his Lanyard. The font I used on this name tag which Buster will have received from work is actually the same I had used for the Good Goop and Joyful Juices poster, as if to say the GGJJ controls EVERYTHING outside of Buster and Janet’s living room. The logo I had designed for this fictional office corporation also is actually the letters GGJJ hidden in a mandala. I also found some colourful, trendy online posters to print out for the shot with the GGJJ poster, so that it’s not on its own. They were mostly random designs that I thought looked cool, but I came across a few which I think worked well with the story. One said ‘Freak Out’ and another ‘Choose Your Escape Route’. I have been practicing their composition with each other so I can make sure to put these visibly in the shot.


Then finally we were to make a questionnaire for Buster to fill out when in the Massage Parlour on the iPad. Luca designed this quickly, keeping the style the same as I had used in the poster. You can have a look here: https://thegoodgoopandjoyfuljuciesmassageparlour.myportfolio.com/work
FP
0 notes
Text

Tyler Shields
b. 1982, American
"Coke," 2017
Chromogenic print dry mounted to foamboard under glass
45" H x 60" W
0 notes
Text
STORYTIME
it was a cold evening and i just got back from uni with some foamboard in hand. but i really wasn't feeling my work's culmination into this. and so i asked for help.
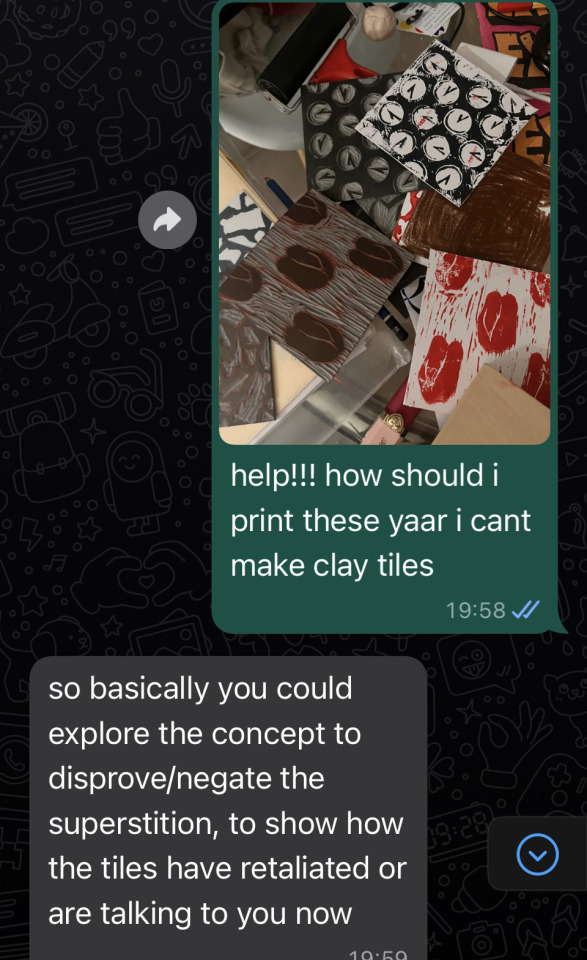

this made so much sense, my sister can sometimes be such a genius. and so my 'action plan' was going to be to click photographs of these superstitions in motion and then printing on them.
1 note
·
View note
Photo

This year my fiance and I went with a classic movie... Steven Spielberg's 1982 movie E.T. Unfortunately many people didn't make the connection that my fiance was Elliott but they knew who I was! I did consider him being Elliott and me being Gertie and having a milk crate attached to the front of him with a homemade ET sitting in it but I really wanted to dress as E.T. and he thought it'd be weird if I was the sister Gertie. How we did it Elliott Costume: Sweatshirt: Red hooded sweatshirt (FREE! Left over from last year's costume). Pants: Blue jeans (FREE! Already owned them.) Candy: A large bag of Reese's Pieces ($3 on sale at CVS Pharmacy) E.T. Costume: Head: Foam board ($1 from Dollar Tree). I then used this Flickr member's photo enlarged and printed to a 2 by 1 page (8.5" x 11" paper) to use as a template because they did such an awesome job! I used it as a stencil to trace out the shape of the face and cut it. I cut out holes in the foamboard for me to see through with a knife (approximately where the nose ended up being). I then drew out the features onto the cut foam board. Using a bucket of Crayola Air Drying Clay ($4.96 from Walmart) I molded on raised brows, eyelids, and wrinkles to enhance the features. Unfortunately pretty much all of the clay cracked and was popping off the foam board when it dried so I had to touch up and reinforce everything with hot glue afterwards. I covered the eye holes with white mesh non-slip drawer lining (FREE! Left over from last year's costume making) on the backside by affixing it with tape. I then painted the whole frontside with acrylic paint (FREE paint! I already owned it). After it dried I attached a thick piece of elastic band ($1.44 at Walmart) as a strap with hot glue. Body: I lucked out! The body primarily consisted of a brown hooded cloak that came from a Monk halloween costume. I originally intended on using a brown hoodie/turtleneck and brown pants with a long brown shirt/nightgown on top but this turned out to be the cheapest and most effective option ($2.49 on clearance at Walmart). I still wore brown pants and a brown tanktop underneath that I already owned. The light-up heart was a heart shaped tap-light ($1 at Dollar Tree) that I hotglued red felt (29 cents at A.C. Moore) to the front to give it a red glow. I drilled a hole in the top of it and threaded a string through it to make a necklace to hang underneath the cloak to create the glowing chest effect. I used some sticky-back velcro ($6.47 at Walmart) to attach the hood to the mask when walking around and to close up the neck of the monk cloak more. Hands: Brown work gloves ($1 at Dollar Tree) with a small piece of red felt (29 cents at A.C. Moore) hot glued to the inside tip of one of the index fingers. I then purchased a Energizer Aluminum Pen LED Flashlight ($8.88 on Amazon.com) that I held inside the glove so I could click it on and off to have a light up finger. Feet: I wore brown sneakers (FREE! Already owned them) and created "3 toe shoe covers" from a brown t-shirt ($5 on sale at A.C. Moore) that I thought I was going to use to make a 3D body until I got the monk cloak. I traced out a widened outline of my shoes on the shirt and drew out 3 pointed toes. I cut it out and sewed the outter toe edges. I then stuffed the toes with Polyfil (FREE! Left over from a prior year). I attached a thick piece of elastic band ($1.44 at Walmart) as a strap with hot glue so I could slip the front end of my sneaker into the toe portion and have the elastic strap go around the heel of my sneaker to hold my 3-toed feet on. Total Cost of both costumes together: $35.53 [$3 for Elliott, $32.53 for E.T.]
0 notes
Text
Check out our New Website withy more print products for your pleasure. #flyer #businesscards #banner #foamboard #rollupbanner #backdrop #mugs #pens #booklet #brochure #letterhead #calendar #bookmarks and more. Head to https://differprint.com/pages/displays-and-large-format/
0 notes
Link
0 notes
Photo
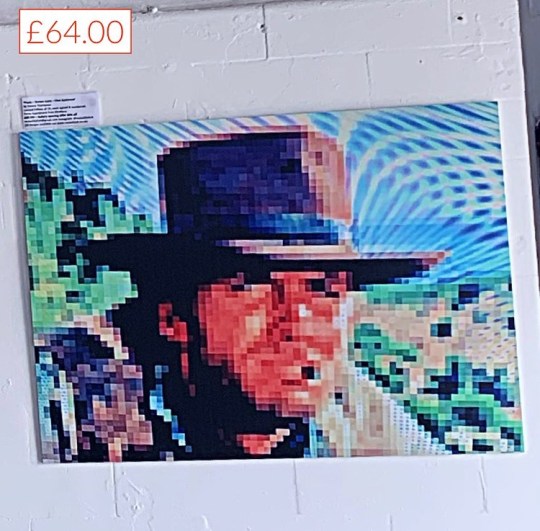
The New City Gallery will be open again tomorrow (Wednesday). I am exhibiting 6 of my 'Pixel' 60x45cm Forex board prints; 4 more went up Saturday, Clint Eastwood, and another that has never been exhibited before so you'll still have to visit to see it! 20% off orders to celebrate the gallery's opening group show, free delivery, contact me or see www.rocketfoot.co.uk for more details. Hope to see you there, please share and let everyone know about this great new art space. #rocketfoot #prints #foamboard #pixels #southend #specialoffer #clinteastwood #discount #photography #photographer #photooftheday #picoftheday #photo #art #NFT #exhibition #artshow #unit22 #moviestar @the_new_city_gallery https://www.instagram.com/p/CjTYhMfrfwP/?igshid=NGJjMDIxMWI=
#rocketfoot#prints#foamboard#pixels#southend#specialoffer#clinteastwood#discount#photography#photographer#photooftheday#picoftheday#photo#art#nft#exhibition#artshow#unit22#moviestar
0 notes
Text
Apex Print 泰業印刷有限公司
泰業印刷有限公司為香港經濟日報集團旗下印刷公司,提供專業快捷一站式印刷服務,由1989年開始投入服務,現為香港最大商業印刷商之一。
Services/Keywords:
印刷, 印刷公司, 數碼印刷, 書刊印刷, 騎馬釘, 膠裝書刊, 宣傳單張, foamboard, 展板, 易拉架
Phone Number:
+852 9089 1788
Website:
https://www.apl-print.com.hk/
Address:
Tai Po Industrial Estate, 11 Dai Kwai St, Tai Po, NT, Hong Kong
1 note
·
View note
Last Seen Blogs
holcombbrantley47
The Journey of Holloway 980

puffpalacesmokeshop
puffpalace

flowofnotmymind
flow of not my mind
puresephone
persephone

loolypop
Looly