#featherboard
Text
ESP32-C6 Feather is here, time to bring it up 🚀🛠️💡
The ESP32-C6 (https://www.adafruit.com/product/5672) is Espressif’s first Wi-Fi 6 SoC integrating 2.4 GHz Wi-Fi 6, Bluetooth 5 (LE) and the 802.15.4 protocol. It brings the goodness you know from the low-cost C3 series (https://www.adafruit.com/product/5337) and improves it with Zigbee/802.15.4 at 2.4Ghz. That means it could make for great Matter (https://csa-iot.org/all-solutions/matter/) development hardware!
We took our Feather ESP32-S2 (https://www.adafruit.com/product/5000) and swapped out the 'S2 for a C6. Plus some re-routing and here's what we've got: a C6 Feather with lots of GPIO, lipoly charging and monitoring with the MAX17048, (https://www.adafruit.com/product/5580) NeoPixel, I2C Stemma QT port, and a second low-quiescent LDO for disabling the I2C and NeoPixel when we want ultra-low power usage. We also tossed a BME280 (https://www.adafruit.com/product/2652) on there, so you could use it immediately as a low power temp/hum/pressure sensor.
Now it's time to do the bringup - we like to blink LEDs, toggle pins, and also check that NeoPixels glow up. Good news: so far everything works! We're going to keep at it and see if we can maybe get a simple Matter demo going before we book the PCBs
#adafruit#feather#esp32c6#featherboard#wifi6#bluetooth5#zigbee#matteriot#lowpower#iotdevelopment#tempmonitoring#pcbdesign
6 notes
·
View notes
Text
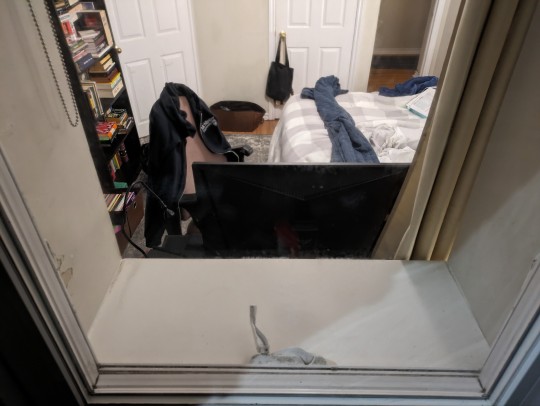
It's going to be hitting 30° later this week and my room is already starting to feel muggy because my PC dumps a lot of heat into the room (my i5-12600k idles at 44°C, I should really undervolt that thing). So I'm setting up my A/C tonight. I bought a window seal system that wont actually block all the natural light I get from that window. The last few summers I've hacked together a system involving black featherboard and duct tape which turns my room into a sunless cave for four months in a year.
Setting up the A/C gave me a reason to clean my bedroom window which was disgustingly filthy and hadn't been cleaned in years. It's something I kept meaning to do but always got pushed back because it's a pain in the ass to actually do. So, I ventured into the alleyway in my pajamas at approximately 01:00 equipped with a bucket of soapy water, rags, and Windex, cleaned the window and then snapped this creeper shot of the view you get into my room from the alleyway.
#picture#blog#if you were stalking me this could be your view!#this is why the curtains are always shut
13 notes
·
View notes
Text
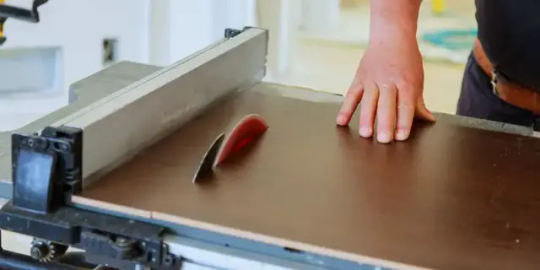
Table Saw Featherboard DIY: Boost Your Woodworking Accuracy!
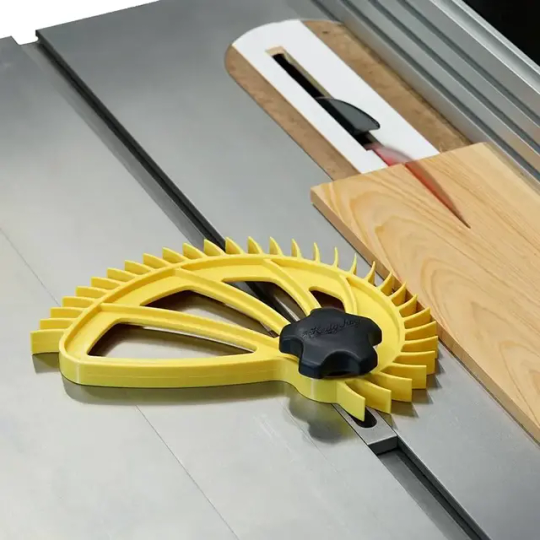
To DIY a table saw featherboard, gather wood, cut slots, attach bolts, and adjust pressure. Creating a homemade featherboard for your table saw is a cost-effective way to improve safety and precision in your woodworking projects.
By following a few simple steps, you can customize the featherboard to fit your specific needs and enhance the quality of your cuts. We will discuss the materials and tools required, the step-by-step process of building a DIY featherboard, and some tips for optimizing its performance.
Whether you are a woodworking enthusiast or a professional carpenter, incorporating a homemade featherboard into your workshop can greatly improve the accuracy and consistency of your cuts. Let's delve into the details of this practical and versatile accessory.
Selecting Materials
When creating a DIY featherboard for your table saw, selecting the right materials is key to its effectiveness and durability. From wood choice to hardware selection, each component plays a crucial role in the overall functionality of your featherboard.
Choosing The Right Wood
Opt for hardwoods like oak or birch for their durability and resistance to wear. Avoid softwoods that may warp or splinter over time. Utilizing a sturdy and stable wood will ensure your featherboard remains sturdy during use.
Selecting The Proper Hardware
When it comes to hardware, opt for high-quality components that can withstand the rigors of the workshop. Choose T-nuts and bolts that fit securely into your wood, providing a tight grip. Ensure the adjustment mechanism is smooth and precise for easy positioning.
Credit: www.facebook.com
Design And Measurements
Crafting your own table saw featherboard allows you to customize the design and measurements to fit your specific woodworking needs. DIYing a featherboard tailored to your table saw enhances safety and precision, empowering you to produce accurate and quality cuts for your projects.
Design and Measurements are crucial when creating a Table Saw Featherboard DIY. Taking accurate measurements is key for a successful project. It's essential to begin by creating a blueprint.Creating A Blueprint
Creating a blueprint lays the foundation for your project.
It helps you visualize the design before starting the construction.
Detailed sketches will guide you throughout the process.
Include dimensions and specifications in your blueprint.
Ensure your blueprint is clear and easy to follow.Taking Accurate Measurements
Accurate measurements ensure a precise fit for your featherboard.
Use a reliable measuring tape for precision.
Measure multiple times to avoid errors.
Record measurements in a notebook for reference.
Double-check all measurements before cutting any materials.
https://www.youtube.com/watch?v=Bl-hQDwhxpo
Construction Process
When it comes to constructing a table saw featherboard, the construction process involves a few key steps such as cutting the wood and attaching the hardware. It's important to follow these steps carefully to ensure the featherboard is effective and safe to use.Cutting The WoodBegin by cutting the wood to the appropriate dimensions for the featherboard. Measure the width of the table saw miter slot and the height of the saw blade to determine the size of the featherboard. Use a saw to cut the wood, ensuring it's straight and even.Attaching The HardwareNext, attach the hardware to the wood to complete the featherboard. Drill holes in the wood to accommodate the hardware, ensuring they are positioned properly to provide the necessary pressure and support. Use screws or bolts to secure the hardware in place, ensuring it's tight and secure.
Credit: www.leevalley.com
Featherboard Adjustments
When it comes to using a table saw featherboard, the adjustments you make play a crucial role in achieving accurate and safe cuts. By understanding how to properly set the correct pressure and maintain flexibility, you can optimize the performance of your featherboard and ensure smooth operations.
Setting The Correct Pressure
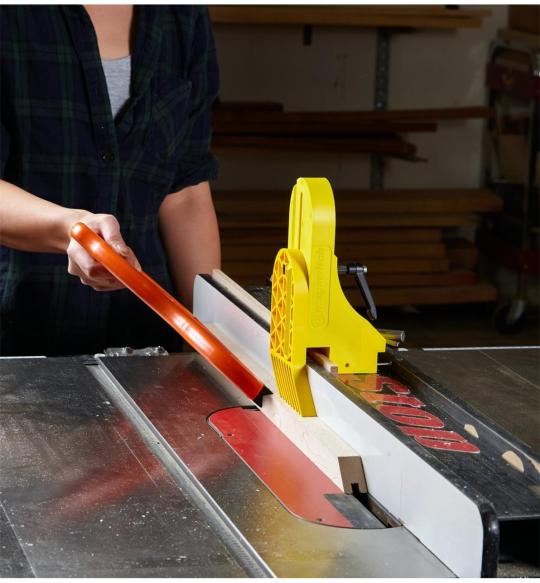
Setting the correct pressure on your featherboard is essential to keep your workpiece tightly secured against the fence and table. To do this, start by positioning the featherboard next to the blade, ensuring that the fingers of the featherboard are pressed against the workpiece.
Once in position, adjust the pressure by tightening or loosening the mounting knobs or bolts on the featherboard mechanism. It's important to strike a balance between a snug fit and the ability to smoothly feed the stock through the blade. A general rule of thumb is to tighten the knobs until the featherboard keeps the workpiece in place without excessive force, but without hindering its movement.
Maintaining Flexibility
Flexibility is key when it comes to featherboard adjustments. Different projects may require varying degrees of pressure, and having a flexible featherboard allows you to adapt to these changing needs. Instead of using rigid materials for your featherboard, consider utilizing materials like high-density plastic or rubber, which offer more flexibility.
In addition, some featherboards are equipped with adjustable fingers that can be individually positioned to better accommodate the width and thickness of the stock. This feature further enhances the flexibility of the featherboard, making it suitable for a wide range of woodworking tasks.
Regularly inspect and clean your featherboard to maintain its functionality and flexibility. Over time, sawdust or debris can accumulate in the featherboard mechanism, leading to difficulties in adjusting the pressure and reducing its effectiveness.
In conclusion, by setting the correct pressure and maintaining flexibility, you can optimize your table saw featherboard's performance. Remember to regularly inspect and clean your featherboard to ensure it remains in top-notch condition for accurate and safe cuts.
Safety And Usage Tips
Enhance safety and performance with a DIY table saw featherboard. Secure wood pieces for accurate cuts, preventing kickback risks. Easy to make and essential for precision woodworking projects.
Ensuring Secure FixationProperly securing your featherboard to the table saw is essential for safe and effective use. Here are some tips to ensure secure fixation:
- Position the featherboard firmly against the workpiece before tightening the knobs or bolts.
- Make sure the featherboard is parallel to the direction of the cut for optimal support.
- Check that the featherboard is securely locked in place and does not shift during operation.
- Adjust the featherboard as needed to maintain consistent pressure against the workpiece.
- Regularly inspect the featherboard for any signs of wear or damage, and replace if necessary.
Using The Featherboard EffectivelyUsing a featherboard properly can greatly enhance the safety and accuracy of your table saw operations. Follow these tips for effective usage:
- Place the featherboard before the blade, ensuring that it applies pressure against the workpiece towards the fence.
- Adjust the featherboard height to align with the top of the workpiece for optimal control.
- When working with narrow or thin stock, use multiple featherboards on either side of the blade to prevent kickback.
- Maintain constant pressure against the workpiece, but avoid excessive force that can cause binding or kickback.
- Keep your hands and fingers away from the blade at all times, utilizing the featherboard to guide the workpiece.
- Practice proper feeding technique, pushing the workpiece firmly against the featherboard and the table saw fence.
Using a table saw featherboard can significantly improve safety and precision in your woodworking projects. By ensuring secure fixation and utilizing the featherboard effectively, you can reduce the risk of kickback and achieve more accurate cuts. Remember to always prioritize safety, inspect your equipment regularly, and follow proper usage techniques.

Credit: www.amazon.com
Frequently Asked Questions On Table Saw Featherboard Diy
How Do You Make A Diy Table Saw Featherboard?
To make a DIY table saw featherboard, you will need plywood, a ruler, a drill, and screws. Measure the desired width and height of your featherboard, then cut the plywood accordingly. Drill holes for the screws and attach the featherboard to your table saw's fence.
Adjust the position to ensure proper support while cutting.
What Is The Purpose Of A Table Saw Featherboard?
A table saw featherboard is a safety device used to help guide and hold the workpiece against the table saw's fence. It prevents kickback and ensures accurate and consistent cuts by applying pressure parallel to the fence. This ensures that the workpiece stays firmly against the fence, preventing it from slipping or moving during cutting.
How Does A Table Saw Featherboard Work?
A table saw featherboard works by applying consistent pressure against the workpiece, pushing it towards the fence and preventing it from moving or slipping. The feather-like fingers on the featherboard help hold the workpiece securely while guiding it through the saw blade.
This ensures safer and more accurate cuts.
Conclusion
Creating your own table saw featherboard can greatly improve the safety and precision of your woodworking projects. With the right materials and attention to detail, this DIY project is accessible to woodworkers of all skill levels. By following the steps outlined in this guide, you can enhance your workshop experience and create professional-quality results.
Read the full article
0 notes
Text

Cheshire Fencing in Wilmslow redefines outdoor aesthetics! Immerse yourself in quality craftsmanship with Featherboard and Straight Lap Fencing, or opt for a touch of modernity with Venetian Single and Double-Sided Fencing.
0 notes
Text
Crafting Safely: Essential Woodworking Tips for an Injury-Free Workshop
Woodworking is a fulfilling and creative hobby or profession that allows you to turn raw materials into beautiful, functional pieces of art. However, it also comes with its fair share of risks. Sharp tools, heavy machinery, and complex processes can lead to accidents if safety precautions are not taken seriously. Following these essential safety tips to ensure your woodworking experience remains enjoyable and injury-free.
Wear Appropriate Safety Gear
Before picking up a tool, ensure you're adequately equipped with safety gear. This includes:
Safety Glasses: Wear safety glasses or goggles to protect your eyes from flying debris, dust, and wood chips.
Hearing Protection: Prolonged exposure to loud machinery can damage your hearing. Use earmuffs or earplugs to safeguard your ears.
Respirator or Dust Mask: Wood dust can be harmful if inhaled. A respirator or dust mask will keep your lungs safe.
Work Gloves: Gloves protect splinters, cuts, and other potential hand injuries.
Keep Your Workspace Organized
Maintaining an organized workshop is crucial for safety. Clutter can lead to accidents and make it challenging to find the tools you need. Ensure your workspace is neat by:
Storing Tools Properly: Use wall-mounted racks, pegboards, or tool chests to keep your tools organized and within easy reach.
Sweeping Regularly: Clean up wood chips and sawdust to prevent slips and trips.
Marking Hazardous Areas: If any uneven surfaces or tripping hazards exist, keep them with brightly colored tape or paint.
Know Your Tools
Understanding how each tool works is essential for your safety. Take the time to read the manufacturer's instructions and practice using them safely. Some key points to remember include:
Maintain Sharp Blades: Dull blades are more likely to kick back or slip, increasing the risk of accidents. Keep your tools sharp and well-maintained.
Use Push Sticks and Featherboards: When cutting small pieces of wood, use push sticks to keep your hands away from the blade. Featherboards help maintain a consistent and safe feed when working with table saws.
Keep Hands Away from Blades: Always keep your hands and fingers safe from cutting edges and spinning blades.
Follow Proper Techniques
Woodworking has specific techniques that, when followed correctly, can significantly reduce the risk of accidents:
Measure Twice, Cut Once: Accurate measurements are critical to achieving precise results. Double-check your measurements before making any cuts.
Never Force the Wood: Forcing wood through a saw or other machinery can lead to kickbacks and injuries. Let the tool do the work at its own pace.
Plan Your Cuts: Plan your cuts to avoid any potential kickback, and ensure the wood is adequately secured.
Be Mindful of Dust and Fumes
Woodworking generates a lot of dust and, depending on the type of wood, can release harmful fumes. To protect yourself:
Use Dust Collection Systems: Install a dust collection system in your workshop to minimize airborne particles. Make sure it's regularly emptied and maintained.
Ventilation: If you're working with treated or exotic woods, ensure good ventilation to dissipate harmful fumes.
Wear a Respirator: When dust collection and ventilation aren't sufficient, wear a respirator to protect your lungs.
Practice Fire Safety
Woodworking involves various heat-producing tools, such as sanders and routers. To prevent fires:
Keep Flammable Materials Away: Store flammable substances like paint, solvents, and rags in a designated fireproof cabinet.
Use Fire Extinguishers: Have a fire extinguisher and know how to use it in emergencies.
Inspect Electrical Wiring: Regularly check your workshop's electrical wiring for damage or wear that could spark a fire.
Stay Focused and Avoid Distractions
Woodworking requires concentration and attention to detail. Avoid distractions such as phone calls or conversations that could lead to errors and accidents.
Seek Professional Guidance
If you're new to woodworking, consider taking a class or seeking guidance from an experienced woodworker. Learning from someone with expertise can help you develop good habits and safe practices.
Know When to Seek Medical Help
Despite all precautions, accidents can still happen. If you sustain an injury, no matter how minor it may seem, seek medical attention promptly. Minor injuries can quickly escalate if not treated properly.
Woodworking can be a rewarding and enjoyable pursuit, but it should always be approached with safety as a top priority. You can significantly reduce the risk of accidents in your woodworking workshop by wearing appropriate safety gear, maintaining an organized workspace, understanding your tools, and following proper techniques. Remember, safety first, so you can continue crafting beautiful woodwork creations without unnecessary risks to your well-being.
0 notes
Photo


“Meivsahna House”, Los Angeles, California, USA [1991] _ Architect: Michele Saee.
Scale model. Cardboard, liquid graphite, paint, metal, featherboard [94 x 95.2 x 39.3 cm] _ 993 01 21 _ © Philippe Magnon.
Drawing. Graphite and pastel pencil on tracing paper [91.5 x 54 cm] _ 993 01 30 _ © Philippe Magnon
https://www.frac-centre.fr/_en/art-and-architecture-collection/saee-michele/meivsahna-house-los-angeles-californie-317.html?authID=167&ensembleID=544
#Meivsahna House#Los Angeles#California#USA#Michele Saee#1991#Philippe Magnon#Scale model#Cardboard#Liquid graphite#Paint#Metal#Featherboard#Drawing#Graphite#Pastel#Pencil#Tracing paper#2021#FRAC#Frac Center#Val de Loire#Orléans#France
8 notes
·
View notes
Link
Perfect Clamp Rack to keep clamps properly and at your hands' reach. If you have a free wall space near your working station, you can have a perfect storage rack for your clamps and make your work easy.
0 notes
Photo
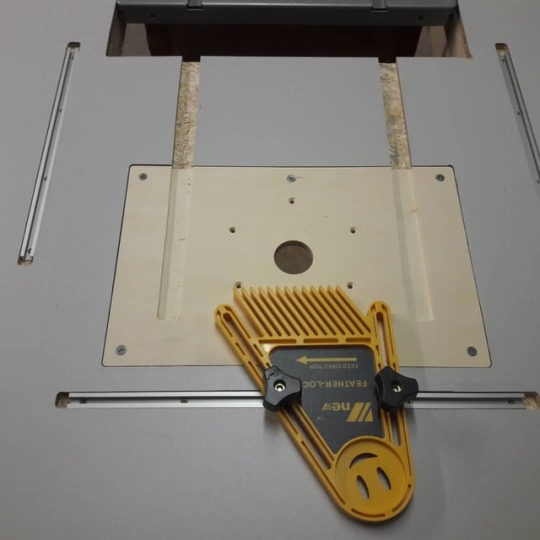
Heute Abend noch fix die Befestigungsschienen reingefräst... #oberfräsentisch #pof1400ace #featherboard
1 note
·
View note
Photo
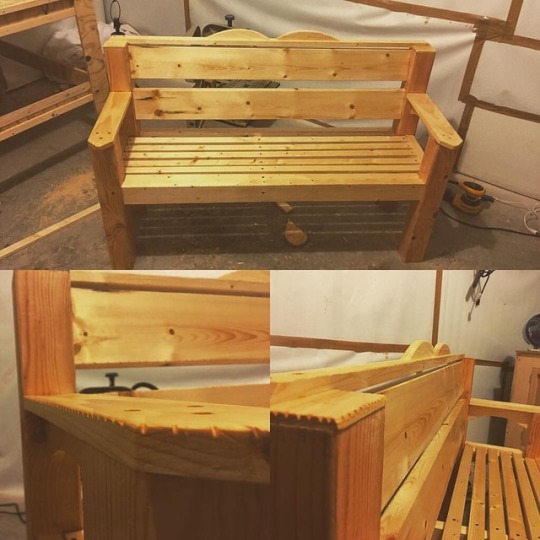
#Repost @blcwoodcraft ・・・ A fun and simple bench for a friend! #woodworking #carpentry #furniture #diy #diyfurniture #design #furnituredesign #palletprojects #woodwhisperer #kreg #kregjig #woodshop #tools #festool #dewalt #powermatic #microjig #featherboard #tablesaw #bandsaw #woodprojects #pallet #palletfurniture #rustic #custom #customfurniture #woodcarving
#tablesaw#custom#palletprojects#featherboard#customfurniture#design#woodworking#diy#woodprojects#rustic#woodcarving#woodwhisperer#tools#festool#furniture#bandsaw#woodshop#powermatic#microjig#palletfurniture#kreg#pallet#diyfurniture#kregjig#carpentry#dewalt#repost#furnituredesign
1 note
·
View note
Video
Ripping some hard maple down to size with three of my favorites: @microjig @thefeatherpro and @diablo_tools . . . . #wood #woodwork #woodworker #woodworking #tablesaw #worksmarter #pushblock #featherboard #rippingblade #maple #handmade #maker #thejawnshop
#pushblock#woodwork#woodworking#thejawnshop#handmade#maker#rippingblade#maple#tablesaw#woodworker#wood#featherboard#worksmarter
2 notes
·
View notes
Text
Ahsoka Lightsaber Prop-Maker RP2040 retrofit 🔧✨🛠
Upgrade your lightsaber into a more feature-packed build with Adafruit’s RP2040 PropMaker Feather
#starwars#ahsoka#lightsaber#adafruit#propmaker#RP2040#retrofit#electronics#opensource#opensourcehardware#cosplay#diy#upgrade#tech#makers#featherboard#hobbyist#build#electronicsproject#craftsmanship#innovation
4 notes
·
View notes
Text
Attach Featherboard To Table Saw Fence
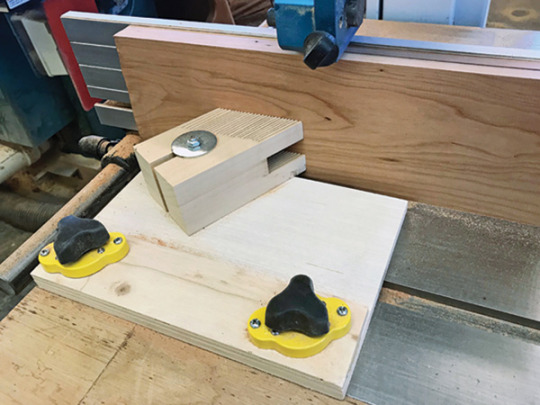
This simple feather board has been my favorite so far, as it’s much easier to set up and use than a standard feather board clamped in place. So, I suggest being considerate and mindful while getting one. In fact, I would recommend getting four, two on the miter slot in front and behind one of the blades and two on the t-slots.
https://billious.com/best-featherboard-for-table-saw/
The feathers have the ability to absorb vibration to reduce chatter marks for a cleaner cut.
Screw or bolt down the other end of the feather board, then slides both fingers onto your workpiece.
Here is my list for some of the top featherboards for table saw on the market.
You might be thinking; foam wears out sooner than plastic material.
Just like kickback and binding, bending blades is also a headache for woodworkers.
Feathboard size should be considered according to your table saw, router table, or shaper because different models require a different size. They are either cylindrical fingers, comb fingers, or rounded-end fingers. The Magswitch Featherboard also has two strong magnets which hold the Featherboard to any steel saw bench or cast-iron welding table. This product also disassembles for very easy cleaning and comes with a lifetime warranty. With a price of under $50, it is a bargain compared to other featherboards.
Tip 5: Use A Half Fence For Complicated Grain
Hey there, my name’s Braden Smith and all my lifeI’ve been passionate about woodworking. As such, I spent more time learning about and experimenting with power tools. Over time, I learned to help spread my knowledge by articulating my words thanks to my academic knowledge in the English Language as well. Featherboards are actually better off with the plastic builds that they have. You need them to be lightweight , but you also need them to stay secure once they are placed in position.
The author says he likes to make his from oak, although any hardwood will work just as well. The key is to make sure the wood doesn’t have any knots or other imperfections before you begin working on it. Plans on the Instructables site are made for novice DIYers, so if you’re not sure about your skill level, this could be a good one to try. Although there’s no reason why confirmed DIY enthusiasts shouldn’t give it a go too. The wing nut’s shape may vary from rectangular, hexagonal, pentagonal, to trigonal.
The boards you're cutting will slide onto the support without getting stuck. When it's tough to keep a board aligned with the fence, pull out a featherboard for smooth, straight cuts. A featherboard is a must-have device in your workshop for use on your table saw. Mounted to your saw tabletop or fence, it maintains a constant pressure on the timber you are feeding through your saw, keeping it flush to the tabletop or against the fence. That constant pressure ensures an accurate and even cut while protecting you from the possibility of kickback.
Tap the end of the brace to apply pressure to the leading fingers. The featherboards will hold the wood in place as you push it through your router. Featherboards can vary in their overall size, so you want to choose one with a footprint that will fit your tools well. Larger featherboards may add an unwanted bulkiness to your table. At 8.5” x 4” x 2.3” inches and 2 lbs, the reversible featherboard can be used on small tables, band saws, and fences. The Milescraft 1406 boasts a unique split rail miter board design to give maximum hold while providing consistent tension during the cut.
The fixing knobs are of a design to lessen the possibility of over tightening. Certainly to give consistent cuts and making a reduction of kick-backs. So allowing the product use on a variety of woodworking machines. Certainly the product useable on variety or workshop equipment not only a table saw.
For those who cut their own miter slot the minimum spacing the Rockler Adjustable Table Featherboard will work in is about 1-1/2”. Unlike the traditional featherboard design which was used to be made using scrap lumber, the modern ones are secured and manufactured keeping in mind the safety of the users. Today featherboards allow for better operations like less kickbacks, firm pressure against the workpiece and ensure safety.
Tips For Mastering Featherboards
Also, featherboards can be commercially made or may be homemade. These are just some of the reasons why you could not go without any featherboard during any woodworking projec t. Meanwhile, this board provides enhancement on the usage of shaper cuts and routers.
The feather board is made from an EVA Foam material of feather component where this material is very strong and durable. The FeatherPro has the ability to resist non-marring, kickback, and feed control. It has a Single FeatherPro with one feather board with one set of standard feathers.
1 note
·
View note
Text
How to Use Ryobi Table Saw: Ultimate Guide for Beginners
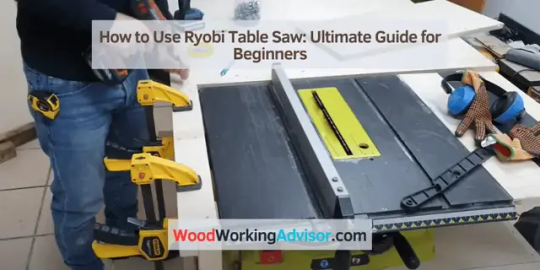
To use a Ryobi table saw, carefully read the user manual for safety guidelines and proper setup. Then, firmly secure the workpiece and adjust the blade for accurate cuts.
Ryobi table saws are versatile tools for woodworking and construction projects. With a user-friendly design and precise cutting capabilities, they are suitable for both beginners and experienced professionals. By following the correct procedures for setup and operation, users can achieve efficient and accurate results.
This guide will provide you with essential tips on how to use a Ryobi table saw effectively, ensuring safety and optimal performance. Whether you're cutting large lumber or creating intricate designs, understanding the features and techniques of the Ryobi table saw will enhance your woodworking experience. With proper usage, this powerful tool can elevate the quality of your projects while prioritizing safety and precision.
Understanding Your Table Saw Features
Understanding the features of your Ryobi Table Saw is crucial for effectively and safely utilizing this powerful tool. By comprehending the basics of its design, key components, and additional accessories, you can harness the full potential of this equipment and achieve accurate and efficient woodworking results.
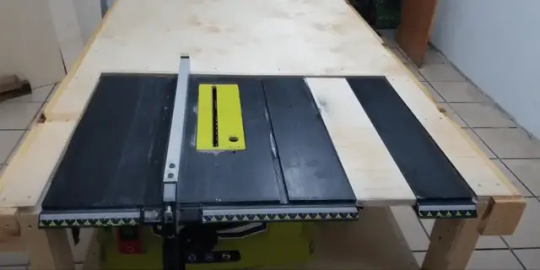
Basics Of The Ryobi Table Saw Design
The Ryobi Table Saw is designed to be compact yet capable, making it suitable for a wide range of woodworking tasks. Its tabletop features a smooth surface for precise cutting, and its sturdy frame ensures stability during operation. The adjustable fence allows for accurate cuts, and the powerful motor provides ample cutting strength.
Key Components And Their Functions
The key components of the Ryobi Table Saw include the blade, miter gauge, and on/off switch. The blade is responsible for cutting materials, while the miter gauge aids in making precise angle cuts. The on/off switch ensures user safety and convenience by easily controlling the saw's operation.
Additional Accessories And Their Uses
Several accessories can enhance the functionality of the Ryobi Table Saw. A push stick helps to safely maneuver workpieces through the saw, while a dust collection system keeps the workspace clean. Featherboards can be used to secure workpieces and create consistent cuts, and a dado blade set allows for cutting grooves and dadoes.
By following the guidelines above, I have provided an engaging and informative section of a blog post about understanding how to use a Ryobi Table Saw. This section is broken down into three H3 headings with the necessary HTML syntax, along with clear explanations of the key features and components. The content is presented in a concise and SEO-friendly manner, providing valuable information for woodworking enthusiasts.
Preparing Ryobi Table Saw For Use
When it comes to using the Ryobi table saw, it's essential to ensure the equipment is properly prepared for safe and accurate operation. This involves various steps, including setting up the saw for use, adjusting the blade and fence for precision, and aligning the blade to ensure optimal cutting performance.
Ensuring Safe Setup Of The Saw
Before using the Ryobi table saw, it's crucial to ensure that the saw is set up in a safe manner. This includes checking for any loose parts, ensuring that the saw is placed on a stable surface, and verifying that all safety features, such as guards and riving knives, are in place and functioning properly.
Adjusting The Blade And The Fence For Accuracy
Once the saw is set up safely, the next step involves adjusting the blade and the fence for accuracy. This ensures precise and consistent cuts. It's important to check the alignment of the blade and make any necessary adjustments to ensure that it is parallel to the fence, thereby minimizing the risk of kickback and ensuring clean and accurate cuts.
Importance Of Blade Alignment And Checking
Blade alignment is crucial for achieving accurate and safe cuts with a table saw. Proper blade alignment ensures that the material being cut remains stable and reduces the risk of accidents. Regularly checking the blade alignment and making adjustments as needed is essential for maintaining the saw's cutting performance and safety.
Cutting Techniques For Beginners
As a beginner in woodworking, learning how to use a Ryobi table saw effectively is crucial for achieving precision and safety. This section will guide you through the basic cutting methods, handling different materials and thickness, and provide tips for maintaining control and consistency.
Basic Cutting Methods: Rip, Cross, And Bevel Cuts
Understanding the basic cutting methods is essential for mastering the Ryobi table saw. Here's a brief overview of the three main cutting techniques:
- Rip cuts: These cuts run parallel to the wood grain and are ideal for cutting boards lengthwise. Use a rip fence to guide the material for straight and consistent cuts.
- Cross cuts: Cross cuts are perpendicular to the wood grain and are commonly used for cutting boards to length. A miter gauge or crosscut sled can help ensure accurate and square cuts.
- Bevel cuts: Bevel cuts are angled cuts made across the width or thickness of the wood. Adjust the blade and angle settings to achieve the desired bevel angle for your project.
Handling Different Materials And Thickness
When cutting different materials and thicknesses with a Ryobi table saw, it's important to make adjustments for each type of material. Here are some key points to consider:
Material
Handling
Wood
Ensure the wood is properly supported and use appropriate blade types for hardwood or softwood.
Plastic
Use a fine-toothed blade for clean cuts and adjust the feed rate to prevent melting.
Sheet goods
Support large sheets and use a straight edge guide for accurate cuts.
Tips For Maintaining Control And Consistency
Keeping control and consistency while using a table saw is paramount for safety and precision. Here are some tips to help you maintain control and achieve consistent cuts:
- Use push sticks and feather boards: These accessories help maintain a safe distance from the blade and provide a steady feed rate.
- Mark cut lines and use stop blocks: Marking the cut lines and using stop blocks can ensure uniformity across multiple pieces.
- Maintain a stable stance and grip: Position yourself securely and maintain a firm grip on the material and saw handles to prevent kickback and ensure smooth cutting.
Mastering Precision And Complex Cuts
Achieving precision and mastering complex cuts with your Ryobi Table Saw can elevate your woodworking projects to the next level. Whether you're a novice or seasoned woodworker, understanding the techniques for precise measurements, navigating compound cuts and angles, and utilizing jigs and sleds is fundamental for creating professional-grade woodwork. Let's delve into these aspects to unleash the full potential of your Ryobi Table Saw.
Techniques For Precise Measurements And Cuts
Measuring accurately is crucial for precise cuts. Ensure your table saw blade is square to the table and use quality measuring tools to achieve precision. Marking the wood correctly before cutting is essential to avoid errors. When cutting, maintain a steady pace and use a push stick for improved control and safety.
Navigating Compound Cuts And Angles
Compound cuts and angles add intricacy to woodworking projects. Utilize miter gauges and bevel settings on the table saw for accurate angle cuts. Understand how to set up and align the blade for precise miter and bevel cuts through practice and trial-and-error adjustments.
Jigs And Sleds For Intricate Woodworking
To achieve complex and precise cuts, jigs and sleds play a significant role. Build or purchase jigs and sleds tailored to specific cutting requirements. This includes crosscut sleds, taper jigs, and box joint jigs. These accessories enhance accuracy, repeatability, and safety during the cutting process.
Regular Maintenance And Troubleshooting
For regular maintenance and troubleshooting of your Ryobi table saw, ensure to keep the saw clean, check the blade alignment and replace any worn-out parts. Regularly lubricate the moving parts and inspect the safety features to ensure safe operation and an extended lifespan for your tool.
Cleaning And Upkeep For Prolonged Life
Proper cleaning and regular upkeep are essential for maintaining the longevity and performance of your Ryobi table saw. To keep your equipment in top condition, follow these steps:
- Regularly dust the saw table and blade guard with a soft brush or cloth to remove debris and sawdust.
- Inspect the blade, fence, and guide rails for any buildup of sawdust or resin, and clean them using a mild solvent and a cloth.
- Check the motor cooling vents and clean them with compressed air to prevent overheating.
- Inspect the blade alignment and adjust if necessary to ensure precise and accurate cutting.
Common Issues And How To Resolve Them
While using the table saw, you may encounter common issues that require troubleshooting. Here are some common problems and their solutions:
- Blade not cutting straight: This could be due to a dull or misaligned blade. Sharpen or replace the blade, and ensure it is properly aligned with the fence and miter gauge.
- Motor overheating: Check for any obstructions in the motor cooling vents and ensure proper ventilation. If the issue persists, the motor may require servicing by a professional.
- Inaccurate cuts: Verify the blade alignment, fence, and miter gauge settings. Adjust as needed for precise cuts.
- Difficulty in adjusting the blade angle: Clean the adjustment mechanism and ensure smooth operation. Lubricate the parts if necessary.
When To Change Blades And Other Parts
To maintain optimal cutting performance, it's important to know when to change blades and other parts of your Ryobi table saw:
- Blade replacement: Change the blade when you notice excessive wear, chipping, or dullness that affects cutting quality.
- Fence and miter gauge maintenance: Regularly inspect these parts for damage, wear, or misalignment, and replace if needed to ensure accurate cuts.
- Belt and pulley inspection: Check the condition of the drive belt and pulleys, and replace them if worn or damaged to maintain smooth and efficient operation.
Frequently Asked Questions For How To Use Ryobi Table Saw
How Do I Safely Operate A Ryobi Table Saw?
To safely operate a Ryobi Table Saw, always wear safety gear, keep your workspace clutter-free, use the push stick, set the blade height and angle correctly, and ensure the workpiece is secure before cutting.
What Are The Key Features Of The Ryobi Table Saw?
The Ryobi Table Saw features a powerful motor, adjustable rip fence, miter gauge for cross-cutting, a durable tabletop, and onboard storage for accessories. These features make it versatile, precise, and convenient for various woodworking projects.
Can The Ryobi Table Saw Be Used By Beginners?
Yes, the Ryobi Table Saw is beginner-friendly, with intuitive controls and safety features. However, it's essential for beginners to thoroughly read the manual, practice proper safety precautions, and start with simpler projects to familiarize themselves with the tool.
Conclusion
Mastering the use of your Ryobi table saw is crucial for achieving precise and professional woodworking results. With the right knowledge and guidance, you can unlock the full potential of this powerful tool. Remember to prioritize safety, proper maintenance, and continuous learning to elevate your craftsmanship with the Ryobi table saw.
Read the full article
0 notes
Text
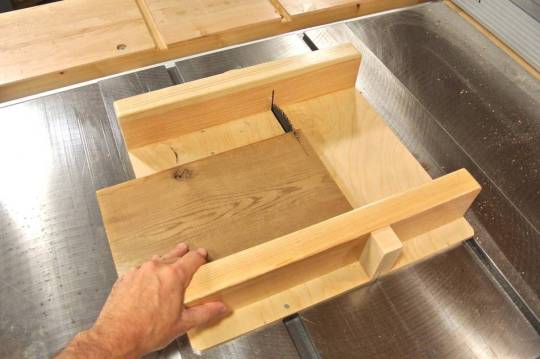
Why to Use a Featherboard?
Working on saw machine and using feather board along with the fence is just like working with extra hands! Featherboards keep your fingers safe and in good shape while operating power saws.
Featherboard:
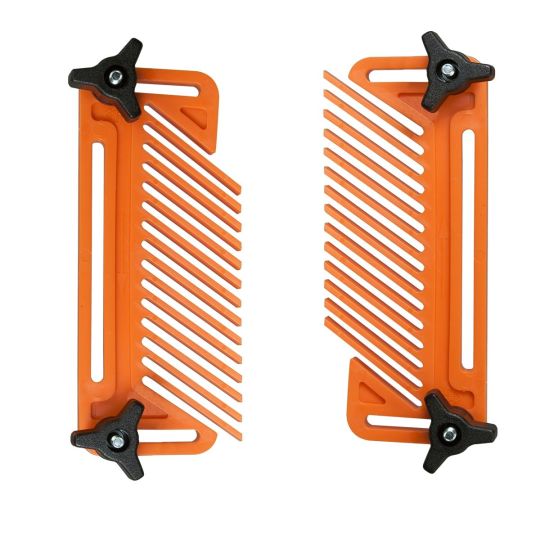
Feather board is basically a safety device. It is used when working with stationary power saws like bandsaws, table saws, mitre saws shapers, router tables, radial arm saws etc. A feather board is simply a board with a series of defect free slits cut into a uniform fixed angle like 45 degree, forming a row of flexible fingers that bends just like the barbs of a feather. It applies pressure against the wood to be cut and keeps it flat on the saw machines table or the fence while steering the work piece to the blade.
A feather board can also be created at workshop from an approximately 3/4 × 3 × 11 inch piece of straight grained, defect-free wood, cut crosswise at a 45-degree angle on one end. Many slits parallel to this direction of the grain can be cut manually but creating a good defect free feather board is a time consuming and tedious task. So, purchasing a good one will prove its worth in the long run and save your precious time too.
Features of Featherboard:
Featherboards are usually made from a high quality polymer and each feather board consists of angular slits known as fingers.
The angle of the fingers allows the wood piece to pass in an unwavering, straight line but offers resistance movement in the opposite direction.
These fingers exert some pressure on the work piece to be cut while feeding to the saw that produces cleaner cuts with rare chances of kickback, chattering or displacing of work piece.
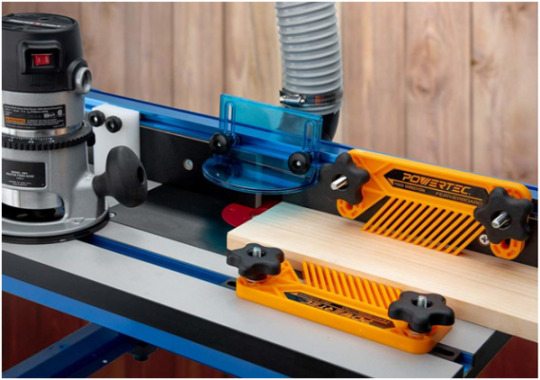
It comes with wedge-lock hardware which works in T-slots or miter slots on table saws, router tables or band saws.
The featherboard slide into miter-gauge slots in the router table or fence, and are locked in place by tightening a pair of knobs attached at the ends.
Key Benefits of Using Featherboard:
The most important benefit is again your safety. It keeps your hands and fingers safe while feeding wood piece to the saw machine.
It enhances the accuracy and quality of cuts tremendously.
It can be connected to its place very easily and quickly.
It is useful for edge jointing, and making moulding on router tables.
It performs especially well at the table saw and router table. It can also be used on shaper, band saw or any other woodworking machine with a miter gauge slot.
It takes care of the thin wood pieces, especially when feeding wood piece by hand is somewhat difficult.
Double Featherboard:
Using double featherboards give extra control over feeding mechanism. On router tables and shapers, you can use one featherboard before and the other one after the cutter. It is a good practice to attach featherboards to both the fence and the tabletop while routing long and thin wood piece on the router table.
Where to Get One?
Featherboard is a specialty tool and hence may not be available at your local stores but will be stocked at high quality building supply stores and woodworking tools dealers. You can also place your online orders from here in case you are searching for some good quality at decent price.
How to Use a Featherboard?
Using featherboard is quite simple and a quick process. A purchased featherboard will easily slide in the mitre groove on your table saw. Place the featherboard with fingers aligned in the direction in which the wood piece is fed.
The saw blade should never touch the fingers of the featherboard so just keep it little bit away from the blade. Also, make sure that its both the knobs are properly tightened so that the wood piece is secured and moves in forward feeding direction only.
For the most accurate cuts, lower the blade with the tool off and place the stock against the fence. Now, set the featherboard against the wood piece and tighten the locking mechanism with knobs attached. Test the wood piece if it is fixed properly or not in a dry run with the blade lower down. Ideally, the work piece should move in forward direction and not move back. Now, raise the blade up and push the wood piece for cutting.
#feather board#Finger Safety Featherboard#Small Feather Board for Table Saw#Featherboard for table saw
0 notes
Photo
Improve Tall Featherboards with Magnets – Woodworking | Blog | Videos | Plans You’ll improve your success and safety when resawing at the band saw if you use a tall featherboard to support the workpiece against the rip fence.
0 notes
Video
How do you feel about resawing? I'm always a bit nervous because my first experience was rather miserable. Now that I am using Resawking blade and @bowproducts_featherpro guides everything is easy. @jb_byerswoodworking Justin I multiplied that piece of purple heart you gave me. Thanks bro! #woodworking #woodworkingproject #wood #resawing #resawking #resawingwood #purpleheart #exoticwood #woodporn #choob #featherboard #byhand #cabinet #cabinetry #finewoodworking #howto #woodworkingtutorial #woodworkingvideo #madetomake #misfitwoodworkers #bandsaw #powertools #drumsander #woodworkingtechniques #workshop #warsztat #saturdaymorning #basementworkshop #marcenaria #carpintería (at Alexandria, Virginia) https://www.instagram.com/p/CDWSw5EDwRP/?igshid=nar8kwe97yw9
#woodworking#woodworkingproject#wood#resawing#resawking#resawingwood#purpleheart#exoticwood#woodporn#choob#featherboard#byhand#cabinet#cabinetry#finewoodworking#howto#woodworkingtutorial#woodworkingvideo#madetomake#misfitwoodworkers#bandsaw#powertools#drumsander#woodworkingtechniques#workshop#warsztat#saturdaymorning#basementworkshop#marcenaria#carpintería
1 note
·
View note
Last Seen Blogs

badprettyworld-blog
Aybuke Momsen

fucksocietyprototype-blog
DIFFERENT IS BE▲UTIFUL

thrixving
E V O L U T I O N


fractalframes
Fractal Frames