#Postman Tutorial Beginners
Text

#postman#postman tutorial#Postman Tutorial Beginners#postman tutorial for automation#postmantutorial#api#api testing#api testing courses online#api testing using postman
0 notes
Text
Beginner's Guide to Effortless API Automation: Choosing the Perfect Tool
The world of APIs, or Application Programming Interfaces, is buzzing with activity. APIs act as the invisible messengers behind seamless app experiences, connecting data and functionalities across platforms. But, ensuring these intricate pathways function flawlessly requires rigorous testing. This is where API automation testing comes in, saving developers and testers precious time and ensuring reliable performance.
However, navigating the landscape of API testing tools can be daunting, especially for beginners. With a plethora of options boasting diverse features and complexities, choosing the "easiest" tool can feel like finding a needle in a haystack. Worry not, intrepid tester! This article will guide you through the key factors to consider when selecting your API testing companion, ultimately suggesting options that prioritize simplicity and effectiveness.
Ease of Use:
Visual Interface: Look for tools with intuitive drag-and-drop interfaces that minimize coding requirements. Postman and Hoppscotch excel in this category, allowing you to build and execute requests effortlessly.
No-Code/Low-Code Options: Embrace tools that offer pre-built workflows and templates for common API testing scenarios. Katalon Studio and Testsigma make automation accessible even for users with limited programming knowledge.
Intuitive Documentation and Learning Resources: Comprehensive guides and tutorials are invaluable. Postman and SoapUI boast extensive documentation and vibrant online communities, making learning a breeze.
Testing Capabilities:
Support for Diverse API Types: Ensure your chosen tool caters to the API types you'll encounter (REST, SOAP, GraphQL). Most popular tools like Postman and Katalon Studio offer broad support.
Test Scripting Flexibility: While a no-code approach is a boon, some scenarios require scripting. Choose tools like REST Assured or Karate DSL that offer powerful scripting languages for advanced users.
Validation and Reporting: Built-in tools for response validation and detailed reporting are crucial. Look for features that simplify data analysis and error investigation, like Postman's test collections and Katalon Studio's reporting dashboards.
Integration and Scalability:
CI/CD Integration: Seamless integration with continuous integration and continuous delivery (CI/CD) pipelines is essential for efficient automation. Tools like Postman and Katalon Studio offer robust CI/CD integrations.
Team Collaboration: Choose tools that facilitate collaboration with version control and team-based workspace features. SoapUI and ReadyAPI Test offer excellent collaborative functionalities.
Scalability for Complex Testing Needs: As your testing needs evolve, ensure your chosen tool can scale. Consider options like The Katalon Platform or Tricentis Tosca, which offer comprehensive suites for advanced API testing scenarios.
Optimize Your API Testing Journey with Testrig Technologies:
TestRig Technologies understands the intricacies of API testing and offers a spectrum of services to empower your testing journey. Consider leveraging their expertise for:
Tool Selection and Implementation: Their consultants can help you choose the right tool based on your specific needs and project requirements.
Custom Test Scripting and Automation: Need advanced automation solutions? TestRig's skilled engineers can develop custom scripts and integrate them with your chosen tool.
Performance and Security Testing: Elevate your testing game with TestRig's expertise in API performance and security testing, ensuring optimal functionality and resilience.
Training and Support: Get comprehensive training on your chosen tool from TestRig's certified professionals, and rely on their ongoing support for smooth testing workflows.
Conclusion:
Remember, the "easiest" tool is subjective and depends on your skillset and project requirements. While beginner-friendly tools like Postman and Hoppscotch are excellent starting points, advanced users might prefer the scripting flexibility of REST Assured or Karate DSL. Regardless of your choice, TestRig Technologies stands ready to be your trusted partner in conquering the vast landscape of API automation testing.
Take the first step towards reliable and efficient API testing by exploring the tools and services discussed in this article. Remember, with the right tools and guidance, even the most intricate APIs can be demystified, ensuring a smooth and seamless user experience.
0 notes
Text
Postman Data Driven Testing with CSV Data File | Postman Testing Tutorial
youtube
In this Postman Testing Tutorial, we'll be demonstrating how to use Postman for data-driven testing using a CSV data file. We'll cover the process of importing a CSV file into Postman, creating a collection, and setting up test scripts to loop through the data and perform assertions. This is a great way to quickly and efficiently test multiple scenarios, making sure your API is working as expected. Whether you're a beginner or an experienced Postman user, this tutorial will provide valuable insights on how to streamline your testing process. So, tune in and learn how to take your Postman testing to the next level!
0 notes
Photo
Welcome to Rahul Shetty Academy. We provide many services Best Cypressio Courses & Certification, Postman Tutorial for Beginners, Postman is one of the most popular software testing tools which is used for API testing. With the help of this tool, developers can easily create, test, share, and document APIs. For more information call us 3237446780.
0 notes
Link
API testing tutorial for Beginners
1 note
·
View note
Text
Rest Assured Tutorial for Beginners | Rest Assured Services Training Courses Online
We are providing a Rest Assured Trainings free and paid tools tutorial. Rest Assured Training course videos help you learn Automating REST bases web services by building automation teat cases, batch running them and generating detailed reports using java libraries.

1.Web Services,Postman
2.Java for Rest Assured
3.Rest Assured API and Pilot Project
4.Live Projects and Framework Designing
#rest assured#rest tutorial#rest assured tutorial#restful web services tutorial#rest assured training#rest testing tool#rest api automation using java#java rest api testing framework#java rest api tutorial#rest assured training online#rest assured api training
1 note
·
View note
Text
Master Microservices with Spring Boot and Spring Cloud
An awesome journey from Restful Web Services ( REST API ) to Microservices with Java, Spring Boot and Spring Cloud

Apply link 📣
https://geeksgod.com/udemy-bestsellers/master-microservices-with-spring-boot-and-spring-cloud/
What you'll learn
1. You will be able to develop and design RESTful web services with Spring Boot
2. You will be able develop MICROSERVICES with Spring Boot and Spring Cloud
3. You will understand How to IMPLEMENT Exception Handling, Validation, HATEOAS and filtering for RESTful Web Services.
4. You will implement client side load balancing (Ribbon), Dynamic scaling(Eureka Naming Server) and an API Gateway (Zuul)
5. You will setup Centralized Microservices Configuration with Spring Cloud Config Server
6. You will learn to implement Distributed tracing for microservices with Spring Cloud Sleuth and Zipkin
7. You will implement Fault Tolerance for microservices with Hystrix
8. You will understand how to version your RESTful Web Services
9. You will understand how to monitor RESTful Services with Spring Boot Actuator
10. You will understand how to document RESTful Web Services with Swagger
11. You will understand the best practices in designing RESTful web services
12. Using Spring Cloud Bus to exchange messages about Configuration updates
13. Simplify communication with other Microservices using Feign REST Client
This course includes
- 11 hours on-demand video
- Full lifetime access
- Access on mobile and TV
- Certificate of Completion
Requirements
1. You have an attitude to learn while having fun :)
2. You have experience with Java and Spring and ZERO Experience with Microservices
Description
Do you want to Learn to Build Amazing REST API with Spring Boot? Do you want to learn what the Hype about Microservices is all about? Do you want to Build Microservices with Spring Boot and Spring Cloud? Look no Further!
******* Some Amazing Reviews From Our Learners *******
★★★★★ Anyone willing to learn Spring Cloud API’s and Spring Rest must enroll for the course without second-thoughts.
★★★★★ Probably I can say this is best tutorial for Spring boot as well as Micro Service for the learners who have just started there work/projects on these technologies.
★★★★★ This was an excellent course! The instructor provided great examples that were straight-forward and easy to understand….. I would highly recommend his courses if you want to solid introduction to spring boot and the spring framework.
★★★★★ Very helpful for the beginners as well as experienced people to gain knowledge on Restful Web-services and Spring boot. Thank you for such a nice tutorial.
★★★★★ This was perfect course to get introduced to the world of microservices. Instructor explained each topic by first listing the problems that the particular solution is going to solve.
★★★★★ Great course, the teacher explains everything in a good way making good examples that makes easy to understand how this knowledge can be use in real project. All the courses of in28minutes are great, i’m waiting for the next great course.
★★★★★ The instructor’s has a unique style of teaching which is very uncomplicated , up-to-the point and very effective. Great job!
★★★★★ This one is the most awesome course that I have ever purchased in udemy!
******* Course Overview *******
Developing RESTful web services and REST API is fun. The combination of Java, Spring Boot, Spring Web MVC, Spring Web Services and JPA makes it even more fun. And its even more fun to create Microservices.
There are two parts to this course – RESTful web services and Microservices
Architectures are moving towards microservices. RESTful web services are the first step to developing great microservices. Java and Spring Boot, in combination with Spring Web MVC (also called Spring REST) makes it easy to develop RESTful web services.
In the first part of the course, you will learn the basics of RESTful web services developing resources for a social media application. You will learn to implement these resources with multiple features – versioning, exception handling, documentation (Swagger), basic authentication (Spring Security), filtering and HATEOAS. You will learn the best practices in designing RESTful web services.
In this part of the course, you will be using Spring (Dependency Management), Spring MVC (or Spring REST), Spring Boot, Spring Security (Authentication and Authorization), Spring Boot Actuator (Monitoring), Swagger (Documentation), Maven (dependencies management), Eclipse (IDE), Postman (REST Services Client) and Tomcat Embedded Web Server. We will help you set up each one of these.
In the second part of the course, you will learn the basics of Microservices. You will understand how to implement microservices using Spring Cloud.
In this part of the course, you will learn to establish communication between microservices, enable load balancing, scaling up and down of microservices. You will also learn to centralize configuration of microservices with Spring Cloud Config Server. You will implement Eureka Naming Server and Distributed tracing with Spring Cloud Sleuth and Zipkin. You will create fault toleranct microservices with Zipkin.
******* What You Can Expect from Every in28Minutes Course *******
in28Minutes created 20 Best Selling Courses providing Amazing Learning Experiences to 250,000 Learners across the world.
Each of these courses come with
 Amazing Hands-on Step By Step Learning Experiences
 Real Project Experiences using the Best Tools and Frameworks
 Awesome Troubleshooting Guides with 200+ FAQs Answered
 Friendly Support in the Q&A section
 Free Udemy Certificate of Completion on Completion of Course
~~~ Here are a Few Reviews on The in28Minutes Way ~~~
★★★★★ Excellent, fabulous. The way he has prepared the material and the way he teaches is really awesome. What an effort .. Thanks a million
★★★★★ A lot of preparation work has taken place from the teacher and this is visible throughout the course.
★★★★★ This guy is fantastic. Really. Wonderful teaching skills, and goes well out of his way to make sure that everything he is doing is fully understood. This is the kind of tutorial that gets me excited to work with a framework that I may otherwise not be.
★★★★★ The best part of it is the hands-on approach which the author maintained throughout the course as he had promised at the beginning of the lecture. He explains the concepts really well and also makes sure that there is not a single line of code you type without understanding what it really does.
★★★★★ I also appreciate the mind and hands approach of teaching something and then having the student apply it. It makes everything a lot clearer for the student and uncovers issues that we will face in our project early.
★★★★★ Amazing course. Explained super difficult concepts (that I have spent hours on the internet finding a good explanation) in under 5 minutes.
Start Learning Now. Hit the Enroll Button!
******* Step By Step Details *******
RESTful Web Services
Step 01 – Initializing a RESTful Services Project with Spring Boot
Step 02 – Understanding the RESTful Services we would create in this course
Step 03 – Creating a Hello World Service
Step 04 – Enhancing the Hello World Service to return a Bean
Step 05 – Quick Review of Spring Boot Auto Configuration and Dispatcher Servlet – What’s happening in the background?
Step 06 – Enhancing the Hello World Service with a Path Variable
Step 07 – Creating User Bean and User Service
Step 08 – Implementing GET Methods for User Resource
Step 09 – Implementing POST Method to create User Resource
Step 10 – Enhancing POST Method to return correct HTTP Status Code and Location URI
Step 11 – Implementing Exception Handling – 404 Resource Not Found
Step 12 – Implementing Generic Exception Handling for all Resources
Step 13 – Exercise : User Post Resource and Exception Handling
Step 14 – Implementing DELETE Method to delete a User Resource
Step 15 – Implementing Validations for RESTful Services
Step 16 – Implementing HATEOAS for RESTful Services
Step 17 – Overview of Advanced RESTful Service Features
Step 18 – Internationalization for RESTful Services
Step 19 – Content Negotiation – Implementing Support for XML
Step 20 – Configuring Auto Generation of Swagger Documentation
Step 21 – Introduction to Swagger Documentation Format
Step 22 – Enhancing Swagger Documentation with Custom Annotations
Step 23 – Monitoring APIs with Spring Boot Actuator
Step 24 – Implementing Static Filtering for RESTful Service
Step 25 – Implementing Dynamic Filtering for RESTful Service
Step 26 – Versioning RESTful Services – Basic Approach with URIs
Step 27 – Versioning RESTful Services – Header and Content Negotiation Approaches
Step 28 – Implementing Basic Authentication with Spring Security
Step 29 – Overview of Connecting RESTful Service to JPA
Step 30 – Creating User Entity and some test data
Step 31 – Updating GET methods on User Resource to use JPA
Step 32 – Updating POST and DELETE methods on User Resource to use JPA
Step 33 – Creating Post Entity and Many to One Relationship with User Entity
Step 34 – Implementing a GET service to retrieve all Posts of a User
Step 35 – Implementing a POST service to create a Post for a User
Step 36 – Richardson Maturity Model
Step 37 – RESTful Services Best Practices
Microservices with Spring Cloud
Step 01 – Part 1 – Introduction to Limits Microservice and Spring Cloud Config Server
Step 01 – Part 2 – Setting up Limits Microservice
Step 02 – Creating a hard coded limits service
Step 03 – Enhance limits service to pick up configuration from application properties
Step 04 – Setting up Spring Cloud Config Server
Step 05 – Installing Git
Step 06 – Creating Local Git Repository
Step 07 – Connect Spring Cloud Config Server to Local Git Repository
Step 08 – Configuration for Multiple Environments in Git Repository
Step 09 – Connect Limits Service to Spring Cloud Config Server
Step 10 – Configuring Profiles for Limits Service
Step 11 – A review of Spring Cloud Config Server
Step 12 – Introduction to Currency Conversion and Currency Exchange Microservices
Step 13 – Setting up Currency Exchange Microservice
Step 14 – Create a simple hard coded currency exchange service
Step 15 – Setting up Dynamic Port in the the Response
Step 16 – Configure JPA and Initialized Data
Step 17 – Create a JPA Repository
Step 18 – Setting up Currency Conversion Microservice
Step 19 – Creating a service for currency conversion
Step 20 – Invoking Currency Exchange Microservice from Currency Conversion Microservice
Step 21 – Using Feign REST Client for Service Invocation
Step 22 – Setting up client side load balancing with Ribbon
Step 23 – Running client side load balancing with Ribbon
Step 24 – Understand the need for a Naming Server
Step 25 – Setting up Eureka Naming Server
Step 26 – Connecting Currency Conversion Microservice to Eureka
Step 27 – Connecting Currency Exchange Microservice to Eureka
Step 28 – Distributing calls using Eureka and Ribbon
Step 29 – A review of implementing Eureka, Ribbon and Feign
Step 30 – Introduction to API Gateways
Step 31 – Setting up Zuul API Gateway
Step 32 – Implementing Zuul Logging Filter
Step 33 – Executing a request through Zuul API Gateway
Step 34 – Setting up Zuul API Gateway between microservice invocations
Step 35 – Introduction to Distributed Tracing
Step 36 – Implementing Spring Cloud Sleuth
Step 37 – Introduction to Distributed Tracing with Zipkin
Step 38 – Installing Rabbit MQ
Step 39 – Setting up Distributed Tracing with Zipkin
Step 40 – Connecting microservices to Zipkin
Step 41 – Using Zipkin UI Dashboard to trace requests
Step 42 – Understanding the need for Spring Cloud Bus
Step 43 – Implementing Spring Cloud Bus
Step 44 – Fault Tolerance with Hystrix
Start Learning

0 notes
Text
Automation Testing Video Tutorials

Learn Automation Testing from Expert at comfort of your Home with flexible Timings.
Easily explained Automation Testing Video Tutorials from Beginners to Advance Level in Hindi Covering Core Java, Selenium Webdriver, JUnit, TestNG, Maven, Testing Frameworks, Grid, Appium, JMeter, Jenkins, API Testing - Web services, SOAPUI, Postman, Rest Assured.
All videos are 100% practical and job oriented with LIVE Online classes every Weekend.
Get FREE Trial online classes Call Parag mob - 9810926239 for more details.
Watch Free Videos at : http://www.rminfotechsolutions.com/videoindexRMinfotech.php
#selenium#selenium webdriver#jmeter performance testing#automation testing#api testing#rest assured#jenkins#appium mobile testing
0 notes
Photo
How the top 6 million sites are using JavaScript
#464 — November 22, 2019
Read on the Web
JavaScript Weekly
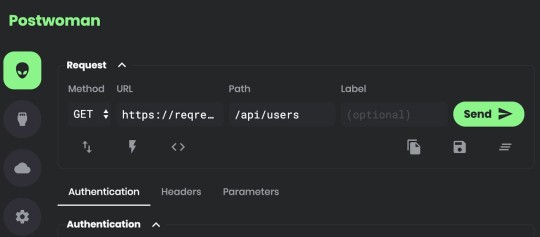
Postwoman: An API Request Builder and Tester — A free alternative to Postman, a popular app for debugging and testing HTTP APIs. Postwoman works in the browser and supports HTTP and WebSocket requests as well as GraphQL. Insomnia is a similar tool if you want to run something as a desktop app.
Liyas Thomas
The State of JavaScript on the Web by the HTTP Archive — The HTTP Archive has released an annual ‘state of the Web’ report focused on data collected from six million sites. There are numerous findings here, including how much JavaScript the Web uses, how long it takes browsers to parse that JavaScript, and what frameworks and libraries are most popularly used.
Houssein Djirdeh
Get Best in Class Error Reporting for Your JavaScript Apps — Time is money. Software bugs waste both. Save time with Bugsnag. Automatically detect and diagnose errors impacting your users. Get comprehensive diagnostic reports, know immediately which errors are worth fixing, and debug in minutes. Try it free.
Bugsnag sponsor
The Differences Between the Same App Created in React and Svelte — Several issues ago we linked to Sunil’s article comparing the same app written in React and Vue and now he’s back with a side by side comparison of some of the differences between an app built in React and Svelte, an increasingly popular build-time framework.
Sunil Sandhu
Node Gains Enabled-By-Default Support for ECMAScript Modules — Node.js 13.2.0 came out this week with both an upgrade to V8 and unflagged support for using ES modules. There are some rules to using them, and you might find this V8 blog entry on JavaScript modules worth revisiting to get a feel for what’s involved. Time to play!
Node.js Foundation
jQuery Core Migrating from AMD Modules to ES Modules — Before you say jQuery isn’t relevant, the HTTP Archive has revealed that it’s being used on ~85% of around 6 million sites.
jQuery
Pika Opens Its 'Write Once, Run Natively Everywhere' JavaScript Registry for Early Access — Rather than authors being responsible for formatting and configuring packages, the registry takes care of it. You write the code, they, in theory, do the rest (including creating TypeScript type declarations). Sadly it’s behind an email wall for now, so watch this space.
Pika
⚡️ Quick Releases
video.js 7.7 — Cross-browser video player.
Svelte 3.15.0 — Compile-time app framework.
Leaflet 1.6 — Mobile-friendly interactive maps.
AngularJS 1.7.9 —An update to the original Angular.
CanJS 6.0 — Data-driven app framework.
Ember 3.14
💻 Jobs
Full Stack Engineer — Expensify seeks a self-driven individual passionate about making code effective, with an understanding of algorithms and design patterns.
Expensify
Senior Web Frontend Engineer (CA, IL or NC) — Design what machine learning "looks" like to improve the manufacturing of millions of things. We value great tools like fast builds, simple deploys, & branch environments.
Instrumental
Find a Job Through Vettery — Make a profile, name your salary, and connect with hiring managers from top employers. Vettery is completely free for job seekers.
Vettery
📘 Articles & Tutorials
Getting Started with an Express.js and ES6+ JavaScript Stack — With typical Smashing Magazine quality, this is a thorough beginner-level walkthrough, this time covering how to get started with Node in building a web app backed by a MongoDB database. Definitely for beginners though.
Jamie Corkhill
Techniques for Instantiating Classes — Dr. Axel walks through several approaches for creating instances of classes.
Dr. Axel Rauschmayer
How To Build a Sales Dashboard with React — Improve your data visualization with JavaScript UI controls. Build interactive dashboards quickly and easily.
Wijmo by GrapeCity sponsor
▶ We Should Rebrand JavaScript. Yep? Nope? — A podcast where two pairs of JavaScript developers debate an idea that was recently floated.. should we rebrand JavaScript?
JS Party podcast
Compile-Time Immutability in TypeScript — How to achieve compile-time immutability in TypeScript with const assertions and recursive types.
James Wright
Having Fun with ES6 Proxies — Proxies aren’t going to be useful in day to day programming for most JavaScript developers, but they open up some interesting opportunities if you want more control over how objects behave and are worth understanding.
Maciej Cieślar
▶ How to Build a Budget Calculator App with Angular — A 2 hour video that walks through the entire process of building an Angular app. The gentle pace is well aimed at those new to Angular or the tooling involved.
Devstackr
Composing Angular Components with TypeScript Mixins
Giancarlo Buomprisco
Hey Node Helps You Think, Prototype, and Solve in Node.js — Transforming data, package.json, the module system and more. Bite-size, info-packed tutorials with videos and use cases.
Hey Node by Osio Labs sponsor
Cropping Images to a Specific Aspect Ratio with JavaScript — How to use the HTML canvas API and some basic math to build a tiny crop helper function, making it easy to quickly crop images in various aspect ratios.
Rik Schennink
🔧 Code & Tools
EasyDB: A 'One-Click' Server-Free Database — A quick way to provision a temporary database (that’s basically a key/value store) and use it from JavaScript. Ideal for hackathons or quick once-off scripts, perhaps.
Jake and Tyson
Nodemon: Automatically Restart a Node App When Files Are Changed — A development-time tool to monitor for any changes in your app and automatically restart the server. v2.0 has just been released with CPU and memory use improvements and far fewer dependencies.
Remy Sharp
GraphQuill: Real-Time GraphQL API Exploration in VS Code — A way to test GraphQL API endpoints from within VS Code so you don’t have to keep jumping between multiple tools.
OSLabs Beta
Open Realtime Data - A User’s Guide with Links to a Free Streaming Platform
Ably sponsor
Lambda API: A Lightweight Web Framework for Serverless Apps — A stripped down framework that takes an Express-esque approach to putting together serverless JavaScript apps to run on AWS Lambda behind API Gateway.
Jeremy Daly
ScrollTrigger: Let Your Page React to Scroll Changes — Triggers classes based on the current scroll position. So, for example, when an element enters the viewport you can fade it in.
Erik Terwan
Siriwave: The Apple Siri 'Waveform' Replicated in a JS Library
Flavio Maria De Stefano
by via JavaScript Weekly https://ift.tt/2XI7YS2
0 notes
Note
Hi, sorry if I'm bothering you but I just wanted to ask how you got started with handlettering? I'm trying to practice but all I'm doing now is trying to copy (strictly for practice) things that I see but I don't feel like I'm improving or anything. And it's the same with doing the alphabet, I'm just copying what I see, but I don't think it's doing anything. Thanks and have a nice day
Hello there! Thank you so much for your question, you’re so polite too!
I started off by copying typefaces (fonts) that I really liked and seeing how the different letterforms come together. I have actually studied typography at uni so that was a definite advantage for me! [BTW typography and lettering are not the same]
I was completely crap at lettering when I first started though, especially brush lettering. The only way I improved was by practicing every single day (for real, I lettered something new every day for the first year and a bit).
You can do some basic drills for your lettering, like writing out the alphabet or writing the same word in different styles and seeing what works best for you.
I wish I could do a workshop or a good video tutorial that would help with beginner work but unfortunately I don’t have the resources for that right now :(
You can however check out The Postman’s Knock - Lindsey is amazing and all her advice has really helped me out.
19 notes
·
View notes
Text
#postman#postman tutorial#Postman Tutorial Beginners#postman tutorial for automation#postman tutorial for beginners#postmantutorial#tutorial academy#tutorial for beginners#tutorials
0 notes
Link
Learn CouchDB- A Beginner to Advanced Guide ##UdemyFrancais ##UdemyFreeDiscountCoupons #Advanced #BEGINNER #CouchDB #Guide #Learn Learn CouchDB- A Beginner to Advanced Guide "Learn CouchDB- A Beginner to Advanced Guide" provides basic and advanced concepts of CouchDB. This course is designed for beginners and professionals both. CouchDB is an open source NoSQL database developed by Apache software foundation. It is written in Erlang programming language. "Learn CouchDB- A Beginner to Advanced Guide" course includes all topics of CouchDB such as couchdb fauxton, http api, installation, couchdb vs mongodb, create database, create document, features, introduction, update document, why couchdb Mango query, Postman API, Connectivity with JAVA, PYTHON, PHP etc. Unlike a relational database, a CouchDB database does not store data and relationships in tables. Instead, each database is a collection of independent documents. Each document maintains its own data and self-contained schema. So, Start this course today with Techno Crats. Happy Learning!! Who this course is for: Professionals aspiring to make a career in Big Data and NoSQL Databases 👉 Activate Udemy Coupon 👈 Free Tutorials Udemy Review Real Discount Udemy Free Courses Udemy Coupon Udemy Francais Coupon Udemy gratuit Coursera and Edx ELearningFree Course Free Online Training Udemy Udemy Free Coupons Udemy Free Discount Coupons Udemy Online Course Udemy Online Training 100% FREE Udemy Discount Coupons https://www.couponudemy.com/blog/learn-couchdb-a-beginner-to-advanced-guide/
0 notes
Text
Manual Testing Tutorial - Rahul Shetty Academy
Manual Testing Tutorial - Rahul Shetty Academy
A Learning Path is a selection of courses tied together for learners to progress through, mastering a particular subject or program. It allows you to enroll multiple users in multiple courses at once saving you valuable time.
SDET Automation Engineer – JAVA
If your language of interest is Java, then this is the path you can start from scratch to learn and excel in your QA Automation Career.
For 2-4 Year’s Experience QA Folk’s-
Core Java Basics with detailed understanding on OOPS Concepts.
Start with Selenium- Java UI Automation and understand how to automate Web applications.
Understand the API Core concepts with real use cases.
API Manual testing with various tools like Postman, Soap UI etc.
Basics of SQL.
For 3- 7 Years Experience -
After solid understanding on Selenium and API Testing, (Above 1- 5 points) Focus on Developing Test Automation Frameworks for Selenium and API Testing with Java using TestNG/Junit, Maven, Cucumber (You should work hard in this area for expertise)
Understand Mobile Automation Testing with Appium and ability to design Framework for Android and IOS Applications
At Rahul Shetty Academy You have a special learning Package which will make you java Automation expert on all above Skills from Scratch with real time use cases/Projects.
Below are the Courses included in Package
Free Software Testing Tutorial for Beginners
Core Java Tutorial
Selenium WebDriver with Java – Basics to Advanced + Frameworks
API Automation Testing with Rest Assured + Frameworks
Mobile Automation Testing with Appium + Frameworks
Java SDET Automation Interview Kit (Top 200+ Questions with explanations)
Purchase this Package as 1 Bundle and start Your preparation for Powerful JAVA -SDET Automation Engineer roles.
Software Quality Assurance Engineer
This Path should be chosen by the people who want to master all the core concepts of Software testing (Manual) with real time Projects.
Below are the Skills one should aware if they want to get into any QA Entry Roles or Switch their domain to QA Testing field
Experience – Freshers / 0 – 3 Year’s Experience :
What is Software Testing and its Principles?
How Testing happens in real time Projects. And day to day activities of the Tester
Complete Understanding on Manual Testing Concepts.
How Testing activities are Performed in Agile and Waterfall models.
Agile Scrum Terminologies and the Process followed.
Knowledge on Manual Test Management tools like Jira, Bugzilla, Quality Centre (ALM) etc.,
What are Webservices and understand the core concepts of WebServices and Rest API testing?
SQL Basics and thorough knowledge on SQL Syntaxes to interact with databases.
Identify Security flaws in applications with Security testing skills.
At Rahul Shetty Academy We have a special learning Package which will make you expert on all above Skills from Scratch with real time use cases/Projects.
Below are the Courses included in Package
Master Software Testing from Scratch with real time Examples
Understand the Jira and Agile Scrum
Learn SQL from Scratch
Web Security Testing essentials
WebServices/API Testing with SoapUI + Real time Projects
Purchase this Package as 1 Bundle and start Your preparation to emerge as QA Engineer with Strong foundation.
0 notes
Photo

Hello all! I was originally just going to make a post revewing Crayola Supertips, Tombow Dual Brush Pens, and Artline Stix, but I decided instead that I wanted to add some tips for brush lettering in as well!
Pens/markers that can be used for calligraphy
Crayola Supertips: these markers are very good for beginners as they are very easy to control and basically you just press down as hard as you want to make thicker lines when you’re trying to do calligraphy!! They are also a lot cheaper than both the Tombow’s and the Artline Stix. I absolutely love the Crayola’s as they also have a lot of colors to choose from, and I highly recommend them to anyone wanting to try brush lettering or even anyone who enjoys brush lettering already! Link to purchase (US)
Tombow Dual Brush Pens: these pens are very nice because they have a dual tip, one is fineliner and one is a brush tip! This makes it very useful if you want to brush letter but also write subheaders or even descriptions/notes! I personally love having the ability to have a fineliner in the exact same color as the brush pen! I also love the variety of colors of Tombow’s, but they do fray easily and are quite expensive. They are sold in Michael’s now in the US, but they do sell for around $27 for 10 pens, which is a heftier price than the Crayola markers. Link to purchase (US)
Artline Stix: these markers are very nice as they are very pigmented and they last for a long time and they do not fray as easily as the Tombow’s. They are quite bulky, but they are worth the price! They are cheaper than Tombow’s but are slightly more expensive than Crayola’s. Overall, the color variety is quite limited but because they are such nice colors, I still highly recommend them to anyone brush lettering!! Link to purchase (US)
How to improve your brush lettering
Practice practice practice! I can’t even say this enough but it is so important! My brush lettering has improved tremendously in the past couple of months since I have been practicing a lot!
Dedicate a notebook to practicing this!! I have two notebooks full of brush lettering practice so far, and I know that I will have more eventually.
Don’t be afraid to try out new things, and don’t get discouraged if something doesn’t look exactly how you imagined/wanted it to. This goes along with not comparing yourself to others as this is a good way to make yourself feed bad about your own work. Try to remain positive, and practice until you’re satisfied with the results!
Watch some videos on YouTube to see how people brush letter, and try to mimic them.
@studyquill ‘s brush lettering guide
@jhonstudies ‘s tips for calligraphy
@tombowusa‘s beginners brush lettering tips
handlettering tutorials by apaperellastory on yt
1
2
3
Download some printables to help you practice handlettering.
The Postman’s Knock
Tombow
Pinterest
Printable Crush
A Paperella Story
TheCoffeeMonsterzCo
Etsy (under $25)
That’s all I have for now, I just wanted to share some reviews of the various products I use as well as some tutorials and printables to help you guys out if you want!!!
|| studygram: @studygraycee
#obsidianstudy#study#aesthetic#tombow#artline#heysareena#crayola#studyblr#studygram#study community#studying#studyday#studyspo#student#studyign#aesthetics#study motivation#notes#bullet journal#bujo
10 notes
·
View notes
Text
Make a RESTful CRUD API in Laravel - How to make a Laravel CRUD API #3 - Laravel
Make a RESTful CRUD API in Laravel – How to make a Laravel CRUD API #3 – Laravel
Make a RESTful CRUD API in Laravel – How to make a Laravel CRUD API #3 – Laravel
[ad_1]
In this tutorial we cover the RESTful api routes with Laravel’s resources and resource collections.
Get the code here:
https://github.com/QuentinWatt/how-to-make-an-api-with-laravel
Follow me on social media:
Twitter: @QuentinWatt
Facebook: @quentinwatt
Instagram: @quentinwatt
Subscribe:
https://www.youtube.com/…
View On WordPress
#api tutorial for beginners step by step#create an api in laravel#crud laravel tutorial#how to make an api for a website#How to make an API with Laravel#laravel api tutorial 5.7#laravel api tutorial for beginners step by step#postman software for api testing#Quentin Watt#restful api laravel tutorial#restful api tutorial#restful api tutorial for beginners#what is an api and how does it work#what is an api for dummies
0 notes
Text
Setting Up An API Using Flask, Google’s Cloud SQL And App Engine
About The Author
Wole Oyekanmi is a data scientist who is working on applying machine learning to consumer finance. When he’s not working, he enjoys drumming up new startup …
More about
Wole
…
Flask makes it possible for developers to build an API for whatever use case they might have. In this tutorial, we’ll learn how to set up Google Cloud, Cloud SQL, and App Engine to build a Flask API. (Cloud SQL is a fully managed platform-as-a-service (PaaS) database engine, and App Engine is a fully managed PaaS for hosting applications.)
A few Python frameworks can be used to create APIs, two of which are Flask and Django. Frameworks comes with functionality that makes it easy for developers to implement the features that users need to interact with their applications. The complexity of a web application could be a deciding factor when you’re choosing which framework to work with.
Django
Django is a robust framework that has a predefined structure with built-in functionality. The downside of its robustness, however, is that it could make the framework too complex for certain projects. It’s best suited to complex web applications that need to leverage the advanced functionality of Django.
Flask
Flask, on the other hand, is a lightweight framework for building APIs. Getting started with it is easy, and packages are available to make it robust as you go. This article will focus on defining the view functions and controller and on connecting to a database on Google Cloud and deploying to Google Cloud.
For the purpose of learning, we’ll build a Flask API with a few endpoints to manage a collection of our favorite songs. The endpoints will be for GET and POST requests: fetching and creating resources. Alongside that, we will be using the suite of services on the Google Cloud platform. We’ll set up Google’s Cloud SQL for our database and launch our app by deploying to App Engine. This tutorial is aimed at beginners who are taking their first stab at using Google Cloud for their app.
Setting Up A Flask Project
This tutorial assumes you have Python 3.x installed. If you don’t, head over to the official website to download and install it.
To check whether Python is installed, launch your command-line interface (CLI) and run the command below:
python -V
Our first step is to create the directory where our project will live. We will call it flask-app:
mkdir flask-app && cd flask-app
The first thing to do when starting a Python project is to create a virtual environment. Virtual environments isolate your working Python development. This means that this project can have its own dependencies, different from other project on your machines. venv is a module that ships with Python 3.
Let’s create a virtual environment in our flask-app directory:
python3 -m venv env
This command creates an env folder in our directory. The name (in this case, env) is an alias for the virtual environment and can be named anything.
Now that we’ve created the virtual environment, we have to tell our project to use it. To activate our virtual environment, use the following command:
source env/bin/activate
You will see that your CLI prompt now has env at the beginning, indicating that our environment is active.
(env) appears before the prompt (Large preview)
Now, let’s install our Flask package:
pip install flask
Create a directory named api in our current directory. We’re creating this directory so that we have a folder where our app’s other folders will reside.
mkdir api && cd api
Next, create a main.py file, which will serve as the entry point to our app:
touch main.py
Open main.py, and enter the following code:
#main.py from flask import Flask app = Flask(__name__) @app.route('/') def home(): return 'Hello World' if __name__ == '__main__': app.run()
Let’s understand what we’ve done here. We first imported the Flask class from the Flask package. Then, we created an instance of the class and assigned it to app. Next, we created our first endpoint, which points to our app’s root. In summary, this is a view function that invokes the / route — it returns Hello World.
Let’s run the app:
python main.py
This starts our local server and serves our app on http://127.0.0.1:5000/. Input the URL in your browser, and you will see the Hello World response printed on your screen.
And voilà! Our app is up and running. The next task is to make it functional.
To call our endpoints, we will be using Postman, which is a service that helps developers test endpoints. You can download it from the official website.
Let’s make main.py return some data:
#main.py from flask import Flask, jsonify app = Flask(__name__) songs = [ { "title": "Rockstar", "artist": "Dababy", "genre": "rap", }, { "title": "Say So", "artist": "Doja Cat", "genre": "Hiphop", }, { "title": "Panini", "artist": "Lil Nas X", "genre": "Hiphop" } ] @app.route('/songs') def home(): return jsonify(songs) if __name__ == '__main__': app.run()
Here, we included a list of songs, including the song’s title and artist’s name. We then changed the root / route to /songs. This route returns the array of songs that we specified. In order to get our list as a JSON value, we JSONified the list by passing it through jsonify. Now, rather than seeing a simple Hello world, we see a list of artists when we access the http://127.0.0.1:5000/songs endpoint.
A get response from Postman (Large preview)
You may have noticed that after every change, we had to restart our server. To enable auto-reloading when the code changes, let’s enable the debug option. To do this, change app.run to this:
app.run(debug=True)
Next, let’s add a song using a post request to our array. First, import the request object, so that we can process incoming request from our users. We’ll later use the request object in the view function to get the user’s input in JSON.
#main.py from flask import Flask, jsonify, request app = Flask(__name__) songs = [ { "title": "Rockstar", "artist": "Dababy", "genre": "rap", }, { "title": "Say So", "artist": "Doja Cat", "genre": "Hiphop", }, { "title": "Panini", "artist": "Lil Nas X", "genre": "Hiphop" } ] @app.route('/songs') def home(): return jsonify(songs) @app.route('/songs', methods=['POST']) def add_songs(): song = request.get_json() songs.append(song) return jsonify(songs) if __name__ == '__main__': app.run(debug=True)
Our add_songs view function takes a user-submitted song and appends it to our existing list of songs.
Post request from Postman (Large preview)
So far, we have returned our data from a Python list. This is just experimental, because in a more robust environment, our newly added data would be lost if we restarted the server. That is not feasible, so we will require a live database to store and retrieve the data. In comes Cloud SQL.
Why Use A Cloud SQL Instance?
According to the official website:
“Google Cloud SQL is a fully-managed database service that makes it easy to set-up, maintain, manage and administer your relational MySQL and PostgreSQL databases in the cloud. Hosted on Google Cloud Platform, Cloud SQL provides a database infrastructure for applications running anywhere.”
This means that we can outsource the management of a database’s infrastructure entirely to Google, at flexible pricing.
Difference Between Cloud SQL And A Self-Managed Compute Engine
On Google Cloud, we can spin up a virtual machine on Google’s Compute Engine infrastructure and install our SQL instance. This means we will be responsible for vertical scalability, replication, and a host of other configuration. With Cloud SQL, we get a lot of configuration out of the box, so we can spend more time on the code and less time setting up.
Before we begin:
Sign up for Google Cloud. Google offers $300 in free credit to new users.
Create a project. This is pretty straightforward and can be done right from the console.
Create A Cloud SQL Instance
After signing up for Google Cloud, in the left panel, scroll to the “SQL” tab and click on it.
Snapshot of GCP services (Large preview)
Cloud SQL’s console page (Large preview)
First, we are required to choose an SQL engine. We’ll go with MySQL for this article.
Creating a new Cloud SQL instance (Large preview)
Next, we’ll create an instance. By default, our instance will be created in the US, and the zone will be automatically selected for us.
Set the root password and give the instance a name, and then click the “Create” button. You can further configure the instance by clicking the “Show configuration options” dropdown. The settings allows you to configure the instance’s size, storage capacity, security, availability, backups, and more. For this article, we will go with the default settings. Not to worry, these variables can be changed later.
It might take a few minutes for the process to finish. You’ll know the instance is ready when you see a green checkmark. Click on your instance’s name to go to the details page.
Now, that we’re up and running, we will do a few things:
Create a database.
Create a new user.
Whitelist our IP address.
Create A Database
Navigate to the “Database” tab to create a database.
Creating a new database on Cloud SQL (Large preview)
Create A New User
Creating a new user on Cloud SQL (Large preview)
In the “Host name” section, set it to allow “% (any host)”.
Whitelist IP Address
You can connect to your database instance in one of two ways. A private IP address requires a virtual private cloud (VPC). If you go for this option, Google Cloud will create a Google-managed VPC and place your instance in it. For this article, we will use the public IP address, which is the default. It is public in the sense that only people whose IP addresses have been whitelisted can access the database.
To whitelist your IP address, type my ip in a Google search to get your IP. Then, go to the “Connections” tab and “Add Network”.
Whitelist your IP address (Large preview)
Connect To The Instance
Next, navigate to the “Overview” panel and connect using the cloud shell.
Cloud SQL dashboard (Large preview)
The command to connect to our Cloud SQL instance will be pre-typed in the console.
You may use either the root user or the user who was created earlier. In the command below, we’re saying: Connect to the flask-demo instance as the user USERNAME. You will be prompted to input the user’s password.
gcloud sql connect flask-demo --user=USERNAME
If you get an error saying that you don’t have a project ID, you can get your project’s ID by running this:
gcloud projects list
Take the project ID that was outputted from the command above, and input it into the command below, replacing PROJECT_ID with it.
gcloud config set project PROJECT_ID
Then, run the gcloud sql connect command, and we will be connected.
Run this command to see the active databases:
> show databases;
Shell output for “show databases” (Large preview)
My database is named db_demo, and I’ll run the command below to use the db_demo database. You might see some other databases, such as information_schema and performance_schema. These are there to store table meta data.
> use db_demo;
Next, create a table that mirrors the list from our Flask app. Type the code below on a notepad and paste it in your cloud shell:
create table songs( song_id INT NOT NULL AUTO_INCREMENT, title VARCHAR(255), artist VARCHAR(255), genre VARCHAR(255), PRIMARY KEY(song_id) );
This code is a SQL command that creates a table named songs, with four columns (song_id, title, artist, and genre). We’ve also instructed that the table should define song_id as a primary key and increment automatically from 1.
Now, run show tables; to confirm that the table has been created.
Shell output for “show tables” (Large preview)
And just like that, we have created a database and our songs table.
Our next task is to set up Google App Engine so that we can deploy our app.
Google App Engine
App Engine is a fully managed platform for developing and hosting web applications at scale. An advantage of deploying to App Engine is that it enables an app to scale automatically to meet incoming traffic.
The App Engine website says:
“With zero server management and zero configuration deployments, developers can focus only on building great applications without the management overhead.”
Set Up App Engine
There are a few ways to set up App Engine: through the UI of Google Cloud Console or through the Google Cloud SDK. We will use the SDK for this section. It enables us to deploy, manage, and monitor our Google Cloud instance from our local machine.
Install Google Cloud SDK
Follow the instructions to download and install the SDK for Mac or Windows. The guide will also show you how to initialize the SDK in your CLI and how to pick a Google Cloud project.
Now that the SDK has been installed, we’re going to go update our Python script with our database’s credentials and deploy to App Engine.
Local Setup
In our local environment, we are going to update the setup to suit our new architecture, which includes Cloud SQL and App Engine.
First, add an app.yaml file to our root folder. This is a configuration file that App Engine requires to host and run our app. It tells App Engine of our runtime and other variables that might be required. For our app, we will need to add our database’s credentials as environment variables, so that App Engine is aware of our database’s instance.
In the app.yaml file, add the snippet below. You will have gotten the runtime and database variables from setting up the database. Replace the values with the username, password, database name, and connection name that you used when setting up Cloud SQL.
#app.yaml runtime: python37 env_variables: CLOUD_SQL_USERNAME: YOUR-DB-USERNAME CLOUD_SQL_PASSWORD: YOUR-DB-PASSWORD CLOUD_SQL_DATABASE_NAME: YOUR-DB-NAME CLOUD_SQL_CONNECTION_NAME: YOUR-CONN-NAME
Now, we are going to install PyMySQL. This is a Python MySQL package that connects and performs queries on a MySQL database. Install the PyMySQL package by running this line in your CLI:
pip install pymysql
At this point, we are ready to use PyMySQL to connect to our Cloud SQL database from the app. This will enable us to get and insert queries in our database.
Initialize Database Connector
First, create a db.py file in our root folder, and add the code below:
#db.py import os import pymysql from flask import jsonify db_user = os.environ.get('CLOUD_SQL_USERNAME') db_password = os.environ.get('CLOUD_SQL_PASSWORD') db_name = os.environ.get('CLOUD_SQL_DATABASE_NAME') db_connection_name = os.environ.get('CLOUD_SQL_CONNECTION_NAME') def open_connection(): unix_socket = '/cloudsql/{}'.format(db_connection_name) try: if os.environ.get('GAE_ENV') == 'standard': conn = pymysql.connect(user=db_user, password=db_password, unix_socket=unix_socket, db=db_name, cursorclass=pymysql.cursors.DictCursor ) except pymysql.MySQLError as e: print(e) return conn def get_songs(): conn = open_connection() with conn.cursor() as cursor: result = cursor.execute('SELECT * FROM songs;') songs = cursor.fetchall() if result > 0: got_songs = jsonify(songs) else: got_songs = 'No Songs in DB' conn.close() return got_songs def add_songs(song): conn = open_connection() with conn.cursor() as cursor: cursor.execute('INSERT INTO songs (title, artist, genre) VALUES(%s, %s, %s)', (song["title"], song["artist"], song["genre"])) conn.commit() conn.close()
We did a few things here.
First, we retrieved our database credentials from the app.yaml file using the os.environ.get method. App Engine is able to make environment variables that are defined in app.yaml available in the app.
Secondly, we created an open_connection function. It connects to our MySQL database with the credentials.
Thirdly, we added two functions: get_songs and add_songs. The first initiates a connection to the database by calling the open_connection function. It then queries the songs table for every row and, if empty, returns “No Songs in DB”. The add_songs function inserts a new record into the songs table.
Finally, we return to where we started, our main.py file. Now, instead of getting our songs from an object, as we did earlier, we call the add_songs function to insert a record, and we call the get_songs function to retrieve the records from the database.
Let’s refactor main.py:
#main.py from flask import Flask, jsonify, request from db import get_songs, add_songs app = Flask(__name__) @app.route('/', methods=['POST', 'GET']) def songs(): if request.method == 'POST': if not request.is_json: return jsonify({"msg": "Missing JSON in request"}), 400 add_songs(request.get_json()) return 'Song Added' return get_songs() if __name__ == '__main__': app.run()
We imported the get_songs and add_songs functions and called them in our songs() view function. If we are making a post request, we call the add_songs function, and if we are making a get request, we call the get_songs function.
And our app is done.
Next up is adding a requirements.txt file. This file contains a list of packages necessary to run the app. App Engine checks this file and installs the listed packages.
pip freeze | grep "Flask\|PyMySQL" > requirements.txt
This line gets the two packages that we are using for the app (Flask and PyMySQL), creates a requirements.txt file, and appends the packages and their versions to the file.
At this point, we have added three new files: db.py, app.yaml, and requirements.txt.
Deploy to Google App Engine
Run the following command to deploy your app:
gcloud app deploy
If it went well, your console will output this:
CLI output for App Engine deployment (Large preview)
Your app is now running on App Engine. To see it in the browser, run gcloud app browse in your CLI.
We can launch Postman to test our post and get requests.
Demonstrating a post request (Large preview)
Demonstrating a get request (Large preview)
Our app is now hosted on Google’s infrastructure, and we can tweak the configuration to get all of the benefits of a serverless architecture. Going forward, you can build on this article to make your serverless application more robust.
Conclusion
Using a platform-as-a-service (PaaS) infrastructure like App Engine and Cloud SQL basically abstracts away the infrastructure level and enables us to build more quickly. As developers, we do not have to worry about configuration, backing up and restoring, the operating system, auto-scaling, firewalls, migrating traffic, and so on. However, if you need control over the underlying configuration, then it might be better to use a custom-built service.
References
(ks, ra, al, il)
Website Design & SEO Delray Beach by DBL07.co
Delray Beach SEO
source http://www.scpie.org/setting-up-an-api-using-flask-googles-cloud-sql-and-app-engine/
source https://scpie.tumblr.com/post/626974453003403264
0 notes
Last Seen Blogs

blurbgreenstars
a tired sports fan

guy-busleeness
SCM fan :3

ask-the-angel-and-raven-blog
We are bored as Hell

foxsoftware934
foxsoftware