#MicroK8s
Text
今日の文書化〜microk8s
Kubernetesの簡易版?
昨日Kubernatesの文書化の際に躓きましたが、気分を変えるためにMicroK8sを設定しました。設定と言ってもUbuntu ServerのインストールオプションでMicroK8sやDockerが選べるようになっていて、インストールが終われば最低限の設定が終わっているという楽なものです。
モノづくり塾のサーバーで動いている資料館。
この手のものはネットを探すといろいろな人が書いているのですが、書いてある通りにやっても自分の環境ではすんなり動かないとか、「これくらいのことはわかってるだろ?」と言わんばかりの難解な記述のものもあって、なかなか良い情報に辿り着くのに苦労することもあります。
今回、公式ドキュメントを読みながら実際にやってみた過程を文書化しました。
View On WordPress
0 notes
Text
Got Canonical?
0 notes
Link
Canonical announced the launch of gopaddle, the Low-Code Internal Developer Platform, as a community addon for MicroK8s edge cloud.
0 notes
Text
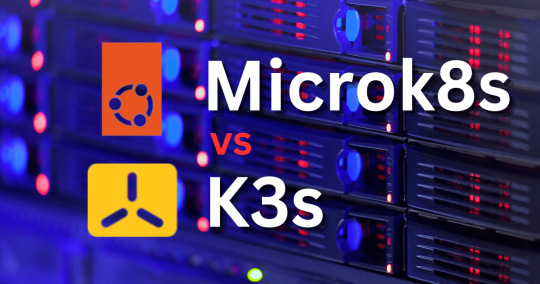
Microk8s vs k3s: Lightweight Kubernetes distribution showdown
Microk8s vs k3s: Lightweight Kubernetes distribution showdown #homelab #kubernetes #microk8svsk3scomparison #lightweightkubernetesdistributions #k3sinstallationguide #microk8ssnappackagetutorial #highavailabilityinkubernetes #k3s #microk8s #portainer
Especially if you are into running Kubernetes in the home lab, you may look for a lightweight Kubernetes distribution. Two distributions that stand out are Microk8s and k3s. Let’s take a look at Microk8s vs k3s and discover the main differences between these two options, focusing on various aspects like memory usage, high availability, and k3s and microk8s compatibility.
Table of contentsWhat is…
View On WordPress
#container runtimes and configurations#edge computing with k3s and microk8s#High Availability in Kubernetes#k3s installation guide#kubernetes cluster resources#Kubernetes on IoT devices#lightweight kubernetes distributions#memory usage optimization#microk8s snap package tutorial#microk8s vs k3s comparison
0 notes
Text
Mikrok8s Automated Kubernetes Install with new Portainer Feature - Virtualization Howto
0 notes
Text
Kubernetes is a free and open-source orchestration tool that has been highly adopted in modern software development. It allows one to automate, scale and manage the application deployments. Normally, applications are run in containers, with the workloads distributed across the cluster. Containers make use of the microservices architecture, where applications are immutable, portable, and optimized for resource usage. Kubernetes has several distributions that include:
OpenShift: this is a Kubernetes distribution developed by RedHat. It can be run both on-premise and in the cloud.
Google Kubernetes Engine: This is a simple and flexible Kubernetes distribution that runs on Google Cloud.
Azure Kubernetes Service: This is a cloud-only Kubernetes distribution for the Azure cloud
Rancher: This Kubernetes distribution has a key focus on multi-cluster Kubernetes deployments. This distribution is similar to OpenShift but it integrates Kubernetes with several other tools.
Canonical Kubernetes: This Kubernetes distribution is developed by the Canonical company(The company that develops Ubuntu Linux). It is an umbrella for two CNF-certified Kubernetes distributions, MicroK8s and Charmed Kubernetes. It can be run both on-premise or in the cloud.
In this guide, we will be learning how to install MicroK8s Kubernetes on Rocky Linux 9 / AlmaLinux 9. MicroK8s is a powerful and lightweight enterprise-grade Kubernetes distribution. It has a small disk and memory footprint but still offers innumerable add-ons that include Knative, Cilium, Istio, Grafana e.t.c This is the fastest multi-node Kubernetes that can work on Windows, Linux, and Mac systems. Microk8s can be used to reduce the complexity and time involved when deploying a Kubernetes cluster.
Microk8s is preferred due to the following reasons:
Simplicity: it is simple to install and manage. It has a single-package install with all the dependencies bundled.
Secure: Updates are provided for all the security issues and can be applied immediately or scheduled as per your maintenance cycle.
Small: This is the smallest Kubernetes distro that can be installed on a laptop or home workstation. It is compatible with Amazon EKS, Google GKE, and Azure AKS, when it is run on Ubuntu.
Comprehensive: it includes an innumerable collection of manifests that are used for common Kubernetes capabilities such as Ingress, DNS, Dashboard, Clustering, Monitoring, and updates to the latest Kubernetes version e.t.c
Current: It tracts the upstream and releases beta, RC, and final bits the same day as upstream K8s.
Now let’s plunge in!
Step 1 – Install Snapd on Rocky Linux 9 / AlmaLinux 9
Microk8s is a snap package and so snapd is required on the Rocky Linux 9 / AlmaLinux 9 system. The below commands can be used to install snapd on Rocky Linux 9 / AlmaLinux 9.
Enable the EPEL repository.
sudo dnf install epel-release
Install snapd:
sudo dnf install snapd
Once installed, you need to create a symbolic link for classic snap support.
sudo ln -s /var/lib/snapd/snap /snap
Export the snaps $PATH.
echo 'export PATH=$PATH:/var/lib/snapd/snap/bin' | sudo tee -a /etc/profile.d/snap.sh
source /etc/profile.d/snap.sh
Start and enable the service:
sudo systemctl enable --now snapd.socket
Verify if the service is running:
$ systemctl status snapd.socket
● snapd.socket - Socket activation for snappy daemon
Loaded: loaded (/usr/lib/systemd/system/snapd.socket; enabled; vendor preset: disabled)
Active: active (listening) since Tue 2022-07-26 09:58:46 CEST; 7s ago
Until: Tue 2022-07-26 09:58:46 CEST; 7s ago
Triggers: ● snapd.service
Listen: /run/snapd.socket (Stream)
/run/snapd-snap.socket (Stream)
Tasks: 0 (limit: 23441)
Memory: 0B
CPU: 324us
CGroup: /system.slice/snapd.socket
Set SELinux in permissive mode:
sudo setenforce 0
sudo sed -i 's/^SELINUX=.*/SELINUX=permissive/g' /etc/selinux/config
Step 2 – Install Microk8s on Rocky Linux 9 / AlmaLinux 9
Once Snapd has been installed, you can easily install Microk8s by issuing the command:
$ sudo snap install microk8s --classic
2022-07-26T10:00:17+02:00 INFO Waiting for automatic snapd restart...
microk8s (1.24/stable) v1.24.3 from Canonical✓ installed
To be able to execute the commands smoothly, you need to set the below permissions:
sudo usermod -a -G microk8s $USER
sudo chown -f -R $USER ~/.kube
For the changes to apply, run the command:
newgrp microk8s
Now verify the installation by checking the Microk8s status
$ microk8s status
microk8s is running
high-availability: no
datastore master nodes: 127.0.0.1:19001
datastore standby nodes: none
addons:
enabled:
ha-cluster # (core) Configure high availability on the current node
disabled:
community # (core) The community addons repository
dashboard # (core) The Kubernetes dashboard
dns # (core) CoreDNS
gpu # (core) Automatic enablement of Nvidia CUDA
helm # (core) Helm 2 - the package manager for Kubernetes
helm3 # (core) Helm 3 - Kubernetes package manager
host-access # (core) Allow Pods connecting to Host services smoothly
hostpath-storage # (core) Storage class; allocates storage from host directory
.....
Get the available nodes:
$ microk8s kubectl get nodes
NAME STATUS ROLES AGE VERSION
master Ready 3m38s v1.24.3-2+63243a96d1c393
Step 3 – Install and Configure kubectl for MicroK8s
Microk8s comes with its own kubectl version to avoid interference with any version available on the system. This is used on the terminal as:
microk8s kubectl
However, Microk8s can be configured to work with your host’s kubectl. First, obtain the Mikrok8s configs using the command:
$ microk8s config
apiVersion: v1
clusters:
- cluster:
certificate-authority-data: LS0tLS1CRUdJTiBDRVJUSUZJQ0FURS0tLS0tCk1JSUREekNDQWZlZ0F3SUJBZ0lVWlZURndTSVFhOU13Rm1VdmR1S09pM0ErY3hvd0RRWUpLb1pJaHZjTkFRRUwKQlFBd0Z6...
server: https://192.168.205.12:16443
name: microk8s-cluster
contexts:
- context:
cluster: microk8s-cluster
user: admin
name: microk8s
current-context: microk8s
......
Install kubectl on Rocky Linux 9 / AlmaLinux 9 using the command:
curl -LO https://storage.googleapis.com/kubernetes-release/release/`curl -s https://storage.googleapis.com/kubernetes-release/release/stable.txt`/bin/linux/amd64/kubectl
sudo chmod +x kubectl
sudo mv kubectl /usr/local/bin/
Generate the required config:
cd $HOME
microk8s config > ~/.kube/config
Get the available nodes:
$ kubectl get nodes
NAME STATUS ROLES AGE VERSION
master Ready 5m35s v1.24.3-2+63243a96d1c393
Step 4 – Add Nodes to the Microk8s Cluster
For improved performance and high availability, you can add nodes to the Kubernetes cluster.
On the master node, allow the required ports through the firewall:
sudo firewall-cmd --add-port=25000/tcp,16443/tcp,12379/tcp,10250/tcp,10255/tcp,10257/tcp,10259/tcp --permanent
sudo firewall-cmd --reload
Also, generate the command to be used by the nodes to join the cluster;
$ microk8s add-node
microk8s join 192.168.205.12:25000/17244dd7c3c8068753fe8799cf72f2ac/976e1522f4b6
Use the '--worker' flag to join a node as a worker not running the control plane, eg:
microk8s join 192.168.205.12:25000/17244dd7c3c8068753fe8799cf72f2ac/976e1522f4b6 --worker
If the node you are adding is not reachable through the default interface you can use one of the following:
microk8s join 192.168.205.12:25000/17244dd7c3c8068753fe8799cf72f2ac/976e1522f4b6
Install and configure Microk8s on the Nodes
You need to install Microk8s on the nodes just as we did in steps 1 and 2. After installing Microk8s on the nodes, run the following commands:
export OPENSSL_CONF=/var/lib/snapd/snap/microk8s/current/etc/ssl/openssl.cnf
sudo firewall-cmd --add-port=25000/tcp,10250/tcp,10255/tcp --permanent
sudo firewall-cmd --reload
Now use the generated command on the master to join the nodes to the Microk8s cluster.
$ microk8s join 192.168.205.12:25000/17244dd7c3c8068753fe8799cf72f2ac/976e1522f4b6 --worker
Contacting cluster at 192.168.205.12
The node has joined the cluster and will appear in the nodes list in a few seconds.
Currently this worker node is configured with the following kubernetes API server endpoints:
- 192.168.205.12 and port 16443, this is the cluster node contacted during the join operation.
If the above endpoints are incorrect, incomplete or if the API servers are behind a loadbalancer please update
/var/snap/microk8s/current/args/traefik/provider.yaml
Once added, check the available nodes:
$ kubectl get nodes
NAME STATUS ROLES AGE VERSION
master Ready 41m v1.24.3-2+63243a96d1c393
node1 Ready 7m52s v1.24.3-2+63243a96d1c393
To remove a node from a cluster, run the command below on the node:
microk8s leave
Step 5 – Deploy an Application with Microk8s
Deploying an application in Microk8s is similar to other Kubernetes distros. To demonstrate this, we will deploy the Nginx application as shown:
$ kubectl create deployment webserver --image=nginx
deployment.apps/webserver created
Verify the deployment:
$ kubectl get pods
NAME READY STATUS RESTARTS AGE
webserver-566b9f9975-cwck4 1/1 Running 0 28s
Step 6 – Deploy Kubernetes Services on Microk8s
For the deployed application to be accessible, we will expose our created pod using NodePort as shown:
$ kubectl expose deployment webserver --type="NodePort" --port 80
service/webserver exposed
Get the service port:
$ kubectl get svc webserver
NAME TYPE CLUSTER-IP EXTERNAL-IP PORT(S) AGE
webserver NodePort 10.152.183.89 80:30281/TCP 29s
Try accessing the application using the exposed port via the web.
Step 7 – Scaling applications on Microk8s
Scaling is defined as creating replications on pods/deployments for high availability. This feature is highly embraced in Kubernetes, allowing it to handle as many requests as possible.
To create replicas, use the command with the syntax below:
$ kubectl scale deployment webserver --replicas=4
deployment.apps/webserver scaled
Get the pods:
$ kubectl get pods
NAME READY STATUS RESTARTS AGE
webserver-566b9f9975-cwck4 1/1 Running 0 8m40s
webserver-566b9f9975-ts2rz 1/1 Running 0 28s
webserver-566b9f9975-t656s 1/1 Running 0 28s
webserver-566b9f9975-7z6zq 1/1 Running 0 28s
It is that simple!
Step 8 – Enabling the microk8s Dashboard
The dashboard provides an easy way to manage the Kubernetes cluster. Since it is an add-on, we need to enable it by issuing the command:
$ microk8s enable dashboard dns
Infer repository core for addon dashboard
Infer repository core for addon dns
Enabling Kubernetes Dashboard
Infer repository core for addon metrics-server
Enabling Metrics-Server
serviceaccount/metrics-server created
clusterrole.rbac.authorization.k8s.io/system:aggregated-metrics-reader created
clusterrole.rbac.authorization.k8s.io/system:metrics-server created
rolebinding.rbac.authorization.k8s.io/metrics-server-auth-reader created
clusterrolebinding.rbac.authorization.k8s.io/metrics-server:system:auth-delegator created
......
Create the token to be used to access the dashboard.
kubectl create token default
Verify this:
$ kubectl get services -n kube-system
NAME TYPE CLUSTER-IP EXTERNAL-IP PORT(S) AGE
metrics-server ClusterIP 10.152.183.200 443/TCP 77s
kubernetes-dashboard ClusterIP 10.152.183.116 443/TCP 58s
dashboard-metrics-scraper ClusterIP 10.152.183.35 8000/TCP 58s
kube-dns ClusterIP 10.152.183.10 53/UDP,53/TCP,9153/TCP 53
Allow the port(10443) through the firewall:
sudo firewall-cmd --permanent --add-port=10443/tcp
sudo firewall-cmd --reload
Now forward the traffic to the local port(10443) using the command:
kubectl port-forward -n kube-system service/kubernetes-dashboard --address 0.0.0.0 10443:443
Now access the dashboard using the URL https://127.0.0.1:10443. In some browsers such as chrome, you may find an error with invalid certificates when accessing the dashboard remotely. On Firefox, proceed as shown
Provide the generated token to sign in. On successful login, you will see the Microk8s dashboard below.
From the above dashboard, you can easily manage your Kubernetes cluster.
Step 9 – Enable In-built storage on Microk8s
Microk8s comes with an in-built storage addon that allows quick creation of PVCs. To enable and make this storage available to use by pods, execute the below commands:
export LD_LIBRARY_PATH="$LD_LIBRARY_PATH:/lib64"
microk8s enable hostpath-storage
Once enabled, verify if the hostpath provisioned has been created as a pod.
$ kubectl -n kube-system get pods
NAME READY STATUS RESTARTS AGE
calico-kube-controllers-7f85f9c7b9-v7lk5 1/1 Running 0 3h42m
metrics-server-5f8f64cb86-82nn2 1/1 Running 1 (165m ago) 165m
calico-node-hljcb 1/1 Running 0 3h13m
calico-node-sjzd2 1/1 Running 0 3h9m
coredns-66bcf65bb8-m6x44 1/1 Running 0 163m
dashboard-metrics-scraper-6b6f796c8d-scwtx 1/1 Running 0 163m
kubernetes-dashboard-765646474b-256qb 1/1 Running 0 163m
hostpath-provisioner-f57964d5f-sh4wj 1/1 Running 0 24s
Also, confirm that a storage class has been created:
$ kubectl get sc
NAME PROVISIONER RECLAIMPOLICY VOLUMEBINDINGMODE ALLOWVOLUMEEXPANSION AGE
microk8s-hostpath (default) microk8s.io/hostpath Delete WaitForFirstConsumer false 83s
Now we can use the storage class above to create PVCs.
Create a Persistent Volume
To demonstrate if the storage class is working properly, create a PV using it.
$ vim sample-pv.yml
apiVersion: v1
kind: PersistentVolume
metadata:
name: sampe-pv
spec:
# Here we are asking to use our custom storage class
storageClassName: microk8s-hostpath
capacity:
storage: 5Gi
accessModes:
- ReadWriteOnce
hostPath:
# Should be created upfront
path: '/data/demo'
Create the hostpath with the required permissions.
sudo mkdir -p /data/demo
sudo chmod 777 /data/demo
sudo chcon -Rt svirt_sandbox_file_t /data/demo
Create the PV:
kubectl create -f sample-pv.yml
Verify the creation:
$ kubectl get pv
NAME CAPACITY ACCESS MODES RECLAIM POLICY STATUS CLAIM STORAGECLASS REASON AGE
sampe-pv 5Gi RWO Retain Available microk8s-hostpath 7s
Create a Persistent Volume Claim
Once the PV has been created, now create the PVC using the StorageClass:
vim sample-pvc.yml
Add the below line to the file:
apiVersion: v1
kind: PersistentVolumeClaim
metadata:
name: my-pvc
namespace: default
spec:
# Once again our custom storage class here
storageClassName: microk8s-hostpath
accessModes:
- ReadWriteOnce
resources:
requests:
storage: 5Gi
Apply the manifest:
kubectl create -f sample-pvc.yml
Verify the creation:
$ kubectl get pvc
NAME STATUS VOLUME CAPACITY ACCESS MODES STORAGECLASS AGE
my-pvc Pending microk8s-hostpath 13s
Deploy an application that uses the PVC.
$ vim pod.yml
apiVersion: v1
kind: Pod
metadata:
name: task-pv-pod
spec:
volumes:
- name: task-pv-storage
persistentVolumeClaim:
claimName: my-pvc
containers:
- name: task-pv-container
image: nginx
ports:
- containerPort: 80
name: "http-server"
volumeMounts:
- mountPath: "/usr/share/nginx/html"
name: task-pv-storage
Apply the manifest:
kubectl create -f pod.yml
Now verify if the PVC is bound:
$ kubectl get pv
NAME CAPACITY ACCESS MODES RECLAIM POLICY STATUS CLAIM STORAGECLASS REASON AGE
sampe-pv 5Gi RWO Retain Bound default/my-pvc microk8s-hostpath 7m23s
$ kubectl get pvc
NAME STATUS VOLUME CAPACITY ACCESS MODES STORAGECLASS AGE
my-pvc Bound sampe-pv 5Gi RWO microk8s-hostpath 98s
Step 10 – Enable Logging With Prometheus and Grafana
Microk8s has the Prometheus add-on that can be enabled. This tool offers visualization of logs through the Grafana interface.
To enable the add-on, execute:
$ microk8s enable prometheus
Infer repository core for addon prometheus
Adding argument --authentication-token-webhook to nodes.
Configuring node 192.168.205.13
Restarting nodes.
Configuring node 192.168.205.13
Infer repository core for addon dns
Addon core/dns is already enabled
.......
After a few minutes, verify that the required pods are up:
$ kubectl get pods -n monitoring
NAME READY STATUS RESTARTS AGE
prometheus-adapter-85455b9f55-w975k 1/1 Running 0 89s
node-exporter-jnmmk 2/2 Running 0 89s
grafana-789464df6b-kt5hr 1/1 Running 0 89s
prometheus-adapter-85455b9f55-2g9rs 1/1 Running 0 89s
blackbox-exporter-84c68b59b8-5lkw4 3/3 Running 0 89s
prometheus-k8s-0 2/2 Running 1 (43s ago) 77s
node-exporter-dzj66 2/2 Running 0 89s
prometheus-operator-65cdb77c59-gfk4v 2/2 Running 0 89s
kube-state-metrics-55b87f58f6-m6rnv 3/3 Running 0 89s
alertmanager-main-0 2/2 Running 0 78s
To access the Prometheus and Grafana services, you need to forward them:
$ kubectl get services -n monitoring
NAME TYPE CLUSTER-IP EXTERNAL-IP PORT(S) AGE
prometheus-operator ClusterIP None 8443/TCP 2m31s
alertmanager-main ClusterIP 10.152.183.136 9093/TCP 2m22s
blackbox-exporter ClusterIP 10.152.183.174 9115/TCP,19115/TCP 2m21s
grafana ClusterIP 10.152.183.248 3000/TCP 2m20s
kube-state-metrics ClusterIP None 8443/TCP,9443/TCP 2m20s
node-exporter ClusterIP None 9100/TCP 2m20s
prometheus-adapter ClusterIP 10.152.183.173 443/TCP 2m20s
prometheus-k8s ClusterIP 10.152.183.201 9090/TCP 2m19s
alertmanager-operated ClusterIP None 9093/TCP,9094/TCP,9094/UDP 93s
prometheus-operated ClusterIP None 9090/TCP 93s
Allow the ports intended to be used through the firewall:
sudo firewall-cmd --add-port=9090,3000/tcp --permanent
sudo firewall-cmd --reload
Now expose the ports:
kubectl port-forward -n monitoring service/prometheus-k8s --address 0.0.0.0 9090:9090
Access the Prometheus using the URL http://IP_Address:9090
For Grafana, you also need to expose the port:
kubectl port-forward -n monitoring service/grafana --address 0.0.0.0 3000:3000
Now access the service using the URL http://IP_Address:3000
Login with the default credentials:
username=admin
Password=admin
Once logged in, change the password.
Now access the dashboard and visualize graphs. Navigate to Dashboards-> Manage-> Default and select the dashboard to load.
For Kubernetes API
For the Kubernetes Namespace Networking
Final Thoughts
That marks the end of this detailed guide on how to install MicroK8s Kubernetes on Rocky Linux 9 / AlmaLinux 9. You are also equipped with the required knowledge on how to use Microk8s to set up and manage a Kubernetes cluster.
0 notes
Text
Eventscripts effects

Module._compile (internal/modules/cjs/loader.js:1072:14)Īt Object.Module._extensions.js (internal/modules/cjs/loader.js:1101:10)Īt Module.load (internal/modules/cjs/loader.js:937:32)Īt Function.Module._load (internal/modules/cjs/loader.js:778:12)Īt Hook.eval (eval at create :365:1)Īt Hook.CALL_DELEGATE Compiler. Function.Module._resolveFilename (internal/modules/cjs/loader.js:889:15)Īt Function.Module._load (internal/modules/cjs/loader.js:745:27)Īt Module.require (internal/modules/cjs/loader.js:961:19)Īt require (internal/modules/cjs/helpers.js:92:18)Īt Object. An EventScripts library that provides new effects. wait until bundle finishedĩ% setup compilation DocGenPlugininternal/modules/cjs/loader.js:892Įrror: Cannot find module 'webpack/lib/util/makeSerializable.js' (node:2020) DeprecationWarning: -static-dir CLI flag is deprecated, see: Kube-system replicaset.apps/dashboard-metrics-scraper-58d4977855 1 1 1 21m Kube-system replicaset.apps/kubernetes-dashboard-59699458b 1 1 1 21m Kube-system replicaset.apps/metrics-server-85df567dd8 1 1 1 22m Kube-system replicaset.apps/calico-kube-controllers-f744bf684 1 1 1 23m Kube-system replicaset.apps/calico-kube-controllers-69d7f794d9 0 0 0 23m Kube-system deployment.apps/dashboard-metrics-scraper 1/1 1 1 22m Kube-system deployment.apps/kubernetes-dashboard 1/1 1 1 22m Kube-system deployment.apps/metrics-server 1/1 1 1 22m Kube-system deployment.apps/calico-kube-controllers 1/1 1 1 23m NAMESPACE NAME READY UP-TO-DATE AVAILABLE AGE Ingress daemonset.apps/nginx-ingress-microk8s-controller 1 1 1 1 1 22m Kube-system daemonset.apps/calico-node 1 1 1 1 1 kubernetes.io/os=linux 23m NAMESPACE NAME DESIRED CURRENT READY UP-TO-DATE AVAILABLE NODE SELECTOR AGE Kube-system service/dashboard-metrics-scraper ClusterIP 10.152.183.197 8000/TCP 22m Kube-system service/kubernetes-dashboard ClusterIP 10.152.183.103 443/TCP 22m Kube-system service/metrics-server ClusterIP 10.152.183.81 443/TCP 22m NAMESPACE NAME TYPE CLUSTER-IP EXTERNAL-IP PORT(S) AGEĭefault service/kubernetes ClusterIP 10.152.183.1 443/TCP 23m Ingress pod/nginx-ingress-microk8s-controller-qf5pm 1/1 Running 0 21m Kube-system pod/dashboard-metrics-scraper-58d4977855-94nsp 1/1 Running 0 21m Kube-system pod/kubernetes-dashboard-59699458b-pb5jb 1/1 Running 0 21m Kube-system pod/metrics-server-85df567dd8-jd6gj 1/1 Running 0 22m Kube-system pod/calico-kube-controllers-f744bf684-d77hv 1/1 Running 0 23m Kube-system pod/calico-node-2jltr 1/1 Running 0 23m
0 notes
Text
Canonical Kubernetes 1.25 is now generally available
Canonical Kubernetes 1.25 is now generally available
The Canonical Kubernetes team is delighted to announce that Canonical Kubernetes 1.25 is now generally available, with Charmed Kubernetes joining our Microk8s release last week, following the release of upstream Kubernetes on 23 August.
We consistently follow the upstream release cadence to provide our users and customers with the latest improvements and fixes, together with security maintenance…
View On WordPress
0 notes
Text
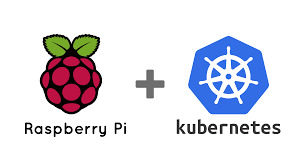
How to install Kubernetes on Raspberry Pi ?
How to install Kubernetes on Raspberry Pi ?
Install Kubernetes on Raspberry Pi – Does this sounds crazy ?.
This is possible.
Now there are several light weight, low footprint Kubernetes platforms available in the market that can be installed in low configuration devices. One of the best and easy way to set up a single node miniature version of Kubernetes is using MicroK8s.
Microk8s is an opensource version of fully conformant Kubernetes…
View On WordPress
1 note
·
View note
Text
How to deploy the Kubernetes WebUI with MicroK8s
How to deploy the Kubernetes WebUI with MicroK8s
Looking for a web-based tool to manage Microk8s? Look no further than the Kubernetes dashboard.
How to deploy the Kubernetes WebUI with MicroK8s
Looking for a web-based tool to manage Microk8s? Look no further than the Kubernetes dashboard.
If you have anything to do with IT, Kubernetes needs no introduction. However, you might not know that there’s a…
View On WordPress
0 notes
Photo
Comprehensive Kubernetes tutorial.
0 notes
Link
MicroK8s is an upstream Kubernetes deployment designed to run on Linux, Windows, and macOS. It is lightweight, fast, and secure, making it ideal for development, testing, and edge deployments. MicroK8s provides a single-node Kubernetes cluster fully compliant with upstream Kubernetes and runs the latest stable version of Kubernetes. In addition, it comes with a range of add-ons, including Helm, Istio, Knative, CoreDNS, GPU support, and many other features. Combining MicroK8s with Portainer will provide a perfect deployment environment for us. Please read this article to know more about them.
0 notes
Text
Kubernetes Persistent Volume Setup with Microk8s Rook and Ceph
Kubernetes Persistent Volume Setup with Microk8s Rook and Ceph @vexpert #vmwarecommunities #homelab #Kubernetespersistentvolumes #persistentvolumeclaims #storageclassesinKubernetes #accessmodes #kubernetes #kubernetesstorage #ceph #rook #blockstorage
Kubernetes persistent volume management is a cornerstone of modern container orchestration. Utilizing persistent storage can lead to more resilient and scalable applications. This guide delves into an experiment using Microk8s, Ceph, and Rook to create a robust storage solution for your Kubernetes cluster.
Table of contentsWhat is a Kubernetes Persistent Volume?Understanding Persistent…
View On WordPress
0 notes
Text
Techshort: What is microk8s?
Techshort: What is microk8s? | Just what I know today -- I'll know more tomorrow #k8s #linux #kubernetes #docker #snap #ubuntu
microk8s is Kubernetes, installed locally! microk8s is designed to be a fast and lightweight upstream Kubernetes install isolated from your host but not via a virtual machine. This isolation is achieved by packaging all the upstream binaries for Kubernetes, Docker.io, iptables, and CNI in a single appliication container
What I have learned is that if you have been a user of Docker then
Kub…
View On WordPress
0 notes
Text
The journey into the land of microservices where most people concur that it is paved with the warmth of glory can be hard to go through. As the philosophies, tools, skills and technologies continue to mature, the path to the “land of glory” becomes clearer and clearer as the thicket lightens and the lights shines the way.
To add another candle into the already bright illumination, we take this chance to compare k0s vs k3s vs microk8s Kubernetes Distributions that continue to inspire more adoption of Kubernetes/Microservices into organizations as well as personal projects. Anyone who has been keen on learning Kubernetes and all matters Microservices can attest that they have come across those three names before and in case they caused whirlpools of dubiety, this article attempts to clear off smog off.
We are going to compare k0s, k3s and microk8s by looking at what they are offering and what they are about in general. So pick your favorite beverage and keep sipping it as we roll down this hill step by step. Let us first define them and then take a close look at what their pockets are carrying. Here we go.
k0s Kubernetes Distribution
From its main website, k0s is the simple, solid & certified Kubernetes distribution that works on any infrastructure: public & private clouds, on-premises, edge & hybrid. It’s 100% open source & free. The zero in its name comes from the point that developer friction is reduced to zero, allowing anyone, with no special skills or expertise in Kubernetes to easily get started.
k3sKubernetes Distribution
Adapted from Rancher, K3s is an official CNCF sandbox project that delivers a lightweight yet powerful certified Kubernetes distribution designed for production workloads across resource-restrained, remote locations or on IoT devices. Kubernetes is a 10-letter word stylized as K8s. So something half as big as Kubernetes would be a 5-letter word stylized as K3s. With that, the 3 in the name is explained thus.
Microk8sKubernetes Distribution
Derived from MicroK8s main docs web page, MicroK8s is the smallest, fastest, fully-conformant Kubernetes that tracks upstream releases and makes clustering trivial. MicroK8s is great for offline development, prototyping, and testing. Use it on a VM as a small, cheap, reliable k8s for CI/CD. It is also the best production grade Kubernetes for appliances. Develop IoT apps for k8s and deploy them to MicroK8s on your Linux boxes.
k0s vs k3s vs microk8s – Detailed Comparison Table
For ease of reading, we decided that a table will be good for easier comparison. Let us take a look at what they have to offer below.
Feature
k0s
k3s
microk8s
Licensing
Completely Open Source
Completely Open Source
Completely Open Source
Packaging
k0s is distributed as a single binary with minimal host OS dependencies besides the host OS kernel
Packaged as a single binary.
MicroK8s is a Kubernetes cluster delivered as a single snap package.
Kubernetes Versions
v1.20 and v1.21
Latest release updates Kubernetes to v1.22.1
Kubernetes v1.22, v1.21
Container Runtime
ContainerD (default)
ContainerD (default)
ContainerD is the container runtime used by MicroK8s
Supported Host OS
Linux (kernel v3.10 or newer) Windows Server 2019 (experimental)
K3s is expected to work on most modern Linux systems
Windows 10, Linux, macOS
Control Plane Storage Options
In-Cluster Elastic Etcd with TLS (default), In-Cluster SQLite (default for single node), External PostgreSQL, External MySQL
sqlite3 is the default storage mechanism. etcd3, MySQL, Postgres also still available
MicroK8s supports high availability using Dqlite as the datastore for cluster state.
Built-In Security Features
RBAC, Support OpenID Providers, Pod Security Policies, Network Policies, Micro VM Runtimes (coming soon), Control Plane Isolation
Secure by default with reasonable defaults for lightweight environments
Secure by default with reasonable defaults for lightweight environments
Supported CNI Providers
Kube-Router (default), Calico or Custom
K3s will run with flannel by default as the CNI, using VXLAN as the default backend. Custom supported as well
Flanneld runs if ha-cluster is not enabled. If ha-cluster is enabled, calico is run instead.
Supported Machine Architectures
x86-64, ARM64, ARMv7
Latest release supports x86_64, ARMv7, and ARM64
x86_64, ARMv7, and ARM64
Backing Company
Mirantis
Rancher
Canonical
Addons
Minimum Addons
Traefik, Helm,LB
Dashboard, Ingress, DNS, and more
Conclusion
Kubernetes has managed to do what most platforms in the past have been trying to accomplish. It has made the deployment of applications as easy and as flexible as possible. It has other added advantages and benefits such as self-healing, ease of monitoring, ease of deployment, complex configuration, orchestration, security, deployment at scale among many other benefits. k0s, k3s and microk8s have come in full force to make the deployment of Kubernetes as easy for every developer out there who would wish to start deploying microservices.
We encourage you to give the three Kubernetes distributions a try and get a feel of what works for you. In the end, we would wish to thank all of you for your generosity, your support and feedback. We wish you the best in your pursuits.
Guides you might enjoy
How To Install MicroK8s Kubernetes Cluster on CentOS 8
Deploy Lightweight Kubernetes with MicroK8s and Snap
Deploy Kubernetes Cluster on Linux With k0s
Install Kubernetes Cluster on Ubuntu using K3s
Create Kubernetes Service / User Account restricted to one Namespace
0 notes
Last Seen Blogs

hilterman44
Seeking for my special taste

meimi13agreste
Meimi the G.0.A.T

free-if-we-want-it
I'll meet you at the divide to break the spell

yoonjinlibrary
Yoonjin Library

sensecause60
The Numerous Benefits Of Peptides.