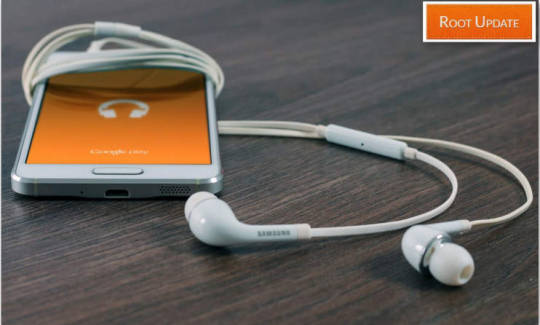
#How to fix Samsung keyboard not working properly
Link
#Keyboard not working cannot enter password on Samsung#How to fix Samsung keyboard not working properly#Solved Samsung phone keyboard not working#FIXED: Samsung phone keyboard not responding#Fix unfortunately Samsung keyboard has stopped#Samsung keyboard not working tablet#Samsung tab S7/S6/S4 keyboard not working#Samsung S20/S20 FE/S9/S7/J7 keyboard not working#Samsung A50/A51/A71/A70 keyboard not working#Why is my Samsung keyboard not working?
0 notes
Text
Mobile phone repairing
Mobile phone repairing
Mobile phones are very delicate devices and they need to be use carefully. Now every single person on earth uses mobile phones and people usually do their day to day works with the help of mobile phones. Mobile phones are now become the necessary part of the human life and people today can’t live without their phone. Mobile phone becomes very useful device for communication and working; we can send messages and make calls to our friends whenever we want just with few clicks on our smart phones, today with developing technology with this small portable device we can do a lot of things the inventor of the mobile phones can’t even imagine of doorstep mobile repair .
In 2000s, many company launched their smart phones in the market. Companies like Blackberry, Nokia and Samsung launched their smart phones that support various other services other than just making calls, like text messaging, MMS, camera, multimedia functionality (include music, gaming, video), wireless internet support and browsing function. Smart phones also now support the advance sensors like magnetometer, accelerometer, proximity sensors, barometer, gyroscope and it also include the function to support wireless communication like Bluetooth, Wi-Fi and satellite navigation. In 2007, Apple launched their revolutionary smart phones iPhone. People suddenly became crazy for the iPhone because of its functions and designs and it became the game changer in the mobile phone industry for the other companies. iPhone featured thin, slate-like design form, capacitive screen with multi-touch gestures instead of physical keyboards, and it also provide facility to download or purchase additional applications from the centralized store, cloud storage is provided to the users of iPhones for storing and keep their personal data safe and can retrieve it back, virtual assistants. apple iphone repair in gurgaon
First iPhone was launched on 29 June, 2007 with the new Apple’s i-OS operating system software and new hardware iterations. The hardware of the phone such as screen, camera, battery, audio and SIM card insertion is new to the former basic smart phone designs. The screen of the first five generations is a 9 cm liquid crystal display with scratch-resistant glass; the capacitive touch-screen is designed for bare finger or multi finger touch sensing. The initial model of the phones included the LCD screens. iPhone X is the first phone of the Apple with OLED screen display. The phone only contains one button that is directly below the screen and called home button and it also enable the finger print sensor on the phone. The new iPhone X doesn’t have any home button but instead it has Face ID that requires user’s facial recognition to unlock the phone. iphone repair gurgaon
The iPhone feature many number of sensors which are used to adjust screen, enable motion-controlled gaming, location based services, authenticate purchases by the apple store and unlocking the phone. Also other sensor as proximity sensor, ambient light sensor, accelerometer, finger print sensor, barometer, facial recognition sensor which makes the iPhone revolutionary in the mobile industry. The iPhone feature internal rechargeable li-ion battery. The SIM card of the phone is inserted into a slot that is on the top of the device. The SIM tray can be ejected with a paper clip or the SIM ejector tool. The operating device of the phone is i-OS, it is a variant of the Darwin operating system core found in macOS. Apple provides free updates to the operating system for the iPhone either wirelessly (through Wi-Fi), or through iTunes. Major new updates have historically accompanied new models. The operating system size depends on the version.
iPhones being so revolutionary and game changer phones in the mobile industry. The iPhone also needs to be handled with more care, because the repairing of the iPhones are not very easy and it does cost the user a lot of money to get it repair in the perfect condition. Generally, iPhones can’t be repair on any mobile repairing shop in the market. The user’s needs to take the damaged phone directly to the Apple store and certified stores of the Apple, where the trained and skilled people or engineers of hardware and software look at the problem and can repair it perfectly. The common iPhone problem people face are cracked and broken screen, this the most common problem among the users of not only iPhone but the other phones also. The screen can be replaced by the repairer but the original screen of the iPhone is very costly and it doesn’t easily available in any mobile repair shop, people only have to go to the Apple store to get fix their iPhone screen replaced with the original and get it check that it is working properly.
Water damage is the second most common problem of the iPhone user’s. The former model of iPhone’s (former than iPhone 7) are not water resistance, so if the iPhone any how gets into the contact of the water, it probably be the chances of stop working. If the iPhone get in contact of the water the first thing the user can do is to wipe out the excess water and try not to turn on the phone because it can cause short-circuit on the phone. And take the phone as soon as possible to the certified service center to get it repaired. Sometimes the iPhone screen get frozen and stop functionally at all, in this situation you should try hard reset by holding the home button (or volume button is new iphones) and sleep/wake button at the same time. Battery issues in the Iphone is also very common like slow charging of the iPhone and rapid battery drain, the solution for this one is to turn off the apps that the user is not using on the iPhone and if the battery is draining so than casual so should get the battery of the iPhone replaced.
iPhones are very famous in the mobile phone market, they are status symbol for the people. But using iPhones are really very easy and it should be handled with care because if the iPhone got damaged or start showing any kind problem, it is not very easy to get it repair, the user have to take it to the certified Apple store only to get the phone perfectly repair and to get its original parts replacement.
1 note
·
View note
Text
Sky Go Macbook

Some things are just made to be watched on a big screen. So, when it comes to Sky Go, there are times you want to ditch that laptop, tablet or smartphone and kick back in front of a TV. Here’s how to stream Sky Go on your TV.
Sky Go has been around for some time now and it’s gone through several iterations, including some confusing crossovers with the Sky Q app. The app’s main function is letting you watch your Sky package over the internet – a super useful feature when you’re away from home or just not in the same room as your Sky box.
Help with the new Sky Go app, including how to set up Sky Go, watch Sky Go, fix a problem or manage devices and settings. Then go to Roaming and delete the Sky and Sky Go folders. Download the Sky Go app from the official Sky website. Then open the downloaded file and follow the on-screen instructions to install the app. B) If you’re on Mac. On your desktop, click Go and click Applications. Remove the Sky Go app. Go back to your desktop, then click Go and click.
Related: Read our full Sky Q review
While being able to watch Sky on your Android or iOS device – from a Samsung Galaxy phone to an iPad – will be a marvel for some, sometimes it just isn’t good enough. The heart-pounding action scenes of Game of Thrones or Gangs of London on even the largest mobile device just won’t do.

We’ve put together this handy guide to show you just how to watch Sky Go on a TV.
Related: What do you think is best streaming service? Vote now
How do I stream Sky Go to my TV?
Kicking things off on a bit of a downer, the simple answer is you can’t. Never fear, you can get Sky Go on a TV using a good ol’ cable.
Unfortunately, Sky is yet to add any kind of casting function to the Sky Go app – as you can do with other streaming services like Netflix or Amazon – and this means there’s no way to shift the app’s mobile content from your phone or tablet to a TV. A lack of a Sky Go app on smart TVs doesn’t help the situation either.
Sky Devices Os
Instead, you’ll need to grab your laptop and download Sky Go if you haven’t already. The next step is to check what connections your laptop has and, fingers crossed, it has an HDMI port and you’ve got a handy HDMI cable lying around.
Other solutions include a VGA/DVI connection on some older machines or a more flexible Thunderbolt port, but HDMI is the simplest way of going about things. Here’s exactly how to do it:
Open the Sky Go app on your laptop
Find what you want to watch and go fullscreen
Attach the HDMI cable to your laptop
Plug the other end into a free HDMI port on the back of the TV
Make sure you are on the correct HDMI input on the TV and you are all set
Having issues with your Sky Go television app? You’re not the only one! Many Sky Go users are reporting the problem that their app is not working properly. Some users see an error tells them what happened, but for many their program just stop working.
This is very frustrating! You can’t watch your programs because of these issues. But don’t worry. It can be fixed…
Fixes to try
The following are a few methods that have helped many Sky Go users. You may not have to try them all; just work your way down the list until you find the one that works for you.
Save up to $100 on Laptop
Sky Go Macbook To Tv
Take good advantage of this link to get a great discount instantly when placing an order at BestBuy.
Method 1: Close the Cisco VideoGuard Monitor process
Your Sky Go app may stop working because there’re issues with the Cisco VideoGuard Monitor process running in the background. You should try closing the process and see if this helps you fix your issue.
a) If you are on Windows:
Press the Ctrl, Shift and Esc keys on your keyboard at the same time to open Task Manager.
Right click the CiscoVideoGuardMonitor process and click End task/End Process.
b)If you’re using a Mac computer:
On your desktop, click Go, then click Utilities.
Double click Activity Monitor.
Click CiscoVideoGuardMonitor, then click the quit button.
Now check to see if your Sky Go app is working properly. Hopefully it is. But if not, you may need to try other fixes listed below.
Method 2: Temporarily disable your firewall
It is also possible that your Sky Go issue results from your firewall itself. To see if that’s the problem for you, temporarily disable your firewall and check if the problem persists. (Consult the documentation of your security software for instructions on disabling it.)
If this resolves your problem, contact the vendor of your security software and ask them for advice, or install a different security solution.
*IMPORTANT: Be extra careful about what sites you visit, what emails you open and what files you download when your antivirus or firewall is disabled.
Method 3: Completely reinstall your Sky Go app
When the fixes about can’t help you fix your Sky Go issue, you should reinstall this app to see if this works for you. To reinstall the app, you should uninstall the program and delete the remaining folders as well. Here’s how you can do it.
a) If you’re using Windows
Press the Windows logo key and R on your keyboard at the same time. Then type “control” and press Enter to open Control Panel.
Under View by, click Large icons.
Click Programs and Features.
Right click Cisco VideoGuard Player and click Uninstall. Then follow the on-screen instructions to uninstall this program.
Right click Sky Go and click Uninstall. Then follow the on-screen instructions to uninstall this program.
Press the Windows logo key and R on your keyboard at the same time. Then type “appdata” and press Enter to open the AppData folder.
Go to Local > Cisco and delete the VideoGuard folder.
Go back to the AppData folder. Then go to LocalLow > Cisco and delete the VideoGuard folder.
Go back to the AppData folder. Then go to Roaming and delete the Sky and Sky Go folders.
Download the Sky Go app from the official Sky website. Then open the downloaded file and follow the on-screen instructions to install the app.
b) If you’re on Mac
On your desktop, click Go and click Applications.
Remove the Sky Go app.
Go back to your desktop, then click Go and click Go to Folder.
Type “~/library” and click Go.
Go to Cisco, then remove the VideoGuardPlayer folder.
Download the Sky Go app from the official Sky website. Then open the downloaded file and follow the on-screen instructions to install the app.
Hopefully, one of these fixes works for you! If you have any questions, leave us a comment below.
You may also want to read…
0 notes
Video
youtube
Smart Minds
https://youtube.com/playlist?list=PLP8MtbY8Spq8N6ZOgXJw-VRX_4vCm1iYA
Here in this play list we have grouped all the videos of our channel Infotainment which makes your digital life simpler and easier.
How To Properly Upload Videos To YouTube From PC or Laptop
How To Change Language In whatsApp keyboard
How To Use Gmail Properly [2020] (Complete Tutorial)
How to Share Product Link from Amazon App
How to Wrap Text in Excel [2020] (3 easy methods)
How to use Amazon prime video app
How to Measure with Mobile | best measurement app
How to Disable Incoming Calls But not Data
how to order in bigbasket
How To Order On Amazon [2020] - Full Step-By-Step Buying Tutorial For Beginners
how to use urbanclap app step by step | Urban Company app
Subreddit icon banner and color change
What is Google Discover ? (V Important) How to Turn On/Off Google Discover on Android
How To Create Whatsapp Group ? 2020 [Very Simple]
How To Create Amazon Wish List
How To Do Cash On Delivery In Big Basket | bigbasket main kaise cash on delivery kare
Amazon Pay Balance Wallet - How to add Money in Amazon Pay Balance?
CRED App- How to get Free Rewards just Paying Credit Card Bills | Redeem Cred Reward Point
roposo app how to use
How to download free books from play books
What is Zen Mode on OnePlus Phone- How to Use it
How to Get Pan Card in Just 10 Minutes | How to Apply Pan Card Online Free
how to change date format in windows 10 and excel dd/mm/yyyy
how to recharge idea sim online
How to do Web Check In Easily| Print Boarding Pass (Hindi) New Rules I Baggage Tag I Indigo
How to get SHOT ON watermark on your smartphone camera photos
How To Purchase Books On Google Play Books.
how to copy excel sheet to another excel file with same layout and format
How To Lock Facebook Profile
Best Test wins under Dhoni Captaincy
How to Set Finger Print Lock On Display in Redmi K20 Pro | Smart Minds
How to Pay Credit Card Bill from Amazon app And get Cash Back
How to Check Bank balance in Cred App [Very Simple]
How to pay postpaid mobile bill (In Hindi)
Video Conference Call Etiquette For Those Who Work From Home
how to fix sim card not Detected in phone (5 Easy Ways)
Different Amazon Payment Methods | How To Make Payment on Amazon App
Calculate Percentage in Calculator of mobile
Seagate Backup Plus Portable 5TB Unboxing
How To Use A Pulse Oximeter Properly?
Lock and Unlock Your Android Phone by DOUBLE TAP
How to find mails by size in Gmail
samsung galaxy tab A 10.1 Unboxing and First Impressions (2020)
Benefits Of Amazon Prime Membership [7 benefits] in Hindi
How to Change Wallpaper in your Phone (Android)
how to turn on roaming on android
How to use and customize Quick Access Toolbar in Excel
How to Unsend a Sent Email in Gmail (Thank Me Later)
How to Switch Between Applications in a Second?
how to track your order on amazon
(2021)How to Subscribe For Amazon Prime Membership (in Hindi) -| Amazon
How to pay LIC premium online Through Mobile| LIC Premium Online Payment | LIC Premium pay online
boAt Airdopes 441 Wireless Earbuds Unboxing & Review [2020]
How to Hide Files/Photos in Android Phone (Very Easy)
Myntra | How to buy clothes on Myntra |
Windows 10 - How to Disable Startup Programs | How to Disable Startup Programs in Windows 10
How To Change UPI Pin In Google Pay
How To Use Telegram Secret Chat | Keep your chat secret with telegram secret chat
infrared thermometer how to use
WhatsApp Disappearing Message | WhatsApp Disappearing Messages Kaise Use Kare
How To Prevent Someone From Adding You On Whatsapp Group 2020 [Extremely Useful]
How To FIX Bluetooth Device Not Working On Windows 10 (Easy Steps)
How to Delete Browsing History Android | Browser History Kaise Delete Kare
How to Use Snipping Tool Correctly (4 Amazing Ways)
Greatest Cricket World Cup Upsets
How to SET WHATSAPP FINGERPRINT LOCK on Android
How To Free Up Storage In Whatsapp | Whatsapp New Features
How to increase HDFC credit card limit online through internet banking
How To Reopen Recently Closed Tab In Google Chrome.
Zomato Me Order Kaise Kare [New] | How to Order Food In Zomato (in hindi)
How To Randomize Data In Excel ? Smartminds
How to Set Up Signal | Signal App Use
How To Check IMEI Number In Your Mobile | Smart Min
#paytm
#laptopconnections
#mobiletipsandtricks
#smartphone
#digitalindia
#digitaltransformation
#zomato
#youtube
#android
#excel
#smartphones
#facebook
#whatsapp
#webex
#amazon
#amazontutorials
#whatsapptutorials
#facebooktutorials
#googlepay
#googlepaytutorials
#flipkart
#bigbasket
#bigbaskettutorials
#twitter
#twittertutorials
#reddit
#reddittutorials
#msword
#telegram
#telegramtutorials
#instagram
#instagramtutorials
#zoom
#zoomtutorials
#OLX
#olxtutorials
#urbanclap
#urbanclaptutorials
#windows
#windowstutorials
#oneplus
#android
#androidtutorials
#cameras
#apps
#phonepe
#phonepetutorials
#dakpay
#creditcard
#cred
#signal
#myntra
#bluetooth
#webcheckin
#videoconference
0 notes
Text
WebStorm 2020.3.2 Crack With Torrent + License Key [Latest 2021]
WebStorm Crack
2021 Full Version Download is the world's best cross-platform IDE (Integrated Development Environment) tool for web developers. It has a PHP, JavaScript and HTML code editor to decode and edit them. Plus, Phpstorm 2020 fully hacked provides developers and students with all sorts of tools to help them get going. This software is specially designed for web developers to edit PHP, CSS, XML, HTML and JavaScript files. Moreover, it helps to edit all kinds of source codes in any language. In addition, it is compatible with PHP 5.3, 5.4, 5.5-7.4, including coroutines and generators.
PhpStorm Crack full activation code download is in Java language but compatible with all kinds of languages. It has many built-in plugins to help users create other plugins to decode different languages. Plus, it has built-in code completion, bookmarks, breakpoints, and scaling options. In addition, it has macros, quick navigation, excellent code analysis, which greatly helps users in their work. It makes complex projects easier to do in a simple way. You can also rewrite different codes to the desired language. Besides, this tool is also compatible with any external source like X Debug.
PhpStorm Crack Key Latest 2021 consists of a powerful SQL editor that shows you all the details about the work. WebStorm is also the best IDE editor. PhpStorm has all the features of WebStorm plus additional unique key features. This is the best PHP editor. Plus, it has a simple and easy-to-navigate navigation bar that makes it easy to manage your work. Shortcuts are also part of the navigation bar. You can easily use advanced tools using these shortcuts. In addition, these tools will help you analyze your work from different angles.
Also Download,
FontLab Crack
New Changes in Version 2020.3.2 Build 203.7148.26:
Some improvements have been made in the metadata
Moreover, fix the issue of the subdirectory where the inspection was unable to work properly through dockerized phpstan
Also, some keys are added for the Array shape of params
Resolve the server issue related to X debugger older than 2.9
Moreover, a new search console to find the required files more easily
Also, resolve the unsuccessful command issue between the Phpstorm and X debugger older than 2.2
Improvements for Vue WEB-31721 +26 support
Further, fix a crash related to the usage of old Xdebuger
Moreover, fix all the crashes related to old Xdebuger command and duplicate comment issue
All types of language support feature
Also, Xdebuger 3 with many new streamline configuration with multiple supports
Furthermore, you can now process Guzzle request
Fix the problems of namespace and language attribute
Phpstorm minor functional improvements
A new major update that brings support for PHP 8 with a new welcome screen and much more
Also, new language support with a new code reader and much more
Improvements in many new editing codes and PHPUnit tests with WSL interpreter
A new VUE-loader to support VUE- templates
Moreover, fix an issue of IDEA-241935 +12
Fix an issue that IDE does not work after update
Moreover, IDE-242047 +24 issue resolve
Added compatibility for custom Satis/Packagist packages and JSON composer
Also, new getter and setter on the fly
Fix issue related to PHP doc comment
There is a new file name as the class in the PHAR files for the improved performance
Further, this version support to open multiple projects in the same window to handle them easily
Also, abrupt fixes for trivial cases
Keyboard improvements by improving the duplicate check
Also, fix the issue of trait collision to sole the overrides issues
What’s New in Crack Version 2021?
Addition of GitHub Pull support
Also, a new flow analysis for PHP control
New widgets for work inspections
Usage improvements related to implement-base-method
Further, fix broken artisan commands
Also, the culmination of PHP XDebug >= 2.9 configuration
Solve the problem related to PHP command-line tools
Work through unregistered servers is no more compatible with the latest version
Missing type hint for PHP is now available
Further, support for Windows Subsystem
Added support for PSR 12 code style
PHP 7.4 edition support
PhpStorm Key Features [Mac/Win]:
Super IDE PHP web development tool with lots of useful features
Also, has a rich code editor, code formatting system, and syntax highlighter
Further, automated code generation and completion
Available in near about all types of famous world languages
It has many new writing and code styles
You can make any change in your work with just a single click
Moreover, fully compatible with PHP Doc
Also, it helps you in the duplicate code detection method
It has many new twig and smarty templates to style your codes
PHP code checker that sniff code smells on the fly
Furthermore, it has PHAR support as well as SQL support
A free trial version of PhpStorm is also available
Featured with the version control system
Further, it has remote development for FTPS, FTP, SFTP that is dependent on automatic synchronization
Also, integrated with Google application engine support for PHP
It helps to track any disturbance in your project
Moreover, it has better testing and debugging system for developers
In addition, it is laced with all types of CSS, HTML, SSL, SCSS, SASS, LESS, and JavaScript features
Also Download,
Visual Studio 2021 Crack
PhpStorm 2020.3.2 Activation Code + Key:
NHVGC-UGTFX-LIKNR-53ZED-9VFX3-58CZ2
XFSEW-KJHIU-BHGYT-BVGFT-VCDRE-KJHYT
CFDTR-KJHYT-CFDRE-XDSEW-DSEWI-VCFDE
56432-CFDSE-65432-BHGFR-90876-BCFDR
45CFD-65CFD-78HGT-89NHG-89NBV
CDF56-NHG90-BHG90-BHJG90-NVF90
System Requirements:
Windows: Vista, XP, 10, 8, 7, 8.1, 2002
Mac: macOS 10 and later
RAM:5 GB
Free disk space for downloading 1 GB
1080 x 720 screen resolution is enough
5 GHz processor
How to Activate/ Crack?
1st of all, install the Free Trial Version of PhpStorm
2nd, carry out it completely
Now download the PhpStorm Crack 2021 Latest Version given here
Extract the file completely in the download folder
Add it to the archive
Run the installation procedure by following the given way
Copy-paste the Activation Code
Wait till the complete downloading
Restart your system after that
Enjoy! The latest version
If You Like Some Other Relatives Software :
IDM Activator 6.38 Build 16 Crack With Serial Key Free Download 2021
IDM 6.38 Build 16 Universal Crack Patch Keygen Serial Download
Z3X Samsung Tool Pro 41.11 Crack + Without Box Direct Loader [No Card]
Gihosoft TubeGet Activation Key + Crack 8.6.18 (Mac/Win) Torrent 2021
0 notes
Text
New Post has been published on Strange Hoot - How To’s, Reviews, Comparisons, Top 10s, & Tech Guide
New Post has been published on https://strangehoot.com/how-to-fix-the-screen-overlay-detected-error-in-android/
How to Fix the Screen Overlay Detected Error in Android
Our mobile phones are a very important part of life. Most of the time when we find that our devices are not working properly. Many times we get panic and do almost wrong things. Mostly when you install any application in your android devices they raise a notification every time regarding some permission issues which almost give us a hell-like situation. Now, this time you don’t have to worry. I am having a big blasting solution to your problem. First of all, we have to understand what is this Screen Overlay Detected error then we will move on to the problem of how to fix screen overlay?
What is Screen Overlay Detected error?
Whenever you will install any application in your Android device or purchase from a store you will usually find a popup notification that will ask you for some permission regarding changes in setting. So that you can enter an application without facing any difficulty.
Sometimes when overlays are actively running on your Android when the application needs a new permission. Your Android does not allow this permission to change the function. This will result “screen overlay detected” error.
What is the function of Screen Overlay?
It is a function by which an application allows the other applications to operate on the other one. You can take the example of Facebook Messenger. If you are doing something in your device and someone messages you which will be received by you as a pop-up notification.
Mostly this type of application is used to hide something from the user. If screen overlay has been turned off in your mobile phones then it will need a permit before appearing in front of you.
There are some devices which are affected by Screen Overlay Detected errors:
Samsung
Lenovo
Android 4.1 Jelly Bean
Google is trying to solve the problems with Android 8.0 Oreo so that it will not make you helpless.
HOW to Fix Screen Overlay Detected Error?
To fix the Screen Overlay Detected error to need to disable the function. Later you can use it again when you want.
Now the process to resolve is:
You just need to open “settings” first. Then click the button on “Apps and notification”.
Now, select the “Special app access” from the advanced option.
Now select display over other apps.
The application which is causing the error you just simply have to select that application and disable its ability to draw over any other application.
It is a simple process but when it comes to a dozen of apps when it is installed in your Android device then it is very difficult to change every application. If you are facing any difficulty then just simply disable that application then you can fix the screen overlay detected error very easily.
What happened if the error message of “screen overlay detected” comes out?
The major problem with the screen overlay detected message error is that it gives a sudden warning in Android mobiles.
The main reason behind this problem is that if you are running a floating Application and have also installed a new application. So to start that new application sometimes it request for the access rights. An example of a floating app can be the Facebook messenger application.
Many smartphones reported this problem from all around the world who are the users of such mobiles like Samsung, Motorola smartphones, etc. AndroidPIT is one of the subjects which can replicate the behavior on smartphones.
Many applications were replicated earlier also but it faces many problems. The applications which were replicated are clean master, Twilight, Lux, File explorer, etc.
There are some technical issues also like some applications ask you permission to use certain parts of your mobile phones like internal storage, camera, etc. if any permission is required for the display overlay then you have to disable the features to interact with the dialogue.
Some steps how to fix screen overlay detected error……
STEP 1: How to find out the application which is having the permission to draw over the screen. These steps are for non-Samsung smartphones:
First of all open the settings.
Tab to the search button over the top
Enter the term draw
Now you will get the option of draw over other apps.
Click over the option to draw the application which you want.
The following steps are for the Samsung users:
The very first step is to open settings
Then enter to applications and application manager.
Now press on more so that applications can appear on the top before you.
STEP 2: How to check the permissions on the various application?
After these steps which are mentioned above you will find yourself in front of the list of many applications that have the permission to use floating buttons. Now you need to identify the problems with the different applications whether it is temporary or permanent. You just simply need to disable such applications.
When you find a bubble on your screen in front of any application then the major cause is that application. You need to disable this application from the list.
If any application which adjusts your mobile color or brightness it can give your mobile phones great harm. So simply disable the application.
Clean Master can make a trouble to your smartphone. You need this application for permission.
The last thing if any application which you are not using or gaining a lot of space then you just simply need to disable that application so that your mobile phone settings can a allow to give permission.
STEP 3: Now you cant launch your app and you will see that the requested permission will be without display overlay detected error.
For the Samsung users, it is suggested that a one-handed keyboard can cause the root. You need to deactivate this by going into settings then you will get the option of advanced features. Is simply has to go in that option and click on the next option which you will be seeing as the one-handed operation.
STEP 4: The very next step is to deactivate the screen overlays. By doing this step it might be considered as reactivating the applications which you use. You need to repeat those two steps that were used to disable the applications. That step you will re-enable the permission of overlay.
STEP 5: Is the above steps don’t work then you have an additional step that can fix your issue. To work on this step you need to use the “safe mode” feature of your Android. The process is as follows:
The very first process is to press the power button of your Android.
Hold it till your mobile phone gets the option of power off.
Three options will pop up under that you are asked to get enable the safe mode. You have to choose OK.
Your device will start rebooting in safe mode.
When your phone turns on then go to settings and click to apps.
Now you need to scroll down the screen so that you can find the application which is suffering from screen overlay error.
You need to selected and permit them and enable all the applications which was asked previously.
Once you have done this project then again reboot the Android device.
Applications to address screen overlay detected error
Many applications can resolve this issue or we can say there are many e additional software’s also so that it can be resolved. First of all, try to resolve the issue in manual ways but if no solution will be there then obviously you have to install the application or software to resolve this problem.
Install button unlocker
It is an application after installation it unlocks the installation button which can cause the screen overlay error. Once the application gets activated in your mobile phone and will ask to access the permission to draw over other apps which will not cause the overriding issue on other apps. Once you will allow the application to work on overlay error then you will not find that error in your Android device.
Alert window checker
This application will help you by permitting to screen overlay. This application will directly help you to uninstall the application which is not required for asking you for permission or directly resolve your problem.
How to disable “Displaying over other apps” on Android Oreo?
Google made it very easy to figure out the exact issues with the display over other apps.
How to access the draw over other apps?
Android Oreo
First move towards the setting as it is slightly different from other Androids. It also has features like draw over other applications.
You need to pull the notification shade and then tap to the gear icon to reach the settings.
Now choose the option of apps and notification and tab to the button of advanced.
The last option you will find is special app access. You need to tap on that.
Now you will see the display over other apps option. This is the correct button that you were looking for.
Samsung devices
Scroll down to the notification option and then tap on the applications.
Where you will find the link of the application manager.
Click on the top right button to more.
Now, select the app, and then you can see your aim in front of you.
LG Devices
Go to the Apps
Tap to three-dot button
Select “Configure apps” option.
Tap to “ Draw over other apps”.
Now you will get the screen overlay detected error.
So, I think so you all got my point and your way to the solution also. Now, what are you waiting for? Go and give the solution to your problem.
Read: How to Play Large Games Smoothly in Android
0 notes
Text
Laptop service center in velachery
velachery:
velachery is a part of Chenai, located in the north west part of the city surrounded by Anna Nagar, Padi and Avadi. It covers an area of 45 km². The neighborhood is served by velachery railway station of the Chennai Suburban Railway and fastest growing area in Chennai.
IT parks in velachery.
The economy of velachery is mainly industrial. It was well known as an auto ancillary hub. However, in the late 2000s many IT companies have come up in velachery.The velachery Industrial Estate, spread over an area of 1,430 acres (4.9 km2), houses about 1,800 units[13] and is the biggest small scale industrial estate in South asia. So we established our service in velachery area.

Laptop service center in velachery
Importance of laptops :
In the modern world, one of the most important and necessary items of use is a computer or a laptop. It plays a vital role in his every day work and is of great help.
Charles Babbage has given the best gift possible to the humans by inventing a computer.
There was a time when people use to write long articles by hand but gone are those days, because now, it's done through typing on a computer or a laptop. A laptop is a more compatible and compact version of a computer. It's just like our notebook but its an advanced one.
Laptop computers can suffice every single need of today. We can work, surf the internet, play games, watch TV and lots more.
It increases the efficiency of the humans resulting in great and optimum utilization of time and energy. One more important aspect of laptops and computers is that people can bank online, shop online, buy/sell online, work online and earn online too.
So, this invention has revolutionized our economy in a positive way. It is due to this reason that computers have reached every nook and corner of the world and is in great use. It pays importance in every field may it be education, sports, news, entertainment or cooking.
These gadgets have brought the world together and close to each other. It makes the world look so simple and small. We as humans must try to be as much techno savvy as possible to make optimum utilization of these gadgets and take our economy and world towards the path of success.
Importance of laptop service center:
Being portable and lightweight, we carry it with us to execute many simple to complex tasks easily with the aid of it. This is why when our laptops face issues like overheating, malfunctioning and shutting down suddenly, we cannot concentrate on any work until we get it fixed or repaired. It becomes our headache.
How Raminfotech help us :
To help us get rid of these issues, many laptop service centers have come to the scene. A significant number of these service centers are called dedicated service centers. A dedicated service center is a company authorized service center. It offers multiple services for a particular brand. A dedicated laptop service center never works for the other brands. Sometimes, it is directly controlled by a company. Besides, the company can hire a contractor or a third-party vendor to offer uninterrupted services on behalf of it. The contractor solves various issues faced by the users of a particular brand. In many cases, it never takes money from a customer- if the issues come within the warranty periods. In that case, the tech support professionals take the signature of a customer and deliver the product.
Multi brand laptop service center :
As the consequence of it, we get to see many dedicated laptop service centers belonging to various reputable companies like Dell, Acer, Asus, Lenovo, Samsung, Toshiba, Compaq, HCL, etc. If your laptop or notebook does not work properly or you need to solve an overheating issue, you should visit a dedicated service center. Based on the manufacturing company, you just need to find one located very close to your home. If you have faced the issue within the warranty period, you do not need to pay for it. Besides, in order to enjoy all benefits- you need to check the facilities ensured by the company at the time of purchasing the notebook.
Customer support :
The customer support executive will ask your product number and model number. After that, they will forward your matter to the concerned department. Once your matter is processed, you will receive a call or an SMS. This call or SMS will let you know the expected time and the name of the person coming to fix the issues. The company representative will ask you to show the bill. After checking and verifying it with your given information.
Types of services provide by Raminfotech:1.

Chip Level Services In Chennai
We offer high quality Laptop Chip Level Service with expert handling. Motherboard of any laptop is the most essential part and needs professionally qualified and skilled personnel to repair it. Raminfotech offer Chip level services in Chennai,chip level laptop service and Broken Laptop Service Center In Chennai. Ram Infotech offers high-quality services for your sensitive mother boards and chips.Experienced technicians, who work with focus and commitment, handle the sensitive and chip level repairs of your laptops. Our dedicated team of experts can handle all makes and models of laptops ranging from HP, Lenovo, Acer, IBM, Dell, Compaq Presario, Sony, etc with expertise. We offer other branded laptop services in chennai like Apple Laptop Service Center In Chennai,dell laptop service in chennai,hp laptop service in chennai,lenovo laptop service in chennai,toshiba laptop service in Chennai,acer laptop service in Chennai.All types of problems related to the mother board like the laptop restart problem, hanging of laptops, memory control problems, keyboard control problems, power supply problems, processor control issues, dead laptops, display problems, bios problems, battery section issues, audio problems etc.

Laptop service center in velachery
2.
Broken laptop Services in Chennai
Ram Infotech offers the most reliable and timely Broken Laptop Service, through which all kinds of damages like damage to the plastic panel, partially or fully broken panel, damages to the hinges or any kinds of structural deformations can be corrected. You can get your broken laptop repaired in record time from Ram Infotech and our proficient team of experts. We provide all branded broken laptop services like Apple Laptop Service, dell laptop service ,hp laptop service ,lenovo laptop service,toshiba laptop service, acer laptop service in chennai.
One of the most popular laptop service centers in Chennai, Ram Infotech offers high-quality Broken Laptop Services for any make and model. Trust your sensitive and high-end laptops in the expert hands of professionals from Ram Infotech. We can also give a suitable finish to your laptops with the best painting jobs. We also can change the color of the existing laptops to offer a totally unique look.
Laptop service center in velachery
Broken laptop panel reworking
Laptop motherboard chip level service
Laptop motherboard bga rework
Data recovery services
Sound not working or sound problems.
Laptop not powering on dead laptop
Laptop Memory replaced or upgraded.
Laptop fans replacement or fans not working.
Laptop Memory replaced or upgraded.
Laptop fans replacement or fans not working.
Laptop Memory replaced or upgraded.
Laptop fans replacement or fans not working.
Availability of branches around the city :
We have 8 branches around the city!
TAMBARAM
AMBATTUR
OMR
PORUR
VELACHERY
ADYAR
VADAPALANI
MADIPAKKAM.
Contact us !
No. 3, 1st Floor, 100 Feet Road, Velachery Bypass Road, Velachery, Chennai - 600042.Land Mark : Opposite to HP Petrol Bunk & Next to Poorvika Mobiles
Laptop service center in velachery
0 notes
Text
Windows 10 Insider Preview Build 18885 released in Fast Ring

Windows 10 Insider Preview Build 18885 released in Fast Ring.
NOTE: Windows Insiders on Build 18362.53 who were unable to update to Build 18875 will need to install Build 18362.86 (KB4497093) *FIRST* before being able to receive today’s build. Build 18362.86 includes the fix needed to update to the latest 20H1 builds from Build 18362.53. If you’re already on Build 18875, this build should come through normally.
IMPORTANT: As is normal with builds early in the development cycle, these builds may contain bugs that might be painful for some. If you take this flight, you won’t be able to switch Slow or Release Preview rings without doing a clean-install on your PC. If you wish to remain on 19H1, please change your ring settings via Settings > Update & Security > Windows Insider Program *before* taking this flight.
Your Phone app
Phone screen now supports additional Android devices
As promised, we have expanded phone screen support to additional phone models – OnePlus 6, OnePlus 6T, Samsung Galaxy S10e, S10, S10+, Note 8, Note 9. Try out phone screen and send us your feedback. We will continue to expand the list of supported devices over time.
Never miss your Android phone’s notifications
Stop reaching for your phone to check your notifications. Boost your focus and productivity by seeing your phone’s notifications on your PC. You are in control and manage which apps you want to receive notifications from. Dismiss a notification on one device and it goes away on the other.
With this preview, you can:
See incoming phone notifications in real-time
View all of your phone notifications in one place
Customize which notifications you want to receive
Clear notifications individually or all at once
This feature will gradually roll out to Insiders on 19H1 builds. It may take a few days for this feature to show up inside the Your Phone app.
You can use the Your Phone app on any Windows 10 PC running Windows builds 1803 (RS4) or newer and most Android phones running Android version 7.0 or newer.
Notifications Requirements
Android devices version 7.0 and greater with at least 1GB of RAM.
Windows 10 PC running Windows builds 1803 (RS4) or newer.
Not supported on devices that have Notification Access disabled by work or other policy.
Known issues
Some notifications may not appear automatically. Please press refresh to see an updated list of notifications.
Notification responses are not supported.
Expanding dictation support to more languages
Ever had a word that you just can’t figure out how to spell? Or like to think out loud and wanna automatically jot it all down? In addition to English (United States), we now support dictation when using English (Canada), English (UK), English (Australia), English (India), French (France), French (Canada), German (Germany), Italian (Italy), Spanish (Spain), Spanish (Mexico), Portuguese (Brazil), and Chinese (Simplified, China)
How to try it? Set focus to a text field and press WIN+H! Or you can tap the little microphone button at the top of the touch keyboard. Say what you wanna say, then press WIN+H a second time or tap the mic button to stop the dictation, or let the dictation session time out on its own.
NOTE:
Speech resources will need to be downloaded for dictation to work. To check that they’re available, go to Language Settings, click on the desired language, and then click on Options. If speech resources are available but haven’t been downloaded, there should be a download button.
Dictation is based on the language of your active keyboard. To switch between preferred languages, press WIN + Space.
Narrator Improvements
Narrator Find is more reliable in the Chrome web browser.
General changes, improvements, and fixes
We fixed an issue that could result in USBs and SD cards being unexpectedly assigned a different drive letter after upgrading.
We fixed an issue that could result in the post install setup message unexpectedly appearing while you were actively using your PC sometime after login.
We’ve improved the layout of the App Volume and Device Preferences page in Sound settings and tweaked the page view for better usability.
We’ve updated the text of the Storage Sense group policies to make them a bit more clear.
We fixed an issue that could result in the “Make Windows better” page appearing after login showing “please wait”, with a progress wheel, for a long period of time. We also fixed an issue that could result in this page unexpectedly appearing while you were interacting with the device sometime after login.
We fixed an issue that could sometimes result in Windows Hello looking for the user and immediately signing them back in right after locking the PC, rather than first prompting with “Welcome back, dismiss the lock screen to sign back in”.
We fixed an issue that could result in some Insiders seeing only a flat blue screen when connecting to a recent build over remote desktop.
Known Issues
There has been an issue with older versions of anti-cheat software used with games where after updating to the latest 19H1 Insider Preview builds may cause PCs to experience crashes. We are working with partners on getting their software updated with a fix, and most games have released patches to prevent PCs from experiencing this issue. To minimize the chance of running into this issue, please make sure you are running the latest version of your games before attempting to update the operating system. We are also working with anti-cheat and game developers to resolve similar issues that may arise with the 20H1 Insider Preview builds and will work to minimize the likelihood of these issues in the future.
Some Realtek SD card readers are not functioning properly. We are investigating the issue.
If you use remote desktop to connect to an enhanced session VM, taskbar search results will not be visible (just a dark area) until you restart explorer.exe searchui.exe.
We’re investigating reports that on certain devices if fast startup is enabled night light doesn’t turn on until after a restart. (Note: The problem will occur on a “cold” reboot or power off / power on. To work around if night light doesn’t turn on, use Start > Power > Restart.)
There’s a noticeable lag when dragging the emoji and dictation panels.
Tamper Protection may be turned off in Windows Security after updating to this build. You can turn it back on.
Some features on Start Menu and in All apps are not localized in languages such as FR-FR, RU-RU, and ZH-CN.
When you try to restore a previous version of Windows you get an error message that you need to delete the new account “NT Service\wlpasvc” before you can continue. To do this:
Run “Regedit.exe”
Navigate to “HKLM\Software\Microsoft\Windows NT\CurrentVersion\ProfileList”
Search for wlpasvc
Delete the node containing wlpasvc, which is different for each user.
Known issues for Developers
If you install builds from the Fast ring and switch to either the Slow ring or the Release Preview ring, optional content such as enabling developer mode will fail. You will have to remain in the Fast ring to add/install/enable optional content. This is because optional content will only install on builds approved for specific rings.
Read the full article
0 notes
Text
Get All Brand Laptop Repaired- at Onsite Laptop Repair Greater Noida

Onsite Laptop Repair Greater Noida is a leading computer repairing services provider across the Greater Noida, we can solve any kind issue occurring inside the laptop whether it belongs to apple, Asus, Acer, Dell, Compaq, Sony, Samsung, Toshiba, IBM, HP, HCL, and Wipro etc. We have expert team of technician who are to solve data recovery problem, window installation issues and many others related to computer/laptop. Computer Repair in Greater Noida has skilled employees who are certified from all brand service center. For that, you need nothing to do, only require call to us, our expert will be at your home within one hour of your call, and will give you appropriate solution on the issues of laptop.
Computer Repair Home Service | Computer Repair Home Service in Delhi | Computer Repair Home Service in Noida | Computer Repair Home Service in Gurgaon | Computer Repair Home Service in Vaishali | Computer Repair Home Service in Indirapuram | Computer Repair Home Service in Greater Noida | Computer Repair Home Service in Faridabad | Computer Repair Home Service in Ghaziabad | Computer Repair Home Service in Kaushambhi
Complete satisfaction on the work and three month warranty :
Onsite Laptop Repair Greater Noida is offering full satisfaction on the work what to be done. As a leader in the field of Computer repairing services, we try to do best as much as possible with the clients. Laptop Repair in Greater provides three months warranty on the replaced part of hardware. Moreover, we provide each details about the technician, means when he reach at your home, where he belongs to etc. our services are very cheap, while we put home service charge only rs 150.
We offer all services related computer- data recovery, window installation and so on:
Window installation like window 7, window 8, window 10 and ubuntu
We use best software when lost important data, get data recovery
Overheating related issues, cooling fan not working
Blue screen appearing with text lining
Motherboard/keyboard related issues
Antivirus installation, application/games installation
Computer is not turning on properly
Bulk rental computer/laptop for office use
Delivery of New laptop at your home
And many more services
Laptop | Computer Window Install Services Provider
Top 6 Hard Disk Problem and its Recovery
How Can I Delete Virus From My Computer Without Antivirus
How Fix Laptop Overheating Problem
How To Build A Computer Network
Recover Deleted Data from Laptop | Desktop Data Recovery Services
Technical Support Common Troubleshoot Keyboard Problems
Computer | Laptop Repair Services at Home, Office
How to Install Windows 8 Step by step
How To Install Windows 7 Ultimate 32-Bit or 64-Bit
Basic Computer Problems And Solutions
What To Do If Computer Stop Working
#laptop repair near me#laptop repair in greater noida#laptop repair in noida#computer repair in greater noida#computer repair shop in greater#laptop repair service in pitampura
0 notes
Text
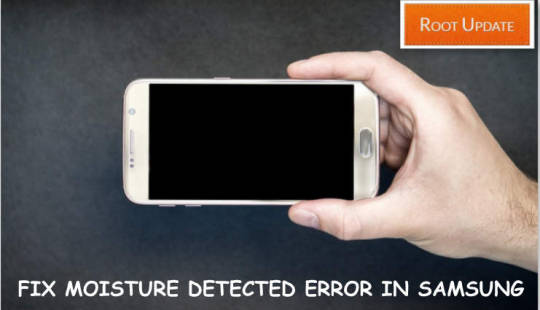
Fix Moisture Detected Error on Samsung Galaxy S7/S8/S9/Note 9
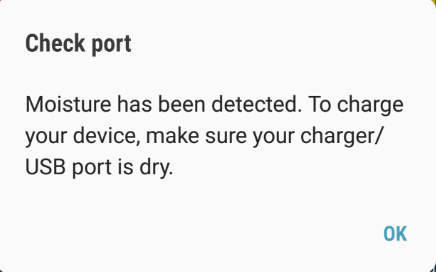
Solve Moisture has been detected. Unplug the charger and wait until both the charger and USB port are dry
So do you often get Moisture has been detected. Unplug the charger and wait until both the charger and USB port are dry Error on your Galaxy S7/S8/S9/ Note 9 or Any other samsung Device. Most of the Devices nowadays come with Waterproof feature which claims to Protect smartphone from Moisture and water, However in many cases users get Moisture detected error while trying to charge their Device.
Samsung Galaxy S7 Moisture detected is the commonly and most faced issue by Samsung users and many other customers who are using Galaxy S8, Galaxy S9 and Note 9 also face the same issue. Almost every high end device comes with IP68 where 6 stands for Dust and 8 stands for Water proof, if you are a samsung user then you might know what error this is But incase you don't know So whenever users tries to Plug in Charger they get "Moisture has been detected. Unplug the charger and wait until both the charger and USB port are dry" Error.
Fix Moisture Detected Error While Charging
Samsung Galaxy Moisture Detected Error Fix
Nowadays almost every one wants a smartphone which comes with Waterproof technology, Gone are the days when smartphone's used to start malfunctioning after coming in contact with water. Almost every one wants a device that won't die or malfunction by contact of water and last but not least there are majority of users who wants to Capture photos under water.
Many new Companies are working very hard on creating Fully waterproof devices but still there is no single Phone even in 2019 which promises full protection from Water and Dust. There are many cases of smartphone going dead due to water damage but surprisingly most of them were waterproof still they were affected by Water which resulted in Moisture detected Error.
The Worst part about Water damage in Smartphone is that if Accidentally you drop your phone in water and then you visit Service center to claim warranty they refuse it for repairing because as of now there is no single smartphone manufacturer company which gives water damage warranty even if the smartphone is Water proof.
Samsung is undoubtedly one of the biggest and most innovative smartphone manufacturer brand. With the Launch of Galaxy S7 and Galaxy S7 edge Samsung introduced the IP68 certification which makes the smartphone Water and Dust proof. Under IP68 water proof technology the smartphone can easily bear water pressure upto 1.5 meters for Around 30 Minutes (But still Water damage is not covered under warranty). Just like every other brand samsung is also working hard in making water and Dust proof smartphones . So without wasting much time let's start the Guide on How to Fix moisture detected issue on Samsung galaxy Smartphones while charging.
Precaution is Always better then cure, So before we start the Guide on How to Fix Moisture Detected issue let's have a Quick look at precautions you can take to protect your smartphone being Damaged by water.
As Most of the devices which are Waterproof and have IP68 certification comes with Certain Limits and Time, and if you are a samsung User so make sure you don't take your Samsung phone below 1.5 meters and more then 30 Minutes.
IP68 certification protects the smartphone only if it is in stationary position, So just make sure you don't take your smartphone to an Environment where water is flowing with flow and Speed Such as Rain or a waterfall.
IP68 protects your smartphone only from water and Dust, Incase if your smartphone comes in contact with Water so just dry and clean it with a Soft cotton cloth. But if it comes in contact with some other liquid So just make sure first you clean it with water and then again Dry it using Cotton cloth.
If your Device has immersed in water Don't try it to charge, Don't Use it and Don't Turn your smartphone on for Minimum 1 day.
Before you start using your Phone make sure that Mircophone and Speaker phones are working properly else you might face problem while talking to Other.
As we mentioned earlier that Don't use your smartphone for atleast 1 day if it immersed in water because at this time touchscreen and other functions of the device wont work properly.
Also Make sure that you use your smartphone responsibly because all the smartphone which are IP certified are tested under expert's supervision and favorable condition which is not the same if you drop your Phone in water.
Also Read:
Download Samsung USB Drivers
Download Odin Tool For Samsung Devices
How to Clear Learned Words from Samsung Keyboard
Every Company Like Sony, Samsung and Apple uses Certain types of adhesive and sealants to protect your smartphone from Water but still there are many points in your smartphone where water can flow easily and damage your device. With growing technology everyday samsung has also developed a technology in almost all its flagship devices which protects the device from Short-circuit by sending a notification to users when they try to plug in the charger.
All the Devices Like Samsung Galaxy S7/S8/S9 comes with protection against Accidental exposure to water but if you try to take your smartphone below water crossing the limits then your smartphone might start malfunctioning as your device won't start charging because of the Water sensors stickers on the board which might get affected after coming in contact with water.
All the Smartphones which come with Waterproof feature doesn't means you can Enjoy taking your smartphone underwater, the features are just an addon for enhanced security for your smartphone. Also make sure that you remember every company holds full right to refuse warranty claims under water damage or any other damage caused by Water.
What Does Moisture Detected in Charging port means?
Fix Moisture Detected Error While Charging
It happens Many times when we accidentally expose our smartphone to water, And if you are one of those who recently exposed their Samsung Galaxy S7, Galaxy S8 and Galaxy S9 into water then you might get "Moisture has been detected"Error very often while charging your phone. So let's Discuss about why this error comes and what does this means.
Now coming to How does a smartphone detects moisture or how does Service centers employees identify if a Smartphone was immersed in water or not. So there are 2-3 stickers in a Smartphone which are called Moisture sensors. So whenever your smartphone comes in contact with water they automatically change Color.

Fix Moisture Detected Error While Charging
Fix Moisture has Been Detected in Samsung
So below are the Steps with which you can easily fix moisture has been detected issue on your smartphone so make sure you follow all the steps carefully:
Soft Cotton Cloth

Fix Moisture Detected Error While Charging With Cotton Cloth
This is the Very first method with which you can dry your smartphone. All you need to Do is just Wipe your Samsung Galaxy S7/S8/S9 and Note 9 By doing this you will almost soak all water. After this Make sure you just wrap your smartphone with Cloth so that the cotton cloth can soak extra water from Mic and speakers.
Vacuum cleaner
So this might sound a Little bit different but yes you can also Dry moisture in your samsung smartphone using Dry cleaner. This is the best way to soak or eject out water from speakers of the smartphone. By Doing this you can Solve Moisture detected error in galaxy S7.
Fix Moisture Detected Error using Rice
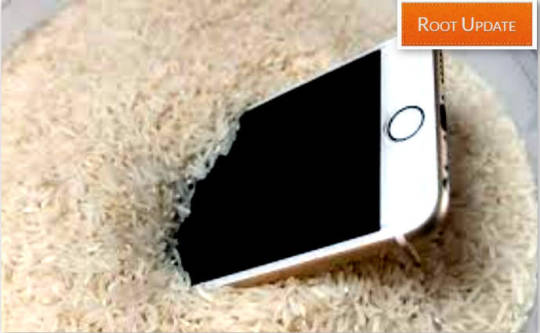
Fix Moisture Detected Error using Rice
So this is one of the most used and working method. Follow the below Steps to Dry out Moisture from your samsung Device using Rice.
First of all Make sure you have a Air Tight Container or a Zip Bag
Now Put Some rice in the Box or bag
Now wipe your smartphone with Cotton cloth and dry it using Hair Dryer
Now insert the phone inside Rice
Close the box and keep it closed for around 3-5 Days.
Now open the box and Start using your Smartphone
By Doing this you can also Fix moisture Detected issue
Blow Air Inside Charging Jack and Speakers
Fix Moisture Detected Error Samsung
So Sometimes when we accidentally drop our smartphone in water there are only 2 parts which get most affected. one being the Charging jack and other is Speakers. So to Dry out water to Solve Moisture has been detected error all you need to do is blow Air inside the Speakers and Charging jack using hair dryer.
Fix Galaxy S7 Moisture Detected Issue
So if you are samsung Galaxy S7 user then you might often get moisture detected S7 error in Galaxy S7, So incase if you dont know why this error occurred in your smartphone then let us tell you that there are some Moisture sensors in your smartphone which get Activated if they come in contact with Water and later on you get moisture detected s7 error. So to Fix that error follow all the above steps and after that you can easily use your smartphone.
Fix Galaxy S8 Moisture Detected Issue
if you recently dropped your Galaxy S8 in water then you might be the one who is getting Moisture issue in your Galaxy S8 while trying to charge your smartphone, But Don't worry as you can Solve this issue easily by using the Rice method which absorbs all the water from your phone and you can easily your smartphone after that.
Solve Galaxy S9 Moisture Detected Issue
So as we already mentioned earlier that most of the devices nowadays come with Anti short circuit sensors which means if your smartphone finds moisture inside the Charging Jack it will stop charging your phone to prevent it from any further Damage. So you can Try any of the above method to successfully Dry out Moisture from your smartphone.
So this was all about How to Dry our Moisture from Galaxy S7/S8/S9 and Note 9. We hope you were able to Fix moisture Detected Error from your Samsung Smartphone. Also if you know any other way to Solve this issue feel free to write down in the comments section below.
Read the full article
0 notes
Text
Losing, breaking and fixing: the multiple lives of my phone
text: Dani Ploeger, photos: Peter Dammann and Dani Ploeger
Since the start of the Bodies of Planned Obsolescence project, back in 2014, a Samsung smartphone has accompanied me. Over the past three years the phone’s history has become intertwined with the project, and has reflected and informed our engagement with electronics consumption and waste in various ways.
In 2015, I lose my Samsung S3 in a robbery on our first trip to Lagos. Some guys bash in the windows of our car while we are stuck in traffic and grab the bag with my phone. The next day, I decide to go to one of the small telephone stalls on the market to buy a basic, ‘dumb’ phone, to get by until I get a new smartphone. The vendor offers me a brand-new Nokia N103 for 2000 Naira – about 6 Euro – but my eye falls on an old Nokia 3310 that she has on display as well. ‘That one is 8000 Naira’, the lady declares. Convinced that she is trying to take advantage of my probably rather obvious nostalgic excitement about the old phone, I try to bargain, arguing that the ugly old phone can’t possibly be more expensive than the new one she offered me at first. But she insists, stating that my phone of choice is ‘an original Nokia’ and therefore more valuable. Determined not to be fooled like that, I buy the new one.

Later that day, I make my first call. I can hardly hear the voice on the other end and notice that shaking the device causes a dangling sound of what seem to be some loose-hanging parts inside. The half-responsive keyboard and dreadful processing speed make the device equally unsuitable for text messaging. In the end, the effective functionality of the ‘phone’ turns out to be pretty much limited to its flashlight function. Later I realize that this was a first sign of the development in global electronics trade that has been the focus of recent project visits to Kenya. In sub-Saharan Africa, cheap new devices, directly imported from Asia, appear to be gradually replacing secondhand electronics from Europe. Until recently, secondhand devices were usually preferred over low quality new gadgets, as my experience in Lagos showed, but secondhand phones are now gradually becoming non-existent on markets across sub-Saharan Africa.
On our trip to Hong Kong, two months later, I replace the dodgy Nokia with a used smartphone, a Samsung S3 just like the one I lost in the robbery. I find it at the secondhand electronics market in Sham Shui Po, during our evening exploration of the area as part of the project. In a back alley of the market we meet a Nigerian trader who tells us that he exports second hand electronics from Hong Kong to Lagos and makes good profit because the demand for second hand goods is much higher in Nigeria. So, the S3 I bought could actually have become one of those expensive ‘original’ phones in Lagos.

Although my current S3 is my second, it feels to me as if I have had the same one since 2013. Even though the actual object has been exchanged in between, I don’t have the experience that anything has changed. My phone may play a central role in my day to day life, but I haven’t actually added any personalized features to its physical presence. The mass-produced nature of both the phone itself and its protective cover make it entirely exchangeable. The logic of both production and use seem to negate it as an individual material object. This has become one of my central concerns in the project: in all sorts of ways consumer technologies seem to drift towards a condition in which their materiality becomes backgrounded in everyday experience (I wrote more about this here)
In 2016, my Hong Kong S3 slowly starts to deteriorate. It switches off at random moments more and more frequently. After the initial remedy I found on an internet forum (hitting the power button on the edge of a table) no longer works I take it to a repair shop in my hometown in the Netherlands. The consultation is brief and straightforward: “You need a new LCD screen, which costs more than your phone is worth.” In other words: total loss. When I visit Njeru and Alphonsol’s repair shop in Nairobi a few weeks later, I decide to give the phone one last chance though. After taking it apart and looking at it for a few minutes, Alphonsol comes to the same conclusion as my repair guy back home: it’s not worth trying to repair it. He starts putting the parts back together, but he takes his time. It looks like he mixed up the parts of my phone with the S3 from the shop which he uses for reference. After 20 minutes, when he still seems to be messing around with the various parts of the two phones I get a bit annoyed and ask him what the problem is. Why can’t he manage to put my phone back together? Considering that the device is pretty much a total loss I suggest that he could just hand it back to me in parts if it is so difficult to put everything back properly. He ignores me and continues his business. Another five minutes later, he hands the phone over to me. “It works.”, he says with a smile. When I ask him what his trouble shooting method was and how he managed to fix it he replies: “Sometimes showing a bit of patience pays off”. I still don’t quite understand what Alphonsol did, but I guess this was an encounter with one of the secrets of the flourishing electronics repair culture in Nairobi, which the project tried to grasp during the event at the Victoria & Albert Museum in March 2016 as part of Utopia 500.

This month I am finally retiring my S3. It is moving to my archive of artworks, where it will get a new role as an exhibition device for my performance-as-smartphone-app ASCENDING PERFORMANCE (2013). So, it isn’t becoming e-waste quite yet...
#ewaste#samsung#nokia#media archaeology#repair culture#recycling#digital culture#electronics recycling
1 note
·
View note
Video
youtube
Smart Minds
https://youtube.com/playlist?list=PLP8MtbY8Spq8N6ZOgXJw-VRX_4vCm1iYA
Here in this play list we have grouped all the videos of our channel Infotainment which makes your digital life simpler and easier.
How To Properly Upload Videos To YouTube From PC or Laptop
How To Change Language In whatsApp keyboard
How To Use Gmail Properly [2020] (Complete Tutorial)
How to Share Product Link from Amazon App
How to Wrap Text in Excel [2020] (3 easy methods)
How to use Amazon prime video app
How to Measure with Mobile | best measurement app
How to Disable Incoming Calls But not Data
how to order in bigbasket
How To Order On Amazon [2020] - Full Step-By-Step Buying Tutorial For Beginners
how to use urbanclap app step by step | Urban Company app
Subreddit icon banner and color change
What is Google Discover ? (V Important) How to Turn On/Off Google Discover on Android
How To Create Whatsapp Group ? 2020 [Very Simple]
How To Create Amazon Wish List
How To Do Cash On Delivery In Big Basket | bigbasket main kaise cash on delivery kare
Amazon Pay Balance Wallet - How to add Money in Amazon Pay Balance?
CRED App- How to get Free Rewards just Paying Credit Card Bills | Redeem Cred Reward Point
roposo app how to use
How to download free books from play books
What is Zen Mode on OnePlus Phone- How to Use it
How to Get Pan Card in Just 10 Minutes | How to Apply Pan Card Online Free
how to change date format in windows 10 and excel dd/mm/yyyy
how to recharge idea sim online
How to do Web Check In Easily| Print Boarding Pass (Hindi) New Rules I Baggage Tag I Indigo
How to get SHOT ON watermark on your smartphone camera photos
How To Purchase Books On Google Play Books.
how to copy excel sheet to another excel file with same layout and format
How To Lock Facebook Profile
Best Test wins under Dhoni Captaincy
How to Set Finger Print Lock On Display in Redmi K20 Pro | Smart Minds
How to Pay Credit Card Bill from Amazon app And get Cash Back
How to Check Bank balance in Cred App [Very Simple]
How to pay postpaid mobile bill (In Hindi)
Video Conference Call Etiquette For Those Who Work From Home
how to fix sim card not Detected in phone (5 Easy Ways)
Different Amazon Payment Methods | How To Make Payment on Amazon App
Calculate Percentage in Calculator of mobile
Seagate Backup Plus Portable 5TB Unboxing
How To Use A Pulse Oximeter Properly?
Lock and Unlock Your Android Phone by DOUBLE TAP
How to find mails by size in Gmail
samsung galaxy tab A 10.1 Unboxing and First Impressions (2020)
Benefits Of Amazon Prime Membership [7 benefits] in Hindi
How to Change Wallpaper in your Phone (Android)
how to turn on roaming on android
How to use and customize Quick Access Toolbar in Excel
How to Unsend a Sent Email in Gmail (Thank Me Later)
How to Switch Between Applications in a Second?
how to track your order on amazon
(2021)How to Subscribe For Amazon Prime Membership (in Hindi) -| Amazon
How to pay LIC premium online Through Mobile| LIC Premium Online Payment | LIC Premium pay online
boAt Airdopes 441 Wireless Earbuds Unboxing & Review [2020]
How to Hide Files/Photos in Android Phone (Very Easy)
Myntra | How to buy clothes on Myntra |
Windows 10 - How to Disable Startup Programs | How to Disable Startup Programs in Windows 10
How To Change UPI Pin In Google Pay
How To Use Telegram Secret Chat | Keep your chat secret with telegram secret chat
infrared thermometer how to use
WhatsApp Disappearing Message | WhatsApp Disappearing Messages Kaise Use Kare
How To Prevent Someone From Adding You On Whatsapp Group 2020 [Extremely Useful]
How To FIX Bluetooth Device Not Working On Windows 10 (Easy Steps)
How to Delete Browsing History Android | Browser History Kaise Delete Kare
How to Use Snipping Tool Correctly (4 Amazing Ways)
Greatest Cricket World Cup Upsets
How to SET WHATSAPP FINGERPRINT LOCK on Android
How To Free Up Storage In Whatsapp | Whatsapp New Features
How to increase HDFC credit card limit online through internet banking
How To Reopen Recently Closed Tab In Google Chrome.
Zomato Me Order Kaise Kare [New] | How to Order Food In Zomato (in hindi)
How To Randomize Data In Excel ? Smartminds
How to Set Up Signal | Signal App Use
How To Check IMEI Number In Your Mobile | Smart Min
#paytm
#laptopconnections
#mobiletipsandtricks
#smartphone
#digitalindia
#digitaltransformation
#zomato
#youtube
#android
#excel
#smartphones
#facebook
#whatsapp
#webex
#amazon
#amazontutorials
#whatsapptutorials
#facebooktutorials
#googlepay
#googlepaytutorials
#flipkart
#bigbasket
#bigbaskettutorials
#twitter
#twittertutorials
#reddit
#reddittutorials
#msword
#telegram
#telegramtutorials
#instagram
#instagramtutorials
#zoom
#zoomtutorials
#OLX
#olxtutorials
#urbanclap
#urbanclaptutorials
#windows
#windowstutorials
#oneplus
#android
#androidtutorials
#cameras
#apps
#phonepe
#phonepetutorials
#dakpay
#creditcard
#cred
#signal
#myntra
#bluetooth
#webcheckin
#videoconference
0 notes
Text
Usb Dect Driver

Usb Dect Driver Wireless
Usb Dect Drivers
Usb Dect Driver Manual
Usb Dect
PC can't detect drive from SATA to USB cable by PotaTom Jul 12, 2017 5:12PM PDT. Hi, I have a seagate 3,5' HDD (31000524AS) and I want to change to a SSHD drive that I bought (ST1000DX002).
Expand the Universal Serial Bus controllers list, plug in the USB hub and remove it again. By this, you will spot the entry related to the USB hub. Right-click the entry, and select uninstall. Follow the prompts to delete the driver. After this, follow step 1 to reboot the computer again. Refresh all USB drivers completely.
Right-click (or tap and hold) USB Root Hub (USB 3.0) and select Properties. Select the Driver tab, then select Update Driver. Select Browse my computer for driver software Let me pick from a list of available drivers on my computer. Select USB Root Hub (USB 3.0), then select Next.
Check Device Manager to see if the Apple Mobile Device USB driver is installed. Follow these steps to open Device Manager: Press the Windows and R key on your keyboard to open the Run command. In the Run window, enter devmgmt.msc, then click OK. Device Manager should open. Locate and expand the Universal Serial Bus controllers section. Alternative to Xiaomi USB Driver. If you are looking for the alternative to Xiaomi USB Drivers you can Download Mi PC Suite. This will automatically Install USB Driver of the connected device. Download Xiaomi Mi PC Suite; I hope this with this guide you have successfully learn How to Download Xiaomi USB Driver for Windows 7/8/8.1/10 and Install.
USB driver is crucial when you want to access your Android device from a Windows computer for file transfer, tethering, rooting, backup or Android data recovery. In most cases, Android USB driver should be automatically installed when you first connect your handset to a Windows 7/8/10 computer. However, it is actually very common that Android USB device drivers fail to install on PC due to system glitch, wrong configuration, compatibility, etc. In this article, we’re going to learn to install USB driver for Android phone/tablet on computer manually. You can also check other tips for fixing Android USB device not recognized problem.
Method 1. Update and Install Android USB Driver on Windows 7/8/10
Sometimes Windows doesn’t recognize Android device because the driver is corrupted and USB driver not working. Hence, you need to update and install proper driver for your Android phone/tablet.
Step 1. Open Device Manager: for Windows 7, go to Start> Control Panel> System and Security> System> Device Manager; for Windows 8/10, press “Windows + X”, then click “Device Manager”.
Step 2. Find and expand “Other devices” or “Portable devices” and find your device. If there is a problem with the driver, it should be marked with a yellow exclamation mark.
Step 3. Right click on the driver and choose “Update Driver Software…”.
Step 4. Choose “Browse my computer for driver software”> “Let me pick a list of device drivers on my computer”, then hit “MTP USB Device” and click Next.
Step 5. You may need to reboot your computer after the update, and then check whether the USB driver problem is solved or not.
Method 2. Download Android USB Driver for Windows from OEM Manufacturer
If the driver for your Android device is deleted due to a certain reason, you can still download USB driver from your cellphone manufacturer site. Please download OEM USB driver according to your device manufacturer, such as Samsung, HTC, LG, etc., from the page linked below and learn how to install them on Windows 10/7/Vista computer.
Download and Install OEM USB driver
Here we take Samsung Galaxy S5 AT&T for example:
Step 1. Visit Samsung download page.
Step 2. Click MOBILE> Phones> Galaxy S> Phone Name> Carrier> CONFIRM.
Step 3. On the new page, find Downloads section, and then click DOWNLOAD icon > CONTINUE> I ACCEPT.
Step 4. Once Samsung USB driver is downloaded, you can install it on your computer under the guide of the page linked above.
Method 3. Install Universal Android ADB USB Driver for Windows
If you don’t have a brand or widely-used Android device, or don’t want to seek hard for the specific driver, a universal Android ADB USB driver might work for you. Visit AdbDriver and download ADB Driver Installer to your computer, then follow steps below.
Usb Dect Driver Wireless
Step 1. Make sure you have USB debugging enabled in your Android device. For this:
Go to Settings> About phone, and then tap “Build number” 7 times.
Go back to Settings, then choose “Developer options”.
Find the “USB debugging” option and tap the button to enable it. Accept warning by tapping on OK button.
Step 2. Connect your device to PC/Laptop using a properly functional USB cable.
Step 3. Unzip the downloaded ADB file, and then launch ADBDriverInstaller.exe.
Step 4. Select your device from the list, and click Install. This process might some time to complete.
Step 5. Once the installation is completed, you’ll find the Device Status marked with OK.
Method 4. Fix Android USB Device Drivers Fail Problem with Command Line
Even though we are quite sure that USB drivers can be successfully installed with Method 1 to 3, it is worth a try to fix “Android USB driver fails to install error” with a command line.
Step 1. Run Command Prompt as administrator: for Windows 10/8, press Windows + X, then choose Command Prompt (Admin); for Windows 7, click Start> All Programs> Accessories, then right-click Command Prompt> Run as administrator.
Step 2. Click Yes when User Account Control window pop up.
Step 3. Copy and paste the following command to the window, and then press Enter:
net localgroup Administrators local service /add
Step 4. Exit the window, and then connect your phone to PC again.
Now that Android USB driver has been successfully installed, you can transfer files between mobile phone and PC, or recover deleted photos, contacts or other data from Android device.
Please enable JavaScript to view the comments powered by Disqus.-->
Summary
Opening the device and obtaining WinUSB handle.
Getting information about the device, configuration, and interface settings of all interfaces, and their endpoints.
Reading and writing data to bulk and interrupt endpoints.
Important APIs
This topic includes a detailed walkthrough of how to use WinUSB Functions to communicate with a USB device that is using Winusb.sys as its function driver.
If you are using Microsoft Visual Studio 2013, create your skeleton app by using the WinUSB template. In that case, skip steps 1 through 3 and proceed from step 4 in this topic. The template opens a file handle to the device and obtains the WinUSB handle required for subsequent operations. That handle is stored in the app-defined DEVICE_DATA structure in device.h.
For more information about the template, see Write a Windows desktop app based on the WinUSB template.
Note WinUSB functions require Windows XP or later. You can use these functions in your C/C++ application to communicate with your USB device. Microsoft does not provide a managed API for WinUSB.
Usb Dect Drivers
Prerequisites
The following items apply to this walkthrough:
This information applies to Windows 8.1, Windows 8, Windows 7, Windows Server 2008, Windows Vista versions of Windows.
You have installed Winusb.sys as the device's function driver. For more information about this process, see WinUSB (Winusb.sys) Installation.
The examples in this topic are based on the OSR USB FX2 Learning Kit device. You can use these examples to extend the procedures to other USB devices.
Step 1: Create a skeleton app based on the WinUSB template
To access a USB device, start by creating a skeleton app based on the WinUSB template included in the integrated environment of Windows Driver Kit (WDK) (with Debugging Tools for Windows) and Microsoft Visual Studio.You can use the template as a starting point.
For information about the template code, how to create, build, deploy, and debug the skeleton app, see Write a Windows desktop app based on the WinUSB template.
The template enumerates devices by using SetupAPI routines, opens a file handle for the device, and creates a WinUSB interface handle required for subsequent tasks. For example code that gets the device handle and opens the device, see Template code discussion.
Step 2: Query the Device for USB Descriptors
Next, query the device for USB-specific information such as device speed, interface descriptors, related endpoints, and their pipes. The procedure is similar to the one that USB device drivers use. However, the application completes device queries by calling WinUsb_GetDescriptor.
The following list shows the WinUSB functions that you can call to get USB-specific information:
Additional device information.
Call WinUsb_QueryDeviceInformation to request information from the device descriptors for the device. To get the device's speed, set DEVICE_SPEED (0x01) in the InformationType parameter. The function returns LowSpeed (0x01) or HighSpeed (0x03).
Interface descriptors
Call WinUsb_QueryInterfaceSettings and pass the device's interface handles to obtain the corresponding interface descriptors. The WinUSB interface handle corresponds to the first interface. Some USB devices, such as the OSR Fx2 device, support only one interface without any alternative setting. Therefore, for these devices the AlternateSettingNumber parameter is set to zero and the function is called only one time. WinUsb_QueryInterfaceSettings fills the caller-allocated USB_INTERFACE_DESCRIPTOR structure (passed in the UsbAltInterfaceDescriptor parameter) with information about the interface. For example, the number of endpoints in the interface is set in the bNumEndpoints member of USB_INTERFACE_DESCRIPTOR.
For devices that support multiple interfaces, call WinUsb_GetAssociatedInterface to obtain interface handles for associated interfaces by specifying the alternative settings in the AssociatedInterfaceIndex parameter.
Endpoints
Call WinUsb_QueryPipe to obtain information about each endpoint on each interface. WinUsb_QueryPipe populates the caller-allocated WINUSB_PIPE_INFORMATION structure with information about the specified endpoint's pipe. The endpoints' pipes are identified by a zero-based index, and must be less than the value in the bNumEndpoints member of the interface descriptor that is retrieved in the previous call to WinUsb_QueryInterfaceSettings. The OSR Fx2 device has one interface that has three endpoints. For this device, the function's AlternateInterfaceNumber parameter is set to 0, and the value of the PipeIndex parameter varies from 0 to 2.
To determine the pipe type, examine the WINUSB_PIPE_INFORMATION structure's PipeInfo member. This member is set to one of the USBD_PIPE_TYPE enumeration values: UsbdPipeTypeControl, UsbdPipeTypeIsochronous, UsbdPipeTypeBulk, or UsbdPipeTypeInterrupt. The OSR USB FX2 device supports an interrupt pipe, a bulk-in pipe, and a bulk-out pipe, so PipeInfo is set to either UsbdPipeTypeInterrupt or UsbdPipeTypeBulk. The UsbdPipeTypeBulk value identifies bulk pipes, but does not provide the pipe's direction. The direction information is encoded in the high bit of the pipe address, which is stored in the WINUSB_PIPE_INFORMATION structure's PipeId member. The simplest way to determine the direction of the pipe is to pass the PipeId value to one of the following macros from Usb100.h:
The USB_ENDPOINT_DIRECTION_IN (PipeId) macro returns TRUE if the direction is in.
The USB_ENDPOINT_DIRECTION_OUT(PipeId) macro returns TRUE if the direction is out.
The application uses the PipeId value to identify which pipe to use for data transfer in calls to WinUSB functions, such as WinUsb_ReadPipe (described in the 'Issue I/O Requests' section of this topic), so the example stores all three PipeId values for later use.
The following example code gets the speed of the device that is specified by the WinUSB interface handle.
The following example code queries the various descriptors for the USB device that is specified by the WinUSB interface handle. The example function retrieves the types of supported endpoints and their pipe identifiers. The example stores all three PipeId values for later use.
Usb Dect Driver Manual
Step 3: Send Control Transfer to the Default Endpoint
Next, communicate with the device by issuing control request to the default endpoint.
All USB devices have a default endpoint in addition to the endpoints that are associated with interfaces. The primary purpose of the default endpoint is to provide the host with information that it can use to configure the device. However, devices can also use the default endpoint for device-specific purposes. For example, the OSR USB FX2 device uses the default endpoint to control the light bar and seven-segment digital display.
Usb Dect
Control commands consist of an 8-byte setup packet, which includes a request code that specifies the particular request, and an optional data buffer. The request codes and buffer formats are vendor defined. In this example, the application sends data to the device to control the light bar. The code to set the light bar is 0xD8, which is defined for convenience as SET_BARGRAPH_DISPLAY. For this request, the device requires a 1-byte data buffer that specifies which elements should be lit by setting the appropriate bits.
The application can set this through the user interface (UI), such as by providing a set of eight check box controls to specify which elements of the light bar should be lit. The specified elements correspond to the appropriate bits in the buffer. To avoid UI code, the example code in this section sets the bits so that alternate lights get lit up.
Use the following steps to issue a control request.
Allocate a 1-byte data buffer and load the data into the buffer that specifies the elements that should be lit by setting the appropriate bits.
Construct a setup packet in a caller-allocated WINUSB_SETUP_PACKET structure. Initialize the members to represent the request type and data as follows:
The RequestType member specifies request direction. It is set to 0, which indicates host-to-device data transfer. For device-to-host transfers, set RequestType to 1.
The Request member is set to the vendor-defined code for this request, 0xD8. It is defined for convenience as SET_BARGRAPH_DISPLAY.
The Length member is set to the size of the data buffer.
The Index and Value members are not required for this request, so they are set to zero.
Call WinUsb_ControlTransfer to transmit the request to the default endpoint by passing the device's WinUSB interface handle, the setup packet, and the data buffer. The function receives the number of bytes that were transferred to the device in the LengthTransferred parameter.
The following code example sends a control request to the specified USB device to control the lights on the light bar.
Step 4: Issue I/O Requests
Next, send data to the device's bulk-in and bulk-out endpoints that can be used for read and write requests, respectively. On the OSR USB FX2 device, these two endpoints are configured for loopback, so the device moves data from the bulk-in endpoint to the bulk-out endpoint. It does not change the value of the data or add any new data. For loopback configuration, a read request reads the data that was sent by the most recent write request. WinUSB provides the following functions for sending write and read requests:
To send a write request
Allocate a buffer and fill it with the data that you want to write to the device. There is no limitation on the buffer size if the application does not set RAW_IO as the pipe's policy type. WinUSB divides the buffer into appropriately sized chunks, if necessary. If RAW_IO is set, the size of the buffer is limited by the maximum transfer size supported by WinUSB.
Call WinUsb_WritePipe to write the buffer to the device. Pass the WinUSB interface handle for the device, the pipe identifier for the bulk-out pipe (as described in the Query the Device for USB Descriptors section of this topic), and the buffer. The function returns the number of bytes that are actually written to the device in the bytesWritten parameter. The Overlapped parameter is set to NULL to request a synchronous operation. To perform an asynchronous write request, set Overlapped to a pointer to an OVERLAPPED structure.
Write requests that contain zero-length data are forwarded down the USB stack. If the transfer length is greater than a maximum transfer length, WinUSB divides the request into smaller requests of maximum transfer length and submits them serially.The following code example allocates a string and sends it to the bulk-out endpoint of the device.
To send a read request

Call WinUsb_ReadPipe to read data from the bulk-in endpoint of the device. Pass the WinUSB interface handle of the device, the pipe identifier for the bulk-in endpoint, and an appropriately sized empty buffer. When the function returns, the buffer contains the data that was read from the device. The number of bytes that were read is returned in the function's bytesRead parameter. For read requests, the buffer must be a multiple of the maximum packet size.
Zero-length read requests complete immediately with success and are not sent down the stack. If the transfer length is greater than a maximum transfer length, WinUSB divides the request into smaller requests of maximum transfer length and submits them serially. If the transfer length is not a multiple of the endpoint's MaxPacketSize, WinUSB increases the size of the transfer to the next multiple of MaxPacketSize. If a device returns more data than was requested, WinUSB saves the excess data. If data remains from a previous read request, WinUSB copies it to the beginning of the next read request and completes the request, if necessary.The following code example reads data from the bulk-in endpoint of the device.
Step 5: Release the Device Handles
After you have completed all the required calls to the device, release the file handle and the WinUSB interface handle for the device. For this, call the following functions:
CloseHandle to release the handle that was created by CreateFile, as described in the step 1.
WinUsb_Free to release the WinUSB interface handle for the device, which is returned by WinUsb_Initialize.
Step 6: Implement Main
The following code example shows the main function of your console application.
Next steps
If your device supports isochronous endpoints, you can use WinUSB Functions to send transfers. This feature is only supported in Windows 8.1.
For more information, see Send USB isochronous transfers from a WinUSB desktop app.
Related topics

WinUSB
WinUSB Architecture and Modules
WinUSB (Winusb.sys) Installation
WinUSB Functions for Pipe Policy Modification
WinUSB Power Management
WinUSB Functions
Write a Windows desktop app based on the WinUSB template
0 notes
Text
Collis Port Devices Driver Download For Windows 10

Collis Port Devices Driver Download For Windows 10 Laptop
Collis Port Devices Driver Download For Windows 10
Collis Port Devices Driver Download For Windows 10 Windows 7
Collis Port Devices Driver Download For Windows 10 Free
If you see a yellow exclamation mark next to one of your PCI drivers listed under Other devices or Unknown devices in the Device Manager, and you have no idea what to do, you’re not alone. Many Windows users are reporting about this problem. Bytespeed laptops & desktops driver download. But no worries, it’s possible to fix, however horrifying the scene looks.
FTDI USB Serial Port driver is the software that helps your operating system to communicate with USB Serial Port devices. Get the latest driver Please enter your product details to view the latest driver information for your system. Drivers & Downloads. Locate drivers, user guides and product specifications for your Gateway technology. Get support via your Windows 10 device Learn. The package provides the installation files for FTDI USB Serial Port Driver version 2.12.16.0. If the driver is already installed on your system, updating (overwrite-installing) may fix various issues, add new functions, or just upgrade to the available version.
Here are 3 solutions for you to choose.You may not have to try them all; just work your way down until you find the one works for you.
What is PCI device driver?
PCI stands for Peripheral Component Interconnect. The PCI device you see in Device Manager indicates the piece of hardware that plugs into your computer’s motherboard, such as PCI Simple Communications Controllers and PCI data Acquisition and Signal Processing Controller as shown in the above screen shot. These are the hardware devices that keep your PC running smoothly.
Cambridge silicon radio mobile phones & portable devices driver download. The package provides the installation files for Cambridge Silicon Radio Bluetooth Filter Driver version 1.0.0.370. If the driver is already installed on your system, updating (overwrite-installing) may fix various issues, add new functions, or just upgrade to the available version. Mini Bluetooth Dongle CMP-BLUEKEY31 uses Cambridge Silicon Radio chip - works out of the box on Ubuntu 10.04, USB Mini Bluetooth v4.0 Dongle CSBLUEKEY200 uses Cambridge Silicon Radio chip with, USB ID 0a12, 0001 - works with most devices, but could not pair with some Bose headphones in Ubuntu -10-02. Download latest drivers for Cambridge Silicon Radio bluetooth devices on Windows 10, 8, 7 32-64 bit. When we connected the phone to the Internet, the mobile revolution was born. Cambridge Silicon Radio device are best. It supports ultra long trasmittion distance up to 65.6 ft, strong, stable, dual mode, and super low energy consumption. Acer Bluetooth Driver version 5.1.0.3900: Acer Bluetooth Driver version 6.0.1.4900: ACPI Function Keys: Alps Bluetooth Device: Ambit Bluetooth Driver version 1.4.1.3: Ambit Bluetooth Driver version 1.4.1.6: ASmobile. S96S Build-To-Order Notebook, Verified by Intel® Bluetooth Driver: ASUS ASUS Bluetooth Driver V7.3.0.100 for Windows Vista 32bit.
If these device drivers fail to work properly, your PC suffers.
How do I fix it?
Note: The screen shots below are shown on Windows 7, but all fixes apply to Windows 10 and Windows 8 as well.
Method 1: Update PCI device driver via Device Manager
Method 2: Update PCI device driver Manually
Method 3: Update PCI device driver Automatically (Recommended)
Method 1. Update PCI device driver via Device Manager
The yellow exclamation mark next to certain device problem can usually be fixed with an appropriate and matched device driver.
1) On your keyboard, press the Windows logo key and R at the same time, type devmgmt.msc and press Enter.
2) If you can see clearly the name of the PCI device as the screen shot shown below (PCI Simple Communications Controller), just go to the manufacturer website of your computer and search for the exact driver from there.
If the computer is assembled by yourself, which means that there is not a definite manufacturer that you can turn to, you can use Driver Easy to help you download the drivers needed for free.
Method 2. Update PCI device driver Manually
If you are not sure which manufacturer website to turn to, you can use the hardware ID to search for the correct driver for you:
1) On your keyboard, press the Windows logo key and R at the same time, type devmgmt.msc and press Enter.
2) Expand Other devices. Double-click PCI Device.
3) Go to Details, select Hardware Ids from the drop-down box.

4) Now, let’s try the first ID listed here first. Copy the first hardware ID listed.
5) Paste it to the search box of the searching engine. Please also add key words such driver or your operating system.
6) Download the correct driver from the list provided. Then you need to install them as instructed by the driver provider.
Method 3. Update PCI Driver Automatically (Recommended)
If you don’t have the time, patience or computer skills to update your drivers manually, you can do it automatically with Driver Easy.
Driver Easy will automatically recognize your system and find the correct drivers for it. Download cssn usb devices driver. You don’t need to know exactly what system your computer is running, you don’t need to risk downloading and installing the wrong driver, and you don’t need to worry about making a mistake when installing.
You can update your drivers automatically with either the FREE or the Pro version of Driver Easy. But with the Pro version it takes just 2 clicks (and you get full support and a 30-day money back guarantee):
1) Downloadand install Driver Easy.
2) Run Driver Easy and click the Scan Now button. Driver Easy will then scan your computer and detect any problem drivers.
3) Click the Update button next to the flagged PCI device to automatically download and install the correct version of its driver (you can do this with the FREE version).
Or click Update All to automatically download and install the correct version of all the drivers that are missing or out of date on your system (this requires the Pro version– you’ll be prompted to upgrade when you click Update All).
We hope this post can meet your needs. If you have any questions or suggestions, feel free to leave comments below. It would be very nice of you if you are willing to click the thumb button below.
(2020 Updated) Download USB Drivers for Any Android (Samsung/ Motorola /Sony/ LG/ HTC/ ASUS/ Huawei and others): .Here we are sharing all the latest Android USB Drivers for Windows and Mac. You can download them from the download section below and install them on your PC or Mac
USB Drivers are one of the must-have tools to be installed on your PC or Mac. Because of that, your mobile device interacts with your PC.These work as Bridge between your Phone and your computer. The USB drivers help us to connect our phone to the computer and perform tasks like transferring data, syncing your device with a PC. They help us to connect our Android devices to tools like Odin, Sony Flash tool, and SuperOneClick.
Below, we are sharing the links to USB drivers for most of the popular Android device manufacturers like Samsung, LG, Sony, Google, HTC, Motorola, Dell, etc. These USB drivers are safe to use as they are from their respective manufacturers. All the links are valid and official. We recommend you to download the latest USB drivers
Collis Port Devices Driver Download For Windows 10 Laptop
(note type=”important”)It is highly recommended to Enable USB debugging on android smartphones before performing any task in the fastboot mode. (/note)
Download USB Drivers for Android
I.Download USB Drivers for Android
Samsung USB Drivers
Latest Samsung DriversDownloadDownload Latest Samsung KiesDownloadSamsung Android ADB Interface Driver v2.9.510.0Download
OnePlus USB Drivers
Latest OnePlus USB Drivers (Windows and Mac)Download
For MediaTek VCOM Driver
MediaTek VCOM MTK Drivers (Updated)Download
Motorola USB Driver
Latest Motorola USB Drivers (Win & Mac)Download
Google USB Drivers
Latest Google USB DriversDownload
HTC USB Drivers
Latest HTC USB Drivers 4.17.0.001DownloadHTC Sync ManagerDownload
Sony USB Drivers
Latest Sony USB DriversDownloadSony PC CompanionDownloadSony Bridge for MacDownload
LG USB Drivers
Latest LG USB DriversDownloadLG Flash and LG UP ToolDownloadLG UpperCut ToolDownload
LG United Drivers for Verizon | Mirror
Dell USB Drivers
Latest Dell USB DriversDownload
Go to the link and choose your mobile device or tablet to download the specific version USB drivers.
Intel Android USB Drivers
Latest Intell Android USB DriversDownload
ZTE USB Drivers
Latest ZTE USB DriversDownload
LeEco USB Drivers
Latest LeEco USB DriversDownload
ASUS USB Drivers
Download Asus PC suite PC Link (drivers included)Download
Huawei USB Drivers
Latest Huawei USB DriversDownload (Check below)
Download HiSuite (drivers included) || Windows | Mac
Acer USB Drivers
Latest Acer USB DriversDownload
Sharp USB Drivers
Amazon USB Drivers
Latest Amazon USB DriversDownload
Pantech USB Drivers
Latest Pantech USB Drivers (PC Suit)Download
XIAOMI USB Drivers
Download Mi Phone Manager (PC Suite) | Mirror
Lenovo USB Drivers
Latest Lenovo USB DriversDownload
Micromax USB Drivers
Collis Port Devices Driver Download For Windows 10
Latest Micromax USB DriversDownload
Video Guide: Enable Developer Options, USB Debugging and OEM Unlock On Android
(note type=”important”)
In case the above drivers do not work for you, do as described below:
Collis Port Devices Driver Download For Windows 10 Windows 7
Go to the official site of the manufacturer
Type the name and model of your device in the search box.
Select your device and click the Support tab/button.
You will get the download link for the specific USB Drivers for your device.
Download the drivers and install onto your computer. (/note)
If you have any question, feel free to ask in the comment below.
Collis Port Devices Driver Download For Windows 10 Free
Rootmygalaxy a.k.a RMG was started in 2015 with a solo goal of Helping users with easy How-to guides. Slowly the website started sharing exclusive Leaks and Tech News. In these 5 years, we have been credited by the likes of Forbes, CNBC, Gizmodo, TechCrunch, Engadget, Android Authority, GSM Arena and many others. Want to know more about us? Check out ourAbout Us pageor connect with us ViaTwitter, Facebook, YoutubeorTelegram.
0 notes
Text
Drivers Resmed Port Devices

-->
Drivers Resmed Port Devices Replacement
Drivers Resmed Port Devices Bluetooth
Drivers Resmed Port Devices Reviews
Drivers Resmed Port Devices Lucie
Scroll down to the LPT/ COM port then double click Prolific USB to Serial Comm Port; Click Driver in the Windows Properties section; The driver must be numbered as '2.0.2.8' and dates accordingly If the driver was not installed, remove the Serial adapter then run 'PL2303DriverInstaller.exe' again. Driver Talent (previously called DriveTheLife) is a straightforward driver updater program that downloads device drivers so you don't have to search the internet for official download links. This application not only updates outdated and missing drivers but also fixes corrupted ones and backs up all your installed drivers.
This article helps to fix an issue in which Windows 10 doesn't install specific drivers for USB audio devices on the first connection.
Original product version: Windows 10, version 1703
Original KB number: 4021854
Symptom
When you connect a USB audio device to a Windows 10 Version 1703-based computer the first time, the operating system detects the device but loads the standard USB audio 2.0 driver (usbaudio2.sys) instead of the specific device driver.
Cause

This issue occurs because the USB audio 2.0 driver (usbaudio2.sys) isn't classified as a generic driver in Windows 10 Version 1703. Therefore, the system assumes that a compatible, nongeneric driver is installed for the device even though the driver is generic.
This issue also causes Windows 10 Version 1703 to postpone the search for other compatible drivers through Windows Update that typically occurs immediately after you install a new device.
Resolution
To fix this issue, use one of the following methods.
Method 1
To resolve this issue, install update 4022716.
Method 2
If the device-specific driver is distributed through Windows Update, you can manually update the driver by using Device Manager. For more information about how to do this, see update drivers in Windows 10.
Method 3
If the device is not yet connected, first install the device-specific driver, such as by using the appropriate installer. After the device-specific driver is installed, Windows 10 will select that driver instead of the standard USB audio 2.0 driver when you first connect the device.
Note
See the device manufacturer's user guide for specific instructions about how to install the driver.
Method 4
If the driver isn't distributed through Windows Update, you can manually reinstall the driver. To do this, follow these steps:
Install the device-specific driver (see Method 2).
Open Device Manager.
Right-click (or tap and hold) the name of the device, and then select Uninstall.
Restart the computer.
When it restarts, Windows will try to reinstall the device by using the device-specific driver.
The USB-A and USB-B connection types are what most users are accustomed to. However, these days, there are more things you can achieve with the new USB-C type of connection. With this option, users can charge their computer. What’s more, they can also connect their PC to other USB-C type devices, including media players, smartphones, docking stations, and display adapters, among others.
However, we are aware that a good percentage of users are having troubles with their USB-C connection. In most cases, the problems are caused by problems with the hardware or software. Don’t worry because you can easily fix USB-C issues in a Windows 10 computer. After all. You will get notifications which you can use to determine how to resolve the problem.
What is a USB-C connector?
Developed by the USB Implementers Forum, the USB-C connection type is a tool for transmitting both power and data. It is worth noting that this was designed, certified, and released as an industry-standard connector by the members of the organization. Over 700 companies are part of the USB Implementers Forum, including Apple, Microsoft, Dell, HP, Intel, and Samsung. This is also the reason why many computer manufacturers readily accepted USB-C technology.
Is it similar to a micro USB connector?
At first glance, the USB-C connector looks a lot like a micro USB connector. However, the former has a distinct oval shape. Moreover, it is a little bit thicker to accommodate its best feature—like MagSafe and Lightning, the USB-C connector does not have an up or down orientation. You simply have to line the connector correctly, and you wouldn’t have to worry about flipping it to plug it in properly. Another key thing to remember is that the cables have the same connectors on both ends. This means that you would not have a hard time figuring out which end goes where.
Comparing USB-C and USB 3.1
The USB-C connection type’s default protocol is USB 3.1. Theoretically, at 10Gbps, USB 3.1 is twice as fast as USB 3.0. However, the ports for USB 3.1 can still be found in their original, larger shape. Such ports are referred to as ‘USB 3.1 Type-A. Generally, it has become more common to see USB 3.1 ports with USB-C connectors.
How to fix USB-C issues in a Windows 10 computer
Some of the notifications you might encounter when the USB-C connection is not working include the following:
You might be able to fix your USB device
Slow USB charger connection
Display connection might be limited
PC isn’t charging
The USB device might not work
These two devices can’t communicate
The USB device might not be working properly
Use a different USB port
The USB or Thunderbolt device functionality might be limited
Every notification has its solution. Whether you need to fix USB-C compatibility or update your drivers, there’s always something you can do to resolve the issue.
What to do when you see the ‘You might be able to fix your USB device’ error notification
If you see this notification while trying to use a USB-C connection type, there must be something wrong with the device or the drivers on your computer. You can run the troubleshooter for hardware and devices, or you can update your drivers to resolve the problem.
Drivers Resmed Port Devices Replacement
To quickly fix «USB-C is not working on Windows 10» issue, use a safe FREE tool developed by the Auslogics team of experts.
The app contains no malware and is designed specifically for the problem described in this article. Just download and run it on your PC. free download
Developed by Auslogics
Auslogics is a certified Microsoft® Silver Application Developer. Microsoft confirms Auslogics' high expertise in developing quality software that meets the growing demands of PC users.
Running the Hardware and Devices troubleshooter
On your keyboard, press Windows Key+S.
Type “control panel” (no quotes), then hit Enter.
Once Control Panel is up, go to the top-right corner of the window and click the View By option.
Select Large Icons from the options.
Click Troubleshooting.
Go to the left-pane menu, then click View All.
Select Hardware and Devices.
Click Next, then follow the on-screen instructions.
The tool will start to identify issues with your hardware and devices, attempting to repair them.

Using Windows Update to fix the device drivers
Right-click the Windows icon on your taskbar.
Select Settings from the list.
Click Updates & Security.
Go to the left-pane menu and select Windows Update.
Go to the right pane, then click Check for Updates.
Install all the available updates.
Updating your device drivers
It is possible that the device drivers in your computer are corrupted, damaged, or outdated. You can update them to give your unit a fresh set of drivers. There are two ways you can do this—going to the manufacturer’s website or automating the update process, using Auslogics Driver Updater.
It is worth noting that manually updating your drivers can be time-consuming and risky. As we’ve mentioned, you have to search for the compatible drivers on the manufacturer’s website. If you download and install the wrong drivers, you might cause more problems to your computer.
Resolve PC Issues with Driver Updater
Unstable PC performance is often caused by outdated or corrupt drivers. Auslogics Driver Updater diagnoses driver issues and lets you update old drivers all at once or one at a time to get your PC running smoother
Auslogics Driver Updater is a product of Auslogics, certified Microsoft® Silver Application Developer
DOWNLOAD NOW
Drivers Resmed Port Devices Bluetooth
On the other hand, when you automate the process with the help of Auslogics Driver Updater, you are avoiding possible PC damage. The best part is, the tool will take care of all problematic drivers—not just the one which caused the USB-C connection type problem. So, you will notice a significant improvement in your PC’s performance and speed.
Finding the error codes for device issues
It is important to know the error code to address problems with your device appropriately. To acquire the error code, simply follow the steps below:
Right-click the Windows icon on your taskbar.
Select Device Manager from the list.
Right-click the problematic device, then select Properties.
Go to the Device Status dialog box to see the error code.
How to fix slow USB charger connected
When the ‘slow USB charger connected’ notification shows up, there are various possible reasons behind it. Here are some of them:
You’re using a charger that is not compatible with your device or computer.
Your charger’s power is insufficient for your device or computer. It is worth noting that devices with USB-C connectors have larger power limits. So, charging should be faster with greater levels of power, as long as the device supports USB power delivery.
You have not properly connected the charger to the port on your device or computer.
The cable’s power capacity is not sufficient for the charger itself, the device, or the computer.
Your USB port is dusty or dirty, preventing proper insertion of the charger.
You’ve connected the charger to your device or computer through an external dock or hub.
You can fix this problem by using the charger and cable that came with your device. These peripherals are designed according to industry standards. So, they have the right power capacity to speed up charging. On the other hand, you can also check if your charger is properly connected to the USB-C port on your device or computer. If the port is dusty or dirty, you can use compressed air to clean it.
Note: Systems with available USB-C connectors have higher power limits, and they can support up to 5V, 3A, or 15W.
Drivers Resmed Port Devices Reviews
Resolving the ‘Display connection might be limited’ error notification
There are many reasons why you see this error notification. It is possible that the dongle has new features that the cable, device, or PC do not support. You should also check if you’ve connected the dongle to the correct port or through an external dock or hub. On the other hand, it is possible that the other devices with the USB-C connection are interfering with the dongle.
You should know that a USB-C connector has Alternate Modes which you can use for non-USB connectors. These modes are HDMI, DisplayPort, and MHL. So, you can resolve the ‘Display connection might be limited’ error notification by checking if your PC, cable, and external display support the aforementioned alternate modes. You can also try to check if the dongle or device is directly connected to your computer. If it is yet the problem persists, try using a different cable.
Drivers Resmed Port Devices Lucie
Getting rid of the ‘PC isn’t charging’ error notification
This error notification is possibly caused by the following:
You’ve used an incompatible charger.
You’ve used a charger with lower power limits, preventing it from properly charging your device or computer.
You’ve incorrectly connected the charger to the port on your PC.
The cable’s power capacity cannot accommodate the charger.
The USB ports are dusty or dirty, preventing proper insertion of the charger.
You’ve connected the charger through an external hub or dock.
You can fix USB-C compatibility issues by using the charger and cable that came with your device’s or computer’s packaging. You can also use compressed air to clean the ports, enabling you to insert the dongle correctly.
Resolving ‘The USB device might not work’ error
This error notification shows up when the Windows version on your PC does not support the driver for the device you’re trying to connect to the USB-C port. So, the solution to this is to install all the latest updates for your operating system. You can do this by following the instructions below:
Click the Search icon on your taskbar.
Type “settings” (no quotes), then hit Enter.
Select Update & Security.
Click Check for Updates.
Install the available updates.
How to fix ‘These two devices can’t communicate’ error
You will see this error notification will show up when you are having trouble connecting two devices via USB-C. It is possible that one or both of the devices do not support the USB-C connection type. The workaround here is ensuring that you are connecting two Windows computers.
Resolving the error ‘USB device might not be working properly’
If your computer does not support the device you’re trying to connect via USB-C, you will see this error message. It is also possible that the power on your laptop is limited because you’re sourcing it from your battery. In this case, you can try using a different computer, or you can try plugging your device into an external power source.
What to do when you get a ‘Use a different USB port’ prompt
When you get this error notification, it is likely that the USB port does not support Thunderbolt, DisplayPort, or MHL. If this is the case, then you can try using a different port on your PC. It is also possible that the functionality of the USB device had become limited when you connected it to a particular port. You can try plugging it to a different port on your computer to resolve the problem.
Resolving the error ‘USB or Thunderbolt device functionality might be limited’
The reasons behind this error notification are similar to what caused the limited display connection issues. So, you can resolve this by making sure that your PC and cable support the same USB-C features as the device you’re trying to connect. You also have to make sure that the dongle is directly connected to your computer.
Which connection type do you prefer?
Let us know in the comments below!
0 notes
Text
Samsung Monitors Driver Download For Windows

Sometimes, when you expand Monitors in Device Manager, you will find it shows you the Generic PnP Monitor rather than the real monitor of your PC. And for some users, it shows as the Generic Non-PNP Monitor.
Samsung Monitor Driver Download Windows 10
Samsung Lcd Monitor Driver Download Windows 7
Samsung Monitors Driver Download For Windows 7
So updating Generic PnP Monitor driver will help Windows make the real monitor back again. Open Device Manager. Expand the Monitors and find the Generic PnP monitor. Right-click it to choose Update driver. After that, Windows will search automatically to update the Generic PnP monitor driver for your Windows 10 system. Download Samsung LS22B300BS LED Monitor Driver 1.0 (Monitor) Specifications: Display: - Screen Size: 21.5' Wide - Resolution: 1920 x 1080. Samsung dual monitor setup with Windows or Mac What you need to run dual or multiple monitors Most computers are able to connect dual or multiple monitors easily by just plugging them into the available ports on the computer. Download drivers for Samsung SyncMaster PX2370 /PX23720Plus (Digital) monitors (Windows 7 x64), or install DriverPack Solution software for automatic driver download and update.
Contents:
Generic PnP Monitor Overview
When you enter the display settings on the Windows 10, your real monitor is not listed here, and you cannot find it in the advanced settings. Click the display adapter Properties, and tap the Monitor tab, it changes to Generic PnP Monitor.
And the screen refresh rate is locked, you are unable to run the 144Hz screen refresh rate for your monitor.
After that, when you retun to device manager, the real monitor is missing, it is replaced by Generic PnP Monitor.
At this moment, you may wonder what Generic PnP Monitor is and how can you find the real monitor and solve the Generic PnP Monitor problems?
Therefore, it is necessary for you to know what a Generic PnP Monitor means and what you can do to fix this Monitor error on Windows 10.
What is Generic PnP Monitor Windows 10?
The PNP is short for Plug and Play. In computer, it is used to connect the external devices (Monitor, USB Devices) to Windows PC. So when you plug a monitor (Dell, ASUS, Other brands) or USB devices (keyboard, mouse) into a computer, the system will recognize the device automatically and install the right drivers for the device to make it run properly.
And the Generic PnP Monitor Driver for Windows 10 means Windows 10 has installed one of the basic monitor drivers and it can run smoothly, although it may function not as perfectly as the manufacturer’s monitor driver. For example, you may cannot set the best monitor resolution and screen refresh rate with this kind of PnP monitor driver.
Usually, people would find out the monitor in display settings > Advanced settings > Monitor > Properties.
But unfortunately, when the monitor driver is missing or it is install failed on Windows 10, your monitor will shows as Generic PnP Monitor, and in device manager you will see the generic pnp/non-pnp monitor with a yellow exclamation.
If it occurs to you, maybe there is a Generic PnP Monitor driver issue, it is time for you to fix this device manager problem on Windows 10.
How Does the Generic PNP Monitor Appear?
For laptop, when you open device manager, you will see a generic PNP monitor list, and there is no yellow exclamation. It is normal, because most of the laptop monitor are show as the Generic PNP monitor. All of the things such as your screen, monitor settings work properly.
But as a common problem, the generic PNP/Non-PnP monitor problem will emerge in the following situations:
1. After upgrading the System from Windows 7, 8 to Windows 10, the desktop monitor or All-in-one PC monitor replaced by the generic PNP monitor or the generic Non-PnP monitor, sometimes, with the yellow error.
2. When you are connecting monitor to pc via the HDIMI cable or VGA cable, it does not be recognized by PC, and the monitor is not showing up in device manger, too. After you uninstall the graphic card driver, the generic PnP monitor appears.
3. When add the second monitor to PC, you will one shows as the real monitor, but another one shows as Generic PnP monitor in device manager.
4. Someone reported that after added a new hardware such as a SSD and update the Windows 10 version, the monitor is unstable, the PC seems changes from the real monitor and generic PnP monitor.
If it occurs to you, maybe there is a Generic PnP Monitor driver issue, it is time for you to fix this device manager problem on Windows 10.
How to Fix Generic PNP Monitor Driver Issue
Here if you feel like to remove the generic pnp monitor issue quickly, you are supposed to combine the hardware methods with the software driver ones. It is to say, you need to check your settings and at the same time, concentrate on Generic PnP Monitor driver updates, such as updating ASUS monitor or Acer or Dell monitor drivers.
Solutions:
Solution 1: Reconnect the Monitor to Computer
If your find the monitor shows as the generic PnP monitor, it may lie in that your system does not recognize it. You can try to reconnect the monitor and restart computer to solve the generic PnP monitor problem.
1. Turn off the computer and monitor.
2. Plug out the monitor cable and the monitor power supply.
3. Plug in the monitor power supply and VGA or HDMI cable again.
4. Reboot the computer.
Then the Windows 10 pc will detect your monitor model and install the windows 10 monitor drivers again.
This will help fix the Generic PnP Monitor issue easily and fast. If it cannot make your unrecognized monitor change from the Generic PnP Monitor to your real monitor, go ahead to find a solution.
Related: How to Connect Monitor to Laptop on Windows 10
Solution 2: Update the Monitor and Graphic Driver
Just as you can see, when your monitor driver is missing, the generic PnP monitor will appear. So updating Generic PnP Monitor driver will help Windows make the real monitor back again.
1. Open Device Manager.
2. Expand the Monitors and find the Generic PnP monitor.
3. Right-click it to choose Update driver.
4. After that, Windows will search automatically to update the Generic PnP monitor driver for your Windows 10 system. Then the real monitor will back again.
If you are using a desktop, you can follow the next steps if above steps cannot help.
5. After you click Update driver, you can goes to :
Browse my computer for driver software > Let me pick from a list of device drivers on my computer.
6. Check the option Show Compatible Hardware. In the result, you will see the real monitor is listed here. Choose the monitor.
7. Follow the same way to update the graphic driver by the Display Adapters > Graphic card > Update Driver to update it.
8. After that, you will see the real monitor is coming back again.
If the device manager cannot find the monitor driver and install it for you, use the automatic way to help you.
Driver Booster can help you fix the monitor driver missing or disabled error easily. It is a professional Windows driver finder, downloader, and updater. As the toptenreviews top 1 driver update software, it can detected the most outdated and missing drivers for your computer and update them automatically.
1. Download, install and run Driver Booster on your computer.
2. Scan. Driver Booster will scan all your hardware devices including the monitor and graphic card.
3. Click Update Now.
After that, Driver Booster will update all the outdated and missisng driver including the monitor driver.
Normally, update the monitor driver may not necessary, but it will helps computer to set the best resolution and refresh rate for your monitor.
Solution 3: Uninstall Generic PNP Monitor Driver
Some people may see there is only a generic PnP monitor with no exclamation, but someone reported that they see generic PnP monitor with a yellow triangle or a generic non-PnP monitor will a yellow exclamation. So if there is driver error with Generic Monitor, you can uninstall it.
1. Follow these steps: Device Manager > Monitors > Generic PNP Monitor > Uninstall to uninstall the monitor.
2. Click View > Scan for hardware changes.
After that, the yellow exclamation will disappear and your generic PNP monitor changes to the real monitor.
Solution 4: Uninstall and Reinstall Graphic Driver
The generic pnp monitor is about showing, so it is related to the graphic driver. If updating the graphic driver cannot fix it, you should uninstall the video driver and reinstall it to see if the generic PnP monitor is removed.
You can uninstalling the graphic driver from control panel and device manager, but it will not uninstall it completely, so you can uninstall graphic driver completely with Display Driver Uninstaller.
After that, go to the manufacturer’s site to get the latest video driver and install it step by step.
Now you can reboot computer and go to device manager to see if the generic monitor is still showing up. If yes, try the next solution.
Solution 5: Run the System File Checker
The System file checker is a built-in tool for users to scan the conflict driver and system files, and then restore the corrupted files. Run this tool to scan if there are some files corrupted with the monitor driver files.
1. Type command prompt in search box, then you will see the result. Right-click it and select Run as administrator.
2. Type sfc/scannow and press Enter.
Then Windows system will begin scan your system file and recovery the problem.
Related: Unknow Hard Error on Windows 10
Solution 6: Check for Windows 10 Update
The Windows 10 update can solve many problems such as system bugs, driver error, hardware issues, etc. If the generic PnP monitor error occurs, try to update the Windows 10 version to solve it.
1. Go to here: Start > Settings > Update & Security > Windows Update.
2. Click Check for updates.
Windows system will help to download the new drivers, new system files. After that, you need to check if the real monitor back in device manager. And here is 4 things you should know about Windows 10 Update.
Solution 7: Perform the Clean Reboot
Windows clean reboot means start your computer within the basic drivers and startup programs. This will helps reduce software conflicts. And you can identify if there is one or more third-party applications or startup items cause this monitor issue.
Here is the way to help you do a clean boot. You are able to make use of this way to fix Windows generic PnP monitor driver issue.
Wish this article can help you fix generic PnP/Non-PnP monitor driver error and get the real monitor back.
Related Articles:
Samsung Drivers Pack is a collection of drivers for rooting and modifying your Samsung cell phone.
It is often a prerequisite to have proper USB functionality for rooting or otherwise modifying a phone and Z3X team includes a number of tools with this package, primary the Samsung USB Driver for Mobile Phones.
The Samsung Drivers Pack also provides the following drivers: Intel USB Flash Loader drivers, Spreadtrum USB, EMP USB, ST-Ericsson, Qualcomm USB composite and the Infineon mobile phone platform.
Installation of all of these packages should make rooting Samsung devices possible in case Windows has not already installed the appropriate software.
Samsung Monitor Driver Download Windows 10
Samsung Drivers Pack 1.9 on 32-bit and 64-bit PCs
This download is licensed as freeware for the Windows (32-bit and 64-bit) operating system on a laptop or desktop PC from drivers without restrictions. Samsung Drivers Pack 1.9 is available to all software users as a free download for Windows.
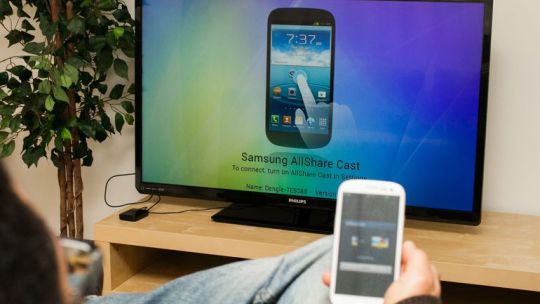
Samsung Lcd Monitor Driver Download Windows 7
Filed under:
Samsung Monitors Driver Download For Windows 7
Samsung Drivers Pack Download
Freeware Drivers
1 note
·
View note
Last Seen Blogs

sweetgrenadineshop
Sweet Grenadine Shop

seralin
Untitled

niharikasarma06
duh

happydayvipmassagedubai
Happy Day Vip Massage Center Dubai

isabeldraws
Mathematical!