#GPU enhancements
Text
Upgrading Your Gaming Rig with the Latest Computer Parts
In the rapidly evolving world of PC gaming, staying ahead of the curve is essential for an immersive and competitive experience. Upgrading your gaming rig with the latest computer parts not only boosts your system’s performance but also ensures that you’re getting the most out of your gaming sessions. This comprehensive guide will walk you through the key components to consider when upgrading…
View On WordPress
#cooling systems#CPU upgrades#cutting-edge gaming technology#DIY PC upgrades#energy-efficient PSUs#future-proofing components#gaming experience#gaming rig upgrades#GPU enhancements#high-resolution gaming#immersive gaming setup#latest computer parts#motherboard compatibility#NVMe SSD#PC gaming advancements#PC performance boost#power supply units#professional PC building#quality computer components#RAM optimization#ray tracing#SSD technology#system compatibility#thermal management
1 note
·
View note
Text
VMware vSphere 8.0 Update 2 New Features and Download
VMware vSphere 8.0 Update 2 New Features and Download @vexpert #vmwarecommunities #vSphere8Update2Features #vGPUDefragmentationInDRS #QualityOfServiceForGPUWorkloads #vSphereVMHardwareVersion21 #NVMEDiskSupportInVSphere #SupervisorClusterDeployments
VMware consistently showcases its commitment to innovation when it comes to staying at the forefront of technology. In a recent technical overview, we were guided by Fai La Molari, Senior Technical Marketing Architect at VMware, on the latest advancements and enhancements in vSphere Plus for cloud-connected services and vSphere 8 update 2. Here’s a glimpse into VMware vSphere 8.0 Update 2 new…
View On WordPress
#NVMe disk support in vSphere#Quality of Service for GPU workloads#Supervisor Cluster deployments#Tanzu Kubernetes with vSphere#vGPU defragmentation in DRS#VM management enhancements#vSphere 8 update 2 features#vSphere and containerized workload support#vSphere DevOps integrations#vSphere VM hardware version 21
0 notes
Text


Neural Filters Tutorial for Gifmakers by @antoniosvivaldi
Hi everyone! In light of my blog’s 10th birthday, I’m delighted to reveal my highly anticipated gifmaking tutorial using Neural Filters - a very powerful collection of filters that really broadened my scope in gifmaking over the past 12 months.
Before I get into this tutorial, I want to thank @laurabenanti, @maines , @cobbbvanth, and @cal-kestis for their unconditional support over the course of my journey of investigating the Neural Filters & their valuable inputs on the rendering performance!
In this tutorial, I will outline what the Photoshop Neural Filters do and how I use them in my workflow - multiple examples will be provided for better clarity. Finally, I will talk about some known performance issues with the filters & some feasible workarounds.
Tutorial Structure:
Meet the Neural Filters: What they are and what they do
Why I use Neural Filters? How I use Neural Filters in my giffing workflow
Getting started: The giffing workflow in a nutshell and installing the Neural Filters
Applying Neural Filters onto your gif: Making use of the Neural Filters settings; with multiple examples
Testing your system: recommended if you’re using Neural Filters for the first time
Rendering performance: Common Neural Filters performance issues & workarounds
For quick reference, here are the examples that I will show in this tutorial:
Example 1: Image Enhancement | improving the image quality of gifs prepared from highly compressed video files
Example 2: Facial Enhancement | enhancing an individual's facial features
Example 3: Colour Manipulation | colourising B&W gifs for a colourful gifset
Example 4: Artistic effects | transforming landscapes & adding artistic effects onto your gifs
Example 5: Putting it all together | my usual giffing workflow using Neural Filters
What you need & need to know:
Software: Photoshop 2021 or later (recommended: 2023 or later)*
Hardware: 8GB of RAM; having a supported GPU is highly recommended*
Difficulty: Advanced (requires a lot of patience); knowledge in gifmaking and using video timeline assumed
Key concepts: Smart Layer / Smart Filters
Benchmarking your system: Neural Filters test files**
Supplementary materials: Tutorial Resources / Detailed findings on rendering gifs with Neural Filters + known issues***
*I primarily gif on an M2 Max MacBook Pro that's running Photoshop 2024, but I also have experiences gifmaking on few other Mac models from 2012 ~ 2023.
**Using Neural Filters can be resource intensive, so it’s helpful to run the test files yourself. I’ll outline some known performance issues with Neural Filters and workarounds later in the tutorial.
***This supplementary page contains additional Neural Filters benchmark tests and instructions, as well as more information on the rendering performance (for Apple Silicon-based devices) when subject to heavy Neural Filters gifmaking workflows
Tutorial under the cut. Like / Reblog this post if you find this tutorial helpful. Linking this post as an inspo link will also be greatly appreciated!
1. Meet the Neural Filters!
Neural Filters are powered by Adobe's machine learning engine known as Adobe Sensei. It is a non-destructive method to help streamline workflows that would've been difficult and/or tedious to do manually.
Here are the Neural Filters available in Photoshop 2024:


Skin Smoothing: Removes blemishes on the skin
Smart Portrait: This a cloud-based filter that allows you to change the mood, facial age, hair, etc using the sliders+
Makeup Transfer: Applies the makeup (from a reference image) to the eyes & mouth area of your image
Landscape Mixer: Transforms the landscape of your image (e.g. seasons & time of the day, etc), based on the landscape features of a reference image
Style Transfer: Applies artistic styles e.g. texturings (from a reference image) onto your image
Harmonisation: Applies the colour balance of your image based on the lighting of the background image+
Colour Transfer: Applies the colour scheme (of a reference image) onto your image
Colourise: Adds colours onto a B&W image
Super Zoom: Zoom / crop an image without losing resolution+
Depth Blur: Blurs the background of the image
JPEG Artefacts Removal: Removes artefacts caused by JPEG compression
Photo Restoration: Enhances image quality & facial details
+These three filters aren't used in my giffing workflow. The cloud-based nature of Smart Portrait leads to disjointed looking frames. For Harmonisation, applying this on a gif causes Neural Filter timeout error. Finally, Super Zoom does not currently support output as a Smart Filter
If you're running Photoshop 2021 or earlier version of Photoshop 2022, you will see a smaller selection of Neural Filters:


Things to be aware of:
You can apply up to six Neural Filters at the same time
Filters where you can use your own reference images: Makeup Transfer (portraits only), Landscape Mixer, Style Transfer (not available in Photoshop 2021), and Colour Transfer
Later iterations of Photoshop 2023 & newer: The first three default presets for Landscape Mixer and Colour Transfer are currently broken.
2. Why I use Neural Filters?
Here are my four main Neural Filters use cases in my gifmaking process. In each use case I'll list out the filters that I use:

Enhancing Image Quality:
Common wisdom is to find the highest quality video to gif from for a media release & avoid YouTube whenever possible. However for smaller / niche media (e.g. new & upcoming musical artists), prepping gifs from highly compressed YouTube videos is inevitable.
So how do I get around with this? I have found Neural Filters pretty handy when it comes to both correcting issues from video compression & enhancing details in gifs prepared from these highly compressed video files.
Filters used: JPEG Artefacts Removal / Photo Restoration
Facial Enhancement:
When I prepare gifs from highly compressed videos, something I like to do is to enhance the facial features. This is again useful when I make gifsets from compressed videos & want to fill up my final panel with a close-up shot.
Filters used: Skin Smoothing / Makeup Transfer / Photo Restoration (Facial Enhancement slider)
Colour Manipulation:
Neural Filters is a powerful way to do advanced colour manipulation - whether I want to quickly transform the colour scheme of a gif or transform a B&W clip into something colourful.
Filters used: Colourise / Colour Transfer
Artistic Effects:
This is one of my favourite things to do with Neural Filters! I enjoy using the filters to create artistic effects by feeding textures that I've downloaded as reference images. I also enjoy using these filters to transform the overall the atmosphere of my composite gifs. The gifsets where I've leveraged Neural Filters for artistic effects could be found under this tag on usergif.
Filters used: Landscape Mixer / Style Transfer / Depth Blur
How I use Neural Filters over different stages of my gifmaking workflow:
I want to outline how I use different Neural Filters throughout my gifmaking process. This can be roughly divided into two stages:
Stage I: Enhancement and/or Colourising | Takes place early in my gifmaking process. I process a large amount of component gifs by applying Neural Filters for enhancement purposes and adding some base colourings.++
Stage II: Artistic Effects & more Colour Manipulation | Takes place when I'm assembling my component gifs in the big PSD / PSB composition file that will be my final gif panel.
I will walk through this in more detail later in the tutorial.
++I personally like to keep the size of the component gifs in their original resolution (a mixture of 1080p & 4K), to get best possible results from the Neural Filters and have more flexibility later on in my workflow. I resize & sharpen these gifs after they're placed into my final PSD composition files in Tumblr dimensions.
3. Getting started
The essence is to output Neural Filters as a Smart Filter on the smart object when working with the Video Timeline interface. Your workflow will contain the following steps:
Prepare your gif
In the frame animation interface, set the frame delay to 0.03s and convert your gif to the Video Timeline
In the Video Timeline interface, go to Filter > Neural Filters and output to a Smart Filter
Flatten or render your gif (either approach is fine). To flatten your gif, play the "flatten" action from the gif prep action pack. To render your gif as a .mov file, go to File > Export > Render Video & use the following settings.

Setting up:
o.) To get started, prepare your gifs the usual way - whether you screencap or clip videos. You should see your prepared gif in the frame animation interface as follows:

Note: As mentioned earlier, I keep the gifs in their original resolution right now because working with a larger dimension document allows more flexibility later on in my workflow. I have also found that I get higher quality results working with more pixels. I eventually do my final sharpening & resizing when I fit all of my component gifs to a main PSD composition file (that's of Tumblr dimension).
i.) To use Smart Filters, convert your gif to a Smart Video Layer.
As an aside, I like to work with everything in 0.03s until I finish everything (then correct the frame delay to 0.05s when I upload my panels onto Tumblr).
For convenience, I use my own action pack to first set the frame delay to 0.03s (highlighted in yellow) and then convert to timeline (highlighted in red) to access the Video Timeline interface. To play an action, press the play button highlighted in green.

Once you've converted this gif to a Smart Video Layer, you'll see the Video Timeline interface as follows:

ii.) Select your gif (now as a Smart Layer) and go to Filter > Neural Filters

Installing Neural Filters:
Install the individual Neural Filters that you want to use. If the filter isn't installed, it will show a cloud symbol (highlighted in yellow). If the filter is already installed, it will show a toggle button (highlighted in green)

When you toggle this button, the Neural Filters preview window will look like this (where the toggle button next to the filter that you use turns blue)

4. Using Neural Filters
Once you have installed the Neural Filters that you want to use in your gif, you can toggle on a filter and play around with the sliders until you're satisfied. Here I'll walkthrough multiple concrete examples of how I use Neural Filters in my giffing process.
Example 1: Image enhancement | sample gifset
This is my typical Stage I Neural Filters gifmaking workflow. When giffing older or more niche media releases, my main concern is the video compression that leads to a lot of artefacts in the screencapped / video clipped gifs.
To fix the artefacts from compression, I go to Filter > Neural Filters, and toggle JPEG Artefacts Removal filter. Then I choose the strength of the filter (boxed in green), output this as a Smart Filter (boxed in yellow), and press OK (boxed in red).
Note: The filter has to be fully processed before you could press the OK button!

After applying the Neural Filters, you'll see "Neural Filters" under the Smart Filters property of the smart layer

Flatten / render your gif
Example 2: Facial enhancement | sample gifset
This is my routine use case during my Stage I Neural Filters gifmaking workflow. For musical artists (e.g. Maisie Peters), YouTube is often the only place where I'm able to find some videos to prepare gifs from. However even the highest resolution video available on YouTube is highly compressed.
Go to Filter > Neural Filters and toggle on Photo Restoration. If Photoshop recognises faces in the image, there will be a "Facial Enhancement" slider under the filter settings.

Play around with the Photo Enhancement & Facial Enhancement sliders. You can also expand the "Adjustment" menu make additional adjustments e.g. remove noises and reducing different types of artefacts.

Once you're happy with the results, press OK and then flatten / render your gif.
Example 3: Colour Manipulation | sample gifset
Want to make a colourful gifset but the source video is in B&W? This is where Colourise from Neural Filters comes in handy! This same colourising approach is also very helpful for colouring poor-lit scenes as detailed in this tutorial.
Here's a B&W gif that we want to colourise:

Highly recommended: add some adjustment layers onto the B&W gif to improve the contrast & depth. This will give you higher quality results when you colourise your gif.
Go to Filter > Neural Filters and toggle on Colourise.

Make sure "Auto colour image" is enabled.
Play around with further adjustments e.g. colour balance, until you're satisfied then press OK.
Important: When you colourise a gif, you need to double check that the resulting skin tone is accurate to real life. I personally go to Google Images and search up photoshoots of the individual / character that I'm giffing for quick reference.
Add additional adjustment layers until you're happy with the colouring of the skin tone.

Once you're happy with the additional adjustments, flatten / render your gif. And voila!

Note: For Colour Manipulation, I use Colourise in my Stage I workflow and Colour Transfer in my Stage II workflow to do other types of colour manipulations (e.g. transforming the colour scheme of the component gifs)
Example 4: Artistic Effects | sample gifset
This is where I use Neural Filters for the bulk of my Stage II workflow: the most enjoyable stage in my editing process!
Normally I would be working with my big composition files with multiple component gifs inside it. To begin the fun, drag a component gif (in PSD file) to the main PSD composition file.
Resize this gif in the composition file until you're happy with the placement

Duplicate this gif. Sharpen the bottom layer (highlighted in yellow), and then select the top layer (highlighted in green) & go to Filter > Neural Filters

I like to use Style Transfer and Landscape Mixer to create artistic effects from Neural Filters. In this particular example, I've chosen Landscape Mixer
Select a preset or feed a custom image to the filter (here I chose a texture that I've on my computer)

Play around with the different sliders e.g. time of the day / seasons
Important: uncheck "Harmonise Subject" & "Preserve Subject" - these two settings are known to cause performance issues when you render a multiframe smart object (e.g. for a gif)

Once you're happy with the artistic effect, press OK
To ensure you preserve the actual subject you want to gif (bc Preserve Subject is unchecked), add a layer mask onto the top layer (with Neural Filters) and mask out the facial region. You might need to play around with the Layer Mask Position keyframes or Rotoscope your subject in the process.
After you're happy with the masking, flatten / render this composition file and voila!

Example 5: Putting it all together | sample gifset
Let's recap on the Neural Filters gifmaking workflow and where Stage I and Stage II fit in my gifmaking process:
i. Preparing & enhancing the component gifs
Prepare all component gifs and convert them to smart layers
Stage I: Add base colourings & apply Photo Restoration / JPEG Artefacts Removal to enhance the gif's image quality
Flatten all of these component gifs and convert them back to Smart Video Layers (this process can take a lot of time)
Some of these enhanced gifs will be Rotoscoped so this is done before adding the gifs to the big PSD composition file
ii. Setting up the big PSD composition file
Make a separate PSD composition file (Ctrl / Cmmd + N) that's of Tumblr dimension (e.g. 540px in width)
Drag all of the component gifs used into this PSD composition file
Enable Video Timeline and trim the work area
In the composition file, resize / move the component gifs until you're happy with the placement & sharpen these gifs if you haven't already done so
Duplicate the layers that you want to use Neural Filters on
iii. Working with Neural Filters in the PSD composition file
Stage II: Neural Filters to create artistic effects / more colour manipulations!
Mask the smart layers with Neural Filters to both preserve the subject and avoid colouring issues from the filters
Flatten / render the PSD composition file: the more component gifs in your composition file, the longer the exporting will take. (I prefer to render the composition file into a .mov clip to prevent overriding a file that I've spent effort putting together.)
Note: In some of my layout gifsets (where I've heavily used Neural Filters in Stage II), the rendering time for the panel took more than 20 minutes. This is one of the rare instances where I was maxing out my computer's memory.
Useful things to take note of:
Important: If you're using Neural Filters for Colour Manipulation or Artistic Effects, you need to take a lot of care ensuring that the skin tone of nonwhite characters / individuals is accurately coloured
Use the Facial Enhancement slider from Photo Restoration in moderation, if you max out the slider value you risk oversharpening your gif later on in your gifmaking workflow
You will get higher quality results from Neural Filters by working with larger image dimensions: This gives Neural Filters more pixels to work with. You also get better quality results by feeding higher resolution reference images to the Neural Filters.
Makeup Transfer is more stable when the person / character has minimal motion in your gif
You might get unexpected results from Landscape Mixer if you feed a reference image that don't feature a distinctive landscape. This is not always a bad thing: for instance, I have used this texture as a reference image for Landscape Mixer, to create the shimmery effects as seen in this gifset
5. Testing your system
If this is the first time you're applying Neural Filters directly onto a gif, it will be helpful to test out your system yourself. This will help:
Gauge the expected rendering time that you'll need to wait for your gif to export, given specific Neural Filters that you've used
Identify potential performance issues when you render the gif: this is important and will determine whether you will need to fully playback your gif before flattening / rendering the file.
Understand how your system's resources are being utilised: Inputs from Windows PC users & Mac users alike are welcome!
About the Neural Filters test files:
Contains six distinct files, each using different Neural Filters
Two sizes of test files: one copy in full HD (1080p) and another copy downsized to 540px
One folder containing the flattened / rendered test files
How to use the Neural Filters test files:
What you need:
Photoshop 2022 or newer (recommended: 2023 or later)
Install the following Neural Filters: Landscape Mixer / Style Transfer / Colour Transfer / Colourise / Photo Restoration / Depth Blur
Recommended for some Apple Silicon-based MacBook Pro models: Enable High Power Mode
How to use the test files:
For optimal performance, close all background apps
Open a test file
Flatten the test file into frames (load this action pack & play the “flatten” action)
Take note of the time it takes until you’re directed to the frame animation interface
Compare the rendered frames to the expected results in this folder: check that all of the frames look the same. If they don't, you will need to fully playback the test file in full before flattening the file.†
Re-run the test file without the Neural Filters and take note of how long it takes before you're directed to the frame animation interface
Recommended: Take note of how your system is utilised during the rendering process (more info here for MacOS users)
†This is a performance issue known as flickering that I will discuss in the next section. If you come across this, you'll have to playback a gif where you've used Neural Filters (on the video timeline) in full, prior to flattening / rendering it.
Factors that could affect the rendering performance / time (more info):
The number of frames, dimension, and colour bit depth of your gif
If you use Neural Filters with facial recognition features, the rendering time will be affected by the number of characters / individuals in your gif
Most resource intensive filters (powered by largest machine learning models): Landscape Mixer / Photo Restoration (with Facial Enhancement) / and JPEG Artefacts Removal
Least resource intensive filters (smallest machine learning models): Colour Transfer / Colourise
The number of Neural Filters that you apply at once / The number of component gifs with Neural Filters in your PSD file
Your system: system memory, the GPU, and the architecture of the system's CPU+++
+++ Rendering a gif with Neural Filters demands a lot of system memory & GPU horsepower. Rendering will be faster & more reliable on newer computers, as these systems have CPU & GPU with more modern instruction sets that are geared towards machine learning-based tasks.
Additionally, the unified memory architecture of Apple Silicon M-series chips are found to be quite efficient at processing Neural Filters.
6. Performance issues & workarounds
Common Performance issues:
I will discuss several common issues related to rendering or exporting a multi-frame smart object (e.g. your composite gif) that uses Neural Filters below. This is commonly caused by insufficient system memory and/or the GPU.
Flickering frames: in the flattened / rendered file, Neural Filters aren't applied to some of the frames+-+
Scrambled frames: the frames in the flattened / rendered file isn't in order
Neural Filters exceeded the timeout limit error: this is normally a software related issue
Long export / rendering time: long rendering time is expected in heavy workflows
Laggy Photoshop / system interface: having to wait quite a long time to preview the next frame on the timeline
Issues with Landscape Mixer: Using the filter gives ill-defined defined results (Common in older systems)--
Workarounds:
Workarounds that could reduce unreliable rendering performance & long rendering time:
Close other apps running in the background
Work with smaller colour bit depth (i.e. 8-bit rather than 16-bit)
Downsize your gif before converting to the video timeline-+-
Try to keep the number of frames as low as possible
Avoid stacking multiple Neural Filters at once. Try applying & rendering the filters that you want one by one
Specific workarounds for specific issues:
How to resolve flickering frames: If you come across flickering, you will need to playback your gif on the video timeline in full to find the frames where the filter isn't applied. You will need to select all of the frames to allow Photoshop to reprocess these, before you render your gif.+-+
What to do if you come across Neural Filters timeout error? This is caused by several incompatible Neural Filters e.g. Harmonisation (both the filter itself and as a setting in Landscape Mixer), Scratch Reduction in Photo Restoration, and trying to stack multiple Neural Filters with facial recognition features.
If the timeout error is caused by stacking multiple filters, a feasible workaround is to apply the Neural Filters that you want to use one by one over multiple rendering sessions, rather all of them in one go.
+-+This is a very common issue for Apple Silicon-based Macs. Flickering happens when a gif with Neural Filters is rendered without being previously played back in the timeline.
This issue is likely related to the memory bandwidth & the GPU cores of the chips, because not all Apple Silicon-based Macs exhibit this behaviour (i.e. devices equipped with Max / Ultra M-series chips are mostly unaffected).
-- As mentioned in the supplementary page, Landscape Mixer requires a lot of GPU horsepower to be fully rendered. For older systems (pre-2017 builds), there are no workarounds other than to avoid using this filter.
-+- For smaller dimensions, the size of the machine learning models powering the filters play an outsized role in the rendering time (i.e. marginal reduction in rendering time when downsizing 1080p file to Tumblr dimensions). If you use filters powered by larger models e.g. Landscape Mixer and Photo Restoration, you will need to be very patient when exporting your gif.
7. More useful resources on using Neural Filters
Creating animations with Neural Filters effects | Max Novak
Using Neural Filters to colour correct by @edteachs
I hope this is helpful! If you have any questions or need any help related to the tutorial, feel free to send me an ask 💖
#photoshop tutorial#gif tutorial#dearindies#usernik#useryoshi#usershreyu#userisaiah#userroza#userrobin#userraffa#usercats#userriel#useralien#userjoeys#usertj#alielook#swearphil#*#my resources#my tutorials
395 notes
·
View notes
Text
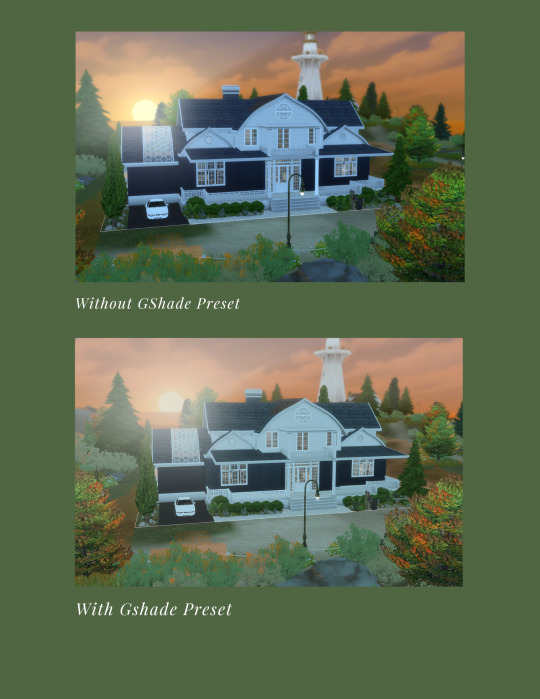
How to get good lighting in your game without using Gshade/Reshade.. sidenote I LOVE me a good Gshade presets, I will ALWAYS use them lol. But this is for the simmers that can't or don't want to use it.
Here is a list of mods that I currently use in my game to help enhance the lighting (Please be sure to read the description of all the MODs):
For CAS: SimplyAnjuta : 🌸 In-Game Sim-Lighting for TS4 🌸 You guys have... (tumblr.com)
In Game: BETTER IN-GAME LIGHTING MOD v1.1 | Patreon
Sunblind (read the instructions carefully, this does not go into your mods folder): simulated affection (tumblr.com)
Cloud replacement: Fluffy clouds (default replacement) | Patreon
Moon replacement: Moon and Lunar Cycle Replacement | Patreon
I also tweaked my GPU setting if you have Nvidia you can do that using this link (do this at your own risk) - 🔧 How to Optimize Nvidia Control Panel For GAMING & Performance The Ultimate GUIDE 2024 *NEW* ✅ (youtube.com)
Hopefully this helps! xo Bonnie
***I am not responsible for anything; this is just some tips that helped me*** Save a copy of your files just in case.
7 notes
·
View notes
Text
Lenovo 300e Gen 4 Perfect Chromebook for Students
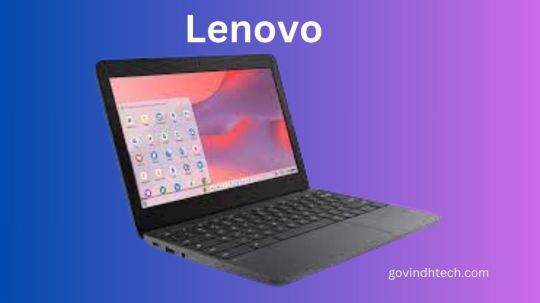
Lenovo 300e Gen 4
With the 300e Gen 4, MediaTek and the Lenovo deliver smarter learning. Lenovo’s next-generation educational Chromebooks use MediaTek. Kompanio processors from MediaTek make these devices suitable for students and teachers.
Security, device management, and Kompanio-powered Chromebooks like the Lenovo 300e Gen 4 are included in the Lenovo MediaTek Chromebook Education school package.
Powerful, versatile digital tools enable in-class and out-of-class learning. Because gadgets work well, teachers can easily set up and supervise classes. This sets schools up for years of success.
Chromebooks with MediaTek Kompanio
MediaTek Kompanio is the trustworthy and innovative do-anywhere companion chip that enhances Chromebook experiences for classroom or remote education, business demands, streaming entertainment, video conferencing, and creative.
Device manufactures can only produce excellent Chromebooks on MediaTek Kompanio platforms.. These powerful, all-in-one chips combine AI processors, HDR cameras, fast and reliable Wi-Fi connectivity, and ultra-efficient performance for true, innovative mobile computer devices with an all-day battery life that can open, flip, fold, or separate.
What benefits Chromebooks from MediaTek?
With a reputation of delivering innovative, always connected, and highly efficient Android smartphone and tablet platforms, MediaTek has developed a range of powerful Chromebook SoCs since 2016.
Chromebooks combine cloud and edge experiences for anywhere computing, including work, education, video conferencing, social, shopping, streaming entertainment, and more.
Top Features & Performance
MediaTek Chromebook chips combine powerful and energy-efficient Arm octa-core CPUs and many-core the GPUs, MediaTek-designed AI processors, premium FullHD-to-4K displays, high-resolution cameras, and the latest Wi-Fi and Bluetooth technologies to deliver amazing Chromebook experiences. Highly responsive apps, multitasking, and stable connectivity.
Enhanced Battery Life
Our Chromebooks are battery-efficient and powerful. The highly integrated design, power-efficiency advancements, and top manufacturing practices ensure your Chromebook lasts as long as you need it.
Lenovo 300e Chromebook Gen 4
MediaTek Kompanio 520
ChromeOS
ARM Mali-G52 2EE MC2 GPU
LPDDR4x-3600, 8GB soldered
Systemsboard 64GB eMMC 5.1
Lenovo Chromebook 300e gen 4
Lenovo’s 300e Yoga Chromebook Gen 4 (11.6″ model) is strong, simple to use, and equipped to grow alongside kids as they meet their learning objectives. With its lightweight, convertible design, efficient MediaTek Kompanio 500 Series CPUs, integrated graphics, and user-friendly ChromeOS platform, this device is designed to facilitate the development of relationships between teachers and students both within and outside of the classroom.
This cutting-edge educational tool is designed for the future of learning with features including a 360-degree Sync hinge, snappy touch panel, optional garaged USI 2.0 Stylus, extended battery life, and an optional 5MP world-facing camera. Whether studying in the classroom or at the kitchen table, students can benefit from quicker connectivity when conducting research for assignments, viewing lectures, and exchanging documents thanks to Wi-Fi 6.
Elevated-Performance Education
By fusing the intuitive ChromeOS platform with the effective and stress-free mobile computing experience of the MediaTek Kompanio 500 Series Processor, the Lenovo 300e Gen 4 makes modern learning possible. The 11.6-inch HD IPS touch display’s 360-degree Sync hinge enables smooth switching between use modes for reading, writing, drawing, content creation, and presenting. Its tactile sensation piques the imagination.
A student-friendly encounter
The Lenovo 300e Gen 4 has an anti-scratch fabric-like cover texture, enhanced Waves Audio for brighter sound, a sharp HD camera, and an optional 5MP world-facing camera. It is designed to spark creativity from anywhere with Wi-Fi 6. The tough-as-nails display with Corning Gorilla Glass protects the display from the daily wear and tear of everywhere learning, while the innovative top-load keyboard offers easy serviceability.
HARDY TECHNOLOGY
The Lenovo 300e Gen 4 is designed to withstand bumps and bruises from the hybrid learning environment because of the new DuraSpec testing standards. The keyboard can withstand unintentional spills up to 360 ml thanks to its anti-pry full-skirt keycaps. Additionally, this durable equipment is portable to any classroom during class hours thanks to its reinforced ports and hinges, A-cover force of 60 kg, rubber bumpers, and a drop test into concrete of 76 cm.
Lenovo 300e Yoga Chromebook Gen 4 Stylus
Teachers and kids are protected from cyberthreats by the Lenovo 300e Yoga Chromebook Gen 4’s integrated end-to-end security, which includes a webcam privacy shutter. Additionally, ChromeOS shields users with safe surfing, sandboxing, and the Titan C security chip from Google in addition to routine automatic security updates that run in the background, meaning you never have to stop learning.
Lenovo 300e Yoga Chromebook gen 4 Services
Lenovo provides a wide range of end-to-end services to safeguard and support your investment, allowing you to concentrate on your studies rather than IT.
Enrollment in ChromeOS Zero-Touch
Provide staff with the appropriate devices while maintaining endpoint security, introducing new cloud-based applications, and overseeing overworked support desks. Lenovo and Google’s zero-touch enrollment enables auto-registration and remote deployment, with devices being shipped straight to users.
Protection Against Accidental Damage
Reduce the amount of time students must miss from school and safeguard your equipment from harm not covered by the guarantee with limitless repairs in the case of inadvertent accidents. Lenovo Qualified parts and extensive diagnostic equipment are used by Lenovo-trained personnel to perform Accidental Damage Protection.
SERVICES FOR CO OFFSET
Customers can offset the carbon emissions linked to their Lenovo products as an easy and transparent method to support the environment. Lenovo has computed the carbon footprint of its personal computers at every stage of their life from production and delivery to use and disposal. Lenovo’s carbon offset partner purchases carbon offset credits based on the device’s calculated emissions and contributes them to various United Nations climate action projects.
Read more on Govindhtech.com
3 notes
·
View notes
Text
Call of Duty: Modern Warfare III Preseason Patch Notes
Patch Notes for the Preseason of Modern Warfare III
November 15, 2023

Due to unforeseen issues, not all of the changes scheduled for today’s update were able to be released. Our teams are hard at work to get key movement changes, Multiplayer weapon balancing, Zombies gameplay and stability fixes, and more into the next available update.
–Global–
COD HQ
Players will no longer encounter a blank screen where MWIII tiles are expected.
Fixed an issue console Players where cross-launching from one game to another disbanded parties containing a split-screen Player.
Fixed an issue for PC Players which selective installs were not available to play after the installation was completed.
A fix has been implemented to solve several crashes that occurred during the application start-up sequence.
Stability & Performance
PC Players with NVIDIA GeForce RTX 40 Series GPUs can now use DLSS 3 across all modes in Call of Duty Modern Warfare III. With DLSS NVIDIA Super Resolution and Frame Generation, DLSS 3 multiplies performance by up to 1.8X to enhance your PC experience.
Fixed a bug in which some console Players would encounter an error upon being invited to a Party.
Fixed a bug in which some console Players were pushed to the Main Menu after selecting certain items in the Battle Pass.
Resolved a bug in which some Players were kicked back to the MultiPlayer lobby after attempting to matchmake in any Playlist.
Addressed account-based issues that prevented offline play.
–Campaign–
Stability & Performance
Resolved a crash that occurred for PC Players during the game’s restart sequence after an update.
Resolved a bug that resulted in Players receiving an error message when trying to launch Campaign.
Resolved an issue causing DEV ERROR 12510 after attempting to start the Operation 627 mission.
Fixed a bug that forced Players to skip cinematic cutscenes when a controller was disconnected.
Fixed multiple gameplay-related crashes in the Oligarch mission.
Resolved a crash that occurred after deploying a Cruise Missile in the Reactor mission.
Gameplay
Completion rewards will now be properly awarded if the Player closes the application during the Credits sequence.
141 Ready Achievement will now properly track the lowest difficulty used to complete a mission.
Fixed a bug in which the functionality of all the Ziplines and Ascenders in the map disappeared after canceling a climb animation.
Fixed a bug in which the Player could not interact with Equipment pickups while quick-drawing a Handgun.
–Multiplayer–
UIX
Bug Fixes
Enemy Player elevation will now be properly displayed on the Minimap.
Fixed a bug in which Playlists would disappear from the Main Menu for some console Players.
Prompt to View Gamercard on the Scoreboard now functions as expected for console players.
Promoting a Player to Party Leader will no longer allow them to attempt to matchmake for locked Playlists.
Progression
Weapons
Addressed an issue that prevented Bolt Attachments from being unlocked at the expected Weapon Level for the KATT-AMR (Sniper Rifle).
Challenges
Introduced new requirements for the Priceless Camo challenge for the WSP Swarm (Submachine Gun).
Get 10 Operator Double Kills while in Tac-Stance.
Resolved issues that prevented several Challenges from tracking completion progress.
Corrected unlock challenge tracking conditions for BBQ (Operator).
Maps
Terminal
Players can no longer plant at the A bombsite from an unintended location in Search and Destroy.
Popov Power
Players will no longer spawn in enemy territory in the Invasion mode.
Modes
Team Deathmatch
Increased match score limit from 75 to 100.
Ground War
Addressed an issue causing DEV ERROR 841 during normal gameplay.
Be on the lookout for an Experimental Playlist in the coming days, featuring enemy Player outlines! More details to come.
Weapons & Attachments
MCW (Assault Rifle)
Increased hipfire control during sustained fire.
BAS-B (Battle Rifle)
Increased hipfire control during sustained fire.
Increased hipfire control during sustained fire.
MTZ Interceptor (Marksman Rifle)
Increased hipfire control during sustained fire.
Renetti (Handgun)
Increased hipfire control during sustained fire.
JAK Ferocity Carbine Kit (Conversion Kit)
Thermo-Optic X9 and SZ VORTEX-90 Optic Attachments can now be toggled as expected.
TYR (Handgun)
Increased hipfire control during sustained fire.
Odin’s Judgement (Trigger Action)
Decreased trigger response time to the intended 210ms duration.
Cosmetics
Gun Screen audio will now play as expected upon pressing the preview button.
Tracer Pack: Hellsing Operator Bundle
Fixed a bug in which Alucard was missing his handgun in the Operator preview.
–ZOMBIES–
Gameplay
Addressed an issue that prevented missions in Act 2 and Act 3 from auto-queueing while in-game.
Stability
Fixed a crash encountered when Players navigated to the Store or Progression tab in the Launcher Menu while queuing.
Various stability and map fixes.
5 notes
·
View notes
Text
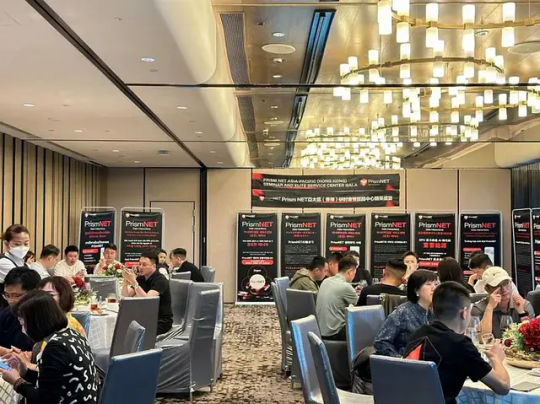
TITLE: PrismNET Asia-Pacific Leaders Symposium: Launch of the 319 Global Service Center Initiative
On May 7th, the PrismNET Asia-Pacific Leaders’ Symposium was successfully held at the Cordis Hotel in Hong Kong, bringing together service center heads and community leaders from various countries and regions within Asia-Pacific to discuss the expansive plans for PrismNET. At the event, Marlik Luno, the Chairman of PrismNET Global Development Committee and Chief Operating Officer, welcomed the representatives of the Asia-Pacific community and outlined the development plans for the upcoming months. Luno highlighted the current global societal transformation characterized by significant shifts in productivity. PrismNET is at the forefront of this transformation, leading the development in the AIGC artificial intelligence industry. The company has addressed the industry’s core challenge of GPU power supply for energy in artificial intelligence, having upgraded 13 GPU power clusters globally with a total capacity reaching 1100P. Furthermore, the platform is developing the PrismNET Chain (PNC), a global distributed power cluster blockchain network aimed at consolidating idle and redundant GPU power for scheduling and distribution, thus maximizing the application value of individual GPU capacities.
Subsequently, Tomy Tang, from the Platform Education and Development Committee, analyzed the current state and future value of the AI+DePin industry track for the leaders. He discussed how PrismNET positions itself as the first platform globally to implement an AI+Web3.0 ecosystem. The platform’s GPU power leasing service has already provided cost-effective energy solutions for more AI enterprises. Using AI for content publication, data streaming, and automated sales through e-commerce server rooms built around the world, along with matrixed account operations, the platform has achieved over $7000 in sales profit per account on TikTok, demonstrating the deep application of AI in e-commerce.
Following this, William delved into an in-depth analysis of PrismNET’s business model and its long-term value prospects. Many community leaders expressed that PrismNET’s business model fully meets everyone’s market expectations and that this mechanism is adaptable to various market conditions, ensuring the best possible outcomes for business expansion. The business model, being a core element of project development, features low barriers to entry, high returns, vast potential for imagination, scalability, user-friendliness, and strong promotional drive, which are significant characteristics of the PrismNET model.
During the banquet, the platform made a major announcement with the launch of PriamAI, an AI short video tool tailored for C-end users, integrating functions like IP creation, graphic generation, video conversion, and digital human cloning. PrismAI provides numerous entrepreneurs with powerful tools for easy use. Additionally, users can utilize PNC for exchanges to enhance their experience significantly, also greatly boosting PNC’s circulation and application value within the ecosystem.
At the banquet, the 319 Global Service Center Plan was announced, which, through the strong support of salons and sharing sessions, aids in the business development of service centers in various regions and rapidly propagates PrismNET’s vast ecosystem in the market. The banquet also recognized outstanding service centers for April, with Chief Operating Officer Luno personally distributing awards to the winners. Additionally, the development and evaluation plans for the community in May and a preview of the PrismNET Global Elite International Symposium scheduled for June were announced.
During this meeting, leaders from the Wutong Community and Xinxin International Community shared their experiences, insights, and market development strategies deeply with the attendees, setting goals and resolutions for May. All leaders present reached a high consensus to strive with full effort to discuss, build, share, and win together, and to collaborate in developing a grand industry ecosystem alongside the platform.
About PrismNET
PrismNET aims to provide cheap computing power and sustainable development super power for global AIGC entrepreneurs and developers in the AI field. It promotes the development of the artificial intelligence industry through the construction of distributed computing power cluster networks and computing power leasing services under trusted networks. Provide global investors with a convenient way to participate in the artificial intelligence track and an AI income path.
Follow PrismNET on:
Website | Telegram |Channel| Twitter | Medium | YouTube
2 notes
·
View notes
Note
how do you enhance the graphics so much? :0c and what emulator do you use?
:3c
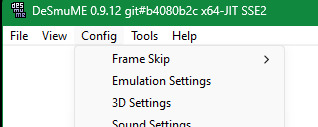
i use desmume, just looked it up and apparently there was an update in 2022, i still have the previous version from 2015 with a development build of the executable from 2021 so idk what changed but it sounds like they no longer support wifi emulation so i won't be updating because i do have a way to connect to a wifi replacement server.
so here's what i do to enhance graphics, it may be a bit different if you're using the latest version. i will warn you. i've found 3d graphics in ds emulation to be a bit laggy on low-end pcs, idk if it's to do with it rendering 2 screens at once or what but make sure you can run things smoothly first because this is only going to make it worse.
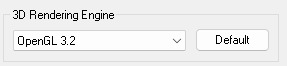
you wanna go to Config > 3D Settings
now if it isn't already, switch your rendering engine to OpenGL 3.2, (idk if the newer version might support Vulkan or something, in which case that may be better). but it may default to SoftRasterizer which is nice but it like software emulates the rendering and may be really slow unless you've got a really good processor. OpenGL (or Vulkan if that's an option) will unload that rendering to your graphics card which will make things faster, especially if you've got a decent one.
anyway, this here is the main feature. the GPU Scaling Factor. increase this to enhance the graphics beyond the limits of the ds screen resolution. bearing in mind, sprites and texures won't be affected but any 3d graphics will look much smoother
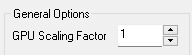
this is the difference between 1 and 4


you way also want to check this setting out. Texture Scaling will increase the resolution of textures and attempt to smooth them out

here's GPU Scaling Factor 4 with Texture Scaling 4x

just bear in mind that some sprites are actually textures on a flat model for technical reasons so some things that are meant to be pixel art 2d sprites might look a bit weird

i hope this helps :3
10 notes
·
View notes
Note
Hi, I enjoy your work immensely. I’m a programmer and I’ve been upscaling art to my screen resolutions and I was wondering if you would like me to post them or not. I know some artists prefer to not post 4k and use their high resolution work for sale only. Let me be clear I have not trained any weights on your work. Upscalers can cause some minor modifications like subtle texture differences, I’m talking about the LDSR latent diffusion super-resolution model. It produces a high quality and it finally works with crisp lines and aliasing is well defined. If you want me to delete them or drop box them to you, I could if you dislike what I did, sorry I’m experimenting with GPU intensive processing each piece is a 15 minute process-time 1080 to 4k. It’s likely you have your own way of producing 4k work easily, I’m just digging for good examples to post to my blog so artists like yourself can see how this compares and I may do some coding and possibly work. I’m also curious what an artist I respect feels about what I just said so that I have an awareness of the climate. I have hundreds of these a lot of obscure stuff that feels a bit like renewing I a respectful way.
Again no training of your work was done it looks to my untrained eyes the same art at super resolution. I will not post without permission and hope that I’ve not been disrespectful as I’m aware it could feel like altered in a negative way I’m not attempting any type of derivation though the textures are enhanced. I don’t have a designers eye, I’m trying to learn as an amateur artist and spread or trade awareness to artists and professionals. One or two is all I am looking to post, but I think your work is a nice looking example of a new type of post-processing. Any feedback is appreciated, this is a complex topic right now and I’m trying to do right to work I appreciate.
Thanks for your message. I already have hi res pic of my drawings. Please don’t post your upscaled ones and maybe delete the files. Thank you!
14 notes
·
View notes
Text
2024’s Ultimate GPU Showdown: The Best Options for Your Needs
Introduction
Welcome to our blog where we are diving into the realm of high-performance computing and graphics processing units. In this article, we’ll be exploring the anticipated 2024 GPU showdown, analyzing the best options available to cater to a wide range of needs. Whether you’re a avid gamer, a content creator, or a professional in need of top-notch visualization capabilities, we’ve got you covered. Join us as we unravel the most promising GPU options and help you make an informed decision for your specific requirements.
The Evolution of GPU Architecture: What to Expect in 2024
The advancements in AI integration are set to revolutionize the rendering process, promising more efficient graphics processing and improved overall performance. Furthermore, the increased focus on ray tracing technology will undoubtedly elevate the visual quality of graphics, delivering more realistic lighting, shadows, and reflections in graphical output. Another key feature on the horizon is the enhanced support for 8K and virtual reality displays, which will cater to the escalating demand for high-resolution and immersive experiences. Notably, the continued emphasis on power efficiency and thermal management will be a driving force behind the development of cooler, quieter, and more energy-efficient GPUs, ensuring optimal performance while maintaining sustainable computing solutions.
Rising Demand for AI and Machine Learning Capabilities in GPUs
The increasing integration of AI and machine learning applications in various industries such as healthcare, finance, and automotive is propelling the demand for more powerful GPU capabilities. As these technologies continue to advance, the need for GPUs with enhanced parallel processing and deep learning capabilities is becoming increasingly apparent. GPU manufacturers are directing their efforts towards developing specialized hardware and software solutions tailored to the specific requirements of AI and machine learning workloads, addressing the growing demand for GPUs optimized to handle neural networks and large datasets.
The Role of Ray Tracing in Next-Generation Graphics Cards
The integration of ray tracing technology in next-generation GPUs is poised to revolutionize the gaming and graphics industry. By simulating the behavior of light in virtual environments, ray tracing will offer unparalleled levels of detail and accuracy, bringing about an unprecedented level of visual fidelity. This advancement not only enhances the visual quality of games but also opens up new possibilities for interactive storytelling in industries such as architecture and film production. Moreover, the cinematic-quality visuals generated in real-time will undoubtedly elevate the immersive experience for both gamers and content creators, setting new standards for visual excellence.
Advancements in Cooling Technology for High-Performance GPUs
Liquid cooling solutions have gained traction in the realm of high-performance GPUs, as they excel in dissipating heat effectively while operating quietly. Additionally, manufacturers are focusing on the development of innovative fan designs with advanced blade technology to enhance airflow and minimize noise levels in GPU cooling systems. Furthermore, the integration of phase-change materials in cooling solutions presents a promising trend, offering efficient heat transfer and improved thermal management. Moreover, the utilization of advanced thermal interface materials (TIMs) is optimizing the contact between the GPU die and cooling solutions, ultimately enhancing overall thermal performance. These advancements in cooling technologies are poised to elevate the efficiency and effectiveness of GPU thermal management.
Impact of Quantum Computing on Future GPU Development
The integration of quantum computing principles into GPU development has the potential to redefine the landscape of computational power and speed. By leveraging the capabilities of quantum computing, future GPUs are poised to deliver unprecedented performance, making real-time ray tracing and AI-driven features more accessible than ever. This innovative approach to GPU architecture holds the promise of enhancing graphics rendering for complex visual tasks and virtual reality experiences, ushering in a new era of computational efficiency and capabilities. The convergence of quantum computing and GPU development may unleash a wave of advancements that revolutionize the field of graphics processing.
Comparing the Top GPU Models of 2024
The 2024 NVIDIA GTX 12800 sets a new standard with its exceptional ray tracing capabilities, catering to the needs of both gamers and digital artists seeking unparalleled visual fidelity and performance. On the other hand, AMD’s Radeon RX 9800 emerges as a powerhouse in the realm of 8K gaming, delivering seamless performance and breathtaking visuals, setting a new benchmark for immersive gaming experiences. For those seeking cost-effective options, the Intel Xe-HP 9600 presents an enticing choice, offering impressive 4K gaming performance while prioritizing efficient power consumption. Additionally, the ASUS ROG Strix RTX 12600 Ti distinguishes itself with its exceptional cooling system, ensuring low temperatures even during the most demanding tasks, making it an appealing option for users with high-performance needs. Each GPU presents a compelling option catering to a diverse range of user preferences and requirements.
How to Choose the Right GPU for Your Gaming Setup
When it comes to selecting a GPU, it’s essential to carefully consider your budget and performance needs. While high-end options may offer better graphics, they often come with a higher price tag, so weighing the cost against the desired performance is crucial. Additionally, researching the compatibility of the GPU with your gaming setup is vital. Factors such as power supply requirements, physical dimensions, and available ports can significantly impact the overall functionality of the GPU within your system. It’s also important to take into account the specific games you play and their recommended system requirements to ensure the chosen GPU can handle your favorite titles at optimal settings. Lastly, don’t overlook additional features such as ray tracing, DLSS, or software suites that may enhance your gaming experience based on your preferences and usage. Each of these considerations plays a pivotal role in selecting the right GPU for your gaming needs.
Maximizing Performance: The Best GPUs for Content Creation
When it comes to high-resolution video editing, the NVIDIA GeForce RTX 3090 is a standout choice with its massive 24GB of GDDR6X memory, ensuring smooth playback and rendering of 8K footage. For graphic designers and illustrators, the NVIDIA Quadro RTX 6000 offers superb support for Adobe Creative Suite and other design software, providing unparalleled stability and accuracy. If your workflow involves real-time visual effects and virtual production, the AMD Radeon VII’s 16GB of HBM2 memory and high bandwidth make it a powerhouse for demanding real-time applications. Additionally, for 3D rendering and complex simulations, the AMD Radeon Pro W6800X Duo delivers exceptional multi-GPU performance, making it ideal for professional content creators. Each of these GPUs caters to specific creative needs, offering optimal performance for different aspects of content creation and design work.
Budget-Friendly GPU Options for Every Need
For casual gamers or office work, the NVIDIA GeForce GTX 1650 offers solid performance without breaking the bank. Its affordability and reliable performance make it an ideal choice for everyday use. If you’re into content creation, the AMD Radeon RX 580 provides a cost-effective solution with great rendering capabilities. Its ability to handle rendering tasks efficiently makes it a valuable asset for content creators seeking an affordable yet capable solution. Gamers looking for a budget-friendly option with ray tracing support can consider the NVIDIA GeForce RTX 2060 for an optimal gaming experience. The inclusion of ray tracing support at an affordable price point opens up a new level of visual immersion for budget-conscious gamers. For those seeking a versatile GPU that balances price and performance, the AMD Radeon RX 5600 XT is a compelling choice with its excellent value proposition. Its balance of affordability and performance makes it a strong contender for those seeking a well-rounded gaming experience without breaking the bank.
Future-Proofing Your System: Upcoming GPU Technologies
In 2024, the ultimate GPU showdown is poised to showcase cutting-edge technologies that aim to revolutionize gaming and professional workstations. With a focus on advancements in AI and machine learning, the upcoming GPUs are anticipated to deliver unprecedented performance for handling complex computational tasks with ease. As users look for the best options to meet their needs in 2024, the emphasis will be on efficiency, prioritizing high frame rates and real-time ray tracing capabilities for truly immersive gaming experiences. Moreover, future-proofing your system with these upcoming GPU technologies will ensure compatibility with next-generation games and software, maximizing longevity and overall value for users.
Conclusion
In 2024, the GPU landscape is set to deliver an array of cutting-edge technologies that will redefine gaming and professional workstations. From the increasing importance of AI and machine learning capabilities to the pivotal role of ray tracing in next-generation graphics cards, the ever-evolving GPU architecture promises to revolutionize the way we experience visual content. As users seek to optimize their systems for gaming, content creation, and everyday use, the careful selection of GPUs based on performance, price, and specific needs will be crucial. Whether it’s maximizing performance with GPUs tailored for content creation or identifying budget-friendly options, the choices available cater to a wide range of user requirements. Looking ahead, with the constant evolution of GPU technologies, future-proofing your system will be essential to ensure compatibility with next-generation games and software, ultimately maximizing longevity and overall value for users.
2 notes
·
View notes
Text
MacBook Pro A1989 13" Repair Service #Nehru Place
Conquering MacBook Pro A1989 13" Display Anomalies with Expertise:~~
Our seasoned technicians understand the intricate dynamics of the A1989 13" display, and their expertise is at the forefront of our solution. Whether the flickering is a result of cable wear, hinge stress, or internal friction, our approach goes beyond the surface, addressing the root causes with finesse. We prioritize clarity, precision, and a commitment to delivering a flicker-free display that meets the standards of your MacBook Pro.
By choosing our MacBook Pro A1989 13" Flickering Solution, you're not just opting for a fix; you're embracing a journey led by expertise. Our comprehensive strategies encompass cable inspections, hinge adjustments, and targeted solutions, ensuring a holistic resolution to the anomalies affecting your MacBook Pro display.

Factors Contributing to MacBook Pro A1989 Screen Flickers:~~
The MacBook Pro A1989 is a powerhouse, but users occasionally encounter screen flickering issues that can be both frustrating and disruptive.
Flex Cable Wear: Wear or damage to these cables may lead to intermittent connections, causing screen flickering.
Hinge Stress: Hinge stress may increase friction on flex cables, contributing to flickering issues.
Internal Friction: Microscopic damage from internal friction can disrupt stable display connections, leading to flickering.
Overheating: Overheating may lead to malfunctions in electronic components, including those related to display functionality.
Software Issues: Software-related problems may cause intermittent display anomalies, contributing to flickering.
Graphics Card Malfunction: Malfunctions in the GPU may result in visual artifacts, including flickering on the screen.
Incompatible Software or Drivers: Incompatibility issues may lead to flickering as the system struggles to render graphics correctly.
Interference from External Devices: Electromagnetic interference can disrupt the display signal, leading to flickering.
Display Settings and Calibration: Adjustments to brightness, contrast, or color settings might affect display stability.
Hardware Failures: Damaged hardware components may result in flickering and other display issues.
How Our Company Pinpoints Flickering in MacBook Pro A1989 13" Displays:~~
Comprehensive Diagnostics: We commence our process with a comprehensive diagnostic assessment, utilizing cutting-edge tools and software to analyze the display's performance. This step involves a thorough examination of both hardware and software components.
Flex Cable Inspection: One of the primary contributors to flickering is often wear or damage to flex cables. Our experts meticulously inspect these delicate cables, identifying any signs of wear, tears, or compromised connections that may be causing flickering.
Hinge Stress Analysis: Frequent opening and closing of MacBook Pro laptops can cause stress on hinges, potentially affecting the display. We assess the hinge mechanism for any irregularities and make adjustments to minimize stress on flex cables.
Temperature and Overheating Check: Overheating can impact internal components, including those related to the display. Our diagnostics include monitoring temperature levels and ensuring proper cooling mechanisms to prevent overheating-related flickering.
Software and Driver Audits: Software glitches or outdated drivers can contribute to display anomalies. Our team conducts thorough audits of the operating system, display drivers, and related software to identify and rectify any issues causing flickering.
External Interference Analysis: External devices or accessories can introduce electromagnetic interference, affecting the display. We assess the environment and connected peripherals to minimize interference and enhance display stability.
Graphics Card Evaluation: Issues with the graphics processing unit (GPU) can lead to flickering. Our experts scrutinize the GPU's performance, ensuring it functions optimally and addressing any malfunctions that may be contributing to the flickering.
Display Calibration and Settings Adjustment: Incorrect display settings or calibration can cause visual anomalies. We meticulously adjust brightness, contrast, and color settings to optimize the display experience and eliminate flickering.
Documentation and Reporting: Throughout the diagnostic process, our team maintains detailed documentation. This includes findings, identified issues, and the steps taken for resolution. This documentation serves as a reference for transparency and future troubleshooting if needed.
2 notes
·
View notes
Text

3dfx Voodoo 3 3000 + Noctua NF-A4x10 fan = overclocking
Or at least, it'll run a little cooler and hopefully add a few more years to the old girls life.
It's not that I need to overclock an old video card when I can easily use a newer card if I'd like more performance. It's more that by enhancing the cooling and seeing how much more performance is hidden in the device takes me back to my younger years when it became a way to saving a good chunk of money by investing in a cheaper CPU or video card and then squeezing out more FPS through some TLC.
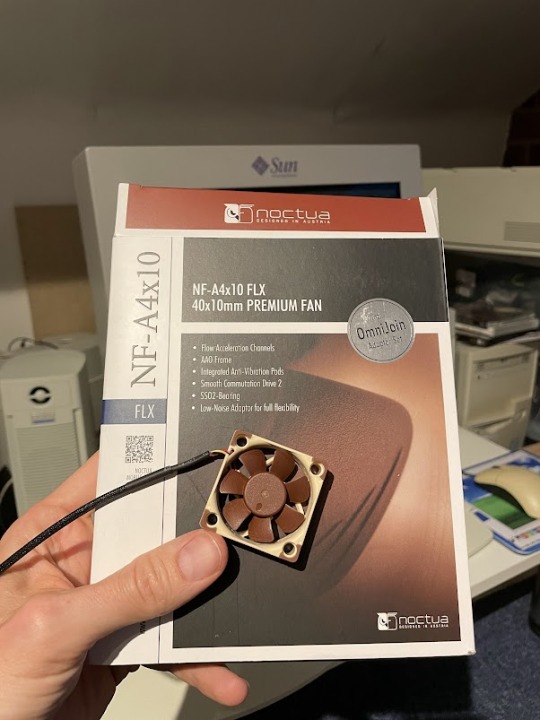
The Voodoo 3 range runs pretty hot by default and don't feature any active cooling. So back in the day it was fairly common for people to slap on a fan in a basic way in order to try and cool down the card a little.
The Voodoo 3 2000 ran at 143Mhz (GPU & RAM) by default which typically gave it quite a lot of headroom for speeding up. Where as the Voodoo 3 3000 running at 166MHz was normally running close to it's limit. Those with a Voodoo 3 3500 were already at 183MHz and would be unlikely to squeeze much more out.
From research it seems that typically it's the memory on the cards that give out before the GPU. With memory chips being used with speed ratings ranging from 6ns, 5.5ns to even some 5ns. Those with lower ratings having more headroom to run at higher speeds.
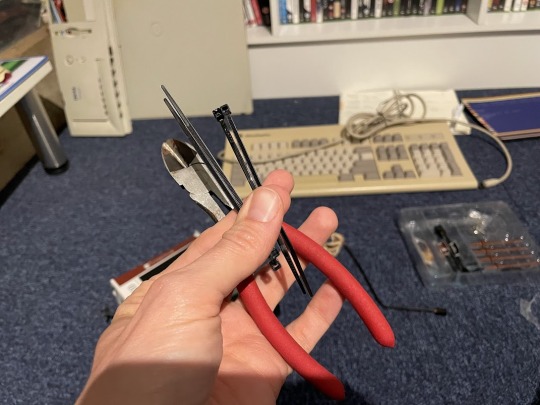
So what could I get some my card? First up, let's attach that fan


The stock 3000 heatsink features two little holes at opposite ends which I thought would be perfect to looping a cable tie through. The first one went in without too much difficulty.
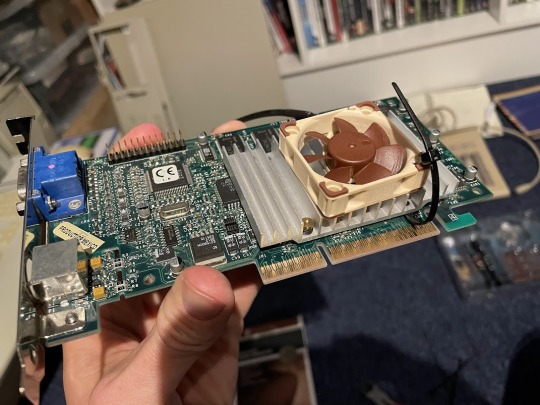
Unfortunately with the second I just couldn't squeeze the damn thing through. After much frustration I instead put a screw through the fan and used some pliers to squash the metal of the heatsink onto the thread of the screw.
Not as elegant as I would have liked, but it's held in place securely enough for my needs.

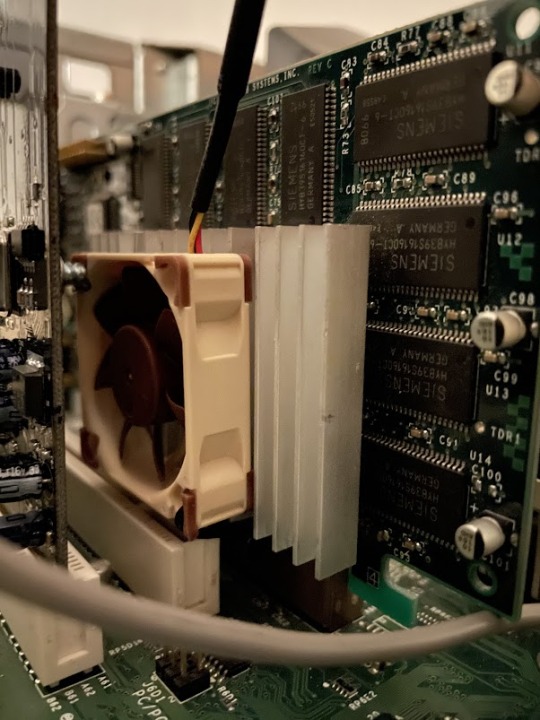
Once in the Pentium III mainboard it fits in nicely and thankfully doesn't hit the PCI header next to the AGP slot (Of course I checked this prior to securing the fan...)
So after all that, how much more performance does this card have to give?
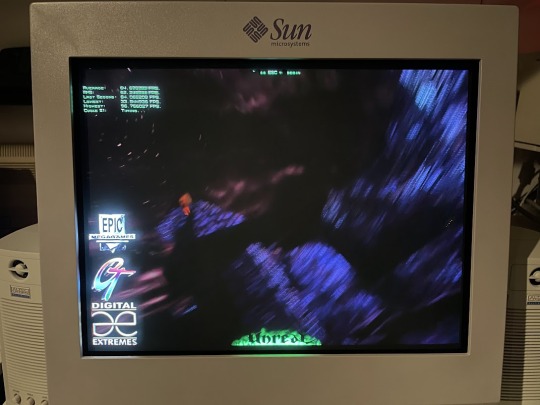
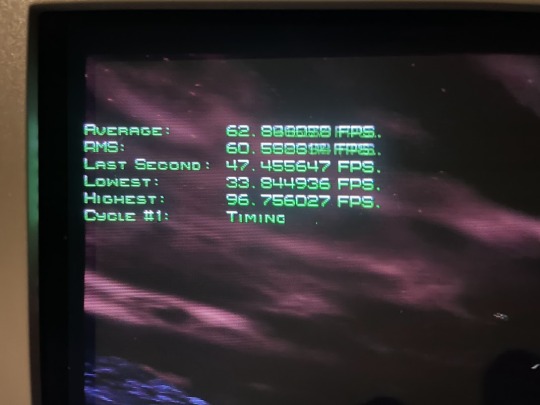
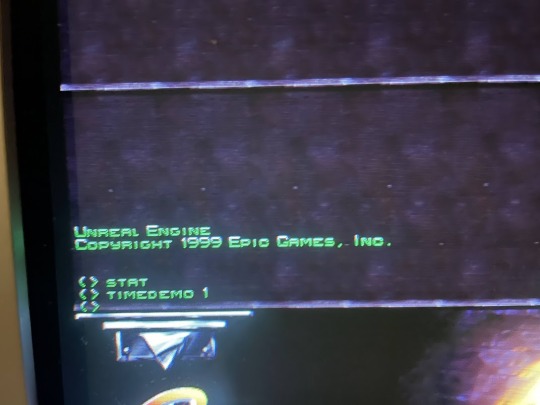
I turned to Unreal, as it was already installed and felt like a suitable game for the era of the hardware and ran a timedemo at 1024x768 and 1280x1024 resolutions
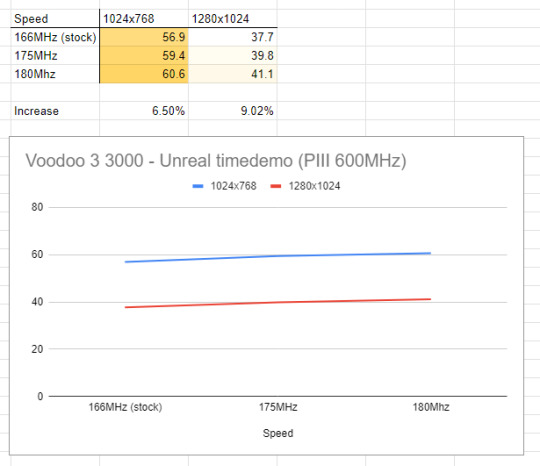
An extra 14MHz gives an additional 6.5% performance at 1024 with a higher 1280 resolution giving a higher 9% uplift. Not earth shattering, but certainly a nice little bonus.
Unfortunately if I pushed the card any further Unreal would get a little psychedelic

Yay for overclocking!
5 notes
·
View notes
Text
Skytech Gaming Prism II Gaming PC: Unleashing Power

I use the Skytech Gaming Prism II Gaming PC, equipped with the mighty INTEL Core i9 12900K processor clocked at 3.2 GHz, an RTX 3090 graphics card, a spacious 1TB NVME Gen4 SSD, and a robust 32GB DDR5 RGB RAM. The package also includes an 850W GOLD PSU, a 360mm AIO cooler, AC Wi-Fi, and comes pre-installed with Windows 10 Home 64-bit. Let me share my experience with this powerhouse.
Performance Beyond Expectations
The Intel Core i9 12900K is an absolute beast, effortlessly handling resource-intensive tasks and demanding games. The synergy with the RTX 3090 is evident in the seamless gaming experience with ultra-settings. Whether it's rendering, gaming, or multitasking, this PC delivers exceptional performance, surpassing my expectations.
Graphics Prowess and Immersive Experience
The RTX 3090 is a graphics powerhouse, providing stunning visuals and real-time ray tracing. Gaming on this machine is an immersive experience, with smooth frame rates and jaw-dropping graphics. The 32GB DDR5 RGB RAM complements the GPU, ensuring seamless transitions between applications and minimizing lag.
Storage Speed and Capacity
The 1TB NVME Gen4 SSD significantly enhances system responsiveness and speeds up data transfer. Games load swiftly, and the overall system boot time is impressive. The ample storage space caters to a vast game library, eliminating concerns about running out of space.
Robust Cooling System
The inclusion of a 360mm AIO cooler ensures that the system remains cool even during prolonged gaming sessions. It effectively dissipates heat, maintaining optimal temperatures for both the CPU and GPU. This attention to cooling enhances the system's longevity and ensures consistent performance.
Powerful and Efficient PSU
The 850W GOLD PSU is more than capable of handling the power demands of the Core i9 12900K and RTX 3090. It provides a stable power supply, contributing to the overall efficiency and reliability of the system. The gold-rated efficiency ensures energy is utilized optimally, reflecting a commitment to sustainability.
Aesthetically Pleasing Design
Apart from the raw power, the Skytech Gaming Prism II stands out with its visually striking design. The RGB lighting on the DDR5 RAM adds a touch of flair, creating a visually pleasing gaming setup. The attention to aesthetics extends to the cable management, contributing to a clean and organized look.
User-Friendly Setup and Windows 10 Integration
The pre-installed Windows 10 Home 64-bit operating system streamlines the setup process, allowing users to dive into their gaming or productivity tasks swiftly. The inclusion of AC Wi-Fi ensures a reliable and fast internet connection, further enhancing the overall user experience.
Conclusion: A Premium Gaming Powerhouse
In conclusion, the Skytech Gaming Prism II Gaming PC is a premium gaming powerhouse that exceeds expectations in performance, design, and efficiency. The combination of the Intel Core i9 12900K and RTX 3090, coupled with ample storage and robust cooling, makes it a top-tier choice for gamers and content creators alike. The attention to detail in design and the user-friendly setup further solidify its position as a stellar gaming desktop. If you're in the market for a high-end gaming PC, the Skytech Gaming Prism II is a compelling choice that delivers on both power and aesthetics.
2 notes
·
View notes
Text
MediaTek Dimensity 9200+ launched for the ultra flagship processors. This contains an enhanced CPU and GPU support. Do you think it works for the brands?
7 notes
·
View notes
Text
Apple M4 Powers Up the iMac: Blazing Speed for Creatives
Apple M4 iMac Predictions
24 Apple iMac
Apple M4 chips may be introduced when Apple updates the 24-inch iMac in 2024. Apple intends to update the Mac series, including the iMac, with AI-focused M4 CPUs. This document details Apple’s M4 iMac ambitions.
Apple M4
Apple may incorporate the M4 chip from the latest iPad Pro models in the forthcoming 24-inch iMac. Since iMacs have M3 chips, the M4 will be a direct upgrade.
Apple M4 is a second-generation chip based on the M3’s 3-nanometer technology with performance and efficiency improvements. Apple M4 CPU outscored M3 chip by 25% in Geekbench benchmark test, suggesting considerable performance boost.
The Apple M4 had 3,695 single-core and 14,550 multi-core scores, compared to 3,087 and 11,702 for the M3.
Apple’s M4 processor has a 10-core GPU and CPU with four performance and six efficiency cores. Apple uses an M4 with a 9-core CPU in the iPad Pro, but the iMac may not have it.
Other Macs will have upgraded M4 Pro, M4 Max, and M4 Ultra CPUs, while the 24-inch iMac, which is equal in price to the MacBook Air, will only have the M4 chip.
Create
No signs suggest Apple will revamp the iMac soon the last overhaul was in 2021. The 2024 iMac refresh may focus internal improvements over exterior design changes.
Computers and displays are merged in the iMac. It fits on a desktop due to its narrow profile and 11.5mm thickness. It has a pastel chin and comes in bright shades.
They know of no iMac enhancements other than the Apple M4 chip.
Larger iMac?
Despite rumours, a 30-inch iMac was still in development in mid-2023. Its release date is unknown. As of May 25, 2024, Apple has no larger iMac. Current 24-inch iMacs include M3 chips. In 2024, rumours of a bigger iMac with an M-series CPU had faded. Apple hasn’t confirmed a 30-inch model for 2025.
Expect a larger iMac: Rumours say Apple may sell a larger iMac in the future.
Connect Mac to external display: You can add a larger external monitor to your iMac or Mac mini. This maximises screen space and lets you choose size and resolution.
Consider Mac Studio: The Mac Studio is fast and may be used with a larger display for a strong desktop arrangement.
Launch Day
Bloomberg’s Mark Gurman expected a 24-inch iMac M4 processor update “around the end of the year.” The iMac may launch at October or November Apple events with new Macs. Pre-year MacBook Pro and Mac mini improvements are anticipated. Since the iMac was updated in October 2023, an October 2024 release would conclude the year.
The M4 processor outperforms the M3 with a 10-core CPU (6 efficiency and 4 performance) and GPU. Hardware-accelerated ray tracing and 16-core Neural Engine are featured. The M4 iMac could handle video editing and 3D rendering.
Apple iMac M3
They expect the new iMac to have a 24-inch Retina 4.5K display like the M3 model. Apple may possibly offer more colours for the upcoming iMac, like the M2 model. The M4 iMac will be a major upgrade from the M3. Keep an eye out for Apple’s M4-powered iMac later this year if you want a powerful and adaptable desktop.
Based on rumours and leaks, the M4 iMac may include these features:
The next-generation 24-inch iMac is believed to have the M4 chip, which Apple used in the current iPad Pro versions.
The M4, a second-generation microprocessor with faster and more efficient performance, uses the same 3-nanometer technology as the M3.
The M4 outperformed the M3 on Geekbench by 25%. Apple’s M4 processor contains a 10-core CPU and GPU with six efficiency and four performance cores.
Design: The M4 iMac will have a slim, colourful aluminium casing like the M3.
Seven brilliant colors blue, green, pink, silver, space grey, yellow, and orange are likely.
256GB of M4 iMac storage can be expanded to 2TB of SSD storage.
The M4 iMac will have 8GB of starting memory and up to 16GB of unified memory.
Reports and leaks suggest these specs for Apple’s M4 iMac:
M4 Chip had 10 cores: 4 efficient, 6 performant.
Ten cores and second-generation 3-nanometers make the GPU more efficient and performant than M3.
24-inch 4.5K Retina screen, True Tone, P3 colour gamut.
SSDs start at 256GB and RAM up to 2TB.
Standard unified memory is 8GB, customisable to 16GB.
Dual SDXC card slots, USB-C connections, Thunderbolt 4 connectors.
From last update, there was no mention of a “M4 iMac.” Apple regularly updates their products with newer processors and features. Apple’s custom Mac CPUs are generally labelled “M”.
The M1 chip, which delivered exceptional performance and energy economy, changed Apple’s desktop and laptop computers. An M4 iMac may use this special silicon to boost power and efficiency. I prefer Apple’s official releases or trusted tech sources for the most accurate and current information.
Read more on Govindhtech.com
2 notes
·
View notes
Text
Things I wish I knew before I installed Linux
Flatpak. Flatpak is a software packaging and distribution solution, the main feature of which is containerization. What that means is if you install a Flatpak app, it is isolated from most of your filesystem and processes at runtime. The main advantage is enhanced privacy and security. The main disadvantage is that, if you would like your application to communicate with external apps (like Discord's rich presence) or if you want it to access an external filesystem, like a secondary drive, that's going to be a bit harder and require some workarounds.
Display/Audio servers. Depending on your distro, your server processes and daemons are going to be different. A normal user doesn't have to worry too much about stuff like PulseAudio unless they are already comfortable tinkering anyway, but Display is another matter. If you notice issues with tearing, stutter, or reduced performance, check whether your Desktop Environment uses X11 or Wayland. If one gives you trouble, switch over and try again. There's more advanced tinkering you can do to improve the display experience but I'm not comfortable telling people to root into their xorg.confs or whatever, so just search on the internet if you feel something's not working right.
Ext4. Ext4 is the preferred filesystem format for Linux OSes. There are exceptions but most distros are going to require this format. Importantly, Windows does not read ext4 out of the box. That means if you decide to back up some data onto a default Linux-formatted ext4 drive, you won't be able to access your files from a Windows PC. In this case, you'll need either some data recovery tool or a live Linux boot media to move your files back.
Mesa. Mesa is the open-source graphics library for AMD and Intel graphics adapters. If you use an AMD or Intel GPU (dedicated or not), you'll most likely want to use Mesa and not bother with proprietary drivers unless you are on a workstation use-case. While Linux has a reputation of being friendly to old tech, support for my Legacy GPUs have been mixed. On Debian, my AMD R7 260X does not play nice with RADV and requires a workaround to force AMDVLK. Your mileage may vary.
3 notes
·
View notes
Last Seen Blogs

roseies
Yours Truly

scottcooper1
Untitled

cartyrs
Original & Fan Art

thepurpleswancompany
The Purple Swan

asongoficeandfancasts
A Song of Ice and Fire Fancasts