
sunnys-amigurumis
Sunny's Amigurumis
Hi!
I'm Sunny and I created this page to share Amigurumi inspo and maybe one day sell some Patterns of my own!
For now my patterns are not available but I'm hoping they will be in the near future, in the meantime, enjoy the blog!
54 posts
Don't wanna be here? Send us removal request.
Last Seen Blogs
matt-riley-wtf
Matt Riley

xtaleunderverse
0.8-1
idemandthingstobeawesome
I demand things to be awesome.
agrboda
Didi

feativen
love, lies
Text

Crochet a Red Tailed Boa Constrictor With a FREE Pattern! 👉 https://buff.ly/31qZOk1
#amigurumis#free crochet pattern#crochet#pattern#free#free amigurumi pattern#snake#snake plushie#snake amigurumi
54 notes
·
View notes
Text
Amigurumi baby Yoda free pattern

Find the crochet pattern at: amigurumi.space
#amigurumis#free crochet amigurumis#free crochet pattern#free amigurumi patterns#free#crochet#pattern#baby yoda#baby yoda plushie#plushie
77 notes
·
View notes
Photo
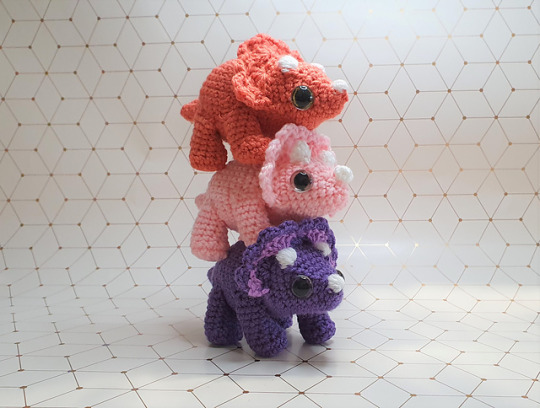
Triceratops by ComplicatedKnots
Free Crochet Pattern Here *** Video Pattern Only ***
#amigurumi#free#free amigurumi pattern#free crochet pattern#crochet#triceratops#triceratops plushie#cute
289 notes
·
View notes
Link
Adorable free amigurumi pattern! 💗🎉🍄
https://www.ravelry.com/patterns/library/mix-n-match-mushrooms
https://www.youtube.com/watch?v=kOAA2GyObD8&feature=youtu.be
#mushrooms#mushrooms amigurumi pattern#free pattern#free amigurumi pattern#free#crochet#free crochet pattern#amigurumi#plushie#mushroom plushie
205 notes
·
View notes
Text
Free crochet fruit avocado pattern
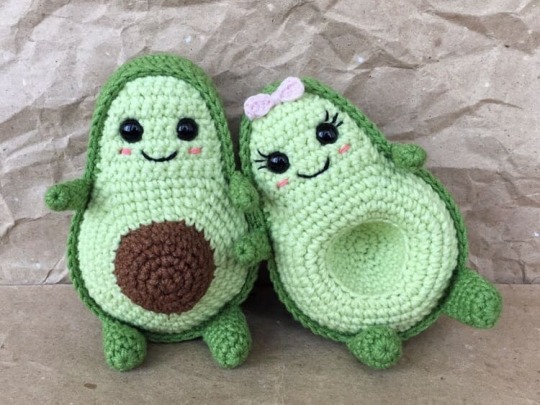
Find the crochet pattern at: amigurumi.space
#avocado amigurumi#amigurumi#free amigurumi pattern#free crochet pattern#pattern#crochet#free#avocado#plushie
104 notes
·
View notes
Photo
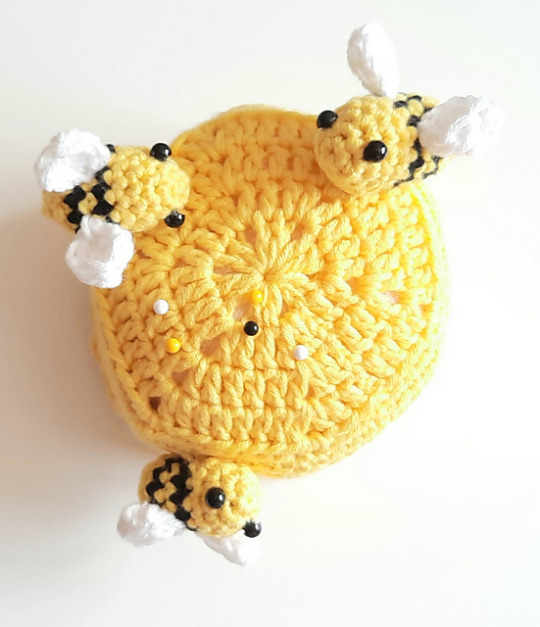
Bee Hive Pin Cushion by Cute Crochet Makes
Free Crochet Pattern Here
#pin cushion#amigurumi#beehive#bees#free amigurumi pattern#free crochet pattern#free#pattern#crochet pattern
247 notes
·
View notes
Link
Free crochet pattern! 💖💖💖
https://www.ravelry.com/patterns/library/the-little-pig-4
#lil pig amigurumi#amigurumi#free pattern#pattern#free#free amigurumi pattern#pig#pig amigurumi#free crochet pattern#crochet
62 notes
·
View notes
Photo

My written crochet pattern instructions for the Kanto Pokemon Starters can now be downloaded online on Raverly for free or if you’d like to support me, find it on my Etsy for some pocket change~! ( •̀ ω •́ )✧ Let me know what you think, all feedback is appreciated!
#amigurumi#pokemon starters#pokemon#charmander#bulbasaur#squirtle#crochet#free pattern#free amigurumi#free crochet pattern#free#pattern
120 notes
·
View notes
Text

My friend is moving to the UK soon and she'd better start finding luggage space for this chonk.
Free written pattern by tillysome
#free amigurumi pattern#free pattern#free crochet pattern#crochet#crochet animal#amigurumi#free#pattern#chicken#chicken amigurumi#bird
152 notes
·
View notes
Photo
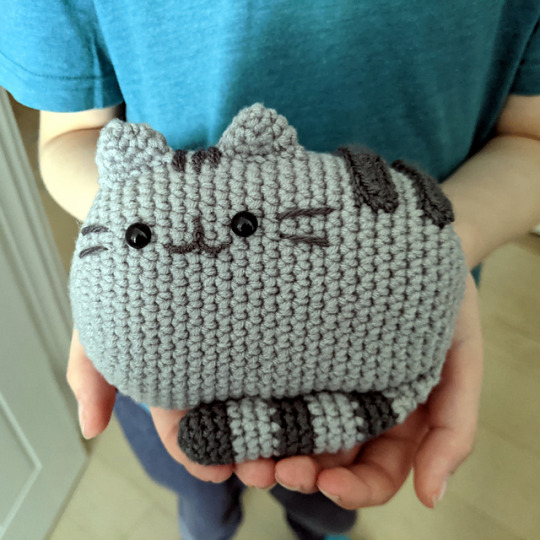
Pusheen by Jessica Felton
Free Crochet Pattern Here (May need to make an account)
#pusheen#free amigurumi pattern#pusheen amigurumi#free pattern#crochet#free crochet pattern#free pusheen amigurumi
432 notes
·
View notes
Text
Free Lazy Bunny Crochet Amigurumi Pattern

Find the free pattern here.
105 notes
·
View notes
Text
Learning crochet master list!!
I made this for people who want to learn crochet but don’t know where to start. I found that out of all the videos I found, these were the most helpful, but feel free to dig around YouTube yourself✨
The bare basics:
https://youtu.be/jUIfV-Qcq2c
youtube
All other essential stitches and more.(essentials are single crochet, half double crochet, double crochet, and maybe treble crochet):
https://youtu.be/kj8BGV3ysro
youtube
The magic knot(essential for discreetly tying together yarn.):
https://href.li/?https://youtu.be/15hqoR0KJHA
youtube
The magic circle(essential for circle projects like hats and coasters):
https://youtu.be/Ex02JPOXf_k
youtube
These are the essential skills(in my opinion) for crochet. Below the cut are additional things that you may want to learn(such as amigurumi), or at least take a look at. I hope you find use in this, and have a wonderful day🌸
Tips for amigurumi(recommend you watch before, and after you learn the basics of amigurumi):
https://youtu.be/v7eI-JD-Ajw
youtube
amigurumi basics(use a crochet hook that’s a size down from the recommended, so for example, if you’re using weight 4 yarn, use a 4 mm crochet hook):
https://youtu.be/ushHnIxLdYw
youtube
How to read crochet patterns(description of the video has all the abbreviations laid out in a list):
https://youtu.be/-5JQkbqzvzw
youtube
How to block a project(so say you have a square that isn’t looking so square, you can block it, and then it will gain its blocky shape):
https://youtu.be/v0Hfu0byjxs
youtube
Recommended beginner projects!
Simple coasters, very easy to do(uses the magic circle, double crochet, slip stitches, and increases)
https://youtu.be/vItcjc8nJ9o
youtube
Fingerless gloves, easy to do.(may have a bit of trial and error in how long you want it, but besides that it’s very easy and fun. Uses treble crochet.)
https://www.thesprucecrafts.com/fingerless-gloves-pattern-978086
Leg warmers, easy to do.(just chain a few less then you initially think, otherwise you’ll have to add drawstrings. Uses double crochet, and slip stitch.)
https://www.bhookedcrochet.com/2014/10/16/beginner-crochet-leg-warmers/
Other random tips:
Make sure you stretch your hands! It’s super important you keep your hands limber and flexible, especially because they get tense after a session of crocheting. I recommend this video, but feel free to browse around yourself.
When doing repeated rounds(like single crochet x times for five rounds) try using the calculator on your phone. So for example: from round 5 to 9 single crochet only, you’d put in 4 + 1, hit equal, and every time you start another round hit equal again until you’ve gotten to the final round it says to do that. Yes I know stitch counters are a thing, but I’m pretty sure this is different.
Paper clips are good replacements for stitch markers! I recommend those flexible, kind of plastic ones? Any should work though.
More beginner patterns, and useful things to learn will be added in due time. Also if there are any beginner patterns or tips you think should be added to the list, you can DM me or leave a comment and I’ll be sure to check it out! 😸
913 notes
·
View notes
Text

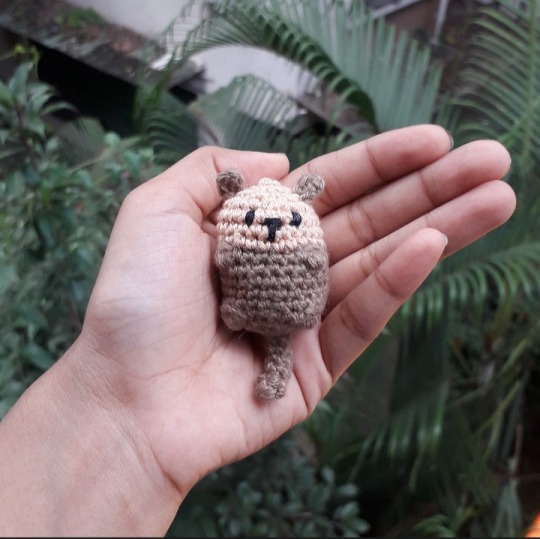
My friend loves otters so I made some because I miss her.
Free pattern by Northern Lakes Crocheterie.
325 notes
·
View notes
Text
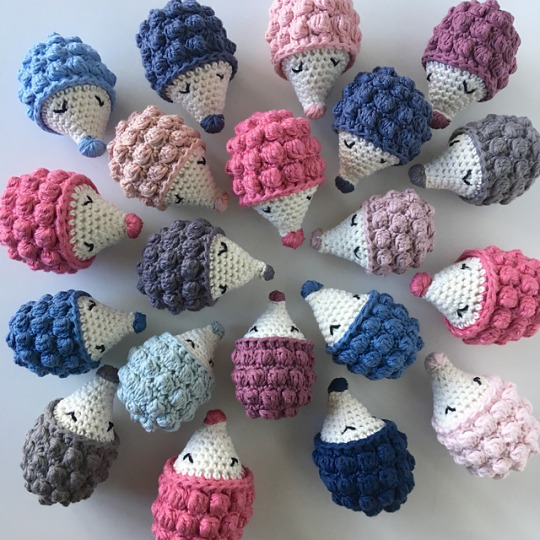
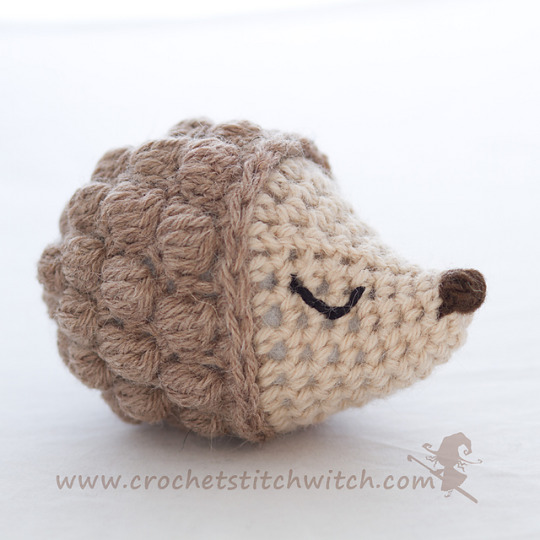
Crochet a Delightful Diddy Hedgehog With a FREE Pattern Designed By Sarah Lyons: 👉 https://buff.ly/2H1gRBV 🦔
#amigurumis#free pattern#free amigurumi pattern#free amigurumi#patterns#free#hedgehog amigurumi#hedgehog
224 notes
·
View notes
Photo
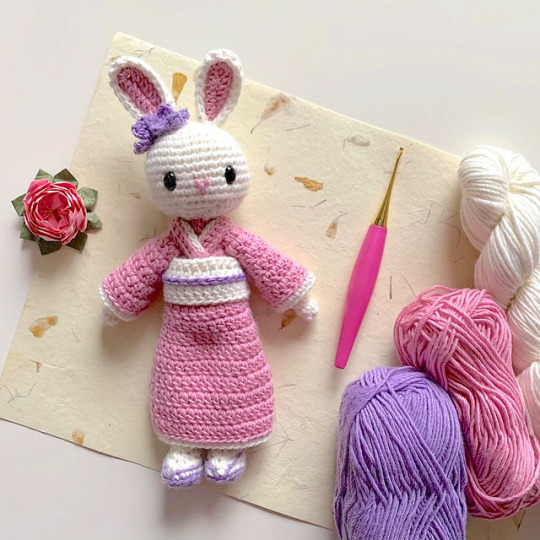
Sakura Kimono Bunny by Sweet Softies via Furls Crochet
Free Crochet Pattern Here
#free#bunny#kimono#amigurumi#free amigurumi pattern#free crochet pattern#crochet pattern#amigurumi pattern
247 notes
·
View notes
Photo

Magikarp by Sir Purl Grey
Free Crochet Pattern Here
#magikarp#pokemon#free#free amigurumi pattern#free crochet pattern#free pattern#crochet#amigurumi#game#fish#plushie#lovely
1K notes
·
View notes
Text
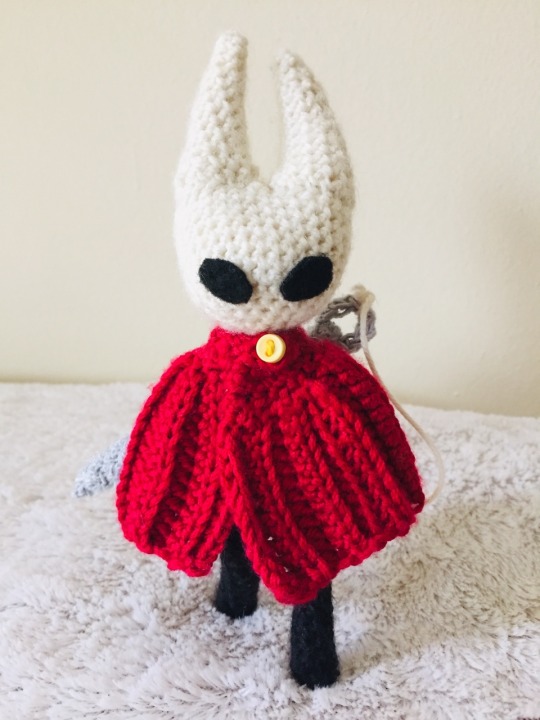
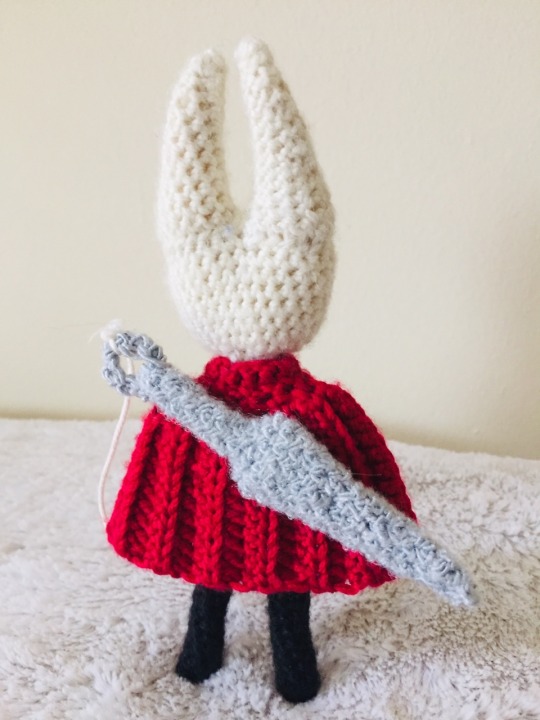


Hornet V2 + Pattern
Key:
Sc - Single Crochet
Hdc - Half Double Crochet
Ch - Chain
Inc - Increase
Dec - Decrease
Mc - Magic Circle
Slst - Slip Stitch
Blo - Back-end Loop Only
(I used 4 mm Comfort DK sport weight yarn by Berroco for all of this)
Legs - Make 2
R1: Mc 6 [6]
R2-12: Sc 6 [6] 10 Rounds
** Stuff lightly
** Fasten off the first leg but when you finish the last rnd of the second leg, move on the Body section
Body
R1: Ch 2 & Sc 1 into first leg, Sc 5, Sc 2 on back loop of chain connecting the two legs, Sc 6 around the second leg you started with till you end up just before the chain that the started the round [16]
** The basic idea here is to use the first 2 chains to connect the legs together. After that you sc into each stitch of the first leg you made (should be 6), work a Sc into each of the back loops of the 2 chain that are now connecting the legs together, and then sc 6 around the second leg until your back were you started. From then on, your just working rounds
R2-5: Sc 16 [16]
R6: (Sc 6, Dec) around [14]
R7: (Sc 5, Dec) around [12]
R8-9: Sc 12 around [12]
** Stuff
R10: (Sc 4, Dec) around [10]
R11-R12: Sc 10 [10]
R6: (Sc 3, Dec) around [8]
** Stuff and then fasten off leaving a tail. Use tail to close off body by sew tail into the front end loops of the 8 stitches of the last round and then pulling tight
Arms - Make 2
R1: Mc 5 [5]
R2-12: Sc 5 [5]
** Fasten off arms leaving a tail. Use tail to sew arms to the top sides of the body leaving a small neck
Horns - Make 2
Ch 16, turn, then sc 1 into 2nd chain from hook, Sc 14 [15]
R1: Sc 15 [15]
R2: Sc 6, Dec, Sc 7 [14]
R3: Sc 6, Dec, Sc 6 [13]
R4: Sc 6, Dec, Sc 5 [12]
R5: Sc 5, Dec, Sc 5 [11]
R6: Sc 4, Dec, Sc 5 [10]
R7: Sc 4, Dec, Sc 4 [9]
R8: Sc 4, Dec, Sc 3 [8]
R9: Sc 3, Dec, Sc 3 [7]
R10: Sc 2, Dec, Sc 3 [6]
R11: Sc 2, Dec, Sc 2 [5]
R12: Sc 2, Dec, Sc 1 [4]
** Fasten off leaving a long tail for sewing & Stuff horns
Head
R1: Mc 6 [6]
R2: Inc Around [12]
R3: (Sc 1, Inc) around [18]
R4: (Sc 2, Inc) around [24]
R5: (Inc, Sc 3) around [30]
R6-12: Sc around [30] 6 rounds
** At the end of the 12th round, leaving hook in the final loop you made, count count backwards from the hook 15 stitchs and mark that stitch. Then Ch 2 and Sc 1 into the stitch you marked. This should create two small circles that will be used to sew the horns onto
** Fasten it off & Stuff generously
Using the tail you left on the horns, sew horns on to head. Try to line up the horns edges with the small circles on the head. The horns should curve slightly inward on one side, so make sure thcruved side is is facing towards the middle of the head. Stuff head after the first horn has been sewn on and again just before you finish sewing the second horn to make the head nice and firm. Once the horns have been attached, roll them between your fingers to help shape into points
Cape Top
Row 1: Ch 19 & turn
Row 2: Sc 1 into 5th Ch from hook, Sc 14, Ch1, turn [14]
** The first 4 chains are skip to create a loop that will hook around the capes button. Ignore the stitches in the loop for the following rows
Row 3-4: Sc 14, Ch 1, Turn, [14] Slst 1
** Do Not fasten off. Continue onto Cape Ribbing
Cape Ribbing
Row 1: Chain 14, turn
** At this point, you’ll turn the cape top 90 degrees and working in rows to do some basic ribbing. One end will have a standard chain 1 and turn, while the other will Slst 1 into the next stitch in the cape top
Row 2: Blo-Hdc 13, Slst 1 into next stitch on cape top, turn [13]
Row 3: Blo-Hdc 13, Ch 1, turn [13]
Row 4: Blo-Hdc 13, Slst 1 into next stitch on cape top, turn [13]
~~~
** Repeat Row 3 and 4 for the rest of the stitch on cape top. That’s 2 rows per stitch for the rest of the 12 stitches on the cape top. Fasten off after the row is completed.
Finally sew a button on the opposite side of the cape top loop. Then cut out some oval using felt for the eyes and glue them on
#hollow night#hornet#amigurumi pattern#free amigurumi pattern#games#free pattern#lovely#talented#craft#fabric crafts#free crochet pattern#plushie
969 notes
·
View notes