
letsmishmash
Wonderful & Random Things
I have many interests; motherhood, travel, crafting, reading, gluten free eating and cooking, adventuring... So, this blog will reflect the mish mash of it all!
5 posts
Don't wanna be here? Send us removal request.
Last Seen Blogs

spacesofdisplay-alize
Spaces of Display
~ Alizé

sectleader
Greed
ceramiccity
Ceramic City

onscarlitos
onscarlitos

blondeudolly
suri
Photo
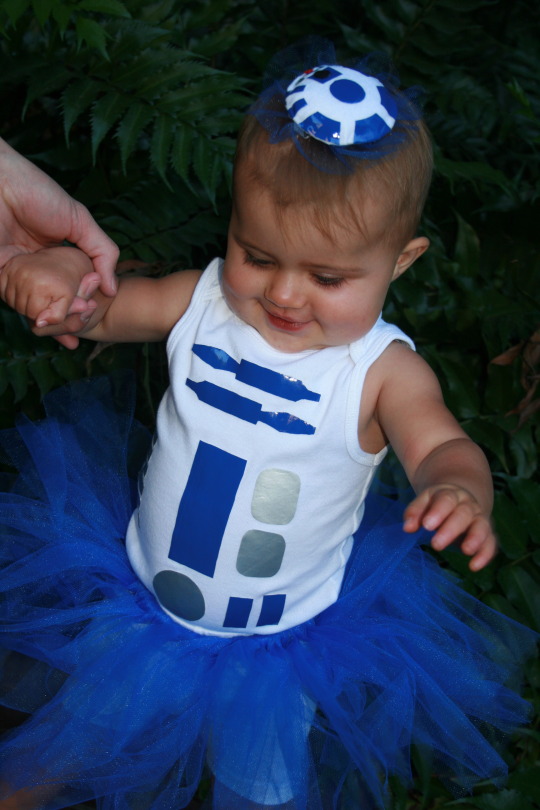
R2 Tutu!
4 notes
·
View notes
Photo
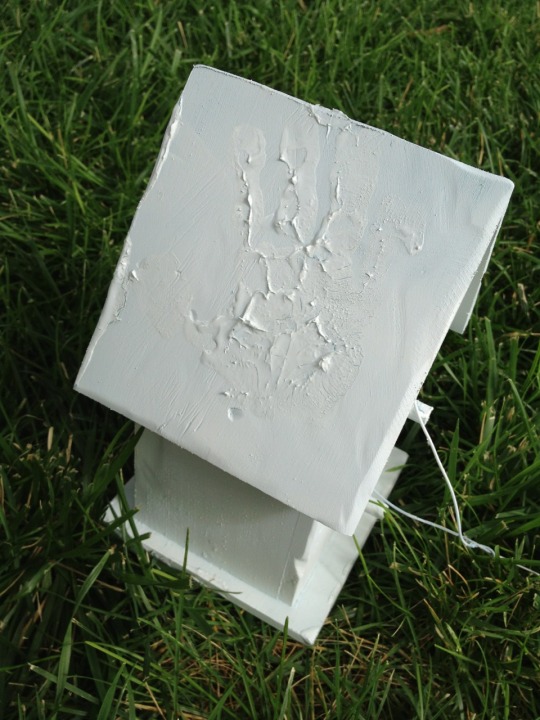
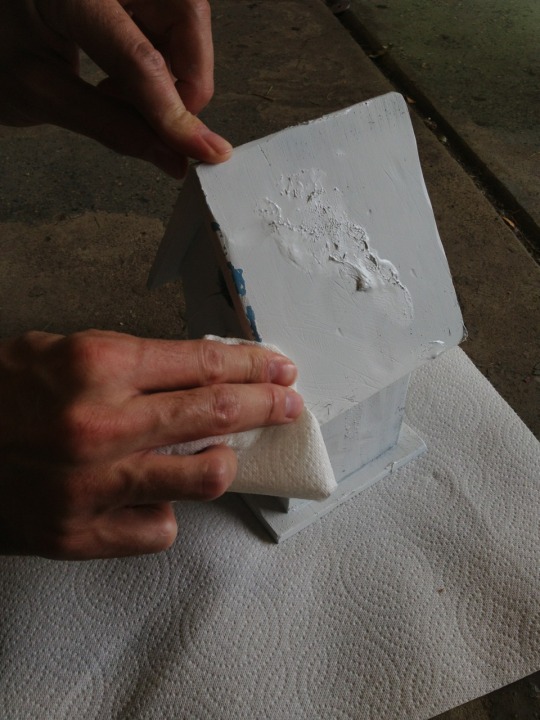
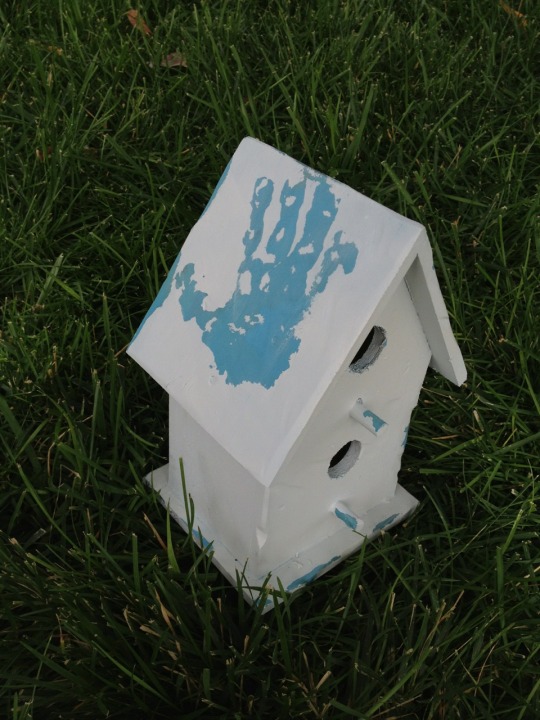
Distressed Birdhouse with Handprints My husband came up with this fun idea for my mother in-law's birthday present. I loved the outcome; rather than traditional hand/foot prints done with paint, this method creates an antique, distressed impression of my children's hand/foot prints. Materials: - wood birdhouse (Hobby Lobby) - sand paper - screw driver - blue spray paint (or other color) - white spray paint - Vaseline Step 1 - sand rough edges. Use the side of a screw driver to distress edges/corners. Step 2 - apply blue spray paint. Let dry. Step 3 - spread a good amount of Vaseline on child's hand, wiping out between fingers so you don't get webbed fingers. (For our infant, we did her foot, since hand prints are hard at that age). Press hand down, making sure to also push gently on finger tips. Step 4 - place Vaseline anywhere else on the bird house that you want to look distressed (e.g. corners, edges, etc) Step 5 - apply white spray paint. Let dry. Step 6 - once dry, use paper towel to gently wipe away any areas where you placed Vaseline. Ta-da! This could work with all sorts of cool things; planks of wood, signs, furniture, etc. ~Amy
0 notes
Photo

Handprint Baby Jesus in Manger Snowy days are big craft days around our house - especially with a new baby. While thinking of Christmas themed projects, inspiration hit for this sweet handprint craft. It also gave me the opportunity to talk with my 2 year old about baby Jesus being the reason for the season :). You will need: - paper - paint: brown, yellow, peachy pink, white, pink - sharpie I started with brown paint on my child's hand for the manger. Once dry, we used his thumb print for baby Jesus' head. An adult or older child can then paint the straw and the little body. Once dry, we drew on a sweet face with a brown sharpie and dotted on pink cheeks. That's it! Happy painting! Amy
0 notes
Photo

Chinese New Year Dragon Handprint Craft
A little decoration for the gathering at Grandma's house
I made this craft with my toddler, all by myself. It was an adventure keeping him from smushing his right (red) hand and his left (yellow) hand together - but he had a blast! (Note: I reused packing paper that was a little crinkled.)
Materials: Legal sized paper (or other long paper), red paint, yellow (or gold) paint, brushes, plus various colors to paint the dragon's face.
Directions: Have red and yellow paint and two foam brushes ready. Make sure all participants are in clothes that can get ruined/messy, or are stripped down to their diaper, like my son was. Paint one hand red and press it close to the edge of the paper. This will be the tip of the dragon's tail. Next, paint the other hand yellow and press down at a different angle, so you get the effect of the dragon's tail zigzagging. Continue to reapply paint and press on the paper. For the head, use all yellow handprints and press them side by side in a circle. Clean up your kiddo and yourself! :)
One the paint is dry, kiddos or adults can paint the face onto the dragon. Our dragon has furry mustache and eyebrows, ears, a beard and big teeth. Feel free to Google around to find features you and your kiddos like best!
Enjoy the year of the dragon!
3 notes
·
View notes
Photo
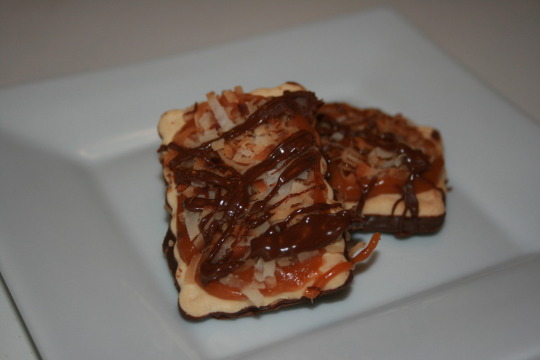

Scrumptious semi-homemade GF "Samoas"
Because it's a bummer to miss out on Girl Scout Cookies
-1 package Schar Chocolate Dipped Cookies
- 5 oz caramel bits (+1-2 tbl water)
- 3 cu toasted coconut
- 1 cu chocolate chips
Place cookies on cooling rack, with foil or parchment laid out beneath. Melt caramel based on package (mine called for adding water, which was great for thinning it out). Drizzle and spread caramel over each cookie. Immediately smush coconut onto each cookie. Melt chocolate and drizzle over cookies.
Note: they will need to sit and cool for 60-90 min because the hot caramel slightly melts the chocolate on the bottom of the cookie. When cooled, nudge each one sideways. If you try to pry it up, it may break.
2 notes
·
View notes