
itsrex
untitled.bmp
Rex || ♋ || twt: @mercedesbennyzFFXIV: Mercedes Benz @ HyperionI'll draw you a picture very poorly for a cool rock or money.
new art tag! lotta ffxiv in here
older art tag
other links
6887 posts
Don't wanna be here? Send us removal request.
Last Seen Blogs

alexilulu
Slum Cur ultimate

system-of-a-feather
Systems of a Feather Flock Together

kodama-fae
Morgana

ramblesbiab
Lover Of Gay Lil Cartoons

planeswalker-umbral
Ultratog1028 almost everywhere else
Text
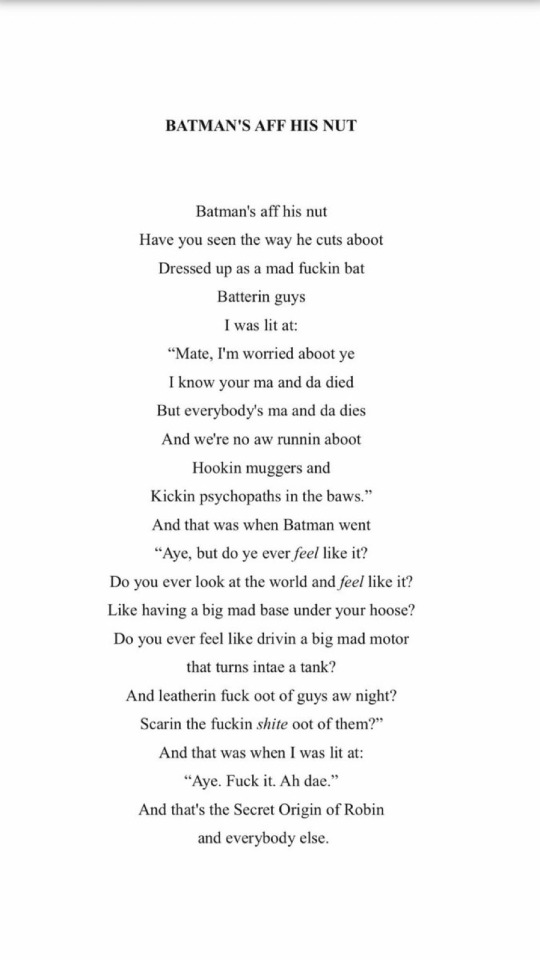
Reminding everyone again of Batman’s Aff His Nut by Robert Florence—the most poem ever.
26K notes
·
View notes
Text
I've seen multiple different artists on Tumblr draw pictures of some sort of amphibious hybrid of housecat and catfish, possibly riffing on each other's work, and every time I see this creature all I can think is that I desperately want a video game where you play as this horrible thing.
3K notes
·
View notes
Text
give it to me by the northern boys is the harry du bois song
771 notes
·
View notes

Text
soundscape of young green martian playing with pvc pipes
134K notes
·
View notes
Text
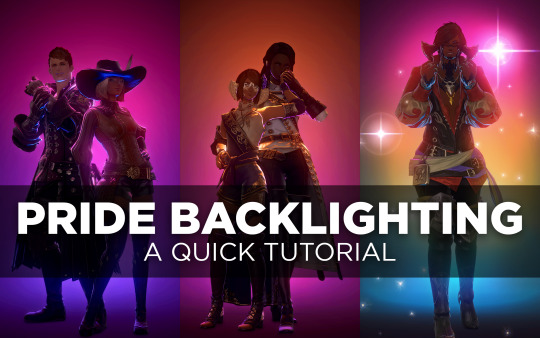
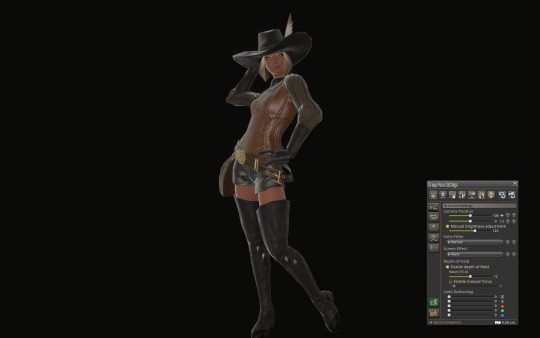
Pride Backlighting Tutorial
A few people have shown interest in replicating the pride backlighting I did, so hey, here’s a quick tutorial below the cut.
Enjoy, and happy Pride Month. 🏳️🌈
STEP 1 — SETUP
First thing you’ll want to do is find a suitably dark background to bounce the light off of. I use the White Screen housing item dyed Soot Black, available from the Housing Merchant or Apartment Merchant in any of the housing zones for 3000 gil.
I line up 2-3 of them for coverage, but one will do if you're trying to be frugal.

If you don’t have an apartment or an FC room to use, try asking friends, FC mates, or even folks you share a Discord server with. You might even find someone who already has a studio space set up and is willing to let you use it!
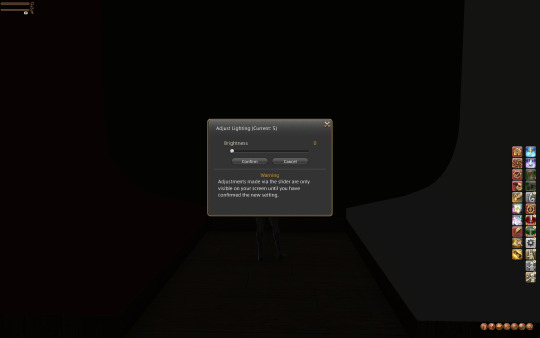
Lighting in your studio space should be 0 (though you might have success at 1 as well), so make sure to adjust that or ask the studio owner if they can make that change before you start posing.
STEP 2 — GPOSE
Position your character(s) just a little ways back from the edge of the screen. You want some space between them and the screen so that the lighting can float there without casting a weird circle on the wall.
Hop into /gpose and bump up the “Manual brightness adjustment” to about 120 or whatever level allows you to see your character well enough to pose them. Pose to your heart's content.
STEP 3 — LIGHTS
Here’s the fun part. In the Light tab of the Gpose menu, switch all of your Light sources to Type 1, which has the shortest falloff radius (meaning it doesn't reach as far as Type 2 or 3). I also set all of my lights to one strong color to differentiate them while I worked on lighting—red, green, and blue, all maxed out at 255 (for now).
Swing your camera (still on all default settings) around to your character’s back and up above their head a little ways. This is where Light 1 (red) will go.
Now pan your camera down at about mid-back height and set Light 2 (green) there.
Pan your camera down one last time until you have a nice shot of your character’s butt and set Light 3 (blue).
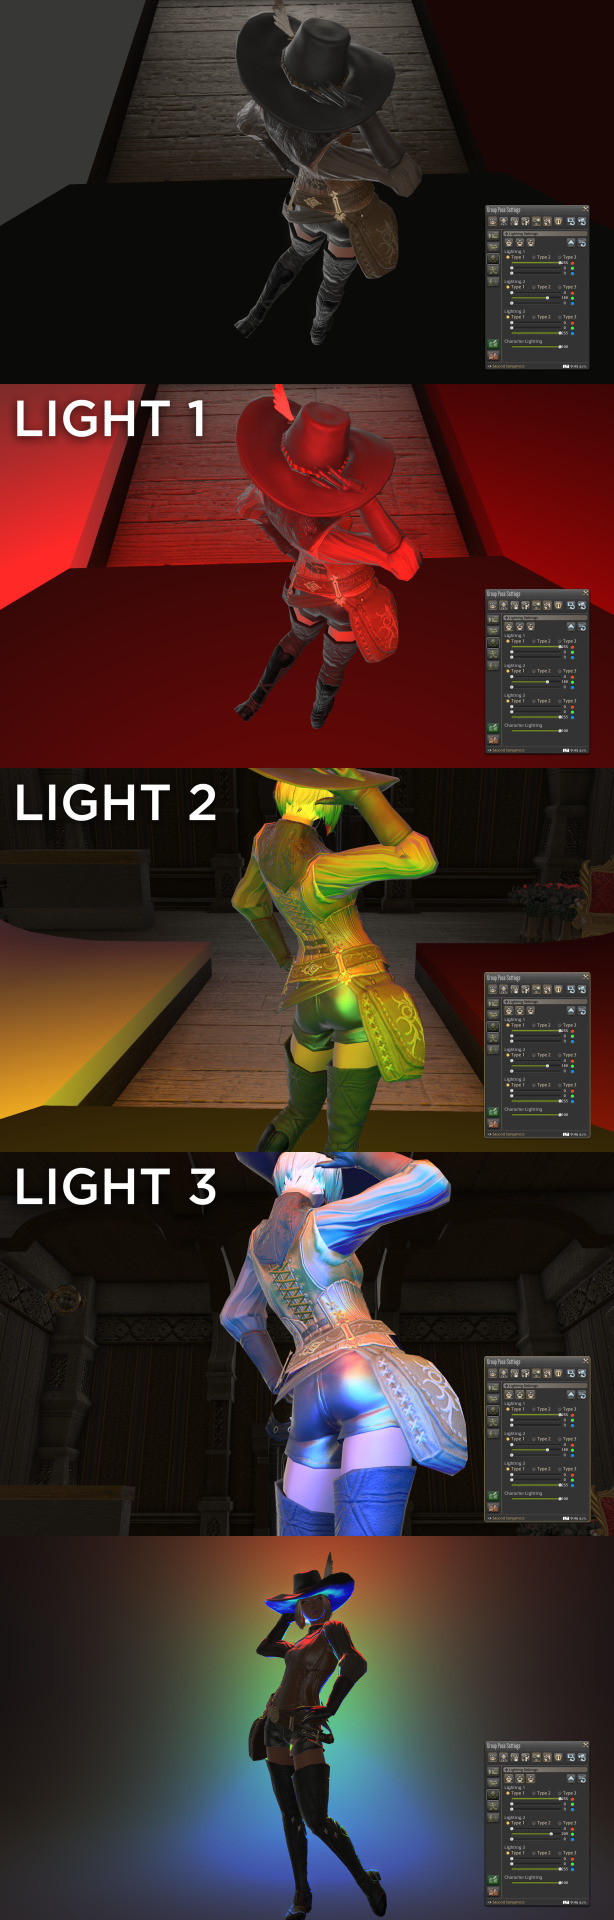
Spin your camera back around and enjoy this nice little macaw-colored gradient.
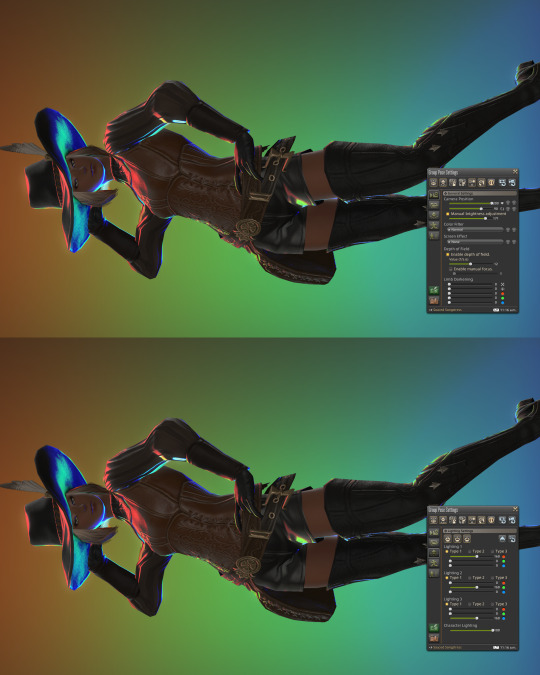
STEP 4 — CAMERA
Set your camera angle.
The way FFIXV’s lighting works is partially dependent on how much light is in a shot. It will adjust a lot like your eyes do when you’re entering a dark room from a bright room, or vice versa. Your zoom level and camera angle are going to directly affect the lighting, so set this before you start messing with light strength and color. Sometimes this means weaker lighting will actually light your character better.
I ended up bringing my lights down to around ~160 and boosted the "Manual brightness adjustment" up quite a bit to get lighting I was happier with.
For a straightforward vertical shot, I like to have my Field of View (FOV) at 200 and of course my rotation is set to 90. Zoom in or out as needed. Remember to save your camera angle if you plan to pan around and fix things!
STEP 5 — COLOR
Make it ~queer~.
Take your flag of choice and pick out 2-3 “main” hues. Generally these will be the strongest hues in the flag, if not the only ones. Some flags, like the Pride/Progress/Intersex-Inclusive flag itself, are difficult to replicate for the sheer number of colors that are in it. You can loosely represent a rainbow with some adjustment to the RGB colors, if you’re determined to have a whole rainbow in there.
Shader Note: I recommend picking a shader preset that doesn’t mess too much with color so that colors are represented correctly. You may need to adjust light strength and “Manual brightness adjustment” to be compatible with your preset of choice. Bloom will also heavily affect the way your colors are showing up, so you may need to tone down the bloom FX or toggle it off entirely. This all depends on your preset, however.
If you’re not into RGB math, here are some cheat sheets! Not every flag is represented here of course, but I tried to cover as many colors as I could so that you could grab a color from another flag as needed! Please note that colors will need some adjustment for your own screenshot, presets, and preferences.
And that’s it, y’all! 🏳️🌈
(Open this image up in a new tab for more detail.)
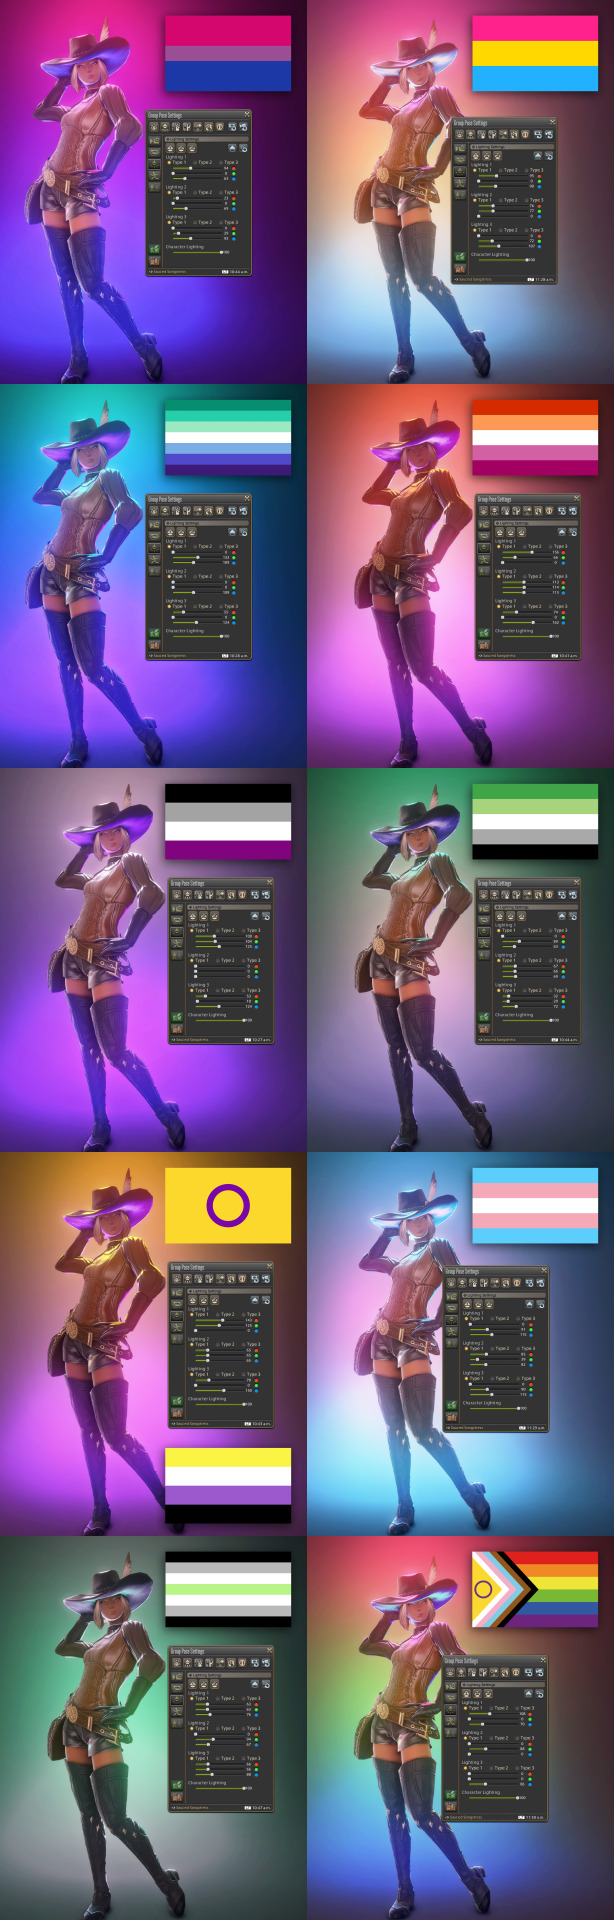
These were taken using a heavily customized shader for that nice glowy effect.
1K notes
·
View notes
Text
do not forget the patron saint of these weeks that we celebrate ourselves proudly and openly in the streets

her name was Marsha P Johnson, and we have her to thank for so much.
remember, the first Pride was a riot, and she was one of the brave souls who endured it to help carve the path which so many of us walk today. she helped found several activist groups regarding LGBT safety and wellbeing. and she was absolutely radiant, too.
thank you, Marsha. we remember you.
91K notes
·
View notes
Text
I think American accents are cute I love hearing American cuties talking yes bitch show me how rhotic your rs are
130K notes
·
View notes
Text
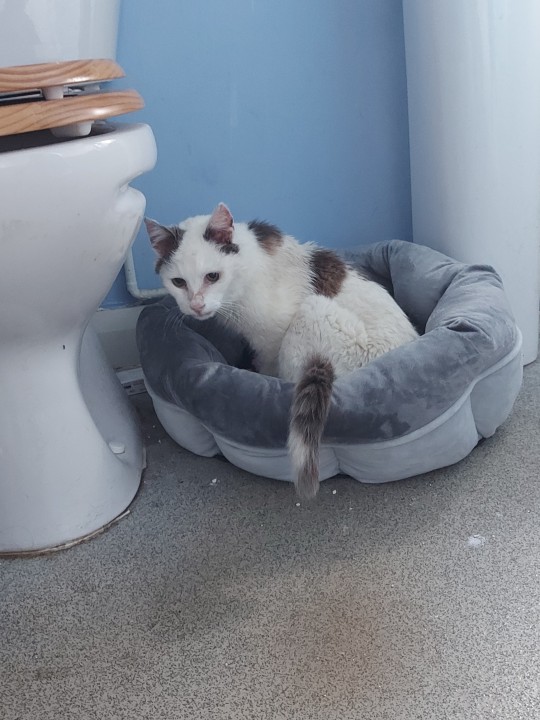
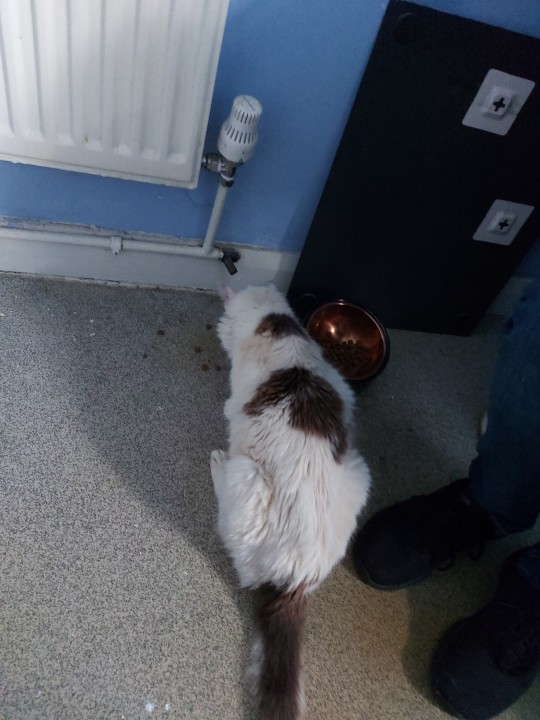
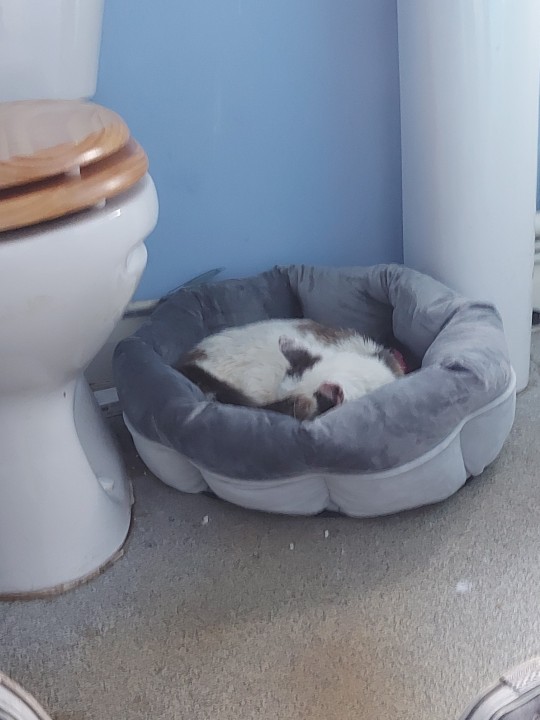
I could think of no better way to share the news than this!
So when I was 17, my cat went missing and I'd given up hope of ever seeing him again.
Until on Monday, 27th of May, 2024, my friend sent me a FB post asking 'isn't that your mother?' about the person named on the microchip.
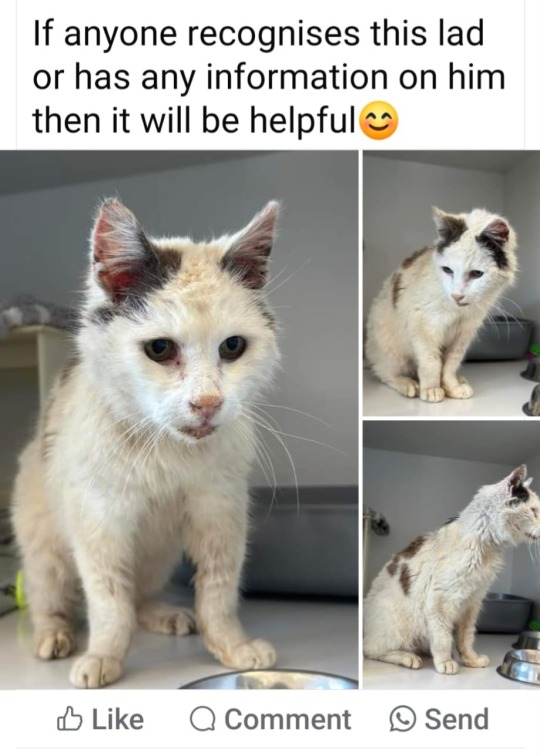
Here he is! 16 years old, and found safe, twelve whole years after he went missing!
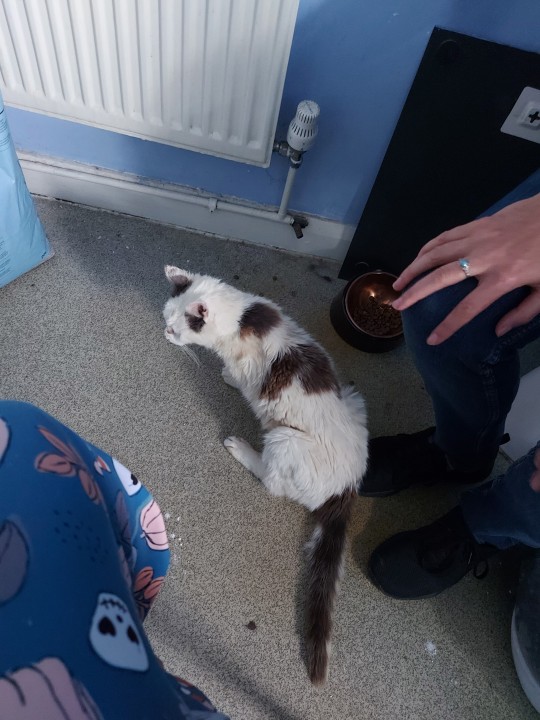
Yesterday (Tuesday the 28th of May, 2024) I went to the rescue that had him, and I reclaimed my boy, renaming him Artie! (He'd originally been called 'Cat' because my mother and I couldn't decide on a name)
He's home safe with me now, currently inhabiting my bathroom and purring up a storm every time someone goes in there!
I'll be doing slow introductions between him and my current cat to give them the best possible chance of living in harmony!
Here's some pictures of Artie once we let him out of the carrier:
30K notes
·
View notes
Text
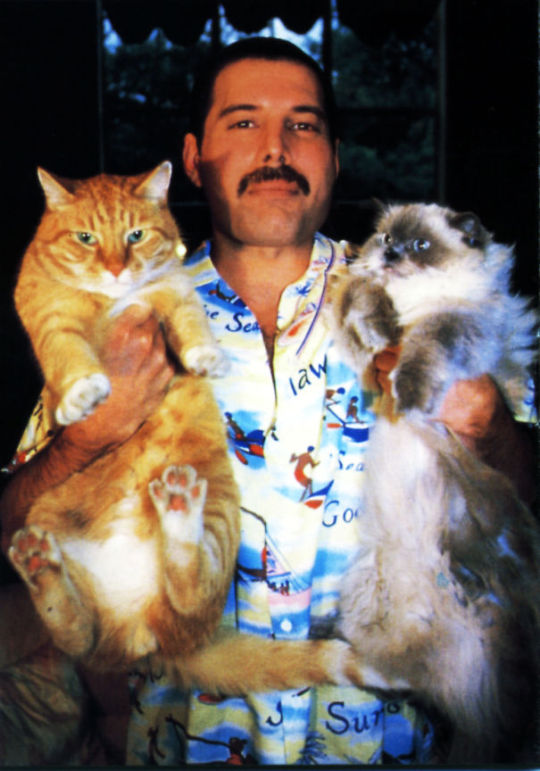
It’s Pride Month Eve, so leave out some milk for Freddie Mercury and his cats.
78K notes
·
View notes
Text
trans women do have an advantage against cis women in sports but its not because of testosterone or whatever its because god loves them more
17K notes
·
View notes
Text
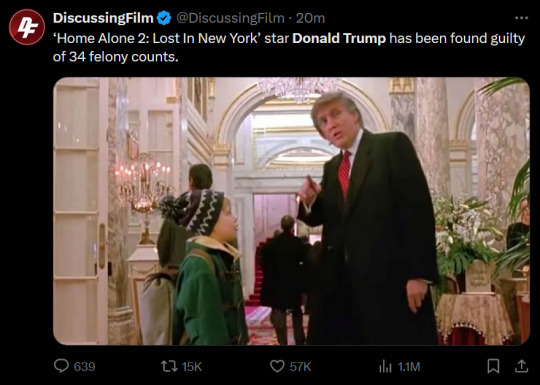
Can he send just like one tweet right now just one tweet I’m begging
32K notes
·
View notes
Text

what is this tiny little man SAYING
#ffxiv#endwalker spoilers#hyth's little mouth movements are soooo hhhghgghgjjhh very good I love this I will watch it for several more minutes thank you
2K notes
·
View notes
Text
A lesbian couple were smoking weed together.
One was a high femme, the other was a stoned butch.
104K notes
·
View notes