
Last Seen Blogs

lighmijusnifu
Heather

rogers-patched-jeans
emma :)

oliver-davila
Oliver Davila - Filmaker and Streamer based in Nicaragua

snwghost
Untitled

padmajagogoi
Padmaja Bhabhi
Text
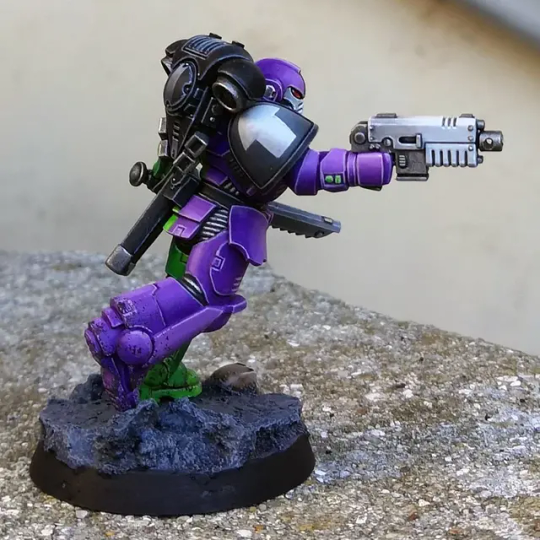
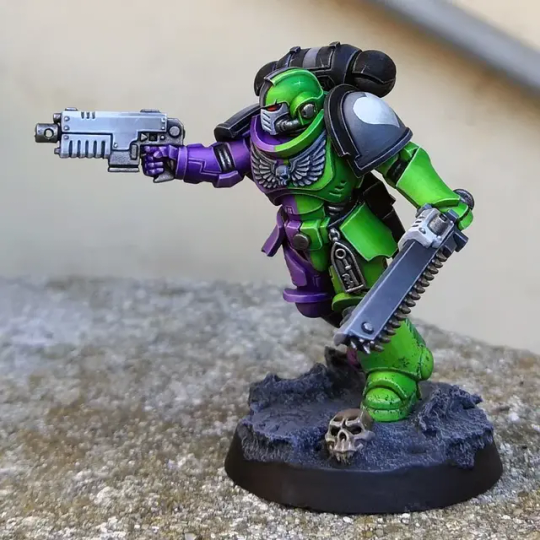
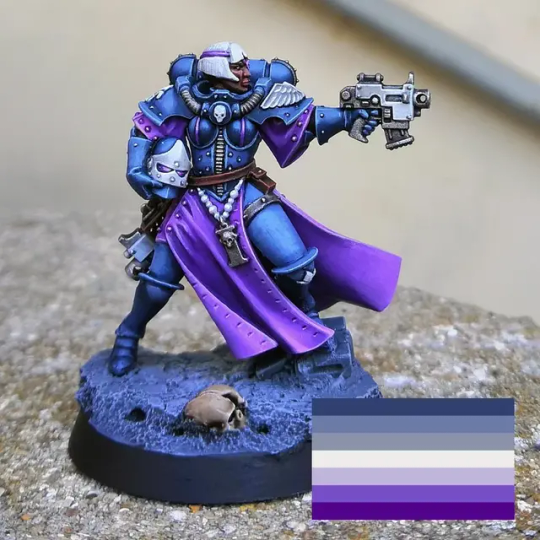
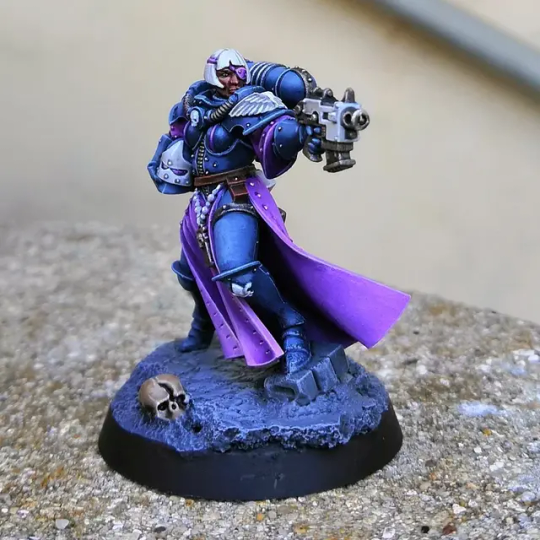
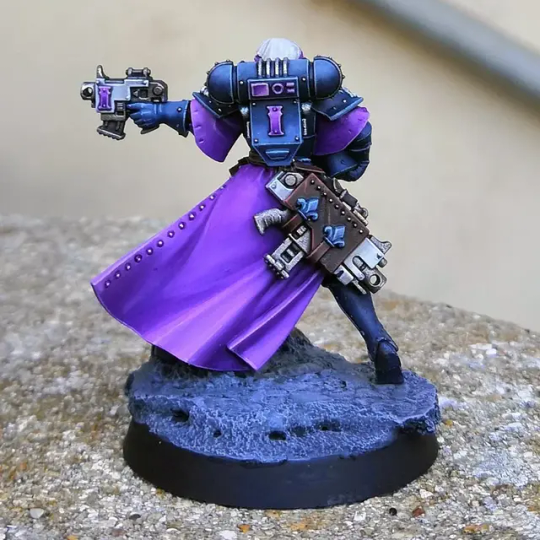
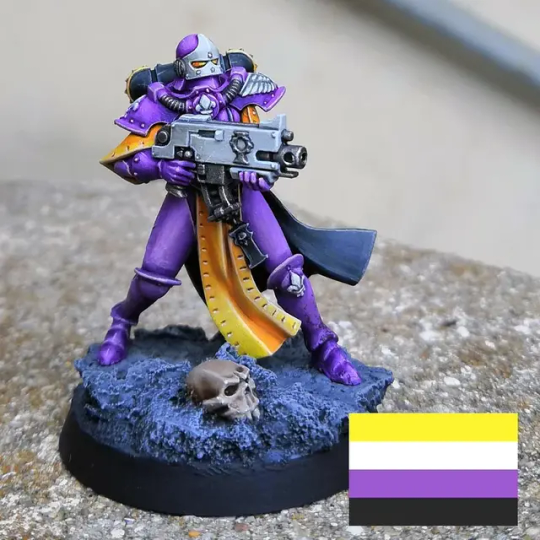
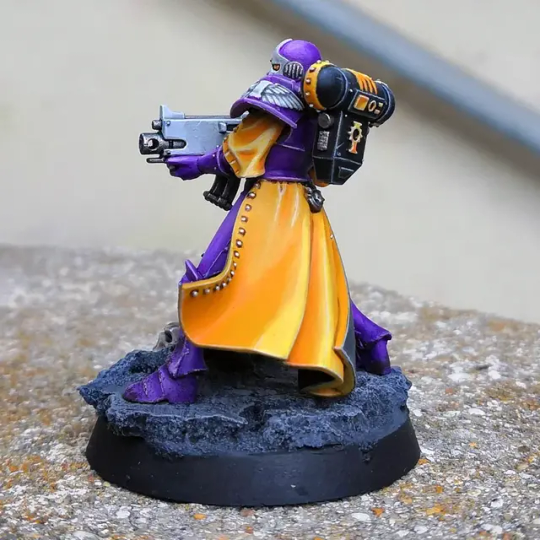
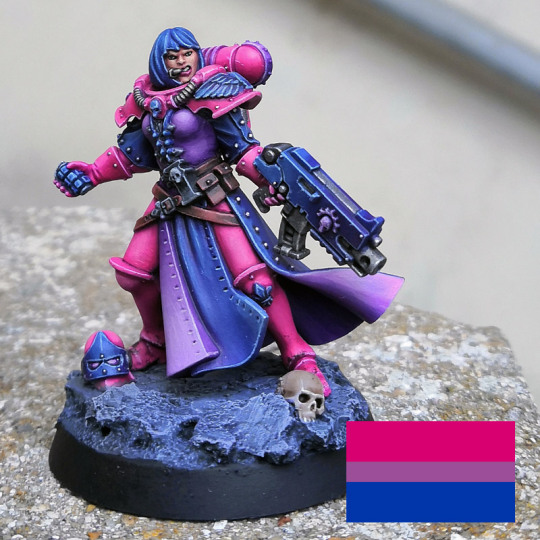
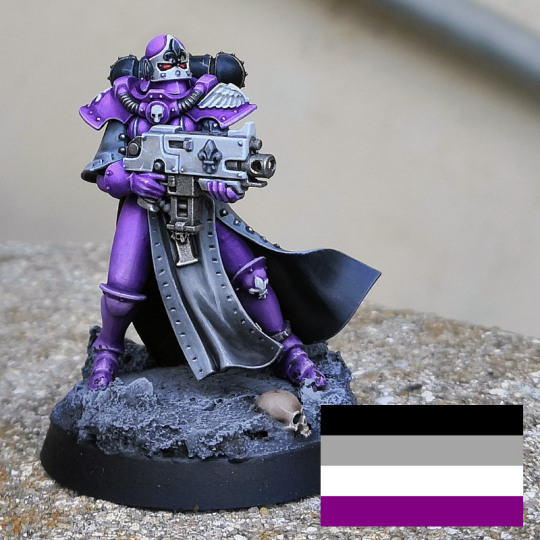
AroAce Space Marine
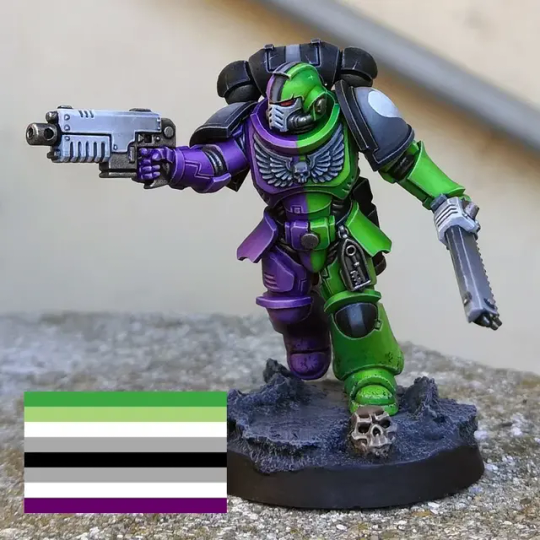
One version of the AroAce flag is createdby Voltroning both the Asexual Pride flag and Aromantic pride flag, so I thought it would be fun to paint a split scheme using both my ace and Aro schemes.

Here are all the angles.


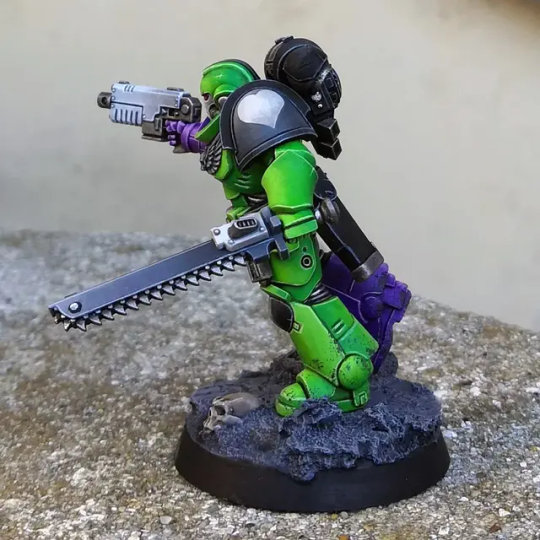
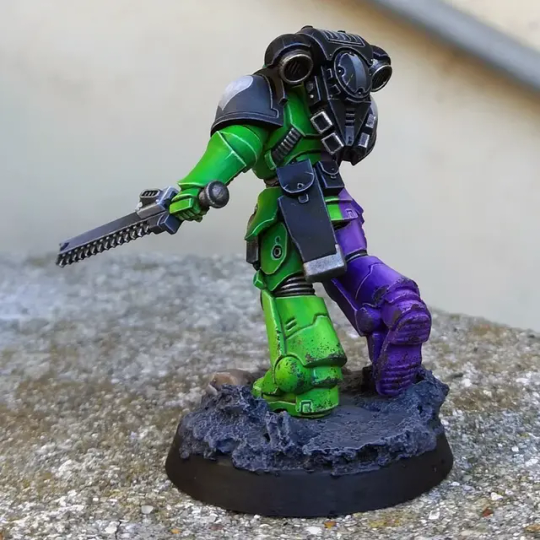
As usual, hope you like it!
#miniature painting#warhammer 40k#warhammercommunity#miniatures#lgbt pride#lgbtq#space marines#aromantic#asexual#aroace
395 notes
·
View notes
Text
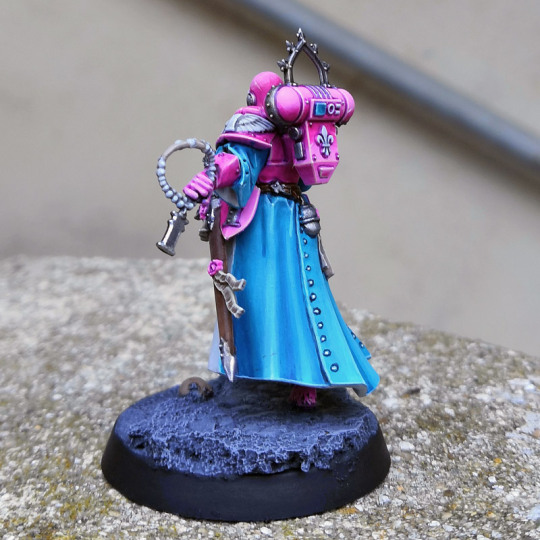
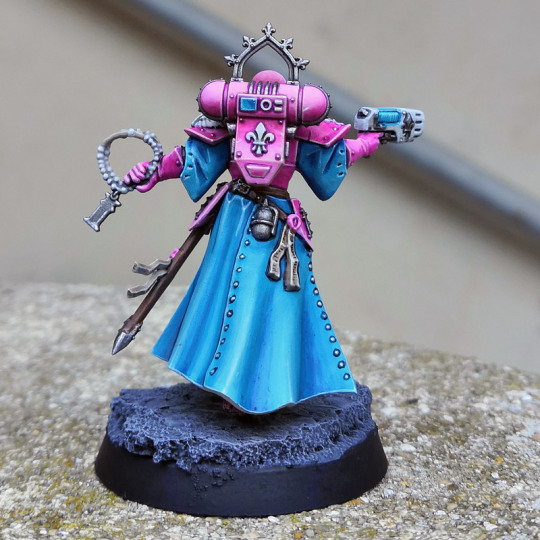
Trans Pride League of Votann Khal

Long time without working on my trans pride series, so here comes the League of Votann representative, the Khal model from the Warhammer shops anniversary.
It was my first time painting some Votann and ooooh boy they are harder sculpts to work with than they look with all the runes. Fun nonetheless.
Anyway, here are all the angles.
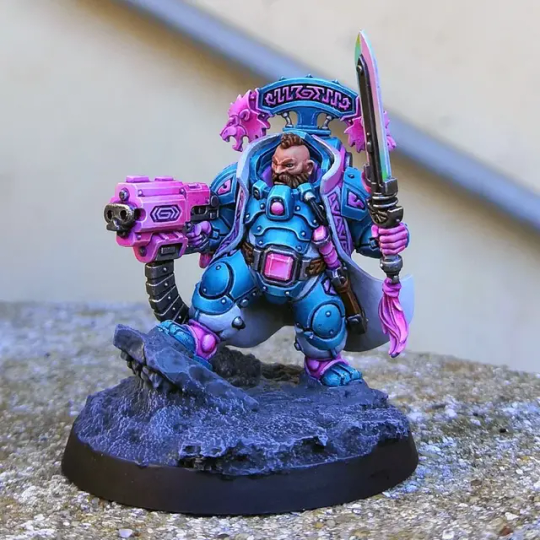
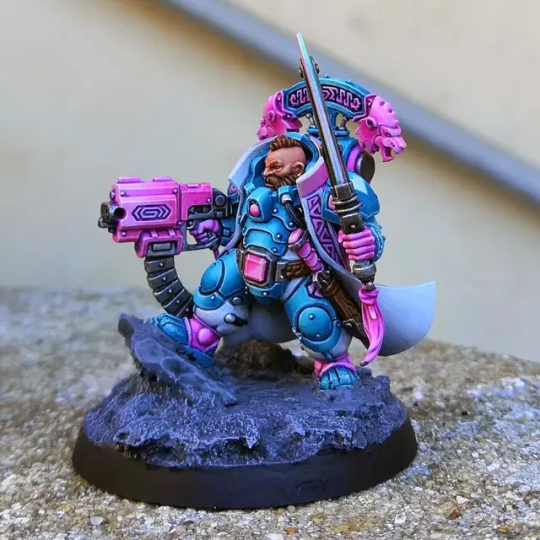

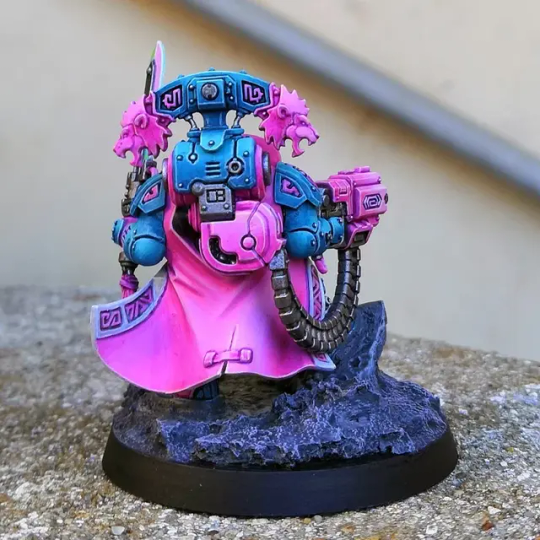


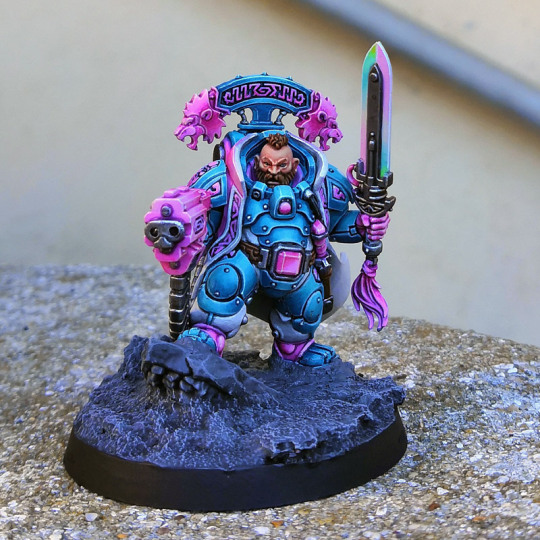
Hope you like him.
#miniature painting#warhammer 40k#warhammercommunity#miniatures#lgbt pride#lgbtq#trans pride#leagues of votann
370 notes
·
View notes
Text
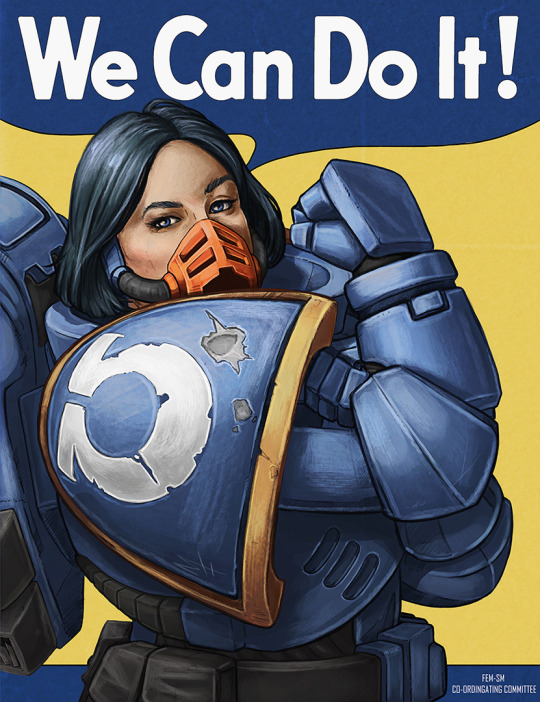
It's interesting trying to simulate the pastel look of the original poster & the mottle of the paper. Some dry media brushes & some overlays got me in the ball park. For the first bit of 'for the lols' work I have done in a while, I'm happy enough.
735 notes
·
View notes
Text
Space Marine Pink Squad!
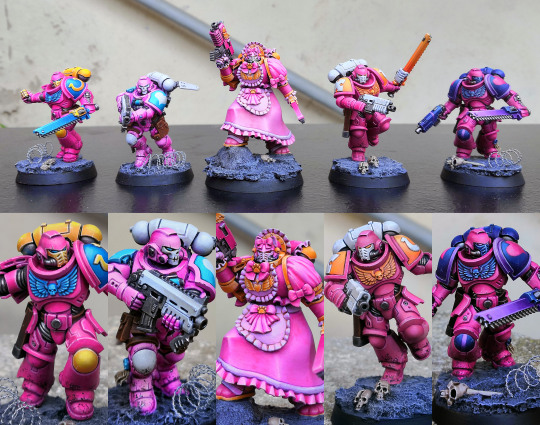
Pretty self explanatory :p
#miniature painting#warhammer 40k#warhammercommunity#miniatures#lgbt pride#lgbtq#trans pride#Space maids#space marines#bisexual pride#lesbian pride#pansexual
285 notes
·
View notes
Text
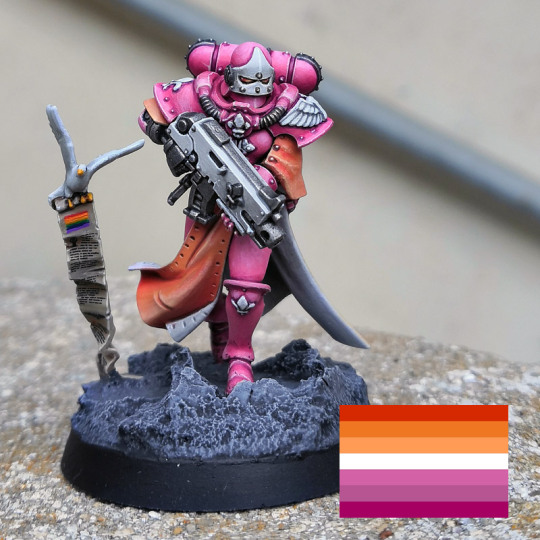
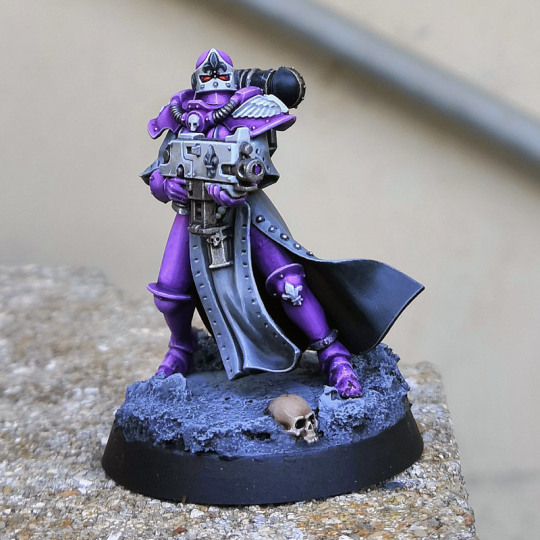
Aromantic Pride Space Marine

Long time without adding new members to my space marine pride series, "The Gate Crushers", so I'm really happy to present the aromantic pride Space Marine.
That flag is really visually pleasing so making it work as a mini color scheme was quite easy.
Anyway here are all the angles.


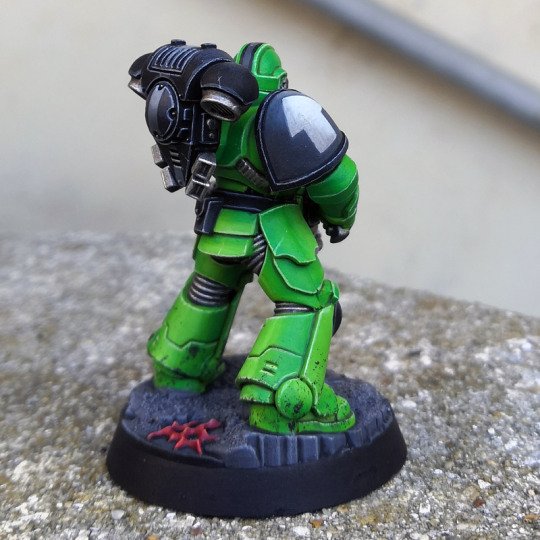

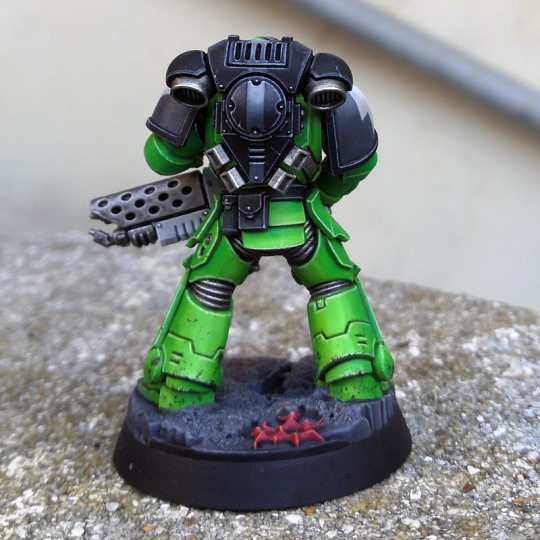
Hope you like it.
202 notes
·
View notes
Text
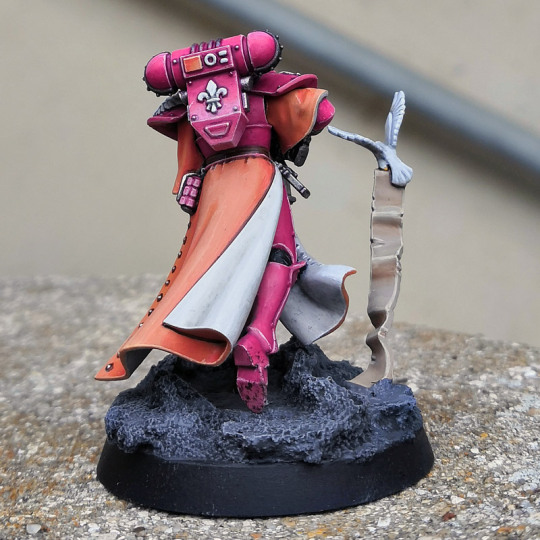
Space Maid Space Marine !
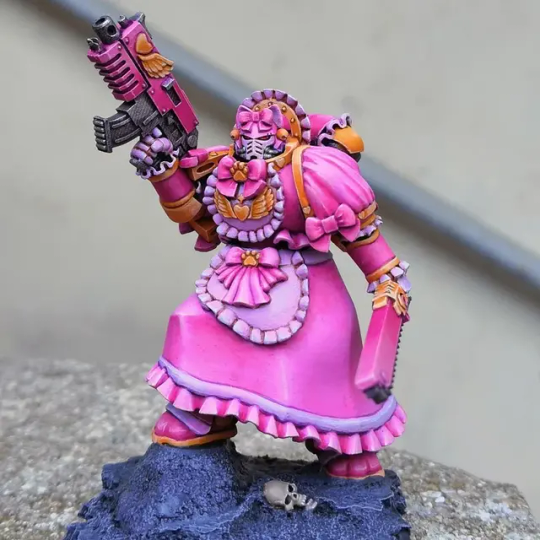
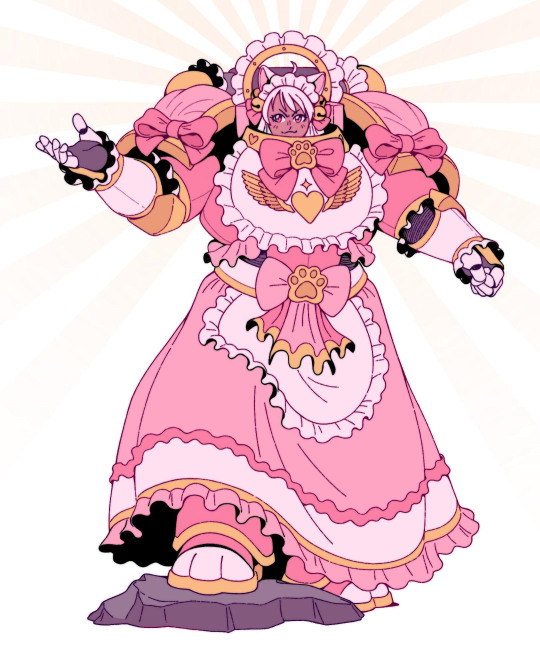
From the very first time I saw the incredible design of the Space Maid made by ChumiiCham, I wanted to paint one. Look at them, they are adorable :

Thanks to Solflamer that created a 3d model for them (available on Cult3d : https://cults3d.com/en/3d-model/game/maidmarine) my dream came true.
It was both a really challenging mini to print correctly (mine still have defaults I patched up as well as I could with greenstuff. I'm a beginner both at 3d printing and greenstuff so that's not amazing) and to paint with a lot of shades of pink, but what a blast that was.
Anyway, here are all the other angle and the reference :

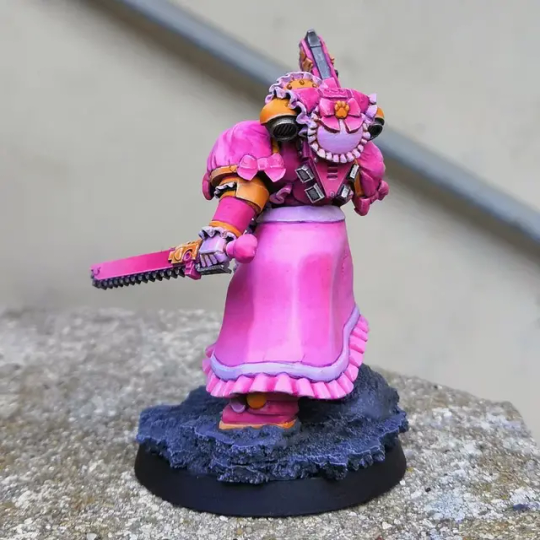
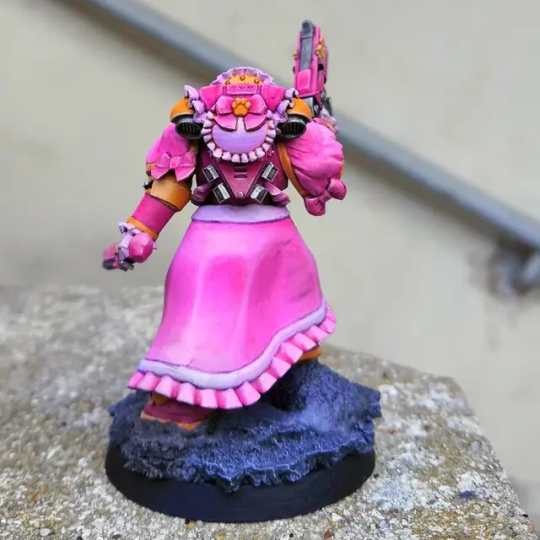
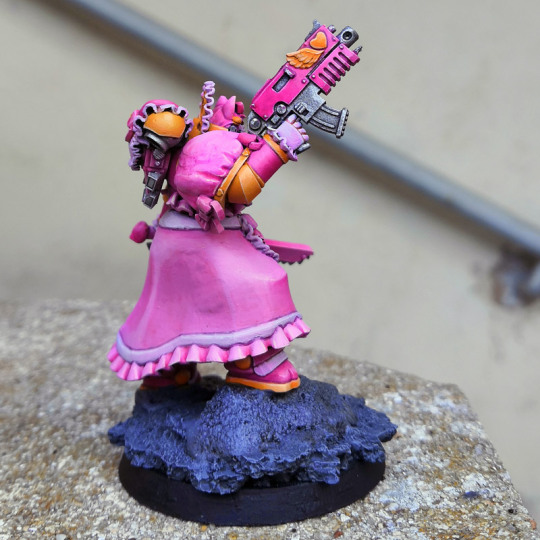
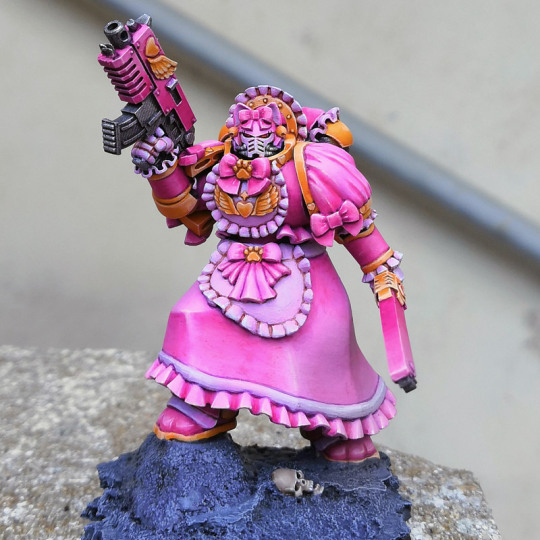

Hope you like her.
#miniature painting#warhammer 40k#warhammercommunity#miniatures#maids uniform#maid outfit#Space maids#space marines#female space marines
3K notes
·
View notes
Text
Butch Lesbian Pride Sister of Battle
Probably not the most well known (or even used) flag, but the butch lesbian pride flag is a really beautiful color scheme so I couldn't pass on it, especially in a Sister of Battle series.
Here are all the angles.


As always, hope you like her.
#miniature painting#warhammer 40k#warhammercommunity#lgbt pride#lgbtq#miniatures#butch lesbian#butch
308 notes
·
View notes
Text
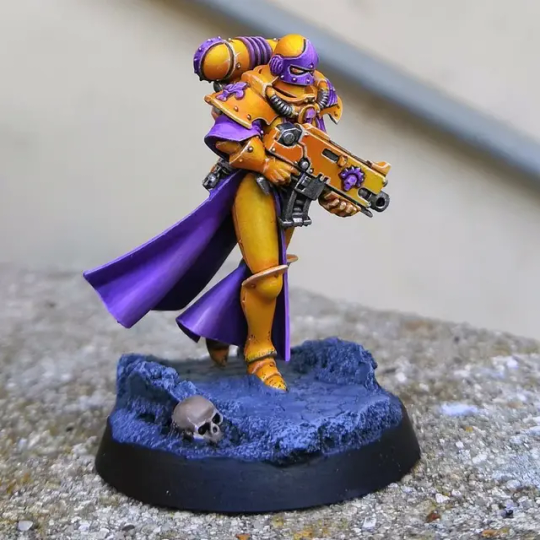
Intersex Pride Sister of Battle!

With the enby sister of Battle, the intersex Pride is probably one with the most contrast possible (yellow and purple are basically opposite on the color wheel).
Working with only two colors is kinda challenging to make sure everytjing is lisible and contrast nicely, but it's fun.
Anyway, here are all the other angles!

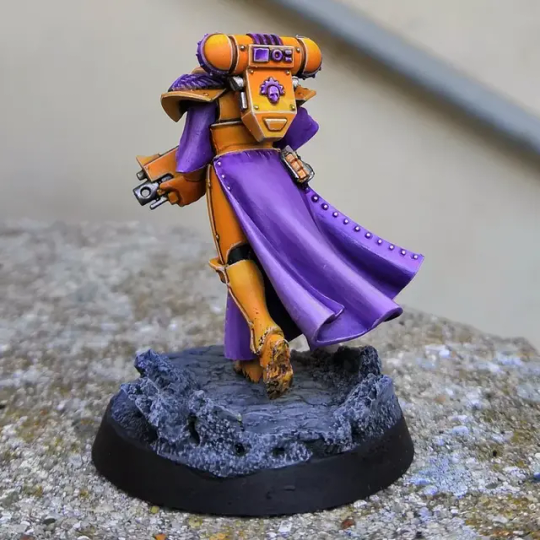


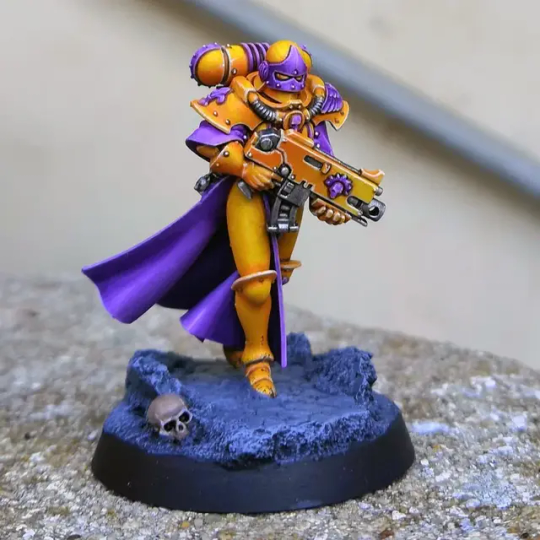

Hope you like them!
#miniature painting#warhammer 40k#warhammercommunity#lgbt pride#lgbtq#miniatures#intersex#intersex pride#intersex positivity#warhammer 40000
190 notes
·
View notes
Text
Gay Men Pride Sister of Battle

Newest addition to my Pride Sister of Battle series with the Gay men pride flag sister of Battle.
On that one I love both how head scratching the idea of a sister of Battle with gay men pride color is and the "fresh" feel of the scheme. It's really toothpastey :p
Anyway, here are more angles :
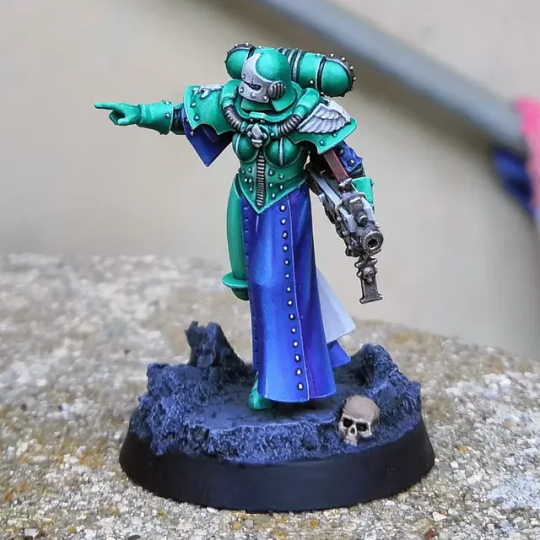


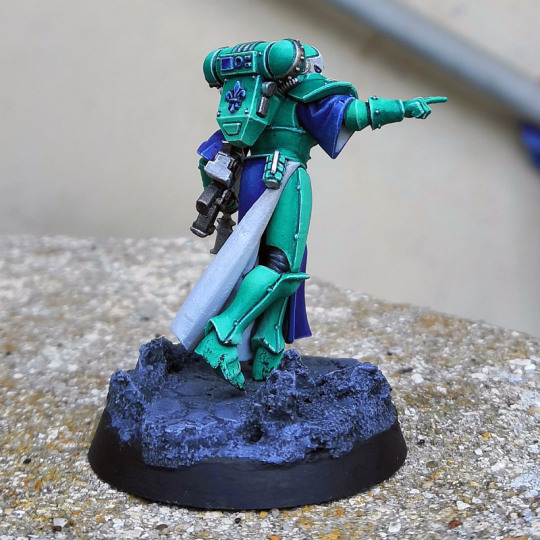
Hope you like it.
#miniature painting#warhammer 40k#warhammercommunity#lgbt pride#lgbtq#miniatures#gay men#sister of battle#sisters of battle
188 notes
·
View notes
Note
Hello I am chiroraptor; I wanted to ask if you can make Asexual Lictor tyranid please
I haven't planned any pride series with the nid's, but seeing how that whole serie of pride Warhammer40k paontong started with one, I might attempt some here and there one of those days.
13 notes
·
View notes
Note
Do you use air brushes for basecoating? I'm currently painting a Ghostkeel following your paint recipe, and it's just really annoying to get a smooth basecoat with the Genestealer purple on that
I work exclusively by brush but an airbrush to basecoat would definitely cut the time needed to paint drastically especially on the more capricious paints.
10 notes
·
View notes
Text
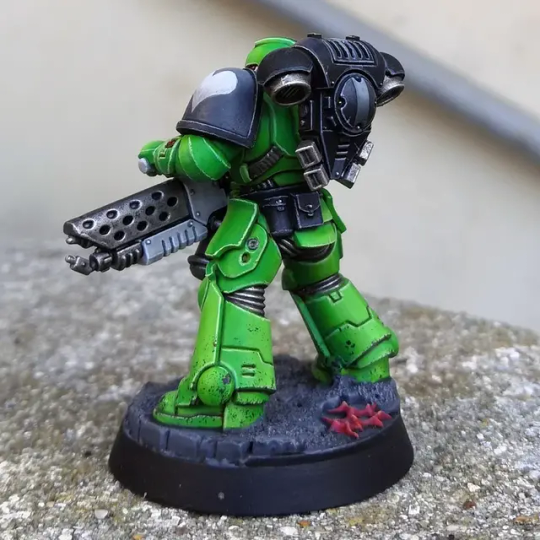
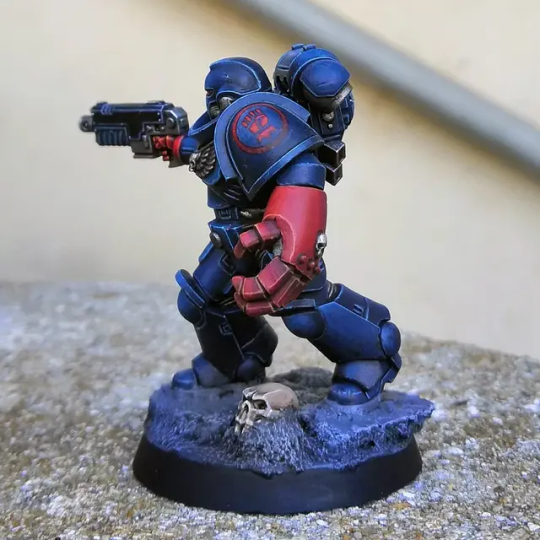
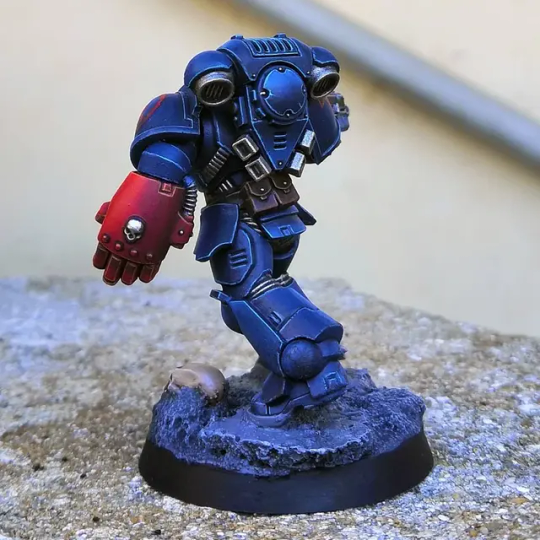
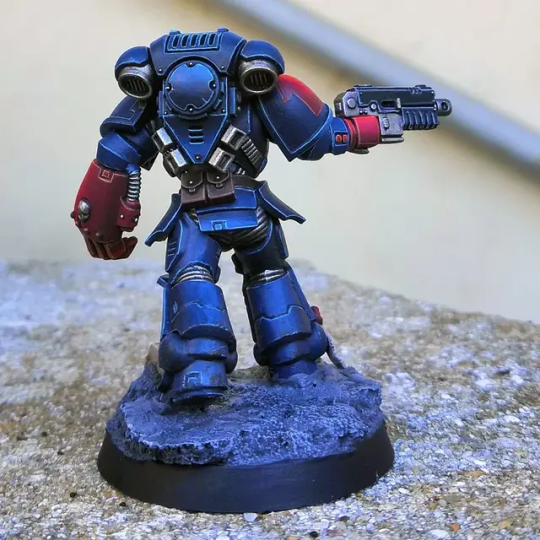
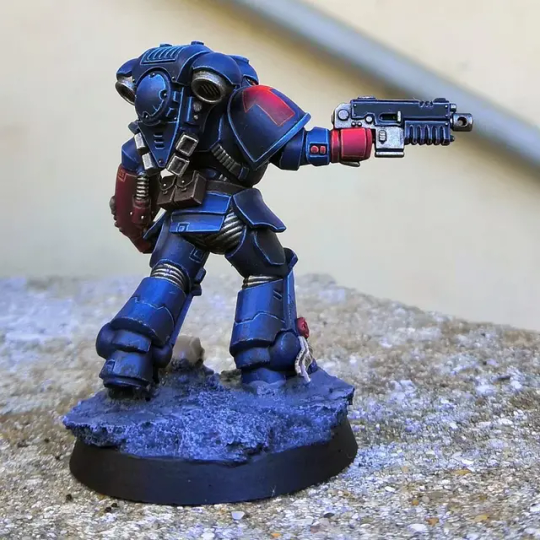
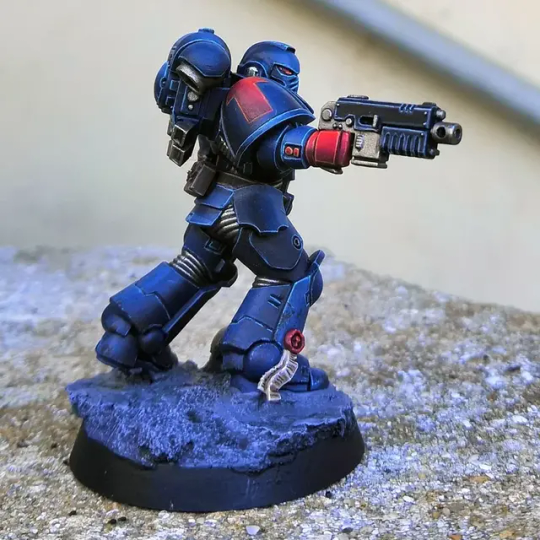
Crimson Fists Space Marine (+ paint recipe)

For a change of pace, I wanted to paint a classic chapter with dark colors. I love the result but it confirm I dislike painting darker color. Always find the process of glazing over a dark paint a pain in the butt were you feel like you aren't building any color at all until the very end.
Anyway, if despite that you want to try my recipe for that chapter, here it is :

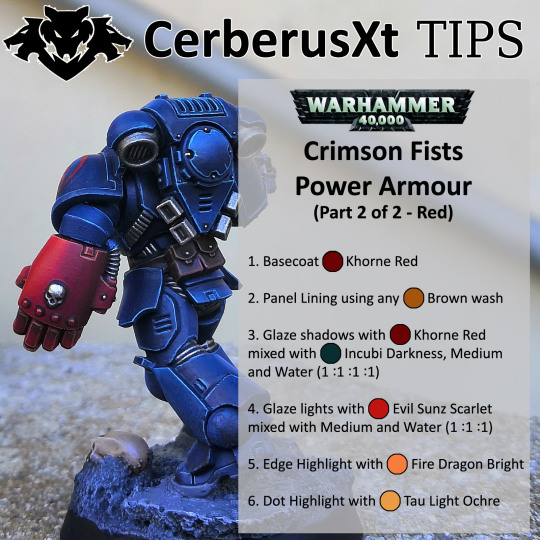
And here are all the other angles of that mini.

#miniature painting#warhammer 40k#warhammercommunity#miniatures#tips and tricks#crimson fists#space marines
161 notes
·
View notes
Text
Non-Binary Pride Sister of Battle
Latest addition to my Sister of Battle pride series with the non-binary pride Sister. It really settles how much I love that color scheme, probably my favourite of all the flags.
Anyway, here are various angles to see notably the robes in more details.


Hope you like them.
#miniature painting#warhammer 40k#warhammercommunity#lgbt pride#lgbtq#miniatures#non binary#nonbinary#non binary pride
259 notes
·
View notes
Text
Barbenheimer WW40k Edition

Or Oppenbarbie! Because why not!
#warhammercommunity#miniature painting#warhammer 40k#trans pride#oppenheimer#oppenbarbie#barbie#the barbie movie#barbenheimer
675 notes
·
View notes
Note
On your ace sister of battle - how did you get that purple? It's so vivid. I have a pretty similar scheme for my army, would like to see if I could replicate it.
I've published the recipe I used on Instagram when I did the space marine version. You can find it on Instagram @cerberusxt_figurines
11 notes
·
View notes
Text
New Warhammer 40k Pride Series – Sisters of Battle Edition !

You might already know the pride series I made by painting 12 LGBT flags inspired Space Marines (if not you can see it here), but I am at it again, this time with Sisters of Battle.
I’ve already done 4 of them, the 3 up top (from left to right : trans pride, lesbian pride, asexual pride) and the latest of the bunch, the Bisexual Pride Sister of Battle :


(Yes, she removed her helmet just to look cool pulling the grenade pin with her teeth ! Style matter in w40k :p)
And here are the individual pictures of the 3 above to get a better look at them :
Trans Pride Sister of Battle :


Lesbian Pride Sister of Battle :


Asexual Pride Sister of Battle :


I’ve a bunch more planned. I’m not sure I will do a 1 for 1 of the flags chosen for the Space Marine or not, I will see as I go along, my goal being always, first and foremost, to have fun painting.
Hope you like them !
#miniature painting#warhammer 40k#warhammercommunity#lgbt pride#lgbtq#miniatures#trans pride#asexual#asexual pride#lesbian pride#bisexual pride
352 notes
·
View notes
Text
How I Paint Things - Part 2
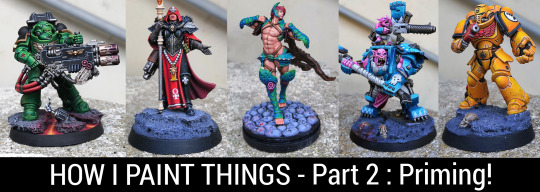
Part 1, all about working in subassemblies, is available here.
Priming minis can seem somewhat easy at first glance. You just spray, and you are done, right ?
Right ?

But any miniature painter with even a small bit of experience can tell you that things can go wrong real bad, real fast. And f-ing up your mini from step 1 is more frustrating than not finding the keys of a chastity belt !
Fortunately, there are quite a few tips, tricks, and good habits you can follow to mitigate that kind of bad experience. So let’s go over it.
Why prime to begin with ?
Priming can seem like a bother, but try painting over bare plastic, and you will understand real fast how not enjoyable an experience that is. It also makes for a less durable paint job overall, so don’t cheapen on that crucial part !
With which color should I prime ?
A surefire way to start a heated debate between miniature painters is to ask which color is best for priming (and if you want to start a century long war, ask chuds which color is best for priming female space marines!). Since I’m not here to settle any of those questions, I will simply list the pros and cons of each available options. That way, you can choose which fits you best.
There are basically 4 options :
Black primer :
Advantage : Even if you forgot to paint some parts of your mini, with a black primer, it will just look like the missing part is in the shadows. It’s especially useful on minis with some hard to reach parts, like inside of capes. With black primer, you can just prime and forget.
Disadvantage : If your scheme uses bright or pale colors, you will have a harder time basecoating and will need more layers to reach full opacity.
White primer :
Advantage : Perfect for bright or pale colors or with paint that cover like ass (yellow, some pink, some dark green, etc.). You will basically cut the basecoating time of those colors in half.
Disadvantage : Contrary to the black primer, if you forget to basecoat some hard to reach parts of your mini, it will stick like a sore thumb. Another disadvantage to keep in mind is that acrylic white paints in general are pretty finicky (it’s due to the white pigment being is « bigger » than other pigments, from what I understand), and there are more horror stories of botched white primer than black primer (texture when the primer dries, etc.), so it’s not the safest option.
Grey primer :
Advantage : Almost like white but less capricious or prone to bad texture.
Disadvantage : Slightly less drastic than with white paint, it can still stick out a bit if you forget part of your mini.
Specific colors primer :
By that, I’m talking about the primers dedicated to a particular color scheme, like Ultramarine blue if you paint smurfs.
Advantage : If you intend to paint loads of minis with a similar color scheme, those kinds of primers can be a real time saver, even if the hue isn’t exactly the one you want in the end.
Disadvantage : Same as for white and grey, with the caveat that it will look less jarring by being the same color as the dominant color of your color scheme.
Since that series is title « how i paint thing », I must say that personally, I prime almost every single one of my minis black, even when I paint bright or pale colors. Overall, I find the white primer making parts you forgot to basecoat stick out more of a pain than having to paint a few more layers over black to reach opacity. I would advise you to try both the black and white primer to experience it for yourself, you might have a different impression though
I won’t go over the zenithal priming method, I personally don’t use it, but basically you prime white and then spray some white primer from the top. Never found that method useful since I never use any contrast type paint.
Spray can or brush-on primer ?
Both are fine. A spray can is faster to apply than by brush, but by brush, you aren’t bound to the weather anytime you want to prime your minis, and you are almost guarantee to not have to deal with weird textures.
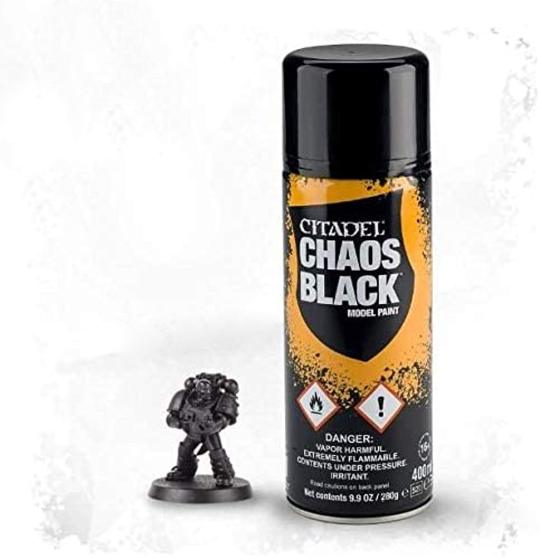
I personally mainly use the Chaos Black primer from Citadel which, while more costly than other brands, never got all weird on me.
As for the brush on primer, I use the one from Vallejo. It even comes in black, white, and grey !

Overall, I tend to use both spray cans and brush on primer in tandem. What I mean by that is that I try not to over prime my minis with the spray can to avoid speckles and weird textures, meaning some parts of my minis are sometimes not primed enough. I then simply correct things by brushing on additional and localized primer. That overall process isn’t very long and guarantee speed and effectiveness.
How-to use brush-on primer ?
Like standard paint, you apply a few coats. Two is generally more than enough with black primer, you don’t need to reach full opacity, what matters is having primer over every surface, even if it’s a bit thin. Then, let your primer cure 24h in a dry room before painting.
You can also use those primer in an airbrush (basically they are made exactly for that purpose to begin with) and you get all the advantages of the spray primer without most of the inconvenient. You still need to clean the airbrush though.
How-to use a spray can primer ?
It might seem pretty easy at first glance, but it’s probably the trickiest part of that whole priming process, seeing how finicky those spray cans can be.
Here are the key things to keep in mind to have the best chance of not messing up :
One, don’t cheapen on the shaking ! When the label says you must shake the can for 2mn, it’s for a reason. So work those arms and count the seconds sloooowly. When in doubt, shake a bit more. That way, you will both have a great priming experience AND huge biceps !
Two, always prime outside, not in your garage, even if it’s well ventilated, otherwise, you run the risk of intoxicating yourself with the fumes. Those are no joke, and the best way to mess up priming a mini is going into a coma.
Three, never prime when it rains. I will later explain a way you can circumvent humid and cold weather, but rain can truly mess up your work, so don’t even try (obvious, I know, but hey).
Four, always apply a first squeeze of the spray can on some piece of cardboard before doing it on your mini. That way, if the spray can do something weird (it can happen when the muzzle dry badly), you will know right away and won’t damage your precious minis.
Five, prime your minis in short bursts, not too close (15/20cm) and try to slowly rotate them (or move your hand) to catch all angles. Don’t forget to prime from the top and the bottom, it’s often the angles that get forgotten.
Six, don’t overprime ! A slight bit of grey isn’t a problem, as long as you have some « dust » of primer over it. It’s always easier to fix not enough primer than too much anyway.

(What too much priming does to a mofo !)
Seven, when you’ve finished priming, put your spray can upside down and squeeze the muzzle until no more paint comes out. That way, you will clean the muzzle and avoid having paint dry in it, making the spray can unusable.
Eight, always let your freshly primed mini dry in the driest room in your house. Humidity at that stage can mess with the priming. Ideally 24h.
Additional tips and tricks, especially if you want to prime when it freezes outside !
Probably the best tip I regularly use, and one that can allow you to prime with a spray can even in the dead of winter :
When cold outside, put the butt of your spray can into a bit of warm water (not hot, it should be around 25°C/30°C at most) for 10 minutes. It should put your spray can at it’s ideal temperature. Then, shake the can while staying indoors before rushing outside, priming as fast as you can, and going back inside. It works like a charm every time !
And one last bonus tip : beware almost finished spray cans ! 95% of my priming problems came during the last leg of one of my spray cans (speckles, or other textures). So, nowadays, I keep my almost finished spray can exclusively to prime bases (those tend to be more accepting of a bit of texture) and use as new a spray can as possible for the minis themselves.
Next part will be all about basecoating !
93 notes
·
View notes