
allyamadork
I am a dork
and I love every minute
836 posts
Don't wanna be here? Send us removal request.
Last Seen Blogs

sleepy-timewriting
my f/o's are in the banner

x-kane
comes and goes.

viciouslove
that's immortality, my darlings;

ulzzangs-nn
ulzzangs galore!

sekbless
sickness
Note
hey if you write a pattern for the chilchuck amigurumi I will buy it instantly
ive gotten multiple asks about this, so ill just answer them all here in one go.
i wrote down everything while i was working on it, but i theres some stuff that i would do diffrently and i also didnt take a lot of process pics so it wont be a full proper pattern for those reasons, but ill add all that i have under the cut!
i dont want any compensation, but if you wanna do me a favor you can donate to esims for gaza, unrwa, any of these gefundme's, or another trusted charity of your choice.
now to the pattern! i would love to see the results of anyone making a squeakychuck, feel free to tag or dm me :)
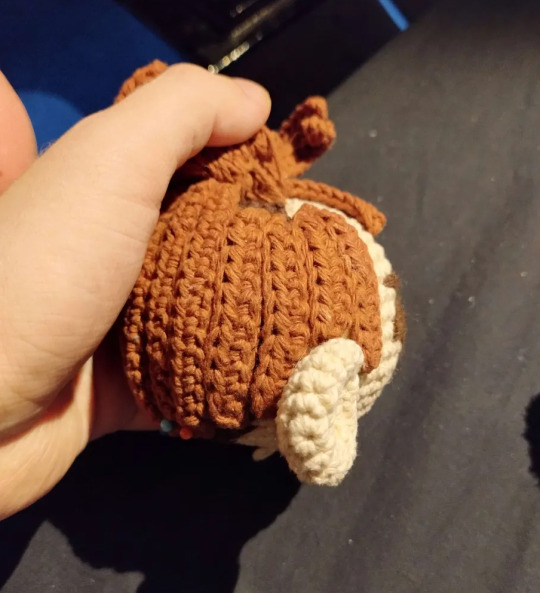
the dimensions of this depend on the size of ur squeaker and yarn, i had a 4ish cm squeaker and somewhat thick 4/8 cotton yarn (kinda 6/8ish thickness). depending on ur yarn and squeaker u might need to follow a different pattern for the body.
if youre using a different body base pattern, the tunic and blouse pattern are pretty easily adjustable. ill add some notes for that at those sections of the pattern. ill also link some videos i used at relevant sections.
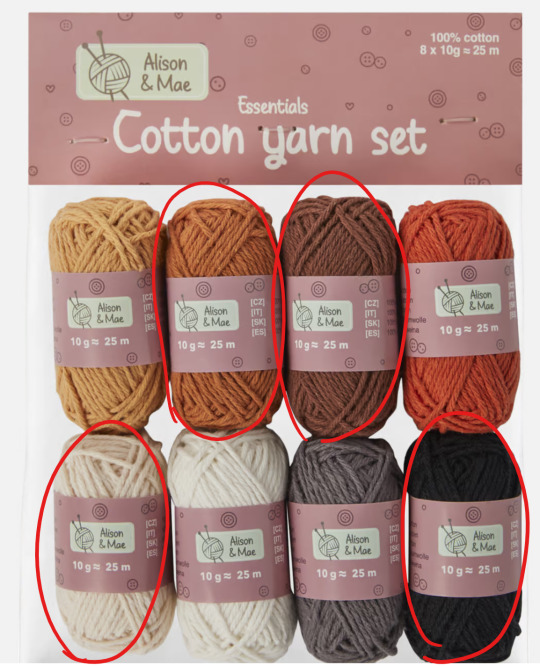
if theres an Action store near where u live, see pic below for the yarn i used for the skin, reddish brown, black and light brown. i got 3 of these but 2 packs was enough. the dark brown and creme were from my stash. i also got the squeaker from a donut dog toy from Action.
-
abreviations list (all in us terms):
mr = magic ring
sc = single crochet
hdc = half dubble crochet
slst = slipstitch
ch = chain
bobble = 5 double crochet in one stitch
BLO = back loop only
FLO = front loop only
what you need:
-skin color of choice yarn
-creme/white yarn (normal for body, thin for blouse)
-greyish creme (for boot flaps)
-black yarn
-dark brown yarn
-light brown yarn
-reddish brown yarn
-green yarn
-4 tiny buttons (for arm joints)
-cardboard (for shoe sole
-3.5mm hook
-squeaker
-needlefelt needle
-stuffing
-stitchmarker (optional, i always mark the first stitch of the round)
-
once again disclaimer, this is not a propper pattern, this is just what i wrote down while i was crochetting. it may not nessecarily be the best way to do it. i wanted most clothes to be removable, but you have to partially disassemble the doll if you want to remove them. if you dont like how something looks or works ur free to do whatever you want. big fan of fucking around and finding out personally.
if you have any questions feel free to dm me, might take me a while to reply though.
-
SQUEAKY CHUCK PATTERN 3.5mm hook
head (skin)
r1: sc 6 in mr
r2: (inc) x6
r3: (sc 1, inc) x6
r4: (sc 2, inc) x6
r5: (sc3, inc) x6
r6: (sc4, inc) x6
r7: (sc 5, inc) x6
r8-15 : sc 42
r16: (sc 5, dec) x6
r17: (sc 4, dec) x6
r18: (sc3, dec) x6
r19: (sc2, dec) x6
r20: (sc 1, dec) x6
r21: sc 12
slst, fasten off
ears x2 (skin)
r1: sc6 in mc
r2: (inc) x6
r3: (sc, inc) x6
r4-6: sc 18
r7: dec 9. slst fatsen off.
Body - leg up (skin, black, thick creme)
start with skin
r1: ch 6, inc in 2nd, sc 3, 4inc, sc 3, inc
r2: inc 2, sc 3, inc 4, sc 3, inc 2
r3: inc 3, sc 5, inc 6, sc 5, inc 3
r4: BLO sc in all
r5: sc 3, dec 2, sc 3, dec 2, sc 6, dec 2, sc 3, dec 2, sc 3
r6: sc 1, dec, sc 4, dec 6, sc 4, dec, sc 1.
r7: sc 6, dec 3, sc 6
stuff
-r8 dec, sc in all
change color to black [color change video]
r9-23: sc in all
1st leg: fasten off
2nd leg [joining legs video]:
r24: sc7, ch 1, sc join in 1st leg after last sc, sc13, sc1 in visible v loop of ch1, sc 7
r25: sc7, sc 1 in remaining v loop of ch1, sc21
r26-31: sc 28
r32: sc 7, change color to creme/white, slst 1, sc 20
r33-35: sc 29
r36: (sc 8, dec) x3
r37: (sc7, dec) x3
r38: (sc6, dec)x3
add squeaker
r39: sc21
r40: (sc 5, dec) x3
r41-42: sc18
r43: (sc 1, dec) x6
fasten off
Arms (skin, dark brown)
i made the arms movable with button joints, but after looking at some videos i discovered that what i did is not called a button joint and i dont have a video explaining it, so i hope this drawing helps.
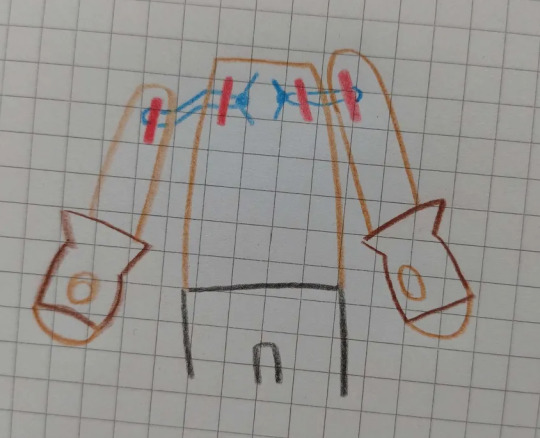
the red bits are the buttons inside of the arms and body, and the thread (blue for clarity, i matched it w the skin) should be pulled tight and finished off with a double or tripple knot inside the body.
or you could just sew on the arms that also works. but wait with doing that until youve finished the blouse as the hands dont fit through the sleeves. i have a seperate section on assembly at the end of the pattern.
start with skin
r1:sc6 in mc
r2: inc x6
r3(sc, inc)x6
r4 : sc 18
change color to brown
r5: sc 18
1st arm r6: sc 3, bobble, sc 14.
2nd arm r6.2: sc 14, boble, sc 3
[i matched the top loop to the bobble color but i think it would look better if u didnt]
r7: sc 18
r8: (sc 4, dec)x3
r9: (sc 3, dec)x3
r10 sc12
color switch to skin (you might want to do this a round earlier, i didnt initially plan on making the gloves flared, and this color change part can sometimes be seen and look kinda weird)
r11-14: sc 12
r15: (sc4, dec)x2
r16-19 : sc 10
r20: (sc3, dec)x2
r21: sc8
insert button joint
r28: (sc2, dec)x2
slst, sew shut
glove flare (dark brown)
r1: ch 15, slst join LONG TAIL
r2: (sc4, inc)x3
r3: sc4, inc, sc8, inc, sc 4
r4: sc 2, slst fasten off
sew 2 rows below thumb bobble
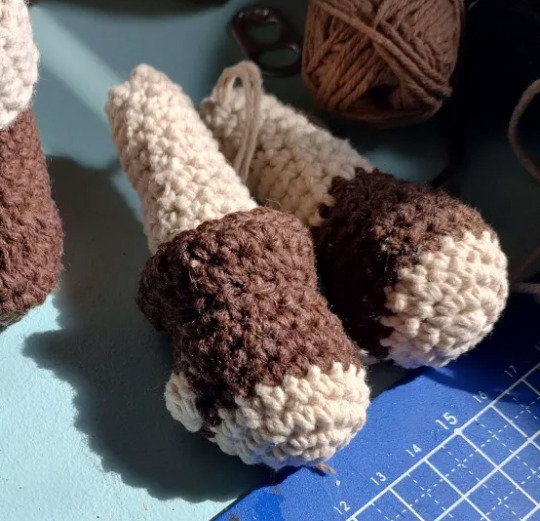
boots (light brown, dark brown, greyish creme) [video]
these are removable but they dont go on easily, so you gotta patiently massage the feet in there.
start with light brown
ch 7, start in 2nd from hook:
r1: sc 5, 3inc, sc 4, inc
r2: inc, sc 4, inc 3, sc 4, inc 2
r3: inc, sc 5, hdc inc 7, sc 5, inc 2
r4: slst fasten off. sew in holes/tails, fray ends for flat gluejob. trace onto cardboard for sole.
switch color to dark brown
r1: BLO join slst, BLO sc in all
r2-3: sc in all
glue in sole
r4: sc 8, dec 5, sc 12
r5: sc 7, dec 4, sc 10
r6: sc7, dec2, sc 10
r7-10: sc in all
switch color to greyish creme
r11-12: sc in all
r13: slst, FLO sc in all
r14-16: sc all
slst fasten off
flip the greyish creme flap over.
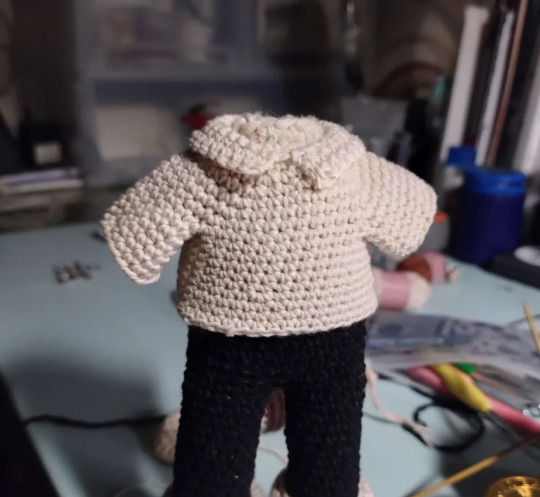
blouse (thinner creme)
this is a standard raglan pattern, if you need the whole thing bigger/smaller you need to have more/less chains at the beginning. this change also carries over to the collar. the increases are evenly spaced for me, and unless your doll has a very broad chest this shouldnt have to change.
if the arms need more space you need to either add more rows to the r3-7 part and/or add more chains in r8 (this part should fit pretty sugg around the body)
i was experimenting a bit w using BLO to minimize the gap where the sleeve and body seperate (r8). it worked p good but you can ignore it if you dont understand it and just sc in all.
r1: ch24, slst join.
r2: (sc 5, inc) x4
r3-7: inc in first of previous inc. last row should have 10 sc between increases.
r8: sc5, blo sc 1, ch 5, blo sc join in 1st of next inc, sc 11, blo sc1, ch5, blo sc join in 1st st of next inc, sc 5
r9: sc6, blo sc 1, sc 5, blo sc1, sc11, blo sc 1, sc 5, blo sc 1, sc 6
r10-13: sc in all (36)
r14: (sc8, inc)x4
r15: sc in all (40)
slst finish off
Sleeve
r1: join mid armpit, slst ,sc2, sc in the leftover bits from the BLO stitches, sc 1, sc in leftover BLO bits, sc2
r2-6: sc in all
collar
join left-middle front, sc 7, inc, sc8, inc, sc 7. turn
r2: sc7, inc, sc 10, inc, sc 7. turn
r3: sc8, inc, sc 10, inc, sc 8. turn
cuffs
r1: join mid body-facing side, FLO sc 20
r2-4: sc 20, slst fatsen off
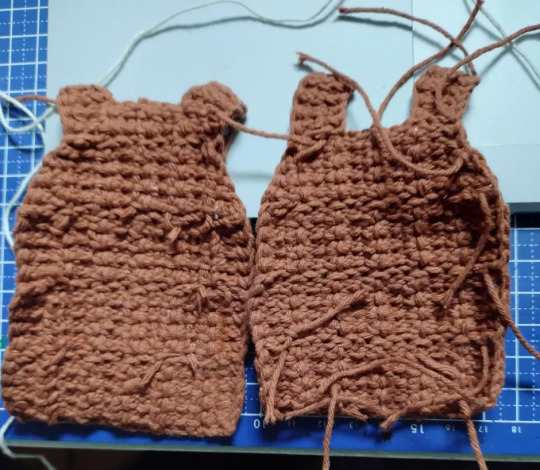
Tunic (red brown) [tunesian entrelac crochet]
if you want to make this bigger i recommend keeping the same square layout, but making the squares bigger. its a bit of measuring and math to figure it out.
the tunic is made in tunesian crochet and i dont really know what written patterns for that look like so i hope this makes sense.
for a single square:
r1: ch4, start in 2nd back bump from hook. pull up a loop from ever back bump. you should have 4 loops on your hook total. simplestitch in all
r2-4: simplestitch in all.
r5: slst in all. fasten off
for the slanted parts i did the decrease by pulling through the middle 2 loops in one go on the back pass
this is how the full thing should look, its worked from bottom left to top right.
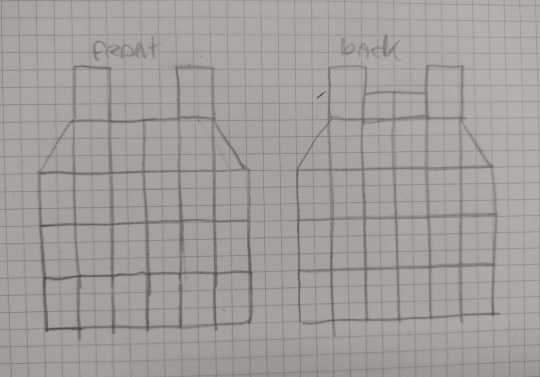
sew together the shoulders together, then sew in all of the ends
:) good luck
tunesian crochet has a tendancy to curl, so if you used cotton i def recommend blocking it
i defined the grid a little bit with a dark brown pencil.
cowl (green)
BLO sc 7, repeat till desired lenght, then BLO slst join the last row to the first.
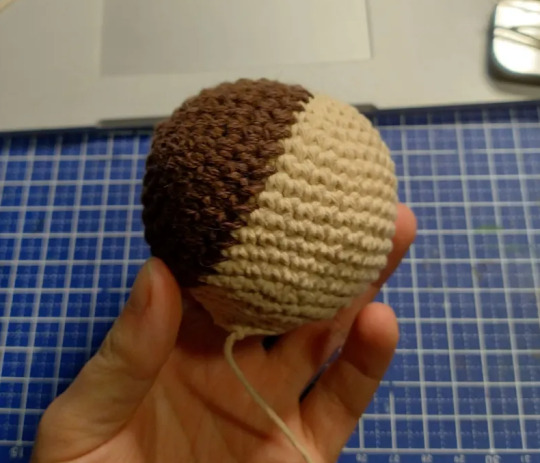
scalp undercut bit (dark brown)
r1: sc 6 in mr
r2: (inc) x6
r3: (sc 1, inc) x6
r4: (sc 2, inc) x6
r5: (sc3, inc) x6
r6: (sc 4, inc)x6
r7: sc36
sew on back of the head (recommend doing this before the ears and face, see end for more detailed assembly instructions)
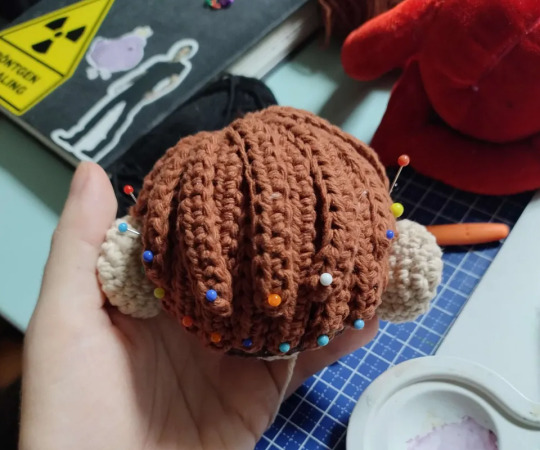
hair (reddish brown) [hair video]
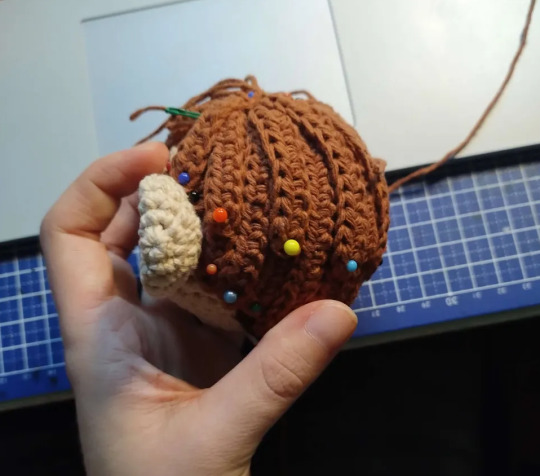
disclaimer, this is kind of a mess. the lenghts didnt line up the way i intended so i improvised by adding loose strands and spent a lot of time pinning every strand in place before glueing them down.
i used bison kit contact glue since its sturdy, transparant, flexible and waterproof. you can use hot glue as well, i just personally dont like it because its bulky.
r1: sc 21 in mc. join BLO slst
r2: ch 12, sc in 2nd from hook, gdc10, BLO slst join
r3: ch 12, sc in 2nd from hook, gdc10, BLO slst join
r4: ch13, sc in 2nd from hook, hdc 11, BLO slst join
r5: ch13, sc in 2nd from hook, hdc 11, BLO slst join
r6: ch 14, sc in 2nd from hook, hdc 12, BLO slst join
r7: ch16, sc in 2nd form hook, hdc 14, BLO slst join
r8: ch 18, sc in 2nd from hook, hdc 16, BLO slst join
r9: ch 18, sc in 2nd from hook, hdc 16, BLO slst join
r10: ch 14, sc in 2nd from hook, hdc 12, BLO slst join
r11: ch 12, sc in 2nd from hook, hdc 10, BLO slst join
r12: ch 10, sc in 2nd from hook, hdc 8, BLO slst join
from now on, join in the FLO's of previous round
r13: ch10, sc in 2nd from hook, hdc 8, FLO slst join
r14: ch10, sc in 2nd from hook, hdc 8 , FLO slst join
r15: ch12, sc in 2nd from hook, hdc 10 , FLO slst join
r16: ch12, sc in 2nd from hook, hdc 10 , FLO slst join
r17: ch14, sc in 2nd from hook, hdc 12 , FLO slst join
r18: ch16, sc in 2nd form hook, hdc 14, FLO slst join
r19: ch 18, sc in 2nd from hook, hdc 16, FLO slst join
r20: ch16, sc in 2nd form hook, hdc 14, FLO slst join
r21: ch14, sc in 2nd from hook, hdc 12 , FLO slst join
1x ch 6, sc in 2nd from hook, hdc 4
2x ch8, sc in 2nd from hook, hdc 6
2x ch 10, sc in 2nd from chain, hdc 8, slst in same, fasten off.
2x ch 12, sc in 2nd from chain, hdc 10, slst in same, fasten off.
3x ch14
pin all in place until it looks good, tie +glue loose strands first. then glue back pieces, crown, and lastly bangs/ top back layer. some of the lose strands go behind the ears, one is the left sideburn, and the rest is to cover up the crown. these pics are the best i can do as a guide, this was my first time doing this so i was struggling lol.
i didnt fully glue down the bangs and the top back layer bc i thought it would be fun if u could ruffle his hair, but my friend who i gave the plush to has significantly abused him (its been 2 days) and his hair is a mess so im gonna have to glue it down again lol. might as well do it all the first time if u plan on throwing him down the stairs or something.
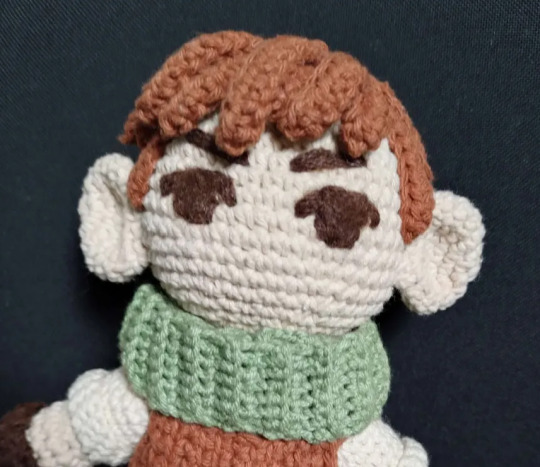
Face
for eyes + eyebrows, embroider outline with dark brown, then needle felt [video] the inner parts w unraveled dark brown fluff. the dark brown i used was probably acrylic. cotton doesnt really work well for this.
Belt and pouch (dark brown)
the belt is a 3 strand basic friendship bracelet! [video]
sew together the ends and hide it with by sewing the pouch on top.
i didnt write down the pattern for the pouch, but from the top of my head its the same start as the squares for the tunic
r1-9: simple stitch in all
r10: simple stitch 1, decrease by putting your hook through 2 vertical bars when pulling up a loop, simple stitch edge 1.
r11: slst in all, finish with a long tail
use tail to sew together the sides, and sew the pouch onto the belt. use some yellow thread to make a button.
ASSEMBLY.
put on the blouse, put the arms in their place and finish the button joints.
put on the tunic, lace the sides with dark brown yarn, finish with a knot and hide the tails underneath the chest part of the tunic.
slide on the belt and boots.
sew the scalp undercut bit to the head
sew the ears to the head
tie + glue the loose hair strands behind the ears
glue the back of the hair
glue the back of the hair
glue the middle circle part of the hair
glue the top back layer and bangs
sew the head to the body
put on the cowl
i hope this is somewhat clear, feel free to dm me is you have questions.
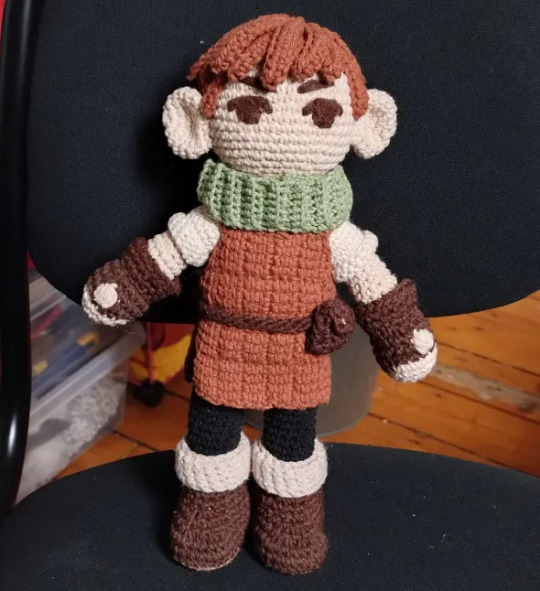
enjoy your squeakychuck :D
130 notes
·
View notes
Text
This is so incredible!!! I wish I knew how to make these! I'd actually sit my ADHD having ass down and do it!
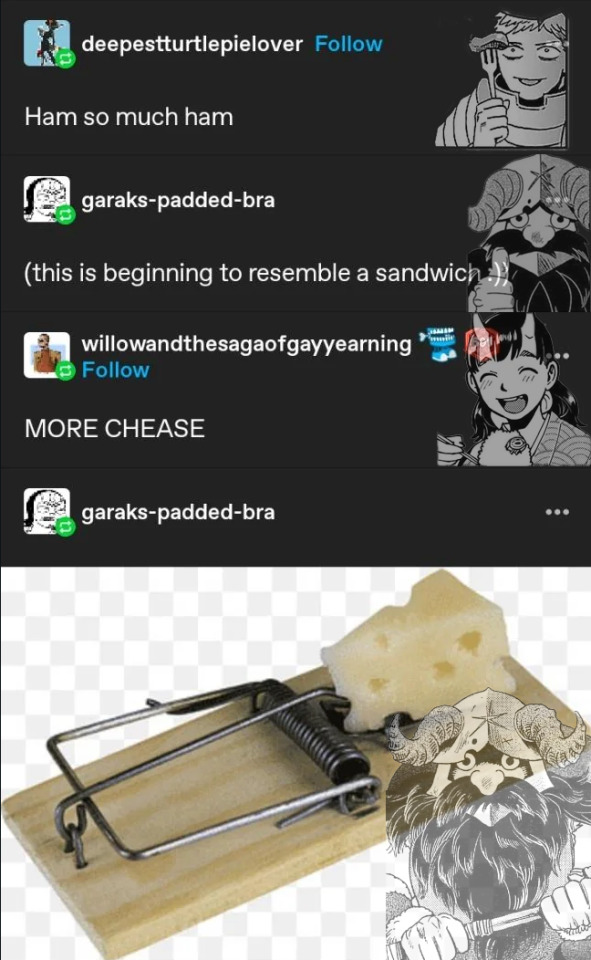
The gift has been giveth i can post squeaky toy chilchuck now. Behold!
3K notes
·
View notes
Text
188K notes
·
View notes
Text
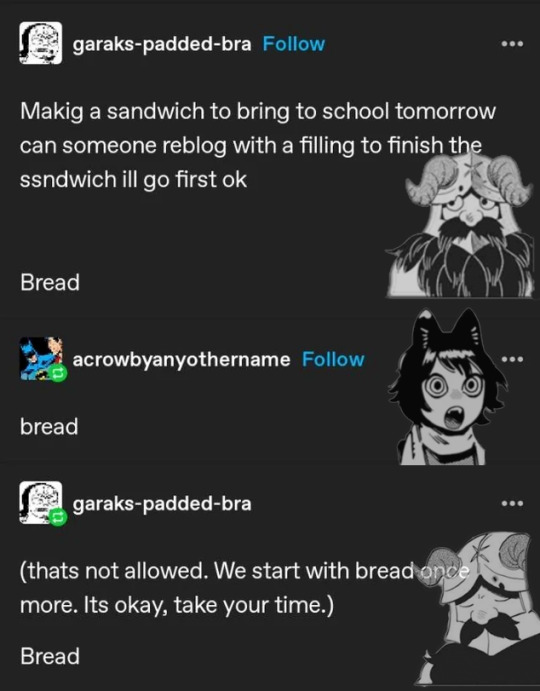
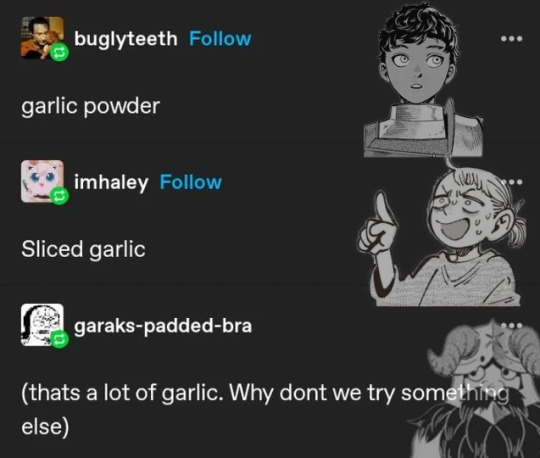
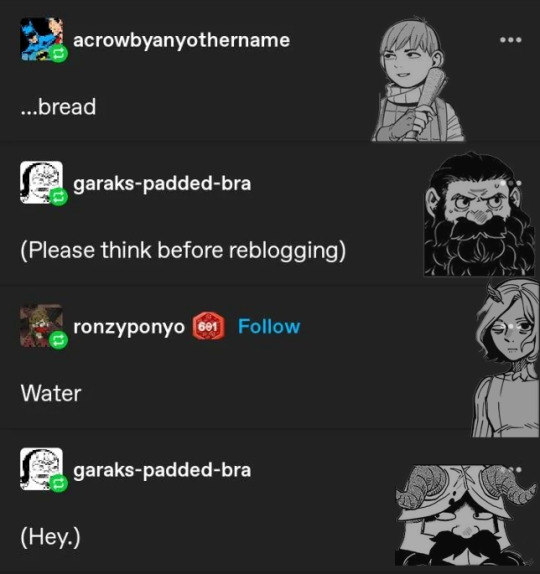
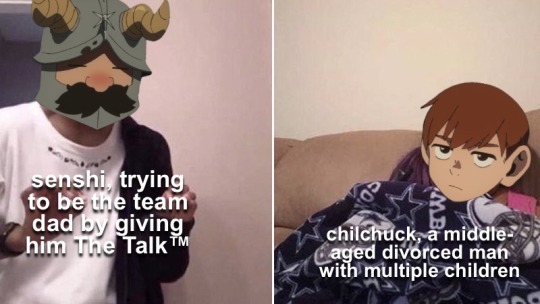
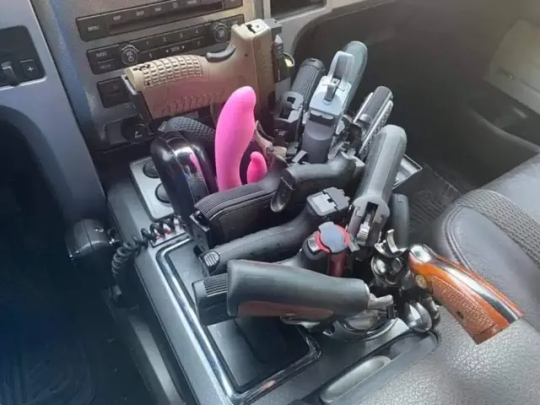
saw this template and immediately knew what i had to do bc it’s literally just canonically them
2K notes
·
View notes

Text
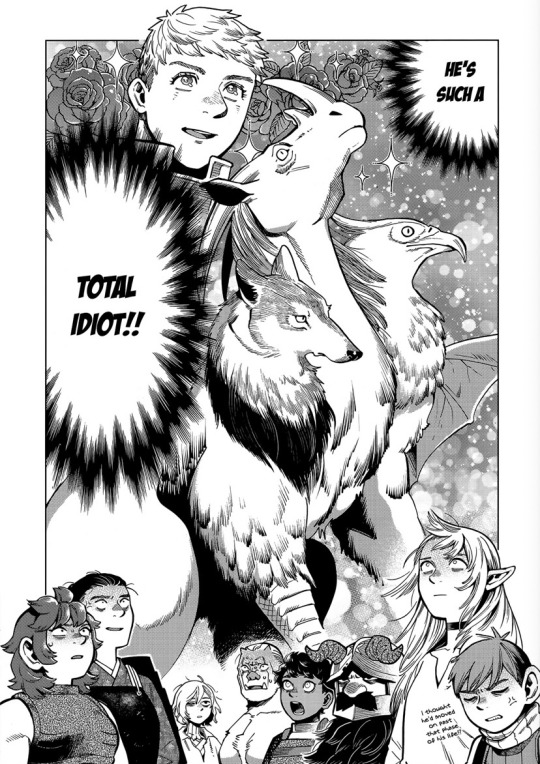
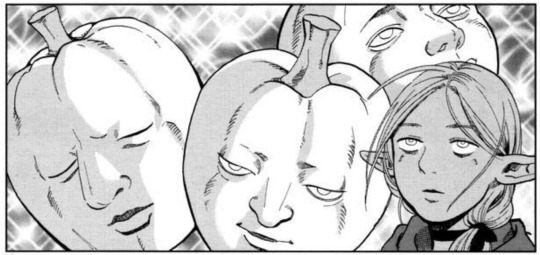
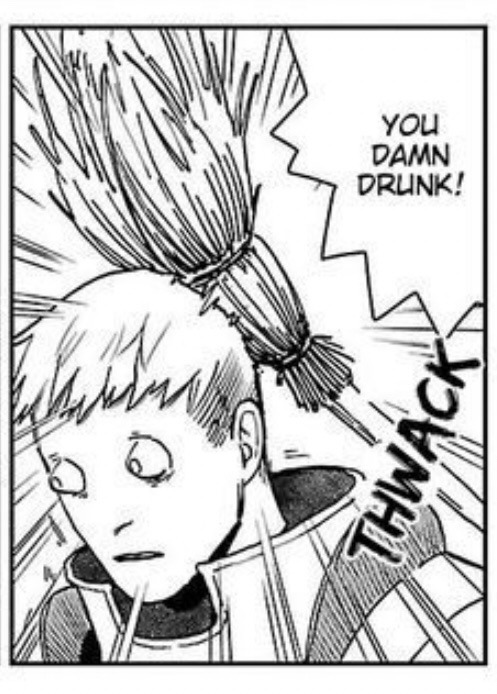
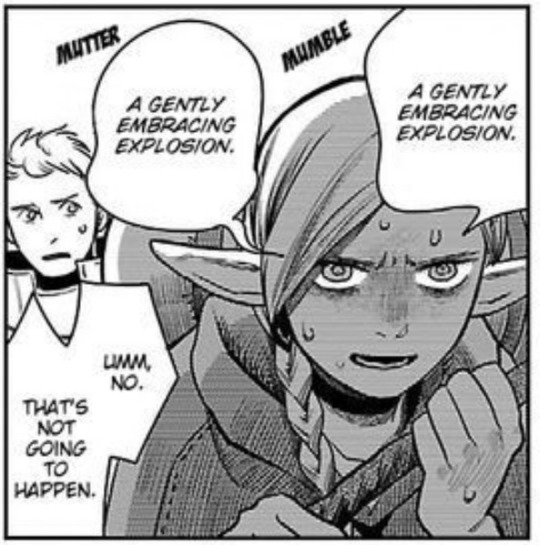
A collection of some peak comedy panels from dungeon meshi (I was taking a lot of screenshots while reading and idk where else to put them)


22 notes
·
View notes
Text
I just discovered foodtimeline.org, which is exactly what it sounds like: centuries worth of information about FOOD. If you are writing something historical and you want a starting point for figuring out what people should be eating, this might be a good place?
196K notes
·
View notes
Text
Hey guys! I'm just letting you all know that I won't be active that much today.
Me and a bunch of psychos on Tumblr are celebrating the death of some old Roman politician.
17K notes
·
View notes
Text

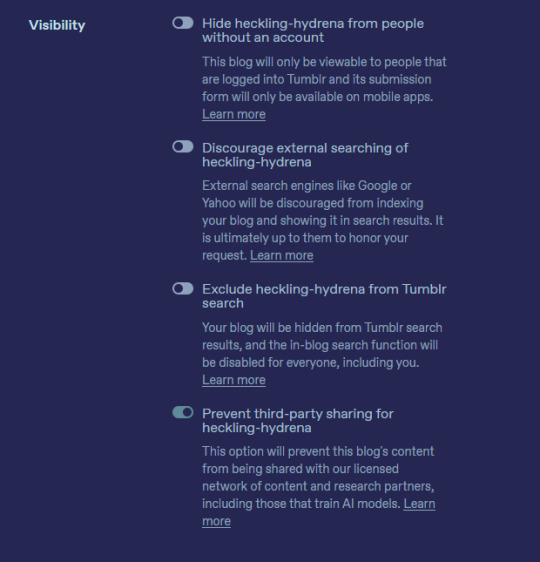
tumblr has an AI toggle you should turn on to prevent your work being shared with training models/etc! it's under settings (gear icon) & then visibility.
24K notes
·
View notes
Text
go to settings > to the right, under "Blogs," pick the blog you want to change the settings of > scroll down to visibility settings > turn on "Prevent third-party sharing for [blog url]" > do this for each individual blog you have
15K notes
·
View notes
Note
What is this about the tumblr staff wanting to sell art data to midjourney?
An ex-colleague of mine mentioned yesterday that there may be contacts between Automattic and midjourney in that direction, but nothing is public yet and I don't have any more info. They probably won't have anything specific to share either, since they left the company weeks ago too. That being said:
I have no reason to doubt my ex-coworker word, they are a trustworthy person.
Tumblr's CEO has been absurdly enthusiastic (comically, even) about AI, and is a big fan of LLMs and 'AI' companies.
A deal with midjourney could solve tumblr financial issues (not the same company, but openAi is paying up to 5 million/year to news companies to use their content as training data... tumblr generates several orders of magnitude more content than any newspaper or any media company and it only would need a 20 to 30 million per year deal to be profitable)
So I don't have any extra info yet, but I'm keeping my ears open.
52K notes
·
View notes
Text
Important rules/tips I've learned as an adult that helped with anxiety
If people are mad at you, it's their responsibility to tell you, not your responsibility to guess
If they're mad at you in secret anyways, they're the ones in the wrong, not you
If people don't like what you're doing, it's their responsibility to tell you
If they say it's fine when it's really not, they're the ones in the wrong, not you
People are allowed to be wrong about you
If they are wrong about you, wait for them to bring it up, because if you try to, you will inevitably overcorrect
Some people are committed to misunderstanding you. You will not win arguments against them. Yes, even if you explain your point of view. They do not care. Drop it
The worst thing that will happen from a first-time offense is being told not to do it again. Maybe with a replacement if you broke something
You can improve relationships and gauge willingness to talk to you by giving compliments. It's like a daily log-in bonus and nobody thinks twice about it
Most things are better after you sleep on them
Most things are better after you have a meal
Most things are better after you shower
Your brain makes up consequences that are irrational. If the worst DOES come to pass and someone acts like they do in your head, they are overreacting, and you are entitled to say "what the fuck"
If your chest hurts after you feel like you've made a social error, that's called rejection-sensitive dysphoria. It means your anxiety is so bad that it's causing you physical pain, which is a good indicator that you're overreacting. Tense yourself, hold it for 20 seconds, let it go, then find a distraction
If you're suddenly angry at someone after you feel like you made a social error, that's also rejection-sensitive dysphoria. You are going to feel annoyed about it for awhile, but being genuinely pissed off is your anxiety trying to find something to blame to take the responsibility off your shoulders, and getting scared because it can't justify itself. Deep breaths, ask yourself how much you ACTUALLY want to be angry at that person, then find a distraction
"Sour grapes" is more healthy for you than stewing. Deciding you don't like someone who's perpetually annoyed with you, won't talk to you, etc. makes letting go of anxiety over them easier
If people don't like you, they will find reasons to be annoyed with you when they otherwise wouldn't. If people do like you, they will find reasons NOT to be annoyed with you when they otherwise would. People do not ping-pong between the two
You DO have to make a conscious choice not to think about something. If you're having trouble circling back to it, say out loud that you're done thinking about it and why. Then find a distraction
When you're upset, part of you is going to want to make false bids for attention (suddenly texting differently, heavy sighs, etc. but when someone asks you about it, you tell them it's nothing). Do not listen to it. You gain nothing from it except more misery
People like to help people they care about. It makes them feel good about themselves
If you think you're insufferable for needing help, see above. Yes, really. They get a serotonin kick from it
If you think you're insufferable for mannerisms you have, you either have to consciously choose not to do them, or accept that they're part of the package that comes with you. Being apologetic about existing does nothing except make you more miserable
If you do things you don't like when you feel meh about it, it makes it easier to do them when you hate it
If you avoid things you don't like when you feel meh about it, it reinforces and magnifies how bad it feels when you hate it
Seriously. Read those last two points again. If you can make yourself make a phone call when you've got nothing to lose, you will slowly lose that panic you get when you have to make a phone call you haven't prepared for. You do have to CONSCIOUSLY take that step
Hobbies that make you care for something get rid of that nagging feeling that you're not doing enough. Go grow some rosemary
If you don't engage with your hobbies regularly, you will feel miserable, and anxiety will spike
Hobbies are things that give you a bit of happiness. They do not have to be organized or named to do that. Go be creative in something. Play with coins. Make up lists. Start a new WIP
No one cares what you look like
If people point out things they don't like about how you look unprompted, they are being rude. You are entitled to say "what the fuck"
People who like you will find you pretty to some degree. Minor things about your appearance go completely unnoticed. Literally, scars and dots and blemishes do not register to someone who likes your company
You looking at yourself in the mirror is 10x more closely than anyone is going to look at you
If you're anxious about your body type, and you're creatively inclined, make/write an oc with that same shape. Give them nice things and make other characters love them. Put them on adventures. You'll start to see yourself in the mirror more kindly
You care about wording and perfect lines/colors way more than anyone who views your work ever will
Sometimes when you're upset, you're going to feel like not eating. Do not do that. Not eating makes you more miserable
Same with things you normally enjoy. Denying yourself helps no one. You are punishing yourself for being sad. Stop it
Both of these will take conscious decision to break the habit of. Make yourself do it anyways, and it will slowly get easier
And again, to reiterate: If someone is mad at you, it is THEIR responsibility to tell you, not your responsibility to guess
45K notes
·
View notes
Text

Lupin week days 6 and 7.
I would've finished and posted day 6 yesterday, but after my kid got home from the doctor's office, our neighbors found a "stray" cat. We, of course, went to look at it, but I noticed this cat was in far too good condition to be a stray. Not a speck of dirt on the little guy! So I scooped him up and then spent the next 3 hours trying to find his owners. I did, though! And he was happily reunited with his family.
#lupin the third#lupin 3rd#lupin the 3rd#lupin the iii#lupin sansei#daisuke jigen#jigen daisuke#goemon#goemon ishikawa#goemon ishikawa xiii#mine fujiko#fujiko mine#lupin week 2024
41 notes
·
View notes
Text
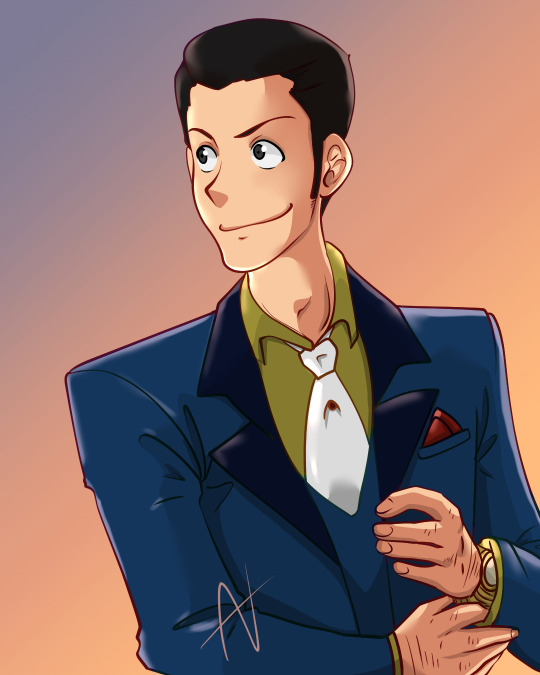
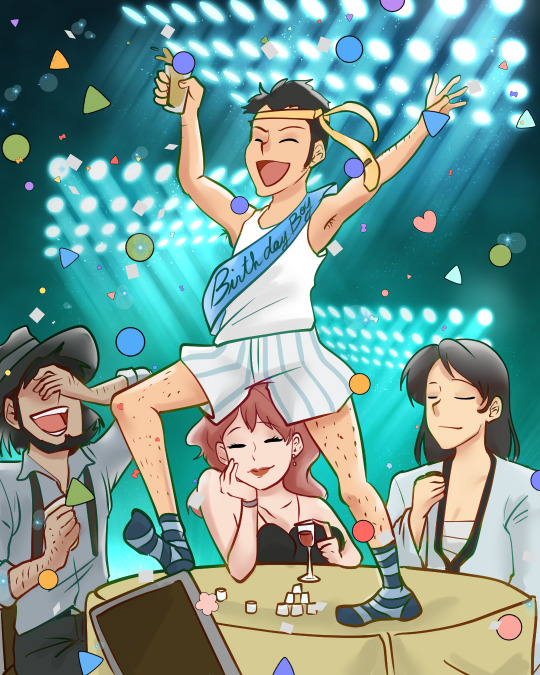
Lupin Week 2024 day 5. He's a dapper guy.
37 notes
·
View notes
Text

Lupin Week 2024, day 4. I chose a coffee shop AU, because there is always a coffee shop AU. Jigen is a jazz musician and Goemon is a martial arts teacher.
#lupin the third#lupin 3rd#lupin the 3rd#lupin the iii#lupin sansei#goemon#goemon ishikawa#goemon ishikawa xiii#ishikawa goemon xiii#jigen daisuke#daisuke jigen#jigen#lupin week 2024
22 notes
·
View notes