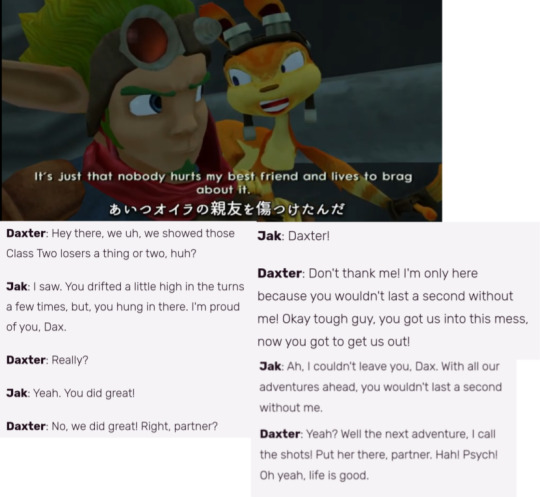
#thank u dax for the image
Note
✨🍦:)
Dax 🥹 thank u
✨ Give you and your art a compliment. Go on now. You know you deserve it. 😉 OK FINE twist my arm… I’m actually bad at compliments lmao shockerrrr. But I think my faces tend to be the best parts? I’m such a dumb romantic so I love putting the blorbos in it—happy or sad, I just like trying to show emotions on their faces. Also I’m pretty fucking good at drawing hands 😤
🍦 What's the sweetest image you've created so far? God. Ok so I drew this piece for…the schneek (schnee week) back in idk, 2021? Oh nearly, it was late late 2020. Anyway, it was the schneesters as babies while Willow read them a bedtime story. Obv looking at it now I’m like wow I could totally redraw this better, from a technical standpoint, but also 🥹 babies, you know?
2 notes
·
View notes
Note
for the character thing give me ypur orange boys daxter and luke.both of them. right now
fucking vibrating like a chihuahua. thnakyou for my boys.
luke
Sexuality Headcanon:
also gay gay homosexual gay
Gender Headcanon:
hes got so much tboy swag you dont even knI JUST NOTICED YOU COULD JUST COLOR PICK THE MAVERIQUE FLAG OFF OF HIM. I HAVE TWO ANSWERS NOW I GUESS!
A BROTP I have with said character:
i think the whole main party dynamic makes me feel mental but like. luke/ion and luke/guy are like the relationships ever to me. what shenanigans can they get up to... fuck around and find out.
A random headcanon:
*thinking rlly hard* i think he likes to fidget w stuff actually. i think he writes down a lot more in his diary for Not Forgetting Stuff Again that rlly doesnt matter but like. he just does it. adhd moment. like hell write down fucking Whatever.
General Opinion over said character:

daxter
Sexuality Headcanon:
women dont want him men dont want him either but unfortunately theyre all stuck with him. hes jsut a little bi creature
Gender Headcanon:
also tboy swag. hope this helps!
A ship I have with said character:
i have to go get the fucking image again. I HAVE TO UPDATE THE IMAGE HANG ON.
A BROTP I have with said character:
dax and tess are actually r eally funny. like i get shes the Love Interest but naughty dog has no idea what they did to people (see: me) by making someone actually care about daxter. she would kill someone for daxter and i actually think thats pretty fucking funny. girl hinder. girl KILL!
A NOTP I have with said character:
if its not one of the two examples i literally just talked abt or showed off the mental illness picture over, it sucks. thank u for asking!
A random headcanon:
oh my god. okay. theres this thing in daxter (The Game) before u do the funny little dream sequence minigames where he spins and curls up into a ball before falling asleep and i love that. Anyway. My point is. forbidden timeline where he daxter Does go back to being human and he just keeps that up. like he has no reason to do it but he still does it. I HAD TO GO GET A GIF OF IT BC I FEEL LIKE IM HORRIBLE AT EXPLAINING.

General Opinion over said character:
daxterhe makes me feel absolutely normal i promise. he may be the comedy relief but hes my absolute beloved. no one gets him like i and only a handful few do
#im going to drink this#no. youre not. youre going to die.#kurutoryuuki#*projects onto luke like crazy* Im fucking normal#also yes i skipped the ships/notp ones for luke u already know how it is <3#i think abt luke and guy alot bc i just#think abt that 1 drama cd where lukes going thru it bc he hasnt seen the ocean#so guy brings him back a fucking bucket of sea water#and i just think abt that 1 comic of luke going and guy obviously going#I WROTE SO MUCH ABT DAXTER COMPARED TO LUKE I FEEL. IM SO SORRY.
4 notes
·
View notes
Text
Guys! Guys!! Guys!!
At last a good month!!!
This month was really good to me and I am really grateful to the ones who prayed for me.. Thanks fam!! You are LOVE ❤
This month was full of activities and surprises for me… Though I missed couple of events.. Still…
First of all we celebrated Eid-Ul-Adha on 22th August, and for the first time after we came in Malaysia, we actually celebrated it.. I mean we actually shopped and cooked and asked friends to come over and went to visit them as well… It felt really good ❤
Secondly, this month our beloved Litmosphere turned 2!! And to celebrate it “A Thousand Words” happened… (which I missed…. )
Thirdly, for the first time I received review copies from a distribution company, that too is from “Times Distributors”!!! and I am damn happy!!!
I really hope my happiness follows me to September as well, and I have a good month.. Keep me in your prayers, love!!
I read around 5 books in this month and almost done with the 6th one (Uprooted, 90% done). And Planning to read 5 books in September as well…
*My August Reads are…*
1. The Hate U Give by Angie Thomas (Bookcentric Reading Challenge)
2. Revenge to the Tennth Power by Jack Chaucer (ARC: NetGalley)
3. The Last Wish of Sasha Cade by Cheyanne Young (ARC: NetGalley)
4. A Lake of Feathers and Moonbeams by Dax Murray (Review Copy)
5. Oh, Brother by Rebecca Paulinyi (ARC: The Book RobinHoods)
#gallery-0-13 { margin: auto; } #gallery-0-13 .gallery-item { float: left; margin-top: 10px; text-align: center; width: 20%; } #gallery-0-13 img { border: 2px solid #cfcfcf; } #gallery-0-13 .gallery-caption { margin-left: 0; } /* see gallery_shortcode() in wp-includes/media.php */
*Books I plan on reading in September*
1. Hearts Unbroken by Cynthia Leitich Smith (ARC: NetGalley)
2. Catwoman: Soulstealer (DC Icons #3) by Sarah J. Maas (Review Copy)
3. The Deadly Notes of Tchaikovsky (The Red Lawyer Series Book 1) by Sacha Lanvin (ARC: The Book RobinHoods)
4. The Caregiver by Samuel Park (Complimentary Copy)
5. Rain of Jamali by Porter Thompson (ARC)
#gallery-0-14 { margin: auto; } #gallery-0-14 .gallery-item { float: left; margin-top: 10px; text-align: center; width: 20%; } #gallery-0-14 img { border: 2px solid #cfcfcf; } #gallery-0-14 .gallery-caption { margin-left: 0; } /* see gallery_shortcode() in wp-includes/media.php */
*New Books added to my Collection*
This month I have bought only 2 books (left picture). The Hate U Give and Anne of Green Gables. I have been looking for this exact editions in affordable price for soo long!! And finally…!!! The right image contains the two review copies that I got this month ❤ Uprooted and Catwoman!! ^_^ They were on my TBR for so long, but the books are quite new to be found on used stores so…
Also this month I made a preorder for the collectible edition of Six of Crows!! Which will be out on October 11th!! Can’t wait!!!
Did you place an order for this one yet?? Please let me know your August Highlights… Or any books you have read and posted a review of that you think I should read too? If so share your post link in the comments.. I promise I will check them out ❤
I hope and pray SEPTEMBER treats you well..
..Happy Reading..
And… Its a Wrap UP!! Guys! Guys!! Guys!! At last a good month!!! This month was really good to me and I am really grateful to the ones who prayed for me..
#August Reads#Book Haul#BookBlog#Bookish Stuff#Bookish Update#Bookworm#Monthly TBR#September TBR#TBR#Wrap Up
0 notes
Link
In Release 8.0 the sysinstall process had a major overhaul as well as the kernels USB handling. So this document assumes the reader will be using a 8.0 or newer system when trying things described here.
To get everyone on the same page with terminology USB memory stick, flash drive, key, stick, and pen all mean the same thing. I will be using USB stick in this article.
Flash Memory Technology:
The memory chip, with the controller chip, is the most important element of a memory card. The memory chip is based on the flash memory technology which is solid-state, non-volatile and rewritable. Solid-State means it contains no moving parts and therefore is immune to mechanical failures and damages from movements and vibrations. It also operates completely silent with a zero decibel noise level. Non-Volatile flash memory stores bits of information in memory cells made of silicon wafers which do not require power to retain information when power is turned off.
In general flash memory functions like RAM memory and a hard disk drive combined. It stores digital data in memory cells like the RAM memory, and stores information like a hard disk drive when the power is turned off. In comparison to other storage media flash memory offers superior features such small form factor, high degree of durability, high degree of reliability, low power consumption and high transfer speed. Based on that flash memory technology is ideal for use in USB sticks. The only disadvantage is the manufacturing cost, which is higher compared to hard disk drives, CDs and DVDs.
There are two different technologies of flash memory, NOR and NAND. NAND flash memory is ideal for memory cards because is less expensive and can accommodate more storage capacity in the same die size. Memory card manufactures are using different NAND technologies for either boasting the memory cards performance or for decreasing the memory cards manufacturing costs. The most common flash memory technologies are the Single-Level Cell, Multi-Level Cell, Multi-Bit Cell and Chip Stacking. The Single-Level Cell technology is used to boast the memory cards performance while the rest are used for decreasing manufacturing costs. The most used technology of them all is the Multi-Level Cell.
A Single-Level Cell, SLC, memory card stores one bit in each cell, leading to faster transfer speeds, lower power consumption and higher cell endurance. The only disadvantage of Single-Level Cell is the manufacturing cost per MB. Based on that, the SLC flash technology is used in high-performance memory cards.
A Multi-Level Cell, MLC, memory card stores three or more bits in each cell. By storing more bits per cell, a Multi-Level Cell memory card will achieve slower transfer speeds, higher power consumption and lower cell endurance than a Single-Level Cell memory card. The advantage of Multi-Level Cell memory card is the lower manufacturing costs. The MLC flash technology is used mostly in standard memory cards. The Multi-Bit Cell, MBC, is a similar technology to the Multi-Level Cell but stores only two bits per cell.
Chip stacking technology is used by many manufactures to double the memory cards capacity at considerable lower manufacturing costs. This is achieved by putting two chips together to form a single chip. For example, by stacking two 256 MB chips together they will form a single 512 MB chip. This technology is far less expensive alternative to the single-die chips or even called monolithic chips.
USB sticks are most commonly manufactured using MLC (multi-level cell) or SLC (single-level cell) technology. MLC is a lot less expensive to manufacture, but is a lot slower than SLC. MLC have ‘write’ lifetimes in the 10,000 to 100,000 range.
SLC is a bit more expensive, but is very fast, and has ‘write’ lifetimes in the 100,000-millions range.
Which chip used in the manufacture of the USB stick is the most important thing that affects throughput and longevity.
What really sucks, is how hard it is to find out which type of chips are used in the USB stick before purchasing it. Some USB sticks come packaged with the vendors website listed. Check out their website looking for email address for tech support or sales dept. Email them and ask what chip type is used in the model of USB stick you are interested in purchasing.
Another point of interest is does your PC BIOS have option to boot from USB stick or even if the BIOS will recognize the USB stick media as bootable? This is a motherboard BIOS problem not un-common for PCs manufactured before 2008. Testing different vendor USB sticks on your PC maybe the only way to find one that will boot. Size as 2GB, 4GB, 8GB, what ever has no baring on this BIOS problem. Using a USB stick for storage only has never been a problem.
Installing FreeBSD on a USB stick to create a bootable USB stick is a lot of work just to test if the USB stick is recognized by your PC BIOS. A quick way is to dd an floppy image to your USB stick and try booting that.
Here are some commands that will help:
Code:
Download the floppy.img from http://www.daemonforums.org/attachment.php?attachmentid=300&d=1267845079
You may have to click the link a second time to get the save download box. Once you have it downloaded, rename it removing the .zip suffix.
Another way to do the same thing.
Use this windows image writer to write the bootable floppy.img file to the USB stick. You can download your own copy from:
https://launchpad.net/win32-image-writer/+download
The objective is to purchase a USB stick containing SLC (single-level chip) then you have no need to take special effort to limit writes like you would have to using a USB stick containing MLC (multi-level chip).
The 6 Types of USB stick Installs.
1. Putting the disc1.iso on a USB stick so it can be used to install FreeBSD on a target in the same way it’s commonly done from the disc1.iso burned to CD. In this usage the USB stick using MLC or SLC makes no difference as after the original writes to population it, there are only reads from that point on. Assuming you don't have any SCSI disks occupying the dax device range or USB external hard drive your USB stick will show up on /dev/da0.
The following fbsdiso2usb script will do this for you.
Code:
2. With Release 8.0 an new USB stick livefs/sysinstall image is released. This memstick.img file is three times larger than the disc1.iso. It’s intended you dd this image to your USB stick. You can use it in fixit mode (it’s a complete running system) or in sysinstall mode. In this usage the USB stick using MLC or SLC makes no difference as after the original writes to population it, there are only reads from that point on. Assuming you don’t have any SCSI disks occupying the dax device range or USB external hard drive your USB stick will show up on /dev/da0.
Use this command:
Code:
To write the memstick.img to your USB stick.
3. Installing FreeBSD on a USB stick containing SLC (single-level chip) from a CD burned from the disc1.iso results in a complete base release system which you can configure the way you like and install ports depending on the GB size of your USB stick. Assuming you don't have any SCSI disks occupying the dax device range or USB external hard drive your USB stick will show up on /dev/da0.
Last edited by a moderator: Sep 6, 2015 FreeBSD Install Guide www.a1poweruser.com fbsd1, Feb 27, 2010 #1 jhgorse, tevfik, Solaris and 1 other person thank for this.
dd if=/dev/da0 count=2 | od -c to display the USB stick MBR dd if=/dev/zero of=/dev/da0 count=2 to zero out the USB stick MBR dd if=/path/floppy.img of=/dev/da0 to write the floppy bootable image
#!/bin/sh # Purpose = Use to transfer the FreeBSD install disc1.iso files to # a bootable USB stick drive so it can be used to install from. # First fetch the FreeBSD 8.0-RELEASE-i386-disc1.iso to your # hard drive /usr. Then execute this script from the command line # fbsdiso2usb # NOTE: This script has to be run from root and your USB stick drive # has to be plugged in before running this script. echo ' ' echo '****** Prepare disc1.iso for usage' echo ' ' cd /usr mkdir dis mdconfig -a -f /usr/8.0-RELEASE-i386-disc1.iso md0 mount -v -t cd9660 /dev/md0 /usr/dis echo ' ' echo '****** Prepare target usb stick' echo ' ' dd if=/dev/zero of=/dev/da0 count=2 fdisk -vBI /dev/da0 bsdlabel -B -w da0s1 newfs -O 1 /dev/da0s1a mount -v /dev/da0s1a /mnt echo ' ' echo ' ' echo '****** Copy all the disc1.iso files onto the usb stick' cd /usr/dis find . -print -depth | cpio -dump /mnt echo ' ' echo 'Finished do clean up now' cd /usr umount -v /mnt umount -v /usr/dis mdconfig -d -u md0 rmdir dis echo ' ' echo ' ' echo "### Script finished ###"
dd if=8.0-RELEASE-i386-memstick.img of=/dev/da0 bs=10240
fbsd1 Active Member Messages: 213 Thanks Received: 47 Last edited by a moderator: Sep 6, 2015 FreeBSD Install Guide www.a1poweruser.com fbsd1, Feb 27, 2010 #2 MNIHKLOM and jhgorse thanked for this.
Everything you want to know about Installing FreeBSD on a USB stick (Chapter Two)
Everything you want to know about
Installing FreeBSD on a USB stick.
(Chapter Two)
4. Installing FreeBSD on a USB stick containing SLC (single-level chip) from another USB stick created by method 1 or 2 above, results in a complete base release system which you can configure the way you like and install ports depending on the GB size of your USB stick. Assuming you don't have any SCSI disks occupying the dax device range or USB external hard drive. You do have a USB stick containing the sysinstall world and a USB stick desired to be the target both plugged in before booting. In sysinstall you have option to select the source of the install files and later on what is the device to be used as the target.
The secret is you have to know which device points to the USB stick containing the sysinstall World and which device points to the target USB stick. Sysinstall will allow you to fdisk the device pointing to the USB stick containing the sysinstall world when you really want the target device. So be very careful and pay close attention to what device you tell sysinstall to use.
One way to know them apart is for the target USB stick to be larger in size. That way in fdisk you will see the size shown on top of the screen.
Another way is to only plug in the USB stick containing the sysinstall World and boot. It will be assigned /dev/da0. When you get to the sysinstall main menu. Plug in the target USB stick and choose the standard install/options item. Use the arrow keys to highlight the "re-scan devices (*)" item and hit the space bar to do the re-scan. The re-scan is so fast you will not notice anything. The target will be assigned /dev/da1. Now you should have no problems selecting the correct device of the source install files and later on for the device to be used as the target.
Take note: Since the target is assigned da1 that will also be what is auto coded in the /etc/fstab file. After the sysinstall is complete and before rebooting you have to manually edit /etc/fstab file and change all references from da1 to da0.
This can be done while the sysinstall main menu is showing. Hit the ALT key and the F4 key at the same time to open the shell console. Issue: ee /etc/fstab and make your changes.
Then ALT key and the F1 key at the same time to return to the sysinstall main menu. Select exit and yes to reboot. Unplug the USB stick containing the sysinstall World and the reboot will boot your new target stick.
If you try to boot the target USB stick without making the /etc/fstab changes, you will be in a world of hurt. The system will not boot because the target USB stick is now the only one plugged in and will be assigned da0 while it's fstab saying its da1.
5. The 'mfsBSD' USB install from http://mfsbsd.vx.sk/ This is a set of custom scripts that generates a bootable image (and/or ISO file), that creates a minimal installation of FreeBSD that is completely loaded into memory. Documentation on what is happening internally is missing. Documentation on how to use the scripts is present but without much details. This mfsBSD project is based on the ideas from the depenguinator project found here. http://www.daemonology.net/depenguinator/
fbsd1 Active Member Messages: 213 Thanks Received: 47
Everything you want to know about Installing FreeBSD on a USB stick (Chapter Three)
Everything you want to know about
Installing FreeBSD on a USB stick.
(Chapter Three)
6. Custom install of FreeBSD on USB stick containing MLC (multi-level chip). Using this type of USB stick, effort is taken to minimize the amount of writes done to the USB stick while running the operating system from it. This same procedure can also be used on a USB stick containing SLC (single-level chip). Assuming you don't have any SCSI disks occupying the dax device range or USB external hard drive. The install source can come from the disc1.iso file or the source can be ftp downloaded. This custom install procedure uses GEOM disk labels so we don't care where the USB stick appears in the device tree. This custom install will be a (minimal install) just the basic running system, no doc, no man, no info, no root password, no nothing else.
There are two ways to obtain the necessary source files. You can download the disc1.iso file, which gives you everything, or just ftp the base and kernel files, which is all that is needed for this minimal install. Both ways are explained.
Obtaining the disc1.iso
Here is the getnew.iso.release script that will download the sysinstall world disc1.iso. You can download this script from the end of this article.
Code:
Obtaining the release files using FTP.
Here is how to use FTP to download only the base and kernel files needed.
Put the follow code into /root/.netrc, that is DOTnetrc.
You can download this netrc file from the end of this article.
Code:
Issue these commands on the user root console command line for the first execution and only the FTP command for all restarts.
#cd /usr
#mkdir dist
#cd dist
#ftp -v ftp2.jp.FreeBSD.org
Executing ftp while in directory /usr/dist will result in ftp putting the downloaded files in that Directory. When accessing one of the FreeBSD FTP servers it is very common to get timed out before downloading of all the files is completed. The mreget command will cause FTP to check the local host for the file and only download it if it's missing from the local host or it's date or size is different. This way you can use the same .netrc for the first execution and to restart downloading files where your task was forced to end because the remote host timed you out.
I am using the mirror ftp2.jp.FreeBSD.org site. I tried a few other mirror FTP sites and was timed out after 3 to 5 minutes. This mirror has very little traffic and I got 80% done before timing out. Only one restart was necessary to complete the download. Recommend you try different mirrors located near your geographical location until you find one with low traffic.
FTP defaults to using extended passive mode. I could not get FTP to function through my ipfilter firewall until I forced FTP to use native passive mode by adding the "epsv4 off" which turns off extended passive mode.
You can see the commented out statements in the .netrc file. These statements would download the complete release source. Basically the same stuff contained on the disc1.iso.
Last edited by a moderator: Sep 6, 2015 FreeBSD Install Guide www.a1poweruser.com fbsd1, Feb 27, 2010 #3 jhgorse thanks for this.
#! /bin/sh echo ' ' echo 'There is not enough disk space on the FBSD slice to hold the' echo 'disc1.iso-image of the new FBSD version.' echo 'cd /usr before starting this script' echo ' ' path="pub/FreeBSD/releases/i386/ISO-IMAGES" name="8.0/8.0-RELEASE-i386-disc1.iso" name2="8.0/CHECKSUM.MD5" fetch -avrpAFU ftp://ftp.FreeBSD.org/$path/$name fetch -avrpAFU ftp://ftp.FreeBSD.org/$path/$name2 echo ' ' echo ' ' echo 'Run these steps to verify download is good' echo 'ls -l to verify file sizes' echo 'md5 8.0-RELEASE-i386-disc1.iso >> CHECKSUM.MD5' echo ' to create value & append to end of file' echo 'ee CHECKSUM.MD5 last line = download value' echo 'check it to disc1 value in the CHECKSUM.MD5' echo 'if they do not match download again' echo ' ' echo 'Script completed.'
machine ftp2.jp.FreeBSD.org login anonymous password [email protected] macdef init prompt off cd /pub/FreeBSD/releases/i386/8.0-RELEASE epsv4 off #mreget ERRATA.HTM ERRATA.TXT HARDWARE.HTM HARDWARE.TXT README.HTM #mreget README.TXT RELNOTES.HTM RELNOTES.TXT cdrom.inf docbook.css #$ getdir base catpages dict doc games info kernels manpages ports proflibs src $ getdir base kernels quit macdef getdir ! mkdir $i mreget $i/*
fbsd1 Active Member Messages: 213 Thanks Received: 47
Everything you want to know about Installing FreeBSD on a USB stick (Chapter Four)
Everything you want to know about
Installing FreeBSD on a USB stick.
(Chapter Four)
Custom process description.
You can download this as script fbsdinstall2usb from the end of this article.
If using the disc.iso as install source do this:
Make a mount point, put the disc1-iso into a memory disk
and then mount it in cdrom format.
Code:
Plug the TARGET USB stick in.
They come preformatted from the manufacture with a FAT32 partition on it.
This command will destroy all existing data on the USB stick.
Zero out the MBR:
Code:
Do fdisk with a new MBR.
Code:
The -B means “Reinitialize the boot code contained is sector 0 of the disk.”
Default from /boot/mbr
The -I means initialize sector 0 slice table for one slice covering the entire disk. You will get a message saying ‘Class not found’ disregard it.
Label the USB stick:
Code:
The -B means bootstrap code will be read from the file /boot/boot and written to the disk. The -w means write a standard label.
Allocate the file system.
In order to reduce the number of writes to the USB stick, and as common practice, use the -U flag to enable soft updates. Additionally, so that we can find the filesystem easily no matter where the USB stick appears in the device tree, we will label the filesystem as FBSDonUSB:
Code:
Mount the USB stick:
Code:
Install the base files the same way sysinstall does by running the same script:
Code:
The following prompt is shown to you and you have to enter ‘y’:
Code:
Install the generic kernel:
Code:
Putting the base and the kernel on the USB stick does not create a fstab file. Create an /etc/fstab file on the USB stick. This one puts the logs on to memory storage (to minimize writes). We also null mount /var/tmp on /tmp, which makes it non-persistent:
Code:
Since we're using the UFS label to define the root filesystem,
we must force the GEOM label class to be loaded early:
Code:
The vi edit program needs a /var/tmp/vi.recover file.
Code:
/var/log is now on memory disk. The newsyslog.conf files needs adjustment. All logs now have count of one, they rotate when their size fills 100KB. And the log file should be created if it does not already exit.
Code:
Set the interfaces to configure themselves over DHCP:
Code:
Turn off rebuilding locate database:
Code:
Set the command line prompt format for root
Code:
End do clean up.
Code:
All the scripts discussed can be downloaded from here
All downloaded files have .zip suffix.
Do not try to open, just do save.
Remove the suffix to use.
Attached Files: Last edited by a moderator: Sep 6, 2015 FreeBSD Install Guide www.a1poweruser.com fbsd1, Feb 27, 2010 #4 MNIHKLOM, jhgorse, y2s82 and 1 other person thank for this.
# mkdir /dist # mdconfig -a -f /usr/8.0-RELEASE-i386-disc1.iso md0 # mount -t cd9660 /dev/md0 /dist
#dd if=/dev/zero of=/dev/da0 count=2
# fdisk -BI /dev/da0
# bsdlabel -B -w da0s1
# newfs -U -L FBSDonUSB /dev/da0s1a
# mount /dev/da0s1a /mnt
# cd /dist/8.0-RELEASE/base # This command if using the disc1.iso # cd /usr/dist/base # This command if using the Ftp source # env -iv DESTDIR=/mnt ./install.sh
You are about to extract the base distribution into /mnt - are you SURE you want to do this over your installed system (y/n)? y
# cd /8.0-RELEASE /kernels # This command if using the disc1.iso # cd /usr/dist/kernels # This command if using the Ftp source # env -iv DESTDIR=/mnt ./install.sh generic # rmdir /mnt/boot/kernel # mv /mnt/boot/GENERIC /mnt/boot/kernel
# cat >> /etc/fstab << EOF # Device Mountpoint FStype Options Dump Pass# /dev/ufs/FBSDonUSB / ufs rw,noatime 1 1 md /tmp mfs rw,-s16M,nosuid,noatime 0 0 md /var/run mfs rw,-s4M,nosuid,noatime 0 0 md /var/log mfs rw,-s16M,nosuid,noatime 0 0 /tmp /var/tmp nullfs rw 0 0 /dev/acd0 /cdrom cd9660 ro,noauto,nosuid 0 0 EOF
# cat >> /mnt/boot/loader.conf << EOF geom_label_load="YES" EOF
# mkdir -p /mnt/usr/local/etc/rc.d/ # cd /mnt/usr/local/etc/rc.d/ # cat >> mkvirecover << EOF #!/bin/sh # PROVIDE: mkvirecover # REQUIRE: mountcritremote # BEFORE: DAEMON virecover . /etc/rc.subr name="mkvirecover" stop_cmd=":" start_cmd="mkvirecover_start" mkvirecover_start() { [ -d /var/tmp/vi.recover ] || mkdir -m 1777 /var/tmp/vi.recover echo '.' } load_rc_config $name run_rc_command "$1" EOF # chmod 555 mkvirecover
# cat >> /etc/newsyslog.conf << EOF # logfilename mode count size when flags /var/log/all.log 600 1 100 * JC /var/log/amd.log 644 1 100 * JC /var/log/auth.log 600 1 100 * JC /var/log/console.log 600 1 100 * JC /var/log/cron 600 1 100 * JC /var/log/daily.log 640 1 100 * JNC /var/log/debug.log 600 1 100 * JC /var/log/kerberos.log 600 1 100 * JC /var/log/lpd-errs 644 1 100 * JC /var/log/maillog 640 1 100 * JC /var/log/messages 644 1 100 * JC /var/log/monthly.log 640 1 100 * JNC /var/log/security 600 1 100 * JC /var/log/sendmail.st 640 1 100 * BJC /var/log/weekly.log 640 1 100 * JNC /var/log/wtmp 644 1 10 * BC /var/log/xferlog 600 1 100 * JC EOF
# cat >> /etc/rc.conf << EOF ifconfig_DEFAULT="DHCP" EOF
# cat >> /etc/periodic.conf << EOF weekly_locate_enable="NO" weekly_whatis_enable="NO" EOF
#echo 'set prompt = "# %/ >"' >> /mnt/root/.cshrc
#cd /root #umount -v /mnt #umount –v /usr/dis #mdconfig –d –u md0 #rm –vrf /usr/dis
fbsdiso2usb.zip File size: 1.1 KB Views: 305
fbsdinstall2usb.zip File size: 5.3 KB Views: 273
getnew.iso.release.zip File size: 1.5 KB Views: 149
netrc.zip File size: 424 bytes Views: 143
DutchDaemon Administrator Staff Member Administrator Moderator Messages: 11,028 Thanks Received: 2,282 Freedom must be organized in order to persist.
FreeBSD Resources: The FreeBSD Handbook | Manuals | FAQ | Wiki
FreeBSD Forum Rules and Guidelines DutchDaemon, Feb 27, 2010 #5
[ one chapter per post, not one chapter per thread ]
yvonney New Member Messages: 13 Thanks Received: 0 yvonney, Mar 2, 2010 #6
Extremely kind and helpful.
respect to all.
y2s82 Member Messages: 68 Thanks Received: 1 y2s82, Jan 9, 2011 #7
Hmm, from time to time, I get an error booting.
It seems the USB stick doesn't get registered quickly enough and gives an error.
As soon as the error comes up, I am notified that the da0 is probed and recognized.
It works fine from there on once I type in ufs:/dev/ufs/FBSDonUSB, but that sort of defeats the purpose of fstab.
So, what might resolve the issue? Is there a way to make sure the USB stick is recognized before the system try to make use of it?
wblock@ Administrator Staff Member Administrator Moderator Developer Messages: 13,816 Thanks Received: 3,446
Add a line to /boot/loader.conf :
Code:
wblock@, Jan 9, 2011 #8 miggir and y2s82 thanked for this.
kern.cam.boot_delay=10000
Beastie Daemon Messages: 1,974 Thanks Received: 362
wblock said:
Add a line to /boot/loader.conf :
Code:
Some people find that kern.cam.scsi_delay works if the above doesn't. I once tried both, but neither worked.
May the source be with you! Beastie, Jan 9, 2011 #9 y2s82 thanks for this.
kern.cam.boot_delay=10000
y2s82 Member Messages: 68 Thanks Received: 1
Just to ask a bit more questions, to create and setup a user, would it be possible to use pw like such?
Code:
Would I need to encrypt the *password*, or put it into a separate file and point it there? If so, how would I issue such command?
y2s82, Jan 14, 2011 #10
# setting root password pw -V /mnt/etc/ usermod root -h *password* # creating user *username* with the password *password* pw -V /mnt/etc/ useradd *username* -m -g wheel -h *password*
Carpetsmoker Daemon Messages: 1,004 Thanks Received: 172 UNIX was not designed to stop you from doing stupid things, because that would also stop you from doing clever things. Carpetsmoker, Jan 17, 2011 #11
As a general comment / constructive criticism:
Try to keep your howto shorter and more to the point. IMHO it is not the right place to go into detail about MLC vs SLC etc. If you really *do* want to keep this, make it a footnote or appendix rather than "inline".
Try to write like a manpage: concise and to the point.
In addition, maybe it's a good idea to add an index/table of contents?
You can just use a piece of text, but if you really want to make it fancy you can use two special tags http://forums.freebsd.org/showthread.php?p=119592)
In general, I find it very difficult to see if this post is useful to me or not — I already make bootable USB drives with FreeBSD, perhaps this post offers some new (better) method or some other trick... Right now I have to read the entire post from "cover to cover" ... Something that doesn't work well on the interwbz (“tl;drâ€).
Just my 2 cents to get more people to actually use your howto ...">
von_Gaden Active Member Messages: 113 Thanks Received: 9
Thank you very much for this howto! I think extra details for SD cards are not unnecessary since you can't use effectively some device if you don't know how it works. If you know or don't care you can just skip the paragraph.
I'm trying to use shorter method for mfs, in /etc/rc.conf
Code:
but neither pkg or freebsd-update work properly.
pkg says that there is not enough space on /tmp, and freebsd-update denies to work because /var is not persistent filesystem.
I can override /var problem by not using Code: but is there some more elegant way?
tmpmfs="yes" tmpsize="20m" varmfs="yes" varsize="32m"
varmfs="yes"
0 notes
Text

i cheated and didn’t quite finish this during talks bc i started the sketch last night buuuut have some cuties bc it’s been A Week and it’s only........tuesday
597 notes
·
View notes
Last Seen Blogs

moodystimmy
Read Pinned Post

kmtforlife
Inside Marie's Brain

mai-sau
mordor manwhore

stvhnt16
Untitled

moony-gallery
(Merlin’s version)