#lightweight safety shoes australia
Text
#Zip Sided Boots in Australia#hard boots construction#hard yakka red collection#lightweight safety shoes australia#local boot
0 notes
Text
Discover expert tips and step-by-step guides to fix your workboots yourself. Don't let minor tears or failing zippers ruin your favorite pair! Read now.
#Zip Sided Boots in Australia#hard boots construction#hard yakka red collection#lightweight safety shoes australia#local boot
0 notes
Link
2 notes
·
View notes
Text
Stylish Ways To Rock With A Basket Bag At Beach
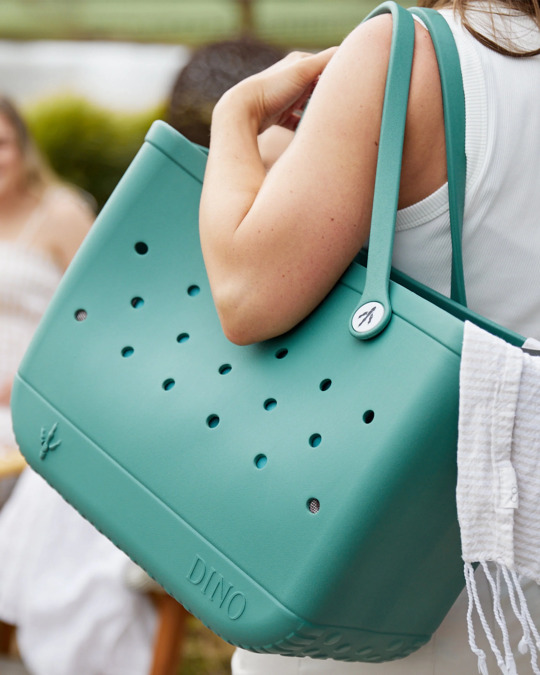
Transitioning your kids' beach bag for maximum fun involves thoughtful planning and organization to ensure they have everything they need for a day of excitement by the sea. From packing essential beach gear to incorporating entertaining activities, here's how you can optimize your kids' best beach bag in Australia for a fun-filled adventure.
1. Choose a Kid-Friendly Beach Bag: Start by selecting a beach bag specifically designed for kids. Look for a lightweight, durable bag with vibrant colors or playful patterns to appeal to their taste. Opt for a bag with multiple compartments or pockets to keep their belongings organized and easily accessible. Consider a backpack-style bag for hands-free carrying, allowing your kids to move around freely.
2. Pack Beach Essentials: Ensure your kids are well-prepared for a day at the beach by packing essential items in their bags. Include items such as sunscreen, hats, sunglasses, and reusable water bottles to protect them from the sun and keep them hydrated. Pack towels or beach blankets for lounging on the sand and a change of clothes in case they get wet. Additionally, don't forget beach footwear like flip-flops or water shoes for comfort and safety.
3. Include Beach Toys and Games: Enhance the fun factor by packing a variety of beach toys and games in their bag. Consider items such as sandcastle molds, shovels, buckets, and sifters for building and creating in the sand. Bring inflatable beach balls, frisbees, or flying discs for active play on the shore. You can also pack a beach volleyball or badminton set for family-friendly competitions. Encourage your kids to choose their favorite toys and games to keep them engaged and entertained throughout the day.
4. Bring Snacks and Refreshments: Keep hunger at bay by packing a selection of snacks and refreshments in their beach bag. Pack portable and nutritious options such as fresh fruit, granola bars, crackers, and cheese sticks. Include individual servings of their favorite snacks to prevent sharing or squabbling over food. Don't forget to pack plenty of water or juice boxes to keep them hydrated in the sun. Consider using insulated containers or cooler bags to keep snacks and drinks fresh and cool throughout the day.
5. Incorporate Sun Protection: Ensure your kids are protected from the sun's harmful rays by incorporating sun protection items in their beach bags. Pack kid-friendly sunscreen with a high SPF and broad-spectrum protection to shield their delicate skin from sunburn. Include hats with wide brims or baseball caps to provide shade for their face and eyes. Sunglasses with UV protection are also essential to protect their eyes from glare and harmful UV rays. Encourage your kids to apply sunscreen regularly, especially after swimming or sweating.
6. Add Beach Safety Essentials: Prioritize safety by including essential beach safety items in their bag. Pack a first aid kit with bandages, antiseptic wipes, and any necessary medications for minor cuts or scrapes. Bring a whistle or waterproof phone case with a lanyard for emergency communication. Additionally, consider packing a flotation device or life jacket for young swimmers or inexperienced beachgoers. Teach your kids about beach safety rules and guidelines to ensure they have a fun and safe beach experience.
7. Customize with Personal Touches: Add personal touches to their beach bag to make it uniquely theirs. Let your kids decorate their bags with iron-on patches, fabric markers, or stickers to express their creativity and personality. Consider sewing on their initials or a fun beach-themed applique for a personalized touch. Encourage them to choose their favorite colors or designs to make their beach bag stand out from the crowd.
8. Plan Fun Activities: Incorporate fun and engaging activities to maximize their enjoyment at the beach. Bring along a beach-themed coloring book and crayons for quiet downtime in the shade. Organize a scavenger hunt to explore the beach and discover hidden treasures like seashells, driftwood, or interesting rock formations. Build a sandcastle together or challenge them to create their beach artwork using sand and water. Encourage imaginative play by bringing along costumes or props for beach-themed role-playing adventures.
By following these tips and incorporating thoughtful planning and organization, you can transition your kids' beach bag for maximum fun and ensure they have a memorable and enjoyable day at the beach. From packing essential beach gear to including entertaining activities, you can create a customized beach experience that keeps your kids engaged and entertained from sunrise to sunset.
0 notes
Text
Packing Like a Pro: Essentials for Your Study Abroad Experience

Embarking on a study abroad journey is an exciting and enriching experience that opens doors to new cultures, perspectives, and adventures. Whether you're heading to a bustling city in Europe, a serene countryside in Asia, or a vibrant university town in Australia, packing smartly can make all the difference in how smoothly your time abroad goes. To help you prepare like a pro, let's delve into the essentials for your study abroad experience.
1. Research Your Destination
Before diving into packing, take some time to research your destination. Consider the climate, local customs, and any specific cultural norms that may impact your wardrobe and lifestyle. For instance, if you're going to a tropical region, lightweight and breathable clothing will be key, while a colder climate will require warm layers and waterproof gear.
2. Essential Documents
Ensure you have all necessary documents in order, including your passport, visa (if required), acceptance letter from your host institution, travel insurance, medical records, and any other important paperwork. Keep digital copies backed up online and carry physical copies in a secure travel document organizer.
3. Clothing Essentials
Pack versatile clothing items that can be mixed and matched for different occasions. Include comfortable walking shoes, a waterproof jacket or coat, layers for varying temperatures, formal attire for special events or presentations, and swimwear if you'll be near beaches or pools. Don't forget accessories like scarves, hats, and sunglasses.
4. Electronics and Adapters
Bring along essential electronics such as your laptop, smartphone, chargers, power banks, and any adapters or converters needed for the local electrical outlets. Consider investing in a portable hotspot or SIM card for reliable internet access, especially if you'll be working or studying remotely.
5. Medications and First Aid
Pack an ample supply of any prescription medications you require, along with a basic first aid kit containing bandages, pain relievers, antiseptic wipes, and any personal health items. Familiarize yourself with local healthcare options and emergency numbers in case you need medical assistance during your stay.
6. Travel Essentials
Include travel essentials like a sturdy backpack or carry-on luggage, travel-sized toiletries, a reusable water bottle, snacks for the journey, a travel pillow and blanket for long flights or train rides, and entertainment such as books, music, or podcasts.
7. Money and Banking
Plan your finances ahead by notifying your bank of your travel plans, obtaining local currency or a travel card for convenience, and keeping emergency cash in a safe place. Familiarize yourself with currency exchange rates and budgeting tips to manage your expenses effectively while abroad.
8. Cultural and Language Resources
Bring along language guides, dictionaries, or translation apps to help you navigate language barriers and communicate effectively with locals. Research cultural etiquette and customs to show respect and adapt to your new environment with ease.
9. Personal Comfort Items
Don't forget to pack items that bring you comfort and familiarity, such as photos of loved ones, favorite snacks or treats from home, a journal for documenting your experiences, and any hobbies or activities you enjoy (e.g., art supplies, musical instruments, sports gear).
10. Safety and Security
Prioritize your safety by researching local safety tips, registering with your embassy or consulate, sharing your itinerary with family or friends, and staying vigilant in unfamiliar surroundings. Use secure locks for your belongings and avoid carrying valuables unnecessarily.
Final Thoughts
Packing like a pro for your study abroad experience involves thoughtful planning, research, and organization. By considering the essentials outlined above and tailoring your packing list to suit your destination and personal needs, you'll be well-prepared to embark on a memorable and rewarding journey of learning, exploration, and growth. Bon voyage!
0 notes
Text
Essential Mountain Bike Accessories: Personal Guide to Protective Riding Gear
Are you looking for mountain bike accessories to take your bike riding to the next level? Whether you are an amateur or have been riding long, having the right gear is essential for safe and smooth rides. Acolion offers a wide range of bikes and bike accessories for people in Melbourne and other regions like Sydney and Brisbane.
Road Bicycle for Sale in Melbourne
When searching for a road bicycle for sale in Melbourne, Sydney, and Brisbane, don’t just focus on the bike in general but also on accessories that will be vital for enhancing the bike's performance. These add-ons or accessories allow you to perform at your best and improve safety to a great extent.
Types of Road Bike Accessories
The accessories are of two types: Essential safety gears and Performance enhancers. Essential safety gear includes a helmet, gloves, eyewear, and protective gear like knee and elbow pads. Performance enhancers include repair kits that provide spare tubes, tire levers, mini pumps, lights, and hydration kits with sipper bottles, bottle cages, and hydration packs.
Road bikes in Melbourne, Australia, have one more type of gear that falls under the Special gear category, including a cycling computer or GPS, bike rack, essential maintenance tools like chain cleaner, lubricants, and apparel such as shoes, clothes, and gloves. This is because the people of Melbourne feel these are essential for their journeys.
Mountain Bike for Sale
Mountain bikes in Australia are preferred by bike enthusiasts who love riding on uneven terrains. However, specialised mountain bikes have different accessories and add-ons than road bike accessories.
Types of Mountain Bike Accessories
There are two types of accessories: trail essentials and additional accessories. Trail essentials include tires and tubes, backpacks, pedals, suspension, seat posts, and apparel that offer mobility and cushion while riding. Other additions include a full-face helmet that provides better protection and doesn’t come off on rough terrains, body armour like chest pads, and back protection pads that provide additional safety.
Conclusion
Choosing the right mountain bike accessories is as important as choosing the bike. These accessories enhance your bike's performance and improve safety and comfort. Mountain and road bike accessories are slightly different, as both bikes are used for other purposes and on different terrains.
Road bike accessories come in three types: essential gears, performance enhancers, and special gears that can be a great value addition to your road bike for a smooth and safe ride.
In other words, bike accessories are like temporary skin on our body that provides extra protection to our body. It might seem you can ride a bike without accessories, but these accessories make it safer and more comfortable.
Mountain bike accessories are of two types: trail essentials and additional. Trail essentials are usually preferred during long and challenging rides on uneven terrains where riders can ascend the mountain, stay there, and return after a few days.
Acolion offers you the best quality carbon mountain and lightweight road bikes, which are easy to handle and light. Carbon bikes enhance performance, allowing you to go the extra mile without getting tired. We also offer a diverse range of road and mountain bike accessories that push your riding to the next level by providing additional safety and comfort. Bike accessories on our website include eyewear, helmets, clothing, phone holders, and bottle holders.
Whether you are a seasoned rider or a beginner who has picked up an interest in bike riding, you can directly visit our website, www.acolion.com.au, or if you have any queries, send an email to [email protected], or you can call our office located at 78/266 Osborne Ave, Clayton South, VIC, 3169.
0 notes
Text
Shop for Higher-Quality Workwear online in Australia for Protection & Safety Purposes
Health and safety is a genuine role concern for risky field jobs. Well-known companies opt for purchasing workwear online in Australia to avoid any inconvenience and health risks. Further, the stores provide high visibility apparel, steel-toed boots, hard hats, or safety goggles to businesses that are concerned about their employees’ safety and security. Rough and tough high-quality work suits are protective from harsh chemicals, weather, as well as toxic materials.

Employees working on construction sites, or any tough fieldwork, are advised to use construction workwear clothing to keep them safe and sound. Furthermore, research portals stated that employees usually work on-site with direct sun exposure and hence they need to wear SPF-protected suits as well as hat as a part of protective gear. It will help to reduce the significant risk of getting sunburned and getting heat exhaustion.
Leading online stores offers 100% cotton coveralls, trousers and shirts with multiple pockets, while maintaining comfort. Additionally, cotton threads, mercerised double pre-shrunk drills and protection fabric make these workwear durable as well as comfortable. The double-needled lap-seamed improves durability and gives extra strength.
It is extremely important to wear protective shoes during tough fieldwork. The safety footwear comes with excellent support stabilisers, breathable mesh, and shock absorption features that increase comfort and reduces the chance of muscle fatigue.
Advantages of Reliable Online Purchase of Safety Wear:
Reliable online stores offer to replace, exchange, home delivery and pick up facilities that help to manage tight schedules.
On the other hand, reliable stores provide quality products with extra protections, safety, and security.
The lightweight safety wears are abrasion resistant, water resistant, heat resistant and acid resistant qualities with higher durability.
The leading stores have a wide range of protective wear essentials with appropriate application and durability.
Businesses and individuals need to explore more reliable online stores to get an extensive collection of safety wear and protective accessories.
Source
0 notes
Text
The science behind the most comfortable work boots
It’s true for every worker, from tradespeople to teachers, emergency services personnel to engineers.
So how do you choose the most comfortable work boots for your job?
In this blog, we’re going to examine the technology behind Steel Blue’s most comfortable work boots so you can enjoy the benefits of boots designed for comfort, durability and performance.
Enhanced safety at work
When it comes to work boots, comfort and safety go hand-in-hand. Your footwear should give you the confidence to step up at work without rigid materials, heavy construction or sub-par safety features holding you back.
Reduce strains and pains
Comfortable all-day work boots support your entire body as you work. At the end of a long day – and week after week – that means reducing the risk of lower back and hip strain, knee pain, and other complaints caused by poor-quality footwear.
Productivity boost
Features that make work boots comfortable
Stability and support
Slips, trips and falls lead to thousands of workplace injuries each year, including musculoskeletal injuries, cuts, bruising, fractures and dislocations.
Improper footwear is the number one culprit on Safe Work Australia’s list of what causes these preventable injuries.
Comfortable work boots should stay comfortable on treacherous surfaces. They should actively prevent sprains and rolled ankles without being hazardously heavy or cumbersome.
Slip-resistant outsoles are another important PPE measure for anyone working on wet ground.
Breathable upper material
Many trades and professions in the mining, construction, agriculture and engineering sectors involve long days working outdoors.
Look for work boots with a lightweight, breathable upper material. For example, Steel Blue boots are made with high-quality leather (or a microfibre vegan alternative) for breathability and durability that doesn’t compromise safety.
Cushioning, shock-absorbing sole system
Work boots are made to be durable and rugged on the outside but supportive and cushioning on the inside.
Consider whether you perform any of these tasks throughout the day:
Jumping in and out of a truck
Climbing ladders
Stepping on uneven ground
Walking on concrete or hard surfaces
Climbing stairs
Operating heavy machinery
Comfortable work boots will absorb the shock of these activities, reducing the strain on your legs and spine.
The key is to look for safety footwear with Australian Physiotherapy Association endorsement and the cushioning technology to provide all-day support.
Fastening styles to suit your feet
Everyone’s feet are unique; there is no one-size-fits-all when it comes to the most comfortable men’s and women’s work boot styles.
Try on a range of Lace-Up, Zip-Sided and Pull-On work boots to find the fit that suits your feet. And if you have pre-existing injuries or lingering discomfort, use our boot lacing guide to find a more comfortable setup.
You might even invest in a second pair of boots with varied fastening styles to serve the different places your work takes you.
Steel Blue fastening innovations, including hybrid fastening systems and our Spin-FX™ system, also give you the option to adjust the fastening for comfort throughout the day.
Flexible in the right places
Very few work boots strike a balance between flexibility and safety. But we invested in engineering lightweight work boots that move with you, to reduce strains and pains without compromising quality.
As you walk across a field, climb into a truck, scamper up a ladder or crouch to pick something up, Steel Blue boots flex to allow for natural movement.
Water-Resistant
There are few things more uncomfortable than working in wet boots.
But by the time you find out your work boots are not Water-Resistant, the damage is already done.
Look for Water-Resistant work boots, especially if your job takes you outdoors in the winter months. As well as the upper (outer) material, look for these features in all-weather, all-day work shoes:
Breathable moisture-repellent upper material
Antifungal and antibacterial lining
Moisture-wicking technology
Non-slip soles
Quality stitching
And remember: Water-Resistant is not the same as Waterproof. So if you need comfortable boots to work in wet weather, make sure you’re buying materials designed to withstand the conditions.
Work boots engineered for whole-body comfort
Steel Blue lightweight work boots are designed for whole-body health, offering all-day comfort and long-lasting support.
From the Trisole® Comfort Technology that cushions your foot to the lightweight materials and several layers of innovative technology keeping you comfortable, our all-day work boots are engineered for men and women who excel at their jobs.
We guarantee it. Every pair of Steel Blue work boots carries a 30-day 100% comfort guarantee.
Find your fit by visiting a Steel Blue stockist or browse the entire range on our website.
1 note
·
View note
Text
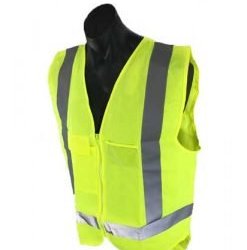
Adult Safety Vests | Plasterers Sand - 20kg - Filled Sandbags NZ
Adult Safety Vests - Safety Vests Australia
These high-vis adult safety vests are great for when children go out on excursions with school or our and about with family so they are visibly seen.Bulk order promotional Hi Vis vests with logo like the embroidered JBs Hi Vis Reversible Vest or custom screen printed JBs Safety Vests. Call 1300 008 300. Picture of DNC Workwear-3801-Daytime HiVis Safety Vests. DNC Workwear ... Picture of Bocini-SJ0322-Unisex Adults Hi-Vis Vest With Reflective Tape.Shop latest orange safety vests online from our range of Life Vest & Buoy at au.dhgate.com, free and fast delivery to Australia.Browse Hi Vis Safety Vests. Products. 6HSV JB's Wear Staff/Security/Visitor Vest · 6HVSV JB's Wear Traditional Hi Vis Vest.picture of DNC Workwear-3801-Daytime HiVis Safety Vests. DNC Workwear ... Unisex Adults Hi-Vis Reversible Vest With Reflective tape.Hi Vis (D+N) L/S Stretch Work Shirt with Tape ... Adults and Kids Hi Vis Non Cuff Traditional Polo ... AUST. Rail (D+N) Zip Off Sleeve Longline Jacket.Stay visible thanks to the neon colour and reflective strips. Standard EN1150. Compatibility. Wear over a warm jacket and a backpack thanks to its loose fit.Flyani Men's Hunting Vest Blaze Orange Safety Vests with Multiple Pockets (Tag L - US S) : Amazon.com.au: Clothing, Shoes & Accessories. The perfect garment to have on hand for site visitors, our range of hi vis vests can be easily slipped on and off.Browse our collection of high quality Hi Vis Clothing, Hi Vis Jackets, Hi Vis Tradewear, Work Vests, Hi Vis T-Shirts & Tradewear.Buy Workwear Sleeveless Fluorescent Reflective Vest at Kmart. Enjoy
delivery Australia wide and free Click and Collect!High quality food safety and hygiene products, designed specifically for the Australian food processing industry. HACCP approved storage and despatch . Buy online JB's 6HFV Fluro Vest from Badger Australia across Australia Wide. ... is ideal for working onsite when high visibility is required for safety.View our wide range of Jacket and Vest workwear and clothing. Select from Hi-vis vests, jackets, polos and jumpers for Men and Women. Shop and Buy Hi Vis Jackets & Vests Workwear at SafetyHQ Australia's Workplace Safety and Personal Protective Equipment Specialists.
Plasterers Sand - 20kg - Filled Sandbags NZ
Plaster Sand – 20Kg Bags. Our Plaster Sand is a very fine washed mixed sand that makes it perfect for all those plastering jobs.Our filled standard 20kg sand bags are filled with premium Builders Sand and are perfect for flood prevention and water diversion. Made from 75gms weave white ...A Miracle Sandbag is a ready-to-use sandbag that doesn't require filling.
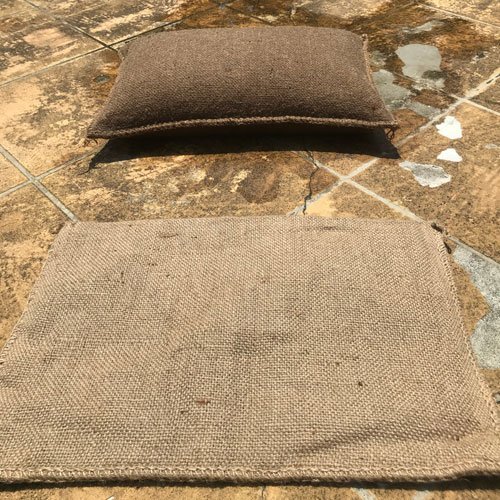
Find out more online or in-store at Bunnings Trade today.Empty Bulk Bags, Plasterers Sand, Heavy Duty Sandbags — 20kg, Builders Mix — 20kg, Hessian Sandbags — 20kg,Super Heavy Duty Sandbags — 20kg.The Firth Plaster Sand is designed to use for plaster and mortar mixes. Scientifically-graded sand consists of minimum number of salts that deliver great .Silt and Sand Bag Filling Frames increase work efficiency by reducing labour required ... by filling approx 500 20kg bags per hour with no power required.Sand and landscaping supplies delivered throughout Greater Sydney for all your landscape needs. Delivery available in bulk, ... Filling Sand Hessian 20kg .Filled Heavy Duty Sandbags - 20kg. by sandbagstore ... Plaster sand bag nz are one among those things that we don't think much about.Our Auckland specific paving sand is a very lightweight but quite coarse product. The lightweight properties come from the pumice content.Empty Bulk Bags, Plasterers Sand, Heavy Duty Sandbags - 20kg, Builders Mix - 20kg, Hessian Sandbags - 20kg,Super Heavy Duty Sandbags - 20kg.
Address : 6K Polaris Place, East Tamaki, Auckland 2013Mon – Fri: 8:30a.m. – 4:30p.m.Tel: 0-9-869 246
0 notes
Text
Tips for traveling far and alone
Because it's been a while since i did one of these lifehack things.
I spend a lot of time traveling for work, which means I've gathered a few XP points and I have a System and shit. So have some tips. They're pretty geared towards how I like to travel, but a few of these could prob work for many people.
Surviving a flight
When people say they love to travel, they mean that they like being places. Very few people like the actual 'getting there' part. It's stressful, there's waiting lines, you're forced to sit still for long periods of time and usually you have to get up at stupid hours. Being treated like cattle just isn't very fun, and it's not good for your health, either. So:
Rest. Airplanes are just… brimming with germs. The reason that this affects you more than, say, the multitude of germs on the subway you take every day, is because farther trips, especially of the 'party' or 'work' variety are utterly exhausting, and that affects your immune system. So while it is tempting to stuff as much as possible in that trip, know that you're 100% gonna get sick two days later. Try not to push yourself too much, and know that you're already being pushed in ways you're probably not used to.
For the same reason: take care of yourself. Stay hydrated. Keep nourishment upon your person. Try to eat a filling, healthy meal with like vitamins and shit before you leave.
Hand sanitizer is a Gift. See above: brimming with germs. So wash your hands before eating or touching your face. In my experience, however, the sinks in those tiny bathrooms on plane or trains are about as gross as the rest of the stall. This is where hand sanitizer comes in.
Staying fed on a budget
Here's the thing about staying hydrated and healthily fed: airport food, ferry food and train station food is usually super expensive. The prices in the Starbucks at my local airport are at least 50 percent higher than the one in the centre of town, and that is Tourist Central. And this is fine. It makes sense from a business perspective. It's not like you can go anywhere. And if you're going on that one big holiday of your dreams (or if you're just, ya know, rich), go ahead and splurge on fancy sushi. But I've been in the Eurostar waiting room four times in the span of two weeks, and you kinda don't want to splurge every time, ya know.
Bring snacks. You are absolutely allowed to bring food through a security check. Airport security doesn't allow a specific amount of liquid but it says nothing about sandwiches, homemade cookies or fruit.
Bring filling food. While you're at it: don't just bring food, but make sure it'll last. My mom, when I was little and went on school trips, would always make me egg sandwiches, which is a thing I still occasionally do. Mostly, you don't want to bring white bread with nutella, because you'll get a sugar spike, right in the middle of 'expensive food town' or worse, somewhere above the Atlantic. So egg sandwiches work, rice balls work, heck, I've brought banana bread or pancakes with rye flower and a lot of nuts in them. Whatever works.
The caveat here is obviously country quarantines. You can't bring cultures and live plants and bugs and stuff. If you're like going to Australia or New Zealand, bring only pre-packaged snacks, or make sure you finish them on the plane.
Do the water bottle trick. You know those bins before security where you're supposed to deposit all your empty bottles? Those are bullshit. You're not allowed to bring *liquids*. An empty bottle is fine (of course this depends heavily on the airport and the mood of security agents that day, don't argue with them, just… don't). In my experience, I've been perfectly able to bring an empty water bottle with me through security, just to fill it at a water fountain later on. I'll admit that this is a Very Cheap trick, but I like having water with me at all times, ok?
Packing for experts
I don't like overloading myself. Few things bother me more than those stupid trolley things that get in the way of everything and that you're basically stuck with, so I try to make two/three day trips on just a backpack and like a tote. This is a challenge, considering I treck around with a heavy laptop and like a Nintendo Switch and two smartphones. And all the cables needed to keep those things running. Here are some tricks:
Don't bother with shampoo. Heavily dependent on the hotel you're staying, but business hotels will always have soap and shampoo for you. The good ones have conditioner as well. Is it shitty? Yes. Is it worth bringing your own bottle over that? Usually not.
Pack whatever the bare essentials are for you. By which I mean don’t just go by the checklist you got off the internet. No, not even this one. For me, the bare essentials are a toothbrush, toothpaste, make-up for being fancy, deodorant and way too much hand cream. Do try to stay somewhat comfortable, it's a trip, not a punishment.
Speaking of bare essentials: ear plugs will save, if not your life, then at least your sleep pattern. Most methods of transportation, and some hotels, are loud AF. You don't want to wear those headphones while trying to sleep.
Roll your clothes. I got this off of a very old Lifehacker article and that shit works ok? Put your outfit flat on the bed, one layer over the next. Fold in the sides and roll the whole thing into a tight cylinder. Once cylinder per outfit/day. Shove said cylinders into your bag for remarkably wrinkle-free outfits at the end of the line.
Jeans are overrated (don’t @ me) Unless you're only wearing one pair of pants, why would you bring jeans? They're chunky and thick and heavy. Made for weathering hard labour, not for sitting in a plane seat for eight hours. Same goes for chunky knit sweaters. Pretty, comfy and warm, but they take up So Much Space.
You know what's great? Leggings. I say this as a rotund lady, whose travel uniform is leggings, sneakers and a tunic. That shit takes up almost no space, it's comfortable and if you get the right fabrics, it doesn't wrinkle. Also: counts as business casual.
Layers are your friend. Weather is notoriously unpredictable and climate change is a thing. I was in the UK in friggin october and it was 25 degrees and sunny. You can't really prepare for that, so layer. Bring a lightweight jacket, bring a thin shawl.
Wear comfy shoes. I shouldn't have to say this because life is too short to wear shitty shoes, but if you're going to travel, for the love of all that is holy don't do it in painful shoes. You will Always Walk More than you expected. Even if they drop you off at the airport. Airports are huge. The Underground or Metro has surprisingly long hallways to traverse, just finding your hotel may take a walk. And also: what's the point of going to some city abroad if you're not going to walk that city? You're flying all the way over there to see the inside of a convention hall? Fuck that. Walk the city. Experience culture. Go friggin shopping.
Get a good bag. It's not very professional looking to travel for work with a backpacker bag, so I see a lot of those leather bags that double as a trolley. They're invariably hideous. Luckily there are better options. People who know me have heard me wax poetic about my backpack, which is pretty much a Tardis. You can fit ridiculous amounts of stuff in there considering that it counts as a laptop bag for cabin baggage. Extra tip: if you're going the overstuffed route, make sure the zippers are of the chunky type. I have broken zippers on several bags already, the thin ones really can't take too much strain.
Safety and stuff
Staying safe and comfortable when traveling alond doesn't have to be too hard.
If you're the careful type you probably already do this but: use the chain on your hotel room door. Most hotels let you use a chain or bolt, as well as some kind of simple hand lock, on top of your keycard. This is important, because hotels are still a public place and those keycards are meant to be used by more than one person. I have a tendency to hang out in my hotel room in my underwear, (it is one of the joys of traveling alone, don't judge me), and I've had cleaning staff just show up in my room in the middle of the day. That is their job. I've also had people try to come into my room thinking it's their room, while I was in the tub. Shit happens. So if you're in your room, keep it locked. That little chain or bolt keeps pretty much everyone out.
Be aware. One of the issues of traveling alone, is that you don't have a buddy to have your back. This means you have to keep your own security. Now I'm not a very scared person; I will walk an unknown city by myself, even at night, but i'm also not stupid. Stick to main roads, don't flaunt expensive gadgets, don't get drunk. You know the drill. Basically be aware of your surroundings.
Do attempt to blend in. It will make you less of a target, though I do realize that some ethnicities will stand out in certain places, regardless of what they do. In general, most large cities are a mix of races and languages, and even then you can pick out an Obvious Tourist because their whole deal is their Otherness. The clothes they wear, the way they act and talk, it screams that they view this whole area as a zoo. People don't really like that. So adjust, a little, if you can, to the vibe of the place you're in. It could be about walking speed, level of politeness, Commuter Resting Bitch Face. It is definitely also about standing on the right side of the escalator, and not blocking traffic. Little things. Get ye a coffee and a window seat and just watch people for a while to pick up on it. Pretend like you're in a romantic coming of age film while doing it.
The interbots abroad
There are essentially only three things I cannot live without when traveling: passport, credit card, internets. The first two are obvious (the credit card is for buying underwear in case everything else gets lost). The internets are for things like maps, companionship, and freaking out over private message when things somehow go wrong. It’s a great comfort.
Roaming sucks: the best thing the EU did in the past few years is get rid of roaming charges. So if you have a european phone subscription, any mobile data used in most EU countries will just go off your regular tab. But usually, roaming in other countries is Ridiculously Expensive, so you would have to buy a burner phone or local card (which is getting harder), or you're stuck with wifi.
Funny thing about hotels: the fancier they are, the more they charge for wifi, on average. Your basic motel will have free wifi, the friggin Hilton will charge your per hour and have next to no plugs. It's getting a little better, because honestly, who charges for wifi, but if you're in this situation, consider the alternatives.
Get coffee. Starbucks is pretty much everywhere and it's a good place to get your internets on. Yes, the coffee is expensive, but still cheaper than hotel wifi, and as a bonus you get coffee. Furthermore, it has popularized the idea that coffee shops need free wifi, so you'll find plenty of local cafés that offer it as well. In the US you could also try like McDonalds or other places that offer it (tip: this usually does not work in Europe; McD's wifi in Europe is generally Awful).
VPN's, at least the free ones, are fairly useless. Most of them will not get through, for instance China's censorship wall, and several are also just a thin front for collecting your data. Honestly, if you're going to a country with strict internet rules and you won't be staying long, it's probably easier to just stay under the radar.
Speaking of radar: clear your devices of any incriminating things before hopping borders. Especially if you're going to the weird places. The US border police might confiscate your laptop and charge you for stolen mp3's, for instance. Some countries' border police may attempt to have you log into social accounts. Put on, at the very least, two-factor authentication to stop anyone swiping your credentials. Better yet, back up your devices and put them back on factory settings before crossing particularly challenging borders.
29 notes
·
View notes
Text
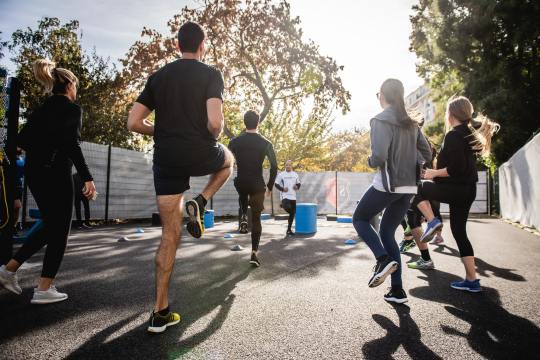
Can Sneakers Be Used For Jogging?
The history of running can be traced back to the ancient Greeks. The Greeks performed athletic contests barefoot and even naked, while the Romans mandated thin-soled sandals for messengers. In the 1800s, the first running shoes were developed. The spiked soles were added to canvas shoes. In 1892, Charles Goodyear discovered vulcanized rubber, which allowed the construction of the first sneaker.
The construction of running shoes differs from other kinds of shoes. A typical pair of running shoes is made from at least 20 different parts. The upper covers the top and sides of the foot while the lower makes contact with the surface. The upper is designed to absorb shock and provide cushioning for the foot's natural movement. It also contains a midsole for shock absorption. The insoles are made of a cushioned material that protects the foot's arch and provides support.
Although the uppers of running shoes are often constructed from layers of textiles, modern models are increasingly made from one single piece. This makes them easier to fit and feel like a foot. A smooth surface is more comfortable than chafing anywhere, which is crucial for running safety. A shoe should support the arch of the foot, while also providing flexibility. Some models have support in other areas but are not ideal for jogging.
You should try on the shoes you plan to use. Always remember to try on a pair before you buy them, and always return shoes that are too small for your feet. Some sneakers have a wide toe area, so sizing up a half size will compensate for this. Make sure the shoe you choose has the right width. If in doubt, go to specialty sports stores and ASICS. These stores offer expert advice on shoes and fit.
Running is a great way to build lung capacity and exercise. However, the repeated impact of your feet striking the ground is likely to cause you injury. This is why running shoes are designed to provide shock absorption and support while ensuring your forward motion is supported. Moreover, they are also lightweight and comfortable. In addition, they have more midsole cushioning and arch support, which help protect your feet against overuse injuries.
In the US, sneakers are typically categorized into two categories: athletic and casual. Athletic sneakers provide cushioning, arch support and heel padding. The upper of athletic sneakers is usually made of leather or engineered mesh, which provides better ventilation. It's important to note that not all athletic sneakers are athletic. So, you should check out the reviews before making your purchase. If you're interested in using sneakers for running, make sure you choose the right ones for your needs.
Depending on your region, the name of the shoe may differ. For instance, in the Northeast, "sneakers" may be the term used, while in Central Florida and parts of Canada, the term "running shoes" is used instead. In Australia, Canadian, and Scottish English, sneakers are also referred to as "running shoes."
0 notes
Text
Explore The Importance Of Camping Gas Cylinders For Seamless Cooking
Steel cap boots in Australia has increased in its usage due to its safety to our feet. It is also known as safety boots in simpler terms. You can easily find this shoe from the premium brand such as Redback Cobar and many more. It comes with a scuff cap and fast release side zipper. This shoe contains leather clasp with a press stud that makes it apart from a usual process. Its durability and comfort combined with safety make this boot a top choice for most of the people.
They are easily available with the leading specialized sellers who also offer camping gas cylinders, travel clothing, fishing equipment and military devices. Most of the modern steel cap boots include 3D weave, elastic inner gusset, air cushion midsole, breathable air mesh lining, durable outsole, and a lightweight design. It is created in a way which can be wear on occasion. Their durability and overall design made them suitable for both work and casual day.
The major reasons this boot is considered is its safety. As it contains steel toe with scuff cap offers extra protection to the toes. Your feet will not get harmed from any outer element. Your toes will not be worn out within this boot. If you work in a high-risk location, wearing steel cap boot proves to be beneficial. Your feet will be protected against grave injuries. Exposures to the electrical wiring and sharp and heavy objects can harm your feet drastically. Getting these shoes can easily avoid preventable injuries in various sites of work.
If you think that this boot is only confined to providing protection, then you are wrong. The specially designed shoes can be used as a style statement which goes pretty well with different kind of attires. These shoes are available in a wide range of styles from which you can select boots for different work settings. Whether you are an engineer or company executive, its type is suitable for other preferences and needs.
If you are interested in buying this boot, get in touch with leading dealers in the city. You can also log into the online stores for checking out the latest collection. The contact details are available on the official website.
0 notes
Text
How to prepare your home before hip and knee surgery?
This article will describe the causes of pain, the reasons for surgery, and which tools will prepare you at home before and after your surgery.
Reasons for surgery
Knee surgery or total knee replacement is one of the most successful procedures in medicine. According to the Australian Institute of Health and Welfare, more than 50,000 knee replacements are performed each year in Australia. This surgery is a safe and effective operation to relieve pain while walking or climbing up the stairs. It will assist you to resume normal day-to-day activities.
There are a number of reasons people need to have knee surgery. The most common is osteoarthritis, a degenerative disease categorised by the receding cartilage resulting in great discomfort and pain, usually in people 50 years and older. The Australian Commission on Safety and Quality in Healthcare has shown that pain or mobility problems caused by osteoarthritis are the reason for 98% of knee replacements in Australia.
Another cause can be rheumatoid arthritis - where the membrane that surrounds the knee joint is inflamed - causing damage to the joint and loss of cartilage. A third reason is a severe knee injury or fracture.
Hip replacement surgery is usually necessary when the joint becomes worn or damaged and affects your mobility resulting in pain. The most common reason for joint replacement surgery is osteoarthritis but a joint may be damaged by other conditions such as rheumatoid arthritis or severe injury.
Osteoarthritis occurs in people over 50 and is a ‘wear and tear’ form of arthritis where the cushioning wears away. The rheumatoid arthritis is an autoimmune disease in which chronic inflammation can damage the cartilage causing pain and stiffness. The post-traumatic arthritis is caused by a serious hip fracture or injury which damages the cartilage. In all these cases a total hip replacement surgery is an effective procedure that can relieve your pain, increase your motion and help you back to enjoy everyday activities
Preparing for hip & knee surgery
Doctors recommend cutting back on unhealthy lifestyle choices prior to hip replacement surgery, like smoking and alcohol consumption. Getting enough sleep can also recharge your body and help with the long hip replacement surgery or knee surgery recovery road that lies ahead. This is especially important when you consider this direct quote from the Australian Institute of Health and Welfare: “1 in 10 people with osteoarthritis 45 & over self-reported poor health”.
Several adjustments can make your home easier to navigate during your recovery. The following preparations will help you with your daily activities:
● In the house - Prepare your home for your arrival following surgery. This means keeping all of your essential items within reach. It might be worth installing new shelves to hold TV remotes, laptops, charging ports etc in one location. Remove any tripping hazards from the floor, including electrical cords, rugs, decorative items, and general clutter. Arrange for a temporary living space on the same floor to avoid walking up or down the stairs (this might be difficult during early recovery). Keep one chair to be your primary chair. It needs to facilitate sitting and standing with minimal effort from you.
● In the bedroom - It might help you tremendously to keep a portable commode in the bedroom for the first few days of recovery. A walker or a zimmer frame will make walking around much easier.
● In the bathroom - The bathroom is always a high-risk area, in fact, many hip injuries occur in the bathroom. Reduce the risk by getting a shower chair for stability. A raised toilet seat will simplify the sitting and standing associated with this bathroom task. A grab rail can also improve safety in the bathroom.
● Getting help – arrange for a friend or a family member to help you at home with everyday tasks like cooking, laundry or shopping for the first 14 days of hip or knee surgery recovery. Gentle and safe exercises can also help to encourage healing faster. Ensure that the exercise you choose to do is approved by your doctor before you start.
Which essential hip & knee recovery aids can help you?
Hip & Knee surgery tools for dressing and mobility promote independence without compromising recovery. In other words, someone who is recovering from surgery will find themselves capable of putting on their own shoes, reaching for items, and even applying lotion to their own skin thanks to a few handy implements.
● Sock aid - this useful recovery aid prevents the need to bend to put on socks. It’s designed for people with limited mobility. It’s not only for socks, but it also works for stockings, too. It is compact and easy to transport, meaning it will fit comfortably into any bag. Store this item nearby to prevent extra standing, bending, walking, and sitting.
● Dressing stick - Persons with limited mobility can use this assistive device to dress, whether they need to put on a jacket, pants, a shirt, or to pull up socks. It’s lightweight and easy to transport, durable and offers excellent grip to prevent accidental slips. It is an ideal piece of equipment to use after hip and knee surgery.
● Reacher - also sometimes called a grabber, this assistive device makes it easy to reach for things that are just too far away, to high up, or too far down. It’s designed to facilitate the basic action of reaching for something without affecting a person’s lack of mobility during hip or knee surgery rehabilitation. It adds a tremendous amount of independence to someone’s life during this frustrating period of time.
● Lotion applicator with a replaceable sponge - We all have those difficult-to-reach spots on our back that also require lotion. This particular lotion applicator helps you apply lotion on those hard to reach places. It comes with a replaceable sponge making hygiene so much simpler. It eliminates the need for painful stretching making it ideal for those who are still in recovery following hip or knee surgery. This device will remain useful even after recovery.
● Leg lifter from Homecraft - The leg lifter’s webbing strap with a semi-rigid insert simplifies lifting a leg which is semi-mobile, immobile, or weak. Whether you need to get both feet into bed easily or back to the floor in order to stand, a leg lifter can facilitate the process in a safer and more steady motion. It enables the arms to do the heavy lifting, keeping strain off the hips and the legs.
● This is the ideal assistive device for those who battle to bend down when recovering from hip or knee surgery. It is designed to enable you to slip shoes over the feet without having to bend over. This reduces the risk of straining and further damaging the injured areas that are in recovery.
These products are available on our website. They are the most highly recommended products in each product category. While many of these products are designed to assist during the healing process, their use will continue for long after. By reducing the need to overreach and bend frequently, seniors can actually minimise the risk of injury. The same is true for bathroom safety and assistive products. They are tremendously useful for the entire family. Products like rails and safety structures are hailed as lifesavers by expectant mothers.
Why do you need essential hip and knee surgery recovery tools?
Bettercaremarket has compiled a hip & knee surgery bundle, containing 4 must-have tools after your hip or knee replacement surgery. Our unique bundle includes;
Essential post-operative hip & knee recovery aids
Reduces overreaching, bending & straining
The Hip & Knee Recovery Bundle is designed specifically with the needs of those who are recovering from hip or knee surgery, in mind. It contains the most popular items as per data collected through ordering systems. This collection of items is designed to help those recovering and their carers, rehabilitation can be very challenging and we understand that.
We have bundled 4 tools in our Hip & Knee Recovery Bundle: the reacher, the long handle shoehorn, the sock aid and the long-handled bath sponge; all from Homecraft so that those in recovery don’t need to resort to overreaching, bending & straining. This kit is the perfect combination for those who need some help after their hip or knee surgery at home. This package is on special for $ 59.95.
High-quality items
When it comes to rehabilitation, you need the highest quality products. The healing process is delicate and requires you to slow down. As frustrating as this may be, it is a necessary part of the process. Would it make it easier if you had the same tools and infrastructure the hospital has? Of course. You can enjoy the help you had from the assistive devices in the hospital, at home.
Bettercaremarket brings hospital-grade equipment to consumers. That means individuals can enjoy the same exceptional quality and the same products used by hospitals, and nursing homes. Our ordering system is designed to be a convenient one-stop-shop solution for assistive living aids. These items are perfect as gifts, demonstrating genuine care for the well-being of an elderly person while gifting them with a greater level of self-sufficiency.
Multifunctional Over Toilet Frame
Bettercaremarket has one more helpful product designed to ease the stress on the joints in the hip and the back following surgery. Their multifunctional over toilet frame offers a raised solution to toileting. It eliminates the intensity of the bend to sit on a standard-sized toilet. It is particularly handy because it doubles as a commode (perfect during those first two weeks), an over toilet frame and a walking frame. The device also doubles as a lifting aid and as a shower chair.
Grab rail
You may need to adjust your bathroom to make it safer and easier to use. Reduce the risk of slipping in the bathroom by attaching a grab rail on the wall of your bathtub or shower. This tool will support you when getting in and out of the bath or shower.
Grab bars are available in two types: the fixed grab bars or removable ones with suction cups. The fixed rails are anchored to the wall with screws while the suction grab bars are attached to the wall with powerful suction cups. Their main advantage is the fact that they are strong and you can attach and remove them from different locations without requiring tools or damaging the wall.
Look at our range of grab rails that can suit your needs.
A cane
A cane provides tremendous support in the early days when you’re on your feet. It can take the strain off of your hips, helping you to balance a little easier. It takes the stress out of moving around thanks to the extra support.
The Comfort - Plus Quad Cane from Airgo is suitable for the indoors and the outdoors. This particular walking cane offers K-shaped rotating base swivels and locks into position, which improves your stability on your feet tremendously. The cane can also stand independently, which makes it the perfect companion, ready at the waiting when you need to get up.
The Preparation and Recovery Time
The better prepared your body is prior to surgery, the lower your chance of complications during the recovery period. This means adequate rest, preparing your house for when you return, and ensuring you have the necessary tools, assistive devices, and support from family members and friends.
0 notes
Text
Guide to Backpacking By Motorbike
Nothing can beat the freedom and sheer limitlessness of hitting the road with your motorbike. The chills and thrills are what strives every keen biker to hop on his vehicle and simply go to explore a new, untamed place, and then utterly unwind. Going camping or backpacking by motorbike is probably the best way to completely utilize your love of traveling and doing it by saving a few bucks while still having fun. Backing by motorbike allows you to do just that, and here is a full guide on how to make your motorbike-backpacking dreams come true.
Do a thorough bike inspection
First things first – safety. Before you start planning and packing, it is of vital impotence to check your motorbike in detail. This means taking it to a specialized shop and have the mechanic check whether all things function properly, change oil, check tires, chain bearings, etc. Regular motorbike maintenance is crucial because you don’t want to get stuck in the middle of nowhere due to some small malfunction.
Pack appropriately
View this post on Instagram
A post shared by The Cafe Racer (@thecaferaceruk) on Feb 28, 2019 at 3:35am PST
Try to find a quality backpack for motorcycle riders as you need to have a comfortable, firm, and durable backpack able to withstand all your belongings and fit perfectly. All keen riders know that having a good and lightweight backpack saves them loads of time and enables plenty of lucrative storage. Pack light. Everything depends on how many days you plan to spend backpacking, however, pack one pair of trousers, two shirts, underwear, and basic cosmetic utilities. All other things can be bought along the way.
Find your designated road
Downloads Google Maps app on your phone if you don’t already have a GPS watch, and try to find some good roads. By knowing where you desire to go backpacking, you can easily plan out your ride, inspect the road, check where the gas stations are, look for some interesting sights and monuments. What’s more, you can plan your trip more eloquently as you will measure the distance, and see if some highways are under construction, and in that way, you could find a detour in advance. Don’t let misfortunes ruin your adventure.
Must-have motorbike luggage
View this post on Instagram
A post shared by Kriega Australia (@kriegaaustralia) on Aug 29, 2019 at 1:07am PDT
Invest a fair amount of cash in your protective gear and clothes. As a motorcyclist, you already know that riding against the wind even in high temperatures can be extremely hard and even painful to the body. Protective gloves, hamlet, dustproof glasses and good shoes are another must-have. Another essential gear for your backpacking experience is the additional luggage. Opt for textile, waterproof luggage which you can easily attach to the sides of your bike. As they are lightweight you can place a large tent and sleeping bag which are the basic amenities you need.
Prepare your budget
Even if backpacking by motorbike is one of the most lucrative ways of traveling and exploring the world, you still need to be prepared for unexpected outcomes and maybe have some cash aside. Some unpredictable things are the gasoline as your motorbike may use up gas more or less depending on the different road, surface, and the speed. If you do pack some food, bear in mind that you would be also eating more along the road. And if you wish to spend the night in a more impressive spot, you should prepare money for the cost of accommodation.
Enliven all your senses
View this post on Instagram
A post shared by Ricardo Cabrita | London, UK (@ricmtat) on Apr 6, 2020 at 2:11am PDT
In the end, the key is to let your mind loose and be free. The best piece of advice for backpacking by motorbike is to keep a steady mind as you are riding, and once you step down your bike, to maximally enliven your senses and dwell into the new wild ambient. Never sit on the bike if you have even drunk a glass of beer, and also make sure that you have plenty of sleep before hitting the road.
Exploding the world on your motorbike is like exploring nature’s soul first-hand. By following the above-mentioned guide, you will undoubtedly have wonderful backpacking experience.
The post Guide to Backpacking By Motorbike appeared first on Travel for Food Hub.
Guide to Backpacking By Motorbike published first on https://zenramensushi.tumblr.com/
0 notes
Photo

If you get the feeling you are playing Tetris when it comes to packing your 4WD, you’re not alone. Getting it just right can be tricky. But, hopefully, this article helps you make it easier.
The two primary issues with packing a 4WD for a camping trip are space and weight capacity. Did you know your 4WD comes with a maximum load carrying capacity? You need to be under this at all times, and no matter how good you are at Tetris there’s only so much space available.
Over the years, we’ve learned a few tricks in packing our 80 Series Toyota Land Cruiser for long trips. Last year, we spent three weeks on the Gibb River Road, and aside from water and fuel pickups, had to be 100% self-sufficient.
So, how can you make packing your 4WD for a camping trip easier?
1. Pack the important stuff first
It’s not possible to take everything you might want to use when heading away on a long camping trip. There has to be a selection process where you prioritise what’s essential and what’s not. First and foremost, you should carry gear that is essential to your travel. Then, if there’s room, anything else you might want to take.
We have a spreadsheet that lists our essentials and we remove anything from the 4WD that isn’t required. What you pack in your vehicle should be personalised to where you are going, who you are going with, and the time frame you are away for.
But, what’s essential?
The right clothing and personal hygiene
Yeah, it might seem obvious, but I’ve lost count of the number of people who don’t look at the weather forecast and take the wrong clothes. We always take at least one set of clothes to suit an unlikely extreme – so a set for if it is really cold and wet, and a set for if it is really hot. Personal hygiene items come down to personal need – toilet paper, soap, shampoo, towels, toothpaste and toothbrush, a shovel, deodorant, and so on.
Quality sleeping and cooking gear
When you are camping, quality sleeping and cooking gear are some of the most important bits of gear you’ll carry. A tent that isn’t going to blow over or leak water, a comfortable mattress and pillow, and a warm sleeping bag, are non-negotiable. Likewise your cooking equipment. Being able to cook and heat food is important. We always carry a spare burner, which screws directly onto an LPG bottle, should our stove fail, which it has in the past.
Our neat and organised campsite at Mt Elizabeth Station on the Gibb River Road in Western Australia.
Tools and spare parts
No matter what you drive, you should have a basic tool kit and spare parts. These should be personalised to your mechanical knowledge, how far you are travelling, and what you know is likely to go wrong. Most cars have their quirks. I have a drawer in our Land Cruiser that is full of filters, tools, bearings, nuts and bolts, electrical cable, fuses, tape, WD-40, grease, brake fluid, cable ties, tie wire, and several types of oil.
If you break down remotely, you can be in pretty big trouble! Having some tools and spares will get you out of trouble in most instances, and could well save your special trip.
Recovery gear, first aid kit, maps, PLB
Recovery gear, rated recovery points, and an understanding of how to use them safely is vital. 4WDs by nature allow you to get away from the crowds but getting stuck can happen. We carry a huge range of recovery gear, and it does get used. Again, personalise it to where you are going, what is likely to happen, and who you are with.
A first aid kit is really important too and should be set up specifically for your given trip. They start at about $40 and work their way up, and are worth their weight in gold should anything go wrong.
Maps, in both electronic and paper format, are important if you are heading anywhere you might get lost. Which is anywhere, really.
It’s also worth packing a PLB for extra safety. You never know what might happen and whether you’ll have mobile coverage should you need it to call for help. A PLB is a worthwhile investment for anybody heading off the beaten track, for your own sake and to help your rescuers.
We keep our tools and spares in one of the built-in drawers in the back of the Land Cruiser. Easily accessible, and low to the floor for good weight balance.
Water, food, fuel
You won’t get very far without water, food, and fuel. We usually factor in about a 30% reduction in fuel efficiency when four-wheel driving, and take 10% more fuel than we need. Fuel includes LPG for your cooking. A 4kg gas bottle lasts us at least three weeks cooking every day.
As for water, there are hundreds of variables. The usual guide is anywhere from 5-10 litres of water per person per day, but it entirely depends on how warm it’s going to be, what you intend on doing on a daily basis, and whether you have access to other water for personal hygiene and dishes. Water is a massive priority, if you do get stranded, it’s the thing you will need most. Don’t skimp on water.
Food is relatively simple – you add up the number of breakfasts, lunches and dinners, and you arrive at the right number of meals. Adjust what you eat each day based on what you feel like, but this way you know you have enough food for the trip. Here’s a bit of menu planning advice, and some pointers on eating without having to lug heaps of fresh ingredients. Some excess tinned food (such as baked beans and spaghetti) are brilliant to have in the back of the car just in case.
Other important gear
A tarp, matches, fire starters, quality rope, sunscreen, a hat, insect repellent, medication, and cash are all equally important. If it affects your safety, you should consider taking it!
From there, we take our fishing and diving gear, photography equipment, electronics, and anything else that is going to be used regularly when away and that enhances our enjoyment. If you’re not sure it will be used (unless its safety-related), don’t take it!
2. Ensure the essentials are easy to access
Items that you use on a regular basis need to be easily accessible. If you’ve got to stop and empty half of the car just to open your fridge, the appeal of travel soon fades. Quick stops should be just that – quick, easy, and fuss-free.
Organisation is imperative
You can tell a lot about how organised someone is by the time it takes them to set up camp. A well-organised vehicle means you can access what you need quickly and easily. You know what they say – a place for everything and everything in its place.
Remember, if you’re going to use a roof rack only store lightweight equipment on it. You’ll see here we have our Oztent RV, solar panels, fishing rods, and recovery boards.
I try to organise our gear in sections, so nothing has to come out of the car that isn’t going to be used immediately. Our camp chairs, mattresses, sleeping bags, clothes, and tent are all easily removed from the vehicle without having to pull out jerry cans, solar panels, tools, and everything else that isn’t immediately needed.
The easiest way to get organised is to have tubs and a drawer system. Being able to put your gear away in drawers is fantastic, especially things that live in the back of the vehicle (tools, spare parts, and those emergency rations).
The order in which you pack is very important too. Not only do you need to be able to fit everything in, but it should be packed in a way that items you need often are easy to get out, and those that you may use once in the trip, are stowed away.
Use the nook and crannies
There are stacks of little areas inside your 4WD that can be used for storage. Under each seat, above the wheel wells, roof consoles, and behind the seats are all spots where you can store appropriately sized gear. I keep occy straps under my seat, old shoes under the passenger seat, rain jackets and rope in the wheel wells, and anywhere else there is a bit of unused space.
Rubbish bin bag
I’ll make a special note of this, as it’s one of our favourite mods to our Land Cruiser. You can purchase bin bags that mount to your spare tyre, which make brilliant rubbish bins. It keeps the smelly stuff out of your vehicle and works well for wet clothes and recovery gear too. Ours is a Bushranger branded one and has been faultless.
All packed and ready to roll at Israelite Bay, Esperance, Western Australia. Note the type bin bag on the spare.
3. Safety is paramount
I’ve seen some pretty foolishly packed 4WDs over the years. If you don’t pack with a bit of thought, you put the lives of those around you in danger. When packing your 4WD, keep safety at the front of your mind.
Fit a cargo barrier
If you have gear behind the driver or passengers, you need a cargo barrier. These are designed to stop your gear coming forward and injuring people if you find yourself in an accident. Even lightweight gear can kill someone if the vehicle is involved in an accident.
These also help with packing – you can push your tubs and gear up against them, and be confident that it isn’t going to move. Cargo barriers are usually steel with mesh, but you can get net versions as well.
Tie any heavy items down
If you have heavy items in your 4WD, they should be restrained. Things like jerry cans, tubs, recovery boards, and water tanks are very dangerous in the event of an accident when unrestrained.
I often carry a couple of jerry cans of water in front of the cargo barrier, and just use a ratchet strap around the seat mounting points. That way, if something does go wrong, you aren’t going to have a 20kg chunk of plastic smash into the back of your head.
Make sure your car fridge is accessible.
Don’t overload your vehicle
I’ll touch on this a little more below, but the basics are pretty simple. A 4WD that is carrying more than it is designed and rated to is dangerous for both you and those on the tracks around you.
4. Keep the weight down
The number of 4WDs that are out and about every day with weight issues is staggering. Two things to consider – you need to keep your weight down low in your 4WD, and also ensure that you aren’t overloading your vehicle.
This is not only important from a reliability perspective, but if your 4WD is overweight, your insurance company can decline the claims you make, and you can get in serious trouble with the law if you hurt anyone.
Centre of gravity
The more weight you put up high in a 4WD, the higher your centre of gravity. This, in turn, means the chance of your 4WD tipping over is dramatically increased along with the more obvious handling issues.
Roof racks are probably the number one misused bit of gear when it comes to weight. Most 4WDs have a roof capacity of 100kg (a few go to 150kg). This is due to the design of the 4WD the roof is only designed to carry 100kg. Some steel roof racks weigh up to 65kg, which would give you a capacity of just 35kg on the roof racks.
Roof racks should be used for lightweight gear, like tents, camping chairs, tables, solar panels, fishing gear and the sorts. To find out your roof loading capacity, have a look at your owner’s manual.
It’s important to consider where the heavy items are located in your vehicle. Things like water tanks, jerry cans, tools and anything else heavy should be as close to the floor as possible, and as close to the rear axle (or in front of it). The further the weight hangs over the back of your 4WD, the more likely you are to do chassis damage (just look up ‘bent 4WD chassis’ on Google!).
A closer look at what’s in my built-in drawer. Spares, tyre compressor, first aid kit…
Overweight 4WDs
Every vehicle has a given payload, which is the maximum amount of weight you can add to the car. This is specified by the manufacturer and is based on safety and reliability of your vehicle.
Have a look at your owner’s manual (or jump on Redbook and look up your model) to check your payload. Most 4WDs range from 600kg to 1000kg. Any weight you add to your 4WD takes away from the payload. This includes passengers, fuel, vehicle accessories, additional tyres and anything else you put inside (or outside).
If you have access to a weighbridge, this is the best, and the most accurate way to work out what you are dealing with. If you don’t, sit down and work out an estimate of the weight of everything in and on your 4WD. You’ll be surprised, I bet. It’s very easy to be overweight!
Remember also, if you are towing something, this needs to be deducted from your payload.
Camping in the Collie River, Western Australia.
Share the load
If you are travelling with other vehicles, plan ahead, and share the load. Anything you can share with another vehicle (where appropriate) is weight and space saved. There’s no need to carry a comprehensive toolkit in every vehicle.
Our tool and spares kit for remote travel would easily weigh 40kg. Obviously, your spares may not be interchangeable, but tools and basic repair items are. Things like gazebos, gas cookers, portable toilets, showers, fish smokers and a whole range of other things can be shared among groups of people. The more space, and lighter the vehicles, the better!
You’ll get better fuel economy, reduce the strain on your 4WD, and have less to pack and unpack!
5. Practice really does makes perfect
Above all, the best way to learn to pack your 4WD is to do it over and over again. When I started camping, I’d often jot a list down, when I was sitting around the campfire, of things that I should have taken along, and things that I’d rather have left at home.
The more you do it, the better your packing becomes, and the easier it is. Sarah and I were a bit rusty at the start of our five weeks in the Kimberley last year, but after 32 nights of camping, we got pretty good at packing and unpacking.
I can sit here and write about different techniques, but the bottom line is you need to practise as much as possible, and that’s best done by just getting out there and going camping!
Do you have any packing tips or tricks to add? Comment below.
The post 5 Tips for Packing Your 4WD for a Camping Trip appeared first on Snowys Blog.
0 notes
Photo
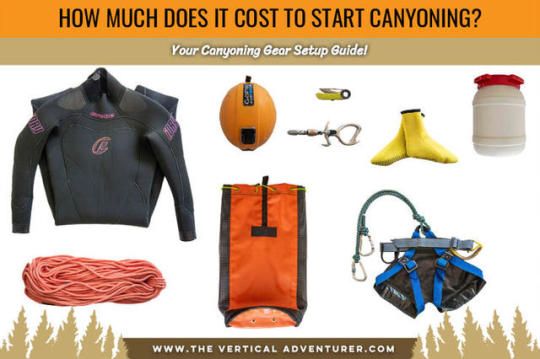
Canyoning is exploding around the world as a popular way to get outdoors, stay fit, and get out of your comfort zone. And on top of that, it’s awesome fun and you feel like a kid again jumping and sliding in the water!
Whether you have just started canyoning or are looking to get into it, the question almost everyone is always interested in when starting is this...
HOW MUCH DOES IT COST TO START CANYONING?
It's the question people always ask me. No matter the sport or activity, if people are interested in trying it themselves, they want to know how much it will cost them, among other things of course!
I've made a list detailing all you need to be a self sufficient canyoner. Minus the experience and skills of course, so you should always seek to get proper instruction from experienced canyoners or take a course.
The following items will be listed by importance, based on you starting your canyoning journey with no gear at all. If you are progressing into canyoning from rock climbing, you will have some of the gear already (yay)!
Any non critical safety items, like shoes, bags or wetsuits, are fine to buy second hand. For all safety equipment, buying new is recommended.
With all items, keep an eye out for sales and discounts at outdoor/climbing gear stores. Joining canyoning clubs will often get you discounts year round. Sales can see some items reduced by significant percentages! So make use of them!
Read More:
Descending The General. Is This One of New Zealand’s Best Canyons?
What is Canyoning? Is Canyoning for You?
A quick note: Some of the links in this post might be affiliate links. This means that if you click on the link and make a purchase, I’ll receive a small commission – at no extra cost for you, which helps me cover the costs for this blog, or at least, I can buy a slice of cake.
1- Canyoning Shoes
Your footwear is important as canyons are often wet and slippery environments. While there are specialist canyoning shoes you can buy, lightweight trainers work perfectly fine in many parts of the world. In Australia where I started canyoning, Dunlop Volleys are very popular for their superior grip on the wet rock.
I have tried expensive canyoning shoes and cheap shoes and now tend to stick with cheap $30 trainers as my expensive pairs last only slightly longer.
Approximate cost: $30 AUD +
Example: Mens/Womens Trainers / Specialist Canyoning Shoes
2 - Harness
A harness is your attachment point to the rope as you abseil or when you need to connect to an anchor or guideline to stay safe. You can buy a simple climbing harness or use a specialised canyoning harness with vinyl bottom protector. This vinyl sheet stops the abrasion on your wetsuit and harness as you slide and move on rocks, so will make the wetsuit and harness last longer. Either are fine to get.
Approximate cost: $80 AUD +
Example: Simple harness Mens / Womens/ canyoning harness
3 - Helmet
Wearing a helmet is important in canyoning as anything moving about the top of the canyon, like animals for example, can dislodge rocks and other debris. A helmet also protects you from general knocks that can happen. You can use any regular climbing helmet, but make sure it fits and you like wearing it. You will be more likely to always wear it if you like it after all!
Approximate cost: $60 AUD +
Example:Mens / Womens
4 - Abseil device with a locking screwgate carabiner
When you first start, you can use a climbing belay device if you already have one since many climbers tend to give canyoning a go. If you are starting with no gear at all, getting a figure eight abseil device is the best choice for the flexibility in the later stages of canyoning, and are also quite cheap as well. As you progress, or if you know you like canyoning, the Petzl Pirana is one of the best devices I’ve used and is highly recommended!
Approximate cost: $30 AUD +
Example:Figure 8 / Petzl Pirana descender
5 - Cowstail with 2 locking carabiners (safety)
A cowstail is important in canyoning as your means of connecting to anchors and guidelines to keep you safe, and is also known as your 'safety'. Using a climbing PAS (personal anchor safety) or sling is not recommended as you need the dynamic rope for a cowstail as the chance of slipping and shock loading your safety is higher in a wet canyoning environment.
You can buy a ready made cowstail from Petzl, or make your own (guide coming soon).
Approximate cost: $60 AUD +
Example:Petzl dual adjust connect / Large locking carabiner
6 - Canyoning pack
A regular hiking backpack will work fine to begin with, especially in dry canyons. But the more water a canyon contains, the more important it is to have a canyoning pack with adequate drainage. As you swim and exit the water, everything drains out quickly and the bags don’t weigh you down. My absolute favourite packs are made by Access Gear in New Zealand.
Approximate cost: $150 AUD +
Example:Mesh Expedition bag / Canyoning Bag (great for lots of rope work)
7 - Wetsuit
Canyons are always cold, even on very hot summer days. For any area in the world with water filled canyons, a wetsuit is very important to keep you warm, which in turn, helps you enjoy your day. For many places, a 3mm thick wetsuit will provide enough warmth and can be bulked up with thermals and spray jackets which add warmth. For places like New Zealand and Europe, thicker wetsuits (4mm+) are recommended as the water is very cold. Any type of wetsuit is fine to get (freediving, scuba, surfing) as long as it will keep you warm based on the area you will go canyoning.
To pick the best wetsuit, try on all the different ones you can find, and buy one based on fit. Ensure you can move reasonably well while wearing it, and that it has tight seals on the wrists, ankles and neck. You can also scout your local trading websites, groups and newspapers for people selling wetsuits as these are often quite cheap.
Approximate cost: $100 AUD +
Example:Canyoning specific wetsuits
8 - Drybag/waterproof keg
A minimum of 2 drybags, one inside the other and closed independently, are perfect to keep the water away from the things you want to keep dry. Using one is no guarantee of keeping your things dry, as they can eventually break and leak! Alternatively, I love my waterproof keg which is 100% watertight and very durable for when you throw your bag around.
Approximate cost: $40 AUD +
Example:Waterproof Keg / STS drybags
9 - Whistle
A whistle may seem like an odd piece of equipment to take canyoning if you have never done it before, but in water filled canyons it is one of the best ways of communicating over the noise of rushing water and when you cannot see each other. It is important to get a 'ball-less' whistle which also works when wet. Regular 'cheap' whistles can fail when water is inside them.
Approximate cost: $5 AUD +
Example:Fox 40 Whistle
10 - Carabiners
You can never have enough carabiners! They are useful for all sorts of rigging tasks and for building anchors. To start with, have at least 2 large locking carabiners spare on your harness.
Approximate cost: $15 AUD each x2 =$30
Example:Large locking carabiner
11 - First aid kit & Survival blanket
It’s important to stay safe in the event something were to happen, so always take a first aid kit and a survival blanket. The survival blanket is especially important as canyons are already cold places, and if you were stuck in there for longer than expected, will get really cold! Consider getting a survival bivvy bag, they retail for around $30 AUD and are far warmer than the blanket. The bivvy bag is a great addition to every outdoor adventure anyway, so is well worth investing in!
Approximate cost: $50 AUD +
Example:First aid kit / Bivvy bag
TOTAL COST TO START CANYONING: $635 AUD ($450 USD)
EXTRA GEAR YOU WILL NEED AS YOU PROGRESS IN CANYONING
While the above gear gets you started, you will require a few more items as you progress. These can be bought over time and will depend on your exact canyoning needs. Not everyone will need a rope as friends or partners canyoning together can share this cost.
Here is the complete list if you want to ensure you are well equipped and self sufficient:
12 - Static Rope
Your canyoning rope should be a static rope. Dynamic rope used for rock climbing is NOT SUITABLE. As well as the increased likelihood of damaging it from sharp edges or abrasion due to its increased stretch, it is also more prone to jam on anchors and in between rocks. Canyons are simply too different compared to the rock faces climbers scale.
A big question is always which rope to get? Basic static rope, either 9-10mm is suitable, and focus on one which has a thick sheath and low stretch versus other static ropes. If you want your ropes to last a little longer, canyoning specific ropes are the way to go, my favourite being the Tendon and Kordas brands. There's no need to stress obsessively over which particular rope to get, just make sure its a rated static rope, is 9-10mm in diameter, and is suitable for abseiling. Always buy well known branded ropes from reputable climbing or outdoor stores, and ask for assistance if in doubt.
Approximate cost: $250 AUD +
Example:Kordas Iris 9
13 - Ascenders
Ascenders are used to get back up the rope and for rescue hauling. This could be if a rope gets stuck, or if someone is stuck on the rope mid-abseil. Prussic loops can be used initially and should always be carried on your harness in both climbing and canyoning sports anyway, but mechanical ascenders like the Petzl Micro Traxion are invaluable in that rare emergency of if you wish to haul something. It should go without saying, hauling and rescue techniques require training.
Approximate cost: $90 AUD+
Example:Petzl Micro Traxion
14 - Knife
A good, lightweight knife is used to cut webbing for anchors. There should be at least one in your group, but it is recommended each person have their own. In severe emergencies, it may be needed for rescues (training required).
Approximate cost: $30 AUD
Example:Petzl Spatha
15 - Wetsuit socks
Cold feet can make the rest of the body feel cold. So for places like New Zealand and Europe, wetsuit socks are well worth investing in and will make a massive difference in your overall warmth!
Approximate cost: $30 AUD
Example: Wetsuit socks
16 - Slings
Slings are used for a variety of tasks and should be carried by everyone. At least one sling is recommended, however, a few extra should be in the group. Webbing material for anchors should also be carried on all trips and may substitute your slings for anchor material.
Approximate cost: $15 AUD +
Example: Black Diamond Nylon Sling
17 - Extra figure 8 descenders for single rope abseil
If using releasable abseils, a extra figure 8 descender is often used for this. You should always be supervised if learning single rope releasable abseil techniques. A munter mule can also be used which requires one of your carabiners. You should aim to learn both techniques to be able to go canyoning with anyone in the world and be familiar with the procedures.
Approximate cost: $10 AUD +
Example:Figure 8
TOTAL COST, INCLUDING THE FIRST LOT: $1,060 AUD ($755 USD)
DOES IT SEEM A BIT EXPENSIVE?
While running the canyoning and abseil events in my adventure group years ago, many people thought this amount of money required to go canyoning is quite substantial. I have always disagreed.
Here’s why.
Many people happily fork out $150 + per month on membership based fitness classes. While they offer a great service, I’ve always seen it as money that could be spent of gear that then opens up many new avenues for adventure and spending time in the outdoors.
And other activities such as boating or scuba diving are far more expensive in both startup and ongoing costs. Even just going canyoning with a commercially run group will usually set you back $150-250+. And that's just for one trip!
Think about this: after 6 months of Crossfit, you would have bought ALL the gear you need to continue canyoning independently for 3 years (approximately) before needing to replace some of the gear for safety. Items such as descenders and carabiners (and all gear made from alloy for that matter) lasts almost a lifetime, unless damaged. Helmets tend to last many years as well.
And as mentioned earlier, you will be able to share gear costs with items such as ropes, among friends and partners, reducing individual costs.
This makes canyoning quite affordable in comparison to many other activities or sports, and also allows you far more freedom to have a variety of adventures and see new places all around the world.
Canyoning can be done in many locations around the world and is FREE to do if you are self sufficient. A bit of gas money to get to the canyoning areas is the only extra ongoing cost and the occasional gear replacement when its worn.
Once you have the gear, get some instruction from some experienced people or mentors, or take a course, and then find some canyons to explore! Taking that first step can be hard, so never be afraid to ask questions no matter how silly they seem.
Got questions of your own? Comment below or contact me for more help!
Remember: Safety is your responsibility! No internet article or video can replace proper instruction and experience. Make sure you’re practised in proper techniques and safety requirements before you go canyoning!
0 notes
Last Seen Blogs

luisairam15-blog
♥WhatDoYouMean♥

outer-space-doggies
🐶 rome 🐶

bhavna
And I can still see the old days in your face...

sanctw
「 ʜᴀᴘᴘʏ нαρρу 」

decaffeinatedgardenerpersona
GardenerPersona