#lazy background for render in blender
Text
Lazy Background for render in Blender
So I’ve been asked about my backgrounds for render in Blender. Do I create sky simulation or environment simulation for my renders? Although there’s a splendid tutorial on How to setup an hdri environment background:
youtube
I use the laziest way ever! :D
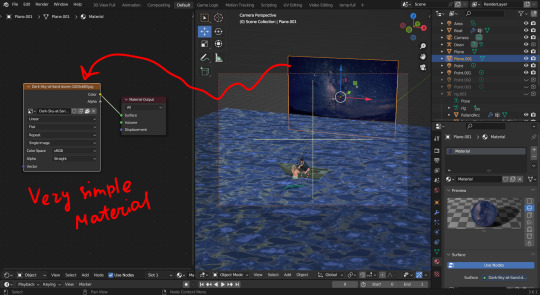
So here’s my blender scene form this post (my lovely siren fish-boy and his werewolf^^).
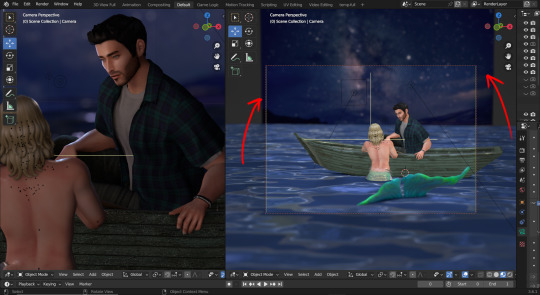
As you can see the background is just a simple plane over there.
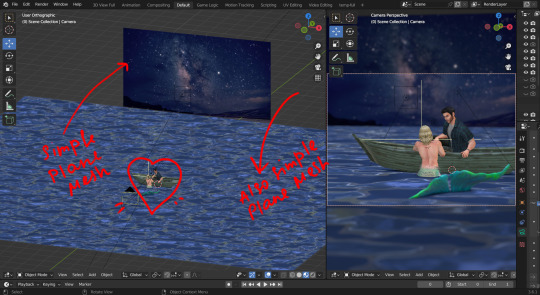
With even... simpler material :D it’s important for this material not to have any specular or other characteristics.
So, for example, I want my picture under this angle. What should I do?
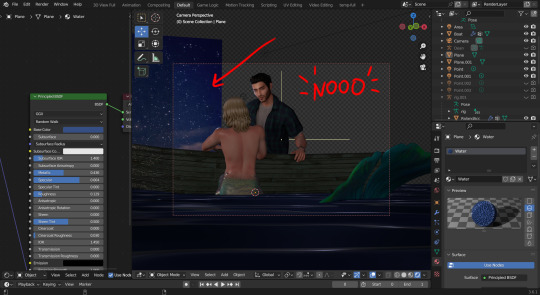
Well! Move and rotate of course! (Scale if needed :D)
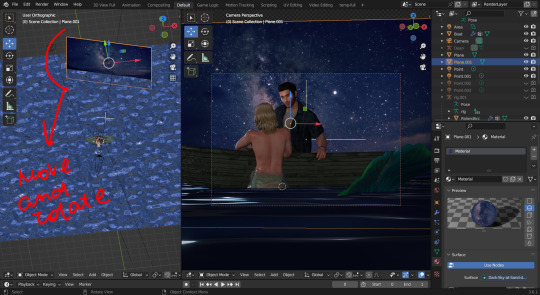
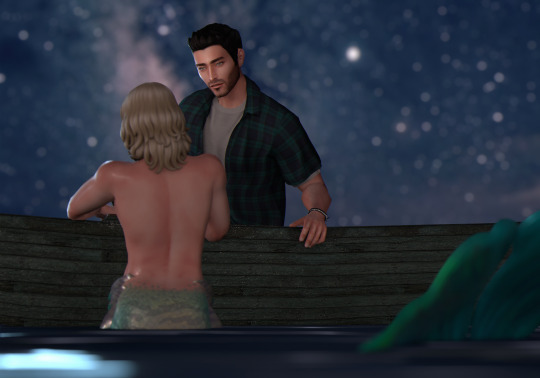
Then add Depth of Field...

And. Tada! The picture is done:D
Thank you, @glammoose for appreciating my work ^^. I doubt you’ll discover something new here, but who knows!
#sims 4 tutorials#sims 4 blender render#sims 4 blender tutorial#blender background for render#lazy background for render in blender#blender render#the sims 4 blender#sims 4 blender#blender#blender tutorial#how i set up background for my renders#render background in blender#TS4#WistfulTutorialSims4
130 notes
·
View notes
Text
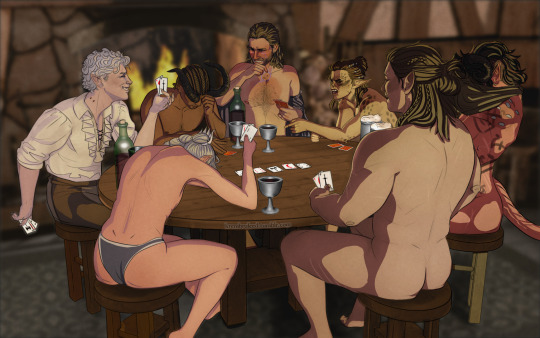
alright, the other day i loosely implied that i would make a behind the scenes/tutorial type of thing. momma didn't raise no liar, so here goes nothing i guess!
step 1) rough sketch
honestly i skip this entirely if have a really concrete idea of what i want to do. sometimes compositions are just beamed into my brain from On High and a sketch is unnecessary.
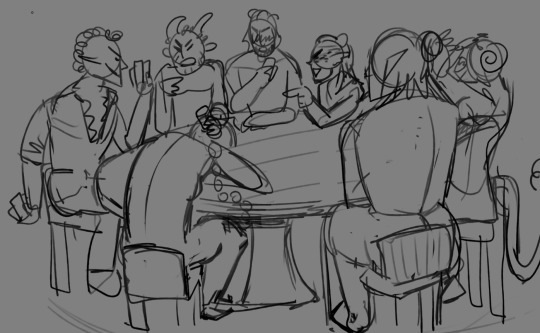
step 2) 3d ref

this is where i refine the composition, lighting, camera angles, props, etc. i use DAZ studio for model posing and blender for almost everything else (props, horns, lighting, rendering).
here's a 10 minute video on how to pose models in DAZ if you're interested in doing something like this! it's not very hard! basic posing requires almost no technical know-how.
i've heard magicposer and virt-a-mate are also good for model posing, but i don't have any experience with either program.

after i'm done posing, i transfer the models to blender so i can work on props, environment, and lighting because doing it in DAZ is ass. you can see that i went overboard on the ref for the paladin i worked on last year by modelling armor.
step 3) lineart

at this stage i'm synthesizing my 3d models, reference images, and style choices into lines.
the 3d likeness of my models is poor because I don't have time for that shit, so this is where my humongous folder full of bg3 screenshots comes into play.
for example: looking at my screenshots, astarion's forehead tilts back towards the back of his skull, much more so than my reference model. his chin and jaw are sharper and longer, and the transition between his brow ridge and nose is almost a straight line. if i combine the information from my 3d model and astarion's face, i get something like this:

3d models aren't fleshy (ie, tummy rolls, wrinkles, muscle deformations, butt squish) unless one puts in A LOT of effort like absolute madman chris jones.
you guys know bernini, right? he has a couple great examples of this. see how hades' hands press in on persephone's leg?
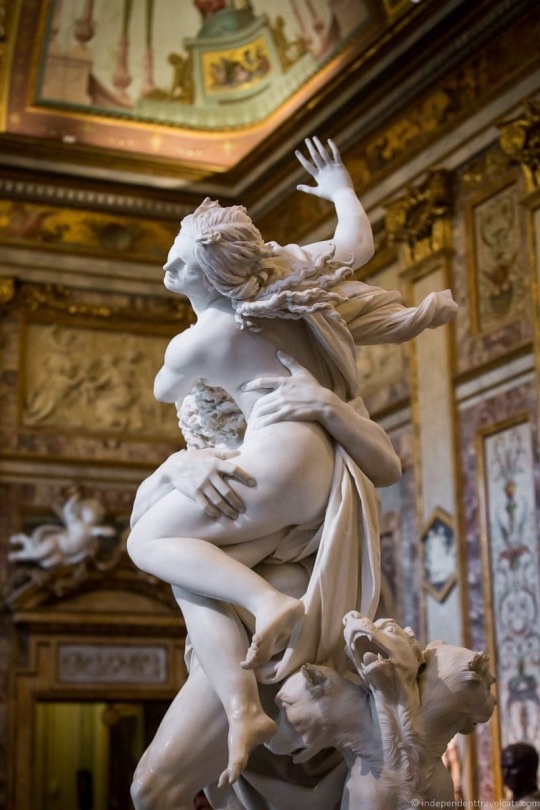

this is what we want to add in the lineart because it's too much effort for 3d. laziness is king.
i guess i draw clothes at this stage too, but for some reason there aren't many in this image. ( ͡° ͜ʖ ͡°)
step 4) base color
i have a little color picked palette that i use for everybody so i get their skintones right before i start messing with colored lighting. i'll use overlay and hard/soft light layers clipped to the base layer during the shading step later.
step 5) shading
if you thought we were done with the 3d part, guess again! i posterize my 3d reference so i can see the shapes of the shadows and highlights better. if i'm not feeling it, i can go back to 3d and change the lighting really easily.
could I make a cel shader for this? yes. am I going to? No. custom shaders are for people with intelligence and I am fresh out. posterization it is.

from there, i do a pretty standard cel shading deal that i usually blur and set to low opacity. (for this image i stuck to no blur because i had been looking at a lot of morebird's art and was really feeling the hard edges)
photoshop is what i use for final rendering because it has bangin tools. the brush customization alone make ps worth it, but i also particularly abuse puppet warp, noise generation, the camera raw filter, and layer styles.

step 6) background
i put the least effort possible into a background and then i blur it into oblivion so you can't fathom the depths of my ineptitude.
and then i have a finished image! ᕕ( ᐛ )ᕗ
#art tutorial#this got long!! the rest is under the cut#i encourage everyone to try out DAZ and blender! theyre both free!!#i love goofing around in 3d
79 notes
·
View notes
Note
Do you have any tips or good tutorial links for getting started using the hair tools in Blender? They seem intimidating, but your models look fantastic
sorry I uuuh don't watch tutorials (evil) I just fucked around for years until it suddenly clicked. So here's a few things, not sure if they'll be useful or not
also blenders particle system fur isn't being worked on anymore and is getting glitchier by the update so maybe look into geometry node fur (I haven't) (evil) also everything under the cut is assuming you know absolutely nothing about hair
this is based on blender 3.5 btw
create a particle system, put it to your desired length (short fur is usually longer than you expect) then set the number to 0, then you can use the add tool to get a symmetrical groom
the strands you add are just to guide all the fur, in areas that curve a lot add more to prevent clipping
puff brush is best girl
once you've finished your groom you can create a weight map to control the furs density (you can also make some for clumping and randomness and shit) (I usually don't) (mostly because I'm lazy) then go to children > interpolated and select your weight map in the density zoneland, if your computers beefy and/or you want a better idea of what it will look like you can change the viewport amount of particles to 100 (or whatever)
go render properties > curves and change it to strip (you don't need to do this using cycles) then back into particle properties under hair shape to change the diameter root length from 1 to whatever looks best (uber dependent on what size your model is, I usually go with 0.08)
oh fuck I forgot to mention you gotta do different systems for the head, neck, body, whatever. It makes it easier and is better for lag
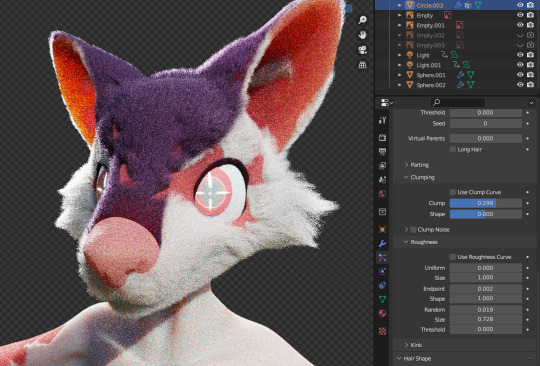
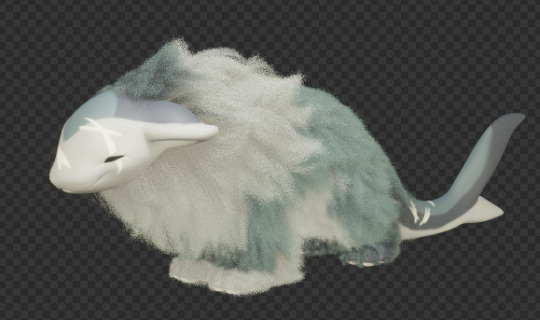
roughness is pretty important for making animal-ish fur too, here's my settings I used for making this face fur, my settings for all my particle systems are pretty consistent but it's also pretty dependent on your models size
here;s some other things I forgot and can't be bothered to go back and add
selecting this thing will let you select groups
uuuuuh I think that's it on the groom itself onto shaders
so they're pretty important to making some nice looking fur, you can make it look fine in eevee but cycles will probably always look more realistic (not to imply eevee isn't best girl it's really good at most things)

(eevee)

(cycles)
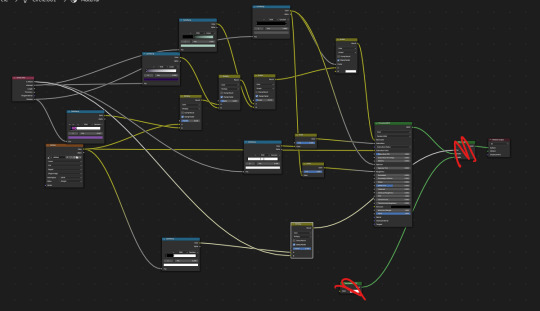
in cycles you pretty much just need a principled hair bsdf shader with a few settings tweaked (here's mine for the model above) (also make sure the fur material is different to the skin material)

so for both cycles and eevee your best friend ever is the curves info node (hair info in older versions)

all of these can be pretty useful but the most usefulest ones for me are intercept into a colour ramp makes an ombre from the roots to the tip

and random which adds variation to the strand colour

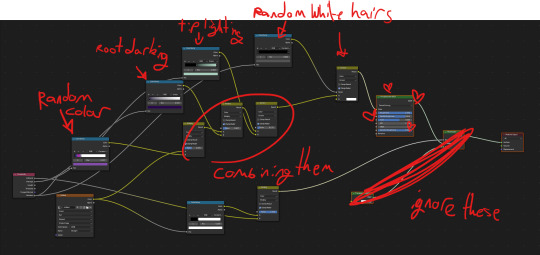
here's a little breakdown of my cycles shader for her
and eevee, they're pretty similar tbh
BUT also for eevee you need to change a few more things to give your hair weight n shit
in render properties enable ambient occlusion and bloom, then in the settings of your lights enable contact shadows
and one more important thing for nice looking hair is lighting, I find it easier in cycles because it reacts more realistically and rim lighting my beloved, but in eevee it's suuper important to making it not look flat, if doing those settings edits didn't do much it's because of your lighting
1 make your background completely black so you can see what you're doing better
2 add ONE area light and position it, pay attention to how the size, distance, and power affect things and make sure you don't make your model look flat

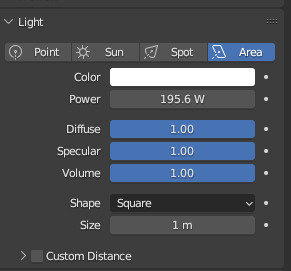
then you can add a rim light (duplicate the area light and reposition) if you want to give your character some extra highlighting, although good fucking luck if you're using eevee it's probably not worth doing
then you can add an hdri (super good webbed site for them) to be the fill light

having it at full strength tends to flatten the model (especially in eevee)
(cringe mode)

(yaaay)
and uuuuuuuuuuuuuuuuuuuuuuuuh I think that's it, I don't feel like reading all this back tbh
and please don't follow this like a loser follows the law this is just a guide and you should do whatever you find the most fun/gets the best result
ALSO ALSO don't feel upset if your first few attempts look like dogshit fur is super hard and only insane people make beautiful grooms first try
#I need to make a tag for this shit#3d blabbering#fur time#also once again I didn't watch any tutorials I could be doing this very badly and wrong#sorry for the evil rant I love talking about blender
21 notes
·
View notes
Note
Hey! Your renders are an absolute delight, I love how you do them. I do have a question though, how do you manage to get such amazing lighting? Sometimes I get really ugly, blocky shadows in blender. ;-; Is there a trick to it or is it just having well-positioned light sources?
First... thank you! o((>ω< ))o
Second: Ohhh, I know exactly what kind of blocky shadows you mean! I recently tried making a new blender file to use (I usually use a default one with the lights + background already set up) and because I was lazy, I did a sloppy job with the lights. Result? Blocky sh*t.
So yeah, I think you need properly set up light sources, multiple, to avoid those! You can then still alter them in their brightness to get some shadows, but overall... light is the key :D
Also, try to not have them directly at the model but in the distance and instead, increase their power. It'll create a softer lighting :)
8 notes
·
View notes
Note
hey thu! i love your renders and i was just wondering where/how you get ur backgrounds? i love how it fits into the render perfectly, but i have no idea where to find these backgrounds...
thank you so much!
my background depends heavily on the concept/aesthetics of the render, therefore i do it differently for each one. for some, i make the background directly in blender by importing in-game cc/3d models into the scene. for others, i make the background in photoshop using textures, png files, etc... sometimes i combine both processes too: create a bg as best as i can in blender and then finish the job with photoshop. im a lazy person so i literally just grab whatever on google that has potential and then pray to buddha that i can make them work
hope this helps!
6 notes
·
View notes
Photo
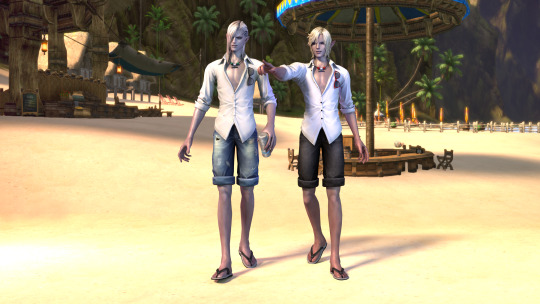
One summer day....
Because the brothers deserve some rest and some time together. Saving the world can wait for a while.
Rendered in Blender. (c) Krafton.
And yes, I was lazy so I used a screenshot as the background in a Blender scene. Recreating all these elements would be a pain and I wanted to focus on Elleon and Leander.
#tera#teraonline#tera online#elleon#elleon kubel#leander#leander kubel#high elf#elf#blender#blender cycles#boysofsummer#NPCsneedlife
11 notes
·
View notes
Photo
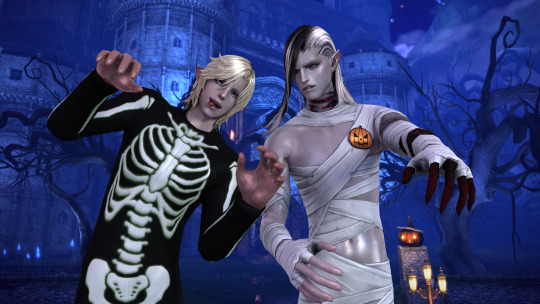
Elleon: “Really, Leander? Really? THAT face?”
Once again I was lazy with the background and used a screenshot...because it’s not the background that’s important here. And I know it’s still a few months till the next Halloween but who cares? :D I enjoyed doing that one.
Posed with Xnalara, rendered in Blender Cycles.
(c) Krafton
#leander#Leander Kubel#Elleon Kubel#Elleon#high elf#high elves#Tera#Tera online#teraonline#blender#blender cycles#3drender#halloween#kubel
6 notes
·
View notes
Last Seen Blogs