#jpg to dst converter
Text
jpg to dst converter
Converting a JPG file to DST format involves converting a raster image (JPG) to a vector format (DST), commonly used for embroidery machines. There are various software tools available for this conversion, but one of the most commonly used ones is dedicated embroidery software like Wilcom, Embird, or Tajima DG/ML by Pulse. These software packages often have built-in converters for various file formats, including JPG to DST.
0 notes
Text
We convert your scanned images from .jpg, .bmp, or .tiff file formats in a machine ready embroidery file like DST or .EMB formats for detailed embroidery digitizing visit our website website https://www.crestcreations.com/services-vector-artwork/
#PPAI#Vector#Design#artwork#art#Paper#digitization#Proofs#custom#logo#Pre#Press#virtual#graphics#digitizing#Samples#embroidery#ASI#SAGE#3D#conversion#discounts#artists#professional#computerized#service#PPAIEXPO#promotional#PNG#quality
2 notes
·
View notes
Text
how to make a digital file for embroidery machine
A Beginner's Guide to Creating Digital Files for Your Machine
The whirring of the machine, the dance of the needle, the vibrant colors coming together to form a stunning design - embroidery is a captivating art form. But before your machine stitches its magic, a digital roadmap needs to be created. This digital file, often called an embroidery file or an embroidery design, tells the machine exactly where to place each stitch and in what color.
If you're new to the world of embroidery machines and want to create your own designs, this comprehensive guide will equip you with the knowledge and steps to transform your ideas into digital instructions. Buckle up, and let's dive into the fascinating world of embroidery digitizing!
Understanding the Digitizing Process
Embroidery digitizing is the process of converting an image or artwork into a format that an embroidery machine can understand. This format typically consists of vectors (lines and shapes) and stitch information (type, length, color). The digitizing software translates the image into these instructions, essentially creating a map for the needle to follow.
There are two main approaches to digitizing:
Manual Digitizing: This is the traditional method where a skilled digitizer uses specialized software to meticulously create the stitch instructions point-by-point. It requires a deep understanding of embroidery techniques, stitch types, and fabric properties.
Automatic Digitizing: With advancements in software technology, some programs offer automatic digitizing tools. These tools can simplify the process for basic designs, but often require manual adjustments to achieve optimal results.
For beginners, starting with automatic digitizing software can be a good option. However, as you progress, understanding the principles of manual digitizing will give you more control and flexibility in creating high-quality embroidery designs.
Tools of the Trade: Embroidery Digitizing Software
The heart of the digitizing process is the software. Several embroidery digitizing programs are available, catering to different skill levels and budgets. Here are some popular options to consider:
Wilcom Embroidery Studio: A powerful and industry-standard software offering a comprehensive set of tools for manual digitizing. It comes with a steeper learning curve but is highly versatile.
Hatch Embroidery: A user-friendly software with strong automatic digitizing features and a good balance of ease of use and functionality.
Inkstitch (Free, Open-Source): A free and open-source software designed for vector art conversion into embroidery files. It's a good option for beginners or those comfortable with vector editing software. However, it may require more manual adjustments compared to paid options.
When choosing software, consider factors like your budget, skill level, desired features (automatic vs. manual digitizing), and compatibility with your embroidery machine format (discussed later).
Additional Software: Depending on your workflow, you might find other software helpful:
Vector Editing Software (e.g., Adobe Illustrator, Inkscape): For creating or editing vector artwork before importing it into the digitizing software.
Image Editing Software (e.g., Adobe Photoshop, GIMP): For preparing images for digitizing, such as reducing colors and cleaning up details.
Preparing Your Design for Digitizing
Before diving into the software, some prep work on your design can significantly improve the digitizing process and final embroidery outcome. Here's what to keep in mind:
Design Choice: Embroidery machines excel at creating bold outlines and filled areas. Opt for designs with clear, well-defined shapes for optimal results. Avoid intricate details and small text, as they might not translate well into stitches.
Image Format: Embroidery software typically works with vector formats like DST, EXP, PES, etc. If you're working with an image (e.g., JPG, PNG), you might need to convert it to a vector format using image editing or vector editing software. There are also online tools that offer basic image-to-vector conversion, but the results may require further refinement.
Color Reduction: Embroidery machines typically have a limited number of threads (usually up to 15-20). If your design has many colors, you might need to reduce the color palette to match your machine's capabilities. Software tools can help with color reduction, but it's also a good idea to experiment and choose colors that complement each other well.
Step-by-Step Guide to Digitizing with Embroidery Software
1. Import Your Design: Open your chosen embroidery digitizing software and import your prepared design (vector or converted image). The software might offer different import options depending on the file format.
2. Define the Embroidery Area (Hoop Size): Embroidery hoops come in various sizes, limiting the size of your design. Specify the hoop size you plan to use for embroidery to ensure your design fits within the designated area.
3. Underlay : An underlay is a layer of stitches placed beneath the main design elements. It helps stabilize the fabric and prevent puckering, especially for delicate fabrics or designs with dense stitch fills. Some software offers automatic underlay generation, while others allow for manual customization of underlay stitch type, density, and placement.
4. Digitizing Objects:
This is where the magic happens! Here's a breakdown of the digitizing process for different design elements:
Outlines ( (satin stitch) or (back stitch)): For outlines, you'll define the path the needle will follow using satin stitch (for a smooth, filled look) or back stitch (for a more defined edge).
Fill Areas ( (satin stitch) or ((tatami stitch)): For areas of solid color, you'll choose a fill stitch type like satin stitch (for a smooth, dense fill) or tatami stitch (for a textured fill). The software will automatically generate fill patterns based on your chosen stitch type and density settings.
Text: Digitizing text requires careful attention to detail. Some software offers automatic text conversion tools, but you might need to adjust stitch types, sizes, and spacing for optimal results.
5. Defining Stitch Parameters:
Once you've outlined and filled your design elements, you can refine the stitch properties for each area. Here are some key parameters to adjust:
Stitch Type: Choose the most appropriate stitch type for each element based on desired texture and effect (e.g., satin stitch for smooth fills, bean stitch for textured fills).
Stitch Density: This determines how close the stitches are placed. Denser stitches create a more solid look but take longer to embroider. Experiment to find a balance between coverage and stitch count.
Stitch Length: This controls the individual stitch size. Shorter stitches provide more detail but increase stitch count. Longer stitches can save time but might not capture intricate details as well.
Thread Color: Assign thread colors to each digitized element based on your chosen color palette.
6. Editing and Cleanup:
After defining the stitch parameters, it's crucial to review your work and make any necessary adjustments. Here are some things to look for:
Jump Stitches: These are non-essential stitches used to move the needle between disconnected areas. Minimize jump stitches to prevent thread breaks and improve embroidery quality.
Overlapping Stitches: Ensure stitches don't overlap unintentionally, as this can create unwanted bulk in the finished embroidery.
Smoothness of Curves: Review how well the digitized outlines follow the curves of your design. Refine anchor points or adjust stitch density if needed to achieve smooth curves.
7. Test & Save:
Once you're satisfied with your digitized design, it's wise to create a test stitch-out on a scrap piece of fabric similar to your final project fabric. This allows you to verify the stitch quality, identify any errors, and make adjustments before embroidering on your final project.
Finally, save your embroidery file in a format compatible with your embroidery machine. Most software allows exporting to various file formats like DST, EXP, PES, etc. Consult your machine's manual for the specific format it requires.
Additional Tips for Beginners
Start Simple: Begin with basic designs that don't have excessive details or complex color variations. As you gain experience, you can tackle more intricate designs.
Practice Makes Perfect: The more you digitize, the better you'll understand the software and the nuances of embroidery techniques. Experiment with different stitch types and settings to see how they affect the final outcome.
Online Resources: There are many online tutorials, forums, and communities dedicated to embroidery digitizing. Utilize these resources for additional learning and troubleshooting.
Consider Digitizing Services: If you find the digitizing process overwhelming, there are professional digitizing services available. They can create embroidery files based on your artwork for a fee.
With dedication and practice, you'll be well on your way to creating stunning embroidery designs from your own digital artwork. Remember, the journey of digitizing is as rewarding as the finished embroidered product. So, unleash your creativity, explore the possibilities, and happy stitching!
Read the full article
0 notes
Text
How to digitize a logo for embroidery in illustrator

#HOW TO DIGITIZE A LOGO FOR EMBROIDERY IN ILLUSTRATOR HOW TO#
#HOW TO DIGITIZE A LOGO FOR EMBROIDERY IN ILLUSTRATOR SOFTWARE#
#HOW TO DIGITIZE A LOGO FOR EMBROIDERY IN ILLUSTRATOR PC#
#HOW TO DIGITIZE A LOGO FOR EMBROIDERY IN ILLUSTRATOR PROFESSIONAL#
#HOW TO DIGITIZE A LOGO FOR EMBROIDERY IN ILLUSTRATOR FREE#
dst file reader you can upload your file to.
#HOW TO DIGITIZE A LOGO FOR EMBROIDERY IN ILLUSTRATOR PROFESSIONAL#
In those circumstances, you may need to enlist the help of a professional company to open the file for you. Or you could find your computer doesn’t have the necessary memory or disk space to open the file. Sometimes, as with any computer software, the file can be damaged by malware.
#HOW TO DIGITIZE A LOGO FOR EMBROIDERY IN ILLUSTRATOR SOFTWARE#
dst file with the software listed above, you may have a corrupted file. Google Chrome Embroidery Viewer and Converter Plugin
#HOW TO DIGITIZE A LOGO FOR EMBROIDERY IN ILLUSTRATOR FREE#
Most need to be purchased but offer a free trial, so you can test it out before you buy.
#HOW TO DIGITIZE A LOGO FOR EMBROIDERY IN ILLUSTRATOR PC#
dst file readers available online for both PC and Mac machines. If you don’t have the software, fear not help is available on the internet. You can choose from PC or MAC depending on the computer you have. Most of the time, your embroidery machine will come equipped with the software you need to open the. Not all software can decipher the data from a. dst file, your computer needs to have software installed to read the information contained within. The color changes when to leave sections blank, even down to which color and position to start stitching from. All the operating instructions the machine needs from start to finish are included. jpg for photos.ĭST files contain coding for embroidery machines to follow. docx does for Microsoft Word documents or. dst file because it’s a file name extension to identify the file as an embroidery format. It’s one of the most popular forms of embroidery software. These days a DST file can be found in commercial and domestic embroidery machines. It’s a computer-aided design program initially used in their commercial embroidery machines. Originally developed by the Tajima group, DST stands for Data Stitch Tajima. What Is a DST File Format for Embroidery? One of the popular versions of the embroidery format is the DST file. So there are different formats available. Not all brands of embroidery machines use the same language, though. These programs are known as software.Īn embroidery machine needs special software specifically developed for them. It can’t see it unless the image has been converted to a computer language or program it can read. Although, to be honest, watching an embroidery machine in action can be mesmerizing and hard to walk away from!īeing a computer, the embroidery machine doesn’t see the image of a cartoon character the same way we do. Leaving you to go and do something else if you get tired of watching. The machine will stitch it automatically while you wait. You simply push a button, select the design you want, and sit back. Some machines even have popular cartoon characters. There will be a selection of images ranging from flowers, motifs, and alphabets in different styles. They are computerized and most come with in-built designs. The popularity of machine embroider a design onto fabric is the reason behind the advent of specific embroidery machines.Įmbroidery machines do all the design placement, stitching, and color change for you. It sounds a bit involved, doesn’t it? Like a lot of hard work. You follow the lines you drew on the fabric first, then go back and fill in the shapes with different colors. Their intricacy depends on how well you can draw freestyle, or if you have a projector, you can trace the projected image from. Then, using a quilting foot, traditionally known as a darning foot, you create designs by moving your fabric backward, forwards, and side to side. All you need is the ability to drop your feed dogs, so they don’t grab the fabric. It sounds basic enough, but there is more to it than meets the eye.įirst, you can do machine embroidery on any sewing machine. As the name suggests, machine embroidery is embroidery done by a sewing machine. To understand DST files, you need to know a little bit about machine embroidery and how it works. Modern technology has opened it up to the world of computerized machines that use DST files to create stunning designs in a matter of minutes. Nowadays, embroidery isn’t a craft restricted to hand sewing. It’s an art form that has been around for thousands of years and it’s still as popular now as it was for our ancestors. Using different colors, thread thicknesses, and stitches, sewists of old could stitch unique and eye-catching designs to a piece of fabric to show off their needle skills.
What Are Other Embroidery File Formats?Įmbroidery is the name given to decorative embellishments sewn onto a fabric or garment with a needle.
#HOW TO DIGITIZE A LOGO FOR EMBROIDERY IN ILLUSTRATOR HOW TO#
How to Convert Images to DST Embroidery Files.What Is a DST File Format for Embroidery?.
0 notes
Text
Architectural thesis project on resort pdf
ARCHITECTURAL THESIS PROJECT ON RESORT PDF >> DOWNLOAD LINK
vk.cc/c7jKeU
ARCHITECTURAL THESIS PROJECT ON RESORT PDF >> READ ONLINE
bit.do/fSmfG
hill resort architecture thesis
resort case study pdf
farm resort architecture thesis
eco resort architecture thesis
resort design briefresort architecture case study
beach resort architecture thesis pdf
resort thesis title
Thesis proposal on resort design - Free download as Word Doc (.doc / .docx), PDF File FOR THE COMPLETION OFBACHELORS DEGREE IN ARCHITECTURESUBMITTED TO:. APPLICATION OF TRADITIONAL FORM AND DESIGN. FOR RESORT BUILDINGS IN LANGKAWI, MALAYSIA by. AYMEN MOHAMED ELMAGALFTA. Thesis submitted in fulfilment of the. ARCHITECTURE THESIS PROJECT - RESORT. 1/24 View. ×. Issuu Downloader · Scribd Downloader · Jpg to Pdf Converter. scribd.pdf-download.net In creating the sense of place, the architecture of X2 River Kwai adopted the ―light structure‖ concept to construct the project. Light structure is commonlyTo help facilitate a connection between the desired outdoors and sport participants on the mountain, the architectural interventions of this project are
https://jeduvajeh.tumblr.com/post/693121405065297920/delta-16926-sd-dst-manual, https://jeduvajeh.tumblr.com/post/693121405065297920/delta-16926-sd-dst-manual, https://jeduvajeh.tumblr.com/post/693121405065297920/delta-16926-sd-dst-manual, https://jeduvajeh.tumblr.com/post/693121405065297920/delta-16926-sd-dst-manual, https://jeduvajeh.tumblr.com/post/693121405065297920/delta-16926-sd-dst-manual.
0 notes
Text
The Benefits of Embroidery Digitizing Services: How to Save Time and Money
Embroidery digitizing services are becoming increasingly popular, as they allow for a wide range of customization options. By converting Jpg To Pes into a digital file, embroidery shops can create custom designs that can be applied to clothing, accessories, and home decor. This process begins with the creation of a vector file, These services provide a high level of customization and flexibility, allowing anyone to create unique designs that reflect their personal style.
In this blog post, we will discuss some of the key benefits of using an embroidery digitizing service, which will also help you save money while still getting the most out of your embroidery designs!
8 benefits of Embroidery Digitizing Services
Some of the benefits of using an embroidery digitizing service include:
-You can get your design files in any format that you need.

This means that you can choose the file type best suited for your needs. You can also customize your designs to ensure they are precisely what you want.
-You can get your design files in any size that you need.
This is an excellent benefit if you need a specific size for your project. You can also choose the resolution of your files, which is crucial if you need high-quality embroidery designs.
-You can get your design files in any color that you need.
This is another great benefit if you need specific colors for your project. You can also choose the thread count of your designs, which is essential if you need high-quality embroidery designs.
-You can have your design files professionally digitized to look great on your finished products.
Professional digitization can take your designs to the next level, making them look great on your finished products. This is especially important if you sell your products online or at craft fairs. A professional digitization service can help you create beautiful, high-quality embroidery designs that impress your customers!
-You can save time by having someone else create your design files.
Outsourcing your designs to a professional service can save you time and hassle. You can send the designer your ideas, and they will take care of the rest! This is an excellent option if you don’t have the time or skills to create your designs.
-You can get your design files in any language that you need.
This is an excellent benefit if you need your design files in a specific language. You can also choose the character set of your designs, which is vital if you need high-quality embroidery designs.
youtube
-You can get started on your embroidery projects right away without spending time creating your design files.
This is an excellent benefit if you want to get started on your embroidery projects. You can choose the designs you want and download them from the internet. The mega digitizing is a USA digitizing company that offers embroidery digitizing services which is an excellent option for beginners who wish to start embroidery but don’t have the time to create their designs.
-You can save money by using an embroidery digitizing service.
If you are someone who regularly orders custom embroidery designs, you know how expensive it can be to pay for each design individually. With Convert Image To Embroidery File Free , you can purchase an unlimited number of designs at the best prices. This is a great way to save money if you plan on ordering a lot of custom embroidery in the future.
If you are looking to save time and money on your next embroidery project, consider using an embroidery digitizing service. You will be glad that you did! We hope that this blog post has given you some insights into the benefits of using such a service.
Are you looking for an embroidery digitizing service? Look no further than Mega digitizing! We offer a wide range of embroidery digitizing services that will meet your needs. Contact us today to learn more about what we can do for you!
#Embroidery Digitizing#USA Digitizing#Pes File Converter#Convert Jpg To Embroidery File#Jpg To Pes#Convert Jpg To Pes#Convert Image To Embroidery File Free#Jpeg To Dst Converter#Jpg To Dst#Embroidery Digitizing Software Free#Embroidery Digitizing Software#Free Digitizing Software#Free Embroidery Digitizing Software
1 note
·
View note
Text
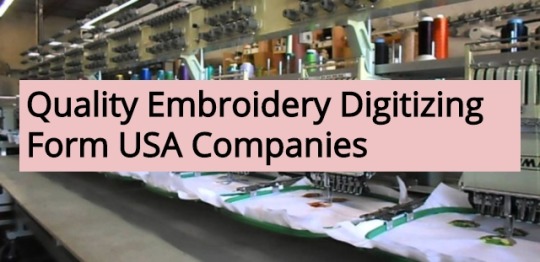
Digitizing From USA Companies
Digitizing is one of the most sought-after services on the internet today. With embroidery machines in every home, people need their designs in a format they can use. They want to use on their machines but unfortunately the machines don’t accept JPG images. Hence, it is important to have the jpg converted to a DST or any other machine embroidery format. Because of this, the services of an embroidery digitizer are very important. Using his services, they can ask him to convert any design into a machine-readable format. If you are looking for such services yourself, you need to look online for the best company.
You can find a digitizing company when you search on the search engines. There you will see many links to different companies. They are all service providers so you have the option to choose from a wide variety. You can click on a link and it will take you to their website. There you can read about their services and see their work. If you want to discuss with them about your design, you can do so with their given communication methods. Usually it is the live chat that allows customers to connect with them instantly. Otherwise, there is always the option to email.
The best way to get a great bargain is to contact multiple embroidery digitising companies. You will learn that there is a slight variation in the charges you are offered. While some of them will blow you away with their prices, most of the professionals will inspire you. You are free to choose the best price you get and also do not forget to ask them for the delivery time. Of course, you cannot wait forever, so ask them how long will they take to deliver. Based upon their delivery time quote, you can clearly distinguish a company from an individual.
Companies have no problem providing a quick delivery. They have an extensive staff available round the clock to work for their clients. If you are in a hurry, mention it to them and the ones with a professional team will agree to work on rush orders. Individuals who pose as a company will be instantly filtered. Always work with a professional company because only they can provide you with quality and adherence to deadlines. In cases of unprofessional designers, you will notice a lot of mistakes done to your file because the person tried to finish quickly and did not pay attention to details.
Whenever you are trying to get quality embroidery digitizing online, check where the company is based. USA based companies are the best to work with because they have the perfect team who know about the latest trends. They also have the best equipment and also have the top talent in the country. If you work with companies outside of the country, you will face a lot of trouble owing to long distance issues. Most companies will face time zone problems so when you post your query, it will be night time at their end and your deadline will already have passed.
1 note
·
View note
Text
Embroidery Digitizing Software Free
Never Lose A Stitch: How Embroidery Digitizing Software Can Help You Sew Like A Pro?
Have you ever seen the beautiful patterns on the dresses and thought to yourself, "wow, I wish I could do that!!". Well, with the help of embroidery digitizing software, you can!
Embroidery digitizing software allows you to transfer patterns and designs onto fabric using a sewing machine. It is a great way to personalize your sewing projects and add a unique touch.

Here, we will be discussing the different features of embroidery digitizing software and how it can help you sew like a pro!
What Are The Common Features Of Embroidery Digitizing Software?
There are a few common features of embroidery digitizing software that can be extremely helpful for those who want to sew like a pro!
Automatic digitizing: This feature can be found in some higher-end software options. It allows you to convert your image into a stitch file automatically. It can be a lifesaver if you are not familiar with how to digitize images yourself.
Edit stitches: This feature allows you to edit existing stitches or create new ones from scratch. It is perfect for those who want complete control over their design.
Adjust thread tension: This is an important feature for getting professional-looking results. By adjusting the thread tension, you can ensure that your stitches are not too loose or too tight.
Save designs: Most free embroidery digitizing software will allow you to save your designs so that you can use them again in the future, while some may charge for them.
Saving your design can be a great time saver if you frequently use the same design.
Where Can I Find Free Embroidery Digitizing Software?
There are a few places you can find free digitizing software.
Search online:
One option is to search for specific software on online forums or message boards. You can also find some free software by contacting companies that make embroidery machines and asking if they have any software you can use.
youtube
Try free versions of paid software:
Another option is to use trial versions of paid software. Many companies that make embroidery digitizing software offer free trials, which allow you to test out the software's features before deciding whether or not to purchase it.
It can be a good way to try out multiple programs to see which one you prefer before making a financial commitment.
Look for websites that offer these services:
Finally, some websites offer free online embroidery digitizing services. These websites typically have limited features and may not be as reliable as paid options, but they can be a good way to get started with embroidery digitizing if you're on a tight budget.
No matter which option you choose, be sure to read reviews of the software before downloading or purchasing it to make sure it will meet your needs.
Endnote:
If you are looking for a site that offers embroidery digitizing software free services or services at a minimal price, look no further than digitizing services at MegaDigitizing.
We offer top-quality services and software that is easy to use and helps you create beautiful embroidery designs. Whether you are looking for logo designing, 3D puff designing, or software to convert jpg to png or des files, we have it all.
So why wait! Visit our website and start using our services today! Contact us if you need more information about Converting Your Jpg to DST .
0 notes
Text
JPG Image or Logo to Embroidery File Format

We all recognize somebody WHO believes that machine embroidery may be a straightforward method – you only transfer the brand, and therefore the machine can build the planning. But hey, we tend to area unit here to burst the bubble as a result of if you would like to convert a JPG image or emblem into associate degree embroidery style, it’s attending to be a difficult method. With this text, we tend to area unit sharing the entire guide with you!
JPG – what's It?
These area unit the foremost image file formats with a pel configuration. after you transfer the photographs from a smartphone to a laptop, it's extremely possible to be in JPG format. This format is nice and wide used as a result of they need compression, which suggests the standard are going to be higher even with alittle size. additionally, they're compatible with net browsers.
Embroidery File – what's It?
There area unit differing kinds of embroidery files, starting from vector-based graphics to pixel-based graphics. The embroidery file must have varied items of data to make sure the embroidery machine will complete the embroidering job. a number of this data includes completely different colours, sewing sorts, sew density, angle, and order. There area unit completely different formats of embroidery files, however you'll be able to simply convert the JPG into associate degree embroidery file.
Logo conversion
When it comes all the way down to JPG image or emblem to embroidery file format, it falls underneath the class of emblem conversion. it's necessary as a result of the embroidery machines aren’t designed to browse similar files because the laptop will. For this reason, it’s necessary to digitise the brand, therefore the embroidery machine will know it to start out embroidering. However, since there area unit completely different embroidery file formats, the embroidery machines will solely support specific formats, and that we area unit sharing the information;
Brother embroidery machines work with .kwk
Happy embroidery machines work with .tap
Tajima embroidery machines work with .dst
Janome embroidery machines work with .jef
Converting JPG Image To Embroidery File Format
Now that we've shared data concerning each forms of files, we will begin with the conversion method. However, detain mind that you simply can would like the digitizing computer code for reworking the formats. within the section below, let’s investigate the instructions;
1. Uploading the brand
First of all, you have got to transfer the JPG image or emblem on the computer code that you’ve selected . certain|confirm|certify|ensure|make certain|check that} that you’ve cropped out the unwanted space (the blank space) to form sure nothing further gets adorned .
2. Setting the planning Size
When you have uploaded the cropped emblem, add the specified size and dimensions. detain mind that what dimensions you set in are going to be the scale of embroidery, thus take it slow in drawing out the scale. Once you decide on the specified sizes, lock the brand.
3. choose The sew sort
There area unit varied sew sorts on the market with completely different textures and appearances. additionally, each sew sort encompasses a most length of stitches that should be thought-about. whereas selecting between the sew sorts, think about the fabric’s push and pull and kind. within the section below, we tend to area unit sharing data concerning 3 common forms of stitches, such as;
Straight sew – this can be the foundational sew wherever straight lines area unit used repeatedly to make a pattern. The users will build thicker lines by continuation the stitches. It will be used for curving shapes and is appropriate for detail work, outlining, and shading
Satin stitch – this can be an inexpensive choice if you would like to form text embroidery. it's a extended length which ends in a very shiny look, and therefore the length goes up to twelve.1mm. The stitch works for borders, texts, words, and for embroidery that must look shiny
Full sew – this can be referred to as cession sew and tatami sew and is employed for filling functions. It tends to supply a plain-woven look, and therefore the length goes up to 4mm. it's appropriate for making the rough-textured
appearance, filling within the style, and for larger styles
4. Setting The Directions
When you have selected the specified sew sort, you would like to line the direction for outlining the map for embroidery machines. In less complicated words, it helps offer sequenced directions for the sewing. detain mind that sew patterns can have completely different shades, contours, and textures betting on the sew, thus consider carefully. Also, setting the directions can guarantee a fair pattern, less thread consumption, and a time-efficient method.
5. Setting The Thread colours
The computer code can show the colour bar, and you would like to settle on the thread color for embroidery. it's necessary that you simply match the thread colours to the Pantone colours of the brand.
6. Transferring Files To Embroidery Machines
When you have selected all the options and styles, you'll be able to transfer the new embroidery file format to the embroidery machine. It depends on however you're exploitation the computer code, thus you'll be able to make a choice from a flash card and USB cable for transferring the files.
If you simply wish to convert the JPG emblem into the embroidery format, this can be the last step as a result of the new format is transferred to the embroidery computer code. within the next step, you simply have to be compelled to prepare the machines for reworking the embroidery file format to period of time embroidering on the material.
Read the full article
0 notes
Text
How to convert jpg to Embroidery File
How to convert jpg to Embroidery File? Free & Fast
Do you want to want to learn how to convert jpg to embroidery file? JPG is a famous realistic arrangement, portrayed by a high picture pressure rate. In easier terms, a JPG picture is an advanced picture that contains compacted picture information. It is helpful while in photo-shoot and some other stuff.
PES and DST are probably the most well-known weaving document designs you can utilize. You…
View On WordPress
0 notes
Text
ImageMagick おぼえがき
概要
ImageMagick という画像ファイルの処理に特化した多機能なコンソールプログラムがあるのですが、 簡単な処理のために毎回使い方を調べている気がするので、よく使うコマンドを記録しました。
コマンド
ファイル形式を変更
// png から jpg に変換 $ magick src.png dst.jpg
アニメーションgifを作る
// 5 fps (1 フレームあたり 20 / 100 sec), 無限ループ $ magick convert -delay 20 -loop 0 *.jpg output.gif
単一ファイル処理
$ magick src.jpg <処理> dst.jpg
引数の順番が大事。
複数ファイル一括処理
// src ディレクトリ内のファイル全てに対して<処理>した結果を dst ディレクトリにそれぞれ同名で保存 $ magick ./src/*.jpg -set filename:f %t <処理> ./dst/%[filename:f].jpg
<処理> クロップ
// 左上から右に10px、下に20pxの位置を基準(クロップ範囲の左上)に 横640x縦480 のサイズでクロップ -crop 640x480+10+20
なお基準位置の方位指定オプションもあり(デフォルト左上)
<処理> リサイズ
// アスペクト比を維持したまま 1600x1200 に収まる最大サイズへサイズ変更 -resize 1600x1200
<処理> 圧縮率指定
// 85 を超えるとファイルサイズが急激に大きくなるらしい、最大100 -quality 85
補足
ググると convert コマンドが紹介されることが多いが、古い形式なので基本的に magick と読み替えれば大丈夫。 または "$ magick convert ..." とすればいいはず。
0 notes
Text
Get Your Embroidery Digitize Logo Ready At Cre8iveSkill

How to Digitize a Logo for Embroidery- Step by Step Digitizing
Logo digitization is a process of converting the existing logo or brand icon into a stitch file that can be transferred to a fabric through means of embroidery. The basic principle of digitizing involves the use of the logo in JPG or PNG format so that the machine can understand it and then transfer the same to digitization software for machine embroidery.
Now, before actually understanding the step by step digitization process, let us get into understanding the essentials that define and shape the process of logo digitization.
File Formats Accepted by Embroidery Software and Machines

When it comes to digitizing, there are many file types that are readable and accepted by machines. Some of these formats include:
DST
EXP
JEF
KWK
DSB
TAP
Types of Stitches Used for Machine Embroidery
Straight Stitches: These are stitches for making straight lines and curved shapes with major use in shading, outlining, and detail work.
Satin Stitches: These are commonly used for writing the text, designing the logo, or for the borders with a view to give a shiny appearance to the final outcome.
Fill Stitches: These are used for filling up the blank spaces in a piece of cloth and majorly put into the process to create a textured look and deliver increased durability.
Types of Digital Embroidery Used for Commercial Purposes
To apply the logo to any piece of garment, the following types of commercial embroidery are put to use.
Standard Embroidery: The name itself defines a standardized approach to customizing the process and outcome of logo digitization.
3D Puff Embroidery: This type of embroidery for digitization helps achieve a textured element to the logo or emblem of your brand with a dimensional depth and elegant feel.
Laser Embroidery: This is a layered form of embroidery where the logo place is confirmed and the material is pushed inside the machine so that the laser technology designs the desired pattern without the use of any stitching.
Patch Embroidery: This form of embroidery is most simple with the fabric being stapled with the logo and then placed on the desired garment using various embroidery designs and patterns.
Step by Step Logo Digitizing Process
Now, when we are aware of the essentials, let us get into understanding the process to digitize a logo for embroidery.
Step 1: The first step is to upload the logo of your brand to the embroidery digitizing software. The uploaded file should be in machine-readable formats like JPG and PNG and then crop the irrelevant spaces to upload the exact requirements to the software.
Step 2: Once you have uploaded the logo, set the dimension of your logo design as you want it to be on your product. This dimension will be the final size of the logo placed on the garment.
Step 3: Now, choose the stitch type like a straight stitch, fill stitch, or satin stitch in response to the kind of stitching you looking to have for your logo. Each type of stitch has its own set of parameters, feel, and length that defines the final appearance of the design.
Step 4: After selecting the type of stitch, the next step is to set the direction of the chosen stitch. This defines in which direction the stitch should be falling on the garment.
Step 5: After all the major parameters are selected, it is time to select the color combination of the threads to be used for logo digitization. The thread colors should fall aligned with the colors on the logo.
Step 6: Now, the file is ready to get transferred to the embroidery machine using a flashcard, USB cable, or any other means of transferring to the computer running the embroidery digitization software.
Step 7: The next step is to prepare the machine for the process of logo digitizing for embroidery. This step includes deciding on the needles, threads, sequence, and orientation. After setting the guidelines for the machine it is important to position the fabric in the actual loop for embroidery.

Step 8: The last step is to test while embroidering a sample and see how it comes and how does it appear on the fabric. Check for all the pre-mentioned guidelines concerning colors, position, orientation, sequence, stitch, and other design elements.
Step 9: Now, take the final step of creating the logo on the desired piece of fabric while accomplishing the process in the most fruitful manner.
Now, the digitized logo is all set to be delivered with the most inspiring look and feel of promoting your brand in an innovative way.
Source : https://www.cre8iveskill.com/shop/category/embroidery-designs
#Embroidery Digitizing Service#Illustrator vector Art#Embroidery Services#Garment Manufacturing#Clothing Manufacturers#Custom Clothing Manufacturers#Custom Embroidery Digitizing#Vector Art Online#Custom Embroidery#Cre8iveskill
0 notes
Text
Converting Your Jpg to DST
Bring Your Vision To Life: Use Custom Embroidery Design Software!
There's no doubt that custom embroidery can add a unique and professional touch to any garment or product. But what if you don't have the time or money to invest in a professional designer?
No problem! You can design your custom embroidery using software that's easy to use and very affordable.
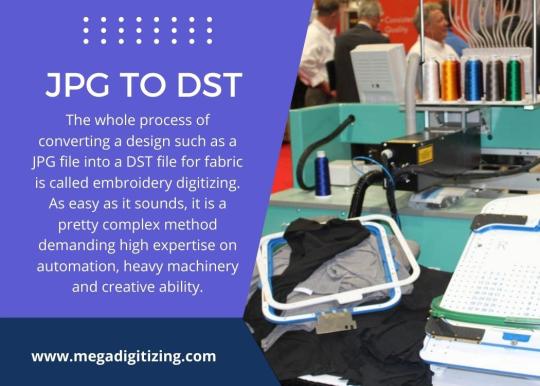
Whether you are trying to design a logo for your new startup or want to add a personal touch to a gift for a friend, converting your jpg to DST file for custom embroidery software makes the process quick and easy. And best of all, you don't have to be an expert designer to create beautiful results.
What are JPG and DST?
JPEG is a file format that is often used for storing digital photos. DST is a file format that is used for storing embroidery designs. To convert a JPEG file into a DST file, you must use special software.
Why Is It Important To Use Jpeg To Dst Converter For Embroidery Digitalizing?
There are a few reasons why it's important to use a JPEG to DST converter for embroidery digitizing.
First, converting a JPEG image to a DST file allows you to create a custom embroidery design from the JPEG image. You can use your designs or images to create beautiful embroidery designs.
Second, a JPEG to DST converted file will have a smaller file size than the original JPEG image. This is important because the file will take up less space on your computer or embroidery machine's memory.
youtube
Lastly, by using a converter, you'll be able to optimize the image for embroidery. It means that you can change the stitch type, density, and other settings to ensure that your design looks perfect.
What Are The Steps To Convert A JPEG Image To A DST File?
There are only a few steps you need to follow to convert a JPEG image into a DST file:
First, you'll need to find a good-quality JPEG image that you want to use for your embroidery design.
Next, you'll need to choose a reliable JPEG to DST converter.
Then, you'll need to upload the JPEG image into the converter.
After that, you can select the settings for your embroidery design, such as stitch type, density, and more.
Finally, you can download the DST file and use it with your embroidery machine.
Converting a JPEG image to a DST file is quick and easy, and it allows you to create beautiful custom embroidery designs. By following the steps above, you can ensure that your design will turn out perfect.
The Final Note:
Custom embroidery is a great option if you want to add a personal or professional touch to any garment. And with JPEG to DST converter software, you can easily design your embroidery without investing in a professional designer.
So why wait! Visit our website at mega digitizing and convert your jpg file to DST, and get started on embroidery today!
Contact us if you need more information about Embroidery Digitizing Software Free !
0 notes
Link
How do we convert JPG to PES embroidery digitizing files?
We have a team of some highly skilled embroidery digitizers. They use different embroidery software to convert JPG to PES. Not only DST, PES. Also, we provide almost all kinds of major embroidery formats. Because there are different machines which require different files. So, we try to provide all major available formats of digitizing to our clients. As well as the source file.
So, the first step of our digitizing is we ask the client for the artwork. And we give the price for the file according to the file. Whatever pricing options they choose, we offer the beatable prices always. So, after choosing the package, we ask the client to place an order or to pay for the file. As soon as we get the payment, we start working ASAP.
#embroidery file#Convert image to embroidery file free\#Convert image to embroidery file free#Embroidery Digitizing Service#Embroidery Digitizing#Custom Embroidery Digitizing
0 notes
Text
How to find a Top-Notch Quality Embroidery Digitizing Service?
Embroidery digitizing is converting a pattern or design or lettering to a computer-readable form of stitches that can be fed to an embroidery machine capable of stitching on a piece of fabric through automation. These embroidery designs must be carefully digitized so that the sew-out will be 100% satisfactory.
Only professional embroidery digitizing service provider can give the expected high-quality output. The deeper the experience, the stronger the result delivered with incredible quality, timely delivery, precise digitizing, and an inspiring feel. Let us see more about Embroidery digitizing.

Finding a good Embroidery Digitizing Service:
A good Embroidery Digitizing Service provider starts with analysing the given artwork and check if it requires any further modifications. All the offered artworks cannot be directly converted to stitches; they may need any additional changes for a clear finish. The Embroidery Digitizing Service provider must choose the exact size for the pattern or text and check if an outline is needed. A small text embroidery digitizing requires additional care for more visibility.
Before start designing, a good Embroidery Digitizing Service provider will ask about the type of fabric on which the design needs to be embroidered. Next, they will ask regarding the output format and size. Further, they might even suggest any better design, size of text, layout, or design style.
Embroidery digitizing requires more attention to Design Visibility, Column Size, Opening Size, Density of Stitches, Push and Pull, Underlay, Travel Stitches, Trims, and Locks for a long-lasting and precise finish.
Online is the best source to find many embroidery digitization services. But the top-notch quality embroidery digitizing goes to experienced technologists and innovative artists who can beautifully synchronize the colorful threads and excellent designs into machine-read files. So, we have a leading company that is experienced more than 20 years in this field and even support through online embroidery digitizing service. Let us see more in the next section.
DesignsIn24:
Designsin24 is a Master's in Embroidery Digitizing. It is an initiative by Bitsnpixs, which is situated in the USA. Their core services are Embroidery Digitizing, Logo Designing, Image Enhancement, Raster to vector conversion, etc. They work with modern designing and digitizing techniques to satisfy the Clients with their best. The Customers of DesignsIn24 are leading promotional products companies and distributors.
Before starting any project, they get all the required details from the Client without any delay. Their experienced designers and digitizers are so professional that they do even minor details in designs with reduced thread breaks, less production time, and minimum stitch count. Their output designs are so apparent that they minimize the production time with less material, thereby reducing the final embroidery costs by maintaining the highest quality stitch outs.
They are always reachable online and support you online. The final output is always confirmed with the Client, and any alteration is made without hesitation to reach the Client's maximum satisfaction, which is highly appreciable where most embroidery digitizing service provider fails to do.
The Turnaround Time is so short, which will blow away the mind of any Client who wants to complete the work faster overnight without any compromise in quality. DesingsIn24 are active 24*7, and their turnaround time is less than 24 hours. You can send any designs or patterns in jpg or png format. They provide the sew-out file per the Client's requirements, such as EMB, DST, PES, etc.
Some of the digitizing services provided by DesignIn24 are Embroidery Digitizing Service, Applique Digitizing Service, Chenille Embroidery, Small Text Digitizing. They are serving Online Embroidery Digitizing services around the globe. Some of their best Embroidery digitizing are below for your reference.
Embroidery Digitizing
Applique Digitizing
Small Text Digitizing
Chenille Digitizing
The Embroidery digitizing is not only limited to business folks but also whoever needs customization for gifts, parties, events, surprises, etc.; for a professional Embroidery Digitizing Service with 24/7 support and quick turnaround time of 24 hours around the globe, visit DesignsIn24 at www.designsin24.com or send your inquiry at [email protected] or call +1 (631) 353-4291.
0 notes
Text
The Utmost Effective 5 Most Asked Questions About Embroidery Digitizing - Cochrane, Alberta, Canada
Electronic embroideries need to have artisans of their own individual sort identified as Digitizers or Punchers, the hugely proficient people who have the ability to flip any style, whether it is brand, photo, illustration of any kind right into a set of particular instructions through various application, that are later transformed into unique equipment readable structure, to get executed, i.e. embroidered via the equipment on a certain garment.
In purest feeling, embroidery digitizing is the entire process of converting any artwork, pictures, textual content, any kind of style, into an embroidery style and design which the embroidery device can understand and execute the embroidery within the garment. Embroidery digitizing, Vector art for monitor printing, Custom Brand Styles, Workwear or school put on badges, T-shirt custom made patterns, designs for caps, embroidered baggage. In addition, embroidery digitizer converts your artwork into digitized file with no compromising and tempering of the initial design.
In case you are seeking the best resources of excellent embroidery digitization, by far the most reliable source of equipment embroidery, embroidery stamping and vector artwork companies, that you are at the proper put. We operate with educational institutions, colleges, corporations along with other intuitions and digitise artwork which customers deliver in JPG to a embroidery file all set to be embroidered. Digitizing Impex offer rapidly and affordable tailor made vector art products and services on-line with quickly flip all over time of 24 hours!
Embroidery Digitizing Products and services - We provide Good quality Designs at Flat Expense to Try. We also give successful vector artwork providers with outstanding high-quality. Vector Conversion Drummondville, Quebec, Canada . We offer Embroidery Digitizing Services and Raster to Vector Artwork Conversion solutions begins at cheapest pricing for each artwork.
Digitizing Impex has become supplying the best digitizing artwork for embroidery and vector conversion considering that 2008 with Countless contented customers, which has helped it receive a premier placement in the market. We have been the largest Digitizing and Vector Artwork Firm with 24/seven Aid. Embroidery & Digitizing, our objective is to generate your organization stand out with exceptional excellent and continue to keep our prospects thrilled with unmeasured customer support.
Our expert services also include things like embroidery style and design on Clothes, Bags, Headwear, Uniform dresses and various extras with good quality embroidery digitizing. Our seasoned digitizers manually change your style into the digitized embroidery file format within your preference. We provides excellent embroidery digitizing service and vector at reduced cost.
Embroidery Digitizing and Vector art Products and services. Our embroidery digitizers focus on smaller textual content digitizing, 3-D embroidery digitizing, appliqué digitizing, and all other digitizing strategies for all attainable garments article content' placement like remaining chest logos, jacket back again logos,… Brand Digitizing and Embroidery Digitizing Services We offer emblem digitizing or digitizing products and services.
We generally battle to provide as good good quality as one can do. We make revisions till we get the absolute best outcomes, but if a client just isn't absolutely pleased with a digitize logo or vector artwork logo, we don't bill that digitize logo or vector artwork symbol. We focus on modest text digitizing, 3-D embroidery digitizing, Applique-digitizing, and all other digitizing tactics for all possible types like remaining upper body logos, jacket back again logos, patches on numerous fabrics, textures, fashion apparel, and so on. Smaller letters in embroidery is really a nightmare For numerous digitizers; they don't understand how to digitize 5mm letters, properly, but we do. You should Call us if you are not happy with the present-day digitizer and trying to find superior digitizing top quality.
Providers and merchandise: digitizing, digitizing, digitize embroidery, embroidery digitizing, embroidery designs, vectorization, Emblem Digitizing, Cap brand Digitizing, Hat Logo Digitizing, Significant Jacket Backs Digitizing, Applique Digitizing, 3D digitizing, 3D Embroidery Digitizing, 3D Puff Digitizing, Raster to Vector, Vector Conversion, Graphic to EMB conversion, Image to DST Conversion, Graphic to MLS Conversion, Impression to Ai Conversion, Picture to EPS Conversion, Picture to CDR Conversion etc.
applique embroidery digitizer
About Me : 55 yrs old ICT Income Representative Kevin Stanforth from Oromocto, has lots of hobbies and interests including snowshoeing, Embroidery Digitizing and eating. Was these days gonna Kenya Lake System in the Great Rift Valley.
Tags: Embroidery Digitizing in Medicine Hat, Alberta, Canada, computer embroidery punching, custom digitizing services, digitizing machine, embroidery digitizing freelance jobs, logo digitizing service, professional digitizing, sew what pro digitizing
0 notes
Last Seen Blogs
mx-metronome
#thatnumberskid

sikasukih
Untitled

the-ruthless-dm
It's Adventuring Time!


kingersroom
kinger's room