#curtain rod brackets 1 inch
Text
The Ultimate IKEA Curtain Shopping Destination in Dubai
You know the feeling. You move into your new Dubai apartment, excited to finally have a space to call your own. But then reality hits - those bare windows are begging for some style and privacy. Don't worry, IKEA has got you covered. Their curtain section is a one-stop shop for transforming your space. Whether you're going for blackout darkness or just a little shade, modern minimalism or bohemian chic, IKEA's selection hits every style and budget.

Hanging and Styling Your New IKEA Curtains
Now that you have your new IKEA curtains in hand, it’s time to get them up on your windows! Hanging IKEA curtains in Dubai properly makes a huge difference in how they look and function.
Measure Your Windows
The first step is to measure your windows accurately. Measure the width at the top, middle, and bottom of the window, and use the smallest of the three measurements for the curtain rod length. Then measure the height of your window in three places as well, and use the largest measurement to determine your curtain length. It’s best if your curtains end 1 to 2 inches above the floor.
Choose Your Hardware
Next, pick out your curtain rods and any mounting hardware you’ll need based on your window measurements. IKEA has lots of affordable options like metal or wooden rods. Consider finials for a decorative touch. For most windows, you’ll want to mount the rods 3 to 4 inches above the window frame.
Attach the Brackets
Attach the mounting brackets to the wall on either side of your window. Make sure they’re level before you put the rod in place. If you’re not comfortable drilling into the wall, you can opt for tension rods that expand to fit the width of your window.
Put Up the Curtain Rod
Slide the curtain rod through the mounting brackets or tension rods. Check that the rod is level for the best appearance.
Add the Curtains
Finally, attach your new curtains to the curtain rod one at a time. IKEA curtains typically come with pre-made loops or tabs at the top to slide easily onto the rod. Pull the curtains across the rod to the desired location and you’re done! Open and close your curtains and enjoy your new window treatment. With the right hardware and installation, your IKEA curtains will look custom-made.
Conclusion
Well, there you have it, everything you need to know about the ultimate IKEA curtain shopping destination in Dubai. Now armed with the inside scoop, you can head to Festival City Mall with confidence, ready to find stylish and affordable curtains and drapes to suit any room in your home. Whether you're looking for blackout curtains for the bedroom, sheer panels for the living room, or fun prints for the kids' rooms, IKEA Dubai has you covered.
0 notes
Text
How to measure Readymade Curtains the right way when using a rod ?
What is the correct method of measuring the size required for your Readymade Curtain when using a rod to hang Eyelet Curtains?
This sounds Simple, but many of us end up making some error or the other. In this blog we are going to explain step by step how to take correct measurements of your doors and windows so that you can order the RIGHT size Readymade Curtains.
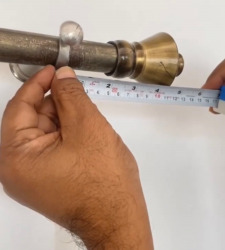
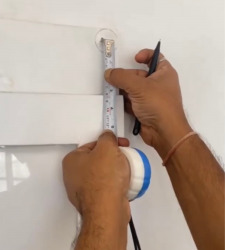
Always use a metallic measuring tape.
Use a Stable Ladder if the height is high (eg above ~8 feet)
Make it a point to do this in a twosome.
Ensure the tape is straight while measuring.
Height Measurement for a Door : Now set the tape on top of the rod and take it all the way down to the floor. Record this measurement in inches. Special Note: When we hang the eyelet Curtain, due to the inner dia of Eyelets, the curtain rises 1.25” above the rod.
Scenario-1 : You want no gap between the curtain bottom and the floor, Add 1.25” to the measured height.
Scenario-2 : You want 0.5” gap between the curtain bottom and the floor, Add 0.75” to the measured height. ARIANA recommends this in general as this ensures minimum light passing from below the curtain and this looks most aesthetic.
Scenario-3 : You want 1.0” (or 1.25”) gap between the curtain bottom and the floor, Add 0.25” (or zero) to the measured height. This is the second number recommendatio by Ariana as this also takes care of Curtains not getting dirty while sweeping.
Scenario-4 : You want 2” gap between the curtain bottom and the floor, Reduce 0.75” to the measured height. Ariana does not recommend going beyond a 2” gap.
6. Height measurement of a Window : Where (a) We want the curtain to fall on the window ledge, ideally we should add 1.5” to our measurement. (b) We want the curtain to fall below the window Ledge. We need to safely add 6”-7” (Reason being, one this will not allow the light to pass even if their is light to medium wind.)
7. Width Measurement: Measure left to right the entire rod upto both ends of the brackets. Record this measurement in inches. Add 10” (If you are on a budget, you may decide not to add any inches) to this measurement to ensure that you have created play as when curtains are hung together, they are not of cut to cut size, this will make light gaps beween two curtains. Now the question is how many lengths of Readymade Curtains to order.
(a). When Width of Curtain is specified as 48”. Please note that the curtain will invariably be of ~ 46” in width ( as the most manufacturers use 48” fabric and ~2” goes into the side stitching ). A thumb rule is to use a 50% rule of the specified width as we ned to make the pleats too. So Coverage for 48” will be 24”. Max you can stretch (if you are on a budget) is 30”.
(b). When Width of Curtain is specified as 54”. Please note that the curtain will invariably be of ~ 52” in width ( as the most manufacturers use 54” fabric and ~2” goes into the side stitching ). A thumb rule is to use a 50% rule of the specified width as we ned to make the pleats too. So Coverage for 54” will be 27”. Max you can stretch (if you are on a budget) is 32”-33”.
So now if your measured with is 96”, you add 10” making it 106”. If buying the 48” width Curtain you need to divide 106” by 24” (=4.41). In case we do not add 10” the width is 96” so the number is 4 panels of curtains. Or in other words if we take 106’ and divide by 4, the result is 26.5” which is in between 24’ and 30”, so this works. So its a bit of trial and error also to arrive at the perfect number.
Shop Readymade Curtains — Blackout, Sheer, Jacquard, Combo Curtains now at https://www.ariana.in/readymade-curtains . Checkout our Bedsheets, Towels, Rugs, Cushion Covers, Dining & Kitchen, Smart Furniture, etc at https://www.ariana.in/.
#readymade curtains#custom made curtains#door curtains#door window curtains#door curtains online#window curtains#window curtains for home#window curtains for bedroom#window curtain designs#curtains#blackout curtains#sheer curtains#curtains for living room#curtains online#curtains for bedroom#linen curtains#curtain shop near me#curtain designs#boho curtains#curtains for home#long curtains#blackout curtains for bedroom#floral curtains#designer curtains online#curtain store
0 notes
Text
How to Hang Door Curtain Panels?

Door curtain panels are a great addition to any home, providing privacy, style, and even some soundproofing benefits. Whether you’re looking to add a decorative touch to your doorway or create a barrier against noise and drafts, hanging door curtain panels is a simple and effective solution. In this article, we will guide you through the process of hanging door curtain panels, ensuring a hassle-free installation.
Measure the Doorway
1. Before purchasing door curtain panels, it’s crucial to measure the dimensions of your doorway. Use a tape measure to determine the width and height of the opening. Make sure to add a few extra inches to the measurements to allow for a proper drape and coverage.
Choose the Right Door Curtains
2. When selecting door curtains, consider the specific needs and preferences for your doorway. If you’re aiming to reduce noise and create a soundproof environment, opt for soundproof door curtains specifically designed to absorb and block sound. These curtains are usually made of thick, heavy materials that effectively minimize noise transmission. Additionally, choose door curtains that match your interior decor and personal style, ensuring a cohesive and visually pleasing look.
Install Curtain Rods or Tracks
3. Next, determine the type of hardware you will use to hang the door curtain panels. There are two common options: curtain rods and curtain tracks. Curtain rods are typically more decorative and are attached above the doorway using brackets. Curtain tracks, on the other hand, are more discreet and can be mounted directly to the ceiling or wall. Choose the option that best suits your aesthetic preferences and the layout of your doorway.
Mount the Hardware
4. Using the appropriate tools, mount the curtain rods or tracks according to the manufacturer’s instructions. Ensure that they are securely attached to the wall or ceiling, as the weight of the door curtains can put strain on the hardware. It may be helpful to use a level during the installation process to ensure that the rods or tracks are perfectly horizontal.
Hang the Door Curtain Panels
5. Once the hardware is securely in place, it’s time to hang the door curtain panels. Begin by gently opening the curtain panels and sliding them onto the curtain rod or track. If you are using curtain rings with clips, attach them to the top edge of the curtain panels and then hook them onto the rod. Make sure the panels are evenly distributed along the rod or track to achieve a balanced look.
Adjust and Style
6. After hanging the door curtain panels, step back and assess their positioning. Adjust the panels as needed to ensure they hang straight and reach the desired length. Experiment with different draping styles to find the look that best suits your taste and complements the overall decor of the room. You can leave the curtains slightly open for a casual and inviting look or pull them closed for maximum privacy.
Finishing Touches
7. To complete the installation, consider adding additional accessories to enhance the functionality and aesthetics of the door curtain panels. For example, tiebacks can be used to hold the curtains in place when they are open, adding a decorative element to the overall design. Alternatively, if you want to achieve a more secure closure, install magnetic or Velcro strips along the sides of the door frame and attach corresponding strips to the curtain panels.
In conclusion, hanging door curtain panels is a straightforward process that can greatly enhance the appearance and functionality of your doorway. By carefully measuring the doorway, choosing the right door curtains, installing the appropriate hardware, and following the steps outlined above, you can easily hang door curtain panels in your home. Whether you’re looking to create privacy, add style, or enjoy the soundproofing benefits of soundproof door curtains, this simple installation can transform your space while providing practical benefits.
#curtains#home improvement#blackout curtains#soundproof curtains#window treatment#soundproof#thermal
1 note
·
View note
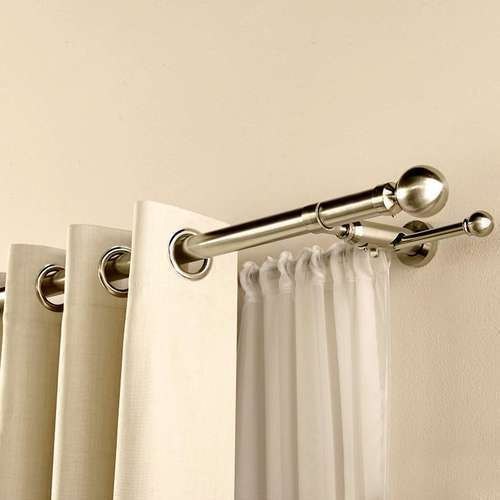
Photo
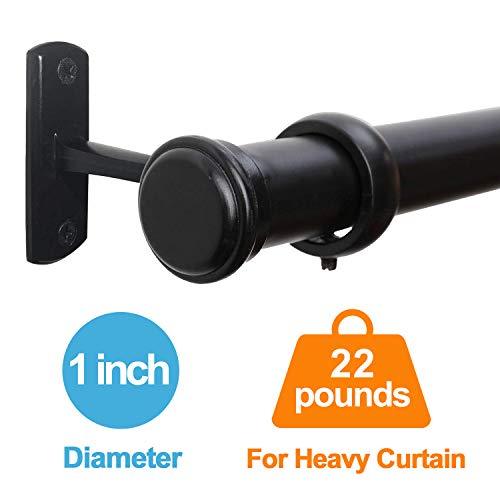
1 Inch Curtain Rods 48 to 86Inch, Curtain Rods for Windows 48 to 84, Hanging Curtain Rod&Wall Mount with Brackets, Outdoor Curtain Rod, Curtain Rods for Windows 48 to 86Inch Black
0 notes
Text
the best & stong curtains rod
The best curtain rods aren’t used only for keeping your curtains up, they are also used as a decoration for your bedroom or living room. A nice curtain rod adds to the design of your room, especially if it goes really well with the design of your drapes. Of course, there are so many different types of rods that are out there. So you might be a bit perplexed with all the brands, types, and designs available.
To help you out, we made this little guide that can help you choose the right curtain rods for your room. In this buying guide, I’ve listed all the important things that you have to consider before you buy a curtain rod. You can use this comprehensive guide to help you pick out the best curtain rods for your drapes.
We’ve also included a list of some of the best brands that you can find in the market. With this list, you can at least narrow down your choices down to six so that you won’t have such a hard time making your choice. Let’s start with the buyer’s guide.
The Best Curtain Rods on the Market Today
How to Select the Best Curtain Rod
When you buy your curtain rod, you have to have some sort of criteria that you can follow so that you can make the best choice. So if you want to buy the right type of curtain rod, then you can follow consider the following:
Types of Curtain Rods
The first thing that you have to take into consideration would be the type of curtain rod that you want to get. Generally, there are four types of rods which are the classic rod, the return rod, the tension rod, and the track rod. We’ll go through them one by one.
These are the types of curtain rods that you can choose from. The type that you choose will really depend on your needs and preferences. At least by knowing the choices, you’ll be able to know what exactly you’re looking for when you want a curtain for your home.
Curtain Rod Size
The next thing that you have to take into consideration would be the size of the rod. First, you have to consider the diameter of the rod because you don’t want a rod that’s too thin; otherwise, it will break apart. We suggest that you get a rod that is at least 1 inch or 2.5 centimeters. Not only are thin rods too lightweight, but they also tend to look a little cheap depending on the design you get. This does not mean that you shouldn’t get a rod that has a diameter of less than 1 inch though. You can still get one that has a 0.75-inch diameter of a 0.5 inch diameter. However, you just have to make sure that the curtains aren’t that heavy; otherwise, your rod won’t be able to bear the weight.
Next, you have to take into consideration the length of your rod. The rod should be longer than the window size by around 3 to 6 inches. This will allow you to make your window look bigger than it really is, and it can allow your curtains to have longer coverage so that you can more effectively block off light. If 3 inches is a bit too long, then you can have 2 inches instead.
Materials
You must also make sure that you choose the best material suited for your drapes. Usually, homeowners would pick materials based on the decor and design of their rooms. For instance, if your room has dark colors and a lot of wooden furniture, then you can get a wooden material rod. The most common materials that you can pick out are wood, resin, metal, and glass. By far, metal is the most versatile and the most commonly used by a lot of homes because they aren’t too flashy and they’re not too dull either. However, the material will really depend on what kind of vibe you want to give to your room. Just pick the one that suits the place.
Design
There are so many designs that you can choose from. There are rods that have circle ends or even variously shaped ones. There are those that have leaf designs or halberd designs at the end. The design that you’ll choose depends on your own individual taste. We recommend that you choose one that complements your room with regard to color, furniture, and decor.
Support Brackets
You will need a rod that has the right number of support brackets. Support brackets are there so that your rod can hold the weight of the curtains. So whenever you look for a curtain rod, you must look for one that has support brackets after every 50 inches. This is the ideal structure for the support brackets so that your curtain rod can support the curtain’s weight. You see, some curtains are heavier than others, so you’ll want to be sure when you buy the road. Of course, this means that longer rods will have more brackets on them. Just remember to take this into consideration when buying your rods.
Color and Stain
You must also take into consideration the color of your curtain rod. Again, the color of the curtain rod will depend on the color of your room. Take into consideration the walls and the color of your curtains when choosing the color of your curtain rod. You’ll want a curtain rod with a color that blends with the color of your walls and your curtains.
Price and Branding
The last things that you’d want to take into consideration are price and branding. While you may want to save money when you buy your curtain rod, you’ll definitely not want to scrimp on quality. If you buy one that is too cheap and comes from an unknown brand, it might just break apart after a few months or so. We suggest that you buy one that is reasonably priced but comes from a good and reputable brand.
All of the brands that we included in our list are well known brands that produce high quality products and are priced quite reasonably. So if this is your first time to buy a curtain rod and you don’t have a benchmark when it comes to pricing, check out the list we provided below.
1 note
·
View note
Photo
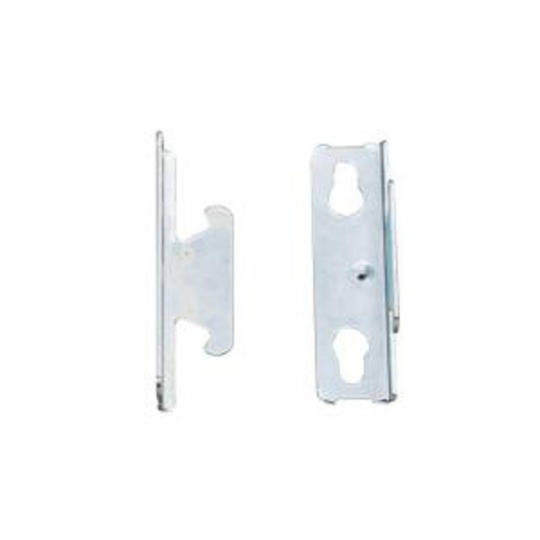
High Quality Curtain Rod Hardware High Quality Curtain Rod Hardware | Howdy beloved visitor. Hunting for new choices is probably the exciting activities however it can be also exhausted whenever we might not obtain the desired plan.
#curtain rod bracket extensions#curtain rod bracket location#curtain rod bracket placement#curtain rod brackets 1 inch#curtain rod brackets at walmart#curtain rod brackets brushed nickel#curtain rod brackets large#curtain rod brackets masters#curtain rod brackets menards#curtain rod brackets nz#curtain rod brackets short#curtain rod brackets with shelf#curtain rod brackets wood#curtain rod hardware vancouver#curtain rod without brackets#curtain rods without hardware#double curtain rod brackets nz#double curtain rod brackets umbra#outdoor curtain rod hardware#yiwu uro curtain rod hardware factory
0 notes
Text
Teamwork Makes the Dream Work
I get ideas. LOTS of ideas. If you need an idea, I have plenty that you can borrow. My husband would love it if you’d take some ideas off my hands. That’s because they often involve him and a screwdriver and/or a trip to Lowe’s. He thinks of things that I don’t consider...like what’s behind a wall or how much does that thing weigh? I’ll explain.
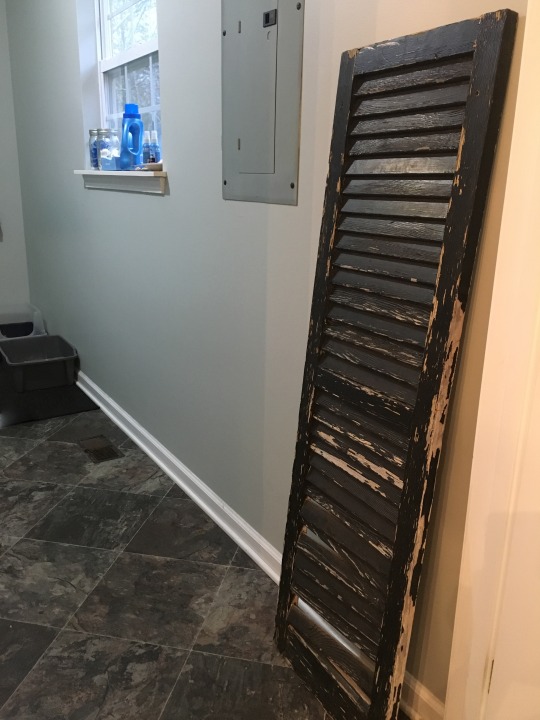
Over a year ago I dragged home a rickety, old shutter from a barn sale. It needed a home and I just knew that it would be perfect on a wall in the kitchen with recipes or photos clipped to it, or maybe over a headboard with a garland strung across it. I figured that I’d stare at it a while and it would tell me where it needed to go. Well, it clammed up and I ignored it until last week. I dragged it out and propped it up in the laundry room. My reasons were twofold...I tend to put all of my supplies on the window sill in that room which creates clutter. Also, that room has the electrical panel that is a necessary eyesore in any house. I wanted to use that window sill for some pretty potted herbs or succulents, and as it turns out that shutter is just wide enough to cover the ugly panel.
This room is neglected. It’s where the cats do their business and where I moan about folding laundry.
I did a little measuring and ordered two wire baskets from Amazon.
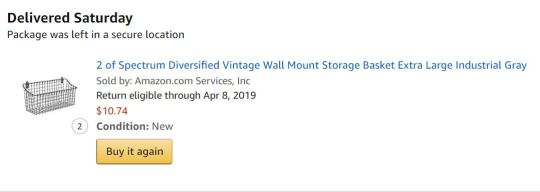
Then I told the mister what I planned to do - attach the baskets to the shutter, hang the shutter over the panel, and create adorable laundry storage and free up that window sill. Genius, right? Nope. He immediately told me that I couldn’t drive a nail into the wall above that panel because there are bundles of wires behind it and yadda, yadda, electrocution, death, short out the whole house, and rain on my parade. Then he mentions that the shutter might not weigh all that much, but once it’s loaded down with my laundry supplies the hanging mechanism needs to support it and blah, bah, blah, I’m not a carpenter. You get the idea. BUT...because I am married to a wonderful man who likes to make my dreams come true, he got busy. He unscrewed the panel to see just where the wires were grouped, then he rummaged through his toolboxes and found just the right size sawtooth hanger, and then he even added brackets to the back of that loosey goosey shutter to make it stronger. While he was doing all of that he even took the time to screw the baskets on for me. Sure, my way would have taken fifteen minutes but we’d probably be dead and the house would be on fire.
So once he did the construction part of things, I got to do the fun part - making it pretty. I raided my Ball jar stash in the garage and started filling jars with stuff I use daily. Tide Pods and Oxy-Clean pods...

Snuggle and dryer balls...
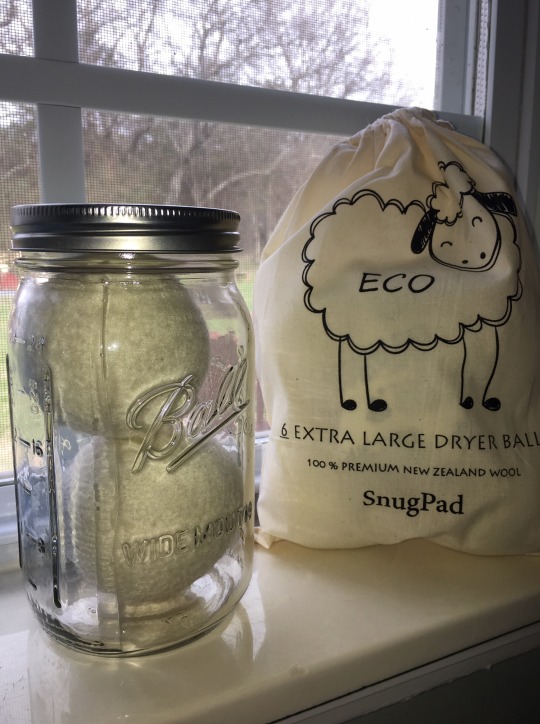
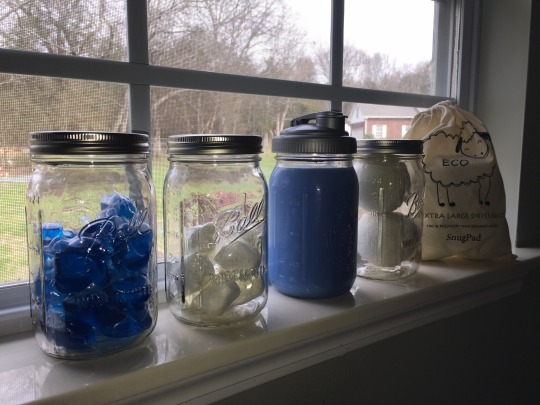
I picked up a pour cap for the liquid fabric softener and it’s a perfect fit.

Now everything is off that window sill and is both useful and decorative. Two of my favorite things!
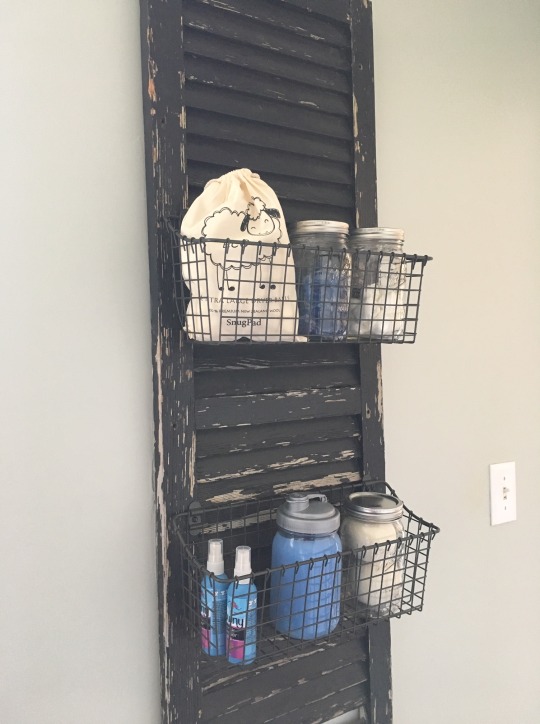
Presto, change-o, no electric panel to be seen! If we ever need to access the panel, we’ll simply take those jars out and lift the shutter off its hanger. Easy Peasey. I absolutely LOVE it.
The room still needs a little fluffing. For example, because of the location of that electric panel, the shutter is a tad higher than I would have liked it - but if I put a curtain rod over that window and hang a little lace valance I think it will balance it.
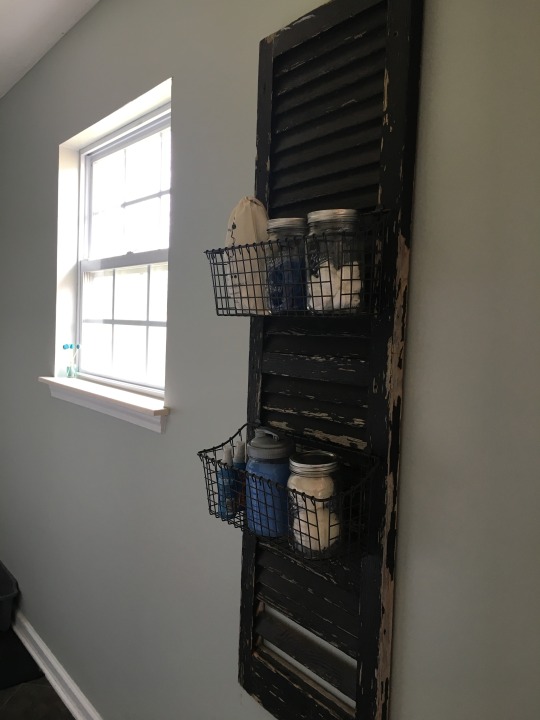
I don’t even care - that’s how much I love it.
And while we’re on the topic of my laundry room, I’d like to share a little something that I love and can’t live without.
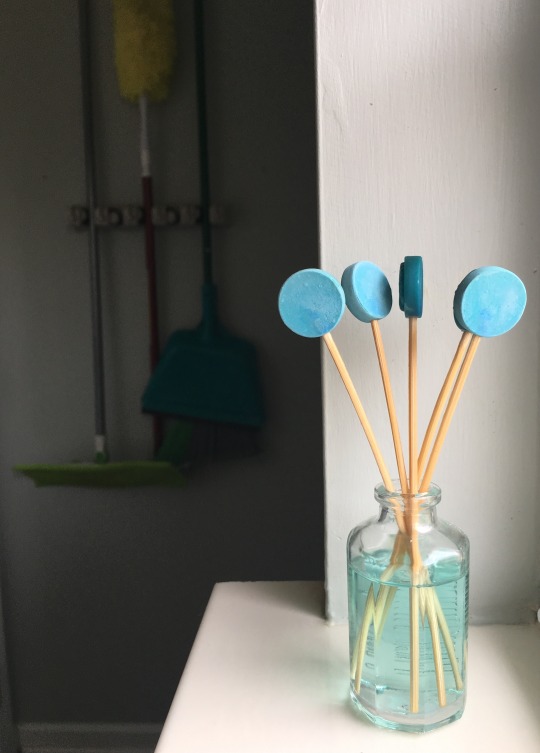
That little bottle makes most of my house smell divine. It really is smaller than it looks in this photo - maybe five or six inches tall. It’s a fragrance diffuser from Pier 1. I’ve used them for quite a while and they. are. fabulous. They offer a wide variety of scents, something for everyone. This one is Sea Air. I also love the Pink Champagne. In the fall I buy their spice cake and pumpkin fragrances. Mickey uses Moroccan Vanilla upstairs in his office. They last much, much longer than any other home fragrance I’ve tried and they don’t give me a headache like so many of the plug-ins and burning candles. These little things are wonderful and they’re only $6.95. Even better, there’s almost always a sale or coupon to get them even cheaper. You guys know how cheap financially responsible I am - I’ve found that with MANY items, not just at Pier 1 but most stores, if you can order it online and pick it up in store (where’d you be going anyway to buy it) you can almost always apply an online coupon and get a tasty discount. Check retailmenot.com and you can find a code nearly every time. I’ve done it everywhere from Target to Kirkland’s and even Belk. Even better, if you’re picking up an order at Kirkland’s they’ll give you a 15% discount on anything you buy while you’re there to get your order. Picking up that doormat you wanted and spy the perfect birthday gift for a friend? Discount! My husband knows that I’d rather have a root canal than pay retail, but I’m even happier if I can bring home a broken $5 shutter and turn it into something I love. If it’s chippy and worn, even better. I may need a truck so I can bring home more things to save us money.

1 note
·
View note
Video
KUNSHAN CARSAI AUTO PARTS INDUSTRY CO., LTD
https://www.carsai-precisionparts.com/
Whatsapp&WeChat: +8615212743691
email: [email protected]
---------------------
ISO certificate factory black powder coated paint bracket prototype laser cut steel metal custom Factory
metal bracket manufacturers uk,metal bracket fabrication,the metal bracket company,metal mounting brackets,c metal bracket,metal bracket support,metal h bracket,metal construction brackets,j metal bracket,l metal bracket,metal bracket manufacturing process,sheet metal bracket manufacturing process,how are metal brackets made,metal bracket manufacturers,s metal bracket,t metal bracket,u metal bracket,z metal bracket,z shaped metal bracket,2 metal bracket,3 metal bracket,4 metal bracket,4 inch metal brackets,4 by 4 metal brackets,6 metal bracket,8 inch metal brackets,c metal bracket,j metal bracket,l metal bracket,t metal bracket,u metal bracket,z metal bracket,3 metal bracket,6 metal bracket,metal bracket suppliers,metal wall bracket suppliers,small metal bracket suppliers,metal mounting bracket,metal bracket support,metal frame brackets,metal mounting brackets,metal u brackets,metal connector brackets,c metal bracket,metal u bracket,metal mounting brackets home depot,j metal bracket,metal u bracket for wood,l metal bracket,s metal bracket,t metal bracket,metal bracket manufacturers uk,u metal bracket,metal u brackets home depot,z metal bracket,z shaped metal bracket,2 metal bracket,3 metal bracket,3 inch metal bracket,3 inch flat metal bracket,4 inch metal brackets,4 metal bracket,6 metal bracket,8 inch metal brackets,steel bracket suppliers,steel bracket supplier malaysia,stainless steel pipe bracket suppliers,steel bracket material,stainless steel bracket manufacturer,stainless steel angle brackets suppliers,steel l bracket manufacturer,metal bracket manufacturers uk,steel z bracket,1 steel bracket,1/4 steel bracket,steel bracket manufacturers,stainless steel bracket manufacturer,steel angle bracket manufacturer,steel l bracket manufacturer,steel bracket material,steel bracket thickness,steel bracket,steel bracket supplier malaysia,steel bracket manufacturing process,sheet metal bracket manufacturing process,steel z bracket,1 steel bracket,1/4 steel bracket,3/8 steel bracket,powder coated brackets,rubber coated brackets,plastic coated brackets,coated angle brackets,coated l brackets,zinc coated brackets,coated orthodontic brackets,coated shelf brackets,powder coated bracket,rubber coated bracket,coated angle bracket,coated l bracket,plastic coated bracket,black powder coated bracket,white powder coated bracket,powder coated angle bracket,ceramicspeed coated bottom bracket,ceramicspeed coated bottom bracket review,coated ceramic bottom bracket,powder coated corner bracket,rubber coated l bracket,powder coated l bracket,dual coated l bracket,black powder coated l bracket,plastic coated l brackets,black powder coated l brackets,white powder coated l brackets,powder coated mounting bracket,powder coated metal bracket,powder coated post bracket,coated brackets,powder coated shelf bracket,black powder coated brackets,simpson powder coated brackets,abru powder coated brackets,white powder coated brackets,powder coated t bracket,powder coated u bracket,coated steel wall bracket,painted shelf brackets,painted angle brackets,painted gable brackets,painted caliper brackets,painted wall brackets,painted wood bracket,painted metal bracket,painted iron shelf brackets,painted handrail bracket,painted curtain rod bracket,ikea shelf brackets painted gold,
0 notes
Text
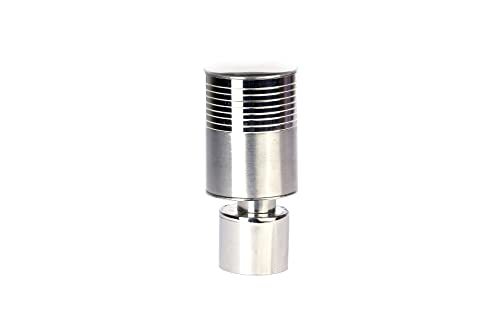
kreyam's Curtain Bracket Set Accessories - with 8 Line Design at Upper Side Stainless Steel (Set of 4)
kreyam’s Curtain Bracket Set Accessories – with 8 Line Design at Upper Side Stainless Steel (Set of 4)
Price: (as of – Details)
kreyam's Brackets for window curtains is made of premium quality stainless steel and alloy. Curtain Holders crafted of beautifully to use in your bedroom, kitchen, living room, bathroom or office for adding a touch of modern style to your décor. Curtain Brackets Set beautiful finials are suitable for rod-pocket style curtains and 1 inch rods.
Product Dimensions:12 x 17…
View On WordPress
#bathroom linen#bedding & linen#carpets & rugs#curtains accessories#cushions & cushion covers#diwan cover sets#inflatable beds pillows & accessories#kitchen linens
0 notes
Text
📷📷📷
STANDARD CURTAINSAll our standard size curtains comes in pair.For e.g., If the order is for 84-inch height Eyelet/ American pleat curtain & the quantity selected is 1, you will be getting 2 curtains & the total coverage will be 58" X 84" (W X H)CUSTOMISED CURTAINSAll our customized curtains comes in pair.Here you have to provide the window height, i.e. from rod/track till the height you want the curtain. The width measurement has to be from rod/track bracket to bracket. Don't put individual curtain widths in customized curtain columns. FOLLOW OUR MEASURING GUIDE NOTE & VIDEOFor eg: if the height of the window is 300cms & the width of the window is 200cms, the quantity selected is 1 & the pleat selected is eyelet, you will get 2 curtains of height 300cms & flat width 200cms each. The coverage will be 200 cms X 300 cms ( W X H) after setting the folds.Whereas in American pleat you will get 2 curtains of width 100cms each. The pleats/frills will be fixed. Here also the coverage will be 200 cms X 300 cms ( W X H)
https://www.curtainlabel.com/linen-naturals-curtain.html?filter=selectroom
0 notes
Text
How To Hang Blackout Curtains

Blackout curtains are a popular choice for those seeking to enhance privacy, block out light, and reduce noise in their homes. Whether you have custom blackout curtains, printed blackout curtains, outdoor blackout curtains, back tab blackout curtains, blackout noise reduction curtains, or outdoor blackout curtains, knowing how to hang them properly is crucial to maximizing their effectiveness. In this article, we’ll provide you with a step-by-step guide on how to hang blackout curtains.
Measure Your Windows
1. Before purchasing blackout curtains, measure the width and length of your windows to ensure a proper fit. Take into account any additional width needed for the curtains to overlap when closed to achieve maximum light blockage.
Select the Right Curtain Rod
2. Choose a sturdy curtain rod that can support the weight of your blackout curtains. Opt for a rod that extends beyond the width of your window frame to allow the curtains to cover the entire window when closed.
Install the Curtain Rod
3. Using a measuring tape, mark the desired height of your curtain rod brackets on either side of the window frame. Ensure that the brackets are evenly spaced and level. Using a drill or screwdriver, secure the brackets into place.
Prepare the Blackout Curtains
4. If your blackout curtains have wrinkles, consider ironing them on a low heat setting to remove any creases. If necessary, follow the manufacturer’s instructions for washing or cleaning your curtains prior to hanging them.
Attach Curtain Hooks or Rings (if applicable)
5. Some blackout curtains may require the use of curtain hooks or rings. If your curtains have back tabs, skip this step. Otherwise, attach the hooks or rings to the top edge of the curtains according to the manufacturer’s instructions.
Hang the Curtains
6. Slide the curtains onto the curtain rod, making sure they are evenly distributed along the rod. For back tab blackout curtains, fold the tabs over the rod. For curtains with rings or hooks, attach them to the curtain rod.
Adjust the Length
7. If your blackout curtains are too long, you may need to hem them to the desired length. Use fabric scissors to carefully trim the excess fabric, leaving a few inches for the hem. Fold the hem twice to create a clean edge, then secure it in place using fabric tape or by sewing it with a needle and thread.
Test the Effectiveness
8. Once your blackout curtains are hung, close them fully to test their effectiveness in blocking out light. Make any necessary adjustments to ensure the curtains provide the desired level of darkness.
Consider Additional Installation Techniques
9. For maximum noise reduction, you can consider installing blackout noise reduction curtains in addition to your regular blackout curtains. These specialized curtains feature extra layers of sound-absorbing materials and can be hung using the same techniques mentioned above.
Maintain and Clean Your Blackout Curtains
10. Regularly maintain and clean your blackout curtains according to the manufacturer’s instructions to keep them in optimal condition. This may involve vacuuming or spot cleaning to remove dust and stains.
By following these steps, you can easily hang your blackout curtains and enjoy the benefits they provide. Whether you have custom blackout curtains, printed blackout curtains, outdoor blackout curtains, back tab blackout curtains, blackout noise reduction curtains, or blackout outdoor curtains, proper installation ensures they effectively block out light, reduce noise, and enhance privacy in your home.
#soundproof curtains#window treatment#blackout curtains#curtains#home improvement#soundproof#thermal
1 note
·
View note
Text
sunflower kitchen curtains
If you are looking for some quick ways to freshen up your kitchen without making too many changes, consider adding sunflower kitchen curtains to your windows. Here are some things to consider that can make a tremendous impact on your kitchen.
If you want to freshen up your kitchen without making too many changes, consider adding valances to your windows. Valances can have a tremendous impact on your kitchen because they can change the feel of a room dramatically.
79 Gorgeous Kitchen Window Options and Ideas
Valances are a popular kitchen window treatment idea that is impractical. You can cover only the top portion of your windows with them, they measure about 18 inches in height, they are made of fabric, and you can purchase them in numerous styles. They may be mounted on boards, rods, or poles.
Use valance panels to create drapes. A variety of options are available for curtains, including custom-made treatments or new designs that can incorporate existing styles or a combination of both. The shape and style of window and a budget will help you determine the scope of the project.
Window treatments are sometimes called top treatments and offer endless possibilities. Used alone or over another window covering top treatments provide both decorative and functional benefits: they can make a window seem larger than it really is, hide wall imperfections or tie in architecture. The elements are combined in a seamless fashion.
Before deciding on which window treatments to use, there are a few things you have to consider. For example, are the windows below the level of your main floor? What sizes are your windows? Will you be using returns for this room? Are there obstacles in the way like protruding furniture or other items that will block light from entering? What items do you want to place on the top of your cabinets? How much will you overlap the window? This information will help you visualize the end result and also help you measure your window accurately.
Many colors, materials, and designs are available in valance. You have a lot of room for creativity because you can choose semi-circular or straight-lined valances. Durable materials would be the best choice for a kitchen. The material of sunflower kitchen curtains for window coverings makes the walls look beautiful and attractive to the eye. It is important to know the difference between how easy it is to maintain your kitchen window treatments.
For the most personalized effect, choose resources that express your lifestyle: materials textures colors and design. If you are uncertain about color combinations patterns and overall design, then custom-made treatments or making your own is also an option. Customized window treatments will allow for a practical use of any accessories or embellishment and give the window your personalized custom look.
How to Add Pleats to a Valance
Edge a favorite fabric with a coordinating pattern and add pleats to create a custom valance. Here’s how:
Materials and Tools for sunflower kitchen curtains
fabric (two complementary patterns)
lining
measuring guide
scrap paper
1×4-inch mounting board
iron
staple gun
drill
L-brackets
sewing machine
thread
Steps:
Draw a sketch to determine the desired size of the valance before it is pleated. Add seams at both sides of sunflower kitchen curtains, the corner pleats, and the panels. If necessary, sew pieces together to obtain the desired width (be sure that seams are hidden within pleats).
First line the book with the main fabric. Then sew a total of 16 inches of the main fabric to seven inches of contrast edging and another 16 inches of lining below that.
Turn the valance in half, right-side out. Sew the seams together along both sides. Turn the valance right-side out and iron it flat. Pin the pleats in place to make sure they hang straight, then steam them into place after sewing. Stitch up one side of the leaf, then back down four inches. Stitch in a line just above where you will sew the leaf to the mounting board.
Cut the mounting board to the desired width and drill the holes for the L-brackets. Cover the board with the main fabric using a staple gun. Keep track of where you have drilled holes for your brackets so you can complete step 4 correctly. Staple the valance to the board with pins still in place. Remove all pins and attach your valance to your wall or door with L-brackets. Attach the board to the wall. Use L-brackets or screws and attach the board to the wall.
How to make a stenciled valance.
Paint the windows. Pick out a precut pine plank to use as your valance, and paint on it with some easy-to-use craft supplies.
Measure Window
Measurements should be noted on a notepad. Use a pencil to make the measurements. A good valance height for windows in rooms with 8 to 10-foot ceilings is 10 inches wide by 6 inches deep.
Create Valance Box
Referring to measurements taken with a pencil and notepad has a 1-by-10-inch piece of wood cut into a pine plank at the local home improvement store. Using a drill, drive 2-inch wood screws through all three boards to assemble the box.
Materials Needed:
precut planks of 1×10-inch pine
L-brackets
drapery panel or fabric by the yard
measuring tape
yardstick
pencil
notepad
scissors
clear acetate alternative
cutting mat
scratch paper
marker
retractable utility knife
Spray paint on a flat surface, or use fabric paint.
stencil brush
drill
2-inch wood screws
roll of batting
staple gun
staples
fabric steamer
drill
screws
Measure Window
Use a tape measure to determine the proper measurements for a valance. Write down these measurements on a note pad using a pencil, and make adjustments based on your room’s ceiling height. It is better to make the valance shorter than too-long.
Create Valance Box
Measurements should be made with a pencil and notepad. 1-by-10-inch pine planks should be cut to size at a local home improvement store. Using a drill and 2-inch wood screws, assemble the precut planks of pine into a three-sided box.
Cut Batting
Fold batting over the top of the valance box. Then cut to size using scissors.
Wrap and Staple Batting
Wrap valance box with batting. Use a staple gun to attach the batting along the inside of the box.
Measure and cut the fabric or panel. Measure and cut the fabric or panel to fit.
Place the yardstick directly on top of the fabric or drapery panel. Measure overall height and depth of the valance box using a yardstick. Cut the fabric or drapery panel to size with scissors.
Steam
Hang cut fabric or drapery panel along a door or drapery pole. Use a steamer to remove all wrinkles.
Wrap and staple fabric or panel.
Wrap the cut fabric or curtain around the valance box. After wrapping, staple along the interior of the valance box. When you look up into the valance, it should be visible from behind.
Sketch Monogram to Scratch Paper
Create a custom monogram stencil by placing scratch paper on top of the cutting mat. Then draw your custom monogram with a pencil.
Trace the Monogram to the Clear Acetate Alternative.
Place clear plastic directly on top of the sketch paper. Next, trace your monogram to the plastic using a marker.
Cut Out Stencil
The utility knife should be used to cut out a monogram from the clear plastic.
Place Stencil and Add Paint
Measure out the width of the monogram, then place it in the center of valance. For fabric, use a stencil sunflower kitchen curtains on which you have written your monogram. Position the stencil so that it is directly above the monogram, aiming straight down. Hold the can of spray paint about 8 inches from the surface of the fabric and apply even coats by moving back and forth slowly. Dip the stencil brush into the paint. Then dab it onto the stencil directly. Allow 30 minutes for the paint to dry before removing the stencil.
Attach to Wall With L-Bracket
Attach L-bracket to wall. Next, place valance into the L-bracket so that it is secured in place from above with screws.
How to Build a Wooden Window Valance
Tools and Materials for sunflower kitchen curtains:
circular saw
finish nailer
jig saw
miter saw
measuring tape
screw gun
wood glue
1/2 sheet of medium-density fiberboard (MDF)
1×3 clear pine for ledger
molding
caulk, paint and painting supplies
Steps
Draw a box the length and height of the cornice. If you want a scalloped edge or any other design on the bottom of the valance draw it onto the wood. For a symmetrical pattern draw your design to half-way point of your pattern. Trace the pattern onto a piece of paper. Cut out a piece of cardboard to be used as a pattern. Cut the pattern out on both sides of the cardboard, then flip over the cardboard and cut one side again. If you are making more than one valance, use a template to ensure all valances are identical.
Measure and mark for returns. The width of the returns depend upon the window treatments that will be hanging under the cornice. Measure the window treatments when they are open and closed. The returns will be attached to the backside of the cornice face but not to the front side. edge.
Cut out the shape of the cornice with a circular saw. Then use a jigsaw to cut out the design.
Attach the cornice with wood glue and nails. Use wood glue to attach the cornice on one side of the roof.
Measure and cut the molding. At the corners, cut the molding at a 45° angle and cope a piece for a tight fit. Nail the molding onto the cornice box.
Fill in any gaps with caulk sand. Smooth the edges of all the cornices and prime them with a coat of primer then paint them. Let them dry completely before sealing or decorating them.
Cut the 1×3 to size for the ledger. The length of the ledger should be just a little shorter than the width of the cornice box. Screw the ledger to the wall. There should be a solid header to attach it to. If not, find studs and attach the ledger to them.
Screw the cornice box to the ledger. Screw it to the ledger to make sure that it will remain in place.
Read also : kitchen faucets lowes
https://kitchengs.com/?p=8530
0 notes
Photo

knobelite(4 Pack) 1-Inch Diameter Single Window Treatment Curtain Rod,22-inch to 42-inch Adjustable,Gold Decrative Window Treatment Drapery Rods,with Resin Finial Brackets & Hardware #1Inch #42inch #AdjustableGold #Brackets #Curtain #Decrative #Diameter #Drapery #Finial #Hardware #knobelite4 #Pack #Resin #Rod22inch #Rodswith #Single #Treatment #Window
0 notes
Text
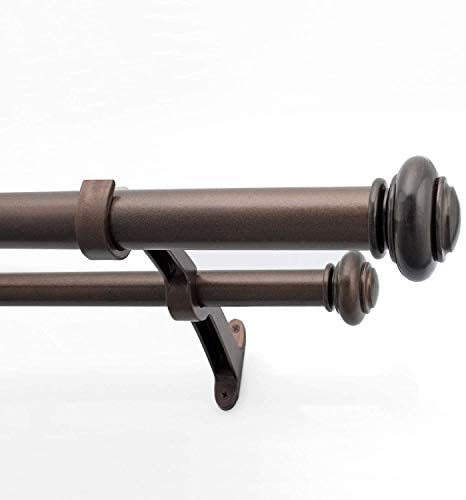
Deco Window 1 Inch Adjustable Brown Double Rod Curtain Rod for Windows Curtains with Endcap Round Finials & Brackets Set - 36" to 66"
Deco Window 1 Inch Adjustable Brown Double Rod Curtain Rod for Windows Curtains with Endcap Round Finials & Brackets Set – 36″ to 66″
Price: (as of – Details)
Product Description
Extendable Curtain Rod
Deco Window extendable rods comes in 2 sizes.
1. 36″-66″
2. 52″-144″
Scratch Resistant
Deco Window rods are powder coated which makes it rust resistant, Scratch resistant.
Easy Installation
Hassle installation free.
3 Steps-
1. Mount Brackets 2. Mount Rod 3. Install Curtains
Decorative Finials
Deco Window Finials are…
View On WordPress
0 notes
Text
How to select curtain rods for French Doors?
Although having its history back from the 17th century, French doors are still one of the most trending home décor designs. They come in a lot of attractive designs that fit your budget. After fixing French doors, the next thing you have to choose is the curtain and the rods needed to hang them over the French doors.
In this article, we will direct you with
Measuring and selecting the perfect curtain rod
Fix them in an appropriate spot for a neat and classy look.
Provide information on the available rod type for French doors.
As a bonus, we provide ideas on rod color that matches your French door.
What are the French doors?
Knowing a bit of detailed information about French doors can give you a clear overview and help you picture your exact curtain rod needs.
French doors are unquestionably a beautiful addition to any home type with their large glass panels separated by small wooden grids. They can bring a certain level of elegance, charm, and class to your home. French doors act as an energy saver and help save electricity by letting in plenty of sunlight.
How to measure French doors for curtain rods?
Measuring your French doors is an essential step before buying the perfect curtain rod. Always hang the curtain a few inches past the window for the fullness of view. Hence you should purchase a curtain rod that is long enough. Further, the curtain rod that is too short will stress the balance and collapse the room interior style.
Additionally, consider the curtain stack back length while measuring for curtain rod length. The term is observed as the gathering of curtain fabrics on both sides of the window while open. Add approximately 10 inches to the original door width to create a full view of French doors.
Standard sized curtain rod:
In general, a thin rod looks better than a fat curtain rod for French doors. To precise, rods that are close to 1″ in diameter make a perfect fit for any room. Regarding curtain rod length, add 3 to 6 inches past the window frame on each side. Adding a few inches to the curtain rod can make your window appear larger and more spacious. By this method, you can let more natural light stream through the window when the curtains are open. For your reference, we are adding some typical rod lengths that extend from 28 to 84 inches, 66 inches to 120 inches, or 120 inches to 170 inches.
Fixing curtain rods for French doors:
There are few points to note before fixing curtain rods over the French doors. While installing them, put the curtain rods higher and near to the ceiling. Placing them higher makes the French doors and room look taller, grander. Similarly, installing them lower will create an illusion of a lower ceiling. We can create a height illusion inside our home décor with the installation position of the curtain rod.
Types of curtain rods available for French doors:
Want some timeless and traditional look, then go for slim and monochrome color. In the case of a trendy and modern look, choose a flashy, chunky, and attention-grabbing curtain piece. Here we will list you with some common curtain rod types available for French doors that you can choose.
Standard café rod -these are standard single rod that extends past the window, and brackets held them up.
Double curtain rod -this type has two rods. One is larger than the other, and the large one lets to hang blackout curtains while the smaller one is for sheer curtains.
Magnetic curtain rod – these type of rods does not need any drills or holes. It is one of the easiest ways to install curtains that work well for metal design.
No drill curtain rod – fix the classic metal hooks and place your curtain rods over the brackets to get the no-drill solution.
Lucite curtain rod – these type of transparent curtain rods is in demand nowadays. Either side completed with or without nickel ends is suitable for any curtain type.
Balfour wrap curtain rod – this type of curtain rod is suitable to reduce - noise, block out all light, and even save energy.
Swingarm curtain rod – this unique type needs one side attachment along with a specialized hinge bracket and has the quality to rotate 108 degrees to the left or right.
How to finalize curtain rod color for French doors?
Choose curtain rod color with colors that complement the accents used in the same room. By choosing the same color rod as the room furniture, you can make the room look more organized and cohesive. At least, assure the color of the curtain rod and the panels match and complement each other. The curtain rods can frame the room and gives an intense feel. To provide you a tip, always choose the curtain rod with the darkest color in the room.
In the case of an airy white snow room, you can make your curtain rods disappear. If you feel overwhelmed by options, go with brushed metal curtain rods. They are timeless and guarantee to blend with any decorating style.
Wrapping up
There are several things to keep in mind while purchasing the curtain rod for your French door. We hope the above tips and tricks on measuring for the curtain rod, selecting a color with style, and fixing them can help you consider what to consider when shopping for curtain rods. You have the freedom to go off-the-shelf options while choosing the curtain rod for your French door.
In Alkilani Fabrics, you can customize the dimensions to create a tailored look, like a perfectly-fitted suit for your modern or contemporary look home interiors. Aside, curtain rods - we have versatile varieties of curtain accessory range to suit - every sense of style and enhance the interior makeover. The installation services and a professional handyman team is also available to provide you with the best furnishing service.
0 notes
Text
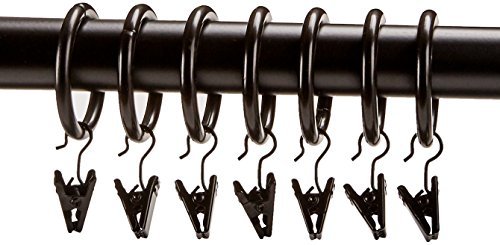
AmazonBasics 1" Curtain Clip Ring - Set of 7, Bronze
AmazonBasics 1″ Curtain Clip Ring – Set of 7, Bronze
Price: (as of – Details)
Curtain clip rings.
Plated-steel rings fit curtain rods up to 1-inch in diameterEach curtain ring can hold up to 1.36 KGHeavy-duty spring-tension clips attach securely to top edge of curtainPerfect solution for curtains with pockets or tabs that are too small for curtain rodMatching AmazonBasics curtain rods, brackets and holdbacks complete the look (sold separately)Deep…
View On WordPress
0 notes
Last Seen Blogs

thornypencils
Untitled

spaceshipsandpurpledrank
Nerd Life Presents: Spaceships and Purple Drank

asadlemon
Melting In A Fridge

marvinnedg
Marvinne

ammarhezbolah
Untitled