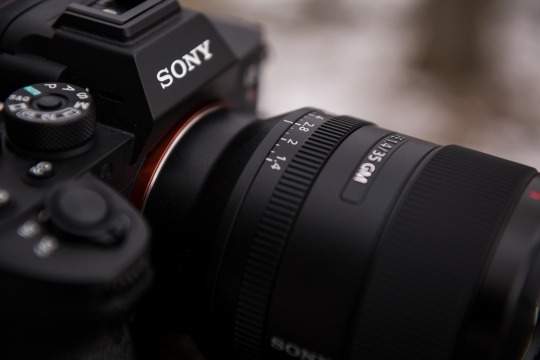
#Rokinon 35mm f1.4
Photo


#sony a7iii#Tamron 28-75#Rokinon 35mm f1.4#photography#black owned#black business#doulalife#photographer#black woman photographer#doula#black doula#branding#marketing#partnership#portrait#portrait photography
1 note
·
View note
Text
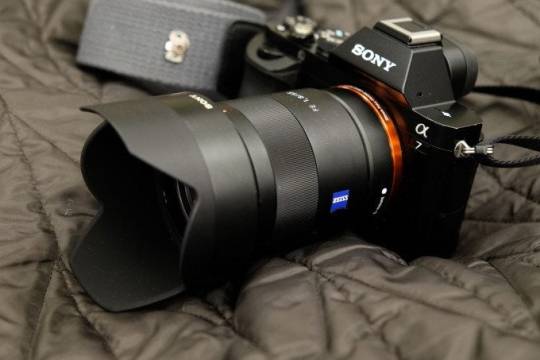
Want a 35mm Lens for Sony FE Cameras? Look Here!
Trust us, we've reviewed all of these ourselves very thoroughly.
If you were to look at the 35mm lens lineup for Sony FE cameras, you’d be shocked. There are tons of 35mm lenses for them. That means there’s some overlap and a large variety of options. Want something cheaper? It’s available. How about something more premium? There are options for that too. We dove into our Reviews Index and our Sony FE Lens Guide to help you find you the best 35mm lens for Sony…
View On WordPress
#35mm#35mm Lens#35mm Lens for Sony FE#Rokinon#sigma#sigma 35mm f1.2#sigma 35mm f1.4#sigma 35mm f2#sony 35mm#sony 35mm f1.4#Sony 35mm f1.4 GM#sony 35mm f1.8#sony 35mm f2.8#tamron#Tamron 35mm
1 note
·
View note
Photo
Anyone want to buy a Rokinon Autofocus 35mm f1.4 FE mount? (at Houston, Texas) https://www.instagram.com/p/B7rLcP4nG08/?igshid=vg6kskk30ly5
3 notes
·
View notes
Text
Rokinon 24mm F1.4 ED AS IF UMC Wide Angle Lens for Sony E-Mount (NEX) Cameras (RK24M-E)
Rokinon 24mm F1.4 ED AS IF UMC Wide Angle Lens for Sony E-Mount (NEX) Cameras (RK24M-E)
Price: (as of – Details)
The Rokinon 24mm F1.4 ED AS IF UMC Wide Angle Lens for Sony E-Mount (NEX) Cameras has the 35mm focal length equivalence of a 36mm lens. With its f/1.4 maximum aperture, it is a very fast lens, ideal for low light and for freezing action as well as for shallow depth-of-field control. Optical construction incorporates four Extra-low Dispersion elements and two aspherical…

View On WordPress
0 notes
Video
vimeo
Original caption:
“Excuse me... Excuse me... I just wanted to ask a question. What does God need with a starship?” -Captain James T. Kirk
When you visit the Trona Pinnacles, sometimes it feels like you are on another planet. Which is probably why it has been used as a filming location for many science fiction movies and television series like Planet of The Apes, Battlestar Galactica, Lost in Space and Star Trek V.
This dry ancient lake bed, located 20 miles or so from Ridgecrest, CA has more than 500 tufa spires scattered across the landscape. These pinnacles, similar to to the much more recent tufas that are found up at Mono Lake, range in age between 10,000 and 100,000 years old and were formed when calcium-rich groundwater and alkaline lake water combined to form porous calcium carbonate deposits. I had visited Trona many times before, but it was always for a very short day trip. I never spent any considerable time shooting there. On a recent trip I decided to spend some time in the pinnacles and really explore the area.
While I was there, a massive film crew for HBO’s Westworld descended on the main section of pinnacles where most people shoot and that forced me to explore some of the other, less visited, areas. I was really happy that I did leave the main area, because I found some really amazing compositions in those other sections.
Trona is not an easy desert. It’s brutally hot in the summer and very cold in the winter, especially at night. Other than the odd shrub, there is little plant life. There are no paved roads. And there isn’t a smooth rock in the entire area - just jagged and sharp rocks to cut yourself on. But it is beautiful in its own harsh way and if you spend any time there, it will steal your heart.
Equipment: DJI Phantom 4 Pro+ Sony a7R III Sony a7S Sony a6500 Canon EOS 6D Sony 10-18 f4 Sony 16-35 f4 Sony 24-70 f4 Sony 70-200 f4 Rokinon 14mm f2.8 Rokinon 24mm f3.5 T-S Rokinon 35mm f1.4 7artisans 25mm f1.8 7artisans 35mm f2 Canon 16-35mm f2.8 Canon 70-200mm f2.8 Canon 300mm f4 Emotimo TB3 Black 3-Axis Motion Controller Dynamic Perception Stage-R Pan/Tilt Modular Digital System w/NMX Motion Controller Dynamic Perception Stage-One Plus Slider
Software: Adobe After Effects CC Adobe Lightroom CC Adobe Photoshop CC Adobe Premiere Pro CC DaVinci Resolve Final Cut Pro X GB Deflicker LR Timelapse 4 Photo Ninja Neat Noise qDSLR Dashboard
Website: aaronkeigherphotography.com Timelapse City, LLC: timelapsecity.net Facebook: facebook.com/akeigher Instagram: instagram.com/aaronkeigherphotography
#California#trona#trona pinnacles#geology#nature#searles lake#valley#landscape#desert#video#drone#wanderlust#the earth story#vimeo#sunset
37 notes
·
View notes
Photo

Follow @shootguru ・・・ Team @shootguru Gear . Bag: @atlaspacks #atlasadventurepack . Cameras: Canon 5D mkii, Sony a7s, Sony a6300 . Lenses: Canon 70-200 f2.8, Canon 50mm f1.4, Rokinon 35mm, 24mm, 85mm f1.5T, Sony 16mm f2.8, Sony 17-35mm . Converter: Digitek and Comlite EF to E mount . Light: Yongnuo LED light panels - 2 . Viltrox HD field monitor . Mac Book Pro 13in . Sound: Zoom H4N, Boya Wireless Lavaliere, Sony wired Lavaliere, Rode micro . Gorilla Pod . All the above is in this bag, keep tuned for a packing video soon . Comment with your gear and win goodies, tag @shootguru or just add #shootguru to your posts for a chance to get featured . #canon #cameragear #canon📷 #canonphotography #canonphoto #canonusa #canoneos #canongearnerd #canon5dmarkiv #canon5d #canon1635f4is #teamcanon #wideangle #redring #lseries #lens #lenses #photogear #cameragear #photograph #photography #photographer #photooftheday #instagood
#canon5d#canonusa#lseries#shootguru#cameragear#teamcanon#canon5dmarkiv#instagood#canonphotography#atlasadventurepack#photographer#canon1635f4is#photograph#photogear#lenses#canon📷#wideangle#photooftheday#photography#canoneos#redring#lens#canongearnerd#canonphoto#canon
2 notes
·
View notes
Photo
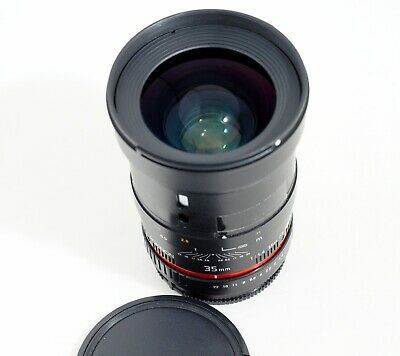
%^ SONY Alpha Rokinon 35mm F1.4 AS UMC Lens A33 A35 A55 A58 A65 A77 A350 A700 https://ift.tt/3ju6gxS
0 notes
Photo
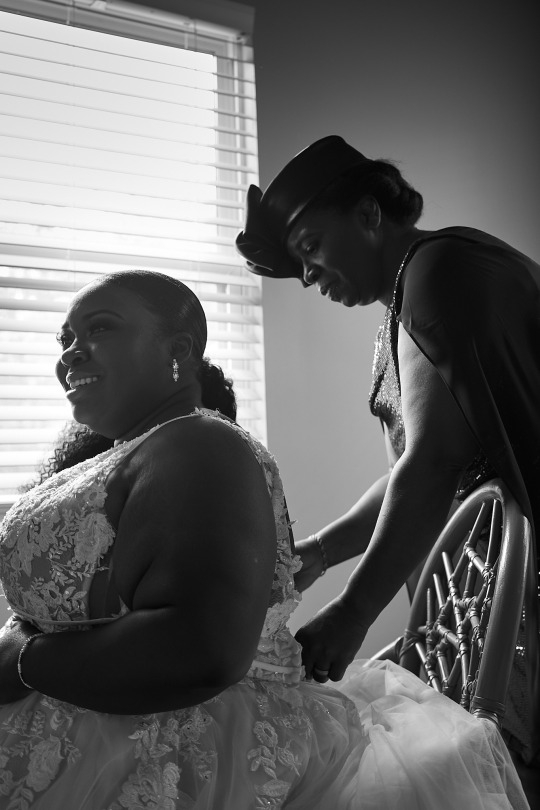

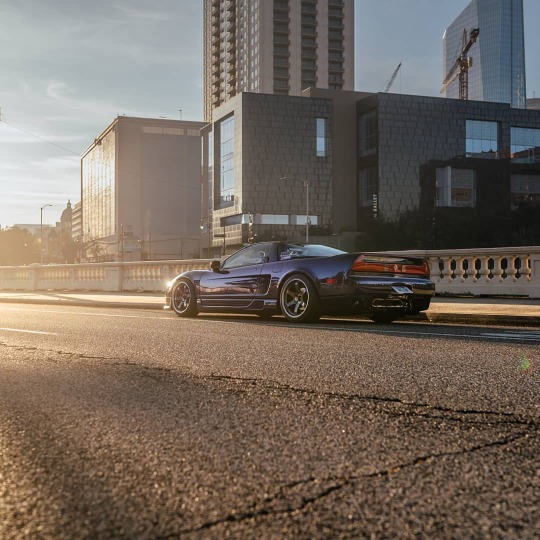
#sony a7iii#a7iii#Rokinon 35mm f1.4#rokinon 85mm#wedding#wedding photography#photo of the day#photography#wedding dress#capture one#sony a7#tamron 24mm
0 notes
Text
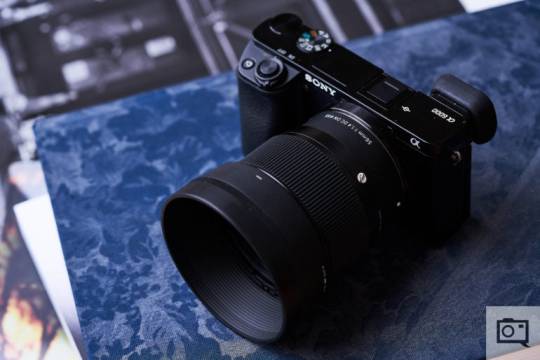
9 E Mount Lenses for Portraits That Get the Most Out of Sony’s Eye AF
If you’re a portrait photographer who uses the Sony platform and want to get the most out of eye AF, these are the E Mount lenses worth a closer look.
Sony has completely revolutionized the portrait photography scene in recent years thanks to the huge advancements they have made in autofocus technology. The eye AF system in place in most of Sony’s cameras is class-leading and hard to beat. The technology has made it easy for portrait photographers of all levels to nail the shot every time they use the camera, but even a system as good as this still needs great lenses to make the most of it. After the break, we round up the best Sony E mount lenses to use if you want to make the most out of the incredible eye AF system found in Sony cameras.

Captured with the Sony 135mm f1.8 G Master.
Not only will these lenses work great with eye AF, but they are also top performers in their own right. All the lenses we list here are incredible when it comes to their optics, the colors they produce, and the overall quality of their builds. Attach one of these lenses to your Sony camera, and you will walk away with portraits that have incredible bokeh and characteristics that will make you and your clients gush. There are E mount lenses below that fit a wide variety of budgets, and there are focal lengths that will suit all types of portrait photography. Pull up a chair and check out the E mount lenses we highly recommend to use with Sony’s Eye AF system.
Sony 35mm F1.8 FE

Here are the pros and cons from our full review:
Pros
Small
Cost-effective
Weather sealing
Sharp – very sharp
Beautiful bokeh
The best colors we’ve seen from a Sony lens
Can focus very closely
Fast aperture
With AF-C on the Sony a7r III, it is fast enough for street photography
Cons
We wish Sony gave us a working distance and zone focus scale for street shooting
Buy now: $748
Sony 55mm F1.8
Here are the pros and cons from our full review:
Pros
Sharp images
Creamy bokeh
Weather-sealed
Smooth, large focusing ring
Cons
Lens hood adds a good amount of length to the front
No depth of field scale
Buy now: $998
Sigma 56mm F1.4 DC DN Contemporary
Here are the pros and cons from our full review:
Pros
Excellent sharpness
Gorgeous bokeh
Lightweight and compact design
Fast and accurate autofocus
One of three widest maximum aperture (f1.4) lenses currently available for Crop Sensor Sony E Mount (besides Sigma’s own 16mm and 30mm offerings)
Dust and splash-proof design with a rubber gasket integrated found around the lens mount
35mm equivalent focal length of 84mm very nearly matches the 85mm focal length preferred by many portrait photographers
Cons
Lacks optical stabilization
Pincushioning is especially noticeable in RAW files, although correctable during post-production
While mountable to Full Frame Sony Mirrorless cameras, the lens will only work in crop sensor mode and will otherwise vignette severely.
Buy now: $398.99
Rokinon 85mm F1.4 AF FE

Here are the pros and cons from our full review:
Pros
More affordable than Sony’s higher-end option: it’s $699
Good image quality
Smooth bokeh
Sharp image quality
Nice colors
Cons
Lacks weather sealing. This has been a consistent problem of Rokinon’s. Editor’s Note: Rokinon has updated their specs to say that there is weather sealing.
Buy now: $649

Pro Tip: The eye AF feature on Sony’s cameras can certainly make life easier for a portrait photographer, but you still need to know how to pose, and you need to know what makes a portrait image compelling. If you are just starting out in portrait photography, or if you would like a refresher, you should check out this posing guide from Lindsay Adler. Learn how to pose and then combine your skills with the tech inside your camera, and you’ll be well on your way.
Sony 85mm F1.4 G Master

Here are the pros and cons from our full review:
Pros
11 aperture blades are the most of any autofocus portrait lens made so far
Big, but very balanced with the Sony a7
Aperture control around the lens is nice
Fast autofocus performance
Nice color rendition for portraiture
The best bokeh of any 85mm lens we’ve tested
Weather sealing
Wonderful for skin tones
Cons
Buy now: $1,798
Sony 85mm F1.8 FE

Here are the pros and cons from our full review:
Pros
Great image quality
Fast-focusing with the Sony a7r II and, in good lighting, it will focus quickly with the Sony a7
Nice feel, though not as great as the G Master 85mm f1.4 lens
Weather resistance built in
Compact size
Cons
Honestly, not a darn thing
Buy now: $598
Sony 90mm F2.8 Macro G OSS

Here are the pros and cons from our full review:
Pros
Great image quality in most situations
Sharp performance, again in most situations
Optical stabilization
Fast-focusing performance
Very silent stabilization
Compact internal focusing design on par with a DSLR lens designed for the same purpose
Push/pull focusing ring
Lightweight
At last, a focusing scale that actually works!
Cons
The colors just aren’t there compared to many of Sony’s other lenses. Perhaps this was done specifically for portraits
Buy now from: $961.11
Sony 135mm F1.8 G Master

Here are the pros and cons from our full review:
Pros
Excellent image quality
Preferred focal length for portraiture
Dust and moisture resistant
Sturdy magnesium alloy construction
Lighter than most 135mm lenses on the market
Cons
Buy now: $2,098

Pro Tip: Another way to really make your portrait work stand out is by using flash. Whether you mount a Speedlight to your camera and bounce the flash off of a wall or ceiling, or if you use off-camera flash, you will see a huge improvement in your images. Learning how to use flash will open up a ton of doors. If you want to learn from one of the masters, check out this tutorial from Joel Grimes. Joel will teach you how to create dramatic images with just one light.
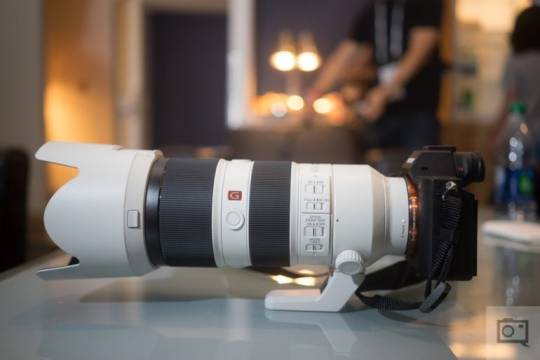
Sony 70-200mm F2.8 OSS G Master
Here are the pros and cons from our full review:
Pros
Great image quality
Nice bokeh
Fairly compact for a 70-200mm f2.8 lens
Good build quality
Can focus pretty fast with the latest cameras
Cons
Buy now: $2,598
Related
!function(f,b,e,v,n,t,s){if(f.fbq)return;n=f.fbq=function(){n.callMethod? n.callMethod.apply(n,arguments):n.queue.push(arguments)};if(!f._fbq)f._fbq=n; n.push=n;n.loaded=!0;n.version='2.0';n.queue=[];t=b.createElement(e);t.async=!0; t.src=v;s=b.getElementsByTagName(e)[0];s.parentNode.insertBefore(t,s)}(window, document,'script','https://connect.facebook.net/en_US/fbevents.js');
Source link
Tags: 9, AF, eye, lenses, Mount, Portraits, Sonys
from WordPress https://ift.tt/2WkF1Lq
via IFTTT
0 notes
Text
Which One? Sigma 35mm f1.4 Art vs Zeiss 35mm f1.4 Milvus Comparison
Not quite apples to oranges here.
When considering the Sigma 35mm f1.4 Art vs Zeiss 35mm f1.4 Milvus lenses, it can be tough to figure out which one is right for you. They both differ pretty greatly when it comes to usage, price point, features, and quality. In fact, it’s only obvious that there’s going to be differences considering that they’re years apart from one another. Lots of photographers out there in the world don’t…
View On WordPress
#autofocus#Bokeh#build quality#canon#ergonomics#image quality#Rokinon#sharpness#sigma 35mm f1.4#Sigma 35mm f1.4 Art vs Zeiss 35mm f1.4 Milvus Comparison#tamron#weather sealing#Zeiss 35mm f1.4 Milvus
1 note
·
View note
Photo

𝑫 & 𝑸 - 𝑻𝒉𝒆 𝑩𝒆𝒆𝒓 𝑺𝒕𝒂𝒕𝒊𝒐𝒏. Houston, TX, 2019. Sony A7iii with Rokinon 35mm f1.4 AF. #montrose #houston #htx #beerstation #sony #a7iii #alpha #rokinon #35mm #htx (at D & Q - The Beer Station) https://www.instagram.com/p/ByRx_LjgL7u/?igshid=5hqlfn3vzdvc
2 notes
·
View notes
Text
SKILLS
Adobe Photoshop
Adobe Premiere Pro
Adobe Lightroom
Adobe Creative Suite
Final Cut Pro
Microsoft Office Suite
Camera:
Canon 6D
Nikon D5200
Rico KR-5, Canon
iPhone
Ability to quickly learn and adapt to unfamiliar camera equipment
Lenses:
Nikon 35mm F1.8
Canon 50mm F1.4
Rokinon 24mm T1.5
Rokinon 14mm T3.1
Video Equipment:
Tripod
Monopod
Sliders
Steadicam
Glidecam
Lighting Equipment & Techniques:
Light Reflectors
Continuous Lighting
Strobe Lighting
Ring Lighting
Light Diffusers
Three-point Lighting
Butterfly Lighting
Harsh Lighting
Search Engine Optimization (SEO)
Strategic Online Marketing
Social Media & Content Management
Promotions & Advertising
Technical & Creative Writing for various Social Media Platforms
Boosting Social Media Engagement
Generating Facebook, Instagram and Google Paid Advertisement
Professional quality printing and mounting on foam boards
Excellent knowledge and experience with the use of copyrighted material
Extensive experience in obtaining licensed music and other intellectual property
Educated in city’s film ordinance and guidelines, specifically in City of San Diego
Experienced in obtaining and filling all necessary city permits and other pertinent documentation as they apply
0 notes
Video
vimeo
Footage over the last few months in or around Ketchikan Alaska. Shot With: Dji Phantom 4 Pro BM Ursa Mini Pro Rokinon 35mm 2.5T Nikon 85mm f1.8 Sigma 50mm f1.4
1 note
·
View note
Video
vimeo
Traditional time-lapses are constrained by the idea that there is a single universal clock. In the spirit of Einstein's relativity theory, layer-lapses assign distinct clocks to any number of objects or regions in a scene. Each of these clocks may start at any point in time, and tick at any rate. The result is a visual time dilation effect known as layer-lapse. After releasing "Boston Layer-Lapse" a few years ago, I was able to quit my engineering job to focus on time-lapse and film making. New York City was the obvious subject for my next film, the immense skyline was ideal. However I was facing an unknown creative challenge: when I created Boston Layer-Lapse I manually animated layers because I only had about 30 layers in a scene, in New York I was making layer-lapses with 100-300 layers so I needed some method to help me automate my workflow. Luckily I have an engineering background I can lean on, so in early 2016 I started learning scripting in after effects, and began writing code to create different layer-lapse 'looks'. To create a layer-lapse effect, I am assigning a unique equation to hundreds of buildings simultaneously. For each frame, every building is calculating and deciding which time of day to reveal. One example of a script that yields a ‘look’ are the waves of day or night that move through some of the shots in this film. To achieve the ‘look’ I can set parameters like the speed at which the wave moves across the screen, how rapidly each layer will switch from day to night or vice versa, and I'll often use a random sinusoidal function to create a subtle oscillation inside the wave itself. Now I've probably lost half my audience but for those of you still reading, the final step is linking an action or a script to a piece of the music. One way I've found this can be done is creating a set of audio triggers for a song, so that every note or beat triggers a change. By linking a certain script to each of these triggers one can create computer generated layer-lapses that are animated in response to music. Admittedly, this film is still a combination of mathematical and manual animation but my goal is to create a layer-lapse film where all the animations are simply decisions made by each layer after analyzing the music and the script it was assigned. By making layer-lapses run on mathematics, there are also some really cool avenues to create interactive physical or virtual art installations where a person could actually touch and manipulate a layer-lapse scene in real time. The further down the rabbit hole of layer-lapses I go, the more opportunities for experimentation I am discovering. I love the process of creative exploration and hopefully my audience gets something from it too, thanks for watching! To learn more about the project please visit: http://bit.ly/2zDWaGh http://bit.ly/2hpYiHn @AliniaMedia 1 Film, 22 Trips to New York, 352 Hours of filming, $1,430 paid in Parking Fees, 9988 Miles Driven, and 232,000 Pictures Taken Special thanks to the team at Kessler Crane, every motion controlled shot was filmed on their Second Shooter and CineDrive systems, visit them at: kesslercrane.com Cameras Used: Sony A7rii, Canon 5ds, Canon 5diii, Canon 5dii, Canon 6D, Canon 7D Lenses Used: Canon 200-400mm, Canon 100-400mm ii, Canon 70-200mm 2.8 ii, Canon 16-35mm 2.8 ii, Canon 24mm f1.4 ii, Canon 24-70mm 2.8 ii, Zeiss T* 50mm 1.4, Canon 135mm f2, Sony G 16-35mm 2.8, Canon 24-105mm, Rokinon 20mm 1.8
0 notes
Text
Cheap Photo: Sigma 50mm f1.4 $602, Loupedeck Console $159, More
Cheap Photo: Sigma 50mm f1.4 $602, Loupedeck Console $159, More – Need some new glass or perhaps some accessories that will make your life easier? Check out these awesome deals. You can grab a Canon EF mount Sigma 50mm f1.4 for just $602.13! That's insane! The Sigma 35mm f1.4 can be yours for $633.89 (Canon) and $647.88 (Nikon). There are some great deals on lenses for Sony, too, like the Tokina Firin 100mm f2.8, which has a $339 discount making it just $499, and the Rokinon 35mm f1.4 is only $599! There's more than lens deals too, we have found accessory deals also. The Wi-Fi-enabled Western Digital 4TB portable hard drive that lets you backup pics on the go is $208.99, one of our favorite camera bags, the Portage Mariner is just $69, and the Loupedeck photo editing console for Lightroom is just $159. Come and see all of the lens deals and discounts on accessories. (Read More...) ≠ promoted by #NewCanonInfo
0 notes
Last Seen Blogs

intrepid-fatling
dan

tokisakikurumi67
無標題

personal-info
Untitled

suresumbat
TikTok Veriyan

i-onced-dreamed
I dream of adventure