#OOC screenshots
Text


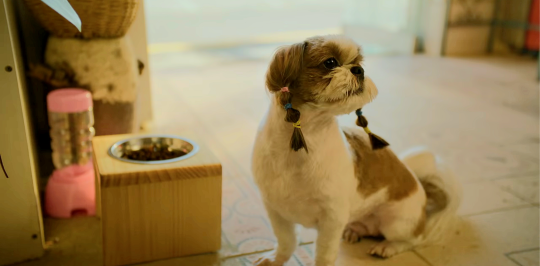


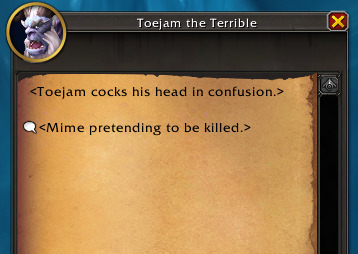
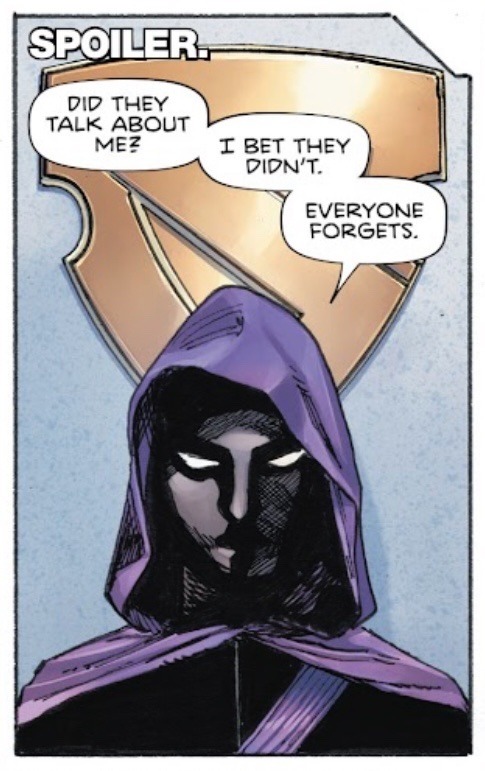
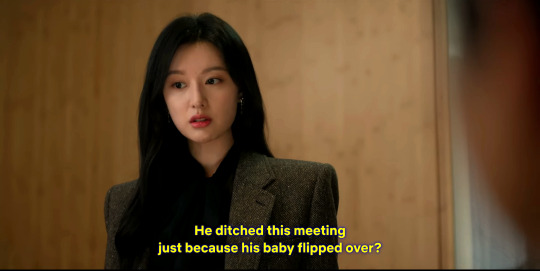
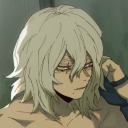
Out-of-context screenshots | Queen of Tears, Episodes 1-2
#queen of tears#kim jiwon#kim soo hyun#kim ji won#kim soohyun#kdrama#korean drama#kdramaedit#OOC screenshots#OOC kdramas
84 notes
·
View notes
Photo

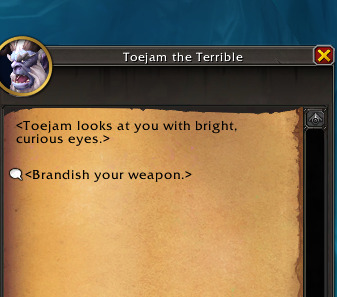


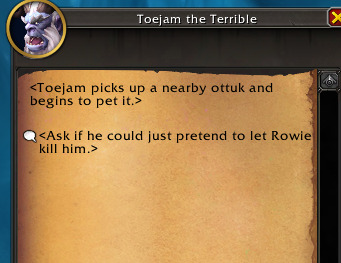

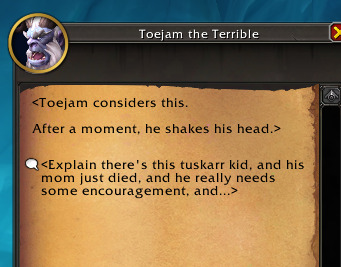


Really love this interaction with this yeti, and showing another side to these usual hostile beings! Very sweet. All he wants is to pet ottuk.
50 notes
·
View notes
Text

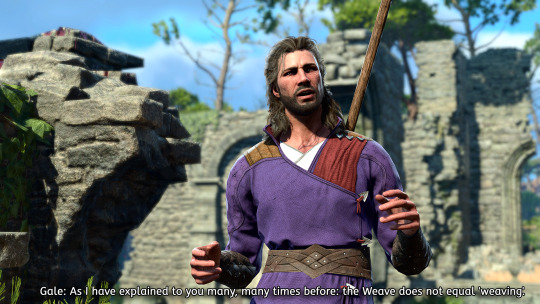


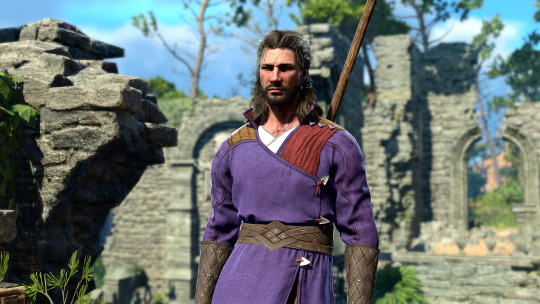
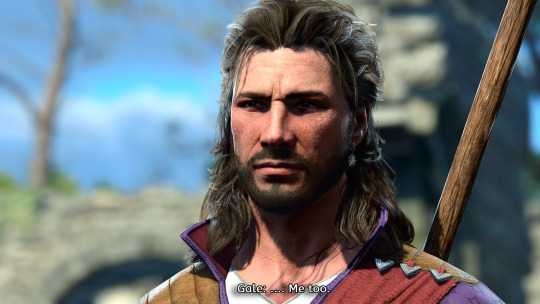
baldurs gate out of context (x)
#they can learn how to knit together :( (failed)#bg3 ooc#oc: ruby the fool#gale bg3#gale dekarios#gale of waterdeep#baldur's gate 3#bg3#my screenshots#bg3 memes#baldurs gate 3#baldur's gate
3K notes
·
View notes
Text

https://x.com/nocontexthousem/status/1770474210713845901?s=46&t=Ybw2BzY_PpsZgU_p8wHn3A
The fact that House was constantly stating how badly he wanted to have sex Wilson is just insane
#every ooc screenshot i see of this show is always these two gay men saying something unbelievably homosexual#housemd#house md#hate crimes md#hatecrimes md#hilson
1K notes
·
View notes
Text
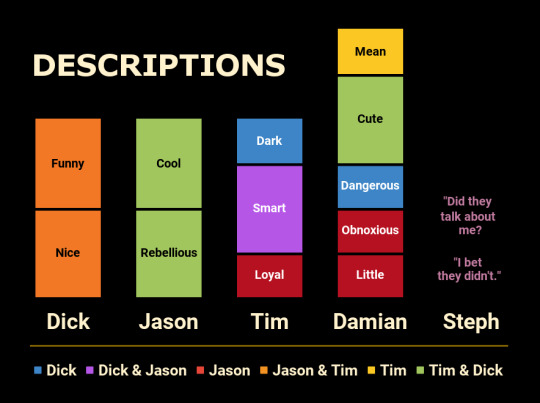
What the Robins consider each other to be
From Heroes in Crisis #9.
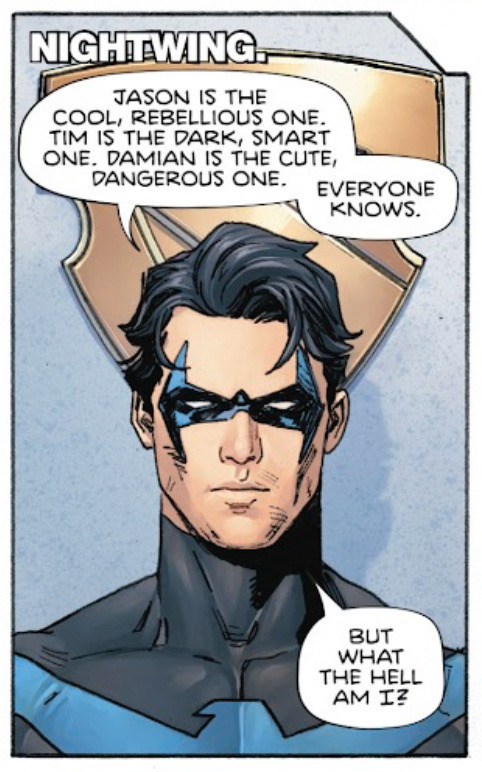
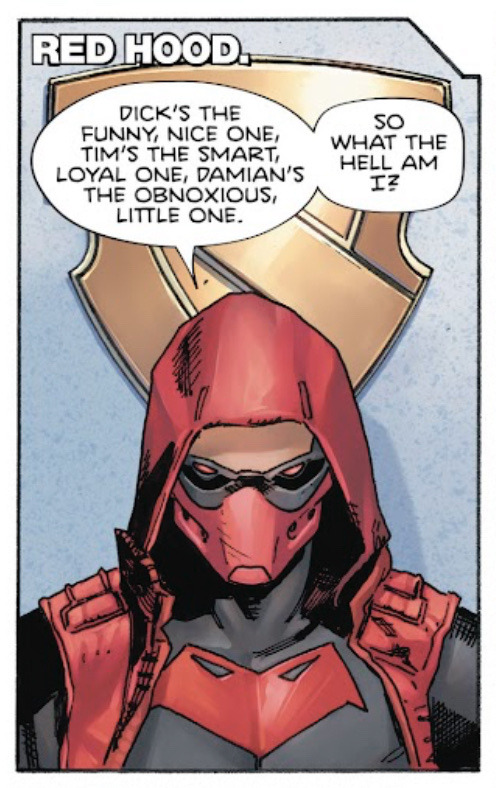
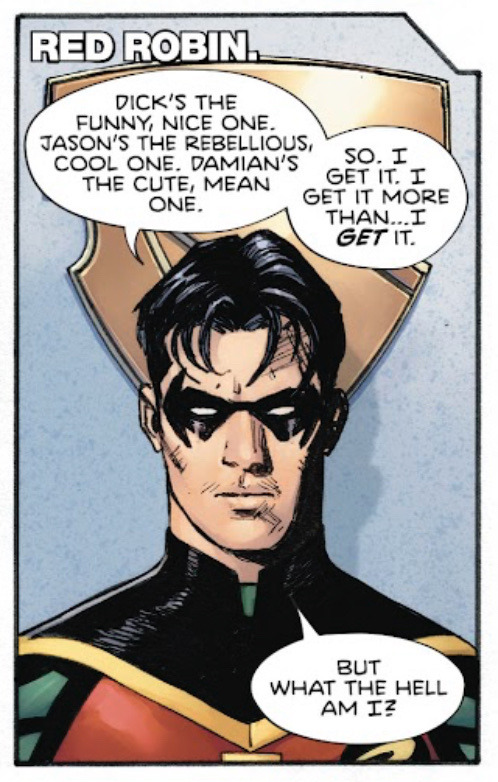

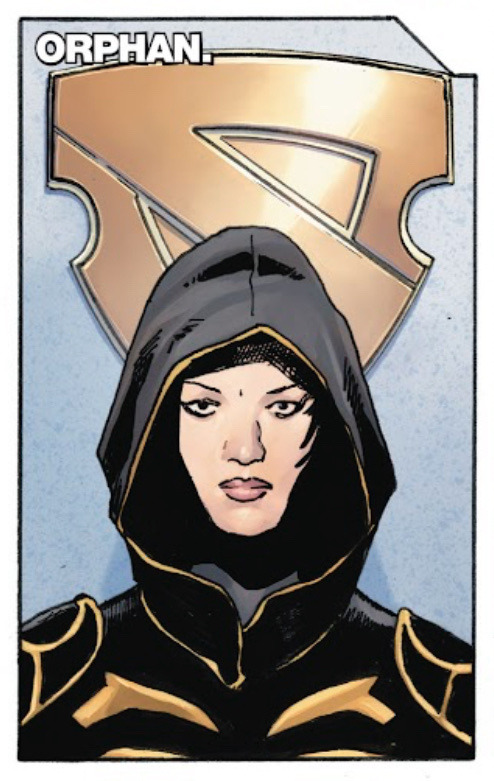
#honestly I thought heroes in crisis sucked ass but this part was almost fun#I’ve been meaning to make this graph since I saw screenshots of the scene many months ago. still don’t like how it turned out but whatever#so OOC though#ESPECIALLY Jason#they would not fucking say that#dc comics#batman#dick grayson#Nightwing#jason Todd#red hood#tim drake#red robin#damian al ghul#Damian Wayne#Stephanie brown#batgirl
3K notes
·
View notes
Text


#JGHJFODHGFKJLHFSKJD#adventure time#fionna and cake#destiny#screenshots#fox post (ooc)#fionna and cake spoilers
1K notes
·
View notes
Text
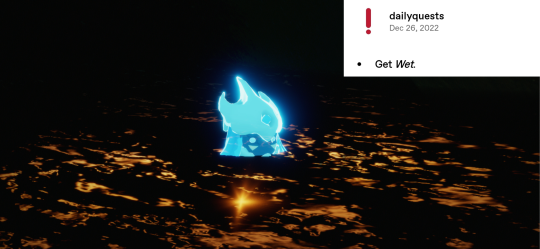

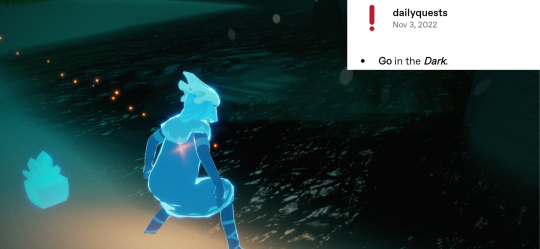

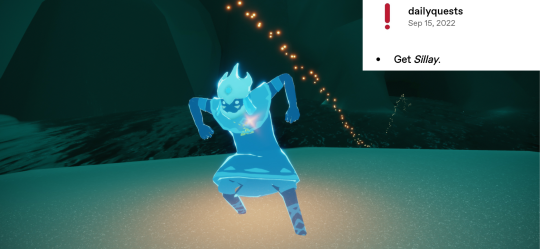
jolly geologist's spirit memory as dailyquests posts
#i particularly love the Get Wet one even without the dailyquest post. its such a good screenshot#thatskygame#sky cotl#sky: children of the light#jolly geologist#season of moments#ooc#sol talks
751 notes
·
View notes
Text
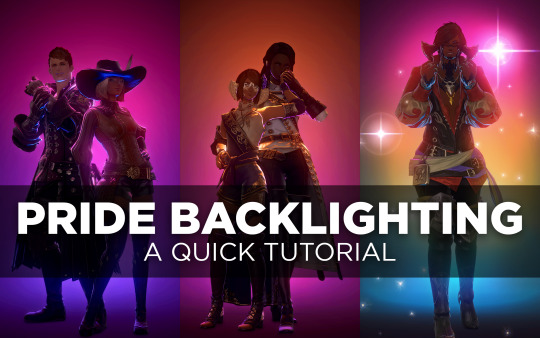
Pride Backlighting Tutorial
A few people have shown interest in replicating the pride backlighting I did, so hey, here’s a quick tutorial below the cut.
Enjoy, and happy Pride Month. 🏳️🌈
STEP 1 — SETUP
First thing you’ll want to do is find a suitably dark background to bounce the light off of. I use the White Screen housing item dyed Soot Black, available from the Housing Merchant or Apartment Merchant in any of the housing zones for 3000 gil.
I line up 2-3 of them for coverage, but one will do if you're trying to be frugal.

If you don’t have an apartment or an FC room to use, try asking friends, FC mates, or even folks you share a Discord server with. You might even find someone who already has a studio space set up and is willing to let you use it!
Lighting in your studio space should be 0 (though you might have success at 1 as well), so make sure to adjust that or ask the studio owner if they can make that change before you start posing.
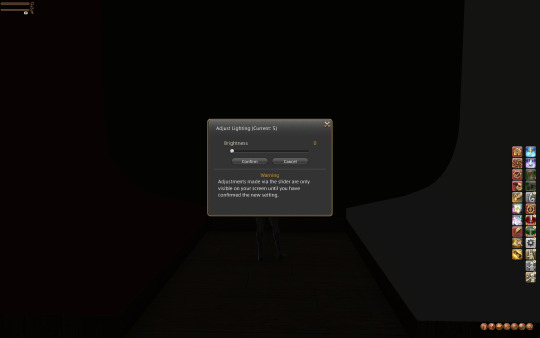
STEP 2 — GPOSE
Position your character(s) just a little ways back from the edge of the screen. You want some space between them and the screen so that the lighting can float there without casting a weird circle on the wall.
Hop into /gpose and bump up the “Manual brightness adjustment” to about 120 or whatever level allows you to see your character well enough to pose them. Pose to your heart's content.
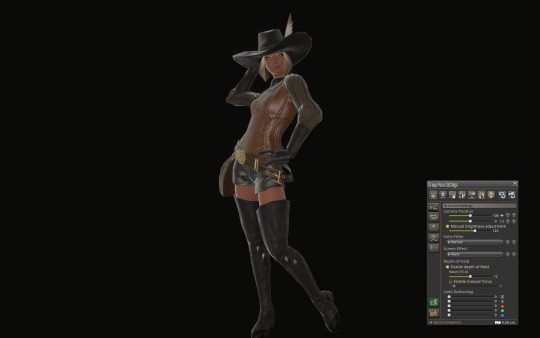
STEP 3 — LIGHTS
Here’s the fun part. In the Light tab of the Gpose menu, switch all of your Light sources to Type 1, which has the shortest falloff radius (meaning it doesn't reach as far as Type 2 or 3). I also set all of my lights to one strong color to differentiate them while I worked on lighting—red, green, and blue, all maxed out at 255 (for now).
Swing your camera (still on all default settings) around to your character’s back and up above their head a little ways. This is where Light 1 (red) will go.
Now pan your camera down at about mid-back height and set Light 2 (green) there.
Pan your camera down one last time until you have a nice shot of your character’s butt and set Light 3 (blue).
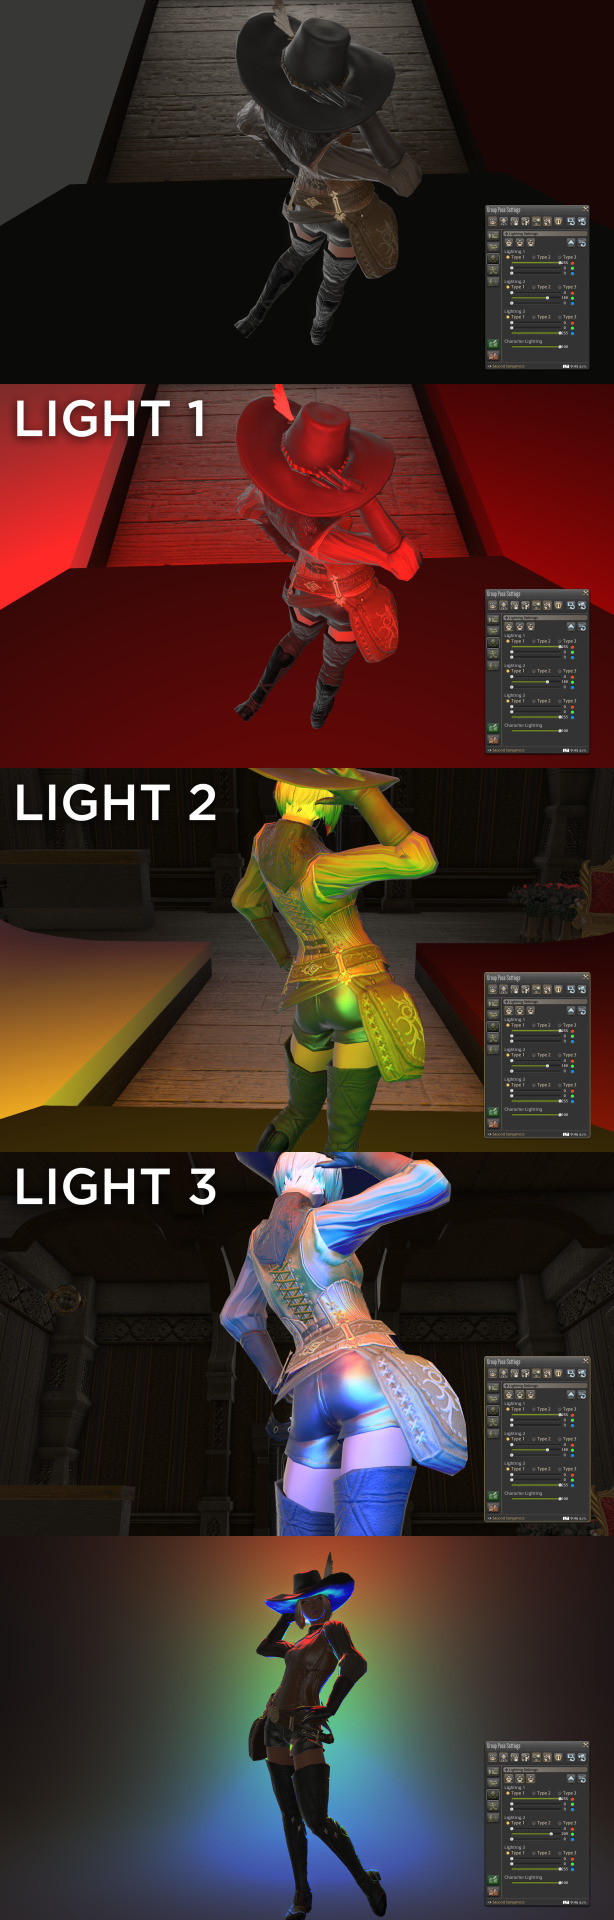
Spin your camera back around and enjoy this nice little macaw-colored gradient.
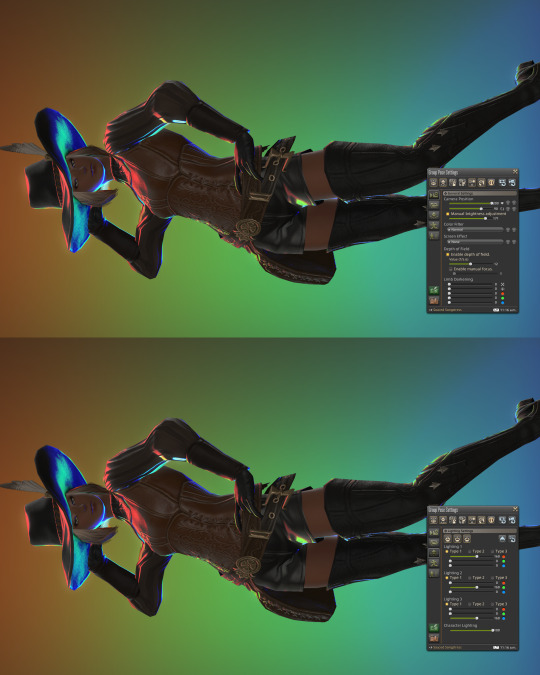
STEP 4 — CAMERA
Set your camera angle.
The way FFIXV’s lighting works is partially dependent on how much light is in a shot. It will adjust a lot like your eyes do when you’re entering a dark room from a bright room, or vice versa. Your zoom level and camera angle are going to directly affect the lighting, so set this before you start messing with light strength and color. Sometimes this means weaker lighting will actually light your character better.
I ended up bringing my lights down to around ~160 and boosted the "Manual brightness adjustment" up quite a bit to get lighting I was happier with.
For a straightforward vertical shot, I like to have my Field of View (FOV) at 200 and of course my rotation is set to 90. Zoom in or out as needed. Remember to save your camera angle if you plan to pan around and fix things!
STEP 5 — COLOR
Make it ~queer~.
Take your flag of choice and pick out 2-3 “main” hues. Generally these will be the strongest hues in the flag, if not the only ones. Some flags, like the Pride/Progress/Intersex-Inclusive flag itself, are difficult to replicate for the sheer number of colors that are in it. You can loosely represent a rainbow with some adjustment to the RGB colors, if you’re determined to have a whole rainbow in there.
Shader Note: I recommend picking a shader preset that doesn’t mess too much with color so that colors are represented correctly. You may need to adjust light strength and “Manual brightness adjustment” to be compatible with your preset of choice. Bloom will also heavily affect the way your colors are showing up, so you may need to tone down the bloom FX or toggle it off entirely. This all depends on your preset, however.
If you’re not into RGB math, here are some cheat sheets! Not every flag is represented here of course, but I tried to cover as many colors as I could so that you could grab a color from another flag as needed! Please note that colors will need some adjustment for your own screenshot, presets, and preferences.
And that’s it, y’all! 🏳️🌈
(Open this image up in a new tab for more detail.)
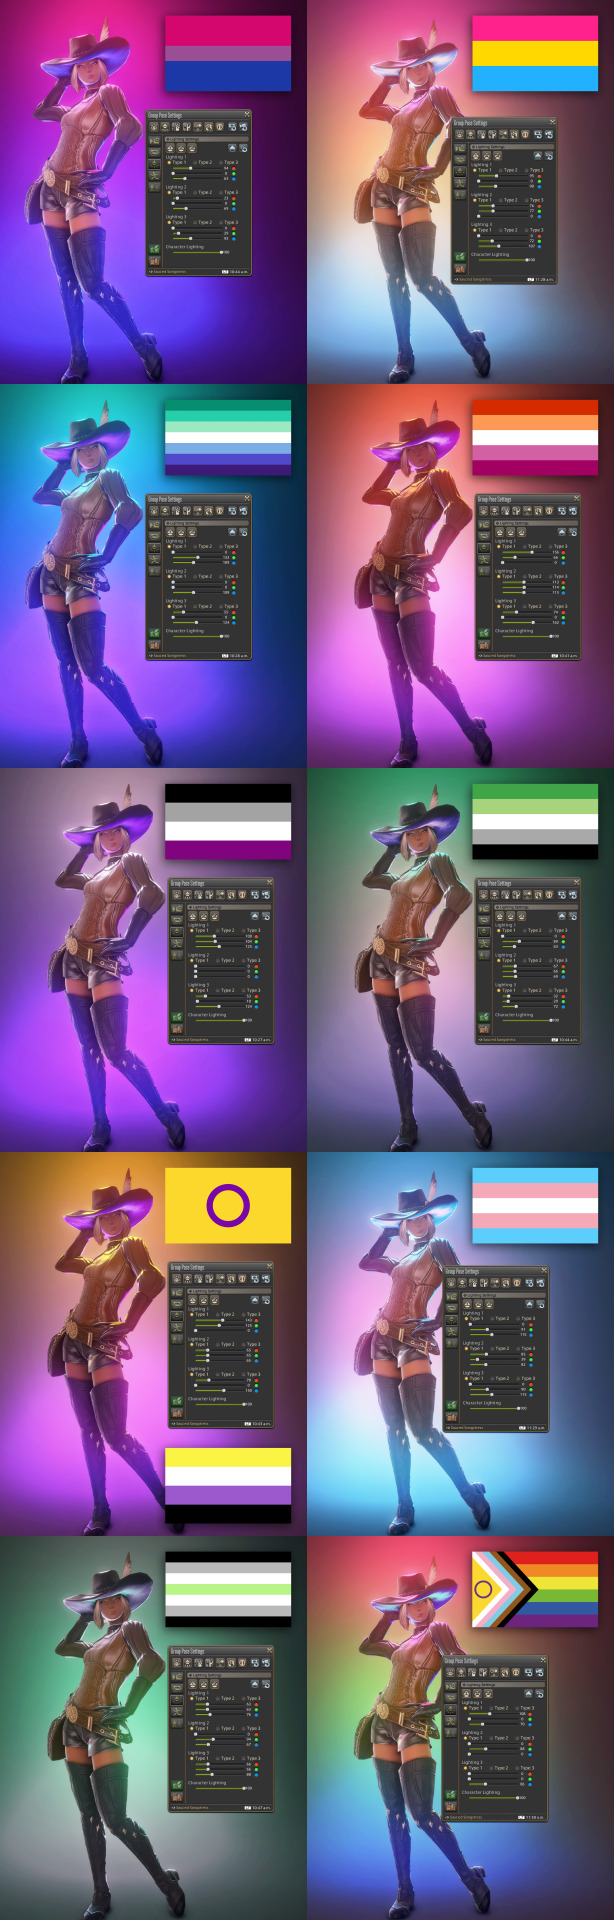
These were taken using a heavily customized shader for that nice glowy effect.
#ffxiv#ffxiv screenshots#[ ooc ]#[ tutorials ]#i didn't actually have a tutorial tag but#now i do#enjoy ❤️
974 notes
·
View notes
Text
adventures in drowsytown - what we know so far
(will be edited as new things are discovered!)
-originally only aired in hatchetfield, but recordings circulated online (these were taken down!! don't know by who though)
-had a main cast of five, wiggly the biggest brother and 'leader,' sometimes reffered to as a lord or king, a pink one (i don't recall the name..) who ate things, tinky who had a cube of some kind(??) and knew things about tech and science and stuff, blinky, and pokey who did a majority of the musical segments. they were brothers
-learned life lessons and occasionally hosted educational segments throughout the show
-had little bird guys called sniggles that were their friends or something. one called snigglette was the butt of jokes a lot of the time
if anyone else knows anything, let me know!!
#hatchetfield#adventures in drowsytown#unreality#unreality cw#ooc - anyone can feel free to contribute anything!! screenshots or lore its all fair game babyyy
155 notes
·
View notes
Text


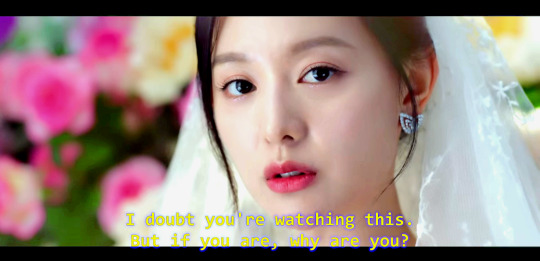
Out-of-context screenshots | Queen of Tears, Episodes 03-04
#queen of tears#kim soo hyun#kim ji won#park sung hoon#kwak dong yeon#kdramas#kdrama#kdramaedit#ooc screenshots#ooc kdramas
64 notes
·
View notes
Text
Nobody asked, but I'm still going to ramble a little about posing Yein.

When I pose them with sparrows, I like to imagine the birds are messengers. The lyrics or quotes I choose are Yein's sentiments, which they whisper to the sparrows. The sparrows then fly off into the world to deliver this message to you all.
Anyway, that's it. That's the rambling.
#ooc post#yein my beloved#little sparrow talks#ffxiv screenshots#gposers#elezen#thx for not being sick of their smiling yet
78 notes
·
View notes
Photo
────── ⊰ 𝕮𝖆𝖑𝖆𝖒𝖎𝖙𝖞 𝖔𝖋 𝕱𝖎𝖗𝖊
10 notes
·
View notes
Text


baldurs gate out of context (x)
#bg3#baldur's gate 3#my screenshots#oc: ruby the fool#bg3 astarion#astarion#astarion ancunin#bg3 memes#bg3 ooc#baldurs gate 3#istg if astarion could sleep she would unironically put clowns face paint on him
917 notes
·
View notes
Text
Nicky: Whether I slept with your uncle or not in our early 20s is not any of your business. Lark was up to a lot of shit back then, it doesn’t matter.
Normal: Isn’t that when he slept with my mom? Please tell me you didn’t also sleep with my mom.
Nicky: Hah! I wish.
Normal:
Nicky: That was inappropriate, sorry. No, I didn’t.
#mine#dndads#i drafted this four months ago and never posted it because it felt too ooc/random#but it still makes me laugh every time i think about it#so. yknow. yeah sure why not ill post it now. nicky WILL fuck your mom normal#<- deranged#i think i have posted a screenshot of this post before but then deleted it. whatever ill commit this time
185 notes
·
View notes
Text
Okay I lied I queued this singular one, okay... it's silly. Look at them.

they are just Staring
#spto#scott pilgrim takes off#spto screenshots#screenshots#kim pine#stephen stills#neil nordegraf#scott pilgrim#spto kim#spto scott#spto neil#spto stephen#scott pilgrim kim#scott pilgrim neil#scott pilgrim stephen#scott pilgrim scott#ooc
76 notes
·
View notes
Last Seen Blogs

christchurchheartgroup
Heart Group Christchurch

animetrashlord-007
Anime Trash
hatayurieworks
hata design

clair3lee-blog
My little world