
stellariaz
here to help!
20 l (gaming) help blog + diary l currently playing: tears of the kingdom
blog under construction rn!!!! plz be paitent :)
8 posts
Don't wanna be here? Send us removal request.
Last Seen Blogs

materehuga
Untitled
materehuga
Untitled

thost2
Untitled

catyeo8
My Heart, Mind & Soul

sicktotheb0ne
AnaStasia
Text
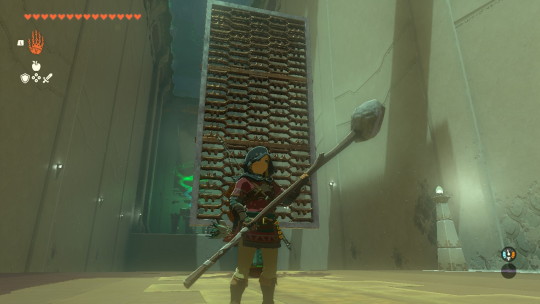
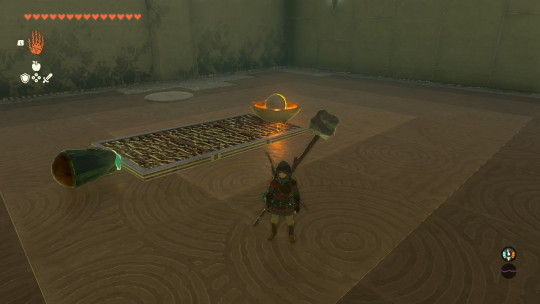
Scoop it Out: Zanmik Shrine
Hop down from the entrance platform.
To your left will be a large wheel with a ball pit underneath. There will be some metal panels and a circuit that runs along the wall.
Using those panels, create a structure like so.

Attach it to the wheel with the opening facing the ball pit.
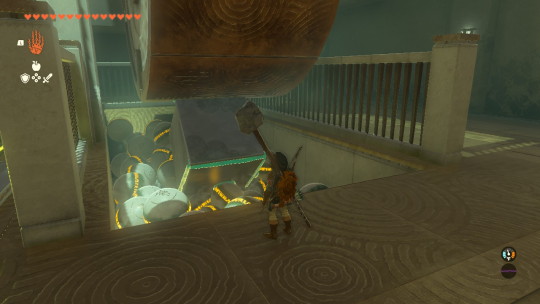
Use one of the panels ro complete the circuit and activate the wheel.

Climb the ladder as the wheel spins. The “scoop” you have created will carry a few balls up to the top. One will fall into the nook on the floor to raise the portcullis.
If too many balls are scooped at once, they may get crowded and stuck. If this happens, just grab them with Ultrahand and move them into the nook yourself.
Pass through the final chamber, collect your Light of Blessing and complete the shrine!
#nintendo#botw#totk#totk shrine#shrine help#zonai shrine#totk gameplay#totk release#loz totk#totk liveblog#stellariaz shrines#stellariaz sidequests#zonai device#zonai construct#totk zonai#totk quest#totk zelda
5 notes
·
View notes
Text
Princess Zelda Kidnapped?!: Dueling Peaks Stable
When you arrive at Dueling Peaks Stable, climb up to the top of the horse head on the stable building.
Penn will be up there, surveying the area. He’ll explain he has reason to believe the Yiga Clan has brought the kidnapped Princess Zelda here as a part of a sinister plot. Specifically, they have brought her to “the carved out heart of the twins” and asks Link to help him investigate.
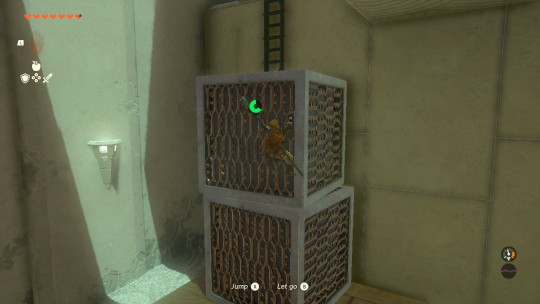
Head to this point marked on the map, where you will see a cage with Princess Zelda inside.

Delighted, she asks you if you recognize her and to help to lift away the cage. Use Ultrahand to free her.
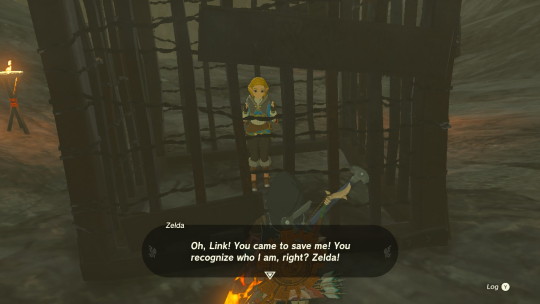
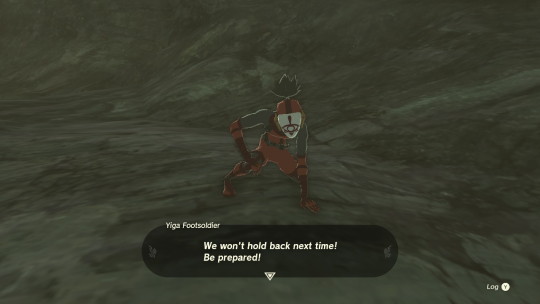
Once the cage has been removed, you discover this is not Zelda at all but a disguised Yiga Clan soldier!
Three soldiers will then appear, be prepared for their fast attacks!
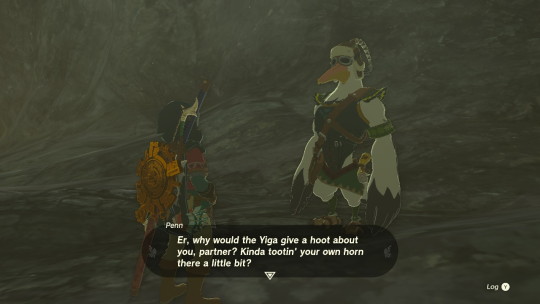
Once defeated, the Yiga disband and Penn appears to give you your pay.
After speaking with Penn, he seems hardly convinced the Yiga would be after a feeble adventurer like you.
#nintendo#botw#totk#totk shrine#shrine help#zonai shrine#totk gameplay#totk release#loz totk#totk liveblog#stellariaz shrines#stellariaz sidequests#zonai device#zonai construct#totk zonai#totk quest#totk zelda
4 notes
·
View notes
Text
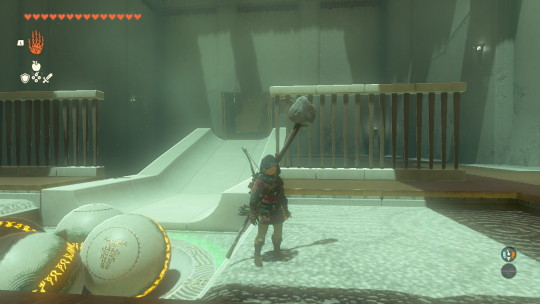
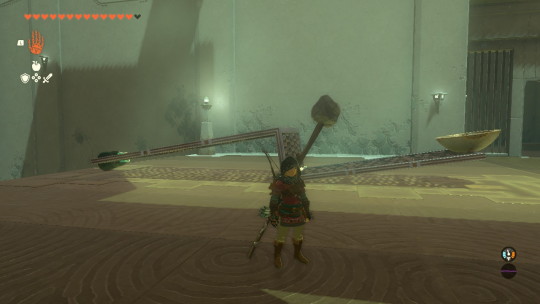
Wind Power: Kisinona Shrine
Upon entry, you will find a large circular structure surrounded by seven fans.
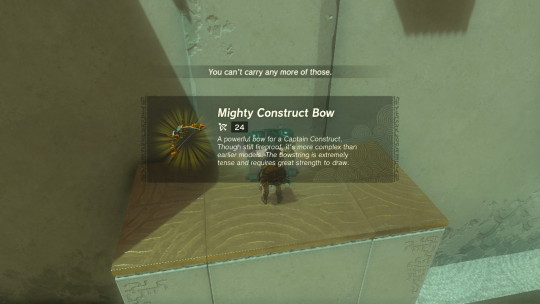
To the right will be two Zonai fans. Grab one with Ultrahand and bring it over to the pillar on the left.
Place it on the floor and activate it.
Ride the updraft to the chest on top of the pillar. Inside will be a Mighty Construct Bow!
In order to get all seven fans spinning at once, the Zonai Fans must be angled slightly and placed on opposing ends of the middle structure, facing opposite ways.
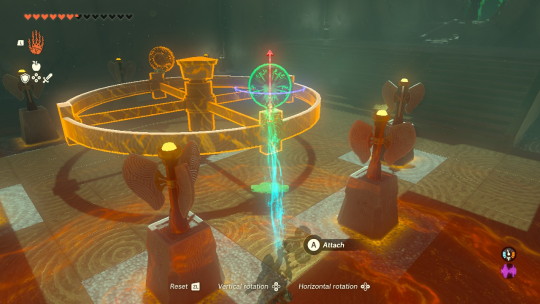
I will show my setup below. It took me a couple of tries to get the angle just right so be patient!
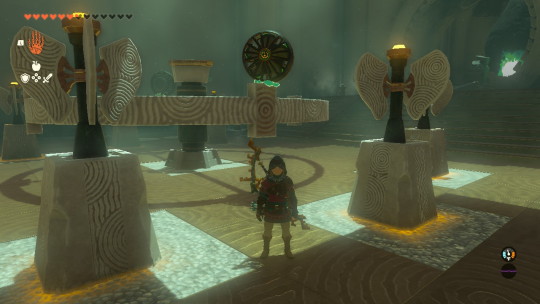
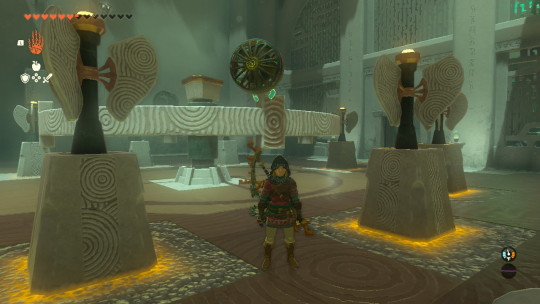
Once you have set up your fans, activate them. If done correctly, the portcullis should rise!
Go through the now-lifted portcullis, collect your Light of Blessing and complete the shrine!
#nintendo#botw#totk#totk shrine#shrine help#zonai shrine#totk gameplay#totk release#loz totk#totk liveblog#stellariaz shrines#stellariaz sidequests#zonai device#zonai construct#totk zonai#totk quest#totk zelda
2 notes
·
View notes
Text
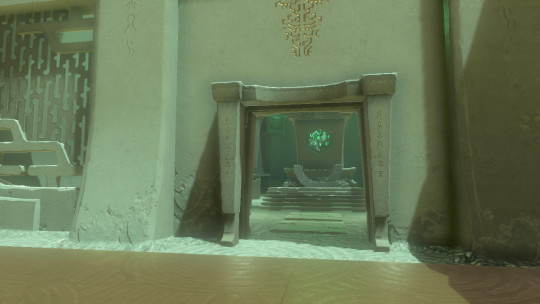
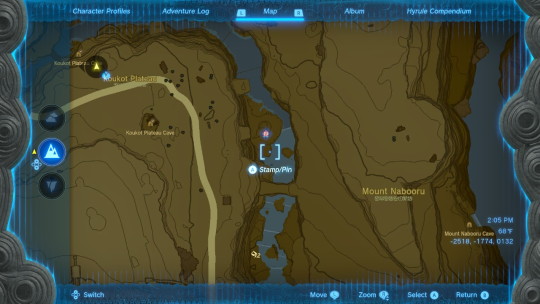
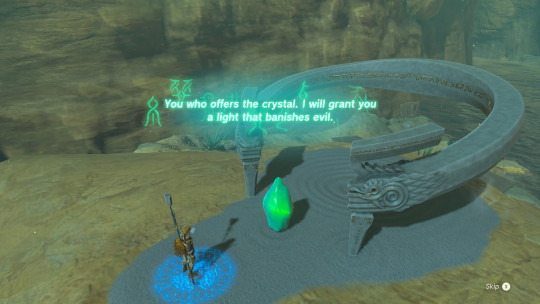
Rakakudaj Shrine: The Gerudo Canyon Crystal
You come across an incomplete shrine in your travels, at the point marked by the red pin on the map below.
A voice will then tell you to follow a beam of light towards something that may be able to help you restore the shrine.

Follow the light until you come across a traveler, with a mysterious green crystal at his side. Offer him a splash fruit, them use Ultrahand, a Zonai device or just carry the crystal back to the shrine.

Once offered, the crystal will open up the shrine as usual.
Inside, you will find a chest before the shrine’s end. It contains a mighty Zonaite Longsword!
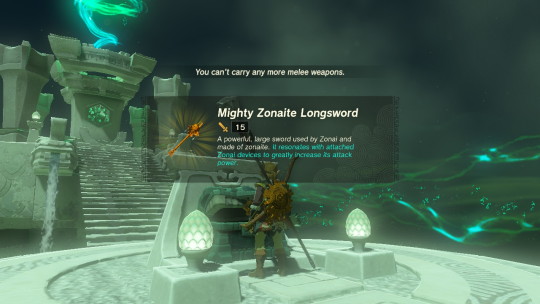
Collect your Light of Blessing and complete the shrine!
#nintendo#botw#totk#totk shrine#shrine help#zonai shrine#totk gameplay#totk release#loz totk#totk liveblog#stellariaz shrines#stellariaz sidequests#zonai device#zonai construct#totk zonai#totk quest#totk zelda
3 notes
·
View notes
Text
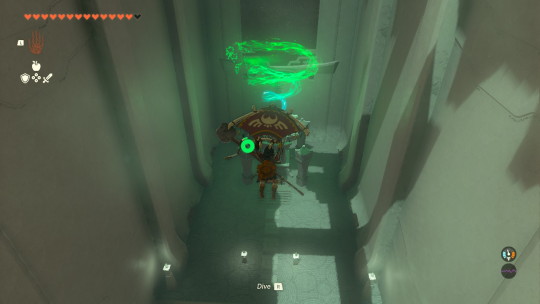
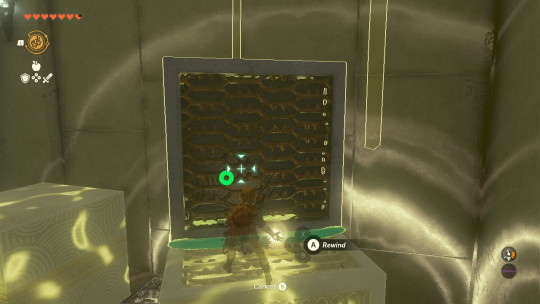
Bridging the Sands: Kudasinar Shrine
Once you enter, you will see three wooden pallets floating across the quicksand in front of you.
Using a combination of Ultrahand and Recall, make your way across to the next platform. Hop onto a platform and apply Recall to ride closer to another. Use Ultrahand or deactivate Recall to hop onto the next platform.
You can use Ultrahand as Recall is active, so keep this in mind!
Once you've reached the platform, grab a pallet floating by.
Use Ultrahand to draw a path for the pallet to follow over the fence in front of you.
Hop on and apply recall to get to the other side.
There will be a soldier construct waiting behind a wall in front of you. Angle yourself to get a clear shot of its head to take it out with one hit.
Using the pallet you have bright across, as well as some floating by, create a bridge to reach the platform in front of you. There should be a ladder leading upwards.
Climb the ladder and step onto the button on the floor. It will launch a ball to the other side of the room.
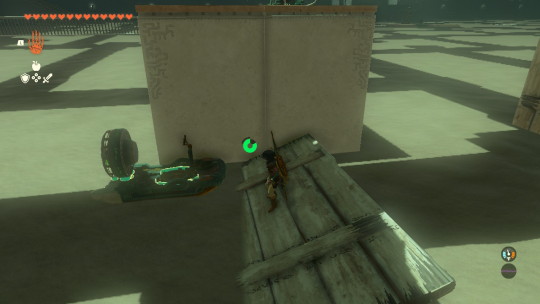
Down the staircase will be a platform with two premade Zonai vehicles.
Chests…
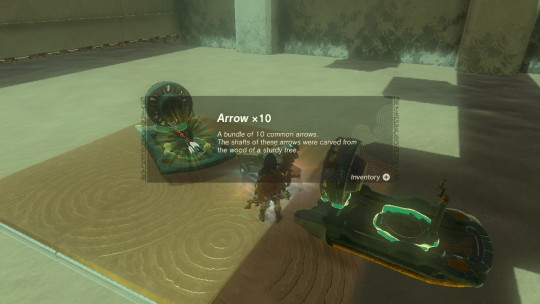
To your left will be a platform and a chest hanging from a string. Use your bow to shoot it down and grab it with Ultrahand. Inside will be a bundle of 10 arrows.
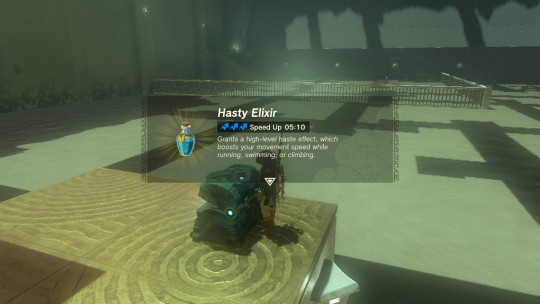
Across the room to the right, in one of the farther corner areas, will be a pillar with a soldier construct and chest on top.
Angle your vehicle like so and hop onto the wooden platform. Take out the soldier construct with your bow.
Use the nearby upright pallet to create a ramp to the pillar. Inside the chest will be a hasty Elixir!
Ride across the room to the chamber where the ball was launched.
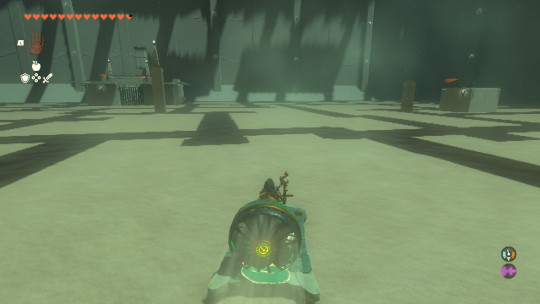
Once you guide yourself underneath the outside edge of the chamber, stop controlling the device and quickly use Ascend to reach the level above. You must be quick, as the vehicle will immediately start sinking once you have stopped controlling it.
Two soldier constructs you have likely already noticed on your ride over, are waiting up top. Quickly take them out to avoid any annoying attacks.
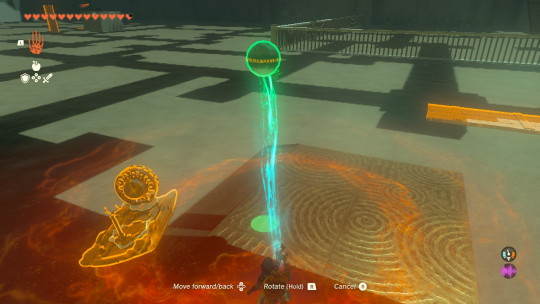
The button in the chamber below will lift a portcullis and release the ball across the sands.
Quickly hop onto another Zonai vehicle and chase it across the sand. You will travel quicker than the ball, so when you reach the platform where the ball was first launched, use Ultrahand to grab it before it floats away.
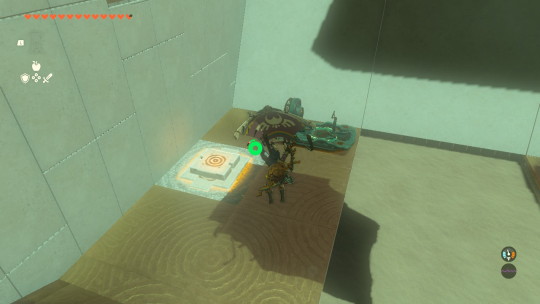
Use the wooden pallets in front of you to create a bridge up to the staircase in front of you.

Carry the ball up and place it into the hole in the floor.
The portcullis will then raise itself.
Collect your Light of Blessing and complete the shrine!
#nintendo#botw#totk#totk shrine#shrine help#zonai shrine#totk gameplay#totk release#loz totk#totk liveblog#stellariaz shrines#stellariaz sidequests#zonai device#zonai construct#totk zonai#totk quest#totk zelda
1 note
·
View note
Text
Makasura Shrine: An Upright Device
Upon entry, you are greeted with what looks to be nothing.
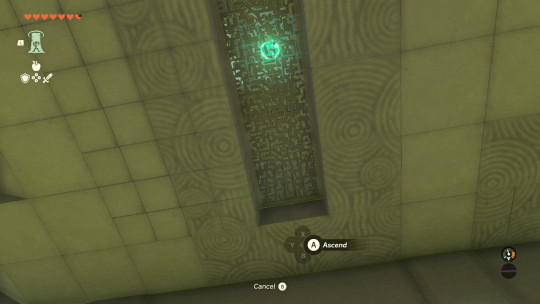
Use your “Ascend” ability on the thin platform in front of you to reach the next level.
The level above contains a platform attached to a Zonai device that will bring the platform upright when struck. An identical device lies to its left.
Strike the device to create a ramp. Place at the edge of the platform, climb, and paraglide to the other side.
The middle platform contains two barred areas on either side.
In the leftmost area, place the ball onto the platform in the center of the barred area using “Ultrahand”.
Then, place the Zonai device on the end of the platform. Strike to launch the ball over the wall.
This may take a few tries and adjustments. I had to launch once and then move the platform closer to the door and try again. Keep tweaking and you’ll get it!
The ball will roll its wall into the nook on the floor to open the right portcullis that reveals a similar device.
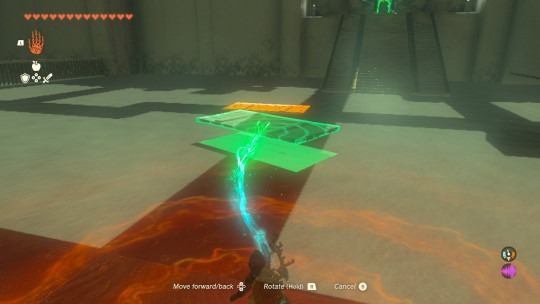
Using the pieces you have now, create a structure like the one shown below.
Sit in the basket and shoot at the Zonai device at the end to launch yourself into the air!
Paraglide over to collect your “Light of Blessing” and complete the shrine!
#nintendo#botw#totk#totk shrine#shrine help#zonai shrine#totk gameplay#totk release#loz totk#totk liveblog#stellariaz shrines#stellariaz sidequests#zonai device#zonai construct#totk zonai#totk quest#totk zelda
1 note
·
View note
Text
Turakawaki Shrine: Stacking a Path
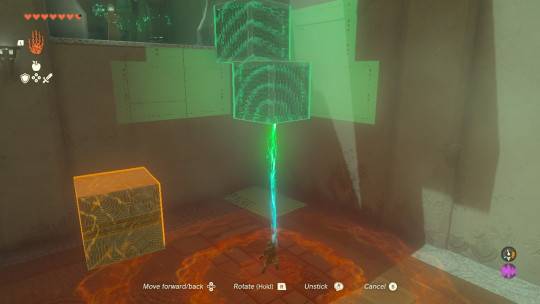
Climb up the first block onto the platform in front of you. Use “Ultrahand” to bring the block you just climbed up onto the platform with you.

Stack and attach the blocks on top of one another to climb to the ladder above.
Bring both attacked blocks to the next level with you.
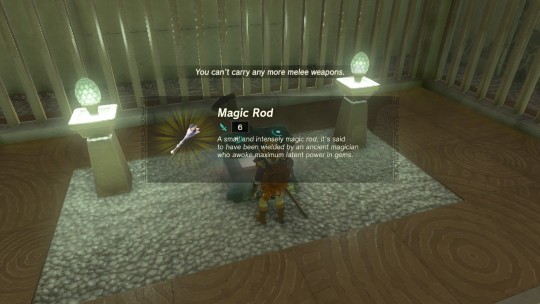
Chest…
Go back to the first room and stand under the grated slit on the ceiling.
Open the chest inside the boxed off area for a Magic Rod!
Use Ascend to exit the box from above
Use “Ultrahand” to draw an upwards path for the boxes to follow. Then, while standing close to the box, apply “Recall” and climb onto the boxes and then the final platform.
Collect your “Light of Blessing” and complete the shrine!
#nintendo#botw#totk#totk shrine#shrine help#zonai shrine#totk gameplay#totk release#loz totk#totk liveblog#stellariaz shrines#stellariaz sidequests#zonai device#zonai construct#totk zonai#totk quest#totk zelda
0 notes
Text
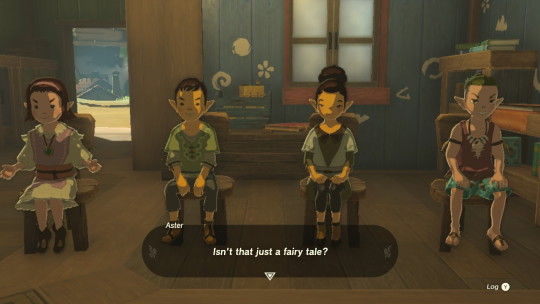
Teach Me A Lesson l: Hateno Village
Head over to the school in Hateno Village around 9:15 am. It can be found on the path behind Ventest Clothing Boutique near the towns entrance.
Speak to Symin, Purah’s former assistant turned teacher, as he begins a lesson on the Calamity with his students.
The students ask Symin for direct proof of the Calamity from 10,000 years ago.
Frustrated, Symin mentions there is a depiction of such in Lady Paya’s hall in Kakariko village but he cannot make the visit with his class. The duty of course falls onto you.
Head to Paya’s manor in Kakariko Village and go upstairs.
To the left will be a tapestry depicting the Calamity, the same picture shown throughout BOTW.
Take a picture and return to the school.
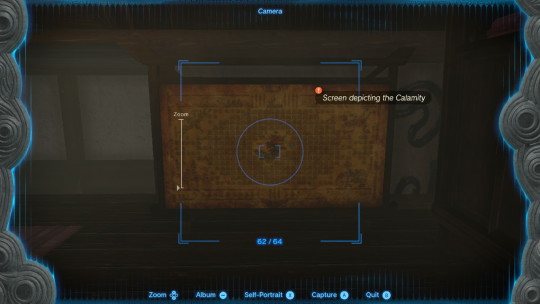
Tell Symin about the photo and he will show it to the students, in awe of the image.
Symin invites you to sit in on his lecture, in which he tells the legend of the Calamity and the story following BOTW.

As a thank you, he gives you ten bundles of Hylian Rice. He mentions the next lesson will teach the children about food, likely involving rice.
#totk#botw#totk liveblog#legend of zelda#zelda totk#game guides#totk zelda#stellariaz shrines#stellariaz sidequests#totk quest#totk shrines#shrine solution#nintendo#zonai shrine#zonai device#zonai construct#shrine help
14 notes
·
View notes