
standardprintco
Standard Print Co
クリエト • “ku-ri-e-to” • Create
8 posts
Don't wanna be here? Send us removal request.
Last Seen Blogs

bitcoin4buying-blog
Untitled

miniatureitaliangoathound
O’syn Difannu

evoked-ambition-blog
Evoked Ambition

cheesy-sunny-days
Sunny Cheesy Days

tmkiskmt
Extremely effective
Text
PETG Quick Start Guide
Everything you need to know to begin printing in PETG
.quickheader { text-align:left !important; } #materialbutton { border:1px solid Black; padding:2px 5px; background-color: none; color: Black; border-radius:10px; } #materialbutton:hover { border:1px solid Black; padding:2px 5px; background-color: black; color: white; border-radius:10px; } .full-width { width: 100vw; margin: 0rem -50vw; position: relative; left: 50%; right: 50%; background-size: cover !important; -webkit-background-size: cover; -moz-background-size: cover; -o-background-size: cover; background-position: center !important; background-repeat: no-repeat; z-index: 99; } .image-banner { height: auto; display: -webkit-box; display: -ms-flexbox; display: flex; -webkit-box-orient: vertical; -webkit-box-direction: normal; -ms-flex-direction: column; flex-direction: column; -webkit-box-pack: center; -ms-flex-pack: center; justify-content: center; -webkit-box-align: center; -ms-flex-align: center; align-items: center; padding-top: 10vh; /* CHANGE NUMBER TO ADJUST HEIGHT */ padding-bottom: 10vh; /* CHANGE NUMBER TO ADJUST HEIGHT */ }
PETG
PETG is great for mechanical applications due to its amazing layer adhesion, low warping and high impact-resistance. As an added bonus, PETG is both chemically resistant to salts, acids, alkalis, solvents, greases, oils and can be sterilised.
Chemical Resistant Water Resistant Rigid
var SPCOCanvas = document.getElementById("SPCOChart"); var SPCOData = { labels: [ "Hardness", "Tensile Strength", "Ductility", "UV Stability", "Heat Resistance", "Ease of Printing" ], datasets: [ { label: "PETG", backgroundColor: "rgba(0,133,202,0.3)", borderColor: "rgba(0,133,202.6)", fill: true, radius: 1, pointRadius: 1, pointBorderWidth: 1, pointBackgroundColor: "rgba(0,133,202,0.6)", pointBorderColor: "rgba(0,133,202,0.6)", pointHoverRadius: 10, data: [3, 1, 1, 3, 3, 5] } ] }; var chartOptions = { maintainAspectRatio: true, responsive: true, legend: { display: false, }, scale: { ticks: { display: false, showLabelBackdrop: false, beginAtZero: true, min: 0, max: 5, stepSize: 1 }, pointLabels: { fontSize: 10, family:"cabin" } } }; var radarChart = new Chart(SPCOCanvas, { type: "radar", data: SPCOData, options: chartOptions });
#quickbuybutton { background-color: #000000; color: #FFFFFF; padding: 13px 30px; } #quickbuybutton:hover { background-color: #FFFFFF; color: #000000; padding: 13px 30px; } #quicktbuttoncontainter { vertical-align: middle; }
Quick Start Guide:
PETG Filament
Pros Cons
Hardware Requirements
Printing Settings
Best Practices
Pro Tips
Applications
Next:
PETG Ultimate Printing Guide
Buy
Next
Overview
PETG is a Glycol Modified version of Polyethylene Terephthalate (PET), which is commonly used to manufacture plastic drink bottles. This semi-rigid material is highly impact and chemically resistant, but its surface is slightly softer than other materials. PETG benefits from great thermal properties, allowing it to cool efficiently with almost negligible warpage making it great for tough parts when 3D printing with a setup without an enclosure.
The mechanical and visual properties of PETG make it a highly useful material. As opposed to beginner-friendly materials such as PLA and PLA+, PETG prints best within a tighter tolerance range of settings, making it slightly less forgiving.
For more information on what PETG is and what it’s good for, check out our Introduction to PETG.
h1 { text-align: center; } #quickstartpro { background-color: whitesmoke; text-align: left; vertical-align:middle; padding: 10px 0px; }
Pros
Cons
✔️ Great chemical and weather resistance ❌ Can produce parts with fine stringing on the part surface ✔️ Sticks well to the bed with negligible warping ✔️ Odorless while printing
Hardware Requirements
#notrequired { opacity: 1; } #headerrow { border-bottom:1px solid rgba(0,0,0,0.2); } #hardwaretable { padding: 10px 0px; }
Enclosure
Heated Bed
Hardened
Nozzle
Fan


✔️
✔️✔️
✖️
✔️✔️
Fume
Extraction
Direct
Drive Extruder
High Temp
Extruder
Filament
Drybox


✔️
✖️
✖️
✔️
#disclaimer { background-color: whitesmoke; text-align: left; vertical-align:middle; padding: 30px 30px; font-weight: 200; }
The internet is filled with conflicting information regarding different settings. It’s critical to understand that printer settings from one printer may not necessarily translate to another printer.
Your print settings may vary from what is shown below - but the fundamentals behind each suggestion remain the same.
With PETG, one thing is certain: You’ll have to experiment to find the best parameters for your printer. This article aims to give you a good starting point.
Print Settings
Extruder Temperature
Bed Temperature
Fan Speed
#tooltipcarrier { text-align: middle; } #tooltipcarrier td { vertical-align: top; } .tooltipinfosymbol { color: rgba(0,0,0,0.5) } /*Left*/ .lefttooltip { position: relative; display: inline-block; border-bottom: solid 0.1px rgba(232,232,232,0.9); cursor: help; } .lefttooltip .lefttooltiptext { visibility: hidden; width: 300px; background-color: black; color: #fff; text-align: left; border-radius: 6px; padding: 0px 5px; position: absolute; z-index: 1; bottom: 125%; left: 0%; margin-left: -25px; /* Fade in tooltip - takes 1 second to go from 0% to 100% opacity: */ opacity: 0; transition: opacity 1s; } .lefttooltip:hover .lefttooltiptext { visibility: visible; opacity: 1; } /*Mid Tip*/ .tooltip { position: relative; display: inline-block; border-bottom: solid 0.1px rgba(232,232,232,1); cursor: help; } .tooltip .tooltiptext { visibility: hidden; width: 300px; background-color: black; color: #fff; text-align: left; border-radius: 6px; padding: 0px 5px; position: absolute; z-index: 1; bottom: 125%; left: 50%; margin-left: -150px; /* Fade in tooltip - takes 1 second to go from 0% to 100% opacity: */ opacity: 0; transition: opacity 1s; } .tooltip:hover .tooltiptext { visibility: visible; opacity: 1; } /*Right*/ .righttooltip { position: relative; display: inline-block; border-bottom: solid 0.1px rgba(232,232,232,1); cursor: help; } .righttooltip .righttooltiptext { visibility: hidden; width: 300px; background-color: black; color: #fff; text-align: left; border-radius: 6px; padding: 0px 5px; position: absolute; z-index: 1; bottom: 125%; left: 100%; margin-left: -300px; /* Fade in tooltip - takes 1 second to go from 0% to 100% opacity: */ opacity: 0; transition: opacity 1s; } .righttooltip:hover .righttooltiptext { visibility: visible; opacity: 1; } .lefttooltiptext p { font-size: 12px; } .tooltiptext p { font-size: 12px; } .righttooltiptext p { font-size: 12px; }
-
↓ Extruder Temperature
↓ Stringing - Will decrease at temperatures <220°C as the molten filament will have a higher viscocity, leading to a neater print.
↓ Oozing - See above.
↑ Underextrusion - Can happen at temperatures of <220°C as your printer simply can't melt the filament fast enough to keep up with the filament feed rate.
Our tip: Before adjusting your extruder temperature any lower than <220°C, try adjusting your retraction, coasting and travel speed.
220°Cs
Set your extruder temperature to 220°C. Increase the printing temperature if you are experiencing underextrusion or if your extruder gear is slipping.
🛈
+
↑ Extruder Temperature
↑ Stringing - Increases at temperatures <240°C as the molten filament will have a lower viscocity, flowing more freely.
↑ Oozing - See above.
↓ Surface Resolution- At temperatures of <240°C leading to sloppy layers and an increase in artifacts like stringing and oozing.
#tooltipcarrier { text-align: middle; } #tooltipcarrier td { vertical-align: top; } .tooltipinfosymbol { color: rgba(0,0,0,0.5) } /*Left*/ .lefttooltip { position: relative; display: inline-block; border-bottom: solid 0.1px rgba(232,232,232,1); cursor: help; } .lefttooltip .lefttooltiptext { visibility: hidden; width: 300px; background-color: black; color: rgba(255,255,255,0.75); text-align: left; border-radius: 6px; padding: 0px 5px; position: absolute; z-index: 1; bottom: 125%; left: 0%; margin-left: -25px; /* Fade in tooltip - takes 1 second to go from 0% to 100% opacity: */ opacity: 0; transition: opacity 1s; } .lefttooltip:hover .lefttooltiptext { visibility: visible; opacity: 0.75; } /*Mid Tip*/ .tooltip { position: relative; display: inline-block; border-bottom: solid 0.1px rgba(232,232,232,0.75); cursor: help; } .tooltip .tooltiptext { visibility: hidden; width: 300px; background-color: black; color: #fff; text-align: left; border-radius: 6px; padding: 0px 5px; position: absolute; z-index: 1; bottom: 125%; left: 50%; margin-left: -150px; /* Fade in tooltip - takes 1 second to go from 0% to 100% opacity: */ opacity: 0; transition: opacity 1s; } .tooltip:hover .tooltiptext { visibility: visible; opacity: 1; } /*Right*/ .righttooltip { position: relative; display: inline-block; border-bottom: solid 0.1px rgba(232,232,232,0.75); cursor: help; } .righttooltip .righttooltiptext { visibility: hidden; width: 300px; background-color: black; color: #fff; text-align: left; border-radius: 6px; padding: 0px 5px; position: absolute; z-index: 1; bottom: 125%; left: 100%; margin-left: -300px; /* Fade in tooltip - takes 1 second to go from 0% to 100% opacity: */ opacity: 0; transition: opacity 1s; } .righttooltip:hover .righttooltiptext { visibility: visible; opacity: 1; } .lefttooltiptext p { font-size: 12px; } .tooltiptext p { font-size: 12px; } .righttooltiptext p { font-size: 12px; }
-
↓ Bed Temperature
↓ Part Adhesion - Too little heat in the bed will cause your part to cool to quickly, curl and dislodge from the bed.
70 - 80°Cs
Set your bed temperature to 80°C for your first layer to ensure your first layer sticks to the bed and 75°C for the rest of the print.
🛈
+
↑ Bed Temperature
↑ Part Deformation - Too much heat will cause your part to melt into the bed, deforming the bottom layers.
#tooltipcarrier { text-align: middle; } #tooltipcarrier td { vertical-align: top; } .tooltipinfosymbol { color: rgba(0,0,0,0.5) } /*Left*/ .lefttooltip { position: relative; display: inline-block; border-bottom: solid 0.1px rgba(232,232,232,1); cursor: help; } .lefttooltip .lefttooltiptext { visibility: hidden; width: 300px; background-color: black; color: #fff; text-align: left; border-radius: 6px; padding: 0px 5px; position: absolute; z-index: 1; bottom: 125%; left: 0%; margin-left: -25px; /* Fade in tooltip - takes 1 second to go from 0% to 100% opacity: */ opacity: 0; transition: opacity 1s; } .lefttooltip:hover .lefttooltiptext { visibility: visible; opacity: 1; } /*Mid Tip*/ .tooltip { position: relative; display: inline-block; border-bottom: solid 0.1px rgba(232,232,232,1); cursor: help; } .tooltip .tooltiptext { visibility: hidden; width: 300px; background-color: black; color: #fff; text-align: left; border-radius: 6px; padding: 0px 5px; position: absolute; z-index: 1; bottom: 125%; left: 50%; margin-left: -150px; /* Fade in tooltip - takes 1 second to go from 0% to 100% opacity: */ opacity: 0; transition: opacity 1s; } .tooltip:hover .tooltiptext { visibility: visible; opacity: 1; } /*Right*/ .righttooltip { position: relative; display: inline-block; border-bottom: solid 0.1px rgba(232,232,232,1); cursor: help; } .righttooltip .righttooltiptext { visibility: hidden; width: 300px; background-color: black; color: #fff; text-align: left; border-radius: 6px; padding: 0px 5px; position: absolute; z-index: 1; bottom: 125%; left: 100%; margin-left: -300px; /* Fade in tooltip - takes 1 second to go from 0% to 100% opacity: */ opacity: 0; transition: opacity 1s; } .righttooltip:hover .righttooltiptext { visibility: visible; opacity: 1; } .lefttooltiptext p { font-size: 12px; } .tooltiptext p { font-size: 12px; } .righttooltiptext p { font-size: 12px; }
-
↓ Fan Speed
↑ Part Strength - Slows the cooling rate of each layer being printed. This gives the part more time to bond to the preceeding layer, resulting in increased interlayer adhesion and part strength. Helps remedy part delamination problems. PETG can be printed with fan speed set to 0%.
↓ Surface Resolution - Decreasing the fan speed will result in your PETG staying more molten for longer. This can result in sloppy layer lines and an increase in artifacts like stringing and burnt looking spots resulting from oozing.
50%
Start at 50% fan speed for a good balance between part strength and surface resolution
🛈
+
↑ Fan Speed
↓ Part Strength - Increases the cooling rate of each layer being printed. This gives the part less time to bond to the preceeding layer, resulting in less interlayer adhesion and a decrease in part strength.
↑ Surface Resolution - Increases layer cooling. Will result in crisp prints with neat and defined layer lines. Perfect if you are after a part that prioritises visual clarity over part strength. PETG can be printed with fan speed set to 100%.
Print Speed
Retraction Speed
Retraction Distance
#tooltipcarrier { text-align: middle; } #tooltipcarrier td { vertical-align: top; } .tooltipinfosymbol { color: rgba(0,0,0,0.5) } /*Left*/ .lefttooltip { position: relative; display: inline-block; border-bottom: solid 0.1px rgba(232,232,232,1); cursor: help; } .lefttooltip .lefttooltiptext { visibility: hidden; width: 300px; background-color: black; color: #fff; text-align: left; border-radius: 6px; padding: 0px 5px; position: absolute; z-index: 1; bottom: 125%; left: 0%; margin-left: -25px; /* Fade in tooltip - takes 1 second to go from 0% to 100% opacity: */ opacity: 0; transition: opacity 1s; } .lefttooltip:hover .lefttooltiptext { visibility: visible; opacity: 1; } /*Mid Tip*/ .tooltip { position: relative; display: inline-block; border-bottom: solid 0.1px rgba(232,232,232,1); cursor: help; } .tooltip .tooltiptext { visibility: hidden; width: 300px; background-color: black; color: #fff; text-align: left; border-radius: 6px; padding: 0px 5px; position: absolute; z-index: 1; bottom: 125%; left: 50%; margin-left: -150px; /* Fade in tooltip - takes 1 second to go from 0% to 100% opacity: */ opacity: 0; transition: opacity 1s; } .tooltip:hover .tooltiptext { visibility: visible; opacity: 1; } /*Right*/ .righttooltip { position: relative; display: inline-block; border-bottom: solid 0.1px rgba(232,232,232,1); cursor: help; } .righttooltip .righttooltiptext { visibility: hidden; width: 300px; background-color: black; color: #fff; text-align: left; border-radius: 6px; padding: 0px 5px; position: absolute; z-index: 1; bottom: 125%; left: 100%; margin-left: -300px; /* Fade in tooltip - takes 1 second to go from 0% to 100% opacity: */ opacity: 0; transition: opacity 1s; } .righttooltip:hover .righttooltiptext { visibility: visible; opacity: 1; } .lefttooltiptext p { font-size: 12px; } .tooltiptext p { font-size: 12px; } .righttooltiptext p { font-size: 12px; }
-
↓ Print Speed | ↑ Print Time
↑ Layer Adhesion - Gives your layers more time to bond, increasing interlayer adhesion.
↑ Part Deformation - Too much thermal energy may be pumped into your part, slowing down the cooling and resulting in sloppy layers
↓ Travel Speed | ↑ Print Time
↑ Stringing - More time spent travelling results in more molten material leaking out of the nozzle of your printer leading to more stringing
↑ Oozing - Results in more oozing from the nozzle. (see above)
30 - 50mm/s
Print Speed: Start at 50mm/s and only increase the print speed if you are comfortable with the print quality. Printing your first layer at 25mm/s will help keep your part stuck to the bed.
Travel speed: Start at a minumum of 150mm/s but speeds of 300mm/s are preferable. Keep as high as your printer will allow. Dial back if you notice ringing occuring.
🛈
+
↑ Print Speed | ↓ Print Time
↓ Layer Adhesion - Gives your layers less time to bond, decreasing interlayer adhesion. Aim to keep print speeds under 60mm/s for best results.
↑ Extruder Skipping - Can occur when the printer can't melt and print filament fast enough
↑ Travel Speed | ↓ Print Time
↓ Stringing - Less time spent travelling results in less molten material leaking out of the nozzle of your printer decreasing stringing
↓
Oozing - Results in less oozing from the nozzle. (see above)
#tooltipcarrier { text-align: middle; } #tooltipcarrier td { vertical-align: top; } .tooltipinfosymbol { color: rgba(0,0,0,0.5) } /*Left*/ .lefttooltip { position: relative; display: inline-block; border-bottom: solid 0.1px rgba(232,232,232,1); cursor: help; } .lefttooltip .lefttooltiptext { visibility: hidden; width: 300px; background-color: black; color: #fff; text-align: left; border-radius: 6px; padding: 0px 5px; position: absolute; z-index: 1; bottom: 125%; left: 0%; margin-left: -25px; /* Fade in tooltip - takes 1 second to go from 0% to 100% opacity: */ opacity: 0; transition: opacity 1s; } .lefttooltip:hover .lefttooltiptext { visibility: visible; opacity: 1; } /*Mid Tip*/ .tooltip { position: relative; display: inline-block; border-bottom: solid 0.1px rgba(232,232,232,1); cursor: help; } .tooltip .tooltiptext { visibility: hidden; width: 300px; background-color: black; color: #fff; text-align: left; border-radius: 6px; padding: 0px 5px; position: absolute; z-index: 1; bottom: 125%; left: 50%; margin-left: -150px; /* Fade in tooltip - takes 1 second to go from 0% to 100% opacity: */ opacity: 0; transition: opacity 1s; } .tooltip:hover .tooltiptext { visibility: visible; opacity: 1; } /*Right*/ .righttooltip { position: relative; display: inline-block; border-bottom: solid 0.1px rgba(232,232,232,1); cursor: help; } .righttooltip .righttooltiptext { visibility: hidden; width: 300px; background-color: black; color: #fff; text-align: left; border-radius: 6px; padding: 0px 5px; position: absolute; z-index: 1; bottom: 125%; left: 100%; margin-left: -300px; /* Fade in tooltip - takes 1 second to go from 0% to 100% opacity: */ opacity: 0; transition: opacity 1s; } .righttooltip:hover .righttooltiptext { visibility: visible; opacity: 1; } .lefttooltiptext p { font-size: 12px; } .tooltiptext p { font-size: 12px; } .righttooltiptext p { font-size: 12px; }
-
↓ Retraction Distance
↑ Stringing -Shorter retraction distances causes a smaller a drop in the pressure inside the nozzle. With distances less than 3mm, it may not be enough to stop molten filament from leaking out of your nozzle.
↓ Oozing - See above.
3 - 6mm
For Bowden systems: Start with a retraction of 3mm. Increase retraction to 4mm if needed. This distance may be higher if you have a longer bowden tube.
For Direct Drive systems: Start with a retraction of 1mm. Increase retraction distance to 2mm if needed.
Our Tip: Tune retraction distance up/down by 0.5mm increments. Aim to keep the distance between the 0.5 - 6mm.
🛈
+
↑ Retraction Distance
↓ Stringing - Causes a larger a drop in the pressure inside the nozzle, stopping more filament from leaking out of your nozzle.
↓ Oozing - See above.
↑ Underextrusion - Excessive retraction can cause a delay before your nozzle resumes printing causing underextrusion.
Our tip: If your retraction distance is at the upper limit, try adjusting your retraction speed, coasting & travel speed.
#tooltipcarrier { text-align: middle; } #tooltipcarrier td { vertical-align: top; } .tooltipinfosymbol { color: rgba(0,0,0,0.5) } /*Left*/ .lefttooltip { position: relative; display: inline-block; border-bottom: solid 0.1px rgba(232,232,232,1); cursor: help; } .lefttooltip .lefttooltiptext { visibility: hidden; width: 300px; background-color: black; color: #fff; text-align: left; border-radius: 6px; padding: 0px 5px; position: absolute; z-index: 1; bottom: 125%; left: 0%; margin-left: -25px; /* Fade in tooltip - takes 1 second to go from 0% to 100% opacity: */ opacity: 0; transition: opacity 1s; } .lefttooltip:hover .lefttooltiptext { visibility: visible; opacity: 1; } /*Mid Tip*/ .tooltip { position: relative; display: inline-block; border-bottom: solid 0.1px rgba(232,232,232,1); cursor: help; } .tooltip .tooltiptext { visibility: hidden; width: 300px; background-color: black; color: #fff; text-align: left; border-radius: 6px; padding: 0px 5px; position: absolute; z-index: 1; bottom: 125%; left: 50%; margin-left: -150px; /* Fade in tooltip - takes 1 second to go from 0% to 100% opacity: */ opacity: 0; transition: opacity 1s; } .tooltip:hover .tooltiptext { visibility: visible; opacity: 1; } /*Right*/ .righttooltip { position: relative; display: inline-block; border-bottom: solid 0.1px rgba(232,232,232,1); cursor: help; } .righttooltip .righttooltiptext { visibility: hidden; width: 300px; background-color: black; color: #fff; text-align: left; border-radius: 6px; padding: 0px 5px; position: absolute; z-index: 1; bottom: 125%; left: 100%; margin-left: -300px; /* Fade in tooltip - takes 1 second to go from 0% to 100% opacity: */ opacity: 0; transition: opacity 1s; } .righttooltip:hover .righttooltiptext { visibility: visible; opacity: 1; } .lefttooltiptext p { font-size: 12px; } .tooltiptext p { font-size: 12px; } .righttooltiptext p { font-size: 12px; }
-
↓ Retraction Distance
↑ Stringing - Lower retraction speeds cause a smaller drop in the pressure inside the nozzle which may not be enough to stop filament from leaking out of your nozzle.
↑ Oozing - See above.
45mm/s
Start with a retraction speed of 45mm/s.
Our Tip: Increase retraction speed by 5mm/s increments until you notice diminishing in returns in stringing and oozing.
🛈
+
↑ Retraction Speed
↓ Stringing - Causes a larger a drop in the pressure inside the nozzle, stopping more filament from leaking out of your nozzle.
↓ Oozing - See above.
↑ Filament Slip - Excessivly high retraction speeds can cause the feed gears to slip, causing extrusion problems.
Our tip: If your retraction distance is at the upper limit, try adjusting your retraction speed, coasting & travel speed.
Not all 3D printers are built the same. This makes giving exact recommendations for settings difficult as settings for one printer may not necessarily carry over to others.
Consider the following settings a starting point to be fine tuned as you experiment. Don't be afraid to go above or below our suggested settings if they result in better quality prints.
Best Practices
In order to print PETG successfully, having the correct the hardware setup and temperature settings outlined above are only half the battle.
As opposed to printing in other materials, with PETG you will have to pay greater attention to the following settings when 3D printing in PETG:
Printing Temperature
Retraction
Coasting
Fan Speed
Print Speed
Here are some best practices to ensure reliable PETG prints.
+ Start with the lowest temperature
When printing in PETG, many problems related to print quality arise from printing too hot. Start printing PETG at the lowest temperature recommended by your manufacturer. By doing this you'll ensure you begin printing at the most optimal temperature.
We recommend printing at 220°C with our PETG.
+ Calibrate retraction settings to reduce stringing
PETG tends to become runny when it is brought up to printing temperature. As your extruder moves around, molten PETG can leak out of your printer's nozzle and end up on your 3D printed part. This results in fine hairs and strings building up on the outside surface of your PETG print.
This can be alleviated by calibrating your retraction settings.
We recommending starting with a retraction speed of 45mm/s and a retraction distance of between 3-6 mm for a Bowden setup or 1-2mm for a direct drive printer.
For more in-detailed tips check out our PETG Ultimate Printing Guide.
+ Enabling coasting settings to reduce blobs
When printing, PETG tends to continue extruding even after the printer has stopped extruding.
This leads to excess material commonly called zits and blobs that build up on your print, reducing print quality. Sometimes this material can even build up to an extent where it can cause a print to fail.
Enabling coasting tells your printer to stop extruding just before the end of a print layer. This ensures less material oozes out of the nozzle during the travel move that occurs immediately after the print move. Set your costing volume to the cubed value of your nozzle diameter and a volume before coasting of around double your nozzle diameter. (i.e. A coasting volume of 0.064mm³ and a 0.8mm³ volume before coasting for a 0.4mm diameter nozzle)
For more in-detailed tips check out our PETG Ultimate Printing Guide.
+ Increase travel move speed
PETG tends to continue oozing out of the nozzle between print moves.
Increasing the printer's travel speed between extrusion moves decreases the likelihood the nozzle spends depositing unwanted material on your print.
Increased Travel Speeds of 150mm/s and greater will ensure your printer's nozzle spends less time oozing between print moves.
For more in-detailed tips check out our PETG Ultimate Printing Guide.
+ Keep Your Filament Dry
PETG is hygroscopic material meaning it will absorb moisture from the surrounding air. This absorbed moisture in the filament is not a problem once the part has been printed but does present a problem during printing and can result in a 3D printed part with:
Weaker interlayer bonding
Stringing and fine hairs developing on the print
Poor surface resolution
As such, keep your filament stored in a dry environment with, like in an airtight bag or a box filled with desiccant packs. This should preserve the filament and prevent it from absorbing too much moisture.
If your filament is already wet, then you can dry it out with an oven set at around 60 °C. Leave the spool in the oven for a few hours while the moisture is cooked out.
For more in-detailed tips about filament storage check out our Filament Storage & Handling Guide.
+ Use Hairspray or Glue as a Release Agent
Usually other 3D printing materials have trouble sticking to print beds and need a thin spray of hairspray or glue stick to act as an adhesive. PETG is the opposite - it sticks so well that it can even tear chunks out of your build surface.
When printing in PETG applying a thin layer of hairspray or glue is surprisingly also an effective solution for PETG parts that stick too well to the build plate. Once applied the added layer acts as a release agent preventing the PETG from damaging your build surface if you are printing on anything other than a metal print bed.
Use a release agent if your printer's bed is:
Glass
PEI or PEI coated
Polymer based (Buildtak or similar)
For more in-detailed tips check out our PETG Ultimate Printing Guide.
+ Allow for Additional Z-Offset Distance
Unlike PLA and ABS, PETG needs a little extra room to be lain down as it exits the nozzle. Allowing for an additional Z-offset of 0.02mm can make a difference when printing in PETG.
PETG doesn't only stick really well to the bed, it sticks very well to itself as well. While this makes for solid 3D printed parts, it can make removing support material a tricky prospect.
For clean support removal and neat interface layers (the layers linking the support to your 3D print) allow for a little extra Z offset to ensure the support doesn't fuse to the print.
For more in-detailed tips check out our PETG Ultimate Printing Guide.
Pro Tips
Settings Tweaks - Dialling in your PETG print settings can be a little tricky and sometimes requires the manipulation of multiple settings to eliminate the dreaded problems of stringing and oozing. Try tackling the settings tweaks using the tips outlined above in the following order adjusting one setting at a time.
Printing Temperature
Travel Speed
Retraction
Coasting
Fan Speed
Adhesion Hack - Try disabling your part cooling fan and printing 5-10°C for the first few layers of the print to keep the part stuck to the print bed.
For a more in-detail look at the best practices when 3D printing in PETG, check out our next guide in this series PETG Filament Ultimate Printing Guide.
Applications
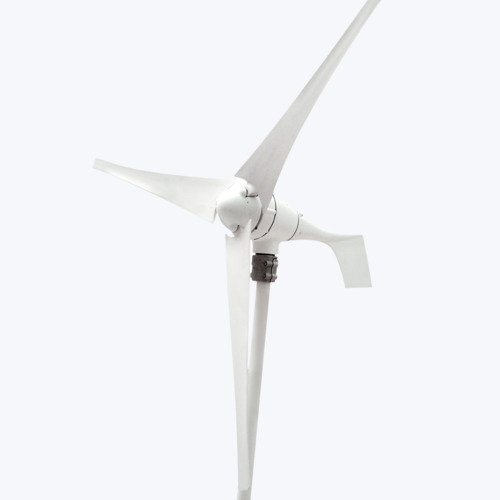
Outdoor Parts
Live Hinge Components
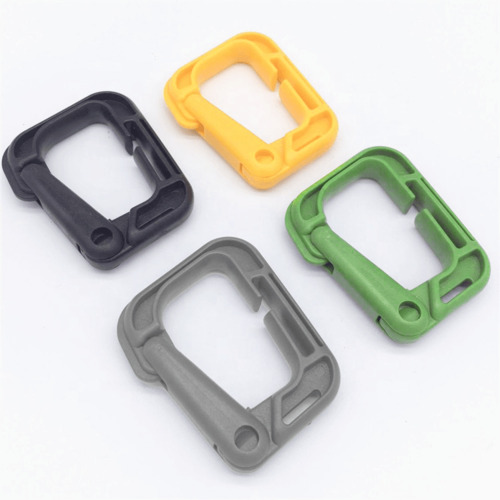
Snap Fit Components
Related Materials
0 notes
Text
How to recycle your 3D prints
Code ♹: The war against 3D printed waste
Summary
Recycling Partners
Downloads
FAQ’S
Almost all FDM 3D printed plastics fall under ♹.
Most councils don’t accept ♹ plastics in curb-side recycling programs.
If your council does accept ♹ plastics, make sure there is a ♹ symbol on your model to ensure it is properly sorted and not diverted into landfill
Check if there are local recycling centres that repurpose 3D printed waste such as Precious Plastics hubs, Local Waste Management Facilities or Standard Print Co. partnered Recycling Facilities.
Let’s face it, plastic recycling is complex. We all want to do our bit to help the environment and minimise our footprint but sometimes it’s just plain confusing to know which plastic is recyclable and which isn’t.
Too often we find ourselves hovering over the recycling bin, rubbish in hand paralysed by indecision. Is this plastic fruit punnet recyclable? What about this piece of plastic wrap? Surely this plastic CD case can be recycled?
With the advent of 3D printing, more people than ever are coming into contact with an ever increasing number of polymers. Knowing which plastic can go in our curb-side recycling bins shouldn’t be this difficult!
Resin Codes
Thankfully that’s where ASTM International comes in. They have grouped all plastics into one of 7 Resin Identification Codes to help better identify plastics. As it stands, the current codes are are follows.
♳ : Polyethylene terephthalate (PETE)
♴ : High density polyethylene (HDPE)
♵ : Polyvinyl chloride (V)
♶ : Low density polyethylene (LDPE)
♷ : Polypropylene (PP)
♸ : Polystyrene (PS)
♹ : Other
3D Printing plastics
Notice that none of the plastics commonly used for 3D printing appear on the list above? That’s because the following plastics all fall under ♹ - a catch all category for a wide variety of plastics that encompasses petroleum based plastics such as ASA and ABS to bioplastics such as PLA. Currently the following plastics fall under ♹:
ABS
ASA
HIPS
Nylon
PLA
PETG
Recyclability
While resin codes ♳, ♴ and ♵ are almost all universally accepted by local councils for curb-side recycling collection, collection of numbers ♶, ♷, ♸ and ♹ vary from council to council with most choosing not to recycle plastics that fall under ♹. While it pays to check if your council is more forward thinking that others, most councils nationwide suggest that ♹ plastics are placed in the general waste bin and are destined for landfill.
Recycling Facilities
This is by no means the end of the road for 3D printed waste recycling as some recycling facilities and institutions may still have need of 3D printed waste. Institutions like Precious Plastics, specialised recycling centres and even universities may be willing to accept specific plastics.
We’ve partnered with the Michel Crouch Innovation Centre at UNSW to collect, process and repurpose 3D printed waste into a variety of useful products. Should you have clean, uncontaminated and well sorted 3D printed waste, you may be eligible to drop it off at one of our collection points for recycling.
Click here to check out out list of partnered institutions that help repurpose 3D printed waste.
Labelling Plastics
If you’re one of the lucky few who live in an area that does recycle ♹ plastics, it’s important to label your 3D prints with the proper resin code as unidentifiable plastics are pulled off the recycling line and diverted to landfill. If you’re looking to recycle your 3D printed waste, it’s important to design a ♹ symbol somewhere visible on the surface of the print so it can be identified.
FAQ’s
+ Which of my 3D printing plastics can I recycle in my curb-side recycling bin?
None of them.
Almost all 3D printed plastics fall under resin ♹.
In Australia almost all councils are unable to recycle ♹ plastics. As such, they can’t be placed in your curb-side recycling bin and are destined for the general waste bin.
Note: Some councils do make exceptions and may accept ♹ plastics for curb-side recycling so it’s worth contacting them to be sure.
+ How can I recycle my 3D printed waste?
Step 1: Check if your local council accepts and recycles ♹ plastics.
If they do: Make sure your prints have a ♹ symbol somewhere visible on the surface of the print so it can be identified or it will end up in landfill despite your best efforts.
If they don’t: Go to step 2.
Step 2: Check if you have a local partnered facility that repurposes 3D printed waste close by.
If you are close to a facility: Ensure your 3D printed waste is grouped by material clear from any contaminants. Drop your 3D printed waste off at your local facility during their opening hours. Again, ensure your prints have a ♹ symbol somewhere visible on the surface of the print.
If you are not close to a facility: Place 3D printed waste in general waste bin.
+ Do you know of any local facilities that will accept my 3D printed waste?
Yes!
Institutions like Precious Plastics, specialised recycling centres and even universities may be willing to accept specific plastics.
Click here to check out out list of partnered institutions that help us repurpose 3D printed waste.
+ PETE (PET) is recyclable in most states. Can PETG can be recycled?
Unfortunately not.
Although PETE (PET) and PETG may differ by a single letter, the glycol present in PETG results the plastics having slightly different melting temperatures. When processed together, the PETG melts and becomes sticky while the PETE stays solid. This causes the materials to clump together and causes problems in the recycling process. As such, PETG is currently not accepted in most councils in Australia for curb-side collection.
Note: Some councils do make exceptions and your local council may differ.
Have we missed anything? Leave us a comment in the section below and let us know!
/** * RECOMMENDED CONFIGURATION VARIABLES: EDIT AND UNCOMMENT THE SECTION BELOW TO INSERT DYNAMIC VALUES FROM YOUR PLATFORM OR CMS. * LEARN WHY DEFINING THESE VARIABLES IS IMPORTANT: https://disqus.com/admin/universalcode/#configuration-variables*/ /* var disqus_config = function () { this.page.url = PAGE_URL; // Replace PAGE_URL with your page's canonical URL variable this.page.identifier = PAGE_IDENTIFIER; // Replace PAGE_IDENTIFIER with your page's unique identifier variable }; */ (function() { // DON'T EDIT BELOW THIS LINE var d = document, s = d.createElement('script'); s.src = '//standardprintco.disqus.com/embed.js'; s.setAttribute('data-timestamp', +new Date()); (d.head || d.body).appendChild(s); })();
Please enable JavaScript to view the comments powered by Disqus.
0 notes
Text
Nozzle Cleaning Drill Bit 10 x 0.04mm
Contents: 10 Drill Bits
Colour: Variable
Material: Tungsten Steel Alloy
Drill Bit Diameter: 0.4mm
Shank Diameter: 31.75mm
A must-have tool in every 3D printer’s toolkit and an essential part of routine 3D printer maintenance. This pack contains 10 x 0.4mm hardened, tungsten alloy drill bits used for unblocking 3D printer nozzles. Suitable for all nozzle sizes - 0.4mm and larger.
Instructions
Heat the nozzle you wish to clean to its suggested printing temperature.
Unload any filament present as per you printer’s manufacturer’s instructions.
While still at printing temperature, carefully remove the heated nozzle from the heat block.
Insert the drill bit gently into the nozzle by hand, from the inside out (following the path that the filament would take) and taking care not to increase the size of the nozzle hole.
Once free of blockages, bring the heat block back to operating temperature before refitting the nozzle, making sure not to over tighten.
Re-level your print bed before printing.
Usage Tips
- Do not attempt to remove a 3D printer’s nozzle from the printer before heating up to full operating temperature as the removal of the extruder while cold can result in damage to both the thread of the nozzle and the heat block.
- Do not attach the drill bit to any form of power tool.
- Do not apply excessive force while clearing the blockage as the drill bits are made of hardened tungsten alloy that can easily damage the softer brass of the nozzle.
- The drill bits can be used while the nozzle is at temperature and still attached to the printer to lightly dislodge any blockages. To do this, simply rotate the drill counter clockwise to dislodge any built-up material and proceed with the “Hot Pull” or “Cold Pull” cleaning methods found here. Extra care should be taken to not insert the drill bit too far up the nozzle as to damage the printer’s filament feeding system.
Details & Care
- After use and once cooled the drill bit can be soaked in solvent such as caustic ethyl acetate for PLA, limonene for HIPS, acetone for ABS to dissolve built up plastic from the drill bit.
Correct Application
- This drill bit set is designed to be inserted into a 3D printer nozzle that has been heated to full printing temperature, and has been detached from the printer in order to unclog blockages that may be present.
- Any other use may be dangerous. The manufacturer cannot be held liable for damage resulting from incorrect or improper use or operation.
- As correct use of this product entails the handling of components heated to an extremely high temperature, for safety purposes, only attempt to use this product while wearing heatproof gloves and safety goggles.
0 notes
Photo
Taken down your Christmas decorations yet? No, neither have we. . . Month long Christmas anybody? Incredible photo by designer @ethman_hsu
0 notes
Photo
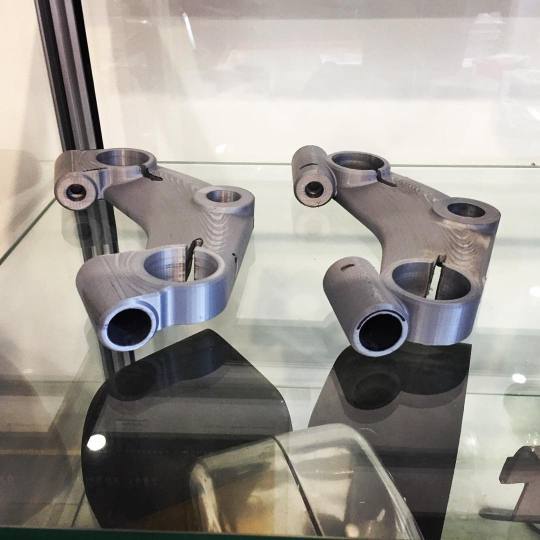
Awesome #3dprinted #rapidprototype #tripletrees by Mark Simpson @simmo675 for @motoretroaustralia in grey #PLA. Destined for a #custom #BMWR100 #airhead #caferacer. Great to see 3D printing technology enabling some old school master craftsmen create jaw dropping #custommotorcycles. #standardprintco (at Motorretro)
#airhead#caferacer#3dprinted#bmwr100#custom#tripletrees#standardprintco#pla#custommotorcycles#rapidprototype
0 notes
Photo
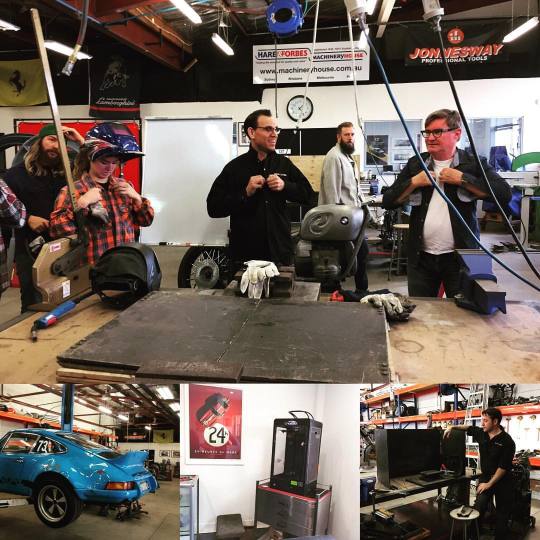
A huge thank you to Adrian and the gang at @rising_sun_workshop for organising a great trip to @motoretroaustralia for a class on welding and metal shaping with Georgio and the team. Great to see old school #craftsmanship and #3dprinting coexisting side by side. Where else can you take classes on #welding, #metalshaping and #restoration while being surrounded by #aircooled #930 #porsche911 's , #bmw2002 's and awesome custom #r100 , #BMW #Airheads . #standardprintco (at Motorretro)
#metalshaping#r100#bmw2002#standardprintco#porsche911#craftsmanship#bmw#restoration#aircooled#930#3dprinting#airheads#welding
0 notes
Photo
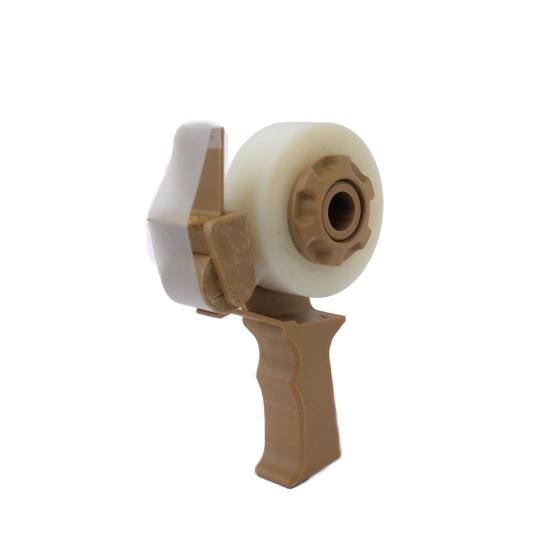
Mini Tape Gun, Bryce Lowe BRN.ABS Plastic: http://bit.ly/2hbkbbk Model: http://bit.ly/2hbkaUO #3dprinting #filament #tape #craft #diy #brown #3m #rapidprototyping #packing #stationary #StandardPrintCo
0 notes
Photo

A HUGE thank you to @bellajanedee, Ade from @MCICUNSW and of course the super awesome team at @rising_sun_workshop for putting on a stellar Digital Fabrication and Rapid Prototyping event on Tuesday! Great presentation on the future of 3D fabrication and custom motorcycles! Very excited to follow @bellajanedee ’s custom motorcycle build using 3D fabricated tech. For that and more, be sure to keep your eyes peeled for @rising_sun_workshop ’s Insta posts. #makerspaces #rapidprototyping #3dprinting #risingsunworkshop #diy #MCIC #MCICUNSW #Caferacer #motorcycle #Custommotorcycle #3dprinting #3dfabrication (at Rising Sun Workshop)
#makerspaces#mcic#risingsunworkshop#caferacer#3dfabrication#mcicunsw#diy#rapidprototyping#custommotorcycle#3dprinting#motorcycle
0 notes