
Last Seen Blogs

gridarloavocepiena
[THANTOPHOBIA] Irene,20,Firenze.

yamayuandadu
Do haniwa dream of ceramic sheep?

goodgraphicsdesign
GoodGraphicsDesign

benfriedlander
BENLANDER

stylish-editorials
latest fashion editorials
Text
Nelly Wedge Shoes by JBU: A Shoe Review!
Whoa Nelly! I love my new Nelly Shoes from JBU by Jambu Footwear. The Nellys are the newest pair of springtime shoes I've received from Jambu as a brand ambassador, and they are so fabulous. They're as comfortable as can be, chic, and fun - they've got it all! We've been having classic springtime weather here in Santa Cruz -- rain, followed by sun, followed by wind, followed by sun... Every time the sun comes out, I jump at the opportunity to get out of my rainboots and cozy socks, and put on some fancy fun shoes instead.
I went out to pick some limes from our tree to share with my yoga students, and then all the pets came out for driveway time. We often do doggie training in the driveway, so everyone was very excited. Especially for everyone's all-time favorite trick: high fives!
Jambu has a lot of great vegan shoes for women, including a bunch of super cute wedge shoes that are great for spring and summer time. (note: Jambu also makes a lot of shoes that aren't vegan, so be sure to check out their vegan shoes page, or double-check that the style you're grooving on is vegan. On their Jambu.com website, they have a vegan logo clearly indicated for the vegan styles).
Jambu makes so many different excellent wedge shoes and I always love their styling. Over the years I have had many different pairs of Jambu wedges and they have always been very comfortable for my feet. Since I teach yoga, I spent a lot of time barefoot, and I am also constantly taking my shoes on and off - before and after teaching. For years I pretty much only ever wore flip-flops! As a result, I really enjoy the opportunity to wear clothes and shoes that aren't for yoga! ha ha.
"nice to meet you" is another favorite trick.
Mostly they are just manically trying to get more treats from me. ha ha.
These Nelly wedges feel so comfortable, and they also look cute and special. It's such treat to put on a more dressy shoe and feel a bit more fancy and still have my feet feel so comfortable and happy! I have a secret affection for wearing high-heeled shoes from time to time, but darned if they aren't uncomfortable and impractical. These Nellys (and honestly, all the wedges I've owned from Jambu) are a wonderful exception to the rule. There's a little rise under the ball of the foot, so the heel is not actually very elevated. The insoles are made with memory foam, which is super cozy and very satisfying to walk on. Every time I put them on, I get a little pep in my step!
The day these shoes arrived, I opened the box, and put them on right away and set out for an afternoon with our house guests. They were immediately perfect! Love at first sight! Love at first stroll!
We took our guests out for a trip to the beach, and then we strolled down to the end of the Santa Cruz wharf to see the sea lions. I didn't want to get sand in my beautiful new shoes, so I took them off at the beach... but while my friends were swimming (brrr!), I did a little photo shoot with my new Nelly shoe friends. The material on these shoes is all-vegan (obviously!), and is a nice quality faux leather, with snazzy patterns die cut through it.
There's a velcro strap at the ankle, and as you can see in the bottom left picture, there is a cute little zip down the back of the heel, which helps get the shoe on and off more easily. There's a little faux suede flap on the inside that protects your heel from the zipper, so that's not noticeable at all once you have the shoes on your feet.
Footie also wants to get in on the cuddle action. A few years ago I bought this bench and installed this little mini-patio in the front yard, as an Xmas present for Mr. VE&T. This has become a special spot for him and Footie. They like to sit out here and be quiet together. Footie lets me sit with him too, but Mr. VE&T is obviously his favorite person.
I hope you can see from these pictures of me playing with the pets just how easy and comfortable these Nelly shoes are to move in and walk in. They feel great and since they also look so cute, I feel doubly great when I wear them. I've never had a shoe quite like these before - a dressy sandal! - and now I can't wait for more sunshine so I wear these all summer long. I especially love how these Nellys look with my capri jeans or with a skirt, so you can see the cute ankle styling.
Ha ha, Footie sez "These shoes are cute, now give me a kitty treat!"
I love this all-business look on his face in this picture.
As far as sizing goes, I found the Nelly shoes to be running a half-size on the large side. I ordered them first in size 9, which is my usual size, but that pair felt too big. When I got a second pair in 8.5, the fit was absolutely perfect. If you're unsure, I'd suggest trying the smaller size, or buying both sizes and returning the one that doesn't fit right.
High Fives, Snoopy!
20% off any purchase at Jambu.com
The folks at Jambu have given me a coupon code to share with you:
Use the code VEGAN18 to get 20% off any purchase at Jambu.com
*good until June 30th*
(Psst! go straight to this page to see their vegan shoes for women)
Source: http://veganeatsandtreats.blogspot.com/2018/04/nelly-wedge-shoes-by-jbu-shoe-review.html
0 notes
Text
On va à la ferme
Rémy at Drumlin farm
“Poules ? Tracteurs ?” (Chicken? Tractors?) Rémy asked inquisitively as I was struggling to put a puffy winter coat on him. Each time I’d walk towards him, he’d tease me and run away, laughing. “Poules !” he exclaimed again in a joyful tone. Oui ! I said, taking advantage of a short moment when he was still to finish to dress him. We were ready. And yes indeed, we were going to see chicken and tractors. And much more.
This happened last Friday when on a sunny morning, I decided to take Rémy to Drumlin farm. To see pigs, sheep, goats, and chicken. And big tractors. Rémy *loves tracteurs which I know, would make his great grandfather beam with pride since he worked and raised his family on a farm.
Despite the vivid sun, the air felt brisk, so that it appeared serene and calm at the farm, and we felt like we had it entirely to ourselves.
Maybe it was the fresh air and the peaceful walk Rémy and I took in search of the poules (chicken) and moutons (sheep) and chèvres (goats) but upon our return, I felt energized to cook lively foods for us.
I started with a batch of bright butternut squash and celeriac rosti for our lunch; I baked deliciously crunchy quinoa granola that Rémy gobbled down for le goûter in an imaginary picnic sitting on a blanket by the fire. And when Lulu came back from school, she chose a favorite financiers recipe from my book for us to cook together–and we baked them using blackberries and blueberries instead of the raspberries and red currants suggested in the recipe.
You should really try these. They are irresistible!
We also made crêpes because after all, Friday was the day of the Chandeleur and I’m extremely attached to that French food celebration!
Financiers, a recipe (page 214) from my book My French Family Table
Drumlin Farm; Quinoa Granola; Chestnut flour crêpes with chocolate,
a recipe (page 154) from my book My French Family Table
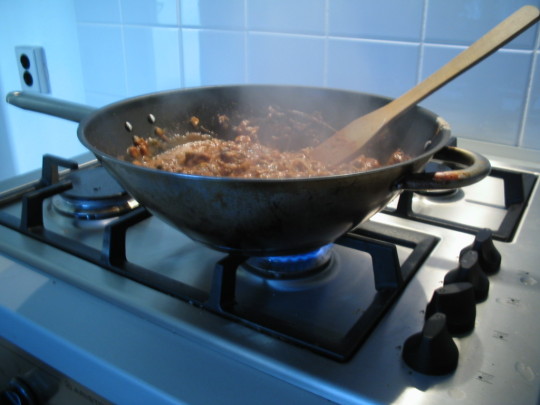
Then there was dinner.
Luckily, the idea for ours came easily to me. I had chicken drumsticks in the fridge and we all agreed that a family style meal (simple to put together) was what we wanted.
So I pulled out my cookbook and found in it the perfect dinner meal–especially as I always keep most spices and ingredients handy (and when I don’t, I still improvise and find substitutions).
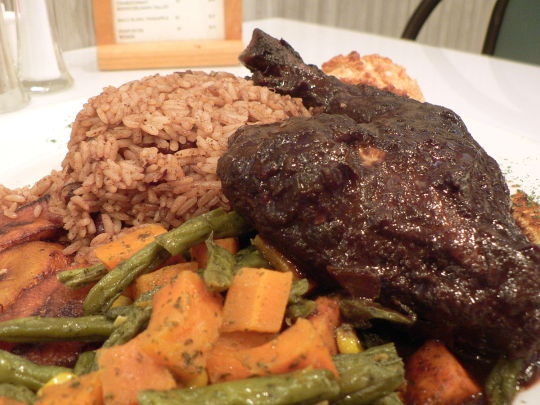
I thought to share the recipe with you. It’s a dish with a richly aromatic sauce (with cumin, coriander, ginger, saffron, turmeric, and lots of fresh herbs), scrumptious with rice or quinoa soaked in it. When I am lucky, I even have leftovers for the next day. And that’s always a bonus in my book.
I hope you’ll enjoy it as much as we did.
Chicken drumsticks with spices and coconut milk, a recipe (page 277) from my book My French Family Table
Chicken drumsticks with spices and coconut milk
Serves 4
You need:
12 chicken drumsticks
1 teaspoon ground coriander
1 teaspoon ground cumin
1/2 teaspoon ground turmeric
1 inch fresh ginger, peeled and finely grated
1 strand saffron
1/2 teaspoon sea salt
Pepper to taste
3 garlic cloves, minced
Zest of 1 organic lime, finely grated
4 tablespoons lime juice
1/3 cup olive oil
1 tablespoon fresh basil, finely chopped
1 tablespoon fresh mint, finely chopped
1 tablespoon fresh parsley, finely chopped
12 cherry tomatoes, halved
1 bay leaf
1/2 red onion, finely sliced
1/4 cup water (or chicken stock)
1/2 cup unsweetened coconut milk
Steps:
Skin the drumsticks by pulling the skin towards the end of the bone and using a pair of scissors cut it off. Set aside in a large baking dish.
In a small bowl, combine the coriander, cumin, turmeric, ginger, saffron, and sea salt. Season with pepper to taste. Ad the garlic and lime zest and juice. Stir in the olive oil and chopped herbs.
Coat the chicken with this marinade and place in the fridge for a few hours.
Preheat the oven to 400 F.
Add the tomatoes to the dish with the bay leaf and slices of onion. Add water (or chicken stock) to the baking dish.
Cook for 20 minutes then reduce the oven temperature to 375 F. Cook for 40 more minutes, stirring a few times, until the chicken is cooked.
Add the coconut milk and cook for 5 more minutes.
Serve with a grain like quinoa, rice, or millet, and a side salad.

Source: https://www.latartinegourmande.com/2017/02/09/gluten-free-financiers/
0 notes
Text
Honey Sriracha Chicken Bowls
Honey Sriracha Chicken Bowls with Rainbow Salad is one of my favorite quick summer meals. It is bright, bold, colorful, and just spicy enough that adults and kids both love it.
I’ve made this Honey Sriracha Chicken Bowls with Rainbow Salad so many times. We had a few really hot weeks and since we don’t have air conditioning, I’ll do just about anything to not turn on the oven. When it is hot, all I want is a crisp salad. And this recipe fits the bill. I got it from Donal Skehan and it has been in heavy rotation since the first time I made it.
I almost didn’t even bother trying it because I thought that it would be too spicy for the kids. I toned down the sriracha a bit and added more honey. It was a hit. It does have some spice, but I’ve found that my kids actually really like bold flavors. This is a rare unicorn that everyone in my house will happily eat.
The rainbow salad is bright, colorful, crunchy, and so pretty. This is a really easy meal to throw together with whatever you have in your crisper drawer. I always have the ingredients for the chicken on hand, so it is a quick meal that is easy to get on the table on a busy night. The salad does take some chopping, but I have my kids help out with that part while I get the chicken together.
Honey Sriracha Chicken
1 teaspoon vegetable oil
4 to 6 chicken breasts or thighs, cut into bitesize chunks
3 Tablespoons sriracha
3 Tablespoon honey
1 Tablespoon freshly grated ginger
Zest and juice of a lime
1 Tablespoon soy sauce
1 teaspoon toasted sesame oil
(If you prefer yours spicier, try 5 tablespoons of sriracha and less honey.)
Rainbow Salad
1/2 head iceberg lettuce, thinly sliced
1/2 head red cabbage, thinly sliced
1 red pepper, sliced
1 orange pepper, sliced
1 yellow pepper sliced
2 carrots, grated
3 green onions, thinly sliced
1 Tablespoon minced basil
1 Tablespoon minced cilantro
1 Tablespoon minced mint
Salted cashews
Sesame seeds
Lime wedges
I like to start with the salad. I slice everything and lay it out on a big platter so that everyone can pick and choose what goes into their bowl. The herbs are my favorite part and add so much freshness to the chicken. It also kills some of the heat.
You can do this earlier in the day, and plan a damp paper towel over to keep crisp and fresh.
I like to start with the sauce and have everything ready before I start cooking the chicken. Add everything to a bowl.
Whisk to combine and taste. If it needs more heat, add some more sriracha, or honey and soy to taste.
Heat a large saute pan or Dutch oven over medium-high heat. Add oil and brown half of the chicken. I usually have to do two batches. Tae the cooked chicken out of the pan and transfer to a plate. You don’t want to overcrowd the pan or it will steam and not brown. Sprinkle with salt and pepper. Repeat with the rest of the chicken.
Add the chicken back to the pan. Reduce the heat to low and add the sauce. Let simmer until thickened and coated, about 5 minutes. The chicken should be cooked through and the chicken should be glazed. Be careful, this can burn easily because of the honey. Resist the urge to raise the heat and walk away.
Fill a bowl with salad, top with chicken, and garnish with lots of herbs, cashews, and sesame seeds.
Print
Description
Honey Sriracha Chicken Bowls with a crunchy and colorful Rainbow Salad. Kids and adults alike love this dinner that comes together in no time. Perfect for summer nights when you want to leave the oven off.
Ingredients
Honey Sriracha Chicken
1 teaspoon vegetable oil
4 to 6 chicken breasts or thighs, cut into bitesize chunks
3 Tablespoons sriracha
3 Tablespoon honey
1 Tablespoon freshly grated ginger
Zest and juice of a lime
1 Tablespoon soy sauce
1 teaspoon toasted sesame oil
(If you prefer yours spicier, try 5 tablespoons of sriracha and less honey.)
Rainbow Salad
1/2 head iceberg lettuce, thinly sliced
1/2 head red cabbage, thinly sliced
1 red pepper, sliced
1 orange pepper, sliced
1 yellow pepper sliced
2 carrots, grated
3 green onions, thinly sliced
1 Tablespoon minced basil
1 Tablespoon minced cilantro
1 Tablespoon minced mint
Salted cashews
Sesame seeds
Lime wedges
Instructions
I like to start with the salad. I slice everything and lay it out on a big platter so that everyone can pick and choose what goes into their bowl.
You can do this earlier in the day, and plan a damp paper towel over to keep crisp and fresh.
I like to start with the sauce and have everything ready before I start cooking the chicken. Add everything to a bowl.
Whisk to combine and taste. If it needs more heat, add some more sriracha, or honey and soy to taste.
Heat a large saute pan or Dutch oven over medium-high heat. Add oil and brown half of the chicken. I usually have to do two batches. Tae the cooked chicken out of the pan and transfer to a plate. You don’t want to overcrowd the pan or it will steam and not brown. Sprinkle with salt and pepper. Repeat with the rest of the chicken.
Add the chicken back to the pan. Reduce the heat to low and add the sauce. Let simmer until thickened and coated, about 5 minutes. The chicken should be cooked through and the chicken should be glazed. Be careful, this can burn easily because of the honey. Resist the urge to raise the heat and walk away.
Fill a bowl with salad, top with chicken, and garnish with lots of herbs, cashews, and sesame seeds.
Source: https://bakedbree.com/honey-sriracha-chicken-bowls
0 notes
Text
50 Late Summer Recipes
Summer is winding down and there is still plenty of time to enjoy some late summer produce including some of my favourites like tomatoes, eggplant, red peppers, corn, cauliflower, broccoli and green beans. In addition to all of the summer produce we already have some fall items showing up including apples, pears and winter squash so we are quite literally spoiled for choice these days! It was really difficult trimming a roundup of recipes down to a manageable amount so I ended up going with a ‘mega’ roundup containing a whopping 50 amazing recipes using late summer produce! When I head down to the market at this time of year it is always challenging to not pick up some of everything that’s available but no matter what I end up bringing home I have plenty of tasty recipes to make!
Source: https://www.closetcooking.com/50-late-summer-recipes/

0 notes
Text
5-ingredient No-Churn Medicated Chocolate Olive Oil Ice Cream (made in a blender — no ice cream machine needed!)
Aug 9, 2018
5-ingredient No-Churn Medicated Chocolate Olive Oil Ice Cream (made in a blender — no ice cream machine needed!)
EgglessGluten FreeHigh FiberHigh Protein
Well, I did it. I made the best friggin ice cream on the planet. This Chocolate Olive Oil Ice Cream. But not just any Chocolate Olive Oil Ice Cream… a medicated Chocolate Olive Oil Ice Cream made with just five ingredients! And you make it in a blender too, so you don’t need to buy an ice cream maker to make this (although, I must say, I own an ice cream machine myself and it was definitely one worthwhile investment. I love it and feel like such a pro when I use it 😉). Best of all, it’s refined sugar free and full of healthy fats, with a punch of protein!
Way better than pot brownies, amirite?
After making my Chocolate Fudge Ice Cream for the third time this last month, I thought I’d make a variation of it. I was thinking a peanut butter swirl, or maybe even blending in some bananas. I looked through my pantry and fridge to find some inspiration, and that’s when I saw it — my cannabis-infused olive oil.
Yep. That’s goin’ in.
When it comes to making homemade marijuana edibles, I prefer a low-dose of THC. I mean, you get to eat more of it (yassss). Kinda like gummy vitamins. They’re so damn good but when you can only have two, what’s the point? I want to eat like, thirty. But without dying from some vitamin or mineral overdose.
It all depends on how you make your marijuana-infused olive oil. You control the potency. My canna oil has a potency of 1mg THC per 1ml of oil. The recipe calls for 5 tsp (or 25ml) of oil, so the entire batch of ice cream has 25mg THC.
And of course, this goes without saying, if you don’t want THC or if it’s not legal where you are, just use regular extra virgin olive oil instead! It’ll still be just as delicious 🙂
If you’ve read my CBD-Infused Butter Mints post, then you know I use CBD for stress, anxiety, and sleep. This recipe calls for just 3 tablespoons of honey, so I used my favorite CBD-infused honey in this ice cream. I have the 500mg jar, so the entire batch of ice cream also has 252mg CBD.
2 cups
Healthy Chocolate Olive Oil Ice Cream
Prep Time: 20 minutes
Cook Time: 0 minutes
Total Time: 20 minutes

Ingredients:
¾ cup Unsweetened Vanilla Almond Milk
⅔ cup (60g) Chocolate Whey Protein Powder
3 tbs Raw Honey (I used CBD-infused honey)
5 tsp (24g) Cannabis-Infused Extra Virgin Olive Oil (regular EVOO works too!)
6oz 70% Cacao Dark Chocolate
Directions:
In a blender (I used my NutriBullet), add the almond milk, protein powder, honey, and olive oil. Blend until completely smooth.
Add the melted chocolate and blend again. Pour the mixture into a large bowl and place in the fridge for 1 hour. Transfer to the freezer for ~4 hours, or until scoopable.
Serve with mini chocolate chips and some flaked sea salt. Maybe a joint too.
Since I already know I’m gonna get emails of people asking, the glassware pictured in this post are from Amara. My newest food prop site obsession!
All images and text ©Desserts with Benefits.
Print Recipe
.
If you’ve ever wondered how to make homemade cannabis edibles that aren’t cliché like pot brownies and gummy worms, then this Medicated Chocolate Olive Oil Ice Cream recipe is for YOU!
It’s ultra creamy, incredibly rich, and perfectly sweet. Plus, it’s made with just five ingredients, and no ice cream machine required.
There’s really no excuse to NOT make this recipe 😉
I brought a batch of this Medicated Chocolate Olive Oil Ice Cream to a party and 60 seconds after taking the lid off the container, five people had their own spoons and were digging in. Everyone loved it and you will too! Enjoy 🙂
.
With love and good eats,
.
– Jess
.
Want to join the healthy dessert club?

Subscribe to the newsletter and get decadent, yet healthy, treats sent straight to your inbox... FREE!
Indulge − no strings attached!
Your information will *never* be shared or sold to a 3rd party.
posted in 5 Ingredients or Less, Ice Cream & Fro-Yo
8 comments »
You May Also Like...
Healthy Homemade Butter Mints (with a secret ingredient!)
Healthy Nectarine Olive Oil Pound Cake
Healthy Cheesecake Ice Cream
Healthy Matcha Green Tea Ice Cream

Source: https://dessertswithbenefits.com/chocolate-olive-oil-ice-cream/
0 notes
Text
Pressure Cooker Chicken Bacon Penne Pasta in a Garlic Cream Sauce
September 1, 2018
This post may contain affiliate links, which won’t change your price but
Pressure Cooking Today will receive some commission.
This Pressure Cooker Chicken Bacon Penne Pasta is a quick, easy, one-pot meal that’s rich, creamy, and delicious! It’s pure comfort food that’s ready in less than 30 minutes. Your family’s going to love this one!
Sigrid, a long time reader of Pressure Cooking Today, recently sent me an email:
When I saw this Food Network article today I thought of you. I know you regularly convert traditional cooking recipes to pressure cooking recipes. Given that this traditional recipe is the most re-pinned pasta recipe on Pinterest (2.8 million re-pins) and has been shared 50,000 times on Facebook, I suspect it would be a very successful post on your blog if it’s converted to a pressure cooker recipe. Also sounds like a delicious dish!
One look at the recipe and I knew Sigrid was right, my readers and my family would love it too. Especially if I transformed it into a quick and easy one pot pressure cooker meal. .
The original recipe, Chicken and Bacon Pasta with Spinach and Tomatoes in Garlic Cream Sauce, is from Julie’s Album where she shares easy-to-make weeknight dinner recipes.
Making Instant Pot / Pressure Cooker Chicken Bacon Penne Pasta in a Garlic Cream Sauce
In addition to the chicken, bacon and pasta, you add spinach and tomatoes. The spinach and tomatoes add a great pop of color and good for you veggies to the pasta, so you can feel good about making it a one pot meal. If you wanted you could easily double the spinach and tomatoes.
The paprika in the recipe adds a pretty color to the creamy sauce and bumps up the smokiness of the bacon flavor in the dish.
The original recipes uses boneless, skinless chicken breasts. I prefer using chicken thighs in recipes when cooking them in the pressure cooker, so I used chicken thighs when I made this pasta. Chicken thighs are more moist and tender when cooked in the pressure cooker.
Boneless, skinless chicken thighs are widely available in most stores now. I generally buy a large package of thighs at Costco to keep in the freezer.
But if you prefer breasts, either breasts or thighs will work well in this recipe.
My family absolutely loved this recipe. It’s flavorful and hearty. It reheats well and you can even freeze leftovers. I like to freeze it in individual portions for quick lunches.
Pin this recipe because you’re definitely going to want to give this pressure cooker recipe a try! Thanks Sigrid for suggesting I give it a try.
Update: This recipe has quickly become a reader-favorite and is one of my most-shared recipes this summer. Some readers have emailed me questions about the recipe, so I’ve created a video to show you how easy it comes together. Give it a try and let me know what you think!
Pressure Cooker Chicken Bacon Penne in a Garlic Cream Sauce
Yield: 6 - 8 servings
Prep Time: 10 minutes
Cook Time: 3 minutes
Total Time: 30 minutes

Ingredients:
1 teaspoon paprika
1 teaspoon Italian seasoning
2 large boneless skinless chicken breasts or 1 lb. chicken thighs, cut into bite-size pieces
6 slices bacon, diced
2 tablespoons butter
5 garlic cloves minced or pressed
1/4 teaspoon red pepper flakes
1 can (14.5 fluid ounces) reduced-sodium chicken broth
1 package (1 pound) penne pasta
3 cups water
1 cup half and half
1 cup Parmesan cheese, shredded plus more for serving
1 cup baby spinach, roughly chopped
1 cup grape tomatoes diced
Salt and freshly ground black pepper, for seasoning
Directions:
Add chicken, paprika and Italian seasoning to a Ziploc bag and toss to combine. Set aside.
Select Sauté and add the bacon to the pressure cooking pot. Fry for about 5 minutes until crisp, stirring frequently. Transfer the bacon to a plate, leaving the bacon fat in the pot.
Add the butter to the pressure cooking pot. Add the garlic and red pepper flakes and sauté for 1 minute. Add the chicken to the pressure cooking pot and sauté for 3 minutes, stirring occasionally.
Stir in the chicken broth and deglaze the pot if necessary. Add the pasta and stir to combine. Add enough water to cover the pasta, about 3 cups. Lock the lid in place. Select High Pressure and 3 minutes cook time. When the cook time ends, turn off the pressure cooker. Use a quick pressure release, or if necessary, use an intermittent release to prevent liquid from coming out of the valve.
When the valve drops, carefully remove the lid. Stir the mixture and taste penne for doneness. If needed, select Simmer/Sauté and cook for a few minutes more, stirring often, until the pasta is tender. Stir in the half and half and Parmesan a little at a time until cheese melts. Stir in the bacon, spinach, and grape tomatoes. Season with salt and pepper to taste.
More pressure cooker pasta recipes you might like:
Pressure Cooker Chicken Enchilada Pasta, Pressure Cooking Today
Pressure Cooker Bow Tie Pasta, Pressure Cooking Today
Pressure Cooker American Goulash, Pressure Cooking Today
Creamy Instant Pot Spaghetti, Wine and Glue
Instant Pot Chunky Pasta Sauce, Kalyn’s Kitchen
Pin It:
Source: https://www.pressurecookingtoday.com/pressure-cooker-chicken-bacon-penne-pasta/
0 notes
Text
『BonBon小物』美國Melissa&Doug,瑪莉莎兒童畫具(水畫本、閃卡、學習墊、點點蓋章筆)

有網友反應上次的美國瑪莉莎Melissa & Doug的「水畫本」與「學習墊」實在是太讚了!!
悔恨自己買太少款,
才剛收到商品就紛紛來信詢問下次開團時間,想再追加入手一些不同的主題內容。
通常同系列的玩具、教具,我一年只會開一次,因為買一次可以玩超久,甚至玩好幾年啊!!
但是現在正值「暑假!暑假!暑假!」
是孩子們最需要玩具、教具的鎮壓,爸媽們最需要這些育兒小道具的時機啊!
於是我硬是向代理商懇求,安排Mellisa&Doug的TOP 3:
(1) 水畫本(閃卡)
(2) 學習墊
(3) 點點蓋章筆。
連同這次的Begin Again益智積木、拼圖玩具(文章介紹)再來一團。
請大家把握今年這團,下次還能有這麼優惠的團購方案,可能要等一年之後了!
========(以下原文介紹)=======================
暑假到來!大小孩子全出籠,媽媽們的頭開始抱著燒。
雖然阿龐還小,但,這一週我似乎也漸漸體會到了「令人困擾的暑假」感覺。
許多原本固定的活動,全因為暑假的到來而暫停,每天都在想破頭要怎樣娛樂孩子。
加上BonBon進入兩歲後,學習能力驚人的大躍進,不再能隨便打發(喂!)。
在娛樂孩子之餘,還貪心的希望能在遊戲中偷渡一些兼具教育意義的內容。
這次要來介紹來自英國的Renart跟美國的瑪莉莎(Melissa&doug,文章連結),
兩大設計感十足的美術畫具。
這些小物,陪伴我與BonBon大半年來的午後時光,
所有父母最害怕的「外出用餐前的等餐時間」,也全靠這些畫具按耐躁動小童了!
這次開團的品項,適合的年齡層從一歲半到十歲以上,不同年紀有不同的玩法!
以下文章裡,我會針對各個商品,分別在不同年紀時,有什麼不同階段的玩法與樂趣。
希望這次的開團商品,能陪大家一起渡過漫長的暑假!
品項眾多,這篇文章要為大家介紹美國Melissa&Doug的眾多系列「兒童畫具」。
(英國RenArt介紹請移駕這裡。)
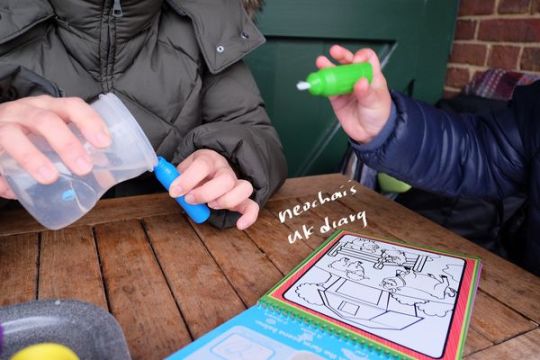
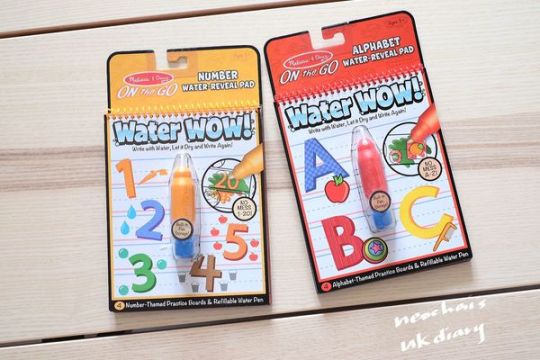
● Melissa&Doug Water wow (水畫本、閃卡):

每一本水畫本裡各有四頁不同的場景內容,和一支筆管。
非常令人驚艷的設計,只要在筆管裡加入清水,就能直接使用。
頁面接觸到水後,表面的特殊塗層就會變得透明,進而呈現繽紛的圖片。
帶水份乾燥後,又能再次重複使用。
「水就是顏料!」
因此完全不用擔心弄髒衣物或傢俱,畫本能無限次重複使用,更是爸媽荷包的好消息。
看過BonBon使用Water Wow的人都嘖嘖稱奇!
水畫本的封面有設計一個收納筆的地方,
帶孩子出門,一定隨身帶有水壺,倒一點水進筆管裡,就能做畫。
一本方便帶著走,不需再多帶額外的哩哩叩叩顏料或是畫筆。
水畫本推出多款兼具學習意義的畫冊,孩子們能邊玩邊學。
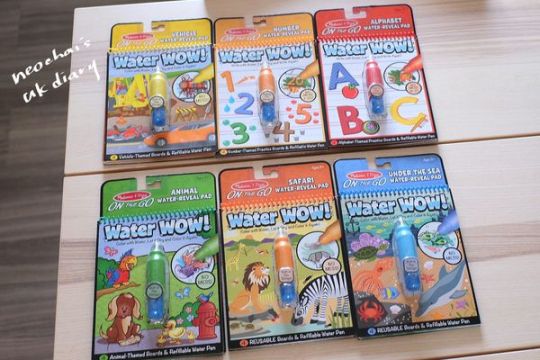
我為BonBon挑選了,男孩都愛的「車子,及動物、非洲草原、海底世界」。
具有學習功能的,我則是挑了「數字」及「字母」兩本。
除此之外,可以參考看看全系列,內容非常豐富:

總共有九款,團購價:
單購一本149,任選四本548(平均137/本),任選八本1000(平均125/本)。
和水畫本一樣設計,還有更為輕便的「閃卡」。

一盒裡有三款組合(共26張),及一支附有掛鉤的水筆。
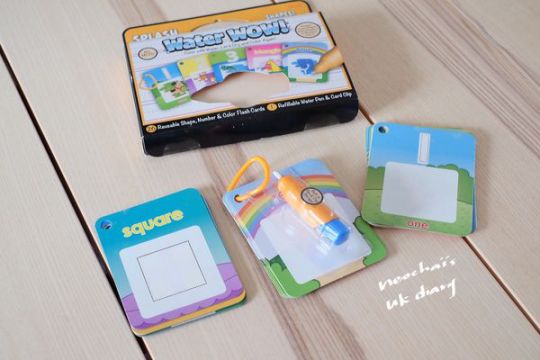
(我這盒裡分別是:各種形狀、顏色,數字,三種主題。)
掛在隨身包包上,再拎著孩子上咖啡館,就能享受孩子畫圖,媽媽偽悠閒時光。

等餐前,丟一本給BonBon,幫他的筆裡裝好水,一切好寧靜!
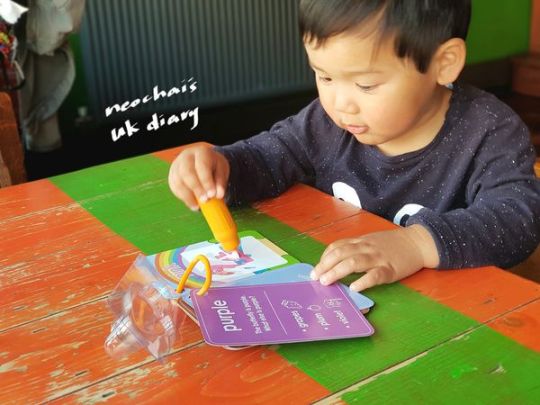

閃卡背後還有說明的文字,隨著孩子長大,更能慢慢增加學習內容。

像這一張閃卡。
正面是介紹綠色,背後則是有關於綠色的文字內容:
綠色
青蛙是綠色,還有什麼也是綠色?
草
烏龜
萵苣

看圖片,學說話。


(水筆畫過的地方,會有顏色呈現。其餘則是維持白色的狀態。)

(水份快要乾燥後,圖片會漸漸變回白色。)
另外再和大家分享一個小秘訣!!
兩歲以下的小小孩握筆還不夠穩定,玩水畫本&閃卡的撇步........

不用水筆!
改用「濕紙巾」,就直接能擦出圖片的圖案!!

簡單的做法,能有效的訓練小小手運動。

(從小培養氣質,拎去池塘旁作畫XD)
● Melissa&Doug 學習墊&可水洗蠟筆、點點蓋章筆

大張的畫版,有數字、顏色、字母...等內容,團購單張99元,任選7張,特價595!
搭配可水洗蠟筆使用,能無限次數的畫及擦。


(學習墊字母主題,背面。)
BonBon才剛過兩歲生日,當然還無法握筆運筆寫字,我們目前還是處於「玩」學習墊的階段。

最常的玩法是,我「念」字母並一邊「描寫」出學習墊上的字母。
然後,請他「幫忙擦掉」a、b、c、d .........(隨機說出的字母)。

學習墊的設計,雙面一樣的內容,一���是彩色的,另一面則是黑白,能讓孩子描寫跟填色。

(上:黑白背面,下:彩色正面)

數字學習墊,我們目前的玩法則是「指&讀」。
「哪個是一隻狐狸?」
「那,七隻小鳥是哪個?」
或是,
「五隻青蛙,是什麼顏色?」
翻面後,黑白那面則是能讓他憑記憶填色。(或是發揮想像力,自由塗色。)
而搭配學習墊的最佳幫手,當然就是Melissa&Doug的可水洗蠟筆。

除了用在學習墊上,當然也能作為一般蠟筆,在紙張上使用。

蠟筆筆管設計很容易抓握,筆心推收設計,不容易從中段裂。
蠟筆質地滑潤,摩擦力小,有利於小小手作畫時滑動蠟筆。


另外還有「點點蓋章筆」,一組有十色不同印章造型的筆型印章,
筆管處有很明顯的圖案標示,以方便孩子使用。


這次團購有兩款可挑。
蓋章是畫畫的起始,小小手的肌肉,先從蓋章練習起吧!
● Melissa&Doug 彩繪水晶壁貼

「貼紙」是每個孩子的最愛!這系列,以貼紙概念,設計出彩繪水晶質感的壁貼。
只要將一張張的彩色果凍貼紙,依照形狀或是數字,貼在另一個板模上,
就能製作出猶如教堂的玻璃彩繪窗美麗,玩成後的作品一定讓孩子成就感爆表!

每組商品裡會有一個板模,一張相對應的多片貼紙,及懸掛的釣線與吸盤。

我為BonBon入手了兩款:「朦朧貓頭鷹與海豚之星」。

看似簡單的一份作品,我心想:一個下午,大概花個一、兩個鐘頭,就能完成一組吧?

但是,在BonBon不到兩歲時第一次玩,我們大概花了四次左右才完成貓頭鷹這幅作品。
分這麼多次才完成,作品漂亮能當作房間裝飾,我對於這組玩具CP值很高,而感到小確幸。
同時也才驚覺,小小孩的指尖細緻運動,真的需要透過類似的玩具,多多練習。
將貼紙精準無誤的貼到對的地方,對大人來說很簡單的精細指尖動作,
小小孩卻是需要常常有練習的機會,才很能促進手眼協調發展。
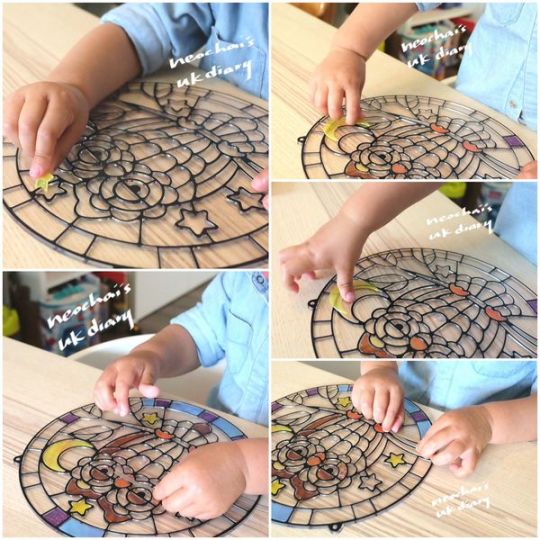

透過這組玩具,也能訓練小孩的耐心與專注力。

BonBon玩自己喜歡的玩具,真的超專心!
這次團購款式眾多,依照水晶壁貼大小與複雜度,單購七折價約是450~780之間,
任選3款,每款再折50元(也就是共折150元的意思!)


除了以上的實用介紹之外,這次團購商品還包括「適合年齡大一點」孩子的創作畫具:
●Melissa&Doug 魔法變色本


●Melissa&Doug 刮畫本


●Melissa&Doug 閃亮轉印貼


●Melissa&Doug 3D娃娃屋拼圖


●Melissa&Doug 兒童戶外露營椅


歡迎關注我的粉絲團,隨時會有更多的優惠開團訊息喔!
Source: http://neochai.pixnet.net/blog/post/35151151
0 notes
Text
Avocado and Tomato Salad with Fresh Za’atar + 10 Years of Brooklyn Supper
We’re celebrating a decade of Brooklyn Supper with a summery avocado and tomato salad sprinkled with lime juice and fresh za’atar.
Jump to recipe.
Back in June, this blog quietly turned 10. I’d planned to mark the occasion with a big celebration and lots of giveaways. But, as it often does, life got in the way.
When I started Brooklyn Supper, my first daughter was just a baby. I was lonely as a new stay-at-home mother and almost certainly suffering from postpartum depression. Though I was deeply in love with my daughter, I felt I’d lost my individuality to my new role as a mom. It was one of the hardest, happiest times of my life. So I came here, as an escape. In the blog, I found a voice I didn’t know I had. I found community and a way forward, through all kinds of ups and downs.
I should have a lot to say about blogging for an entire decade, but making grand revelations or offering up life-changing advice about photography or social media has never been my thing. After 10 years, I want to pop in and share something delicious that I think you’ll love, just like I do every week.
But before we get to the recipe, I want to thank you. For being here all these years, for not batting an eye when the writer of a blog called Brooklyn Supper moved to Charlottesville, Virginia, and for the trust you put into me when you make this food. I never could have planned this accidental food career, but I’m glad things have worked out the way they have.
I like to catalog my anniversary posts every year – here they are: first, second, we skipped the third, fourth, fifth, sixth, seventh, eighth, and ninth. Let’s do something big when we hit 11.
Chances are, you’ve encountered and even made an avocado and tomato salad recently. But I’d like to assert that this one’s a little bit different. Drenched in lime and sprinkled with fresh za’atar, it’s crunchy and bright and summery. Toasty sesame seeds and creamy avocado make a dynamic pairing, and perfectly sweet heirloom tomatoes are just right dressed up in lime juice and flaky sea salt. The final bit of goodness is a little spoonful of the best goat milk chèvre you can find. This tomato salad is delightfully effortless, with flavors and colors that pop. I’m going to hold fast to tomato season for as long as I can. If you’re with me, this avocado and tomato salad is an excellent place to start.
The next day, the salad was perfect piled on a couple slices of toast slathered with mayo for a drippy but delicious knife and fork sandwich. (It’s always a good idea to have a very solid leftover plan.)
Avocado and Tomato Salad with Fresh Za'atar
A summery avocado and tomato salad sprinkled with lime juice and fresh za'atar. If you haven't made your own za'atar before, it's simpler than you think.
Along with fresh thyme and oregano, you'll need sumac, a tangy red-hued spice that can be found in the spice aisle at most markets or at specialty stores. Bright and savory, sumac is an excellent addition to your spice rack. Before making your za'atar, make sure your herbs are completely dry.
Lastly, the secret to avocados that don't brown is lots and lots of lime juice. Be sure to coat the avocados completely and they should stay vibrant.
Recipe Type: Salad
Cuisine: American
Keyword: tomato salad
Makes: 4 generous servings
Author: Elizabeth Stark
Ingredients
Za'atar
2 tablespoons sesame seeds
1/2 teaspoon sea salt, plus more to taste
3 tablespoons fresh thyme leaves
1 tablespoons chopped fresh oregano leaves
2 teaspoons ground sumac
Salad
2 medium cucumbers, cut into 1/16-inch thick slices with a mandoline or a knife
1 medium shallot, cut into 1/8-inch thick slivers
1/4 cup fresh squeezed lime juice (from about 2 limes), divided
sea salt
3 heirloom tomatoes, sliced 1/4-inch thick
2 ripe avocados, sliced 1/8-inch thick
1 cup cherry tomatoes, halved
2 tablespoons olive oil
1/2 cup goat milk chèvre (*optional)
Instructions
To make the za'atar, toast sesame seeds in a small skillet over medium heat, stirring constantly. After about 4 minutes, seeds will become golden and fragrant. Remove seeds from skillet, toss with sea salt, and set aside to cool.
When seeds are completely cool, fold in herbs and sumac. Add sea salt to taste. Za'atar will keep in a sealed container at room temperature for 1 month.
To assemble the salad, toss cucumbers and shallot with 2 tablespoons lime juice and 1/4 teaspoon sea salt. Set aside for 15 minutes.
Arrange tomato slices on a large platter; sprinkle each tomato with a pinch of sea salt. Drain cukes and shallots, and tuck under and around tomatoes. Fan the avocados in segments and tuck throughout the salad. Drizzle remaining 2 tablespoons lime juice over salad, being sure to coat avocados completely. Next drizzle olive oil all over. Top off with several tablespoons fresh za'atar.
Serve immediately alongside chèvre, if using.
Related

Source: https://brooklynsupper.com/avocado-and-tomato-salad/
0 notes
Text
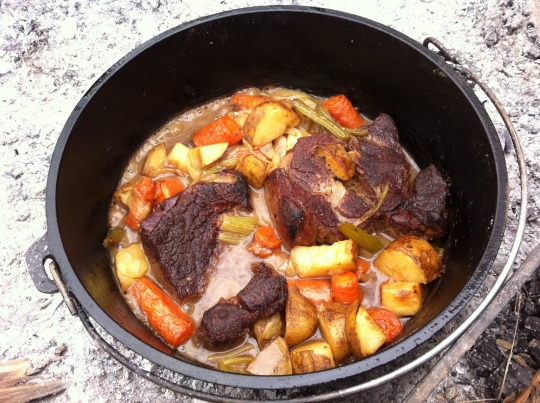
Slow Cooker Beef Ragu
With the busy holiday season upon us, I thought it would be a great time to come up with a new slow cooker dinner recipe. Oh boy, how I love it when dinner is magically ready at the end of a busy day, thanks to a little prep work that I did earlier in the morning! So, inspired by some recipes I saw when browsing online, I decided to turn my Slow Cooker Marinara Sauce from my Fast & Fabulous Cookbook into a (meat-based) ragu Sauce.
I first have to tell you that my 8th grader is not a huge meat person—she could easily survive as a vegetarian. She is not a big fan of dishes like my Slow Cooker Steak Chili, which I love, yet she’d choose Veggie Chili over that any day. And she’s also not too thrilled when I make chicken too many nights in a row. It’s always fun as a parent keeping up with all these different, ever-changing preferences (can you relate?)—not that I always accommodate!
So, I honestly held my breath when she walked over to the slow cooker to see what was for dinner while I was making this new ragu recipe. I was waiting for a complaint and shocked when she instead said, “Oh, this looks good!” I actually thought she must be talking about something else next to the slow cooker (Um, the cooked noodles look good? The parmesan cheese looks good? Surely it wasn’t our meaty dinner! LOL). But low and behold, she loved seeing the mix of carrots and celery in the meat sauce, and she said she really liked it when we put a little dollop of ricotta on top of the finished dish. So, I now have a new crowd-pleasing, meaty dinner to add to my slow cooker arsenal. I’ll for sure be making this one again and again!
Ingredients
1/2 yellow onion, diced
1 1/2 pounds flank steak
2 teaspoons Italian seasoning
1 teaspoon salt
1/4 teaspoon black pepper
2 large carrots, peeled and diced
2 ribs celery, trimmed and diced
4 garlic cloves, minced
1 28-ounce can crushed tomatoes
1 28-ounce can diced tomatoes
Instructions
Layer all the ingredients in the slow cooker, starting with the onion and ending with the canned tomatoes. Turn on high for 5 or 6 hours, or low for 8 to 10 hours. You can take the lid off for a bit at the end to help reduce the sauce down to make it thicker (or spoon some liquid off the top).
Divide the sauce evenly over beds of cooked whole-wheat noodles, top with parmesan and ricotta cheeses (if desired), and serve.
Recipe Notes
There is no need to cut the meat before adding to the slow cooker as it will be nice and tender when done (it easily pulls apart with a fork on the plate). However, you could cut the meat across the grain into a few pieces prior to placing in the slow cooker if you want smaller pieces.
We recommend organic ingredients when feasible.
Source: https://www.100daysofrealfood.com/slow-cooker-beef-ragu/
0 notes
Text
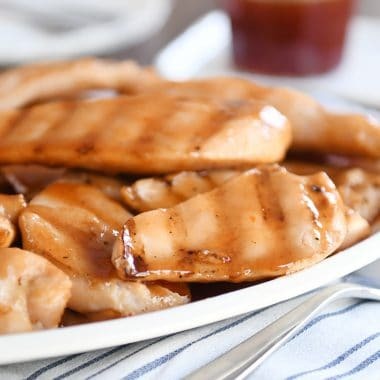
Grilled Sweet and Sour Chicken
A healthier take on the popular classic, this grilled sweet and sour chicken is fantastic! Thanks to a quick brine, the chicken is ultra tender, and that homemade sweet and sour sauce is divine (as always).
Disclaimer: Traeger Grills sent me a pellet grill to test out, but as always, all opinions and thoughts I share here are 100% my own.
It’s no secret we are huge sweet and sour fans here in the remote wilderness of Idaho.
This baked sweet and sour chicken is one of the most popular recipes on my site (with almost 1,000 comments and tons of 5-star reviews), and it is still Brian’s favorite meal of all time after all these years.
I was making it long before I ever had a blog. And it’s the recipe most other “baked sweet and sour chicken recipes” around the internet hail from.
I’ll never stop making it, but I’m not going to lie, I’ve been wanting to make a quicker, grilled version for years – not only to eliminate the somewhat messy breading step but also for a healthier take on the popular classic.
This grilled sweet and sour chicken is crazy delicious.
It might look as simple as slapping some chicken pieces on the grill, slathering in sweet and sour sauce and calling it good. But you know me better than that, right?
There’s always a back story. A philosophy. A reason for the deliciousness.
First of all, the chicken gets a quick brining action that adds a ton of flavor and ensures super juicy and tender chicken. Brining is basically a water + salt + sugar bath for the chicken, and you don’t want to skip it for this recipe. Trust me.
Flavor! Juiciness! Love! Happiness! It’s all yours if you brine that chicken.
Second of all, while you could totally opt for a store bought sweet and sour sauce, I’ve learned not to mess with a good thing, so I brought in that insanelypopular (and super simple) sweet and sour sauce to use for this grilled version, and it’s definitely a match made in sweet and sour heaven.
The sauce gets a quick simmer on the stovetop to reduce and thicken just a little. And then it’s ready to get brushed on the chicken during the last few minutes of grilling…and drizzled liberally over the cooked chicken.
So, so yummy.
Even though some may wonder about alternative cooking methods, I highly encourage the grilling action for this recipe (although, fine, you could experiment with cooking in a skillet or broiler).
As I’ve mentioned many times over the years, I use my pellet grill/smoker for grilling. Traeger Grills recently sent me a new pellet grill to try out (it’s what I used for this recipe!), and it again confirmed to me that pellet grills are my jam. I love them – the flavor, ease of use, everything.
As a sidenote, I’ll be posting an (unsponsored) Camp Chef vs Traeger pellet grill side-by-side comparison soon since I get so, so many questions about it (and requests for a recommendation). Similar to these popular, and hopefully helpful, comparison posts: Kitchenaid vs. Bosch and Blendtec vs. Vitamix
In the meantime, make this grilled sweet and sour chicken! It is a delicious summer meal that takes regular ol’ grilled chicken to a place where you may want to be eating it every single day.
Skillet Zucchini and Squash
Drop Biscuits
Hot, cooked brown or white rice
One Year Ago: Crispy Southwest Chicken Wraps
Two Years Ago: Instant Pot Perfect Brown Rice Pilaf
Three Years Ago: Grilled Mojo Pork Tenderloin Tacos Freezable Option
Four Years Ago: Stuffed Zucchini Enchilada Boats
Five Years Ago: Fresh Green Bean Salad with Balsamic Dressing
Yield: 6 servings
Total Time: 2 hours 40 mins (includes brining time)
Prep Time: 20 mins
Cook Time: 20 mins
Ingredients:
Brine:
2 quarts water (room temperature or cool water, not warm or hot)
1/3 cup (2.5 ounces) coarse, kosher salt (use half the amount for table salt)
1/4 cup (1.75 ounces) packed light or dark brown sugar
1/4 cup soy sauce
6 thin cut chicken breasts, about 2 pounds (or use 3-4 thicker chicken breasts and cut them in half lengthwise or pound thin)
Sweet and Sour Sauce:
1 cup (7.5 ounces) granulated sugar
1/2 cup ketchup
1 cup apple cider vinegar
2 tablespoons soy sauce
1 teaspoon garlic powder
Directions:
For the chicken, prepare the brine by whisking together the water, salt, brown sugar and soy sauce in a large bowl until the sugar and salt are mostly dissolved.
Cut each chicken breast into 2-inch strips (so about two strips per chicken breasts, depending on the size of the chicken breasts) and submerge all the chicken pieces fully in the brine mixture. Cover the bowl and refrigerate for at least two hours (or up to four hours). Any longer than four hours and the chicken may be too salty.
For the sauce, whisk together all the sauce ingredients in a medium saucepan and bring the mixture to a simmer over medium-low heat. Let the sauce simmer for about 15 minutes to reduce and thicken slightly (can simmer longer for a thicker sauce), stirring occasionally. There may be a strong vinegar smell as the sauce simmers and the vinegar evaporates – that’s completely normal (and the sauce will not taste overly vinegary).
Preheat grill to medium heat (on my pellet grill, I preheat to 350 degrees for this recipe). Remove the chicken from the brine and pat dry with paper towels. Discard the brine.
Grill the chicken, turning once, until an instant-read thermometer registers 165 degrees F (exact cooking time will depend on what type of grill you have; it takes about 15 minutes total on my pellet grill for thin cut chicken at this temperature). During the last two minutes of grilling brush the chicken liberally with the prepared sweet and sour sauce.
Remove the chicken from the grill to a serving platter and drizzle with remaining sauce OR serve the sweet and sour sauce on the side.
Notes:
You can use up to four pounds of chicken using the same amount of brine.
All images and text ©Mel's Kitchen Cafe.
Follow @melskitchencafe on Instagram and show me the recipes you are making from my blog using the hashtag #melskitchencafe. I love seeing all the goodness you are whipping up in your kitchens!
Recipe Source: brine recipe adapted from Traeger’s Everyday Cookbook, sweet and sour sauce recipe from this baked sweet and sour chicken post
Posted on July 26, 2018 by Mel

Source: https://www.melskitchencafe.com/grilled-sweet-and-sour-chicken/
0 notes
Text
Clean Eating Ginger Ale Recipe
This clean eating ginger ale recipe is perfectly refreshing!
I never grew up being a big ginger ale fan. But there are times when ginger ale is called for.
Recently, Mini Chef ended up with a tummy ache. My normal go-to for tummy aches is chamomile tea. But this time, I thought I’d try something a little different. I have to say that the homemade stuff is so much more flavorful then anything you can buy at the store. I mean, just think… you’re getting real ginger without any added chemicals or additives! Can’t go wrong with that!
It’s a pretty simple process and the whole thing is totally adjustable to your tastes and preferences. You can make it stronger or weaker, sweeter or less sweet and in whatever quantity you prefer! You could easily make this for one person or ten!
I have to say that I’m still not much of a ginger ale fan, even with the homemade stuff. But that’s just my personal preference. Mini Chef gulped this down and was a pretty happy camper from that point forward. I can’t say it was totally because of the ginger ale, but it never hurts to try these things and a happy kid makes for a happy mama. So all was well in the McCauley household that day.
I’ll make this again in the future and maybe add a few things to it to make it suit my own tastes a bit more in the future. I’m thinking some lime or lemon juice would go super well with this. Almost like a ginger lemonade! Yum!
Remember to subscribe to my free, Gracious Pantry Newsletter to receive all my latest recipes in your inbox! Click here to sign up!
YOU MIGHT ALSO ENJOY THESE CLEAN EATING RECIPES:
Enjoy!

CLEAN EATING GINGER ALE RECIPE:
Clean Eating Ginger Ale Recipe
A refresher, homemade version of a long-loved classic. Note that measurements are just a starting point. You can add more or less of any of the ingredients to suit your tastes.
Course: Drinks
Cuisine: American
Yield: 2 servings
Author: The Gracious Pantry
Ingredients
1/3 cup raw ginger (chopped for measuring)
1/2 cup water
pure liquid stevia (or other clean sweetener, to taste)
2 cups sparkling water (or more as needed.
Instructions
Peel and coarsely chop the ginger (this is to make it easier on your blender.) Blend the ginger with water in a blender.
Run the blended pulp through a cheese cloth, nut milk bag or fine-meshed strainer, letting the liquid drain into a bowl, glass or pitcher. Discard or compost pulp.
Add the sweetener and sparkling water, adjusting amounts to taste.
Recipe Notes
Please note that the nutrition data given here is a ballpark figure. Exact data is not possible.
Source: https://www.thegraciouspantry.com/clean-eating-ginger-ale-recipe/
0 notes
Text
Watch: Is There a Better Way to Make a Turducken?
Of all the weird hybrid foods we have had to stomach, the turducken is one of the most exhausting. Basically it’s a chicken inside of a duck, inside of a turkey; and in this episode of Prime Time, the guys are going to try and come up with their own version.
Hosts Ben Turley and Brent Young have spent plenty of hours experimenting at their Brooklyn butcher shop the Meat Hook, whether it’s creating a sausage to resemble a breakfast sandwich, or assembling a beef porchetta. But this time they’re stumped by the turducken method. Still, they’re going to try stuffing a large duck with pheasant, squab, quail, and offal sausage. “I don’t think this [experiment] has helped me understand why turducken exists,” says Turley. “The sum is not greater than its parts,” echoes Young.
Follow Eater on YouTube to watch more videos | Like Eater on Facebook to never miss a video
Eater.com
The freshest news from the food world every day
By signing up, you agree to our Privacy Policy and European users agree to the data transfer policy.
Source: https://www.eater.com/2018/11/19/18102920/game-bird-turducken-video
0 notes
Text
48 Hours in Aspen: The Ultimate Travel Guide
The ultimate 48 hour travel guide to Aspen, Colorado. I’ll show you where to stay, what to eat and what to do!
Last month I crossed a new destination off my travel bucket list: Aspen! While I’ve been to Colorado many times over the years, I typically always head to Denver, Boulder or Vail.
Not only was this my first visit to Aspen, but this was my first time ever skiing in Colorado! I couldn’t wait to find out how it compared to skiing in Park City and Banff. (I already knew it wouldn’t compare to skiing in Michigan, that’s for sure.)
Of course, I quickly learned that there’s so much more to Aspen than skiing. In fact, I can easily see why so many people love visiting Aspen year round, both skiers and non skiers.
To kick off my 48 hour travel guide to Aspen, let’s start with where to stay! After having such an amazing experience at the Limelight Hotel in Sun Valley, Idaho, I couldn’t wait to experience their Aspen property.
Right away I felt cozy and at home in their spacious guest rooms, each equipped with a fireplace. Music to this gal’s ear since I always seem to run a little cold.
Similar to Sun Valley, you can start each morning at Limelight Aspen with a complimentary breakfast buffet. Offering both cold and hot items, I was very impressed with the healthy options including hearty oatmeal, hard boiled eggs and fresh fruit.
To start your first day in Aspen, head to Four Mountain Sports where they’ll hook you up with ski and snowboard rentals.
Aspen has four ski mountains to choose from: Snowmass, Buttermilk, Aspen Mountain and Aspen Highlands. In general, Buttermilk has the most beginner runs and is the most family friendly. Snowmass offers a good amount of everything and is large so you never get bored.
If you’re an expert skier, head to Aspen Mountain or Aspen Highlands. Since I only ski out west about two times a year, I stick with intermediate runs. As a result, I spent my first day at Snowmass and my second day on Buttermilk.
What I loved most about skiing in Aspen is that the runs are so much longer than anything I’ve ever experienced in the midwest or anywhere else really. Each run would take 20-30 minutes to complete. A far cry from Michigan where you reach the bottom of the hill in 3 minutes.
The other thing that makes skiing in Colorado so special? BLUE SKIES! Offering 300 days of sunshine, there is nothing more beautiful or breathtaking that skiing through packed powder with sun shining on your face.
Ready for a bite of lunch while on the slopes? I have two great recommendations for you starting with Venga Venga Cantina and Tequila Bar located on Snowmass Mountain. The food was authentic and flavorful and the presentation was gorgeous. You can explore the whole menu here.
If you’re spending the day at Buttermilk, be sure to stop in to Cliffhouse Restaurant located right on the mountain. I travel all over the world for a living but it’s rare that I experience such incredible views from a restaurant.
The make-your-own Mongolian BBQ menu is a lot of fun and a great way to refuel during a long day of skiing. I decided to warm up with a rich bowl of pho which was out of this world.
After a long day of skiing, you might be ready to warm up with a hot cup of coffee. Local, a coffee shop in Aspen, is located right downtown just a few minutes away from Limelight. It’s the perfect place to pop in before heading back to the hotel.
When you’re ready to unwind, head back to the Limelight lounge for après drinks and bites. Pro Tip: Order their artisan pizza – it won’t disappoint.
On day two, head to Ajax Tavern located inside The Little Nell hotel at the base of Aspen Mountain to try out their infamous truffle fries. Everyone told me to go here and they were right – they are next level delicious.
When you get back to the Limelight, be sure to check out Aspen’s favorite local bands every Thursday through Monday from 6:30–9:30pm in the lobby. Learn more about menu selections and specials.
Not skiing during your visit to Aspen? No problem. For lunch options downtown, I have two suggestions starting with Clark’s Aspen.
Open year round, Clark’s Aspen offers a wide variety of seafood (think: oysters, lobster rolls, whole roasted fish, etc.), sandwiches, soups and more. It was one of my favorite meals of the trip.
Another great option for lunch downtown is Pyramid Bistro. A nutritarian restaurant, each dish on the menu offers as much nutrients as possible per calorie. How incredible is that? I was blown away by the curry dishes and the fresh rolls.
If you’re looking for a sweet treat in Aspen, look no further than Paradise Bakery. They’ve been serving their famous cookies since 1976 and I’m here to tell you – they are soft, chewy and perfectly balanced with salt and sweet. I decided to buy a bag to bring home to my boys.
For dinner, I have a couple options depending on what you’re craving. If you’re a sushi and Asian food lover like I am, head to Kenichi. Pro Tip: Order the shishito peppers. You’ll be glad you did.
Offering a small plates menu of sushi, sashimi, salads, entrees and more, every dish was inventive and flavorful.
My second dinner recommendation in downtown Aspen is Meat and Cheese Restaurant. Located on Restaurant Row, this gem is a hybrid specialty food store and restaurant.
While the menu offers everything from salads to sandwiches to entrees and more, my favorite were the share boards. The menu changes seasonally but I am confident you won’t be disappointed with whatever you order.
After dinner, before hitting the town, I highly recommended getting your namaste on at Aspen Shakti. Lucky for me, I happened to be visiting on a day that coincided with their Thug Yoga classes. If you love hip hop as much as I do, this class is a blast. Bonus: they include a complimentary beer from Aspen Brewing Company.
Want to skip the yoga and head right to the beer? You can do that too. Aspen Brewing Company is located right down the street.
Craving craft cocktails instead? Head to Hooch craft and cocktail bar located right on Restaurant Row.
Another great option for craft cocktails is Bad Harriet located inside the lower level of Hotel Jerome.
Since I firmly believe you can’t go wrong with a good Bloody Mary, make time to swing into the St. Regis also located downtown. Insider tip: every St. Regis offers their very own signature Bloody Mary recipe. You can sample the Aspen version or try one from around the world.
Last but not least, if you’re ready to end your day with a bang, head to Escobar, Aspen’s premier dance club. Featuring a live DJ most nights of the week, this is the spot to go if you’re ready to get down with your friends.
While I didn’t spend much time shopping during my visit to Aspen, that’s always a great option if you’re not into skiing.
There are certainly no shortage of shops and the entire town is extremely walkable and pedestrian friendly. PS: Notice all that sunshine in my face? Gotta love Colorado!
What cities would you like to see me cover next? Leave a comment below to let me know!
Your passport is waiting.
Disclosure: Limelight Hotels hosted my hotel accommodations. Photography by Alejandro Photography. All thoughts are my own.
You May Also Like:
<![CDATA[.yuzo_pro .relatedthumbcursor:pointer.yuzo_prooverflow:hidden;padding:10px 0;margin:10px 0;width:100%;display:block;clear:both.yuzo_pro .yuzo_clearfixed,.yuzo_widget_wrap .yuzo_clearfixedclear:both;display:block;margin:5px 0.yuzo_pro .text-centertext-align:center;margin:0 auto;display:block.yuzo_pro h3margin-bottom:0!important.yuzo_pro .relatedpostsmargin:0 0 20px 0;float:left;font-size:12px.yuzo_pro .relatedposts h3font-size:20px.yuzo_pro .relatedthumbmargin:0 1px 0 1px;float:left;line-height:15px;text-align:left.yuzo_pro .relatedthumb imgmargin:0 0 3px 0;padding:0.yuzo_pro .relatedthumb aoverflow:hidden;text-decoration:none;display:block;padding:0;background-image:none;background-color:transparent.yuzo_pro .yuzo_textmargin-top:10px;display:block.yuzo_pro .relatedthumb .yuzo-img-wrapmargin-bottom:4px.yuzo_pro .yuzo__bf_textmargin:10px auto.yuzo_pro .yuzo__title--centeredtext-align:center;display:block;margin:0 auto#wp-admin-bar-admin_yuzo_views .yuzo_menu_bar_iconsmargin-left:5px;width:20px;height:26px;background-image:url(https://cdn.thelemonbowl.com/wp-content/plugins/yuzo-pro/assets/images/fires3.png);background-repeat:no-repeat;position:absolute;top:0;left:0#wp-admin-bar-admin_yuzo_views .ab-itemposition:relative;padding-left:26px!important#wp-admin-bar-admin_yuzo_views .yuzo_menu_bar_icons.color_normalbackground-position:-3px 5px#wp-admin-bar-admin_yuzo_views .yuzo_menu_bar_icons.color_flare_hotbackground-position:-22px 5px#wp-admin-bar-admin_yuzo_views .yuzo_menu_bar_icons.color_flare_hot2background-position:-43px 5px#wp-admin-bar-admin_yuzo_views .yuzo_menu_bar_icons.color_flare_hot3background-position:-62px 5px#wp-admin-bar-admin_yuzo_views .yuzo_menu_bar_icons.color_flare_hot4background-position:-83px 5px]]><![CDATA[.yuzo_pro .relatedthumb.box_shadow_related .yuzo-imgbox-shadow:0 1px 4px rgba(0,0,0,.2)!important]]><![CDATA[.yuzo_pro imgwidth:47.6px!important;height:200px!important.yuzo_pro .relatedthumbline-height:inherit;background:#fff;color:#919191!important.yuzo_pro .relatedthumb:hoverbackground:#FFFFD3!important;-webkit-transition:background 0.2s linear;-moz-transition:background 0.2s linear;-o-transition:background 0.2s linear;transition:background 0.2s linear;;color:!important.yuzo_pro .relatedthumb acolor:!important;text-decoration:none;outline:none;border-bottom:0.yuzo_pro .relatedthumb a:active,.yuzo_pro .relatedthumb a:focus,.yuzo_pro .relatedthumb a:-webkit-any-linkcolor:!important;text-decoration:none;outline:none;border-bottom:0.yuzo_pro .relatedthumb:hover acolor:!important.yuzo_pro .relatedthumb:hover .yuzo__text--titlecolor:!important.yuzo_pro .yuzo_text,.yuzo_pro .yuzo_views_postcolor:#919191!important.yuzo_pro .relatedthumb:hover .yuzo_text,.yuzo_pro:hover .yuzo_views_postcolor:!important.yuzo_pro .relatedthumbbox-sizing:border-box;margin:0% 1% 0% 0%!important;padding:5px 5px 5px 5px.yuzo_pro .relatedthumb .icon_middle_only_style_1display:none.yuzo_pro .relatedthumb .yuzo_metamargin:2px 2px 2px 2px;;font-size:12px;color:#c4c4c4;text-align:left;;line-height:12px.yuzo_pro .relatedthumb .yuzo_meta .yuzo_meta_view,.yuzo_pro .relatedthumb .yuzo_meta .yuzo_meta_date,.yuzo_pro .relatedthumb .yuzo_meta .yuzo_meta_category,.yuzo_pro .relatedthumb .yuzo_meta .yuzo_meta_authordisplay:inline;margin:0 5px.yuzo_pro .relatedthumb .yuzo_meta>div:nth-child(1)margin-left:0!important;text-align:left;margin-right:0!important.yuzo_pro .relatedthumb .yuzo_meta .yuzo_meta_view:beforecontent:'';font-family:'Fontawesome';font-size:13px;padding-right:1px.yuzo_pro .relatedthumb .yuzo_meta .yuzo_meta_date:beforecontent:'';font-family:'Fontawesome';font-size:13px;padding-right:1px.yuzo_pro .relatedthumb .yuzo_meta .yuzo_meta_category:beforecontent:'';font-family:'Fontawesome';font-size:13px;padding-right:1px.yuzo_pro .relatedthumb .yuzo_meta .yuzo_meta_author:beforecontent:'';font-family:'Fontawesome';font-size:13px;padding-right:1px.yuzo_pro .relatedthumb:hover .yuzo-img-webkit-filter:brightness(1.5);filter:brightness(1.5).yuzo_pro.ycolumns-widget .relatedthumbwidth:47.6px.yuzo_pro .yuzo_wrapsmargin-top:5px.yuzo_pro.ycolumns-8 .relatedthumbwidth:47.6%.yuzo_pro.ycolumns-7 .relatedthumbwidth:47.6%.yuzo_pro.ycolumns-6 .relatedthumbwidth:47.6%.yuzo_pro.ycolumns-5 .relatedthumbwidth:47.6%.yuzo_pro.ycolumns-4 .relatedthumbwidth:47.6%.yuzo_pro.ycolumns-3 .relatedthumbwidth:47.6%.yuzo_pro.ycolumns-2 .relatedthumbwidth:47.6%@media all and (max-width:1170px).yuzo_pro.ycolumns-8 .relatedthumbwidth:18%!important@media all and (max-width:1024px).yuzo_pro.ycolumns-8 .relatedthumbwidth:23%!important@media all and (max-width:899px).yuzo_pro.ycolumns-4 .relatedthumbwidth:47.6%.yuzo_pro.ycolumns-8 .relatedthumbwidth:23%!important@media all and (max-width:750px).yuzo_pro.ycolumns-4 .relatedthumbwidth:47.6%.yuzo_pro.ycolumns-5 .relatedthumbwidth:47.6%.yuzo_pro.ycolumns-6 .relatedthumbwidth:47.6%.yuzo_pro.ycolumns-7 .relatedthumbwidth:47.6%.yuzo_pro.ycolumns-8 .relatedthumbwidth:22%!important.yuzo_pro.ycolumns-5.yrows-1 .yuzo_wraps .relatedthumb:nth-child(5)display:none@media all and (max-width:700px).yuzo_pro.ycolumns-8 .relatedthumbwidth:30%!important@media all and (max-width:550px).yuzo_pro.ycolumns-3 .yuzo_wraps .relatedthumb,.yuzo_pro.ycolumns-4 .yuzo_wraps .relatedthumbwidth:48.6%.yuzo_pro.ycolumns-4 .yuzo_wraps .relatedthumb .yuzo-img-wrapheight:100%!important.yuzo_pro.ycolumns-4 .yuzo_wraps .relatedthumbheight:250px!important.yuzo_pro.ycolumns-4 .yuzo_wraps .relatedthumb .yuzo-imgheight:180px!important.yuzo_pro.ycolumns-8 .relatedthumbwidth:48.10%!important@media all and (max-width:420px).yuzo_pro.ycolumns-3,.yuzo_pro.ycolumns-4,.yuzo_pro.ycolumns-2,.yuzo_pro.ycolumns-5,.yuzo_pro.ycolumns-6,.yuzo_pro.ycolumns-7,.yuzo_pro.ycolumns-8margin:0 auto.yuzo_pro.ycolumns-3 .relatedthumb,.yuzo_pro.ycolumns-4 .relatedthumb,.yuzo_pro.ycolumns-2 .relatedthumb,.yuzo_pro.ycolumns-5 .relatedthumb,.yuzo_pro.ycolumns-6 .relatedthumb,.yuzo_pro.ycolumns-7 .relatedthumb,.yuzo_pro.ycolumns-8 .relatedthumbwidth:48.10%!important;margin:5px.yuzo_pro.ycolumns-3,.yuzo_pro.ycolumns-4,.yuzo_pro.ycolumns-2,.yuzo_pro.ycolumns-5,.yuzo_pro.ycolumns-6,.yuzo_pro.ycolumns-7,.yuzo_pro.ycolumns-8margin:0 auto.yuzo_pro.ycolumns-3 .relatedthumb,.yuzo_pro.ycolumns-4 .relatedthumb,.yuzo_pro.ycolumns-2 .relatedthumb,.yuzo_pro.ycolumns-5 .relatedthumb,.yuzo_pro.ycolumns-6 .relatedthumb,.yuzo_pro.ycolumns-7 .relatedthumb,.yuzo_pro.ycolumns-8 .relatedthumbwidth:100%!important.yuzo_pro.theme_standar-style-1 .yuzo_textdisplay:block]]><![CDATA[.yuzo_pro .relatedthumb]]>
Source: https://thelemonbowl.com/aspen-travel-guide/
0 notes
Text
Apple and Brie Grilled Cheese
Believe it or not, it’s almost fall. It might not feel like fall, but it’s just around the corner and I can’t wait. Besides ripe tomatoes and peaches, there isn’t a ton I love about late summer. I’m ready for cooler temperatures, the holidays, and fall recipes.
Apples are a big part of fall for most people. We don’t really have an apple-picking culture in Colorado, but I remember it from when Betsy and I lived in DC and I still sort of miss it. Bringing home more apples than you could ever conceivably eat was about as Americana as it gets.
This Apple & Brie Grilled Cheese is the perfect intro to fall and to apple season. The trick to making it work is to bake the apples with a little sugar and cinnamon first, basically creating a pie filling without the pie. Then add those to sturdy bread with a thick layer of brie.
Brie works well with grilled cheese, but you have to be careful not to cook it too long or the brie will actually get too melty if you can imagine such a thing. But a sturdy sourdough bread will allow just enough heat to get through while getting toasted with a layer of Land O Lakes® Cinnamon Sugar Butter Spread.
I don’t think I need to tell you how well all these flavors go together. Raise your hand if you’re ready for fall!
A quick and simple sandwich that is just in time for apple season! You could use many cheeses, but brie is my favorite!
Ingredients
1 red apple, peeled and cubed into ¼-inch cubes
2 tablespoons Land O Lakes® Cinnamon Sugar Butter Spread
Directions
1) Preheat oven to 400 degrees F. In a small baking dish, stir together cubed apple, sugar, and cinnamon. Bake for 20 minutes until apples are soft.
2) Prepare brie by slicing off rind and cutting into slices.
3) Prepare bread by smearing about ½ tablespoon of Land O Lakes® Cinnamon Sugar Butter Spread on each slice.
4) Place a sturdy skillet over medium-low heat. Place bread in the skillet, butter side down. Top with brie and half of the apple mixture. Then top with second piece of bread.
5) Cook sandwiches for 3-4 minutes per side, being careful not to burn the bread, until brie is melted and bread is browned and toasted.
Serve while warm.
Apple & Brie Grilled Cheese
If you try to just stick apples in a grilled cheese, it’ll work okay but the apples will be crispy. Sometimes this can be nice if they are sliced thin, but for this sandwich I like to roast the apples toss with some cinnamon and sugar to create a pie filling.
Baked apples!
Then you use those baked apples in your grilled cheese!
Ready to sandwich!
Spread the Land O Lakes® Cinnamon Sugar Butter Spread on two pieces of sturdy sourdough bread and place them in a skillet over medium heat. Add the brie and the apples! I recommend slicing the rind off the brie before using it.
Making sandwiches
Cook the sandwiches for about 3-4 minutes per side until the bread is nicely toasted. Brie melts really easily and can actually get too melted if you overcook the sandwiches.
YES.
Assuming you don’t do that though, you’re left with a real treat of a grilled cheese sandwich.
Look at that gooey deliciousness!
Make these apple brie grilled cheese sandwiches happen, team!
CHOMP.
Source: https://www.macheesmo.com/apple-and-brie-grilled-cheese/
0 notes
Text
Tepache de Piña
Published: May 9, 2019 · Modified: May 9, 2019 · This website earns income from affiliate links, ads, and sponsored content.
Vibrant and tart with the flavor of pineapple, and infused with sweet cinnamon and star anise, tepache is a traditional fermented drink from Mexico. To make it, you’ll need a pineapple, unrefined sugar like piloncillo or jaggery, spices and a jar. After making this tepache recipe, let it culture at room temperature, and you’ll have a vibrant sweet-tart, slightly effervescent drink in a few days.
What is tepache?
Tepache is a fermented soft drink native to pre-hispanic Mexico (1). In addition, brewers traditionally made it with corn. But now, contemporary brewers typically use pineapple, cane sugar and spices.
Tepache’s flavor is vibrantly sweet and tart. Further, cinnamon and star anise infuse some tepache recipes with a distinct, sweet spicy aroma.
Unrefined cane sugar also gives the drink a distinct floral note with mineral undertones. Occasionally, brewers will add water kefir (also known as tibicos) to the brew to kickstart fermentation. Using a starter helps it to brew faster.
These ingredients ferment at room temperature for 1 to 3 days. Hot, tropical temperatures allow the drink to ferment faster, while colder temperatures slow the fermentation process.
Tepache is usually served only lightly fermented as a soft drink, and even young children drink and enjoy it. However, some brewers ferment the drink for longer period to produce an alcoholic version. And when you let it ferment a month or longer, it will turn pineapple vinegar. When you ferment the drink for a short period of time, it will have a very low alcohol content – similar to kombucha.
Is it good for you?
Like most fermented drinks and foods, tepache is rich in beneficial bacteria and probiotics as well as beneficial acids. Pineapple is a good source of enzymes and rich in vitamin C.
Gut Health and Tepache
As a wild-fermented drink, specific cultures will vary from batch to batch and brewer to brewer. Most tepache recipes will contain lactic acid producing bacteria including lactobacillus lactis, which is also found in buttermilk and cheese (2).
Most tepache brews will also contain beneficial yeasts like saccharomyces boulardii(3) which is associated with increased enzymatic activity and better nutrient delivery in the gut (4). It also plays a role in supporting gut health and the restoration of the gut barrier, so shows promise in addressing conditions related to leaky gut (5).
Vitamins, Minerals and Enzymes
Pineapple contains a good amount of vitamin C, thiamin and manganese. It’s also rich in various food enzymes, like bromelain, which may help to support digestion.
During fermentation, beneficial bacteria and wild yeast consume sugars and produce beneficial acids and B vitamins. But even though tepache is fermented, it still tastes sweet. And that means there’s till plenty of sugar remaining in your brew. So drink small amounts, and people prone to blood sugar imbalance may wish to skip this drink in favor of fermented vegetables .
How to Make Tepache
Most tepache recipes need only pineapple and unrefined sugar. But you can also add spices. And water kefir will give your brew a boost so it cultures faster.
Slice your pineapple peel, and reserve the fruit for another purpose.
Then warm a bit of unrefined sugar with water. Artisan producers make unrefined cane sugars like piloncillo and jaggery the traditional way, by boiling sugar cane juice to a fine syrup. Then they beat it as it crystallizes. The result is that it has a rich flavor, and plenty of residual minerals.
Pro Tip: Since sugar cane takes up heavy metals from the soil, use an organic jaggery like this one from Pure Indian Foods that’s screened for heavy metals.
Pour the sugar water over the pineapple peel. Drop in the spices. And then cover it with more water. Next, allow it to ferment for a few days, until lightly sweet, pleasantly tart and faintly effervescent.
Tepache de Piña
<![CDATA[.wprm-recipe-rating .wprm-rating-star.wprm-rating-star-full svg * fill: #343434; ]]>
Prep Time: 10 minutes
Cook Time: 5 minutes
Total Time: 2 days 15 minutes
Servings: 8 servings (2 quarts)
Calories: 49kcal
Robust with the vibrant sweet-tart flavor of fresh pineapple and gently perfumed with cinnamon and star anise, tepache is a flavor-forward, gently effervescent drink. A short fermentation of only a few days gives this thirst-quenching drink a light effervescence and striking, dynamic flavor. Since tepache takes a few days to ferment, plan ahead.
Print Recipe
Instructions
Warm the sugar and 2 cups water in a small saucepan set over high heat. Stir them together until the sugar dissolves fully.
While the sugar water cools, cut away the pineapple’s top and bottom. And then, discard them. Chop the remaining pineapple coarsely, including the peel, core and fruit. Place it into a 1 gallon jar. Drop the cinnamon stick and clove into a gallon-sized jar.
Pour the sugar water over the the pineapple, and then pour in the remaining 6 cups water and the water kefir, if using. Cover the jar, and allow the tepache to ferment for two to three days, or until bubbles and foam form at the surface of the jar. Strain away the pineapple and spices, and then pour the tepache into bottles.
You can drink the tepache right away, or allow it to ferment in the bottle an addition 1 to 2 days. Serve over ice.
Notes
Make alcoholic tepache or vinegar. You can ferment the tepache longer, about a week or so, and it will become increasingly alcoholic. If you ferment the tepache at least a month, it will form raw pineapple vinegar.
Nutrition
Calories: 49kcal | Carbohydrates: 13g | Protein: 1g | Fat: 1g | Saturated Fat: 1g | Sodium: 3mg | Potassium: 33mg | Fiber: 1g | Sugar: 12g | Vitamin A: 0.2% | Vitamin C: 9.8% | Calcium: 1.1% | Iron: 0.7%
Where to Get Fair Trade Star Anise and Cinnamon
Sweet spices infuse this tepache recipe with subtle flavor and delightful. We recommend ordering from Mountain Rose Herbs, a longtime partner specializing in organic, fair-trade spice.
Another Fermented Drink You Might Like
Probiotic Lemonade
If you like the sweet-tart fizz of real, homemade tepache, you might give probiotic lemonade a try too. Lemons, honey and fantastic bubbles.
1,2) Fuente‐Salcido, N. M., et al (2015), Isolation and characterization of bacteriocinogenic lactic bacteria from M‐Tuba and Tepache, two traditional fermented beverages in México. Food Sci Nutr, 3: 434-442.
3) Romera-Luna, H.W., et al (2018) Evaluation of the Probiotic Potential of Saccharomyces cerevisiae Strain (C41) Isolated from Tibicos by In Vitro Studies
4) Terciolo, C., Dapoigny, M., & Andre, F. (2019). Beneficial effects of Saccharomyces boulardii CNCM I-745 on clinical disorders associated with intestinal barrier disruption. Clinical and experimental gastroenterology, 12, 67–82.
5) Vandenplans, Y., Brunser, O., &
Source: https://nourishedkitchen.com/tepache/
0 notes
Text
Make-Ahead Turkey Sandwich Kebabs
September 2, 2018
Turkey Sandwich Kebabs are the perfect, healthy lunch (without bread), made with your favorite lunchmeat. Make ahead for picnics, parties or school lunches!
Our kids are older now, but we still have a lot of activities and parties and people into our home, especially during the summer months.
Turkey Sandwich Kebabs
Providing healthy snacks and a fun lunch ideas, like these Make-Ahead Turkey Sandwich Kebabs, are my favorite. If you’re grilling, don’t forget these Barbecue Chicken Maple Kebabs or Pickle Caprese Salad Kebabs (if you’re grilling burgers!)
Remember as a kid going to a pool party, and feeling like you were starving? We’d pop open a bag of potato chips, and munch on those as our poolside snack, but within 30 minutes we’d be starving again!
As the hostess, a great idea to serve to kids is to make a platter of Turkey Sandwich Kebabs. Of course, these are made low-carb, with no bread!
Make-Ahead Turkey Sandwich Kebabs
So, on wooden kebabs I placed a couple slices of turkey, lettuce, tomatoes, a hunk of pickle, tomatoes, cheese cubes and balls, and olives!
Who says a sandwich has to be on a piece of bread? :)
Make kebabs for different parties
These kebabs are also great ideas for back to school lunches, picnic options, a hiking snack, and great for camping or anything in the outdoors (keep them chilled).
Set the table
I grabbed a clean swimming sarong as a bright cheery tablecloth.
Set the buffet area with a platter of kebabs, ranch dressing, and baguette slices.
Napkins and a bowl of fruit.
Get ready to dig in to a healthy snack or lunch that everyone loves!
Turkey Sandwich Kebabs
These Turkey Sandwich Kebabs are the perfect, healthy treat that you can make ahead for lunches, picnics, or pool parties.
Yield: 12-24
Total Time: 15 minutes
Prep Time: 15 minutes
Ingredients:
Lunch Meat (I used Foster Farms All Natural Turkey Lunchmeat)
Lettuce (Romaine)
Olives
Cherry Tomatoes
Cheese Cubes (I used Colby cheese and Mozzarella balls)
Dill pickle spears
Cucumber chunks, seeds removed
Skewers
Ranch dressing (optional)
Directions:
Chop and lay out all ingredients. Open a package of your favorite lunchmeat.
Layer ingredients on skewers, starting and ending with a cherry tomato or cheese cube, that will hold it all together.
Refrigerate until ready to serve. Serve with baguette slices and Ranch dressing.
All images and text ©Sandy Coughlin for Reluctant Entertainer.
More make-ahead recipes for back-to-school: Make Ahead Egg Muffins [Spend with Pennies], and Make-Ahead Cinnamon Rolls [Love from the Oven].
This post was sponsored in 2015 by #TheBestTurkey, Foster Farms All Natural Lunchmeat.
Source: https://reluctantentertainer.com/turkey-sandwich-kebabs/
0 notes
Text
Baking Tools You Should Have in Your Kitchen Today
Baking season is upon us. And that means it’s time to make sure our kitchens are full of stocks. If you’re new to baking, have a new home, or only recently started living on your own, you will want to invest in a few basic, but critical, baking tools.
Top 10 Baking Tools
Whether you’re making your first batch of raspberry puree for a birthday cake filled with gooey goodness, or you’re going after one of the most difficult desserts to make, a chocolate soufflé, you’re going to need some awesome baking tools. Here are the top ten, in our opinion, that will make your baking efforts a lot easier.
Tool #1 — Food Rasps and Graters
Rasps are for grating foods, like cheese, nutmeg, lemon, or orange peel. They come in a variety of styles with grating surfaces perfect for anything as fine as spices, like nutmeg, up to hefty shreds of cheese used to top your salads. Be sure to get a few different sizes and make sure you prepare.
Tool #2 — Cookie Spatula
If you think all spatulas are equal, unfortunately, you are incorrect. Some spatulas leave behind large chunks of your baked goods on the pan. Finding the right cookie spatula is important for presenting the perfect cookies for your holiday guests.
Look for spatulas that are firm, and smaller in size. This will make it easier to get cookies out of tight spaces. If you’ve ever had cookies bleed into each other, you know the value of that feature.
Tool #3 — Wooden Reamer
If you ever use natural juices in your baking, you’re going to want a wooden reamer. This handy little tool is perfect for quickly getting juices from any fruit like an orange, lime, or tomato. Be sure to pair this tool with a sieve for catching the pulp of the fruit.
Tool #4 — Whisk
It is essential to look for a whisk at some point in your baking career. Whether it’s whipping egg whites into foamy peaks for your meringue, or whipping together butter and sugar for one stage of your favorite chocolate chip cookie recipe, a whisk is a must-have tool for your baking corner.
Tool #5—Hand Mixer
Not to be outdone by the manual model, a hand mixer will make baking a lot easier, without taking up the space of a full-on heavy stand mixer, like the famous Kitchen Aid. Don’t get us wrong, stand mixers are awesome, but a hand mixer is often more convenient for whipping up a quick batch of cookies or a pan of brownies.
Tool #6 — Food Scale
This may not seem like a necessity, but a food scale will definitely make your baking easier. International recipes often list weights in grams instead of cups or teaspoons. A food scale will make that precise baking possible for difficult recipes.
Tool #7 — Sifter
One of the most critical items needed for successful baking is a good sifter. You’ll often need this hand-held manual tool to sift flour, or sift together items like sugar and flour, to create the right texture for the dry goods in your recipes. Make sure the metal for your sifter is rust-resistant, or you’ll have to replace it sooner than you’d like.
Tool #8 — Cooling Racks
There are a lot of baked goods that need to be cooled on racks. Cookies, for example, need to remove from the hot baking pans and place on racks to maintain their shape but don’t overcook. There’s nothing worse than a beautifully golden cookie that turns out blackened on the bottom from mild burning.
Tool #9—Nitrogen Whipped Cream Dispenser
Okay, this one isn’t mandatory, but it sure does add a lot of fun for recipes. A lot of Eastern European recipes call for whipped cream, and a lot of us love adding whipped cream to everything sweet. If you use a nitrogen-powered whipped cream dispenser, you’ll have instant, cold whipped cream at the ready.
Bonus, if you are a coffee lover, you can use your whipped cream dispenser to make Nitro Coffee at home, too.
Tool #10 — Rolling Pin
If you ever plan to make sugar cookies, certain kinds of bread, or pie crusts, you’re going to need a rolling pin. They can be all wood, like in the old days, but you can also get marble, glass, or stainless steel rolling pins. Each has its own benefits.
Your Kitchen Complete
You’ll need these 10 tools as listed, but you’ll also need the other basics if you don’t already have them. Make sure you have a few sets of measuring cups, measuring spoons, cookie cloths, cookies sheets, glass cake pans, pie pans, bread pans, and, of course, a pizza sheet. Not all baking is desserts, after all.
Source: https://cakejournal.com/desserts/baking-tools/
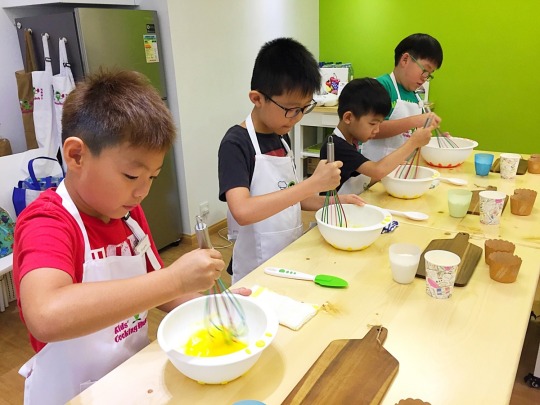
0 notes