
Last Seen Blogs

orangejuice707
Random me

daylydustvoodo-blog
DaylyDustVoodo

windykacjaterenowa-blog
Untitled

pokeretiwe
Untitled
pokeretiwe
Untitled
Text
What does unicorn pudding taste like? An investigation
Back when four-legged sports sensation Air Bud was in his pudding-eating heyday, there were simple flavors on store shelves. Nowadays, chocolate and vanilla just don’t cut it. People want color. They want magic. And what’s more magical than a sparkly pastel horse with a spiraling horn on its forehead?
Old-School Snacks We Bet You Completely Forgot Existed
Snack Pack’s six-pack “Unicorn Magic” features two blue and four pink pudding cups. They’re gluten free and, perhaps most importantly, they come with temporary tattoos. But what do they taste like? The packaging just says that they’re made with artificial flavoring, star dust, fairy dust and princess kisses, which allegedly “tastes like joy and rainbow sparkles.” Those are some pretty heavy claims, so naturally we had to investigate.
First and foremost, both pink and blue are vanilla-based, fruity and very sugary. In fact, the blue variety tasted like someone may or may not have dumped Pixy Stix in it. The pink one had a hint of cotton candy. And now that we think about it, we're not sure they aren't just exactly the same flavor. We don’t know what the real flavors are, but those are our best guesses. If we had kids, we would certainly allow them to sneak this off the shelf and into the shopping cart. But we're adults, so we can buy these for ourselves.
Snack Pack Unicorn Magic is available at most grocery stores for a suggested retail price of $2.79. Plus, they’re only 100 calories each, so they’re not by any means the unhealthiest junk food in the grocery store.
Source: https://www.thedailymeal.com/eat/snack-pack-unicorn-magic-pudding/020619
0 notes
Text
4 Reasons Your Kid Needs A Healthy School Lunch!
August 22, 2019 Kiran Dodeja Smith Leave a Comment
This post is by blog team member, Kiran. To learn more about Kiran, check out our team page or her website!
So it’s that time again…the excitement is felt by many, while others are not exactly thrilled. Back to school brings so many different feelings and emotions, including getting us to think about school year goals. And today we’re chatting about the benefits of healthy school lunches and sharing why this should be one of your top priorities this school year.
4 Reasons Your Kid Needs A Healthy School Lunch!
Academic achievement.
Kids attend school for half of their waking hours in most cases and consume a good portion of their calories while there. As seen in this infographic, there’s a direct correlation to kids eating healthy foods and achieving better grades. And while not directly associated with just lunch, this fact sheet from the CDC illustrates the relationship with grades achieved when directly compared with behaviors such as eating breakfast, drinking juice and/or soda, eating vegetables, and more. The bottom line—kids academic abilities can be affected by what they eat. So why not send them something healthy for lunch?
–
Enforcing healthy eating habits.
I’m a big believer that parents and teachers are partners in many aspects of shaping and educating their children. Often, when my child does something silly, like get up and start dancing while we’re eating dinner, I’ll ask, “Can you do this at school?” Consistency is key, in my opinion, and if you aim to eat well at home, you should continue that effort with their school lunch. Plus, think about it, if all of us parents work together and send healthy foods, it might become the “cool thing” to have healthy lunches. Hey, a mom can dream, right?!
–
Aiming to stay healthy with proper nutrition.
While eating healthfully is not a guarantee of a clean bill of health, it certainly can help provide necessary vitamins, minerals, and nutrients. When combined with physical activity, your diet can help you to reach and maintain a healthy weight, reduce your risk of chronic diseases, and promote your overall health. These benefits start from the day that we are born! And on the flip side—with 1 in 5 kids aged 6 to 19 being obese, it makes smarter eating habits even more necessary.
–
Optimal athletic performance.
Many kids stay after school for sports and activities or are driven directly there. With this being said, and the fact that nutrition directly affects performance on and off the field, it’s essential that they have well-balanced meals that can fuel them for productivity. I’ve personally been going through this with my 13-year-old daughter who does competitive dance. She will be at the studio for 6 hours, and if I don’t pack her a lunch, she’ll take (her own) money and go to the nearby pizza place and get a slice of pizza and garlic knots—that’s it. I try to explain how her nutrition is going to affect her performance. If kids want to do well in their sports, sometimes having them fully understand the whole piece is helpful. And packing a healthy lunch, whether you or them do it, is also helpful! This one daughter is a work in progress :).
How to Pack a Healthy School Lunch
Whether packing a healthy school lunch is a new or existing goal of yours, we have just the resource for you to make it easy peasy: Real Lunches, Real Easy! This is a series of 4 ebooks, each with 6 weeks of healthy school lunch plans, and within you’ll get color photos to show you exactly what the week ahead looks like as well as recipes, shopping lists, and a program to ensure that your child will go to school with a healthy school lunch that’s easy AND different—no more PB&J’s each day of the week!
Real Lunches, Real Easy! is only available until Sunday, September 1st, so don’t delay. Get your copies today and set yourself up for an A+ year.
Posts may contain affiliate links. If you purchase a product through an affiliate link, your cost will be the same but 100 Days of Real Food will automatically receive a small commission. Your support is greatly appreciated and helps us spread our message!
Category: Convincing Others, Health Benefits, Meal Plans, School Lunches
Free Membership
Get instant access to tons of content by joining the 100 Days Membership area! 100% free, always!
Other Posts You Might Like
About Kiran Dodeja Smith
Kiran Dodeja Smith is the mom of 4 kids and has been a part of the 100 Days team for 6 years. When she’s not in the kitchen cooking, she can be found running (and sometimes more likely running her kids around) and posting on her own blog, EasyRealFood.com.
Reader Interactions

Source: https://www.100daysofrealfood.com/benefits-healthy-school-lunch/
0 notes
Text
Ground Turkey and Zucchini with Indian Spices
Liz Della Croce’s board Healthy Entrees on Pinterest.
You May Also Like:
<![CDATA[ /* general yuzo style */ .yuzo_pro .relatedthumb cursor:pointer; .yuzo_pro overflow: hidden; padding: 10px 0; margin: 10px 0; width: 100%; display: block; /*float: left;*/ /*problem with other plugins*/ clear: both; .yuzo_pro .yuzo_clearfixed, .yuzo_widget_wrap .yuzo_clearfixedclear: both;display: block;margin: 5px 0; .yuzo_pro .text-center text-align:center;margin:0 auto;display:block; .yuzo_pro h3 margin-bottom: 0!important .yuzo_pro .relatedposts margin: 0 0 20px 0; float: left; font-size: 12px; .yuzo_pro .relatedposts h3 font-size: 20px; /*margin: 0 0 5px 0;*/ .yuzo_pro .relatedthumb margin: 0 1px 0 1px; float: left;line-height: 15px;text-align: left; /*padding: 5px;*/ .yuzo_pro .relatedthumb img margin: 0 0 3px 0; padding: 0; .yuzo_pro .relatedthumb a overflow: hidden; text-decoration: none; display:block; padding:0;background-image: none;background-color:transparent; .yuzo_pro .yuzo_text margin-top: 10px; display: block; .yuzo_pro .relatedthumb .yuzo-img-wrap margin-bottom: 4px; .yuzo_pro .yuzo__bf_textmargin:10px auto; .yuzo_pro .yuzo__title--centered text-align:center;display:block;margin:0 auto; #wp-admin-bar-admin_yuzo_views .yuzo_menu_bar_icons margin-left: 5px;width: 20px;height: 26px;background-image:url('https://thelemonbowl.com/wp-content/plugins/yuzo-pro/assets/images/fires3.png');background-repeat: no-repeat; position: absolute;top: 0;left: 0; #wp-admin-bar-admin_yuzo_views .ab-item position: relative; padding-left: 26px!important; #wp-admin-bar-admin_yuzo_views .yuzo_menu_bar_icons.color_normal background-position: -3px 5px; #wp-admin-bar-admin_yuzo_views .yuzo_menu_bar_icons.color_flare_hot background-position: -22px 5px; #wp-admin-bar-admin_yuzo_views .yuzo_menu_bar_icons.color_flare_hot2 background-position: -43px 5px; #wp-admin-bar-admin_yuzo_views .yuzo_menu_bar_icons.color_flare_hot3 background-position: -62px 5px; #wp-admin-bar-admin_yuzo_views .yuzo_menu_bar_icons.color_flare_hot4 background-position: -83px 5px; ]]><![CDATA[ /* theme standar style */ .yuzo_pro .relatedthumb.box_shadow_related .yuzo-img /*box-shadow: 1px 1px 3px rgba(227, 227, 227, 1);*/ box-shadow: 0 1px 4px rgba(0, 0, 0, 0.2) !important; ]]><![CDATA[ .yuzo_pro img width:47.6px !important; height:200px !important; .yuzo_pro .relatedthumb line-height:inherit;background:#ffffff; .yuzo_pro .relatedthumb:hover background:#FFFFD3 !important; -webkit-transition: background 0.2s linear; -moz-transition: background 0.2s linear; -o-transition: background 0.2s linear; transition: background 0.2s linear;;color:!important; .yuzo_pro .relatedthumb a color:!important;text-decoration:none;outline:none;border-bottom:0; .yuzo_pro .relatedthumb a:active,.yuzo_pro .relatedthumb a:focus,.yuzo_pro .relatedthumb a:-webkit-any-link color:!important;text-decoration:none;outline:none;border-bottom:0; .yuzo_pro .relatedthumb:hover a color:!important; .yuzo_pro .relatedthumb:hover .yuzo__text--title color:!important; .yuzo_pro .yuzo_text, .yuzo_pro .yuzo_views_post color:#919191!important; .yuzo_pro .relatedthumb:hover .yuzo_text, .yuzo_pro:hover .yuzo_views_post color:!important; .yuzo_pro .relatedthumb box-sizing: border-box; margin: 0% 1% 0% 0%!important; padding: 5px 5px 5px 5px; .yuzo_pro .relatedthumb .icon_middle_only_style_1 display:none; .yuzo_pro .relatedthumb .yuzo_meta margin:2px 2px 2px 2px;;font-size: 12px;color: #c4c4c4; text-align: left ; ;line-height:12px; .yuzo_pro .relatedthumb .yuzo_meta .yuzo_meta_view, .yuzo_pro .relatedthumb .yuzo_meta .yuzo_meta_date, .yuzo_pro .relatedthumb .yuzo_meta .yuzo_meta_category, .yuzo_pro .relatedthumb .yuzo_meta .yuzo_meta_author display:inline; margin:0 5px; .yuzo_pro .relatedthumb .yuzo_meta > div:nth-child(1) margin-left: 0!important; text-align: left; margin-right: 0!important; .yuzo_pro .relatedthumb .yuzo_meta .yuzo_meta_view:before content:''; font-family: 'Fontawesome'; font-size:13px;padding-right: 1px; .yuzo_pro .relatedthumb .yuzo_meta .yuzo_meta_date:before content:''; font-family: 'Fontawesome'; font-size:13px;padding-right: 1px; .yuzo_pro .relatedthumb .yuzo_meta .yuzo_meta_category:before content:''; font-family: 'Fontawesome'; font-size:13px;padding-right: 1px; .yuzo_pro .relatedthumb .yuzo_meta .yuzo_meta_author:before content:''; font-family: 'Fontawesome'; font-size:13px;padding-right: 1px; .yuzo_pro .relatedthumb .yuzo-img .yuzo_pro .relatedthumb:hover .yuzo-img -webkit-filter: brightness(1.5);filter: brightness(1.5); /* for widgets */ .yuzo_pro.ycolumns-widget .yuzo_pro.ycolumns-widget .relatedthumb /*width: 100%;*/ width:47.6px; .yuzo_pro .yuzo_wrapsmargin-top:5px; /* responsive */ .yuzo_pro.ycolumns-8 .relatedthumb width:47.6%; .yuzo_pro.ycolumns-7 .relatedthumb width:47.6%; .yuzo_pro.ycolumns-6 .relatedthumb width:47.6%; .yuzo_pro.ycolumns-5 .relatedthumb width:47.6%; .yuzo_pro.ycolumns-4 .relatedthumb width:47.6%; .yuzo_pro.ycolumns-3 .relatedthumb width:47.6%; .yuzo_pro.ycolumns-2 .relatedthumb width:47.6%; @media all and (max-width: 1170px) .yuzo_pro.ycolumns-8 .relatedthumb width: 18%!important; @media all and (max-width: 1024px) .yuzo_pro.ycolumns-8 .relatedthumb width: 23%!important; @media all and (max-width: 899px) .yuzo_pro.ycolumns-4 .relatedthumb width:47.6%; .yuzo_pro.ycolumns-8 .relatedthumb width: 23%!important; @media all and (max-width: 750px) .yuzo_pro.ycolumns-4 .relatedthumb width:47.6%; .yuzo_pro.ycolumns-5 .relatedthumb width:47.6%; .yuzo_pro.ycolumns-6 .relatedthumb width:47.6%; .yuzo_pro.ycolumns-7 .relatedthumb width:47.6%; .yuzo_pro.ycolumns-8 .relatedthumb width:22%!important; .yuzo_pro.ycolumns-5.yrows-1 .yuzo_wraps .relatedthumb:nth-child(5) display: none; @media all and (max-width: 700px) .yuzo_pro.ycolumns-8 .relatedthumb width:30%!important; @media all and (max-width: 550px) .yuzo_pro.ycolumns-3 .yuzo_wraps .relatedthumb, .yuzo_pro.ycolumns-4 .yuzo_wraps .relatedthumb width:48.6%; .yuzo_pro.ycolumns-3 .yuzo_wraps .relatedthumb .yuzo-img-wrap , .yuzo_pro.ycolumns-4 .yuzo_wraps .relatedthumb .yuzo-img-wrap, .yuzo_pro.ycolumns-3 .yuzo_wraps .relatedthumb .yuzo-img , .yuzo_pro.ycolumns-4 .yuzo_wraps .relatedthumb .yuzo-img , .yuzo_pro.ycolumns-5 .yuzo_wraps .relatedthumb .yuzo-img , .yuzo_pro.ycolumns-6 .yuzo_wraps .relatedthumb .yuzo-img , .yuzo_pro.ycolumns-7 .yuzo_wraps .relatedthumb .yuzo-img , .yuzo_pro.ycolumns-8 .yuzo_wraps .relatedthumb .yuzo-img /*height:160px!important;*/ /*height:100%!important;*/ .yuzo_pro.ycolumns-4 .yuzo_wraps .relatedthumb .yuzo-img-wrap height:100%!important; .yuzo_pro.ycolumns-4 .yuzo_wraps .relatedthumb height:250px!important; .yuzo_pro.ycolumns-4 .yuzo_wraps .relatedthumb .yuzo-img height: 180px!important; .yuzo_pro.ycolumns-8 .relatedthumb width:48.10%!important; @media all and (max-width: 420px) .yuzo_pro.ycolumns-3,.yuzo_pro.ycolumns-4,.yuzo_pro.ycolumns-2,.yuzo_pro.ycolumns-5, .yuzo_pro.ycolumns-6, .yuzo_pro.ycolumns-7, .yuzo_pro.ycolumns-8 margin:0 auto; .yuzo_pro.ycolumns-3 .relatedthumb,.yuzo_pro.ycolumns-4 .relatedthumb,.yuzo_pro.ycolumns-2 .relatedthumb,.yuzo_pro.ycolumns-5 .relatedthumb,.yuzo_pro.ycolumns-6 .relatedthumb, .yuzo_pro.ycolumns-7 .relatedthumb, .yuzo_pro.ycolumns-8 .relatedthumb width:48.10%!important; margin:5px; .yuzo_pro.ycolumns-3,.yuzo_pro.ycolumns-4,.yuzo_pro.ycolumns-2,.yuzo_pro.ycolumns-5, .yuzo_pro.ycolumns-6, .yuzo_pro.ycolumns-7, .yuzo_pro.ycolumns-8 margin:0 auto; .yuzo_pro.ycolumns-3 .relatedthumb,.yuzo_pro.ycolumns-4 .relatedthumb,.yuzo_pro.ycolumns-2 .relatedthumb,.yuzo_pro.ycolumns-5 .relatedthumb,.yuzo_pro.ycolumns-6 .relatedthumb, .yuzo_pro.ycolumns-7 .relatedthumb, .yuzo_pro.ycolumns-8 .relatedthumb width:100%!important; .yuzo_pro.theme_standar-style-1 .yuzo_text display: block; ]]><![CDATA[.yuzo_pro .yuzo_pro .relatedthumb]]>
Source: https://thelemonbowl.com/ground-turkey-and-zucchini-with-indian-spices/
0 notes
Text
KFC(™) Chicken Pot Pie
Today I have a secret recipe for one of my favorite comfort foods served at KFC. A delicious chicken pot pie always brings me back to my childhood. Some time saving tips for this recipe is to pick up a rotisserie chicken and pre-made pastry dough from the supermarket.
You can find more secret recipes from KFC on our website: Go Here
Enjoy!
=-=-=-=-=-=-=-=-=-=-=-=-=-=-=-=-=-=-=-=-=-=-=-=
Which food RELEASES stored up toxins & MELTS belly fat fast?
(the answer may surprise you) Please tap your answer:
AvocadoBreadPearsChicken
=-=-=-=-=-=-=-=-=-=-=-=-=-=-=-=-=-=-=-=-=-=-=-=
=-=-=-=-=-=-=-=-=-=
New Secret Recipe
=-=-=-=-=-=-=-=-=-=
KFC(™) Chicken Pot Pie
Like this recipe? Get our secret recipe cookbooks on sale – Go Here
Pastry:
1 1/2 cup flour
1 tsp salt
1/2 butter
1 egg yolk
1 tsp water
Pot Pie Filling:
2 medium sized carrots chopped into small pieces (about ¾ of a cup)
3 cans cream of chicken soup
3 cups milk
1/2 cup frozen peas
1/2 pound cooked chicken breast
1 teaspoon salt
1/2 teaspoon ground black pepper
1/2 cup diced potato
Preheat oven to 400 degrees F.
Pastry:
Measure out all of your ingredients. Sift together your salt and flour.
Make a well in the pasta. Place butter in small knobs all of the way around the dough.
Pour water and egg in the well.
Swirl the dough together.
Start to incorporate the flour.
Use a bench scraper or a pastry fork to fold in the flour.
Cut the butter into the flour.
Or you can combine all of these ingredients into a food processor, and process until a soft dough is made.
Pot Pie Filling:
Make the filling, by first by placing the cut carrots, and the potatoes into a small pot, covering with water.
Cook over medium heat for about 8 to 10 minutes or until the vegetables are just tender.
In a medium sized pot combine the cans of chicken soup mix, and milk.
Heat through, and stir until the soup is heated through.
Add cooked chicken, carrots, potatoes, frozen peas.
Season with salt and pepper.
Fill each pie plate with about 1 cup of filling.
Roll out dough, and drape over the pie plate edge.
With a knife gently cut a slit into the pie dough, so steam will escape.
Bake for about 20 – 25 minutes or until the tops are just turning golden brown.
Remove from oven, and allow to cool several minutes before serving.
Have a comment or question about this recipe? Post it here
Source: Recipe Secrets Forum
Until Next Time… Be Well!
Kind Regards,
Ron
PS- Join us on Facebook and get more recipes and freebies: Go Here
PPS- Forward this email to a friend or tell them to sign up here.
=-=-=-=-=-=-=-=-=-=-=-=-=-=-=-=-=-=
=-=-=-=-=-=-=-=-=-=-=-=-=-=-=-=-=-=
The Recipe Secrets Newsletter (RSN)
Source: https://www.recipesecrets.net/blog/recipes/kfc-chicken-pot-pie/
0 notes
Text
Salmon Patties
Salmon Patties – Made with just a handful of ingredients, these crunchy, yet tender and juicy salmon patties are the best idea for a quick and delicious dinner recipe.
SALMON PATTIES
Crispy on the outside, flaky and juicy on the inside, Salmon Patties are the most delicious way to upgrade canned salmon.
Prepared with fresh herbs, onions, garlic, and lemon juice, Salmon Patties or Salmon Cakes, are pretty straightforward and require minimal prep time.
P.S. You can also use leftover cooked salmon instead of canned. 🙌
Using the same cooking method as I did here for my Baked Batter “Fried” Shrimp recipe, our Salmon Patties are baked, not fried, and very easy to make.
Also, if following a low carb or Keto diet, use pork rinds in place of the panko crumbs.
HOW TO MAKE SALMON PATTIES
This quick salmon recipe blows me away. The flavors and textures are spot-on whether you use fresh (cooked) salmon or canned salmon.
Start by roughly chopping up the salmon. You’ll need about 14 ounces canned salmon or baked salmon.
In a mixing bowl combine salmon with grated onions, chopped green onions, fresh dill, panko crumbs, garlic, lemon juice, lemon zest, and seasonings.
Scoop out the mixture and shape into 12 patties. You’ll need about 1/4 cup mixture for each patty.
In the meantime, preheat the oven and pour oil on a rimmed baking sheet; place in preheated oven for 2 minutes.
Remove baking sheet from oven, arrange the patties on top of the hot oil, and bake for 13 minutes; turn the patties over and continue to bake for 6 minutes, or until golden brown.
WHAT TO SERVE WITH SALMON PATTIES
Packed with great flavors, this seafood dish is perfect for your next dinner party, but even better for a busy weeknight. Keep it light by pairing the Salmon Cakes with this Cilantro Vinaigrette Coleslaw and a side of Taratur for dipping. YUM!! 😋
CAN I USE CANNED TUNA INSTEAD OF SALMON?
CERTAINLY! Just follow the recipe as is – no need to change anything else. I will say, though, since tuna is leaner, the patties won’t be as juicy.
WHAT CAN I USE IN PLACE OF THE BREADCRUMBS?
I would leave out the breadcrumbs and add one more egg, or you can also use chopped pork rinds. Pork rinds are perfect for those on a Keto diet because they are high in fat and have zero carbs.
HOW TO STORE LEFTOVERS
Store in an airtight container and keep in the fridge for up to 3 days.
Reheat in the microwave or in a lightly oiled skillet over medium heat.
CAN I FREEZE SALMON PATTIES?
I suggest to freeze UNCOOKED salmon patties for up to 3 months. Wrap the patties individually in plastic wrap and then combine them into a freezer bag.
Thaw and cook as directed in the recipe.
MORE EASY SALMON RECIPES
ENJOY!
TOOLS USED IN THIS RECIPE
Salmon Patties
Made with just a handful of ingredients, these crunchy, yet tender and juicy salmon patties are the best idea for a quick and delicious dinner recipe.
Course: Appetizer, Dinner
Cuisine: American, American/Southern
Keyword: appetizer recipes, canned salmon, easy salmon recipe, fish, gluten free, healthy dinner recipes, keto friendly recipes, low carb recipe, salmon burgers, salmon cakes, salmon patties, seafood
Servings: 4 serves
Calories: 305 kcal
Ingredients
2 tablespoons vegetable oil
1 can (14.75 ounces) canned salmon, drained and roughly chopped (you can also use leftover cooked salmon)
1 cup panko bread crumbs (FOR Low carb or KETO, use crushed pork rinds)
1 small yellow onion, grated
2 green onions, chopped (white and green parts included)
2 garlic cloves, minced
2 eggs, lightly beaten
1 tablespoon chopped fresh dill
1 tablespoon fresh lemon juice
1 teaspoon lemon zest
1/2 teaspoon smoked or sweet paprika
1/2 teaspoon salt
1/8 teaspoon fresh ground pepper
Instructions
Preheat oven to 425˚F.
Add 2 tablespoons vegetable oil to a rimmed baking sheet and set aside.
In a large mixing bowl combine prepared salmon, panko crumbs, onions, garlic, eggs, dill, lemon juice, lemon zest, paprika, salt, and pepper; mix until thoroughly combined.
Form mixture into 10 to 12 patties; you'll need about 1/4 cup of mixture per patty.
Place previously prepared baking sheet in the preheated oven for 2 minutes.
Carefully remove from oven and add the patties to the hot oil.
Bake for 12 to 13 minutes; flip over and continue to bake for 5 to 6 more minutes, or until golden brown and crispy.
Remove from oven and let stand 5 minutes.
Serve.
Recipe Notes
WW FREESTYLE POINTS: 5
HOW TO STORE LEFTOVERS
Store in an airtight container and keep in the fridge for up to 3 days.
Reheat in the microwave or in a lightly oiled skillet over medium heat.
Nutrition Facts
Salmon Patties
Amount Per Serving
Calories 305 Calories from Fat 135
% Daily Value*
Total Fat 15g 23%
Saturated Fat 7g 35%
Cholesterol 164mg 55%
Sodium 812mg 34%
Potassium 447mg 13%
Total Carbohydrates 15g 5%
Dietary Fiber 1g 4%
Sugars 2g
Protein 28g 56%
Vitamin A 7.3%
Vitamin C 6.4%
Calcium 33.4%
Iron 11.5%
* Percent Daily Values are based on a 2000 calorie diet.
Want To Save This Recipe?
SUBSCRIBE TO GET FREE UPDATES & A FREE ECOOKBOOK!
GET AN EMAIL WHEN THERE'S A NEW RECIPE
Source: https://diethood.com/salmon-patties/
0 notes
Text
A new FREE eCookbook!
At the Low Carb Denver conference I felt like I found my tribe.
Finally.
All these other people who love eating low carb as much as I do.
Who don’t see it as a crazy fad.
Who understand the science.
And all the benefits.
Especially for diabetics like me, who don’t have great blood sugar control.
It made me realize that it’s time for a change in my business.
Of course I still want to help people simplify eating well.
To use less ingredients.
And make their lives easier.
BUT
I also want to help people to eat healthier.
To enjoy the freedom and deliciousness of Low Carb.
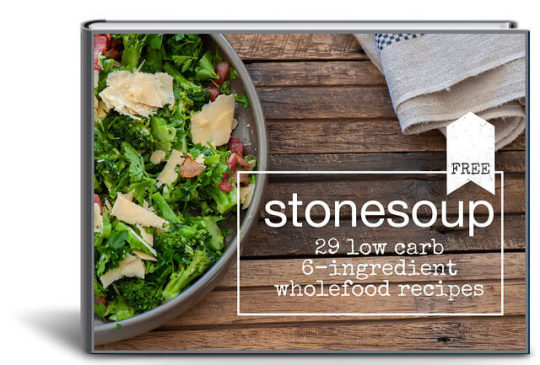
And so I’ve expanded and updated my FREE eCookbook!
It now has 29 simple 6-ingredient recipes.
They’re all low carb.
They all use wholefood ingredients.
And it should go without saying that they’re all delicious!
Here’s a sneak peek inside…
‘Stonesoup FREE’ contains some of my best simple, low carb, wholefood recipes. Including…
Enter your email below to download your FREE eCookbook…
And as always have fun in the kitchen!
Especially when you step away from the carbs :)
With love,
Jules x
Tags: 6-ingredients, ebook, free, low carb, simple, wholefoods
Source: https://thestonesoup.com/blog/2019/06/03/free/
0 notes
Text
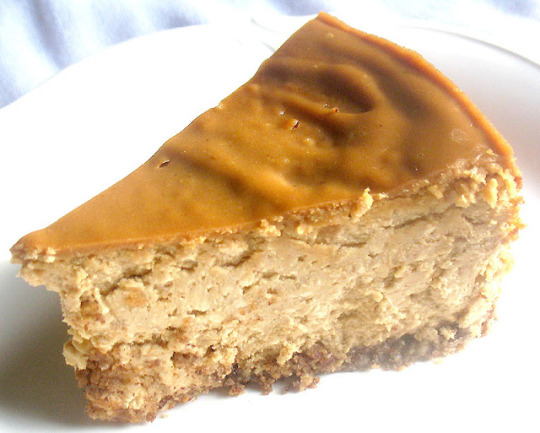
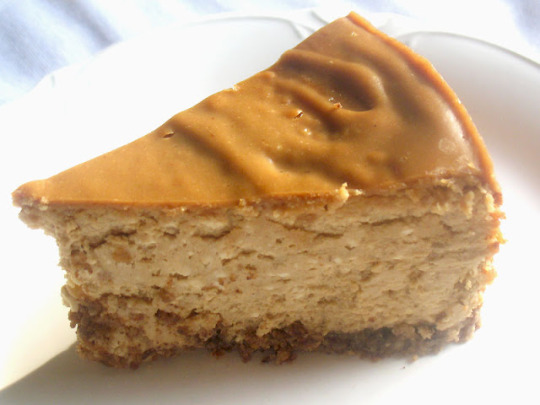
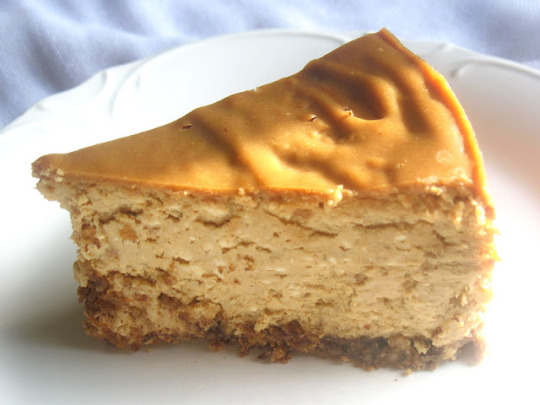
Creamy Peanut Butter Cheesecake

It's a rare occasion indeed when I make something this rich and decadent, but I do enjoy cheesecake occasionally and I happen to adore peanut butter, and when you put the two ideas together, it's a heavenly combination. What I especially like about this cheesecake is how well it all comes together and also, while it is incredibly rich, it isn't actually sickeningly sweet as are many cakes that can be had from bakeries and grocery stores. Be warned, you really only need a small slice and you may want to wait awhile after you've had dinner in order to enjoy the full goodness of this dessert. I might add that it really happens to be good for you if you don't overindulge as it is full of protein and one wouldn't even need feel guilty if served up for breakfast.
I've adapted this recipe from The Cheesecake Bible: 300 Sweet and Savory Recipes for Cakes and More by George by Geary. There is a reason it's named the cheesecake bible. This book is packed with temptations, including a few color photo sections interspersed throughout the book, and pretty much any type of cheesecake recipe you could imagine is featured in this volume. There are recipes for iconic creations to more unusual inspired ones. Berries, citrus, fruits, chocolate, nuts — there is just no end to the ideas. And I suppose this is why this is the second edition which was released to introduce even more ideas than the preceding edition.
Consider cheesecake breakfasts, bars, pies, smaller cakes and even savory cheesecakes which are covered in a short intriguing chapter that can be served as appetizers or even as a meal. There are even cheesecakes that are vegan and gluten-free, and also some no-bake cakes. There are invaluable tips and short discussions regarding methods, tools and suggestions to help you come up with your own stunning and luscious cheesecakes right in your own kitchen, just like a professional. Each recipe is also accompanied by specific tips and often ideas for substitutions and variations. Of course, this volume includes recipes to make your cookies and crumbs for a base, and toppings, syrups and sauces to adorn your creations. If cheesecake is your passion, this book has you covered, from cover to cover.

I wanted to try so many of the ideas in this book, but finally decided on a creamy peanut butter cake because I am especially smitten with the delicious goodness of peanut butter. I combined two recipes from the book. I made a pecan crust from a recipe for a three nut cheesecake, and then followed the instructions for this peanut butter cheesecake with some further adaptations. I cut down on the sugar somewhat and used coconut palm sugar rather than granulated sugar.
A copy of the first edition already adorned the dessert section of my extensive cookbook collection but when I was offered a copy of the second edition to browse, I could not resist. Peanut butter fanatic that I am, this is the first recipe I tried but I can hardly resist trying one of the ideas for a savory ones soon. That will be in my near future I am sure.

Creamy Peanut Butter CheesecakeRecipe by Lisa Turner
Adapted from The Cheesecake Bible: 300 Sweet and Savory Recipes for Cakes and More
Published on December 6, 2018
Rich and creamy baked peanut butter cheesecake with a pecan crust and a peanut butter and sour cream topping

Print this recipe
Crust:
1 2/3 cups raw pecans
1/3 cup all-purpose flour
1/3 cup unsalted butter, melted
Filling:
2 lbs (900 g) cream cheese, softened
1 cup dry curd cottage cheese*
1 cup cane sugar or coconut sugar
1 cup natural creamy peanut butter
4 large eggs, room temperature
3 tablespoons lemon juice
1 /1/2 teaspoons vanilla extract
1 cup dry roasted unsalted peanuts, chopped
Topping:
1/2 cup sour cream
1/4 cane sugar or coconut sugar
1/4 cup natural creamy peanut butter
1 tablespoon lemon juice
1 teaspoon vanilla extract
Instructions:
To make the crust, combine the pecans and flour in a food processor and pulse until finely ground. Transfer to a medium bowl and stir in the melted butter. Press the mixture into a lightly greased 9-inch springform pan. Bake in a preheated 350° oven for 10 minutes. Remove the pan from the oven and set aside.
When the pan is cool enough, chill in the freezer while you prepare the filling.
In a large mixing bowl, beat together the cream cheese, cottage cheese and sugar on medium-high speed with an electric hand mixer or stand mixer for about 3 minutes, until very smooth. Scrape down the sides of the mixing bowl as needed. Beat in the peanut butter on medium-high speed for another 2 minutes. Beat in the eggs, one at a time, beating after each egg has been added. Now mix in the lemon juice and vanilla. Using a wooden spoon, fold in the chopped peanuts.
Remove the pan with the crust from the freezer, and preheat an oven to 350°. When the oven is ready, pour the filling into the pan and smooth evenly. Bake on the middle rack until the top is light brown, about 50 minutes. Remove from the oven and let cool on a wire rack at room temperature for 10 minutes (keep the oven on). The cake may sink slightly in the middle.
While the cheesecake is cooling, prepare the topping. In a small bowl, combine the sour cream, sugar, peanut butter, lemon juice and vanilla with a whisk or spoon until smooth. Pour over the cake and gently spread evenly. Return the cake to the oven and bake for another 5 minutes. Transfer to a wire rack to cool for 2 hours at room temperature. Cover the pan with plastic wrap and chill in the refrigerator for at least 6 hours before serving.
To serve, gently unlock the springform pan and lift from the cake. Cut into slices using a sharp knife, wiping the knife clean between each slice.
To store leftovers, carefully position the sides of the pan over the remaining cheesecake and lock again. Cover the top of the pan with plastic wrap and store in the fridge. Alternately, if you only have enough for a few slices, cut what remains and store in a well sealed contained in the fridge.
Notes: If using regular cottage cheese instead of dry curd cottage cheese, press through a fine mesh strainer to remove excess liquid before combining with the other filling ingredients. Pressed cottage cheese is ideal because it contains less moisture and it's nice and creamy, so you don't need to drain it or run it through a food processor to puree before adding it.
I used my reliable and efficient KitchenAid stand mixer, but an electric hand blender could also be used, but it will take longer to get the creamy texture you are looking for as there is a lot of cheese to this cake.
Makes 1 9-inch cheesecake or about 12 servings
Other cheesecake recipes to enjoy from Lisa's Kitchen:
Ancient Roman Cheesecake
No-Bake Lemon Cherry Cheesecake
Blueberry Ricotta Cheesecake
Pumpkin Cheesecake
Ricotta Cheesecake with Mixed Berries and Balsamic Vinegar

Source: https://foodandspice.blogspot.com/2018/12/creamy-peanut-butter-cheesecake.html
0 notes
Text
Meal Plan Monday #129
© Copyright 2008-2018 • Christy Jordan - Southern Plate® • All Rights Reserved • Site design by Emily White Designs
ALL CONTENT PROTECTED UNDER THE DIGITAL MILLENNIUM COPYRIGHT ACT. CONTENT THEFT, EITHER PRINT OR ELECTRONIC, IS A FEDERAL OFFENSE.
PLEASE do not copy recipes and post on your site or use my photos without permission (see above legal notice).
Blogging about recipes and linking to the complete recipe on SouthernPlate.com is welcome and appreciated!
Source: https://www.southernplate.com/meal-plan-monday-129/
0 notes
Text
Gin-credible Mulberry Gin & Tonic Jam
Have a glut of mulberries and not sure what to do with them? Try this mulberry gin and tonic jam! Made with pectin from lemon seeds and rind rather then pectin powder, this made a wonderful jam with plump whole fruit and the distinct flavour of gin & tonic! Chin chin!
If day drinking (no judgement) and mimosas with breakfast are your thing, then dare I say this jam is just your sort of jam. If you are blessed enough to have a mulberry tree, chances are your cup runneth over with mulberries and the best way to do something delicious with them is jam them because mulberries do cook down and even with a kilo of them you only get about 2x400ml/14oz. jars worth of jam.
Unfortunately we don't have a mulberry tree (one disadvantage of apartment living) but we have found one that bears a lot of fruit and isn't too picked over on a side street in the Eastern suburbs. A few weeks after we first picked some berries, I pestered Mr NQN go back for more. He agreed as he loves mulberries and we made our way there one sunny afternoon.
The tree was popular, people were already picking some and eating them straight off the tree. There was a man who owned the property that the mulberry tree was draped over and he watched Mr NQN reaching up to the sky to pluck the berries. "That's what they're for," he said he said nodding agreeably.
He watched him for a few seconds before making a suggestion for him to climb the tree. Mr NQN wasn't sure so the man asked us to hand him our bag and quickly scaled the tree picking off the plump, ripe berries at the top. He climbed down and handed the bag over and we thanked him for his berry picking.
Mr NQN then climbed the tree like a monkey scaling a tree for coconuts. "Don't fall!" I said pretty uselessly. I have never learned how to climb a tree and while it would have been better for me to do it as I am smaller, it was beyond my capability. Passersby watched him climb, some gave him smiles and other a thumbs up for my intrepid climber. And we got enough for a couple of jars of jam.
A lot of lemons nowadays are seedless so avoid those if you're hoping to use the seeds for pectin. I was the lucky recipient of some fantastic lemons from my mother's friend's tree-these were super juicy with plenty of seeds so I used these to make the pectin and added a generous splash (ok more than a splash) of gin and tonic syrup! And I do believe this is what might motivate me to climb a tree!
So tell me Dear Reader, do you know how to climb a tree? Have you ever picked mulberries? And do you like jams flavoured with alcohol?
An Original Recipe by Lorraine Elliott
Preparation time: 15 minutes
Cooking time: 50 minutes
Makes 2x400ml/14oz. jars
1kg/2.2lbs. mulberries
500g/1.1lbs. sugar
Zest of 1 lemon
Seeds of 2 lemons
1/4 cup lemon juice
160ml/5.7flozs. gin
80ml/2.8flozs. tonic syrup
Step 1 - Wash and trim the mulberries (snip the green stem with scissors) and place the mulberries, sugar and lemon juice in a large, heavy bottomed pot on low to medium heat to start melting the sugar. Place the zest and seeds in a muslin pouch and once the mulberries start releasing their juices, add the pouch into the pot.
Seeds and zest for pectin
Step 2 - Bring the berry mixture to a boil and simmer with the lid off pressing down gently on the pouch - this releases the pectin that thickens the jam (if you like a firm set jam, use jamsetta or a similar product). Place a freezer proof plate in the freezer and periodically test to see if the jam is ready by spooning a bit of liquid and then draw a line through it and if the line holds or wrinkles appear it is ready-it can take anything from 20-40 minutes depending on many factors. The sauce should be quite thick by then. Add the gin and tonic syrup and stir in - I like to keep the flavour so I don't cook it much more now.
Step 3 - Sterilise jars by placing them in a 180C/350F oven for 10 minutes leaving them in the oven once they're done. When filling glass jars, make sure that the jar and filling are the same temperature or the glass will crack. Ladle the hot jam into the hot jars and screw tightly while wearing gloves. Place upside down on a baking tray and allow to cool. You should get a seal and can store them at room temperature.
Source: http://www.notquitenigella.com/2018/12/01/mulberry-gin-tonic-jam/
0 notes
Text
Burger King just brought back this carnival-inspired side
Dunkin’ has Donut Fries and McDonald’s is rumored to be releasing Donut Sticks in the near future, so it should come as no surprise that Burger King is getting in on the action too — but this version comes with a bit of a twist. On January 24, the chain launched Funnel Cake Fries, which are eerily similar to BK’s Funnel Cake Sticks from 2010.
25 Things You Didn't Know About Your Favorite Fast Food Chains
The sweet new side is made with fried bread dough that’s served hot and crispy with powdered sugar on top, just like the real deal. (If only the carnival or county fair had a drive-thru.) Unlike the 2010 edition, it doesn’t look like this version comes with a dipping sauce. If you’re someone who dabbles in multi-purposing milkshakes as dip, that could be the way to go. And wouldn't ya know it; Burger King just launched a scrumptious new M&M’s milkshake. We know an iconic duo when we see one.
So far, it looks like the internet is responding well to the idea of Funnel Cake Fries — and the internet doesn’t like anything.
“Burger King is bringing back their funnel cake fries and now my life is complete,” @Natalie_Blair09 wrote on Twitter.
“WAIT ARE BURGER KING FUNNEL CAKE FRIES REAL
ARE FAST FOOD RESTAURANTS HAVING SOME SORT OF FRY-FEUD
WHAT A TIME TO BE ALIVE,” @inlovewthesalsa said.
And then there was @Model_Porsche, who shared this GIF of Shia LaBeouf, who is all of us.
Funnel Cake Fries are only here for a limited time, so get ‘em before they disappear forever. One order costs just $1.99, which gets you nine pieces each. They’re 222 calories with 10.9 grams of fat and 11.8 grams of sugar, which doesn't sound too bad, all things considered. On the contrary, you might need to spend some extra time at the gym should you encounter any of these crazy fair foods.
Source: https://www.thedailymeal.com/eat/burger-king-funnel-cake-fries/012419
0 notes
Text
51 Healthy Meal Prep Recipes to Make This Year
Jan 06
51 of the best healthy meal prep recipes to make this year! From easy breakfasts and filling lunches to delicious, one pan dinners and plenty of healthy treats, these recipes are perfect to prep for the week or to feed your family.
Starting the new year with some of the best healthy meal prep recipes that you guys are going to love. The new year is a great time to reset, recenter, and set goals for ourselves, but often in our society that comes with mixed messages from the diet focused culture we live in. Just here to remind you that you won’t find specific diets, “good” and “bad” foods, or one way of eating at Ambitious Kitchen — instead you’ll find nourishing, approachable, and delicious recipes that are meant to be enjoyed all year long.
So, let’s meal prep some favorites! I broke these recipes up into breakfast, lunch, dinner, snacks & treats so that you can pick and choose a few each week. What’s life without a little variety?
These recipes are my go-to’s to make at the beginning of the week and enjoy all week long. They’re great for feeding a whole family, and many of them are freezer friendly if you’re cooking for one or two. You’ll get plenty of protein, fiber & veggies from these feel good recipes, and you know they don’t skimp on taste.
If you meal prep any of these be sure to leave a comment, share on Instagram with the hashtag #ambitiouskitchen, or pop a photo into our Facebook group. Enjoy, xo!
Breakfast
1. 5-Ingredient Almond Flour Pancakes
2. How to: Make a Delicious Immune Boosting Wellness Smoothie
3. Spinach & Goat Cheese Quiche with Sweet Potato Crust
4. Peanut Butter Blueberry Overnight Oats
5. Fluffy Coconut Flour Pancakes with Wild Blueberry Maple Syrup
6. Savory Chicken Sausage, Egg and Cheese Muffins (Keto + Low Carb)
7. Veggie Packed Freezer-Friendly Breakfast Burritos
8. Peanut Butter and Jelly Oatmeal Bake
9. Protein-Packed Breakfast Acorn Squash + Video
10. Healthy Breakfast Egg Muffin Cups
11. Almond Butter, Strawberry & Banana Overnight Oats with Chia
12. Nutrition-Rich Omega 3 Blueberry Breakfast Cookies (Gluten Free + Vegan!)
Lunch
13. Chickpea Apple Broccoli Salad with Honey Dijon Dressing
14. 4 Healthy Meal Prep Salads
15. Famous Crunchy Cashew Thai Quinoa Salad Vegan & Gluten-Free
16. Vegan Curried Broccoli Chickpea Salad
17. Roasted Veggie, Chickpea & Pesto Quinoa Salad
18. The Easiest Chopped Chickpea Greek Salad
19. One Pot Moroccan Chickpea Quinoa Salad
20. Crunchy Rainbow Thai Peanut Chicken Wraps
21. Kung Pao Chickpea & Brussels Sprouts Stir-Fry
22. Healthy Sesame-Orange Ginger Chickpea Stir-Fry
23. Vegan Sweet Potato Buddha Bowl with Orange Sesame Almond Butter Dressing
24. Farmer’s Market Spicy Tuna Wraps with Homemade Chipotle Greek Yogurt Dressing
Dinner
25. Healthy Enchilada Chicken & Quinoa Stuffed Bell Peppers
26. One Pan Caribbean Jerk Chicken with Pineapple-Coconut Rice
27. Mom’s Authentic Puerto Rican Rice and Beans
28. Healthy Delicious White Chicken Chili
29. Sheet Pan Zucchini Chicken Meatballs with Coconut Curry Sauce
30. How To Make an Easy Roasted Chicken + Video
31. 30 Minute Chili Maple Lime Salmon Bowls with Forbidden Rice
32. Slow Cooker Black Bean Quinoa Pumpkin Chicken Chili
33. Vegan Slow Cooker Tofu Tikka Masala
34. Spicy Thai Peanut Chicken Sweet Potato Noodle Stir Fry
35. Thai Peanut Coconut Cauliflower Chickpea Curry
36. Spicy Maple Glazed Salmon for Two
37. Cheddar-Stuffed Sweet Potato BBQ Turkey Meatloaf
38. One Pan Tandoori Chicken with Spiced Coconut Rice
39. Better Than Chipotle DIY Chicken Burrito Bowls
40. Slow Cooker Thai Peanut Chicken with Sticky Coconut Purple Rice
41. 4 Easy Chicken Marinades
42. Stuffed Poblano Peppers with Black Bean, Corn & Sweet Potato
43. One Pan Thai Coconut Yellow Curry Chicken & Rice + Video
Snacks + Treats
44. No Bake Peanut Butter Granola Bars
45. Coconut & Chocolate Peanut Butter Protein Bars
46. Flourless Black Bean Brownie Muffins
47. Salted Date Brownie Energy Bites
48. Sea Salt Cashew Butter Chocolate Protein Bars
49. Power Flax Chocolate Chip Banana Oatmeal Muffins
50. Peanut Butter Cup Protein Bars + Video!
51. 5-Minute Protein Peanut Butter Energy Bites
PIN THESE HEALTHY MEAL PREP RECIPES:
Source: https://www.ambitiouskitchen.com/healthy-meal-prep-recipes/
0 notes
Text
6 Sous Vide Beef Recipes for Steaks, Burgers, Brisket, and Beyond
[Photographs: J. Kenji López-Alt]
Sous vide is a predictably excellent way to cook tough cuts of beef. The slow, gentle cooking breaks down stubborn sinew and leaves you with buttery, rich, juicy meat. So, of course, we developed recipes for sous vide brisket and heartier cuts like beef chuck. But we also think sous vide can be the perfect cooking method for steaks, burgers, and even tongue.
While it can be intimidating to those of us more comfortable with roasting and grilling, learning the basics of sous vide cooking is really quite straightforward, and with the right sous vide machine on hand, you'll be ready to attack any of these recipes with ease.
[Photograph: J. Kenji López-Alt]
Beef chuck is an ideal alternative to brisket when you're barbecuing or, in this case, sous vide-ing. It's a cheaper cut of meat that's easier to find, and it cooks with more consistent results. Here, we sous vide the chuck until it's tender and moist, and then we move it to the grill to impart it with the smokiness and char of classic barbecue.
Sous Vide Smoked Beef Chuck Recipe »
Back to the full list
[Photograph: J. Kenji López-Alt]
Good brisket is really, really good—magical, even. But finding the perfect brisket, one which balances between juicy, tender meat and a charred, flavorful bark, is difficult. Making this smoked meat with a sous vide machine takes a lot of the guesswork out of fantastic brisket. Just as we do with the smoked chuck, the brisket starts in sous vide, and right when the meat is on the brink of falling apart, we move it to the grill to take on both color and smoky char.
Sous Vide Smoked Brisket Recipe »
Back to the full list
[Photographs: J. Kenji López-Alt]
Making something as fast-cooking as burgers using the sous vide method may seem counterintuitive, but really it makes a lot of sense. The slow and exact cooking means your burgers will be cooked evenly all the way through—no brownish-gray circle around the nice medium-rare meat. And cooking the burgers sous vide right up until they're finished on the grill ensures they retain as much moisture as possible. You'll never want to make them another way again.
Sous Vide Burgers Recipe »
Back to the full list
[Photograph: J. Kenji López-Alt]
We're not saying there's anything wrong with pan-searing or grilling steaks. In fact, we think those methods render some really beautiful meat. But for truly foolproof steaks, we always side with sous vide. The gentle heat and total control over temperature means you don't face a gradation of doneness throughout the meat. If the center is medium-rare, the edges will be, too. To achieve a nice crust (necessary for both flavor and texture), finish the steaks in a cast iron skillet or on the grill.
Sous Vide Steaks Recipe »
Back to the full list
[Photograph: J. Kenji López-Alt]
While we're talking about the benefits of cooking steak with the sous vide method, we'd be remiss not to include this dry-aged sous vide ribeye. With a good amount of fat to keep the meat moist and an impressive bone to add flavor and centerpiece value, this is a perfect dinner-party main dish. The cherry on top? We finish this steak by blasting it with a propane torch to give it the perfect crust.
Dry-Aged, Sous Vide, Torched-and-Seared Bone-In Ribeyes (a.k.a. The Ultimate Steak) Recipe »
Back to the full list
[Photograph: J. Kenji Lopez-Alt]
We know tongue isn't for everyone, but give this sous vide tongue a chance and you may well have a change of heart. The tongue, seasoned with salt and pepper, is vacuum-packed with cilantro, onion, tomato, and duck or pork fat. After being cooked sous vide for at least 24 hours, the tongue is ready to be pulled apart, scooped onto corn tortillas, and garnished with your favorite taco toppings.
Sous Vide Tacos de Lengua Recipe »
Back to the full list
This post may contain links to Amazon or other partners; your purchases via these links can benefit Serious Eats. Read more about our affiliate linking policy.
Source: https://www.seriouseats.com/roundups/sous-vide-beef-recipes
0 notes
Text
SPICY WATERMELON MINT AGUA FRESCA
Agua fresca is one of my most favorite drinks. Refreshing and light, and the perfect partner for spicy Mexican food. To combat the heat, they tend to be quite sweet, but I made mine a little on the drier side so it can be enjoyed ala carte. With the mint and jalapeño, it’s a sweet and spicy combination you’ll drink by the gallon, so be prepared to make A LOT. Enjoy!
INGREDIENTS
2 cups cold water
2 cups watermelon (rind removed), seeded and chopped
2 tablespoons granulated sugar
juice of 1/2 lime (no more than 1 tablespoon)
1/4 cup mint leaves
1/2 jalapeño, roughly chopped
Ice cubes or crushed ice (optional)
DIRECTIONS
Combine all of the ingredients and puree until smooth. Pour mixture through a strainer into a pitcher, forcing through most of the pulp. Chill and serve.

Source: https://www.thekitchykitchen.com/?recipes=/spicy-watermelon-mint-agua-fresca/
0 notes
Text
Crock Pot Buffalo Chicken Chili
Crock Pot Buffalo Chicken Chili is a creamy and rich white bean chili with shredded chicken, corn, fire-roasted tomatoes, buffalo sauce, and blue cheese. It’s the soup version of Buffalo Chicken Dip and a bowl of this spicy chicken chili will warm you up on the coldest of days.
Serve with a few tortilla chips on the side. You’ll want to dip them into this flavorful, cheesy chili.
A package of cream cheese makes this chili super thick, rich, and creamy. It gets added in towards the end so that it does not separate.
No prep is needed for this easy recipe. Three boneless, skinless chicken breasts get added to a 6-quart or larger crock pot along with 3 cups of chicken broth, a can of fire-roasted diced tomatoes, 1 can of white beans (add a second can if you like lots of beans in your chili), a can of diced green chilies, 1 cup of corn, 1/2 cup of Buffalo sauce, a little diced celery, onion powder, garlic powder, and white pepper.
Everything gets cooked on LOW for 5 hours. Add the cream cheese and cook on LOW 30 more minutes to melt the cream cheese. Shred the chicken, add some shredded Monterey Jack cheese, and stir everything well to get it blended. Serve with blue cheese crumbles and green onions sprinkled on top. Plus more Buffalo sauce if you want it spicier.
More Buffalo Chicken Recipes
Crock Pot Buffalo Chicken Chili
Crock Pot Buffalo Chicken Chili is a creamy and rich white bean chili with shredded chicken, corn, fire-roasted tomatoes, buffalo sauce, and blue cheese. It's the soup version of Buffalo Chicken Dip
3 boneless skinless chicken breasts
3 cups chicken broth
1 (14.5-ounce) can fire-roasted diced tomatoes, undrained
1 (14-ounce) can white beans, drained and rinsed
1 (4-ounce) can diced fire-roasted green chilies
1/2 cup Buffalo wing sauce
1 cup fresh or frozen corn
1/4 cup finely diced celery
1 teaspoon onion powder
1/2 teaspoon garlic powder
1/2 teaspoon white pepper
1/2 teapsoon salt
1 (8-ounce) package cream cheese, cut in chunks.
1 cup shredded Monterey Jack cheese
1/3 cup blue cheese crumbles
2 green onions, sliced
Combine chicken, broth, diced tomatoes, white beans, chilies, wing sauce, corn, celery, onion powder, garlic powder, white pepper, and salt in a 6-quart or larger slow cooker.
Cover crock pot and cook on LOW for 5 hours.
Add cream cheese and cover and cook on LOW 30 more minutes. Open slow cooker and remove chicken. Add Monterey Jack cheese and sitr until cream cheese and Monterey Jack cheese are melted and blended in.
Shred chicken and return to slow cooker. Dish into bowls and top with blue cheese crumbles and green onions.
Disclosure: This post contains affiliate links.
Source: https://spicysouthernkitchen.com/crock-pot-buffalo-chicken-chili/
0 notes
Text
Instant Pot Chicken Tortilla Soup (Gluten Free)
Easy chicken tortilla soup made in your instant pot will rival the soup from your favorite Mexican restaurant. Your whole family will love customizing their bowls with their favorite toppings.
What are your thoughts on instant pot recipes? I’ve been using mine more often this fall and winter and I’m finally starting to understand the appeal. Now that I’ve posted two IP recipes in a row, what do you think? Do you love your pressure cooker, or should I go back to sharing more traditional stovetop recipes?
I’m a huge fan of chicken tortilla soup. I have a few go-to recipes already, but I wanted to try my hand at a new version based on one from my favorite Mexican restaurant. It’s thick and rich – almost like a white chili – with less tomato than traditional tortilla soup usually has. It also has rice in it, which makes it super hearty. This recipe comes together in just about 30 minutes and everything is made in one pot – right down to the crispy tortilla strip garnish.
If you don’t have an instant pot, check out this easy tortilla soup made on the stovetop. It’s one of my favorite soup recipes of all time.
How to make Instant Pot Tortilla Soup
One of the things that I love most about using an instant pot instead of a slow cooker is that the saute function lets me fry or brown ingredients without taking out a second pot.
For this tortilla soup, I start by frying tortilla strips in two tablespoons of olive oil. It only takes a few minutes, and the deep sides of the pot also help keep splatters to a minimum. When the tortilla strips are golden and crispy, transfer them to a paper towel to drain and sprinkle them generously with coarse salt.
Saute onion, garlic, red bell pepper, and jalapenos in the leftover oil until they begin to soften. Then add chicken thighs or breasts, chicken broth, black beans, diced tomatoes (I love using fire roasted), chili powder, and rice. I also throw a few corn tortillas into the pot. They break down as the soup cooks and help it thicken.
Once the soup is cooked, all you need to do is shred t
he chicken and add some garnishes. You can keep it simple, or go wild! I like my soup topped with tortilla strips, shredded cheese, and cilantro. You can also add sliced avocado or sour cream if you like.
This soup is great left over, too. It will thicken up in the refrigerator but will thin back out as it heats up. If you’re planning to have leftovers, keep the tortilla strips separate and store them at room temperature an airtight container. They’ll stay crispy for several days.

Yield: 6 servings
Prep Time: 5 minutes
Cook Time: 25 minutes
Additional Time: 10 minutes
Total Time: 40 minutes
Ingredients
2 tablespoons olive oil
4 corn tortillas, cut into thin strips
1 onion, diced
4 garlic cloves, minced
1 red bell pepper, diced
2 jalapeno peppers, minced
1 pound boneless skinless chicken thighs or breasts
4 cups chicken stock
1/2 cup uncooked white rice
1 can (14.5 ounces) black beans, drained
1 can (14.5 ounces) fire roasted diced tomatoes, drained
2 teaspoons chili powder
1 teaspoon dried oregano
2 limes, juiced
For garnish (optional): shredded Monterrey jack cheese, cilantro, sour cream, avocado
Instructions
Heat the oil using the saute function of your instant pot. When the oil is hot, add half of the tortilla strips. Cook 4-5 minutes, or until golden brown. Use a slotted spoon to transfer the tortillas to a paper towel. Sprinkle generously with coarse salt.
Add the onions and garlic to the pot and saute 2-3 minutes, or until softened. Add the peppers and cook another 3-4 minutes. Add the chicken, uncooked tortilla strips, stock, rice, beans, tomatoes, chili powder, and oregano. Lock on the lid, making sure the vent is set to sealing, and cook on high pressure for 12 minutes.
Carefully remove the lid. Shred the chicken. Stir in the lime juice and season to taste with salt.
To serve top the soup with the crispy tortilla strips and any other garnishes that you desire.
Nutrition Information:
Yield: 6 Serving Size: 1
Amount Per Serving: Calories: 446 Total Fat: 19g Saturated Fat: 5g Trans Fat: 0g Unsaturated Fat: 13g Cholesterol: 103mg Sodium: 467mg Carbohydrates: 43g Fiber: 7g Sugar: 6g Protein: 30g
Source: https://www.healthy-delicious.com/instant-pot-chicken-tortilla-soup-gluten-free/
0 notes
Text
What is nutritional yeast + 25 ways to use it
As an Amazon Associate I earn from qualifying purchases. Please see my Privacy Policy for more details.
What is nutritional yeast and how do you use it? Nutritional yeast is inactive yeast, grown on molasses. It has a cheesy, nutty flavor. It’s a source of protein & B12.
Today I’m sharing all of the details on “nooch” plus 25 ways to use it.
Some people have jars of sugar and flour on their counter for easy access. I have a jar of nutritional yeast.
(This one was made by vegan potter, Jeanette Zeis.)
I pull from it several times a day for sprinkling on a chickpea scramble, to give a cheesy flavor to air-popped popcorn, or as a treat for the kitties.
And when the jar runneth empty, it’s time to make a grocery store run. STAT. It’s not an ingredient I want to be without.
But there was a time when nutritional yeast flakes weren’t a pantry staple or part of my vegan essential spices and seasonings.
In fact, when I first went vegetarian, I’d never even heard of it before.
Nutritional yeast is dried, inactive yeast, grown on molasses.
Since it is inactive, that means it can’t be used for making raised donuts or breads.
And the same holds true the other way around. If a recipe calls for nutritional yeast flakes, do not substitute with brewer’s yeast, torula yeast, or active yeast sold in packets. It’s not the same thing and won’t deliver the results you want.
You may wonder, is yeast vegan? <—– Find out here. But the short answer is that yeast is part of the fungus family, like mushrooms.
How does nutritional yeast taste?
I’ll admit that the name nutritional yeast flakes doesn’t sound wholly appealing.
(If you can’t bear to call it nutritional yeast, give nooch a whirl. It’s a popular slang term for it in the vegan community.)
Luckily, it makes up for it in taste. It has a cheesy, nutty flavor that is a wonderful addition to sauces, dips, or gravies.
When it comes to flavor, nutritional yeast can be a bit divisive. It seems to be one of those love it or hate it foods like cilantro or mushrooms. I fall strongly into the former camp.
It’s also important to know that the flavor of nutritional yeast can vary from brand to brand. So if you don’t like it the first time around, give it another chance with a different brand.
Is nutritional yeast good for you?
Yes! In addition to giving foods a cheesy taste, nutritional yeast is also a source of protein and vitamin B12.
(Although, I recommend taking a regular B12 supplement as well, if you’re vegan. A B12 deficiency is nothing to mess around with. That’s a link to the one I use.)
Where can you buy it?
Nutritional yeast is popping up in more and more places nowadays. In addition to being sold at Whole Foods and other natural grocery stores, Trader Joe’s sells nutritional yeast with their own branding. At $2.99 bag, that’s what I buy most of the time.
It’s also for sale at Hy-Vee (in the health market), Walmart, and Amazon. It’s usually in the natural foods section, near the baking stuff like flour, or with the supplements. You can often find it in bulk bins as well.
Other brands that I like include Bragg & KAL.
How do you store it?
As you’d probably guess since it’s sold in bulk bins, nutritional yeast does not need to be refrigerated. It can be stored anywhere cool and dark to preserve its B vitamins. A ceramic jar in the pantry or on the countertop works fine.
Since it’s a dry product, the key is keeping moisture out. If you’d prefer, it can also be frozen in a sealed, air-tight bag. It has a shelf life of 1 to 2 years.
How do you use nutritional yeast?
So you’ve purchased nutritional yeast, and now you don’t know how to use it? Here are some ideas to get you started.
Sprinkle it on avocado toast or a toasted hummus & avocado bagel.
Use it as a popcorn topping.
How do you make nutritional yeast popcorn? Melt vegan butter, drizzle it on popcorn, add nutritional yeast, and a pinch of salt.
I’m so addicted to this, I’ve been known to smuggle my own nutritional yeast into movie theatres. (Some movie theatres have jars of their own!)
Use it instead of parmesan cheese on spaghetti.
You can use just the nutritional yeast in lieu of parmesan. Or you can blend nutritional yeast in a food processor with walnuts or cashews, and salt until it becomes a powder.
Give nutritional yeast to cats for a treat.
Most cats love it! Just put sprinkle some onto a little dish, and let them lick it up.
Make cheesy things
Vegan cheese dip
Because of its cheesy flavor, nutritional yeast adds so much to dairy-free sauces. This savory vegan chili cheese dip is loaded with three bean chili, seitan chorizo, and creamy cashew queso.
Build-your-own vegan nacho bar
Continuing on the nacho thread, nacho bars are lots of fun for all ages. And it’s a relatively low cost way to have a dinner party!
Fill a table with toppings like spicy black beans, vegan chili cheese dip, salsa, and guacamole. Then let your guests pile them onto chips, exactly how they like.
Chili cheese tater tots
Satisfy the kid in you with vegan chili cheese tater tots. So messy & delicious, it ticks all the pleasure sensors! Serve it as an appetizer or a full meal on its own.
Vegan Philly cheesesteak with jackfruit and cashew cheese sauce
Vegan Philly cheesesteak sandwiches are loaded with savory jackfruit, creamy cashew cheese, sautéed onions, and peppers. It’s a hearty, heavy-duty sandwich that screams comfort food.
Tofu ricotta
Nutritional yeast gives a cheesy edge to tofu ricotta. Add it to vegan lasagna, stuffed shells, and mushroom pizzas.
It’s made with just a few ingredients in the food processor, and comes together in only minutes.
Vegan lasagna for one in the air fryer
Vegan lasagna is layered with pasta sauce, tofu ricotta, zucchini, fresh basil & spinach. This mini casserole is just the right size for one.
And it’s ready in only 30 minutes thanks to the air fryer! Perfect for when you need something cozy fast.
Fried squash blossoms with cashew cheese
Fried squash blossoms with cashew cheese are a vegan appetizer that’s sure to impress! Delicata squash or zucchini blossoms are stuffed with cashew cheese, dredged in flour and spices, and shallow fried.
Cheesy udon noodle bowl with Brussels sprouts
Udon noodle bowl is topped with a cheesy cashew sauce & browned Brussels sprouts. The creamy sauce is filled with the flavors of miso, sriracha, and tamari.
Vegan pesto rice
Vegan pesto rice is the perfect weeknight meal. It uses just 10 ingredients & takes about 8 minutes to make.
Eat it on its own, as a side dish, or as a base for delicious pesto rice bowls with your favorite toppings!
Stir it into polenta
Creamy vegan polenta
Polenta and nutritional yeast work so well together in creamy vegan polenta. Dotted with sun-dried tomatoes, this soothing breakfast is good for easing into the day.
Polenta breakfast with Brussels sprouts & vegan breakfast sausage
For a heartier option, top the polenta with toothsome vegan sausage, browned Brussels sprouts, and a drizzling of maple syrup.
Vegan polenta stacks with barbecue squash & cashew cream
There’s something about stacked food that just screams fancy. These vegan polenta stacks would make an eye-catching entree for the holiday table or a dinner party.
Pair it with tofu
Crustless mini vegan quiche in the air fryer or oven
Tofu is a blank slate for flavors. So when you add nutritional yeast, it stands out in a marvelous way – like in crustless mini vegan quiche.
They are filled with red bell pepper, onions, kale, and seitan bacon in a savory tofu and cashew filling. Cook these adorable, portable quiche bites in the air fryer or oven.
Vegan breakfast tacos with tofu & black beans
Vegan breakfast tacos are loaded with seasoned tofu, black beans, corn, bell peppers, onions, and garlic. Pile the scramble into warmed corn tortillas with a dollop of guacamole and pinch of cilantro.
Breakfast nests with creamy queso
Looking for a vegan brunch idea? You’re going to love these delicate breakfast nests with layer of hash browns, tofu scramble, and a drizzle of cashew queso.
Austin breakfast with tofu scramble
This Austin breakfast platter is a panoply of spicy scrambled tofu, refried beans, breakfast potatoes, and guacamole. All of your brunch favorites on one plate.
Vegan tofu scramble with kale and avocado
This vegan tofu scramble recipe is filled with fresh, seasonal vegetables – kale, red bell pepper, and onions. It’s topped with avocado.
Vegan breakfast sandwich with eggy tofu & sausage
This vegan breakfast sandwich with thinly sliced eggy tofu, non-dairy cheese, and veggie sausage is wonderfully filling & perfectly portable.
Use it on chickpeas
Air fryer chickpeas & roasted chickpeas
Nutritional yeast is a delightful topping on roasted chickpeas. Eat the roasted chickpeas as a snack, or use them as a salad topper.
Make creamy things
Loaded sliced potatoes in air fryer
Nutritional yeast gives cashew cream added umami flavor.
These sliced potatoes are almost like crostini. With decadent cashew cream, smoky seitan bacon, and a smattering of green onions, your guests will be raving about it.
(No air fryer? No problem. Get the oven version here.)
Warm vegan spinach artichoke dip
If you ever went to a casual dining restaurant chain in the early 2000’s, chances are someone at your table ordered spinach & artichoke dip. This version is veganized with nutritional yeast added for richness.
Creamy vegan tomato soup
Few foods give the cozy comfort of a bowl of creamy vegan tomato soup with a non-dairy grilled cheese sandwich for dipping. This full-bodied soup has a wonderful depth of flavor from the addition of sun-dried tomatoes.
Add a handful of homemade vegan croutons and a drizzle of sun-dried tomato oil on top just before serving.
Use it for breading
Vegan fried ravioli in the air fryer
An appetizer the whole family will love. Fried ravioli in the air fryer – seasoned with basil, oregano, nutritional yeast, and garlic. On the side, marinara sauce for dipping.
Give foods an edge of cheesy, savory flavor
Vegan corn cakes
You’re going to love these vegan corn cakes for breakfast or brunch. They’re great on their own or with a tofu scramble on the side. Plus, they’re naturally gluten-free!
Originally posted May 2017. Content updated May 2019.
Source: https://cadryskitchen.com/what-is-nutritional-yeast/
0 notes
Text
How + Why To Start A Gratitude Journal
Gratitude journals are one of the easiest ways to practice cultivating more gratitude in your life which proves to have a significant impact on both our physical and psychological health and can help us to create a happier, healthier more vibrant life.
But what exactly is a gratitude journal? Why do we want to start a gratitude journal? And how can a gratitude journal actually help us to live a more joyful and fulfilling life?
Gratitude + Your Brain
When we let our brains run on default mode, they tend to choose negative thinking over positive thinking, and they do that for good reason.
Our brains are designed for survival, they are programmed to look for problems and obstacles as a way of keeping us safe and protected. But the problem is that since we no longer live in a world where we are in constant need of food and protection, our brains tend to create problems where they don’t really exist.
So it becomes our job to help train our brains to relax and to look for the good (hint: this is where gratitude can help).
Try to think of your brain as a GOOGLE search engine; it’s your servant. If you are thinking in terms of a problem and worrying all the time, your mind will work to seek evidence to prove this thinking true.
On the flip side, when you intentionally look for the good and direct your brain to focus on gratitude and the things that are working in your life, your mind will go through the day looking for more of that goodness.
It’s like a snow ball effect; energy goes where attention goes so let’s get really good at looking for the good (on purpose).
HOW TO BEGIN A GRATITUDE JOURNAL
STEP 1: Choose Your Medium
Where are you going to keep your journal? Personally, I like to use notebook but you can also keep it digital, by using your phone or computer. Ultimately you want to choose whatever will feel the most doable for you so that you can stay consistent.
STEP 2: choose a Time to JOURNAL
Do you want to do this daily, weekly, or even bi-weekly? Everyone is different, so there’s no right or wrong way to do this. It just makes it easier make that decision before hand.
Also think about the time of day that will work for you. I recommend first thing in the morning, this way you are setting yourself up for the day, but again, do what feels right to you.
STEP 3: CHOOSE A PROMPT
Think of one thing to be grateful for. Just one. It can be something big or something small.
Next, list five reason that you are grateful for this one thing. Having to search for these reasons will really helps to shift you into a feeling of gratitude (which is a great way to shift out of any type of negative or doubtful emotions).
STEP 4: CONGRATULATE YOURSELF
You just got started with your gratitude journal! Once you have shifted yourself into a place of gratitude and feeling good, use this time to think about your day and what you want to be putting your attention on.
Gratitude is a great starting place for creating the type of day you want to have.
Do you keep a gratitude journal? What are some of your favorite prompts when it comes to your journal?
Source: https://cleananddelicious.com/2019/01/04/how-why-to-start-a-gratitude-journal/
0 notes