mdiyblog-blog
MDIY
Place of appreciation for all thigns handmade, along with the odd tutorial.
6 posts
Don't wanna be here? Send us removal request.
Last Seen Blogs

orphic-kalopsia
pages clarify

icanbebetterthanmyself-blog-blog
W. Kings ♔
w3irdo666
Kwuikz

imasimp4kny
𝒀𝒐𝒖𝒓 𝒅𝒆𝒂𝒓𝒆𝒔𝒕

inkyu
Inkyu
Photo
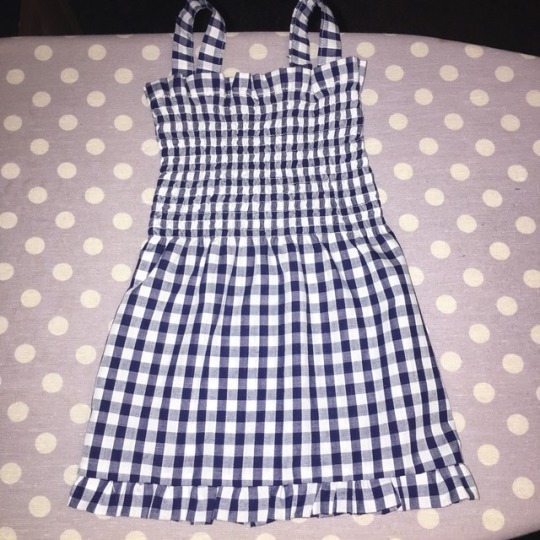
How cute is this little baby smocked dress I made today 😭😭 praying I have a girl so I can make these by the dozen😍
0 notes
Text
How to sew a buttonhole!
Just a quick beginners demo on how to sew a buttonhole using your machine. Here’s what you’ll need:
Buttons
Tailors chalk (please use chalk where I’ve used pen)
A stitch ripper
Fabric/ project requiring buttonhole

Ok so I’ve just done this on a little scrap of fabric and I suggest if it’s your first time you should do the same, just til you get the hang of it. Ok so what we want to do first is measure our buttonhole. So this by placing your button in the desired location, and marking above and below it with CHALK, please don’t use pen this was just to make it easy to see. I usually then draw a little line between these markings so it looks like the letter “I”. This is how it will appear on a sewing pattern.

Once you’ve marked your buttonhole in CHALK, then take your fabric to the machine. These settings are used for creating a buttonhole:
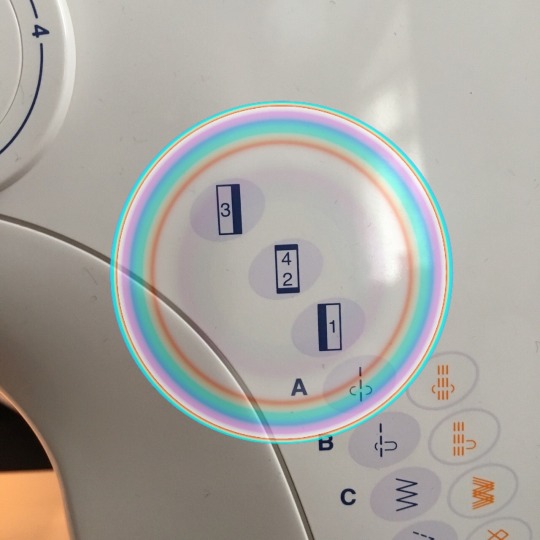
With your needle in the top left of your “I” select setting one and stitch down to the other end. This may vary by machine but my machine uses zig zag stitch for this part. This is ideal for buttonholes as it allows stretch and prevents fraying.
Once you get the the bottom select setting 2. This will create a sideways stitch at the end of your buttonhole that looks something like this:

Setting three will be the same as your initial stitch (zig zag, part one) but backwards. I find I need to guide my machine a little with this part to help walk the fabric through, however my machine is getting a little old.
When you reach the end, switch back to setting 2/4 and finish up. No need to backstotch or anything here your buttonhole should be finished nicely. Now we have something like this.

So to open your buttonhole, we wanna take the stitch ripper and use it to cut down the middle of the line, between the zig zag stitches.

To lace my button I always line up my buttonhole with where I want the button and make a little mark through with CHALK to guarantee it lining up right. If you have a pattern you don’t need to worry about this.

Once your button is attached you’re good to go! The finished product should look something like this, although a little more colour coordinated hopefully. Please note I used old scraps and spare buttons for his demo, I recommend finding a thread that matches your fabric before attempting anything wearable. Hope this helps!
0 notes
Text
How to make a zipped cushion

I’m so we’re moving out soon and I couldn’t find exactly what I wanted so I thought I’d make my own sofa cushions. All you’ll need is enough fabric for the front and back of each pillow, a zipper, pins and your machine. This can also be done by hand but I guess it would get a bit meticulous. If you’ve not sewn a zipper before I’ll do my best to explain.

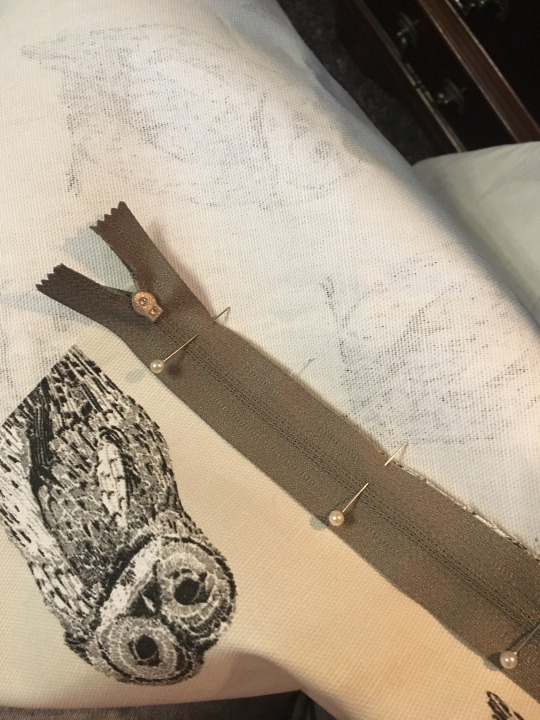
So first of all, pin your zipper to the front of your fabric, with the right sides together as shown (that’s very important, stops any untidy seams showing!). Once pinned into place, sew down the edge of the fabric. I’ve used around a 1cm seam allowance here, but it depends on the width of your zipper. The closer you see to the teeth, the less of the zip will show on the outside. You can also use an invisible zip for this for which I’d recommend using your zipper foot.
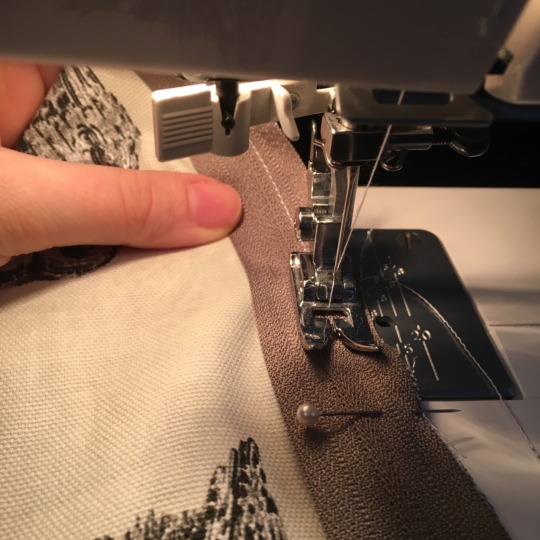

So once you’ve done this on one side, we need to attach it to the backing fabric in the same way. Right sides together, stitching close to the zip. If you have a patterned fabric make sure you consider which edge you sew your zip on to, as you probably won’t want it showing on top. I’ve used the side of mine so it won’t show.
Once your zipper is in, align your front and back pieces and pin into place. Make sure your zip is slightly open so we can turn it the right way out after this next step. Sew around the edges using your desired seam allowance. You can also sew over the zip if it has small teeth to hold it in place and finish your cushion professionally.

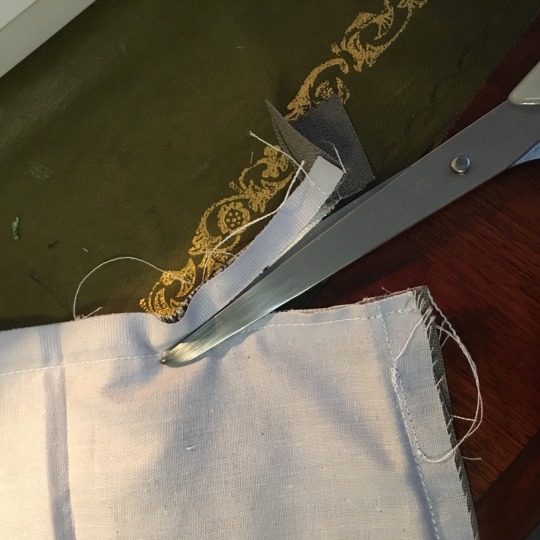
Once you’ve sewed the edges, trim of any excess. Do not cut too close to the stitching. Cut off the corners at a right angle, this will help achieve a nice pointy corner when we turn it the right way out. You can also trim the ends of the zip off if you have sharp enough scissors.
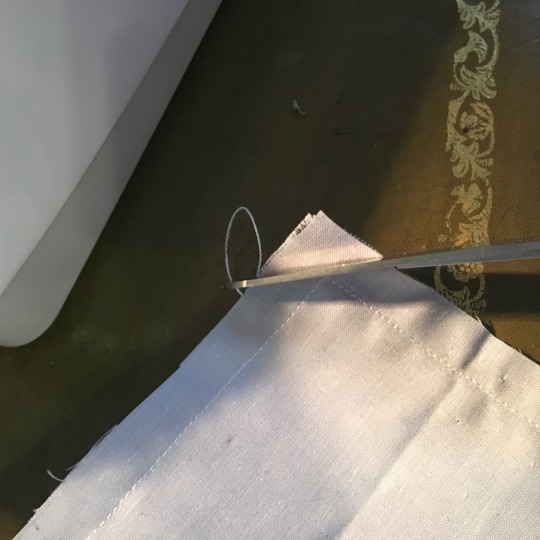
Turn the right way out, pike the corners out and insert your cushion inner, job done!

For anyone wondering where to buy the cushion inners, I got ten 45x45cm inners for £12 from wilkos! Hope this is clear 😊 enjoy 😘
0 notes
Photo
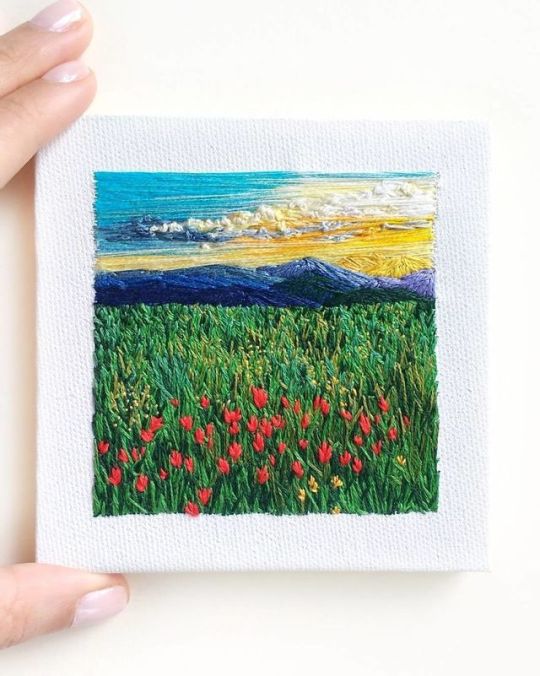
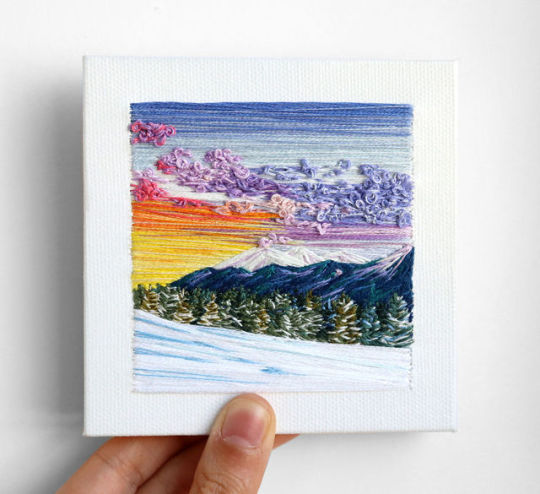


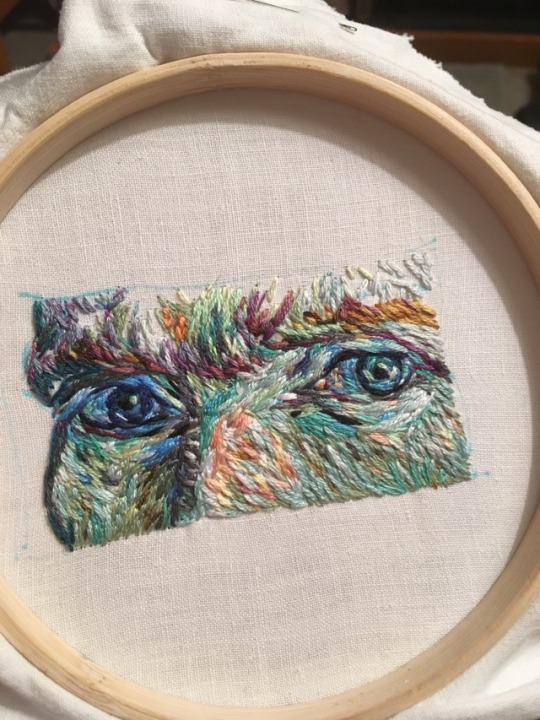
Miniature Landscape Embroideries by Carolina Torres
991 notes
·
View notes
Photo
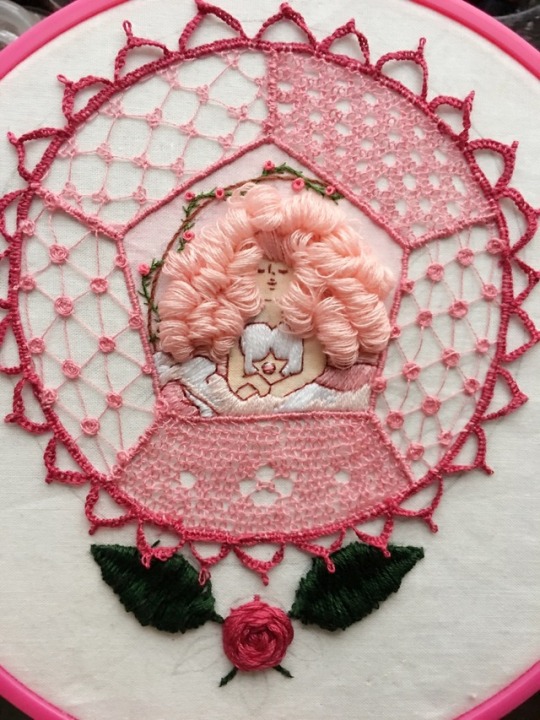
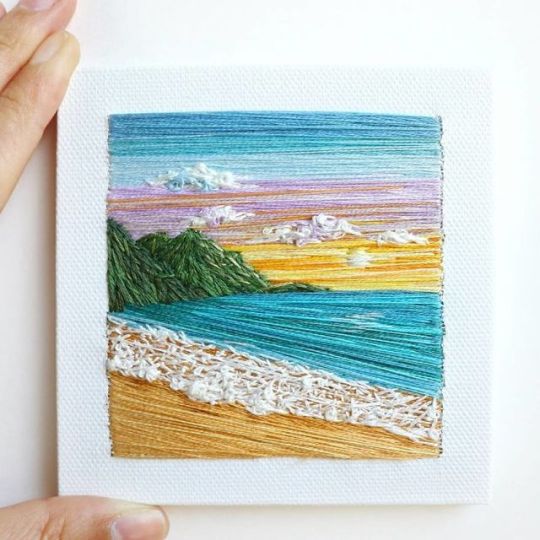
finished my gfs embroidery and learned a couple lace stitches along the way ( ´ ▽ ` )
5K notes
·
View notes